

Building the "Baker's Friend" Guitar - A Photo Diary
Just as A. E. Staley's baking powder worked wondrous transformations in bakers' recipes a century ago, so a hearty measure of artistry transformed an old packing crate into this beautiful heirloom guitar.
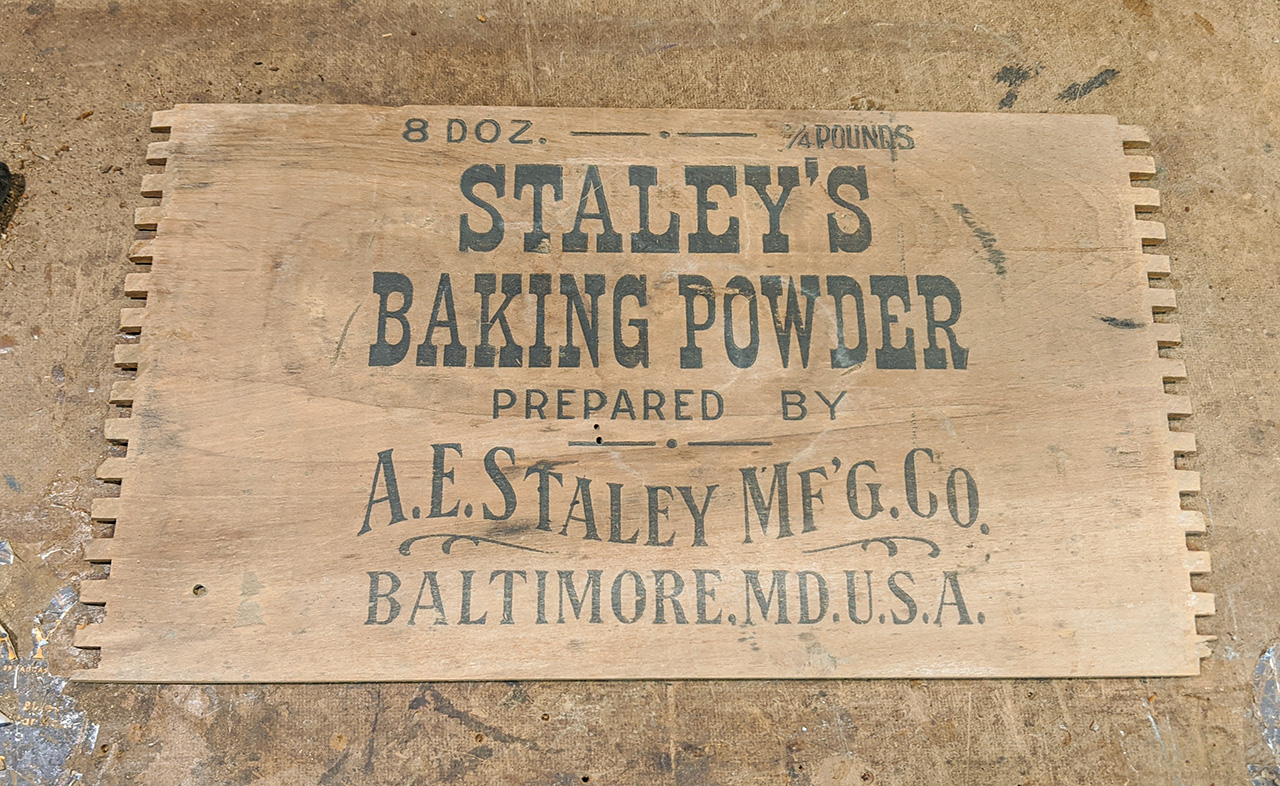
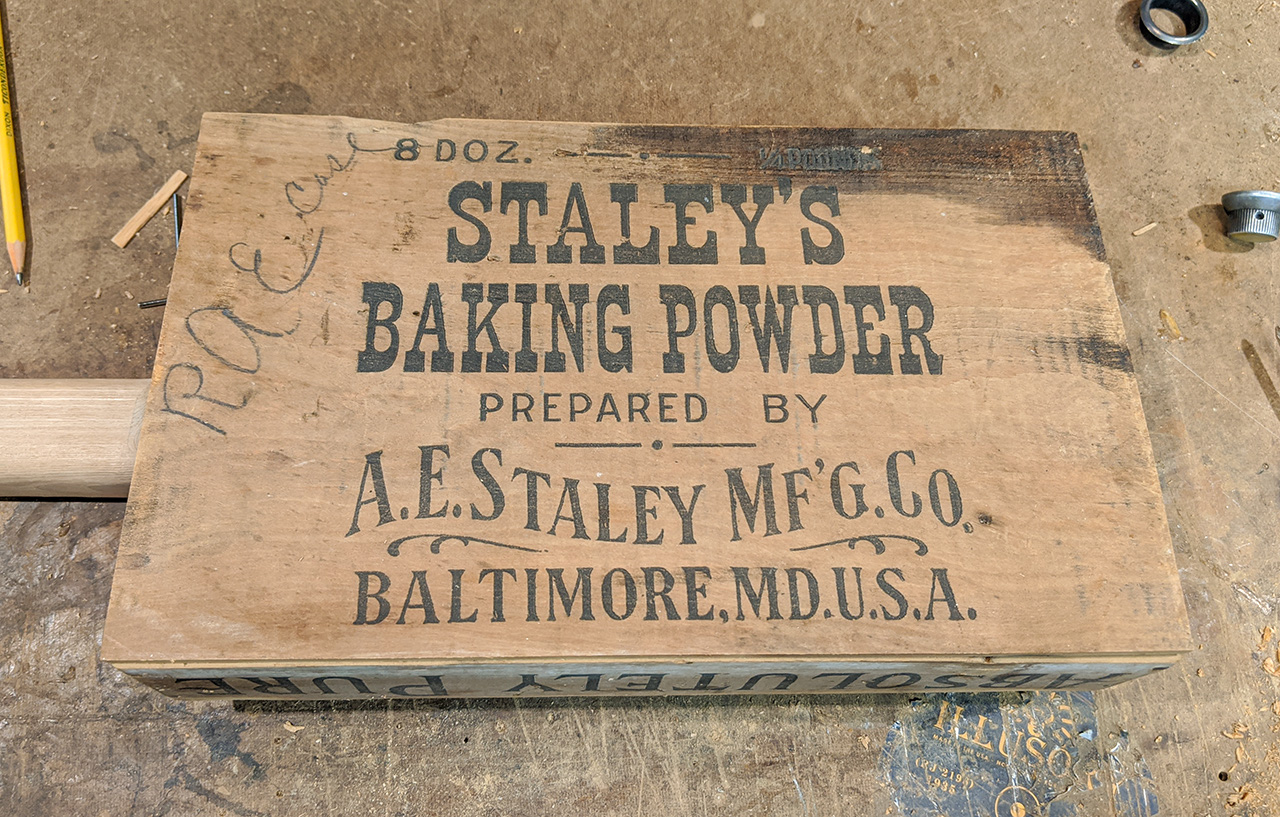
Wooden crates were once the mainstay of product packaging in the United States, and box-making factories abounded - many manufacturers even had their own box-making plants. Often these boxes and crates would be printed with branding and product info, making them both beautifully decorative as well as utilitarian. It was from one such crate that this new build was born.
The A. E. Staley Manufacturing Company was once one of the largest producers of starch products and other baking supplies, growing from humble beginnings in the first decade of the 1900's. Founder A. E. "Gene" Staley was a large figure, both literally and figuratively - he played a large role in introducing soybean growing and processing in the United States, helping to turn them into a huge industry. He even played a role in the start of professional football - the team he founded and owned went on to become the Chicago Bears.
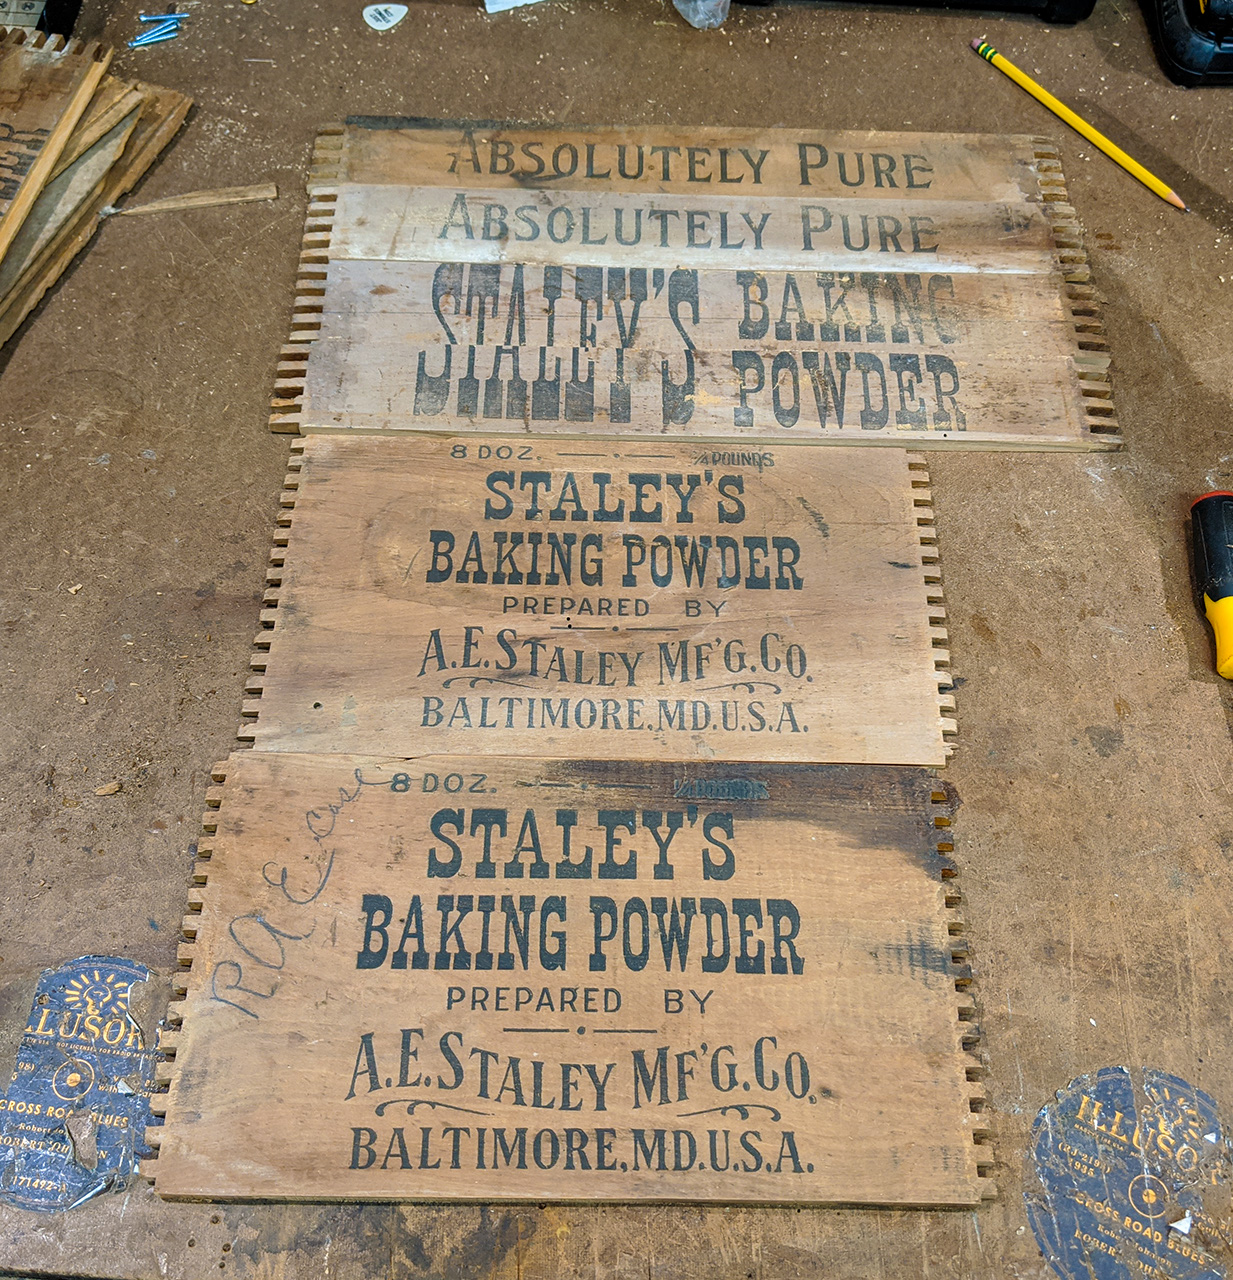
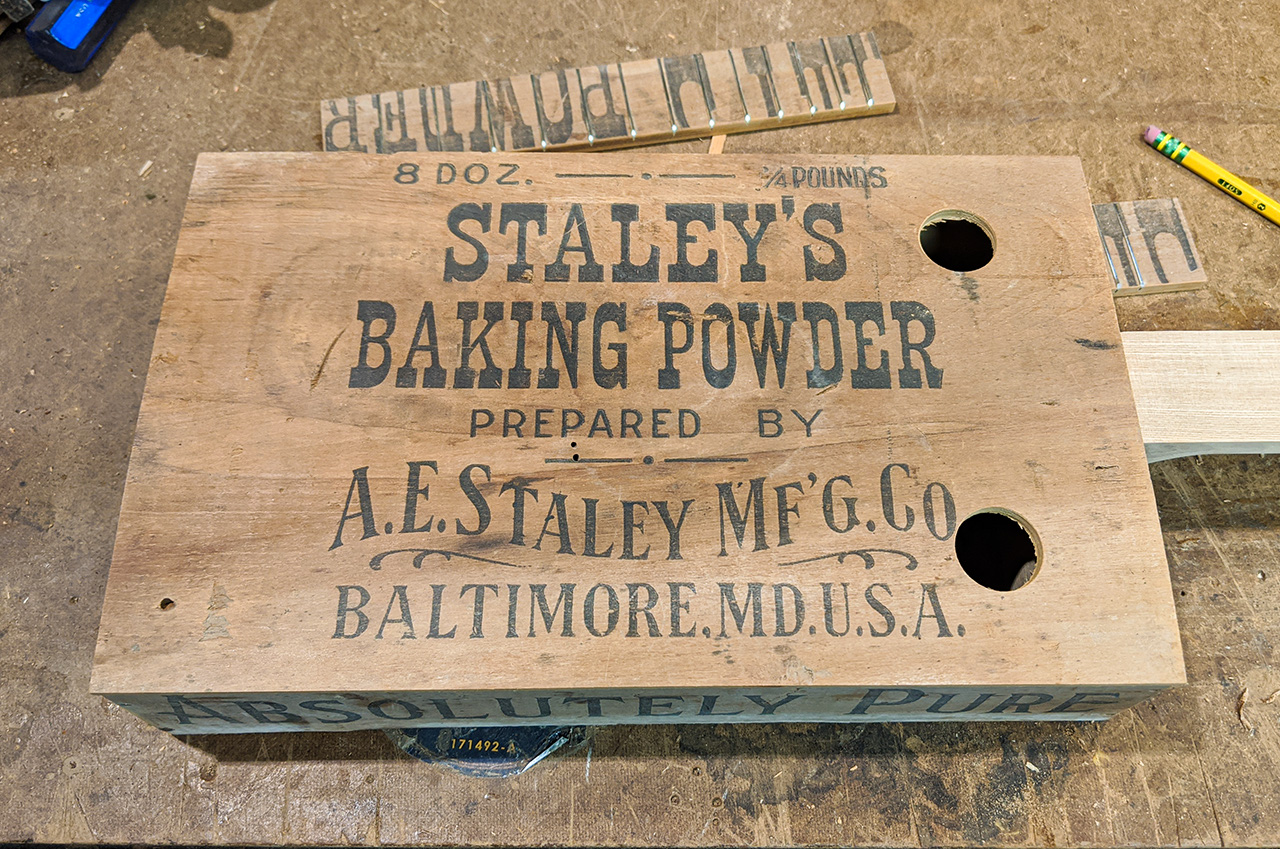
Of the uncounted thousands of wooden crates the company produced to house its products, one little example made its way up into New England, where I happened to discover it at a little antique shop just around the corner from my home. The distinctive lettering immediately caught my eye, as did its nice smallish size - I knew immediately that it was destined to become an heirloom guitar.
This photo diary walks you through my process of transforming the old wooden crate into a guitar. These sorts of crates are easy to find in antique shops and junk stores, and I hope that seeing what I did will inspire you to build your own.
Guitar Specs:
- Scale Length: 17 inches
- # strings: 3
- Tuning: G D G
- String Type: Silver-wound and plain nylon
- Tuners: Antiqued Grover Open-gear hand-relic'd by John "Red Dog" McNair
- Pickup: Disc-o-Tone embedded piezo with volume control
The "Baker's Friend" Builder's Photo Diary
|
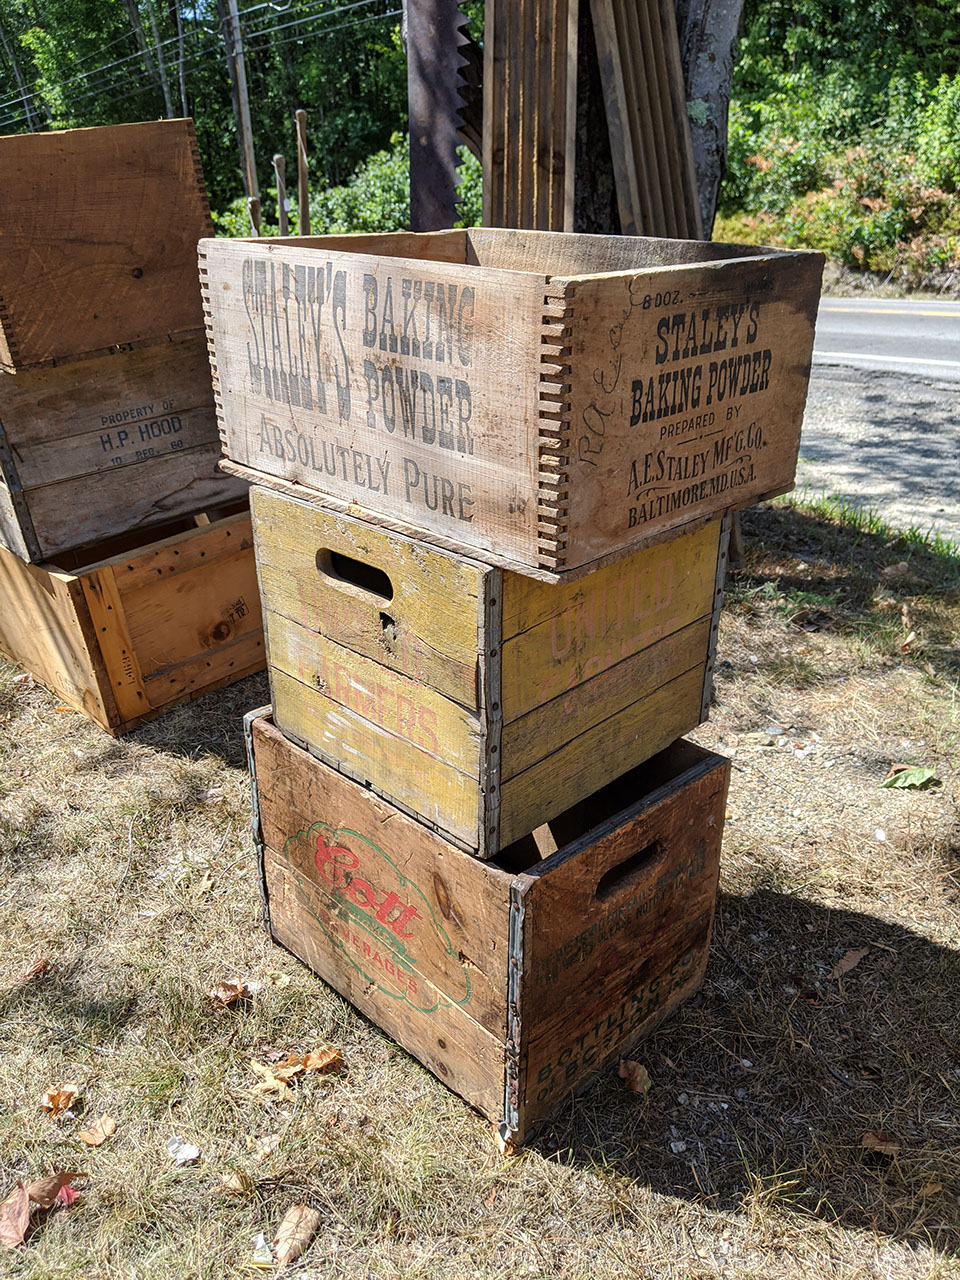
Here is how I found the crate, at a little only-open-sometimes antiques store just around the corner from my home. Of all the crates they had available that day, the lettering on this one just seemed to jump out at me. I also bought that "Cott Beverages" crate you can see at the bottom of the stack, for a potential future project. |
|
|
|
|
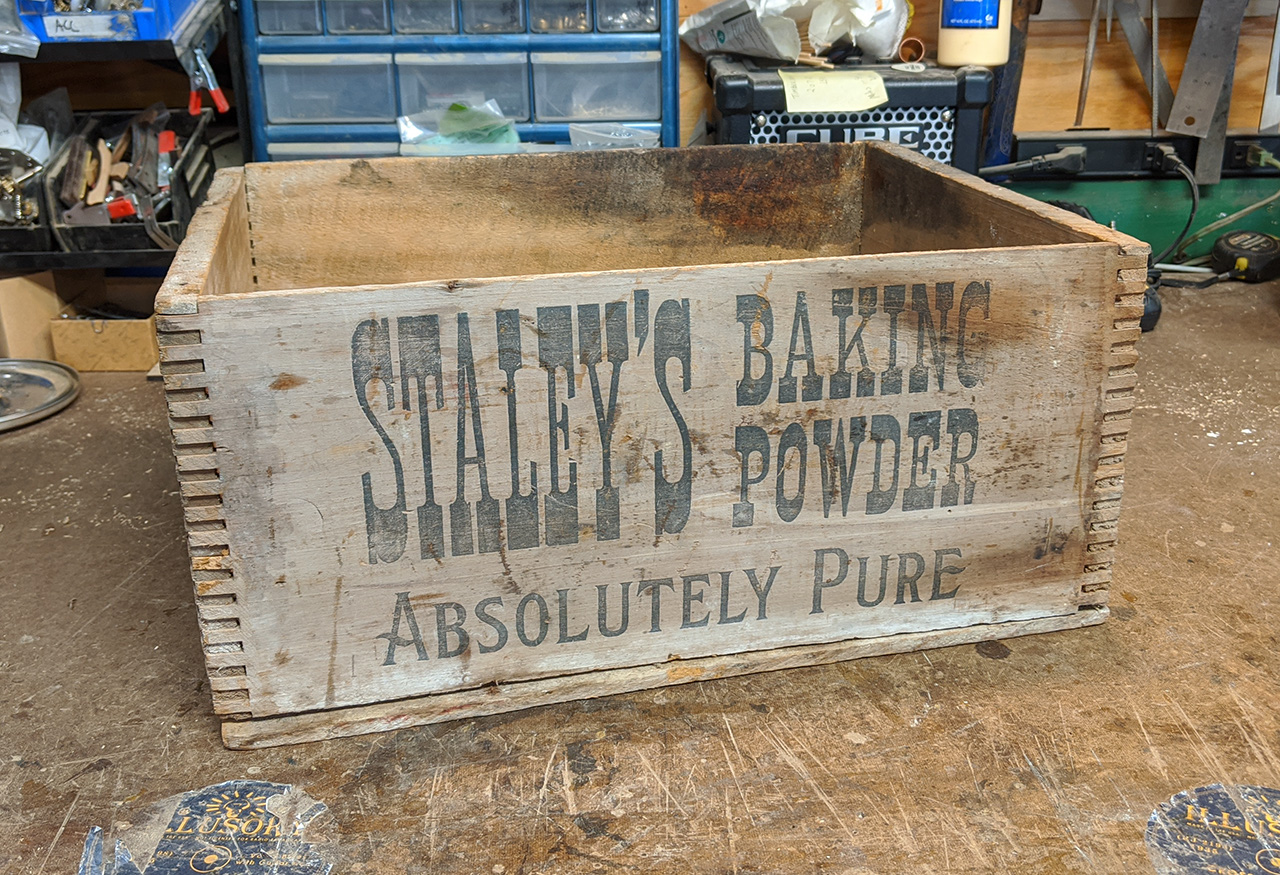
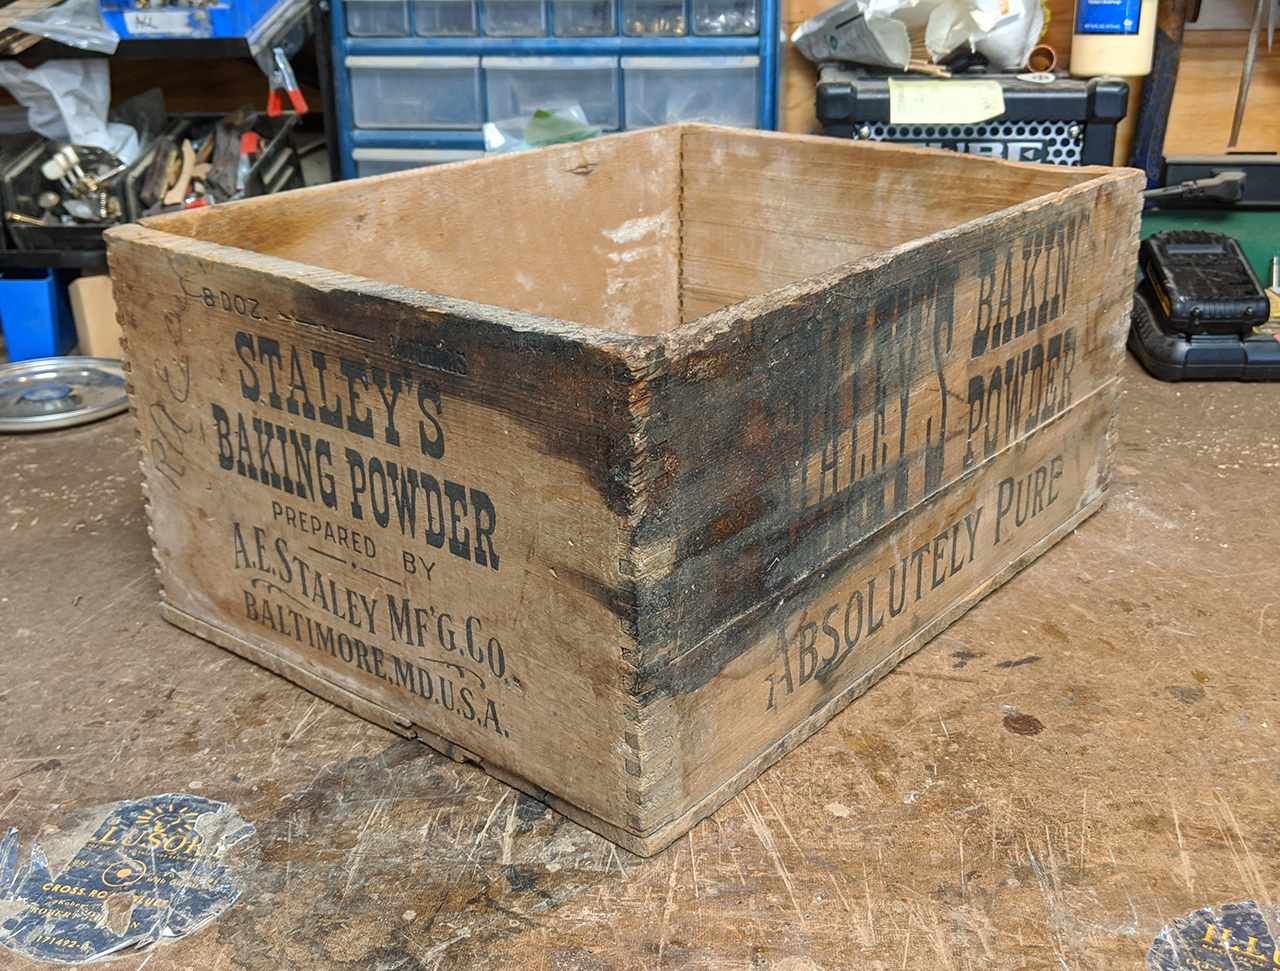
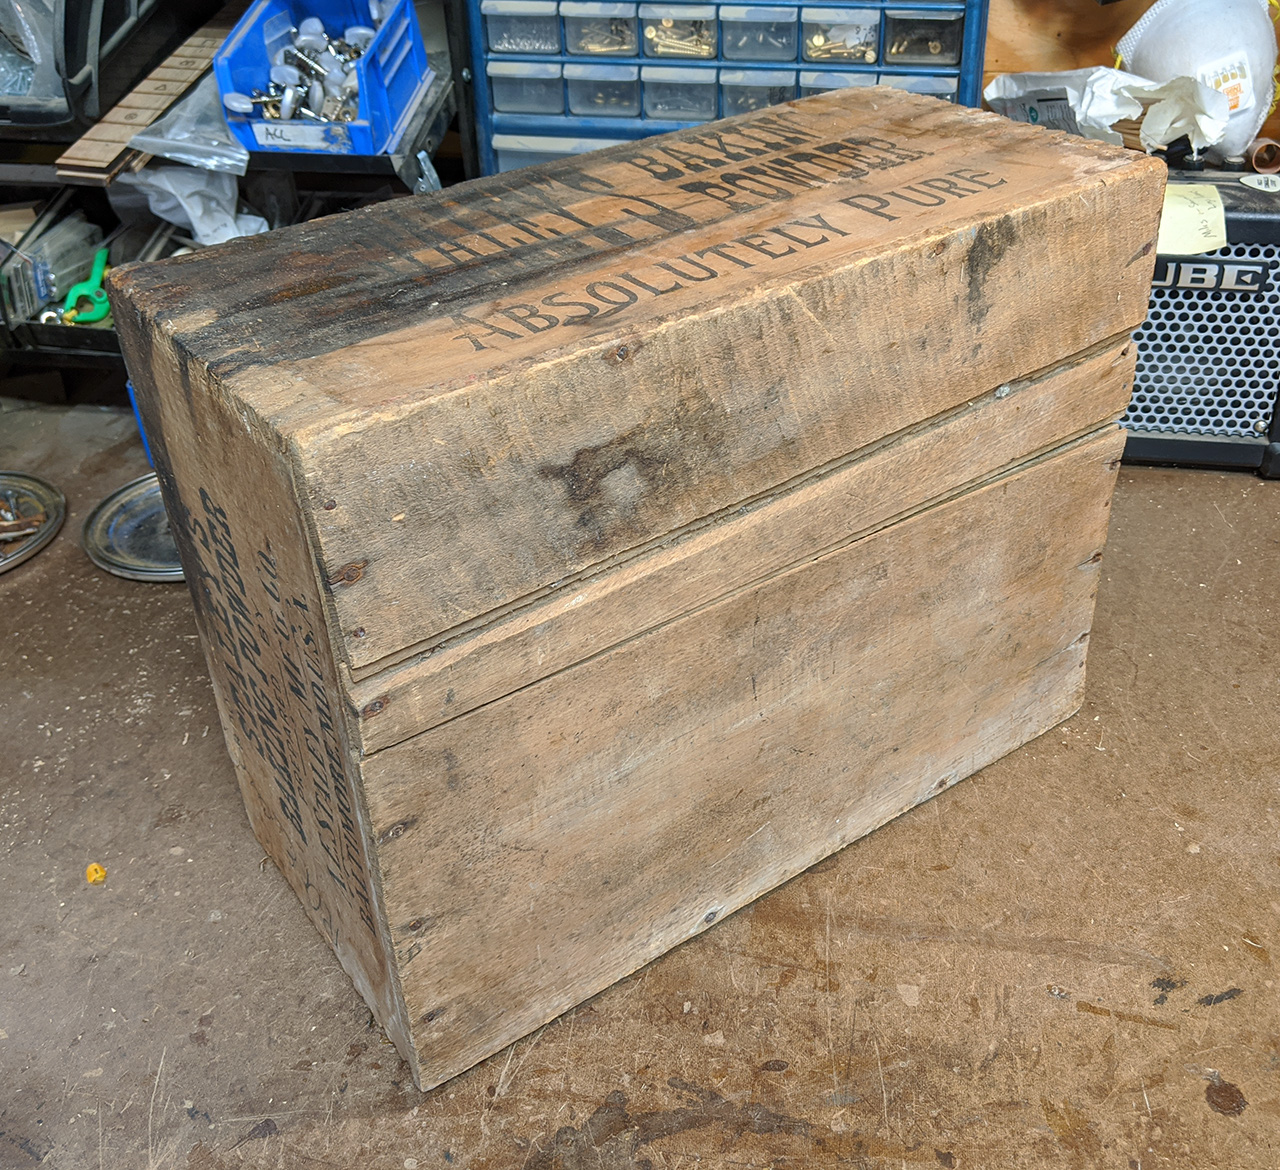
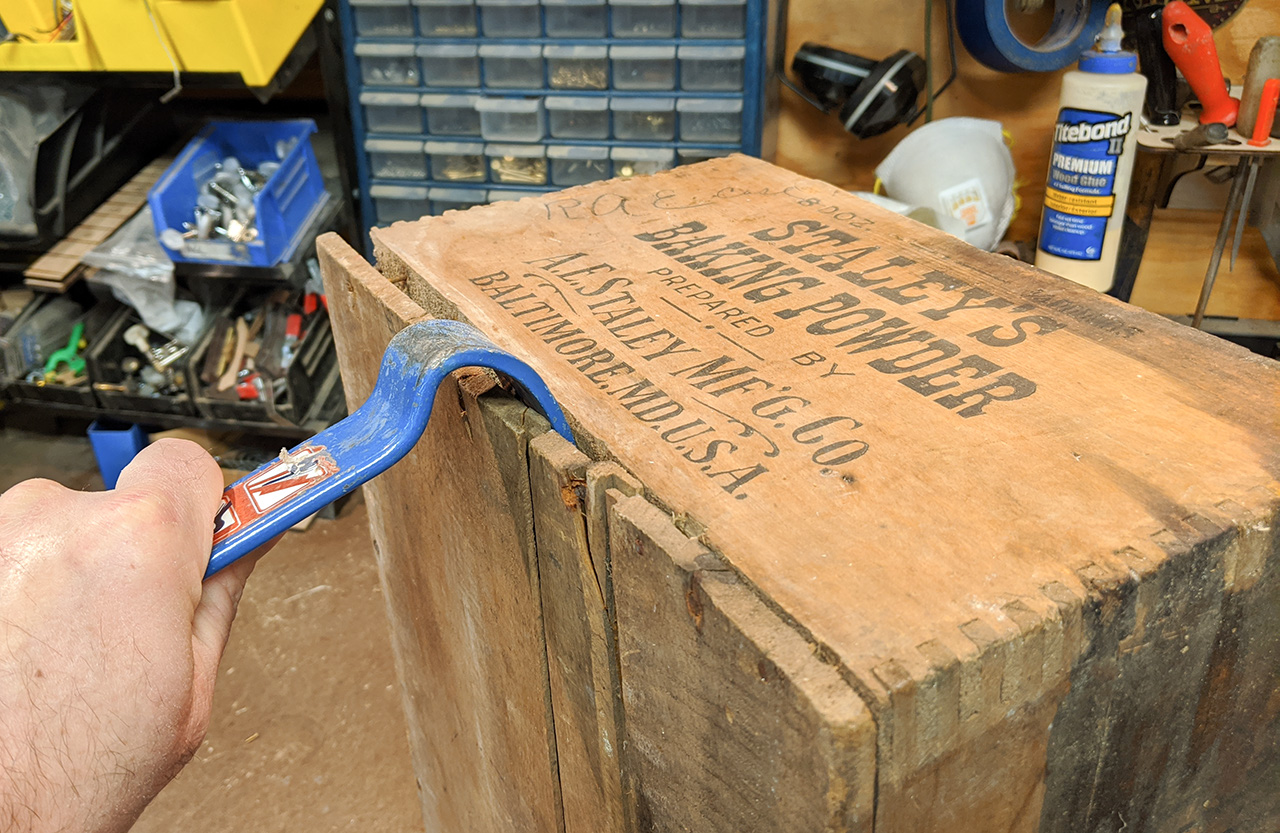
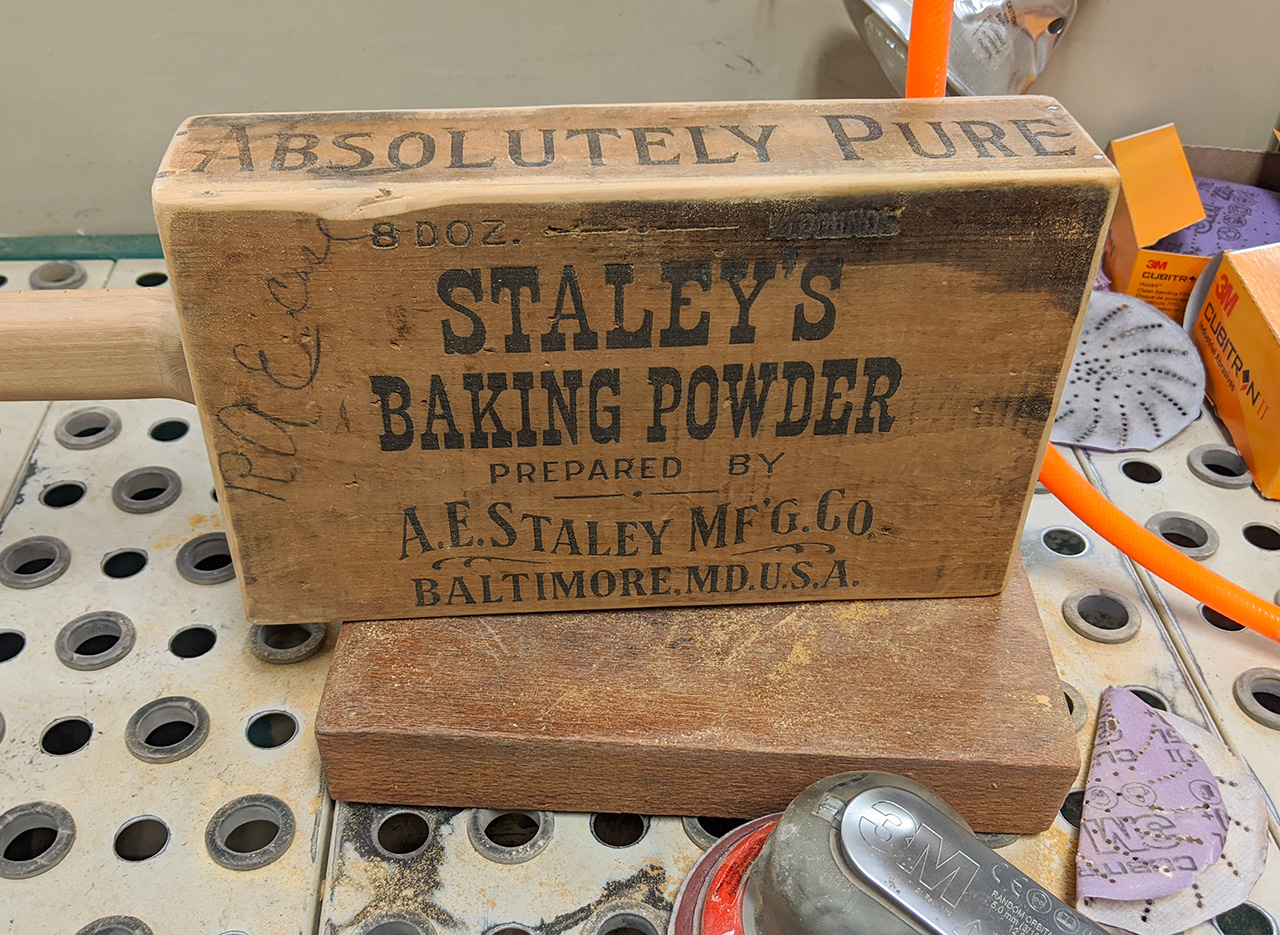
Back at the workbench, I began looking at how I would take this old box apart. I always like to get reference photos from all of the key angles before starting. The crate measured about 16 inches long by 12 inches wide by about 10 inches deep. |
|
|
|
|
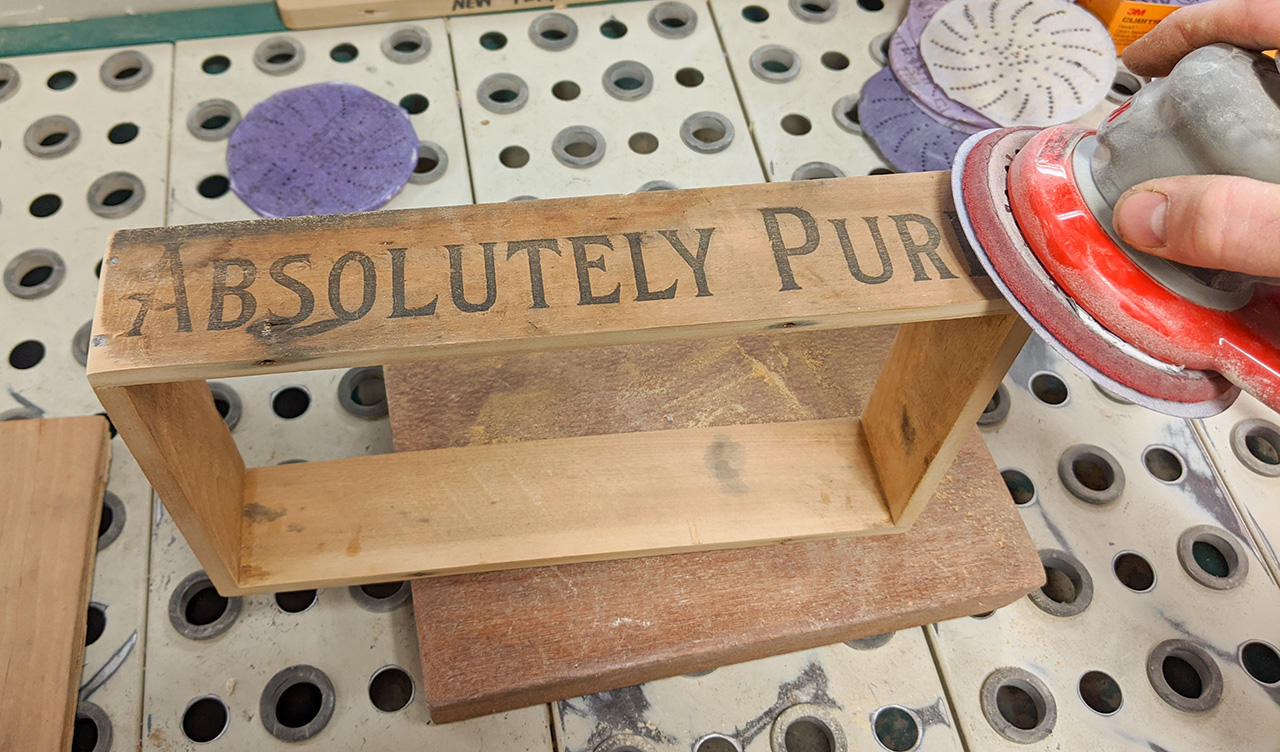
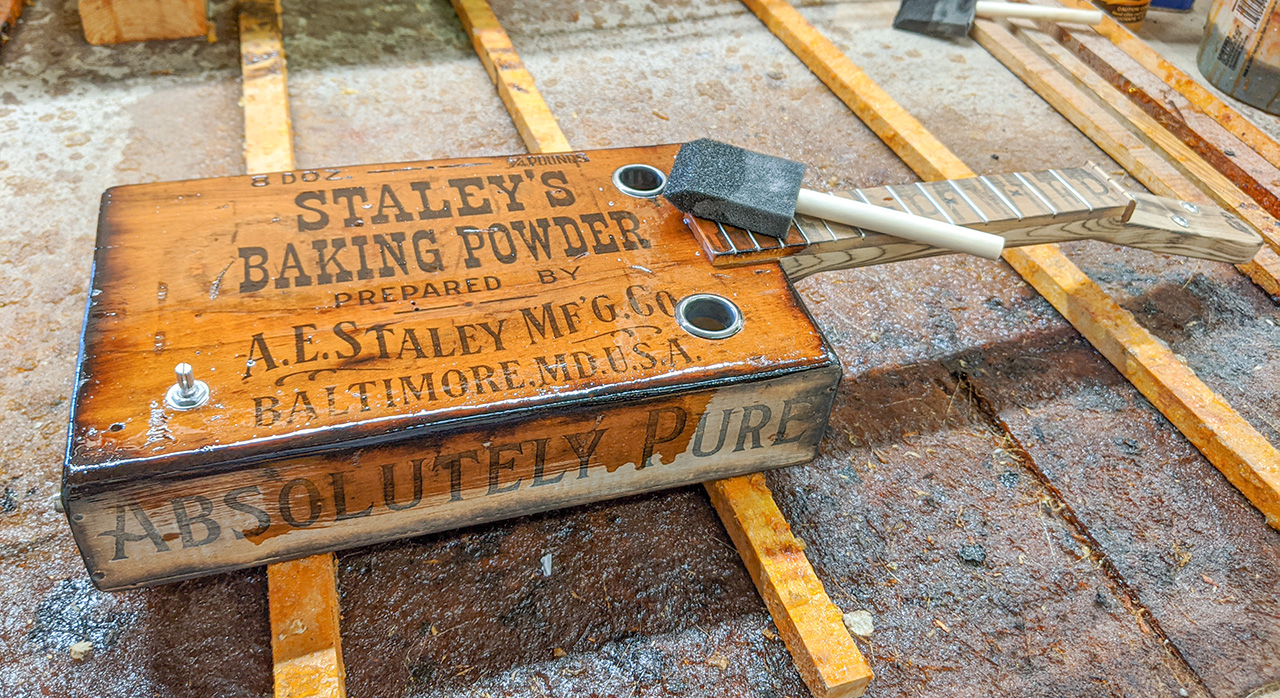
One panel of the crate had some pretty bad staining, from having been soaked with some unknown oily substance at some point in its past. I knew that panel wouldn't be as useful to me... but I was able to cut the bottom part with the "Absolutely Pure" off for use as one of my side panels. |
|
|
|
|
The panels on the bottom of the crate were pretty plain and beat up, and I ended up cracking the ends trying to get the nails out, so I didn't end up using any of them on my build. I quickly discovered as I examined the crate more closely that it was made from hard maple rather than pine, which was surprising. |
|
|
|
|
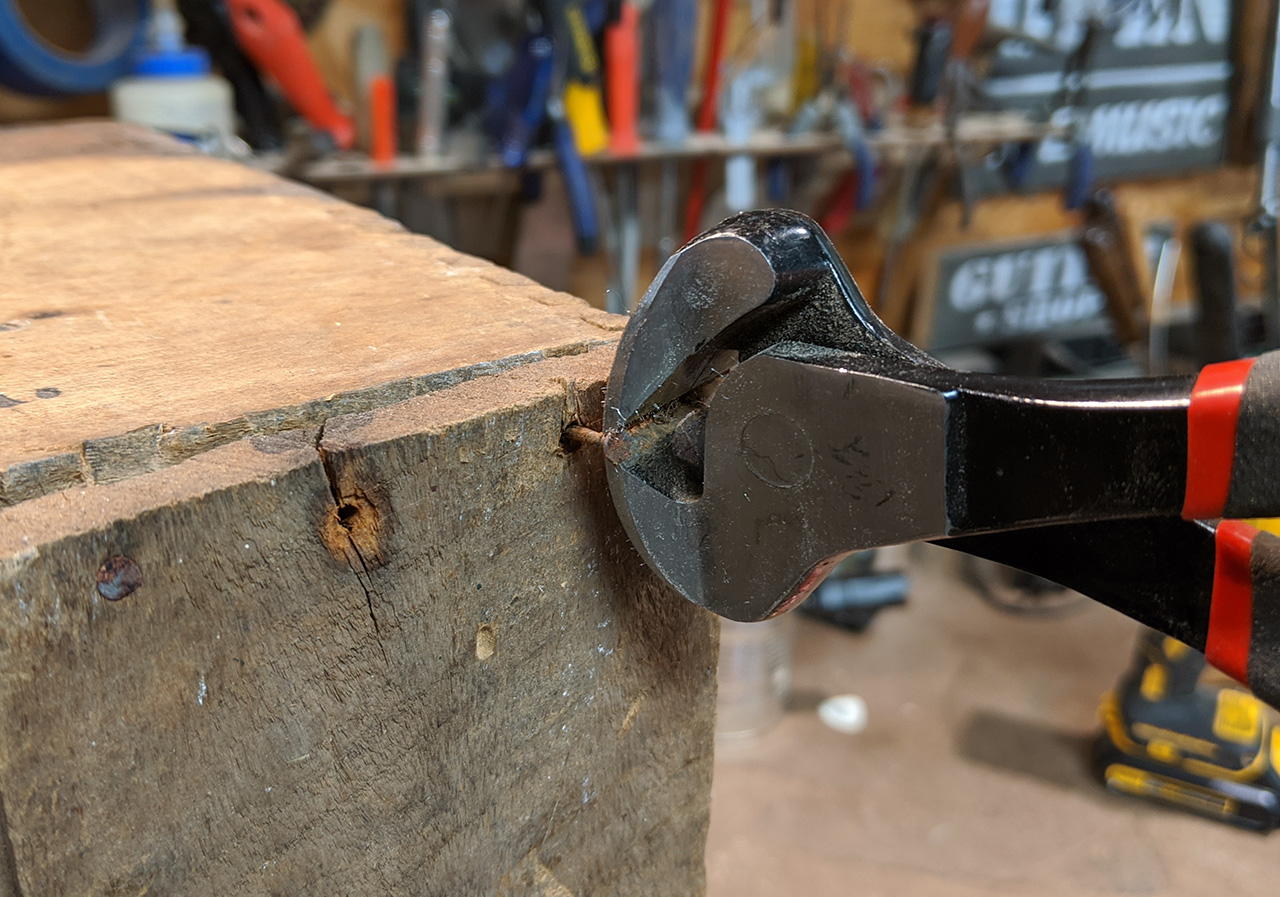
Because the crate was made from hard maple, the nails used in its construction REALLY didn't want to come out. Most of them were pretty corroded and the heads snapped right off when I tried to remove them. The bottom panel pieces also cracked a bit at the ends during removal... but I was fairly sure I wouldn't need them. |
|
|
|
|
A few of the nails did agree to be pulled out... maybe about half of them. My pair of C. B. Gitty fret nippers came in handy during the removal. |
|
|
|
|
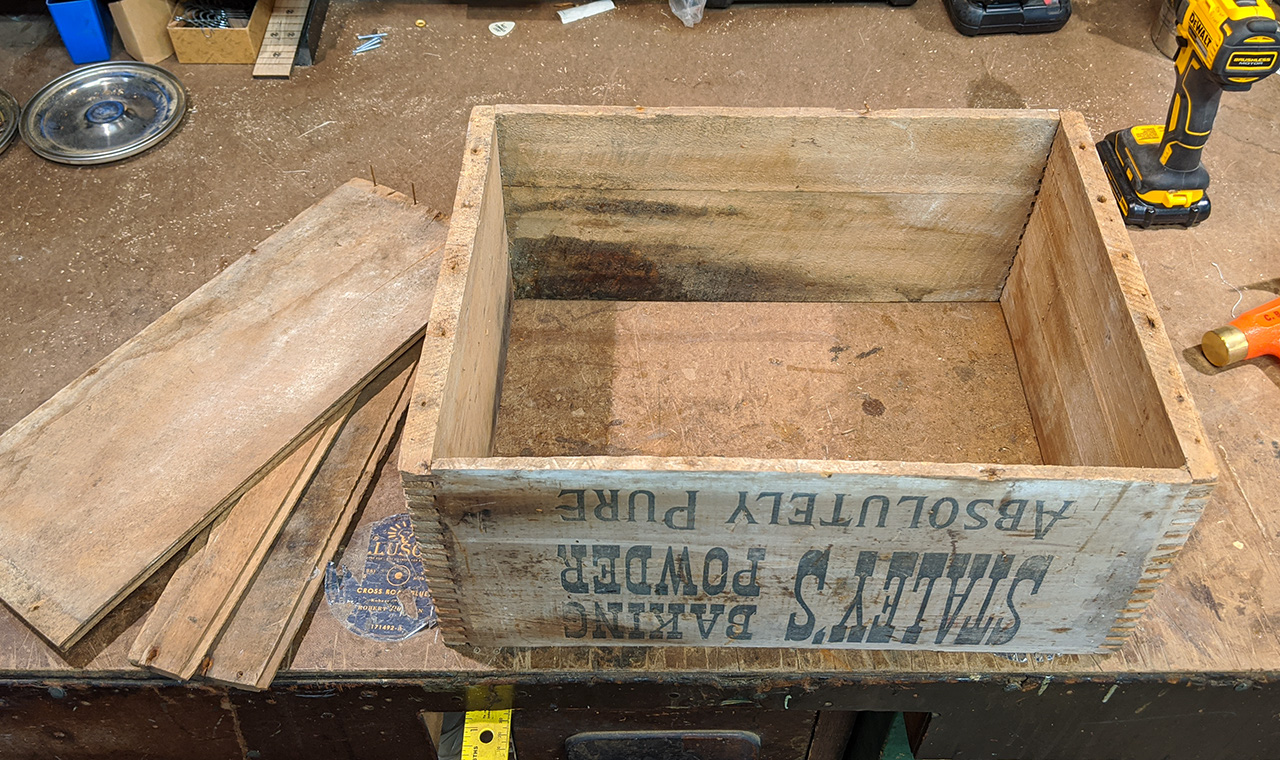
With the bottom panel removed, I could start looking at taking apart the box-jointed sides. |
|
|
|
|
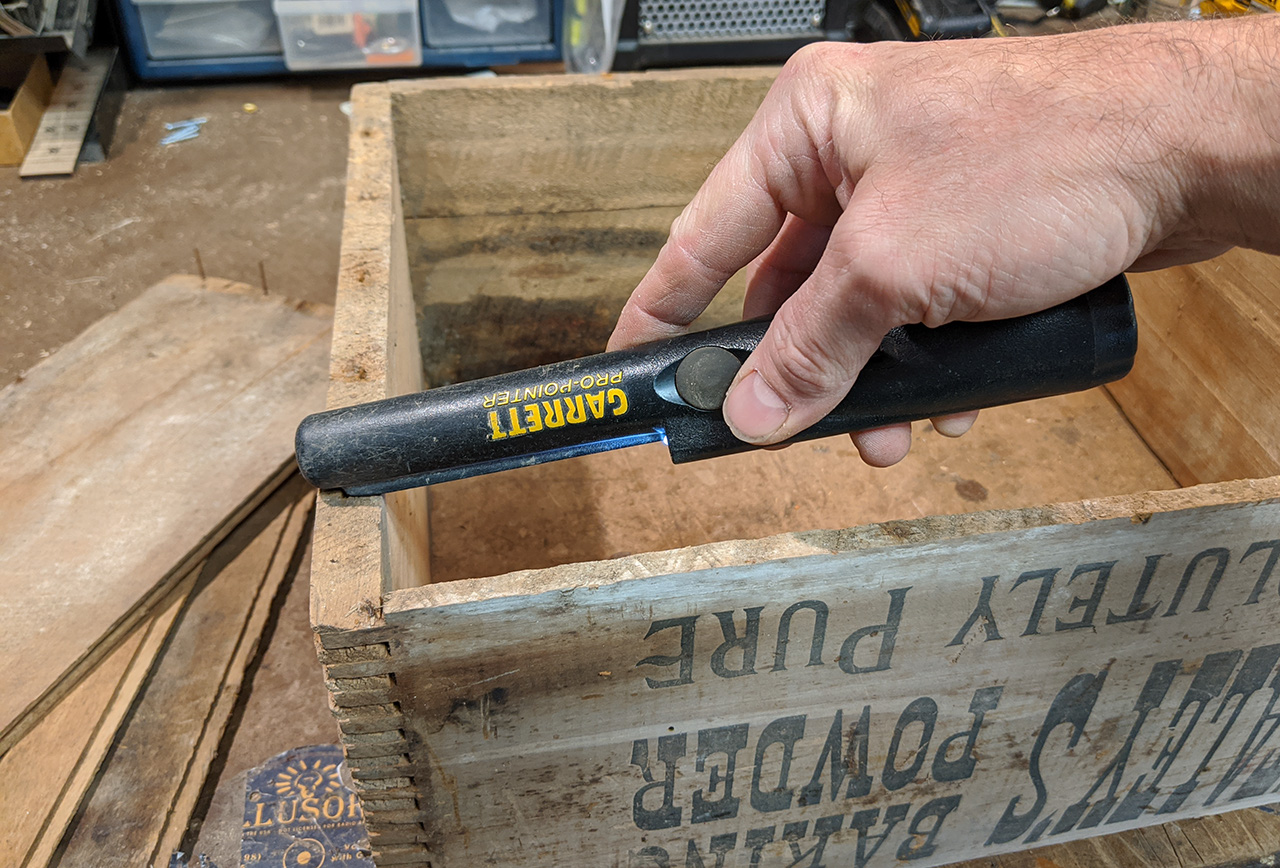
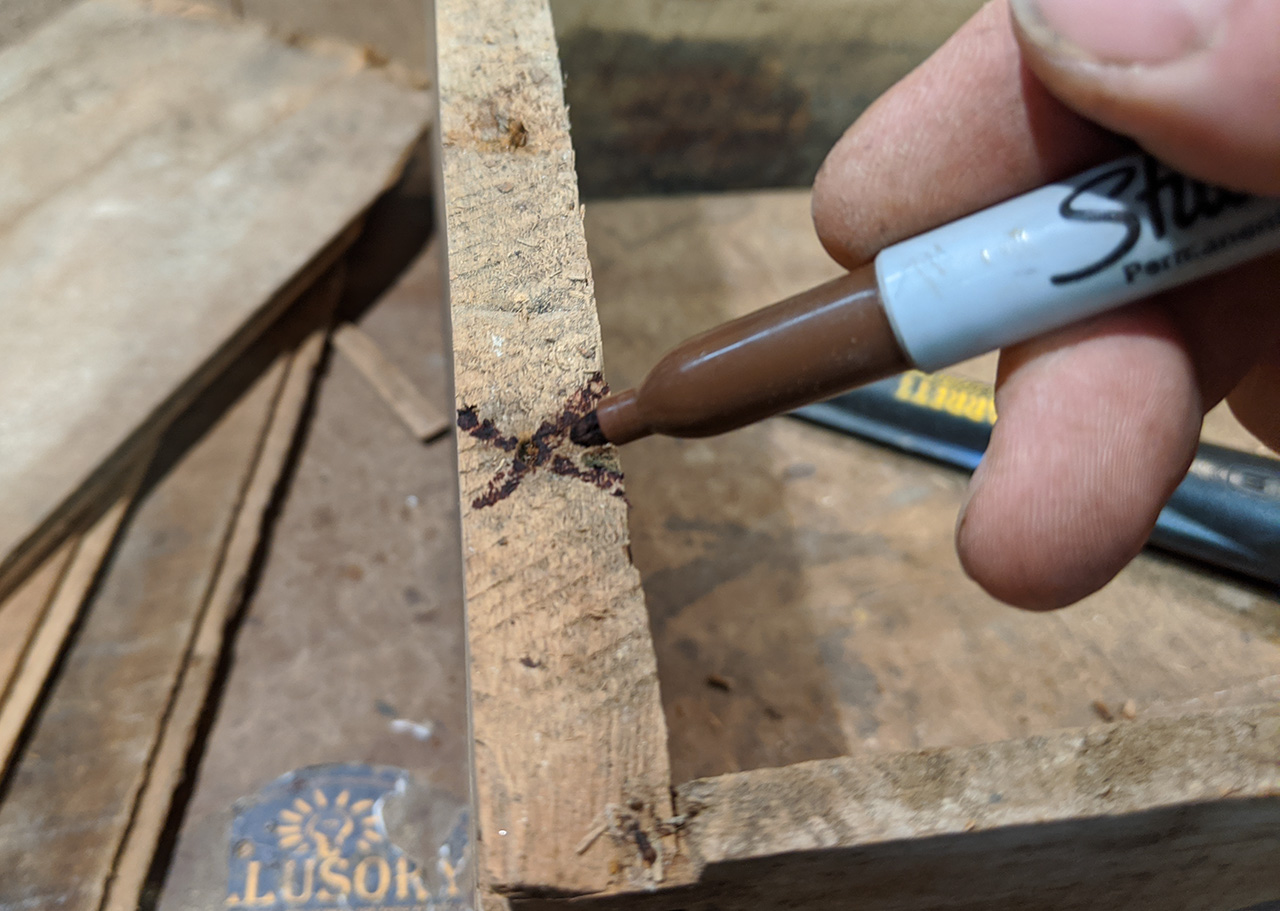
But first I decided to find the broken-off nails in the side panels. A Garrett metal-detecting pinpointer wand helped locate the hidden nail shanks in the wood. |
|
|
|
|
I then marked each one with an "X" to help me remember where they were. Hitting steel nails with saw and planer blades makes for a bad day. |
|
|
|
|
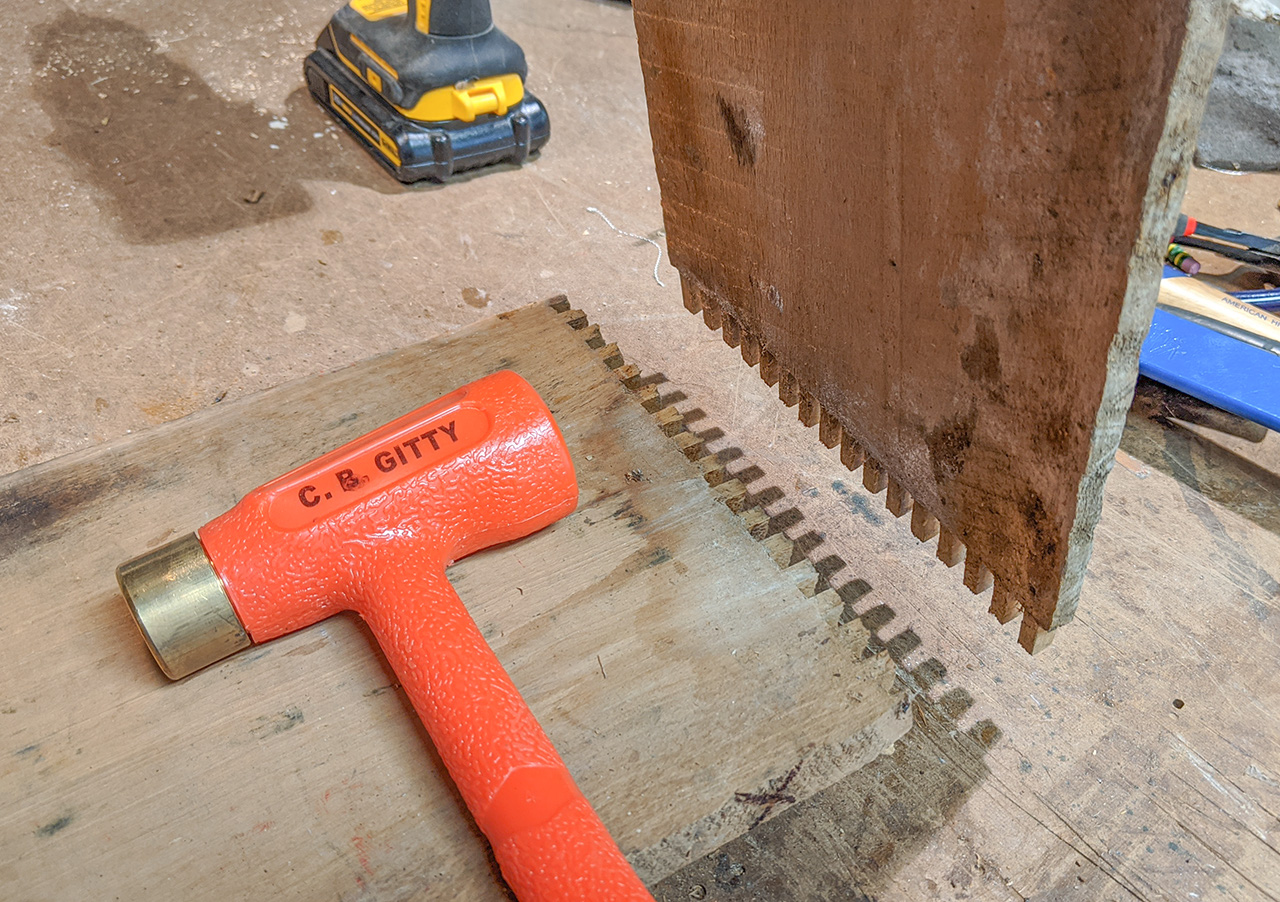
Thankfully the sides came apart nice and easy, any glue that had been in those box joints having long since let go. |
|
|
|

|
Soon I had my stack of raw materials laying on the bench. The side panels had some warping, but nothing too bad. |
|
|
|
|
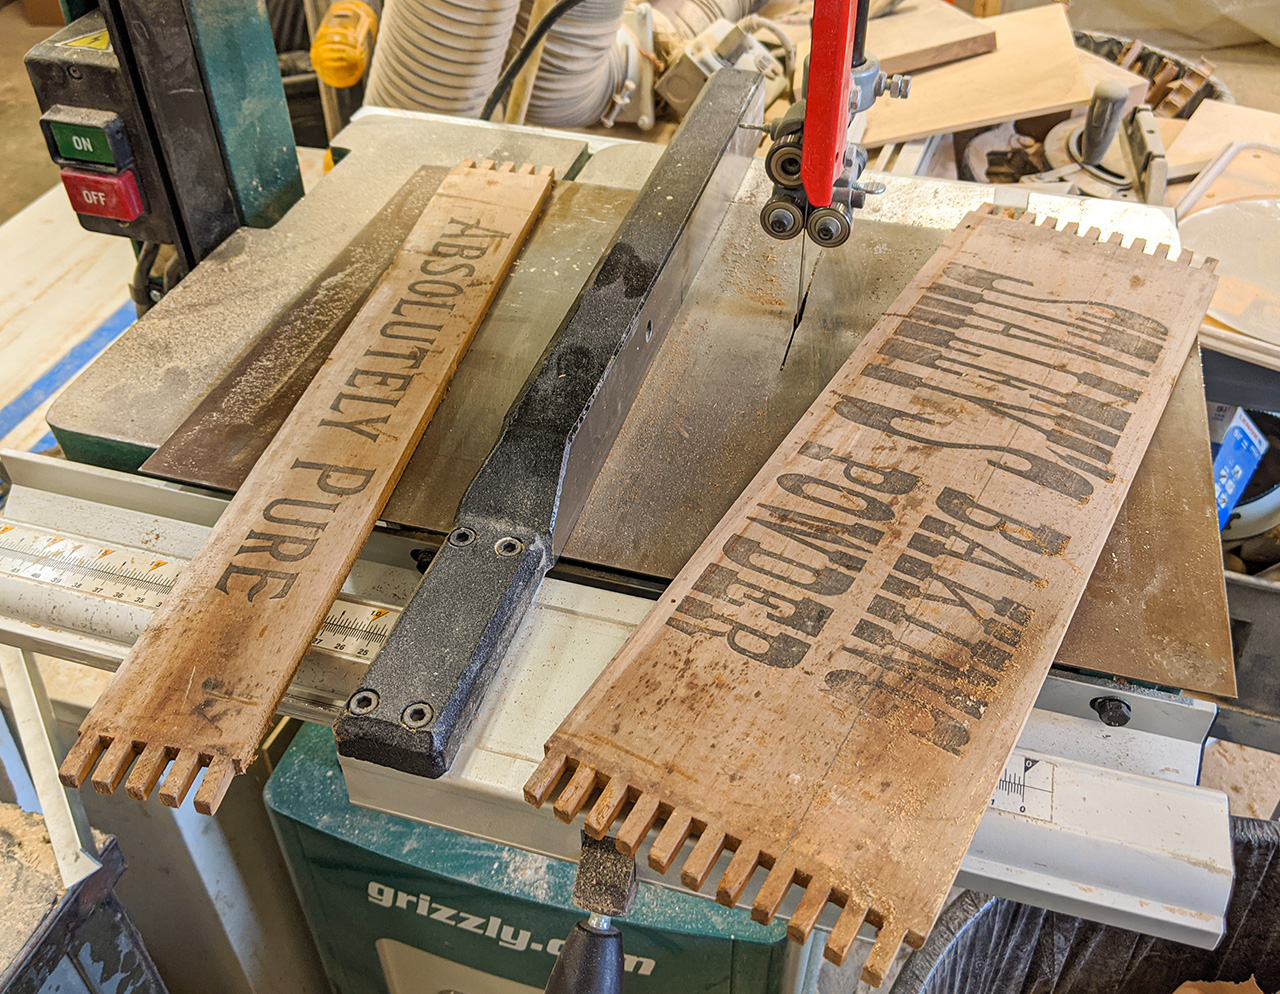
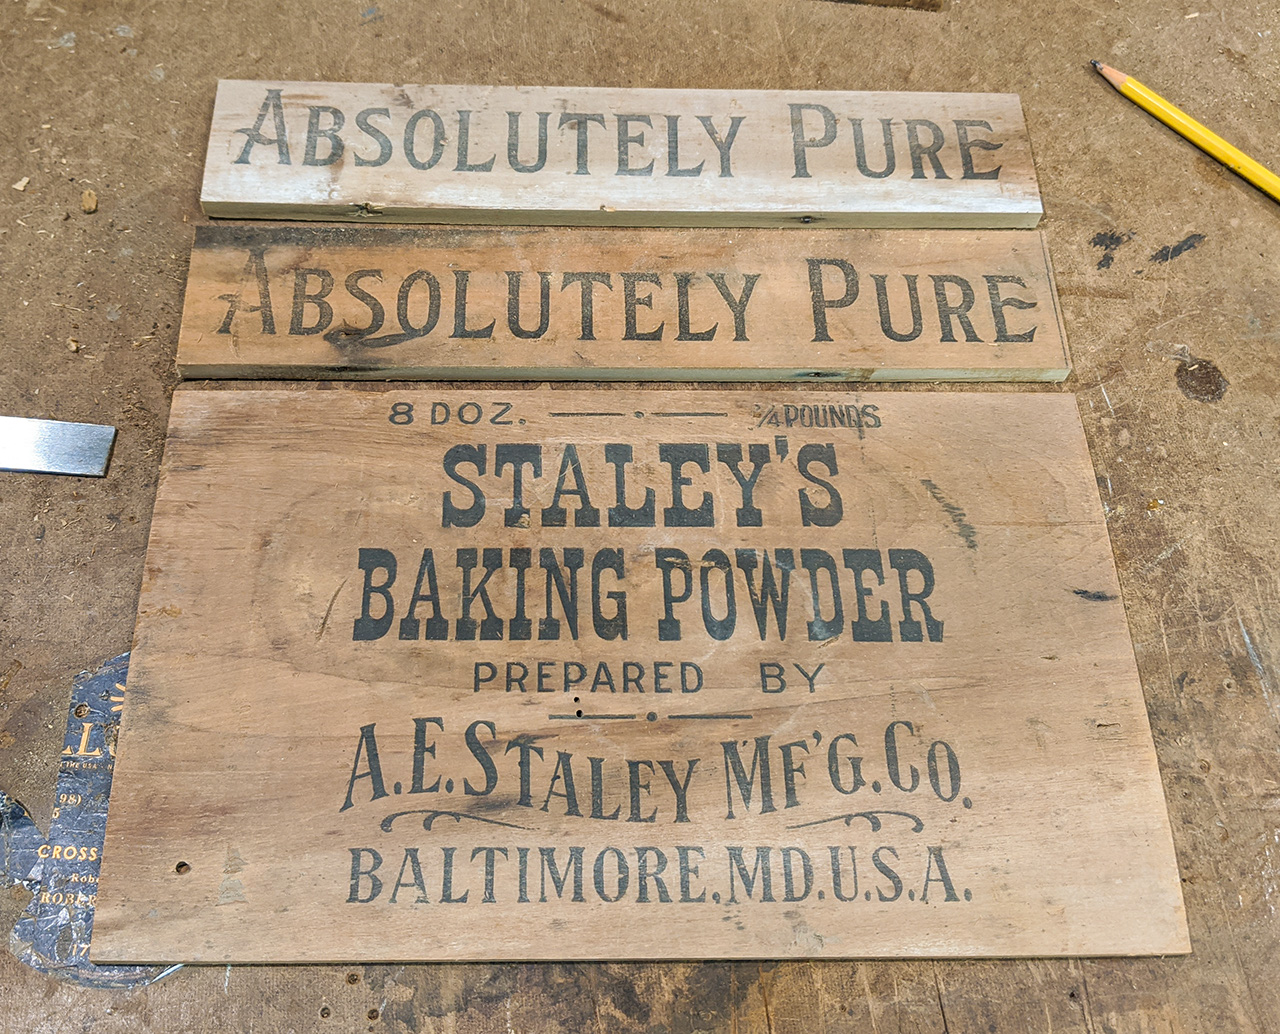
After some measuring and figuring, I headed over to the bandsaw to start cutting the pieces for my box's side panels. I wanted to retain as much of the distinctive lettering as possible, so I chose my slat width based on that goal. |
|
|
|
|
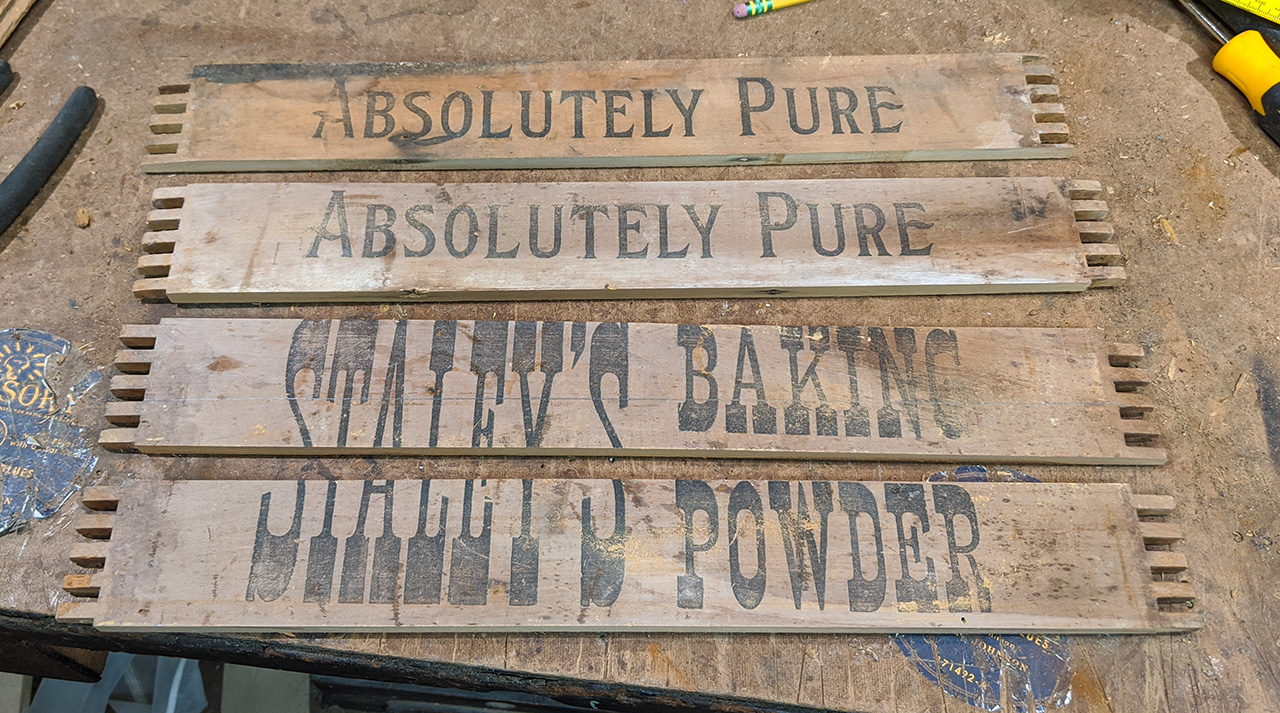
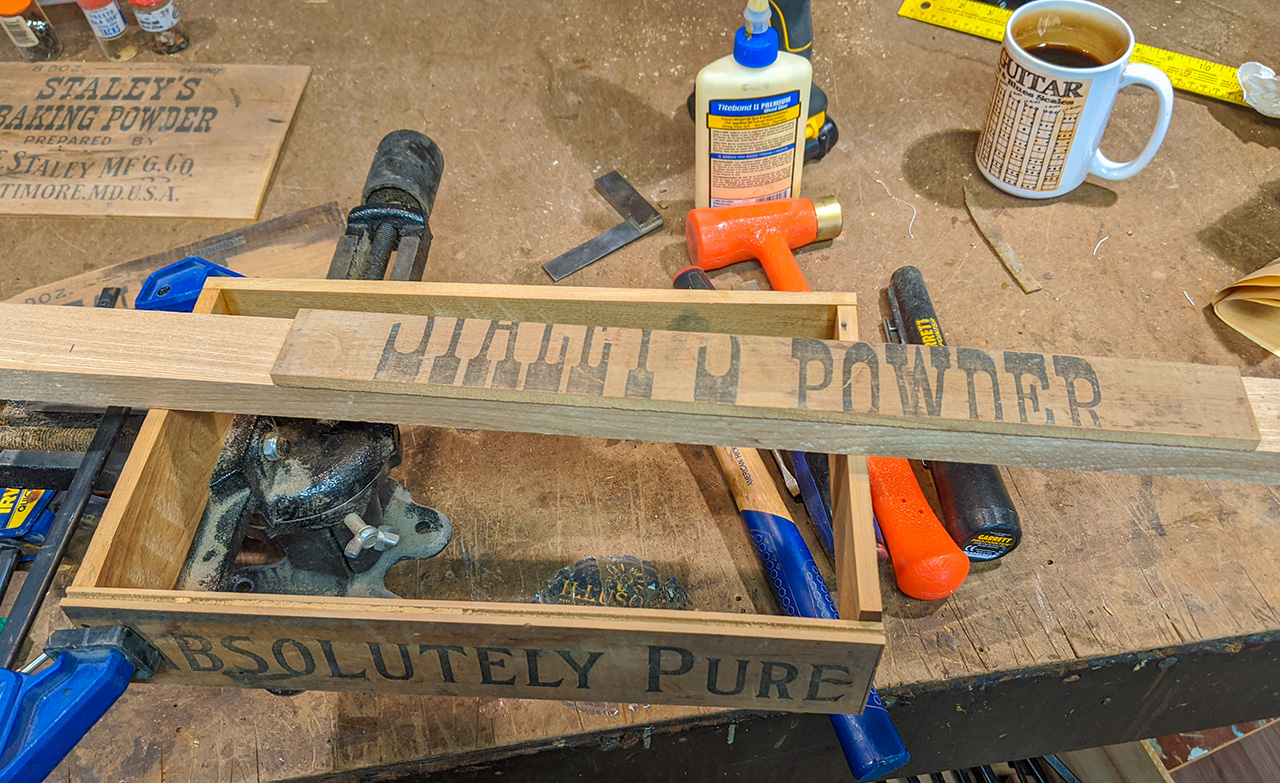
Soon I had four nice pieces ready for cutting down to length. At first I was thinking about how I could retain some of those nice box-jointed ends, but in the end I cut all of them off, to better center the text - and also because there was no way to keep them on all four corners, and still end up with the box size I wanted. |
|
|
|
|
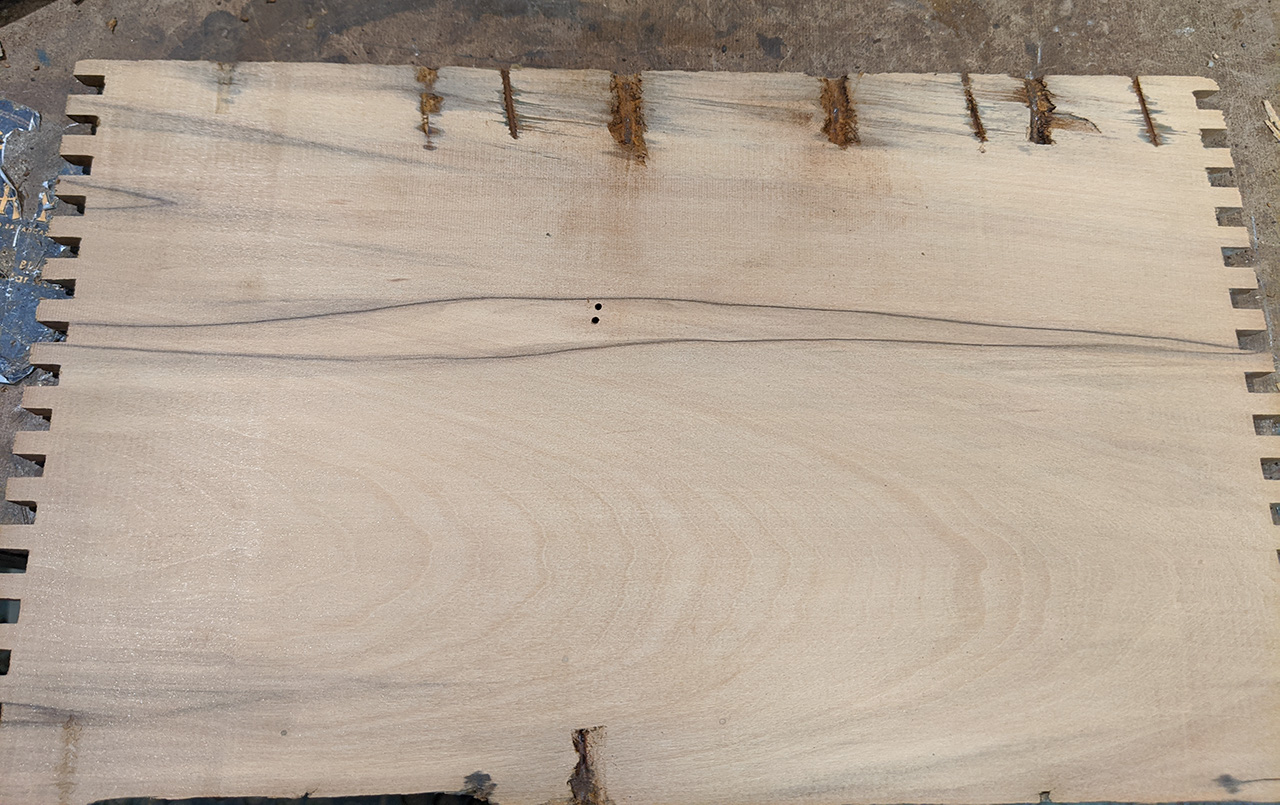
Next I started working on one of the crate's end panels, to turn it into what would be my soundboard. I chose the one without any staining, with the lettering nice and clear (the lettering is face down in this photo). Remember that these panels had nail ends embedded in the wood... so I very carefully planed down a little at a time... |
|
|
|
|
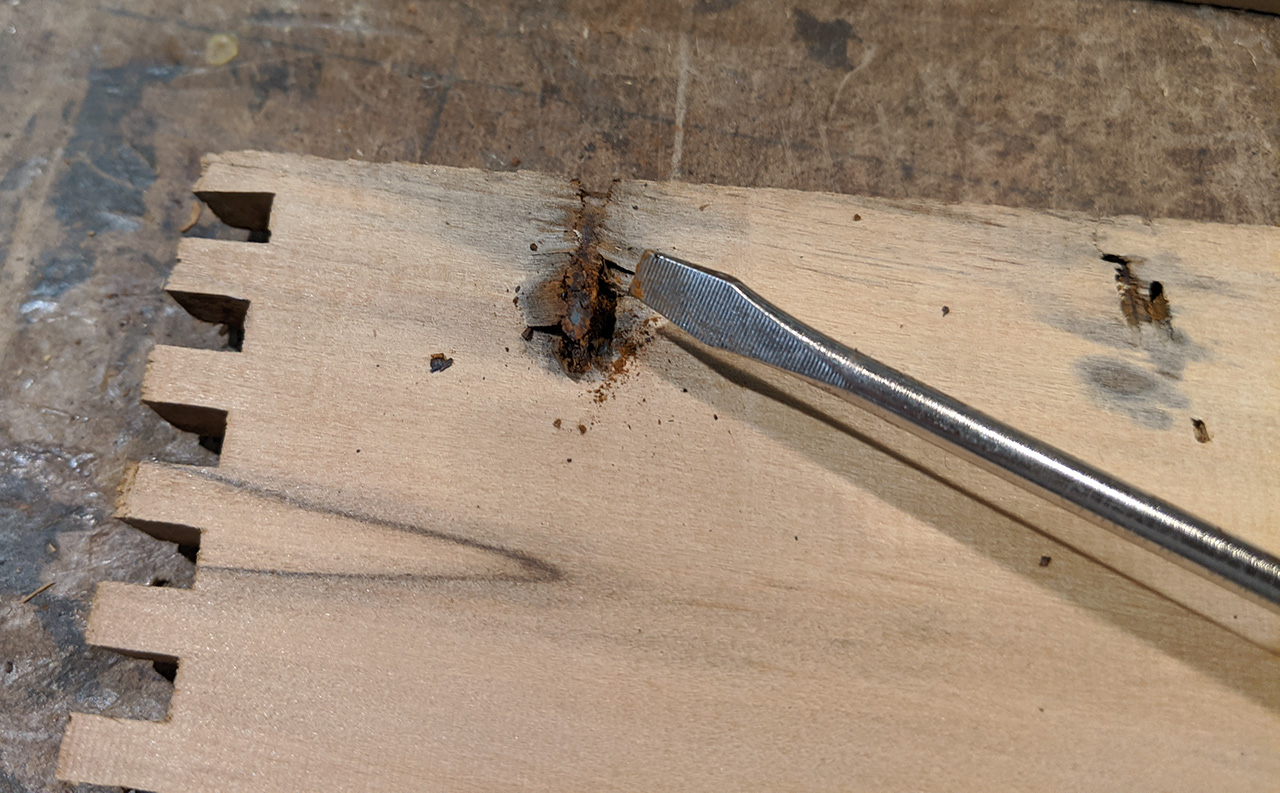
And as each nail location began to be exposed, I'd dig it out with a screwdriver. |
|
|
|
|
In the end, quite a few nails had to be removed in this way, and it was a gamble (with my planer blade at risk) to use this method, but I got lucky and didn't end up hitting any during the process. |
|
|
|
|
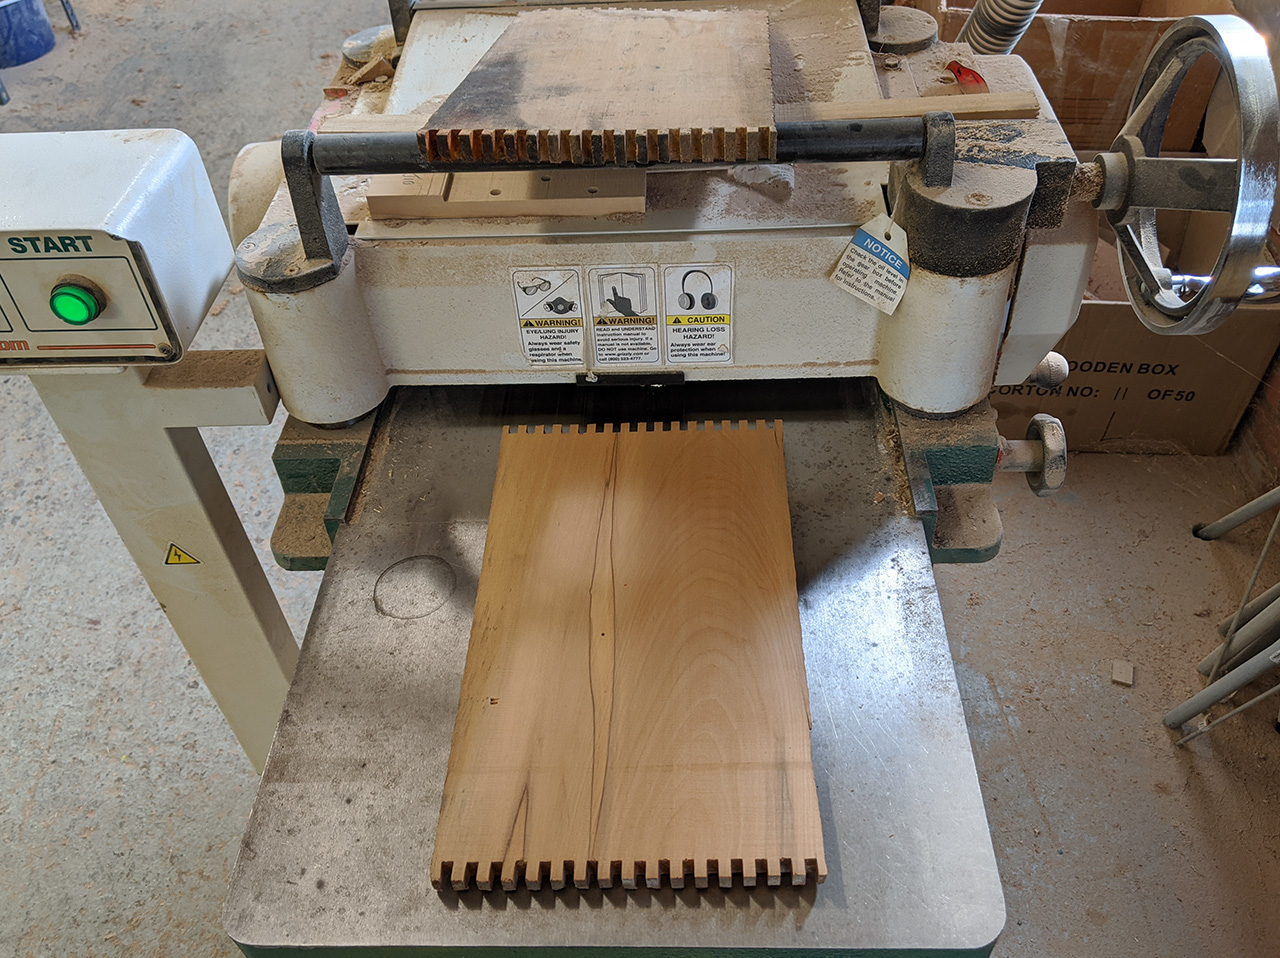
After the planer, which only goes down to 3/16" thickness, I ran the piece through the drum sander a dozen or so times to get it down to just over 1/8" in thickness. Because the soundboard was hard maple instead of softwood, I knew I'd have to get it nice and thin for the best possible resonance. In this photo, my nicely thinned-down soundboard is now ready for cutting to size. |
|
|
|
|
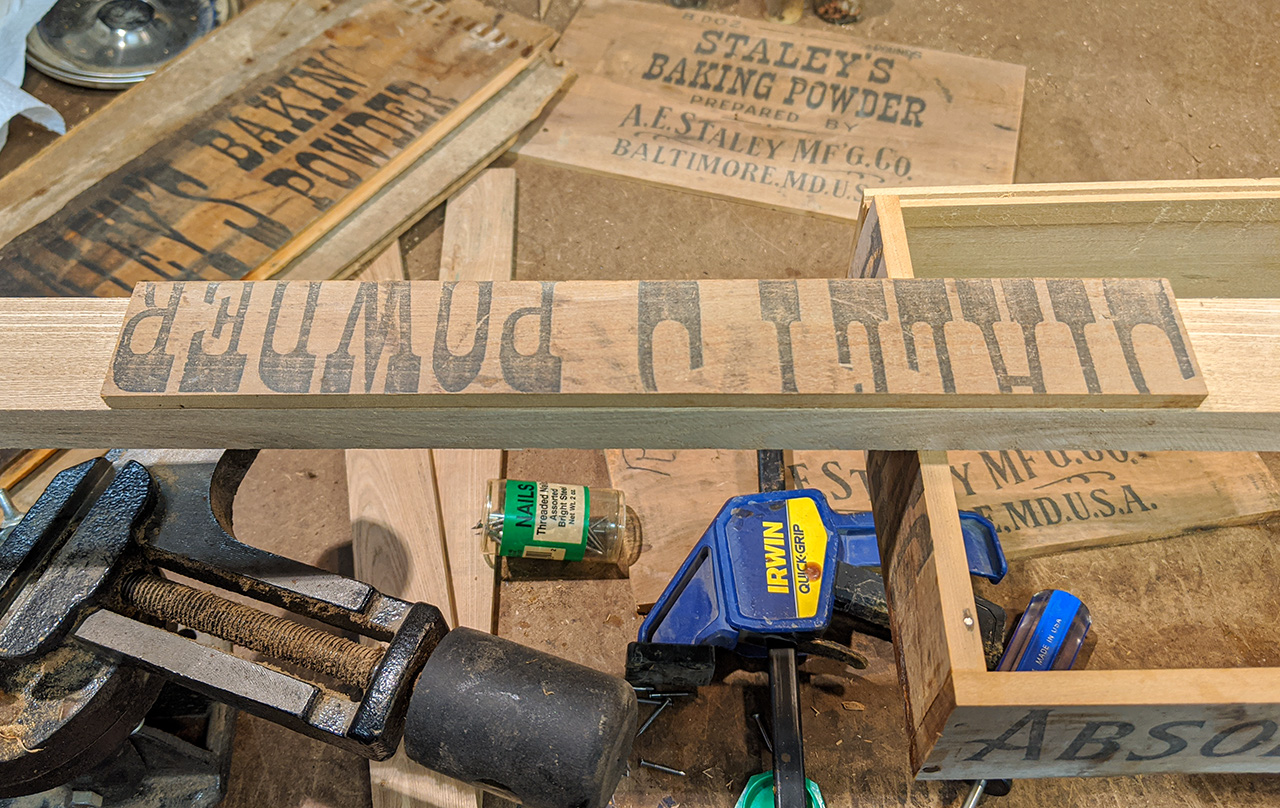
I now had all of the pieces I needed for the sides, front and back of my guitar body box. |
|
|
|
|
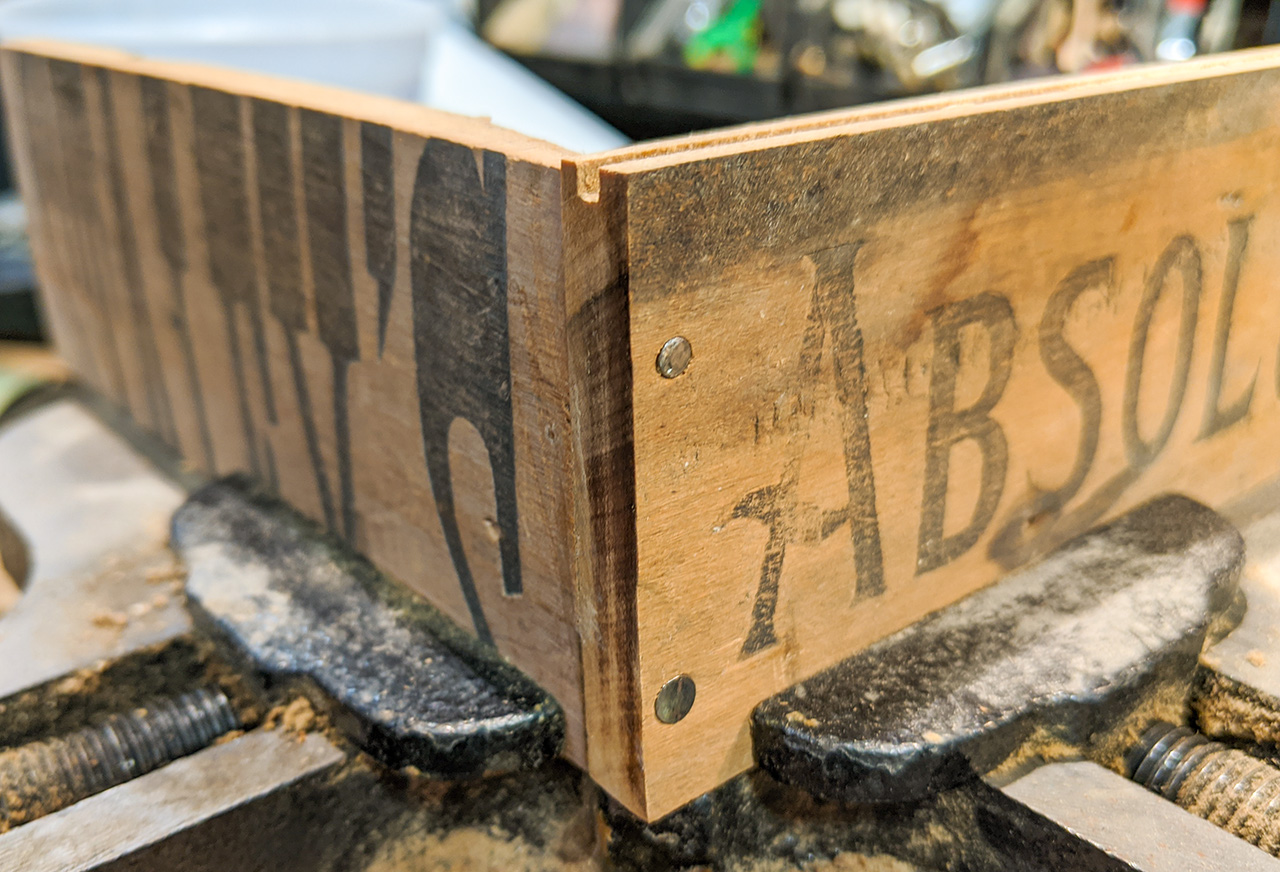
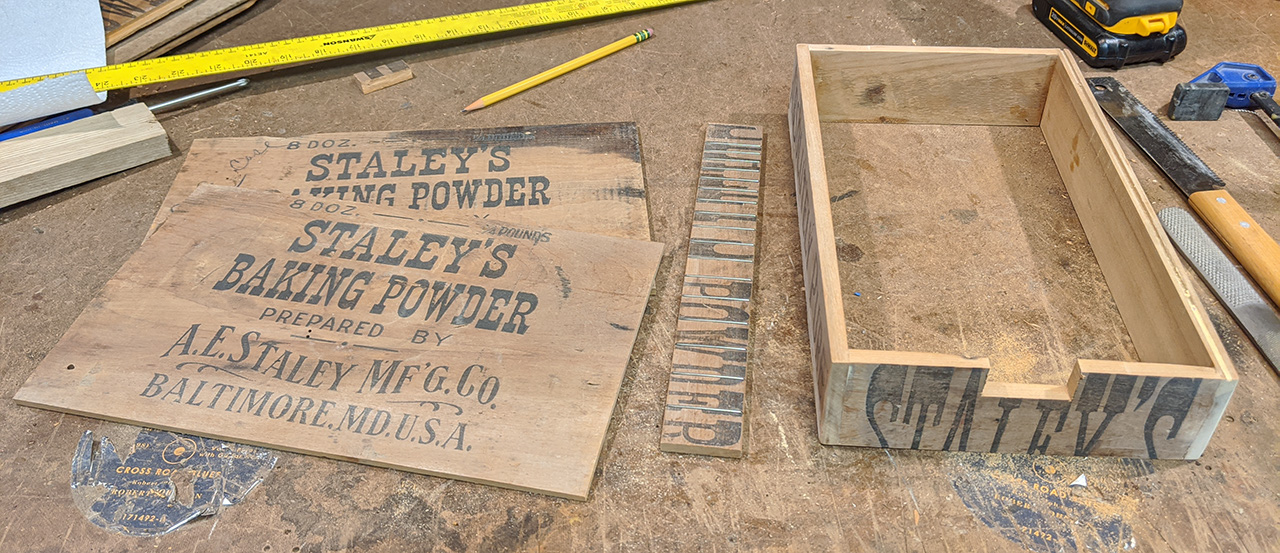
A trip to the chop saw soon yielded pieces of the length and width I wanted. The "Absolutely Pure" panels would make up the longer edges of my box. |
|
|
|
|
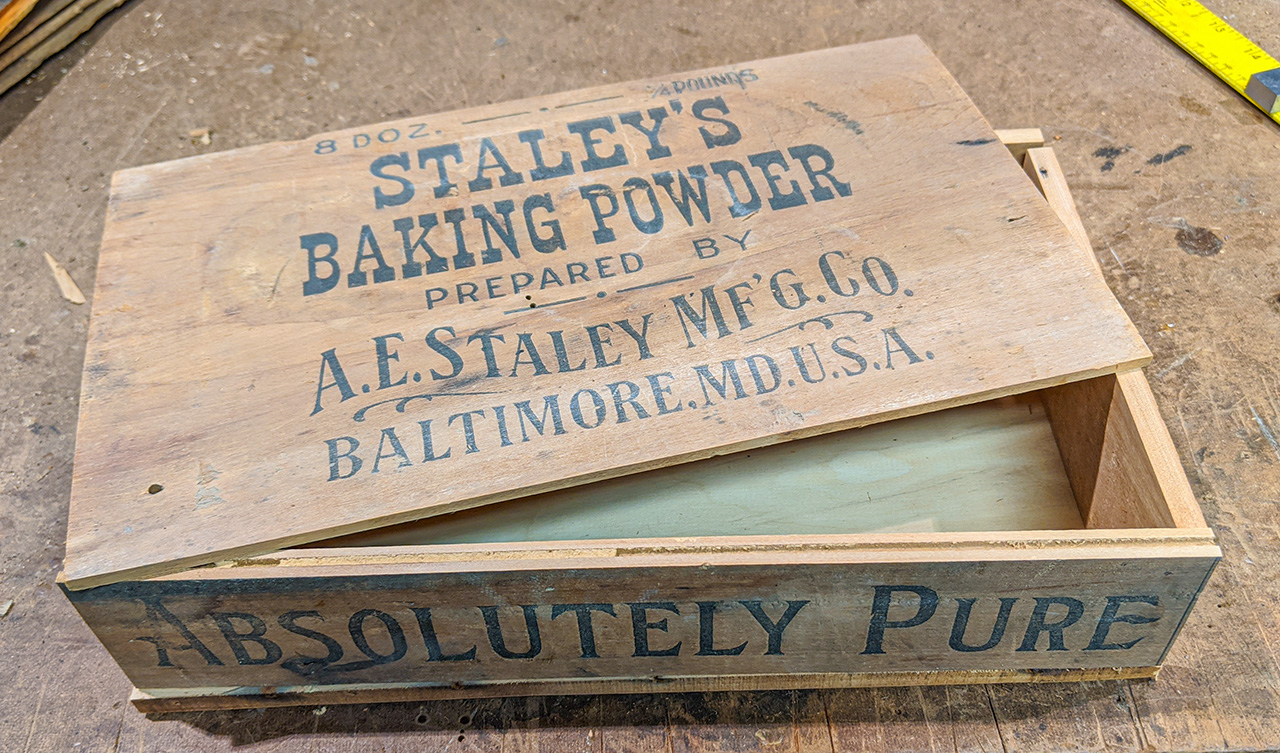
Here, all of the components of my box-to-be are laid out in a "dry fit" to get an idea of how everything will piece together. So far so good! |
|
|
|
|
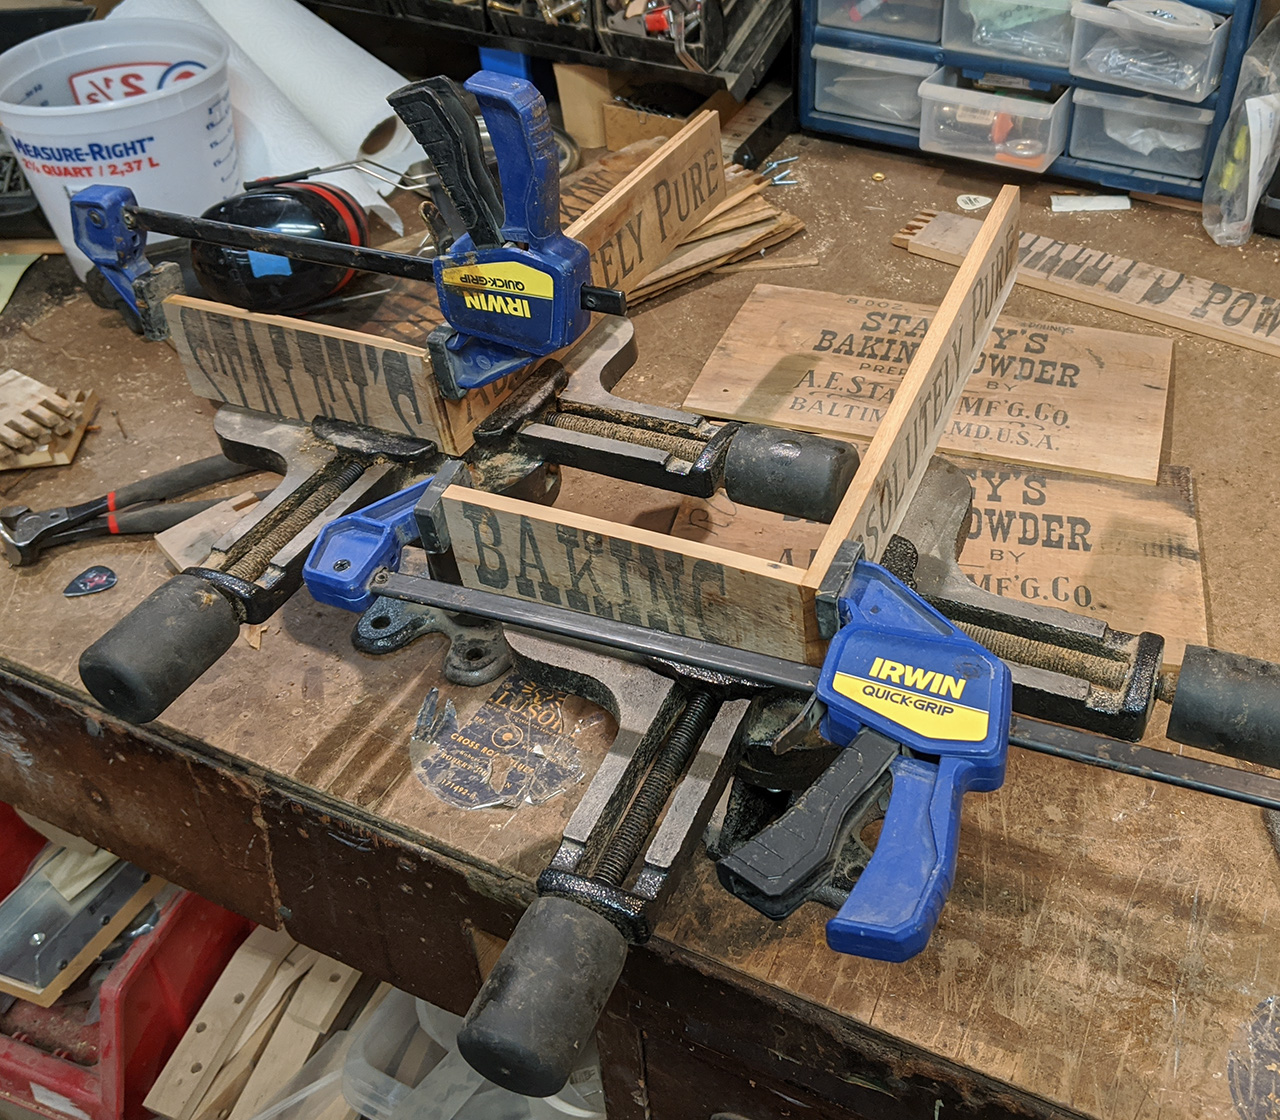
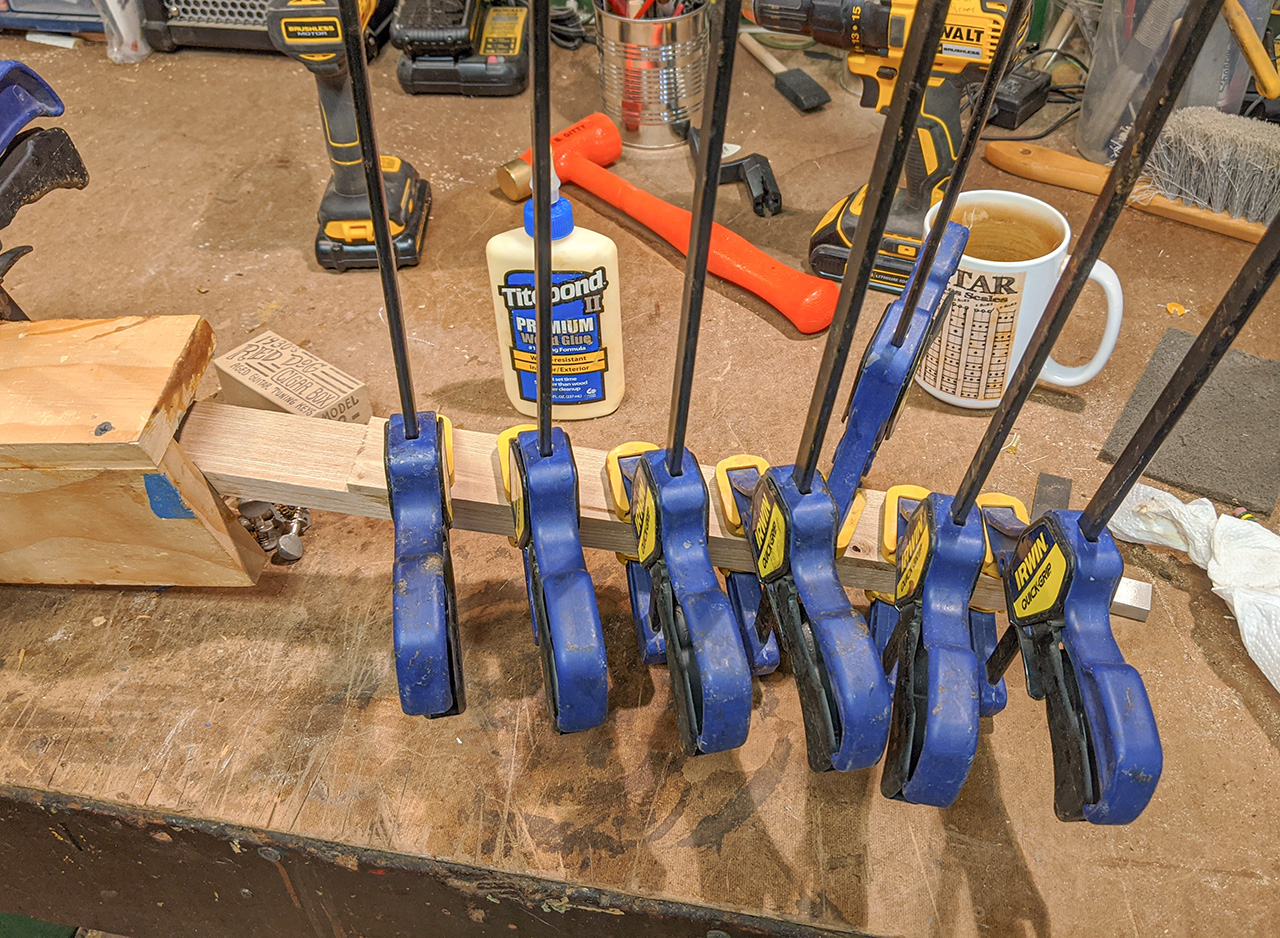
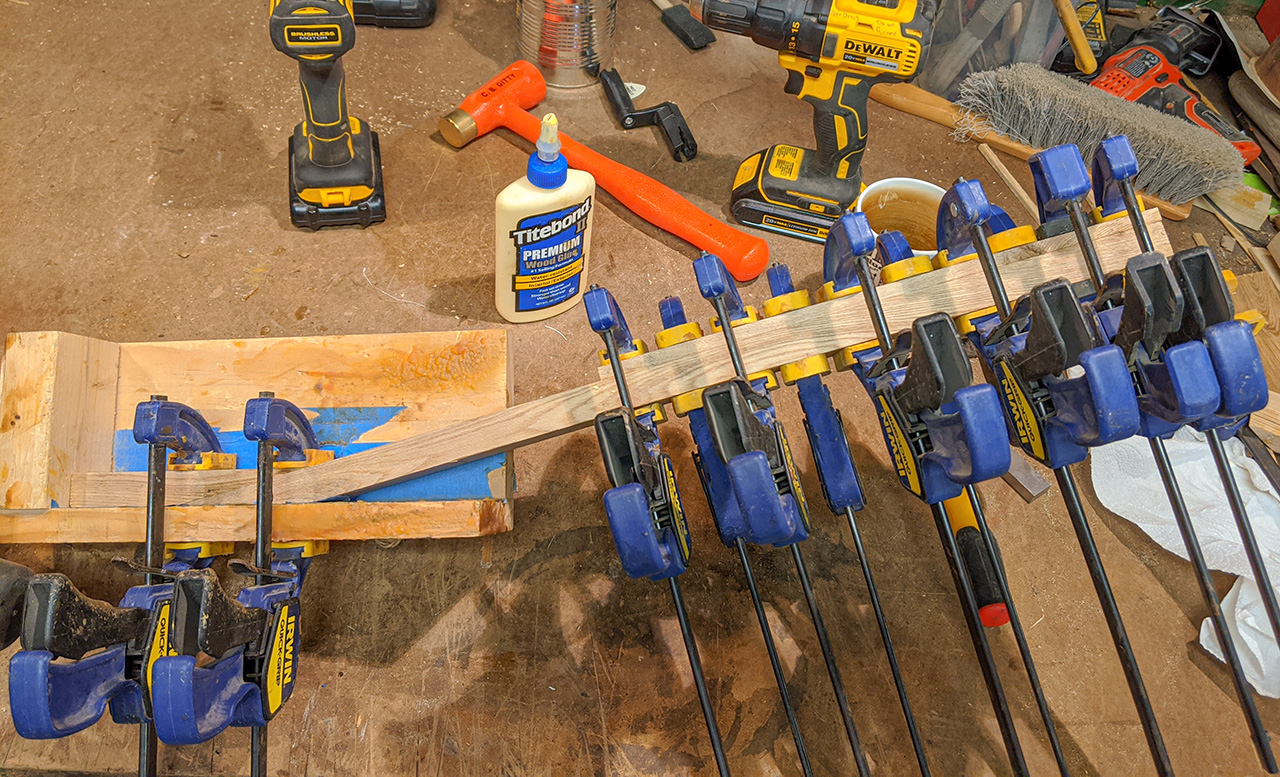
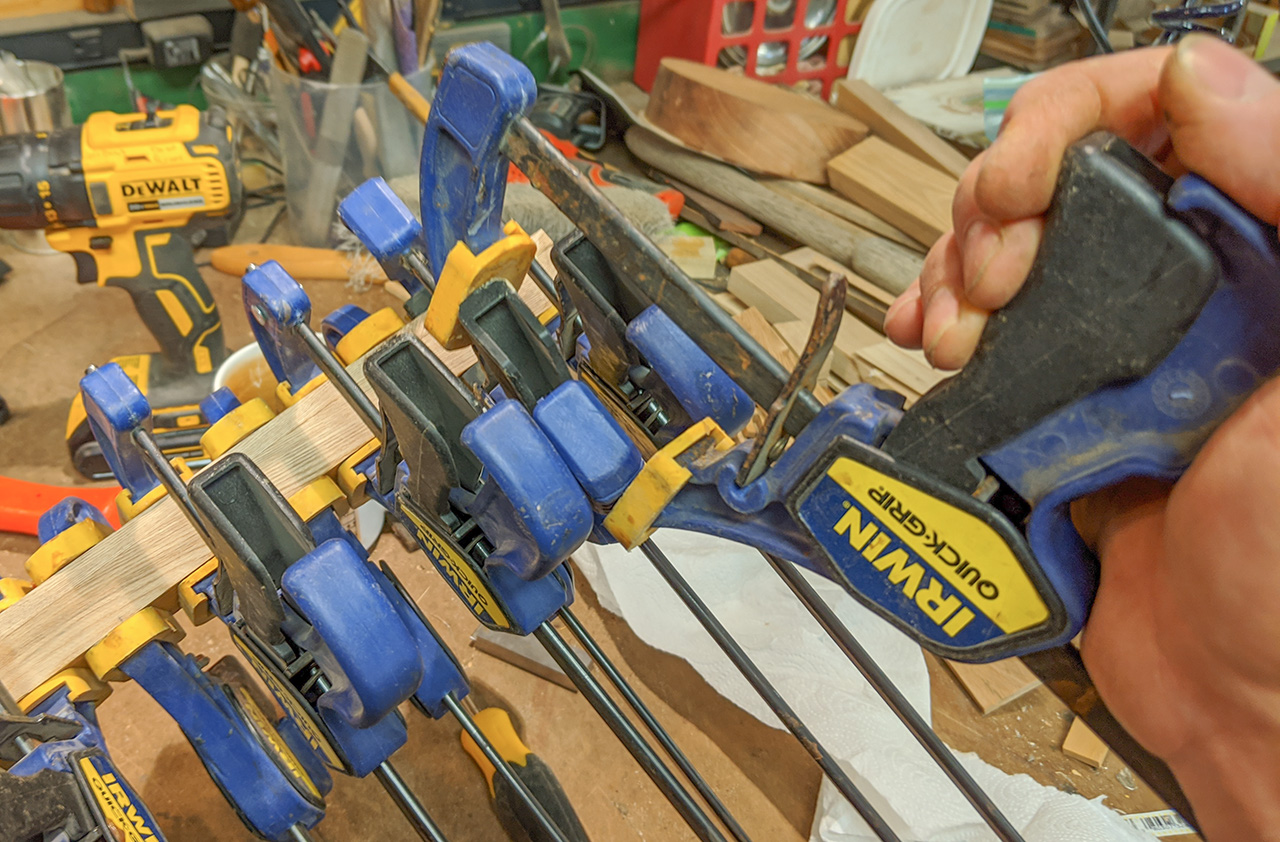
Then they went into the miter vises to start their transition into a box. I used the squeeze clamps to pull the top part of the glue joints together nice and tight, since the miter vises weren't quite enough. |
|
|
|
|
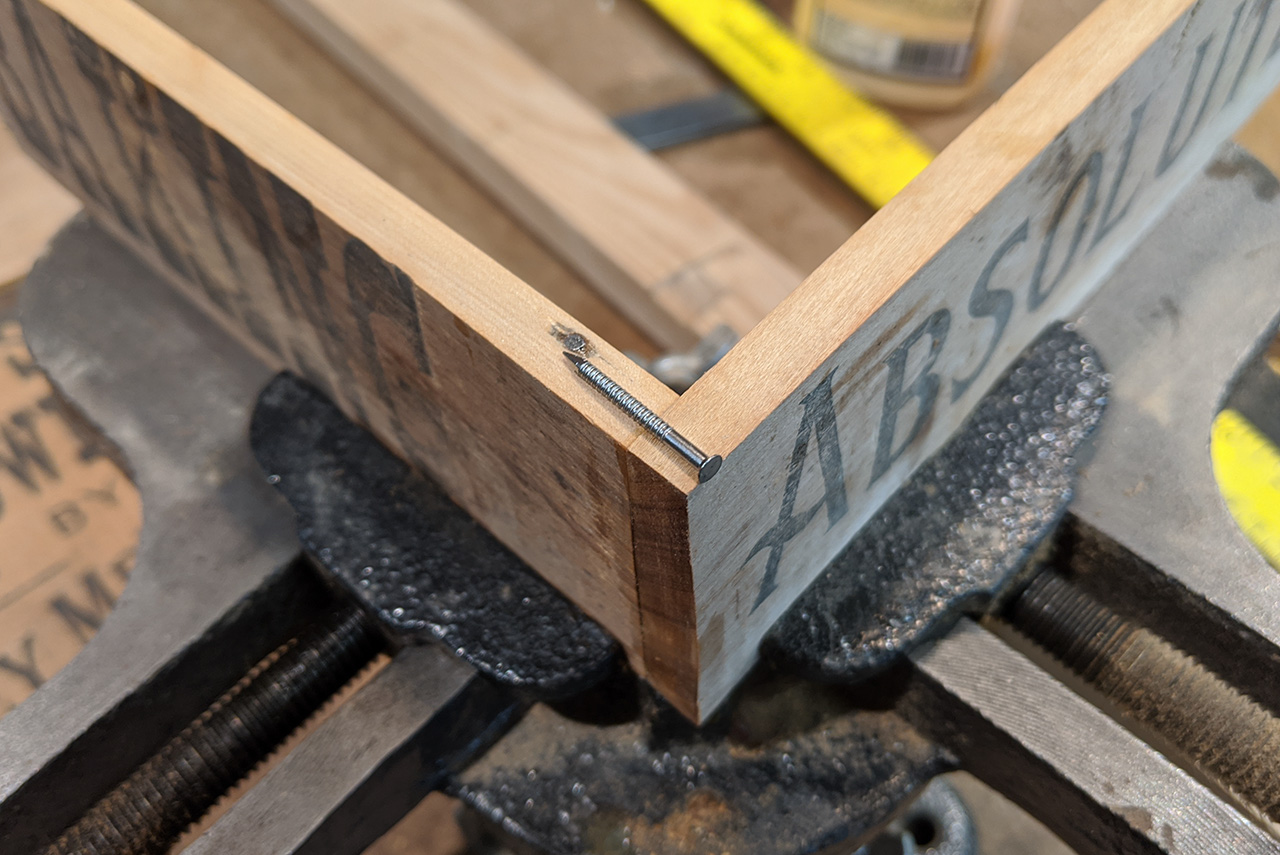
While the glue was setting up, I decided to use small nails in my corner joints both for additional strength and also because nails were used in the original crate construction and I thought it would look good. |
|
|
|
|
I think they worked out nicely and carry forward the spirit of the original crate's builders. |
|
|
|
|
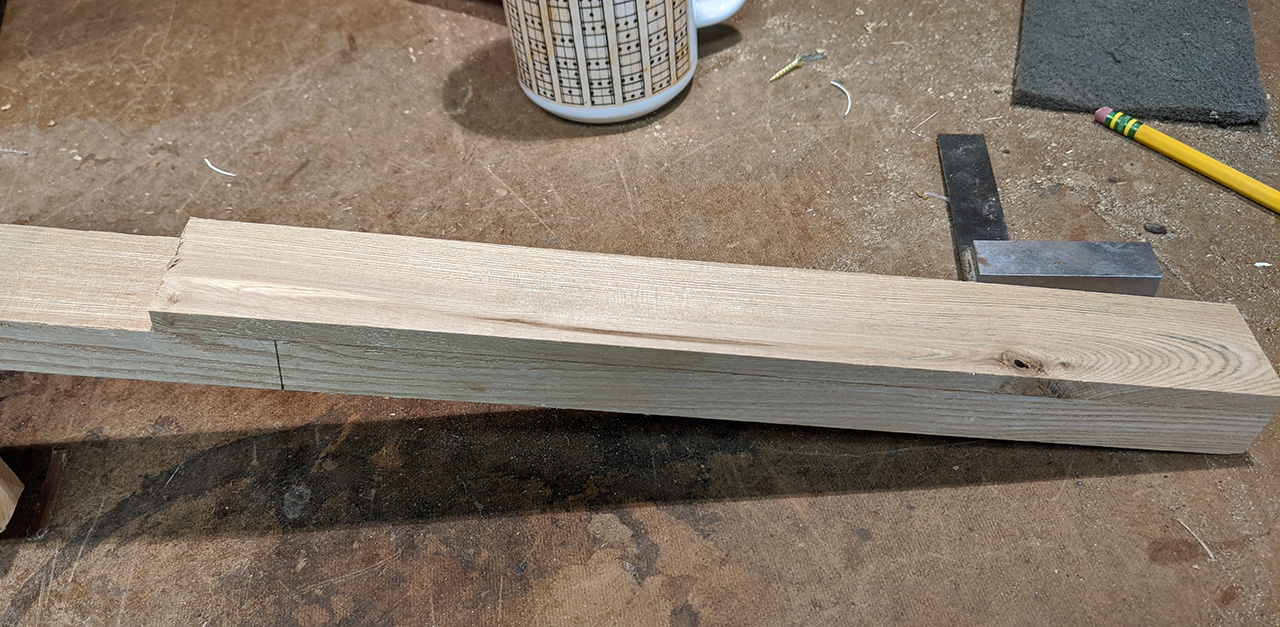
At this point, as I continued to glue up the corners of my box sides, I begin working on what will be my neck and fretboard. I decided to use another piece of the original crate, with its nice lettering, for my fretboard, and it worked out great. For the neck, I used a piece of the 200-year-old reclaimed American chestnut that I have used on a number of recent builds. I figured that wood from an old barn fit in well with the story behind the crate. |
|
|
|
|
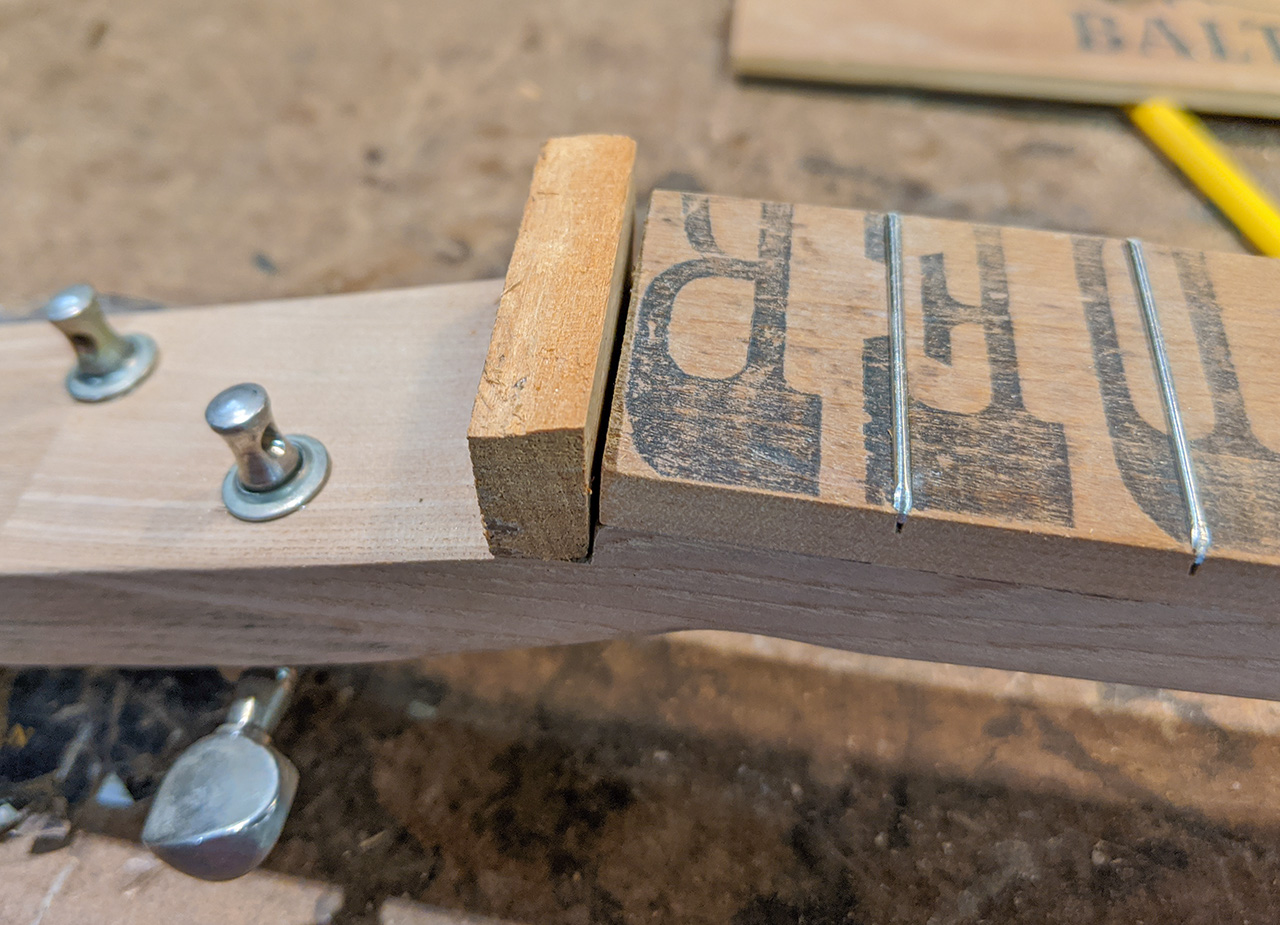
Here the fretboard has been cut to length, and is ready to be slotted. |
|
|
|
|
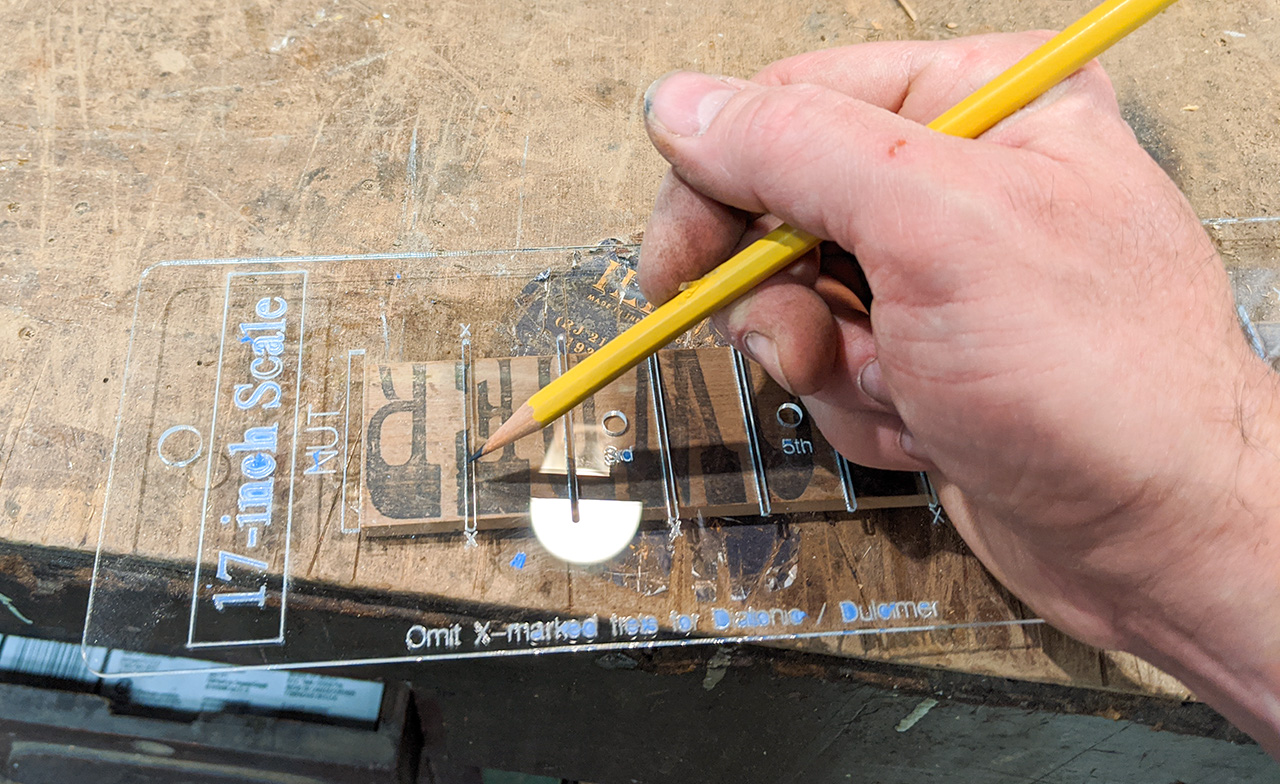
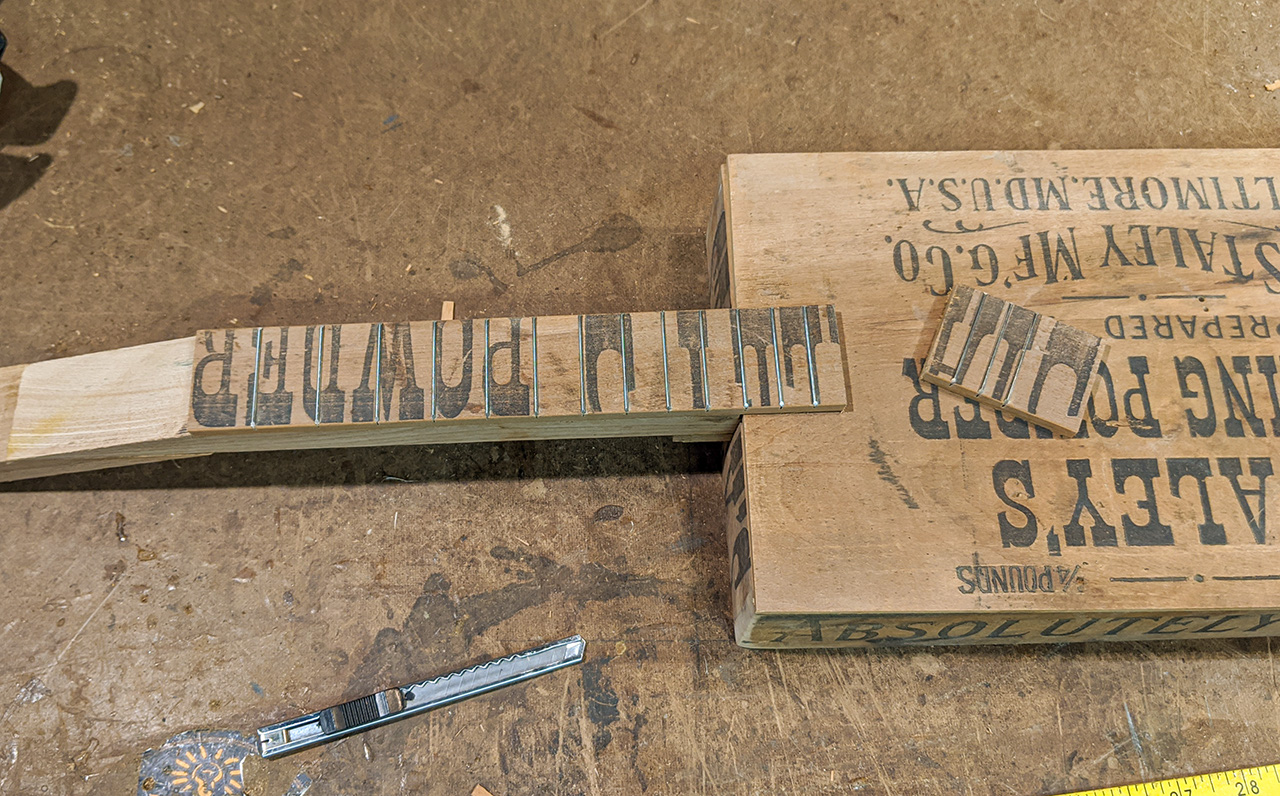
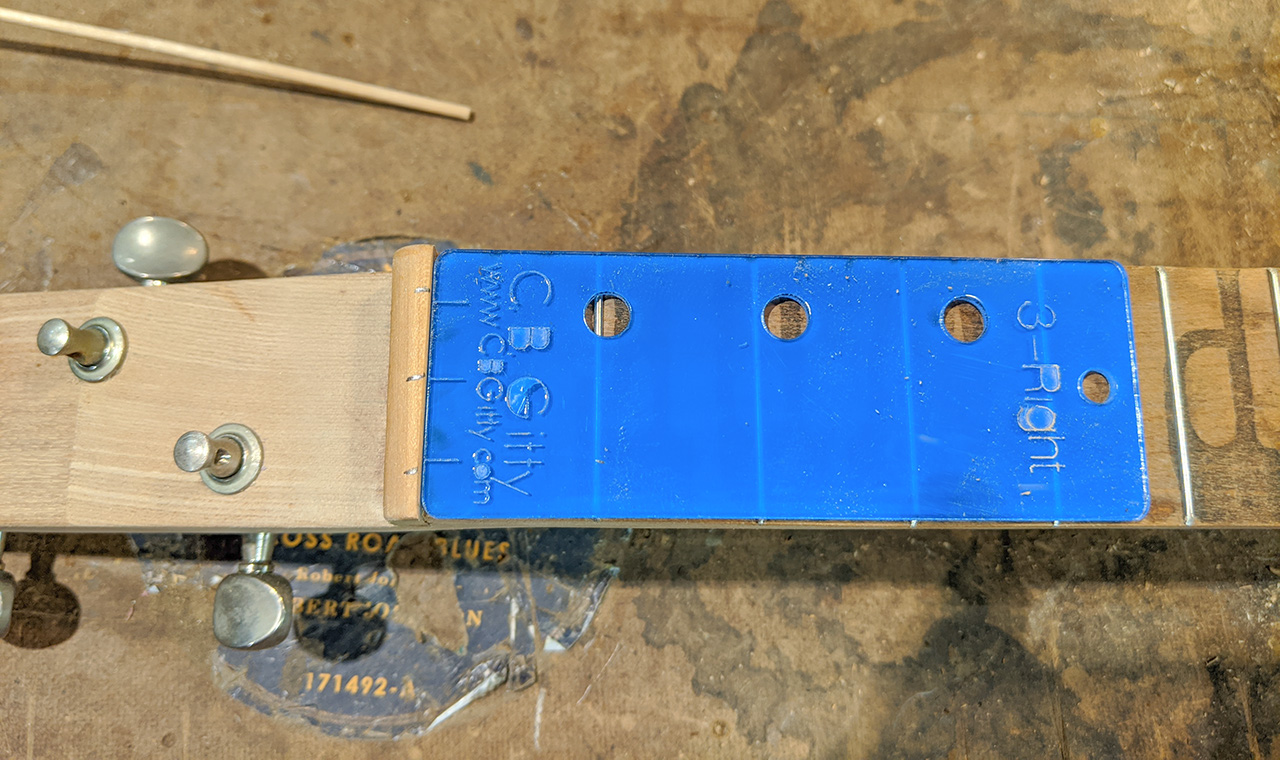
I marked my fret locations with a C. B. Gitty 17-inch scale acrylic fretting template, which made the job a breeze. |
|
|
|
|
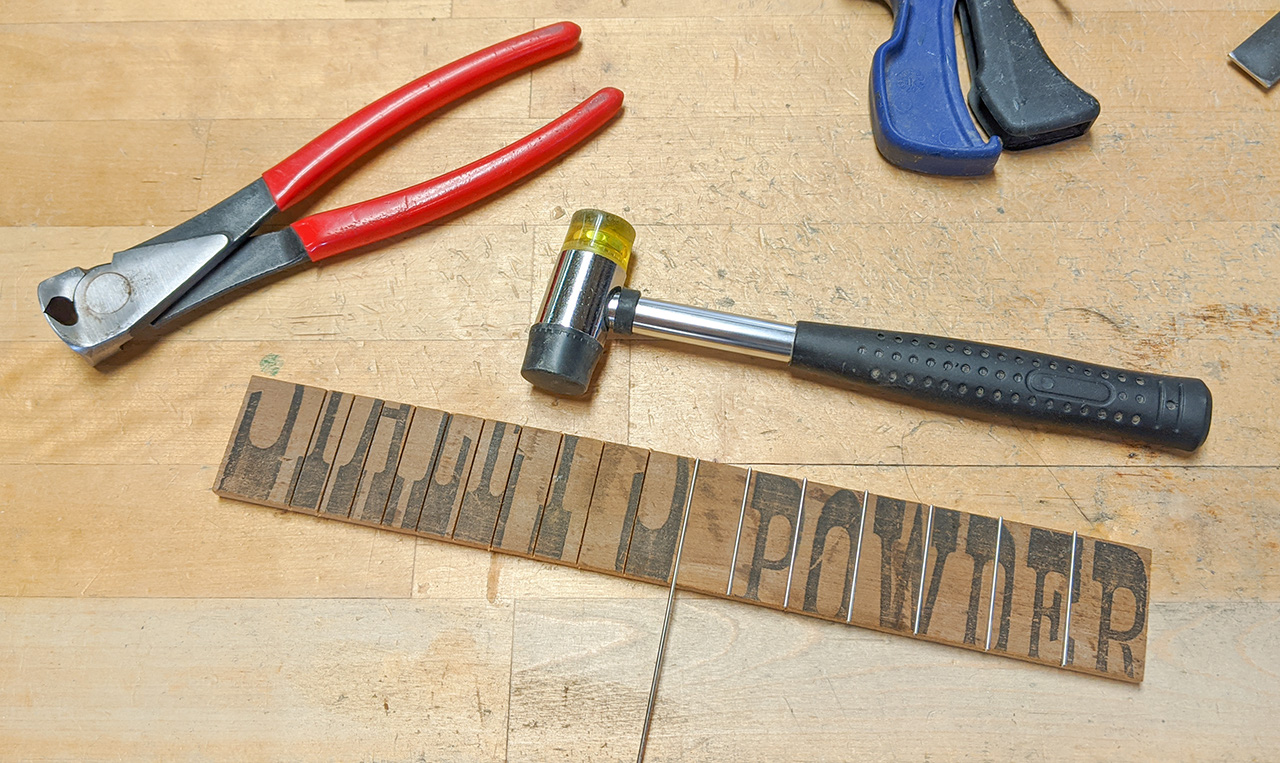
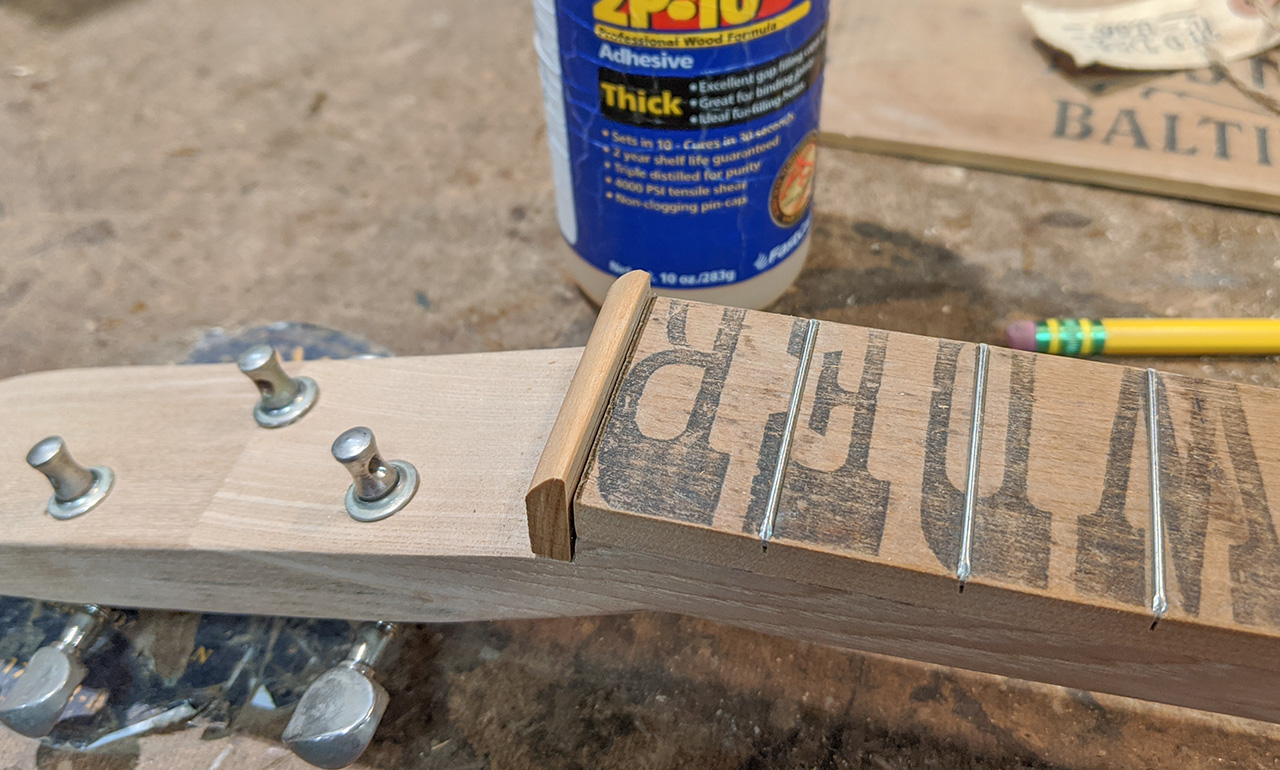
Then it was over to the fretting bench to cut the slots and install Narrow/Low fretwire. |
|
|
|
|
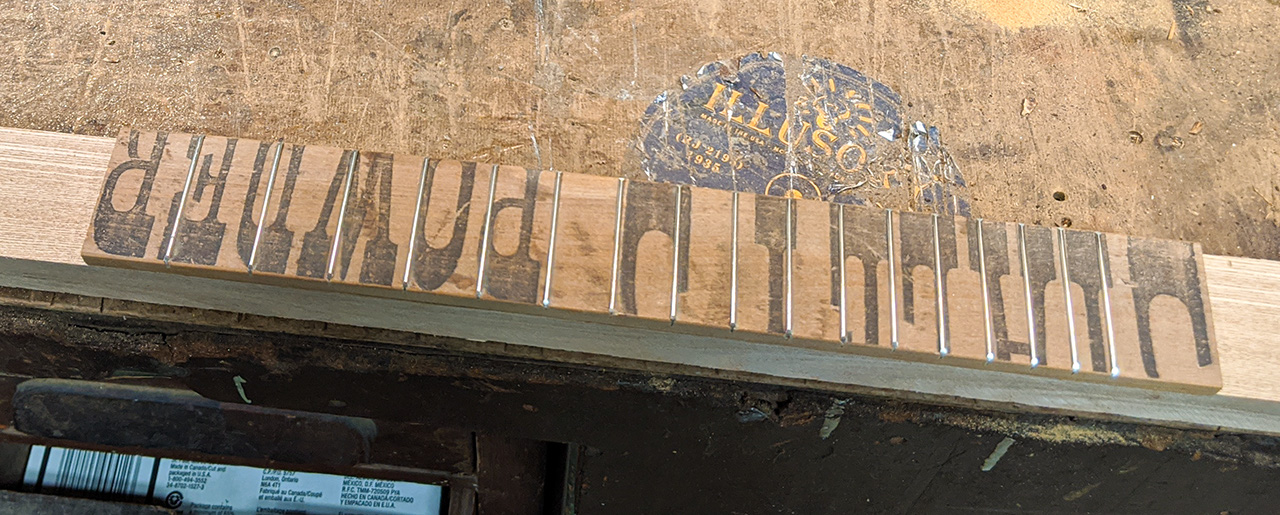
A bit of beveling and fret end-dressing, and my fretboard was ready to roll. |
|
|
|
|
I decided to use an angled headstock on this build, so I carefully made my scarf cut and glued it up. |
|
|
|
|
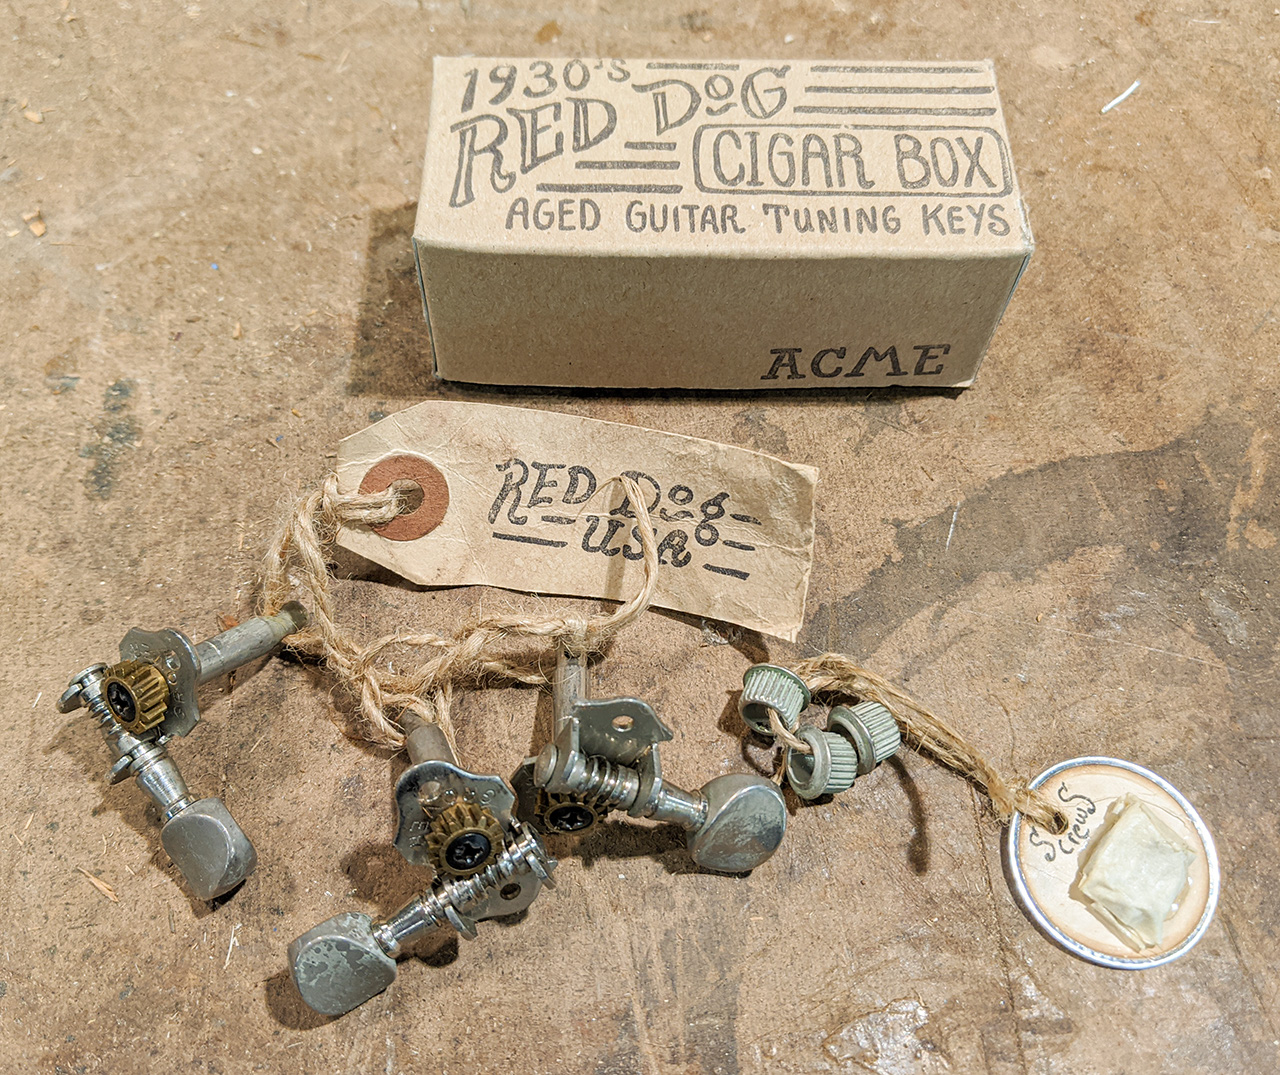
While glue was drying, I found a special set of tuners that I've had on the shelf for years. They were given to me by John "Red Dog" McNair, one of the old-timers of the modern handmade music movement. John antiques and relics these tuners by hand, starting with a set of high-quality Grover machine heads and giving them his unique style. The packaging is a work of art unto itself. |
|
|
|
|
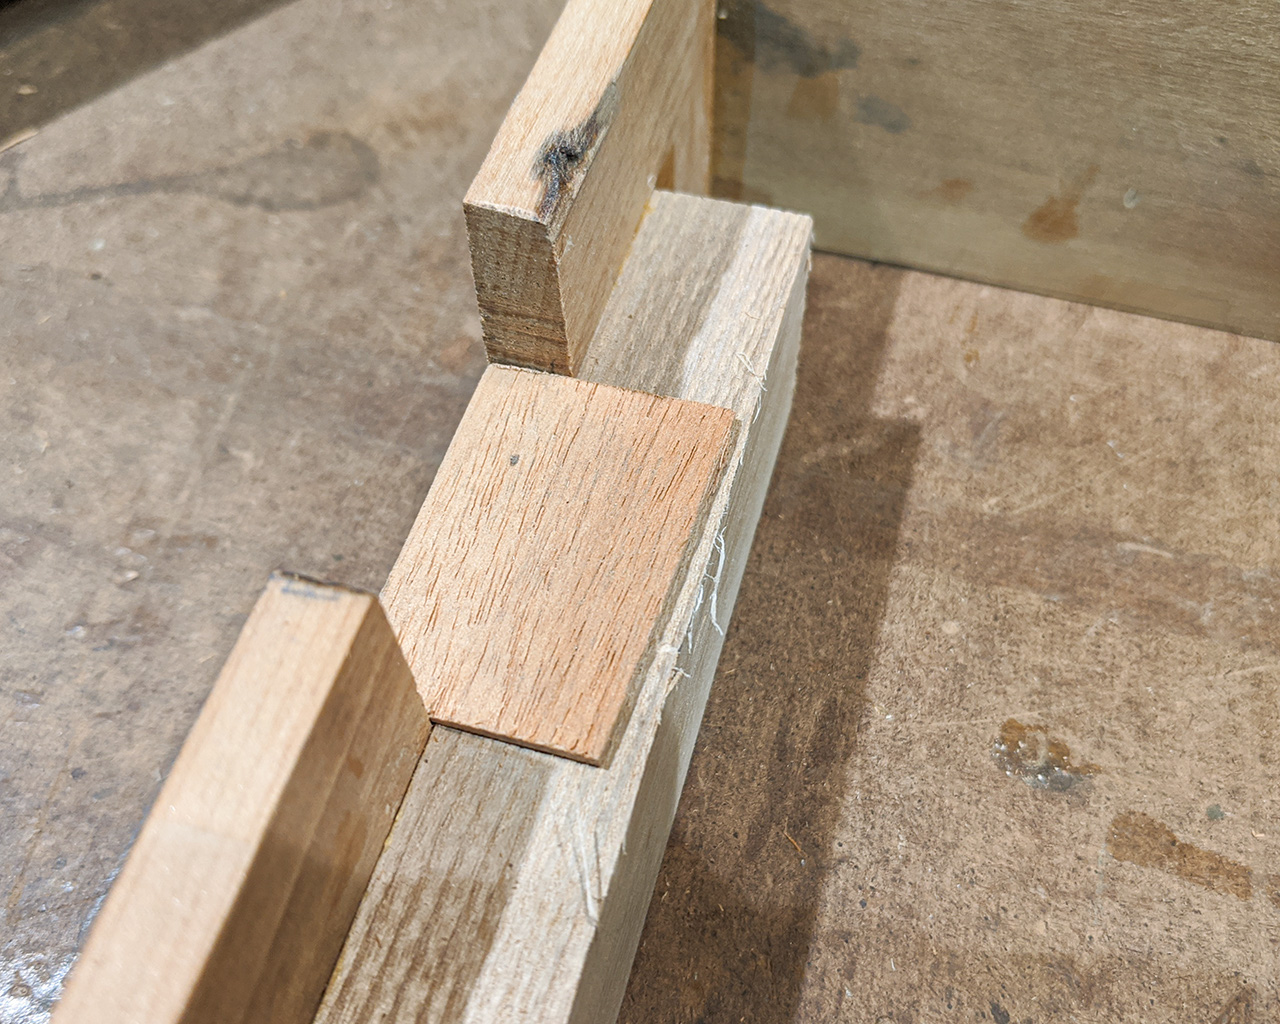
I knew I'd have to notch down into the neck where it went through the box, so I decided at this point to glue on a brace to give it more strength where I'd be notching it, and a slight heel that would extend outside the box. |
|
|
|
|
Here, I am gluing on my brace. But look closely... see the angle of the neck coming out of the clamping jig? I almost mistakenly glued my brace to the TOP of the neck! Fortunately, I noticed quickly enough that the glue hadn't set and I was able to pry it back off... |
|
|
|
|
And get it correctly glued onto the BOTTOM of the neck instead. Whew, that was a close one. |
|
|
|
|
What's going on here? I took this picture to share a little "pro tip" that I discovered for squeeze clamps. Sometimes you just can't squeeze the clamp as tightly as you'd like... but you can take a second clamp, and use that to "double squeeze" the first one tighter. Using this method, you can really get some high pressure clamping, a good bit more than you'd be able to get otherwise. |
|
|
|
|
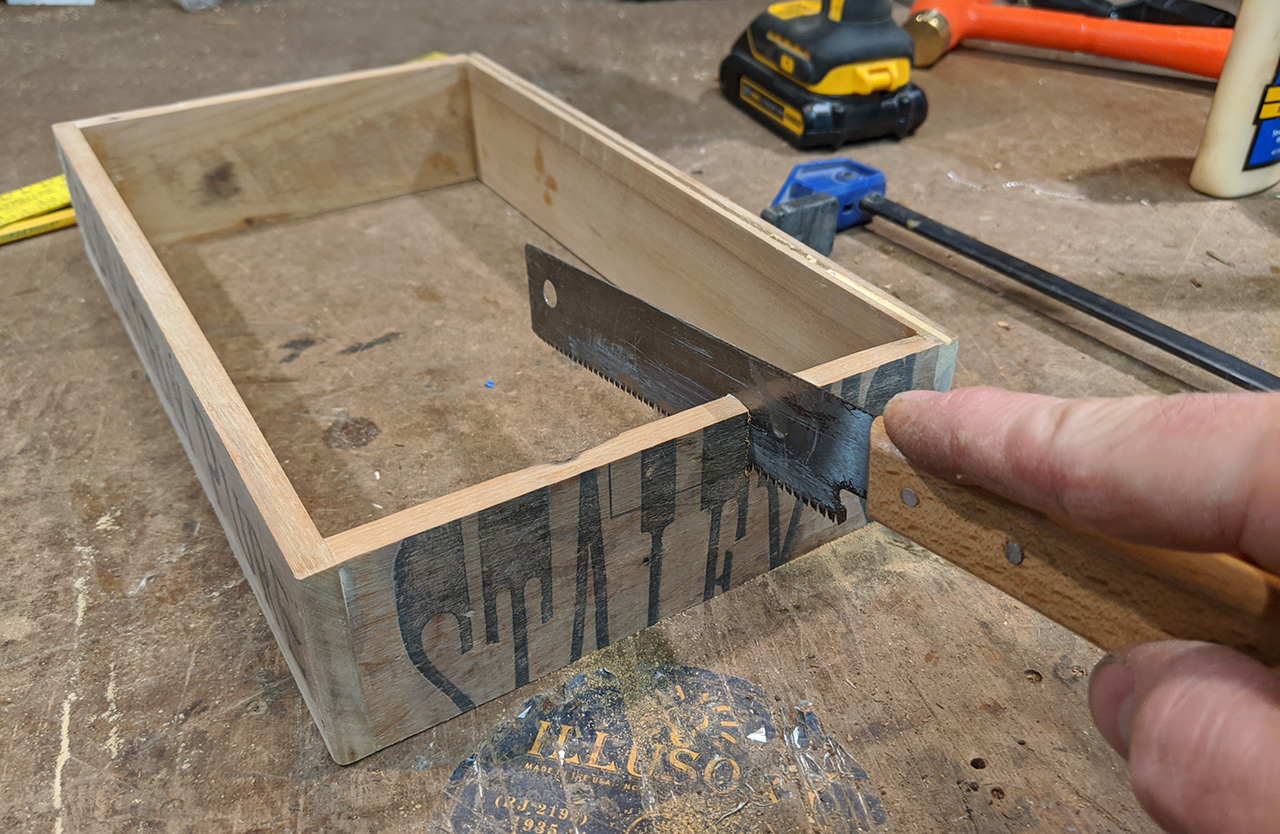
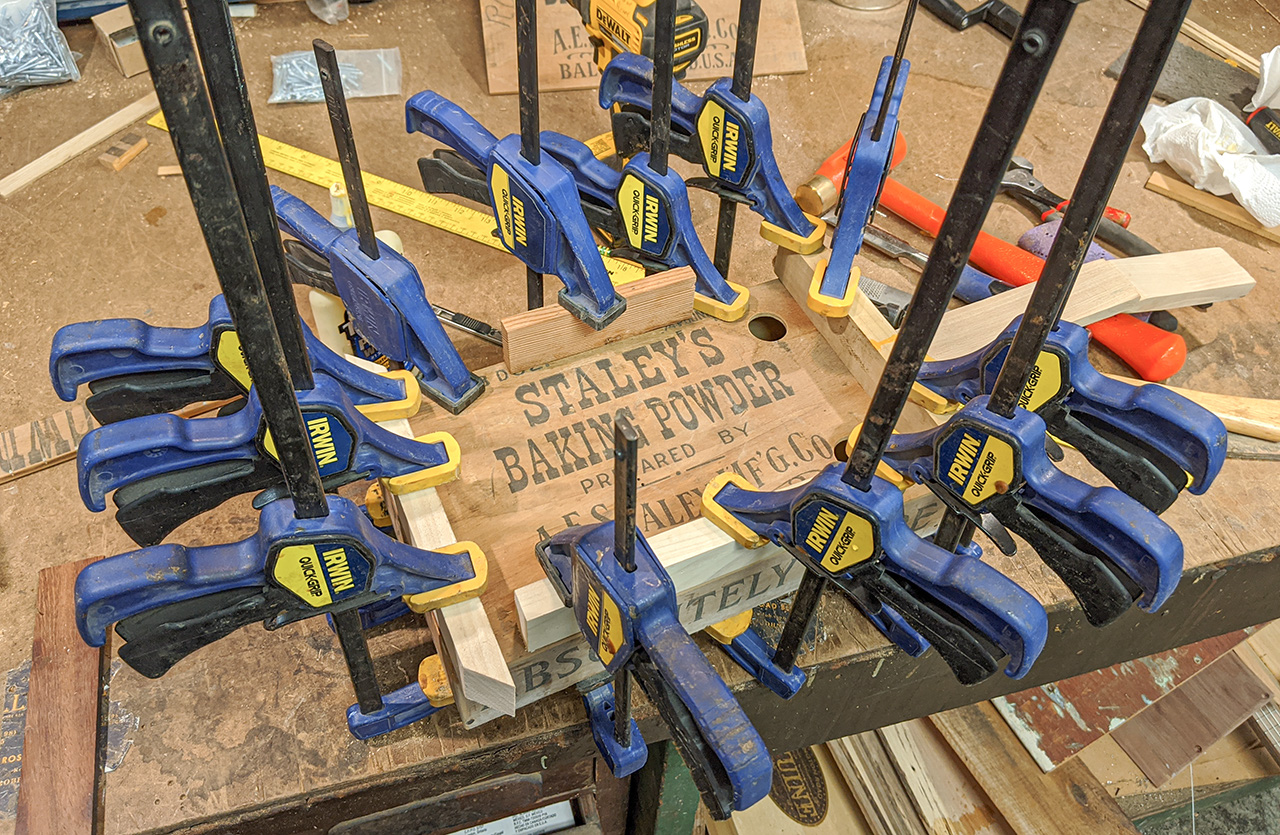
With the glue set on my box joints, I headed over to the sanding table to round over edges, remove overhangs and even everything up. |
|
|
|
|
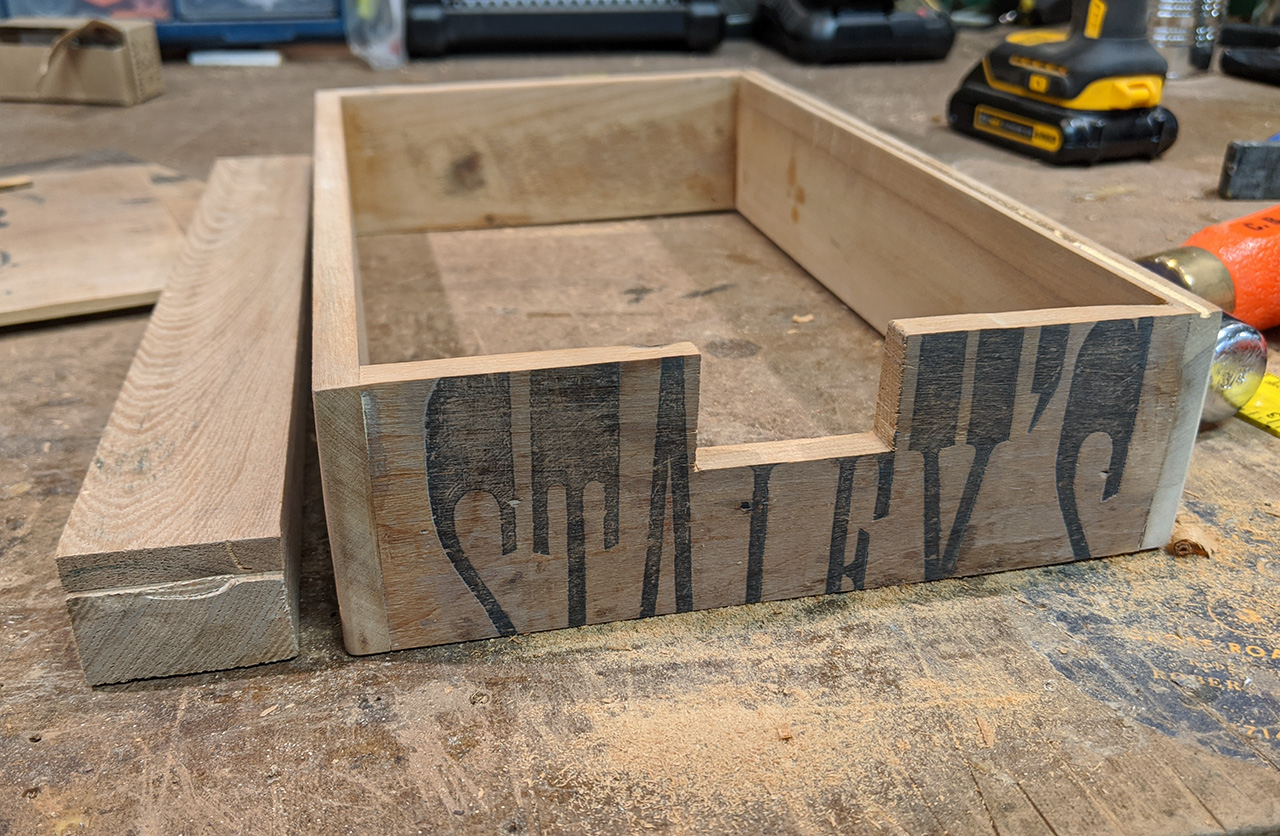
Because my guitar would be a "neck half through" model I had to cut a notch in the front panel for it to go through. I used a cutoff piece of my original neck stock to size the hole... but neglected to account for the 1/4" brace I was gluing on, so later I had to cut it deeper and re-file the bottom. |
|
|
|
|
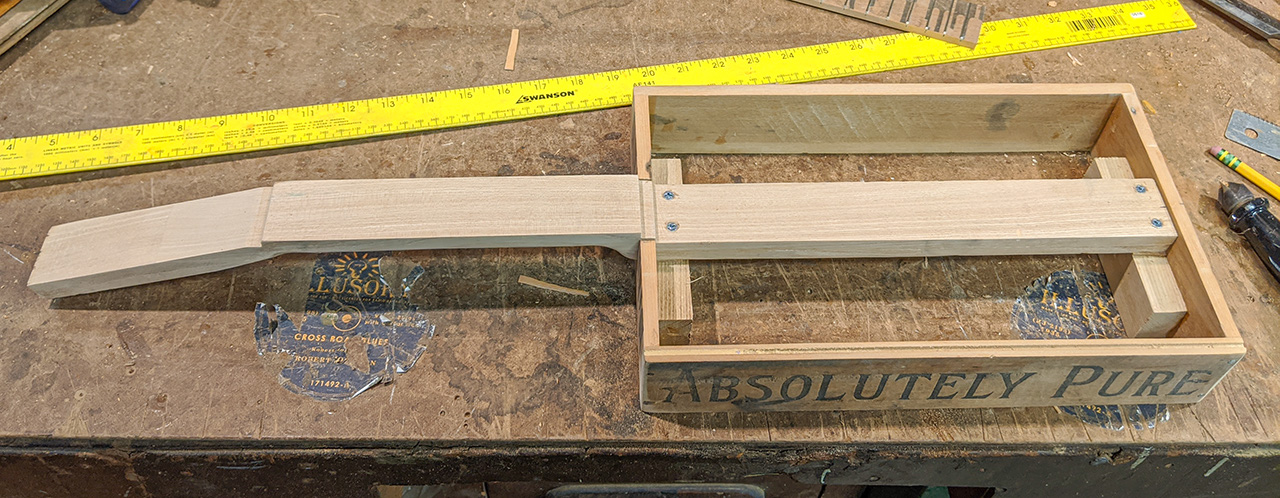
All of the parts of my guitar-to-be were starting to take shape. |
|
|
|
|
Here I have further deepened my neck slot to accommodate the brace/heel that would extend a couple of inches outside the box. |
|
|
|
|
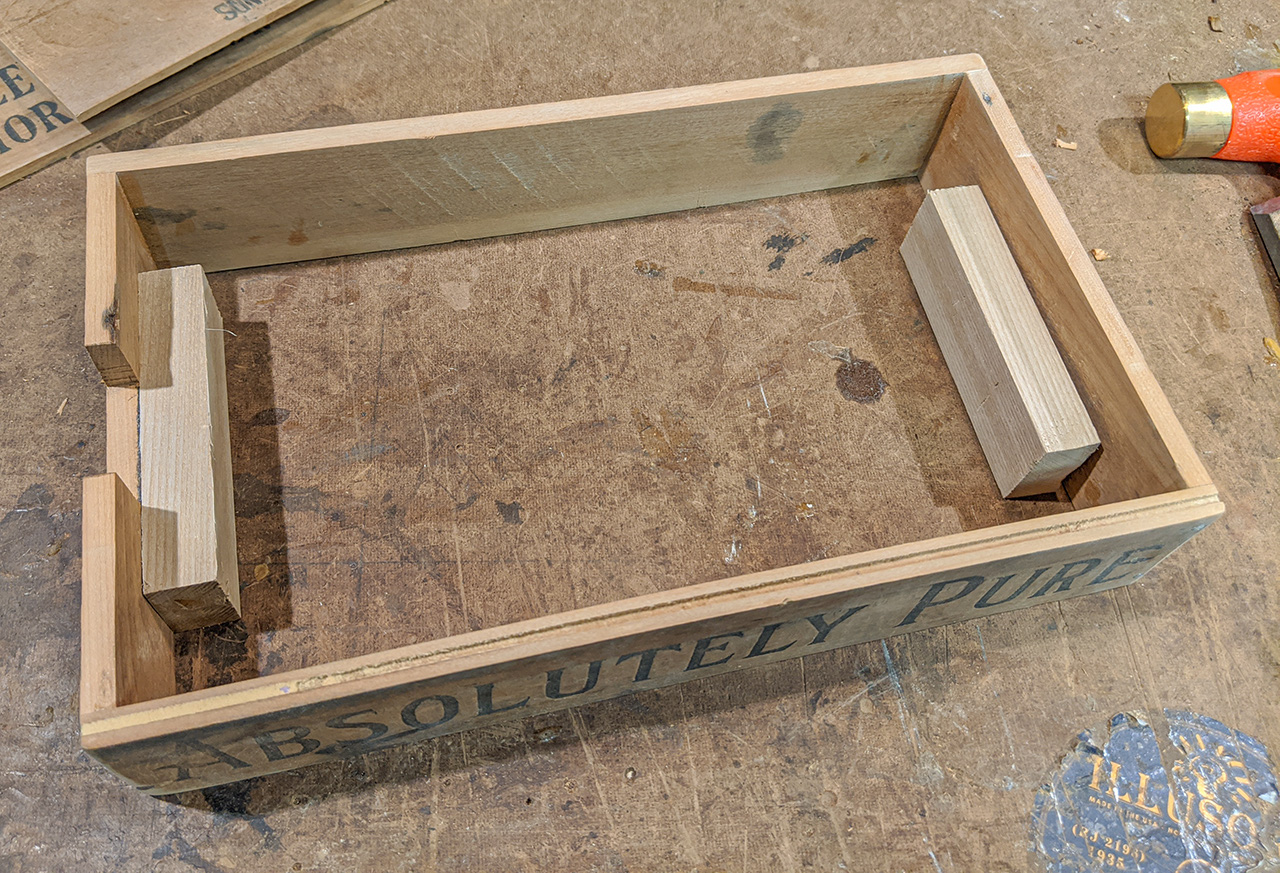
To help support and anchor the neck, I glued in a couple of scrap pieces of American chestnut to the end panels. I milled these to just the right height so they would hold the neck at the correct spot. |
|
|
|
|
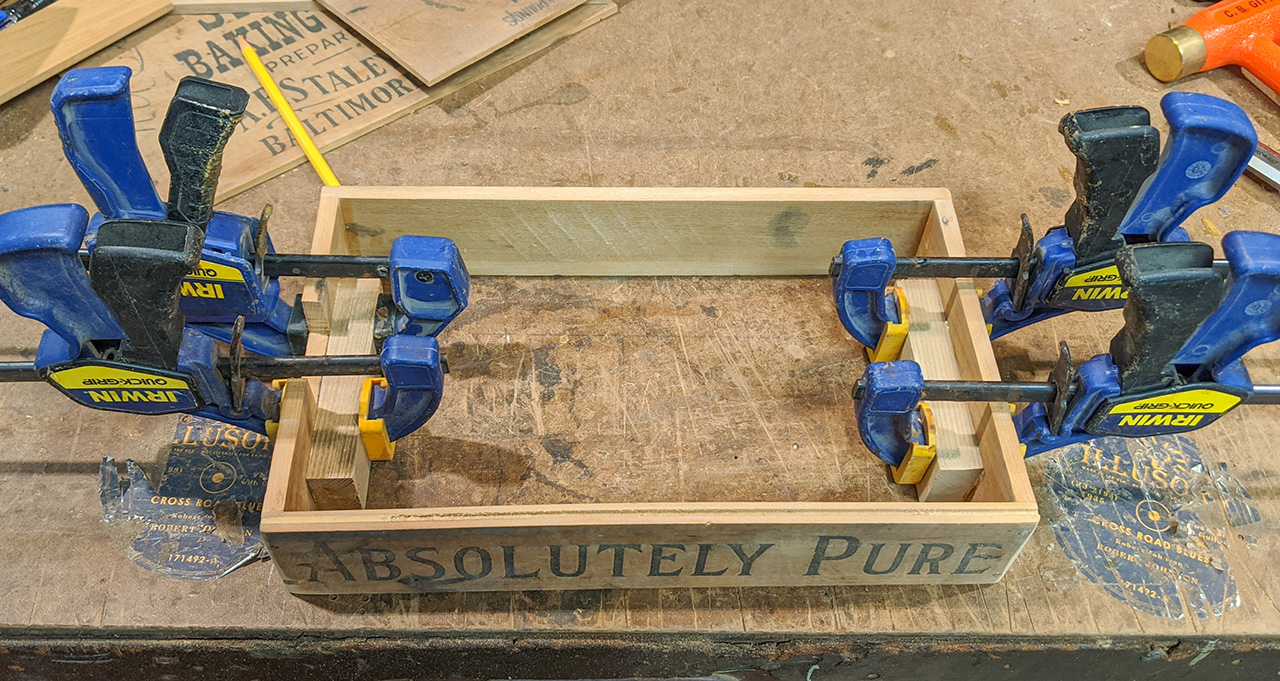
Some Titebond II wood glue and clamps soon have the braces settled into their forever homes. |
|
|
|
|
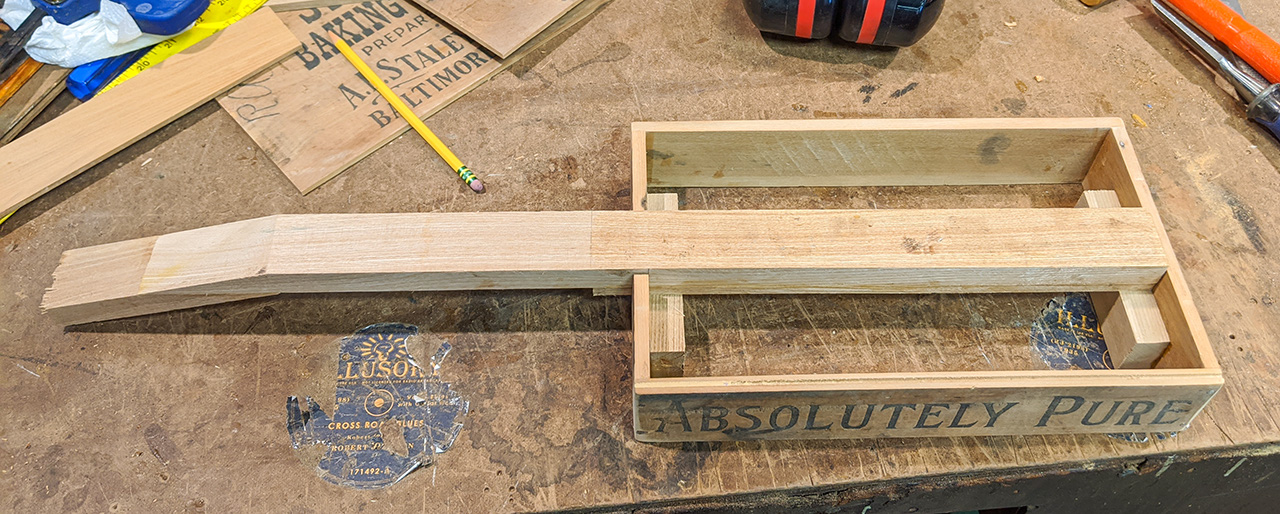
Here is a dry fit of my scarf-jointed neck and heel brace nestled into its spot in the box. |
|
|
|
|
The neck was sitting a little lower than I wanted, so I added a spacer shim to the front and back brace pieces, made from some mahogany veneer I had around. |
|
|
|
|
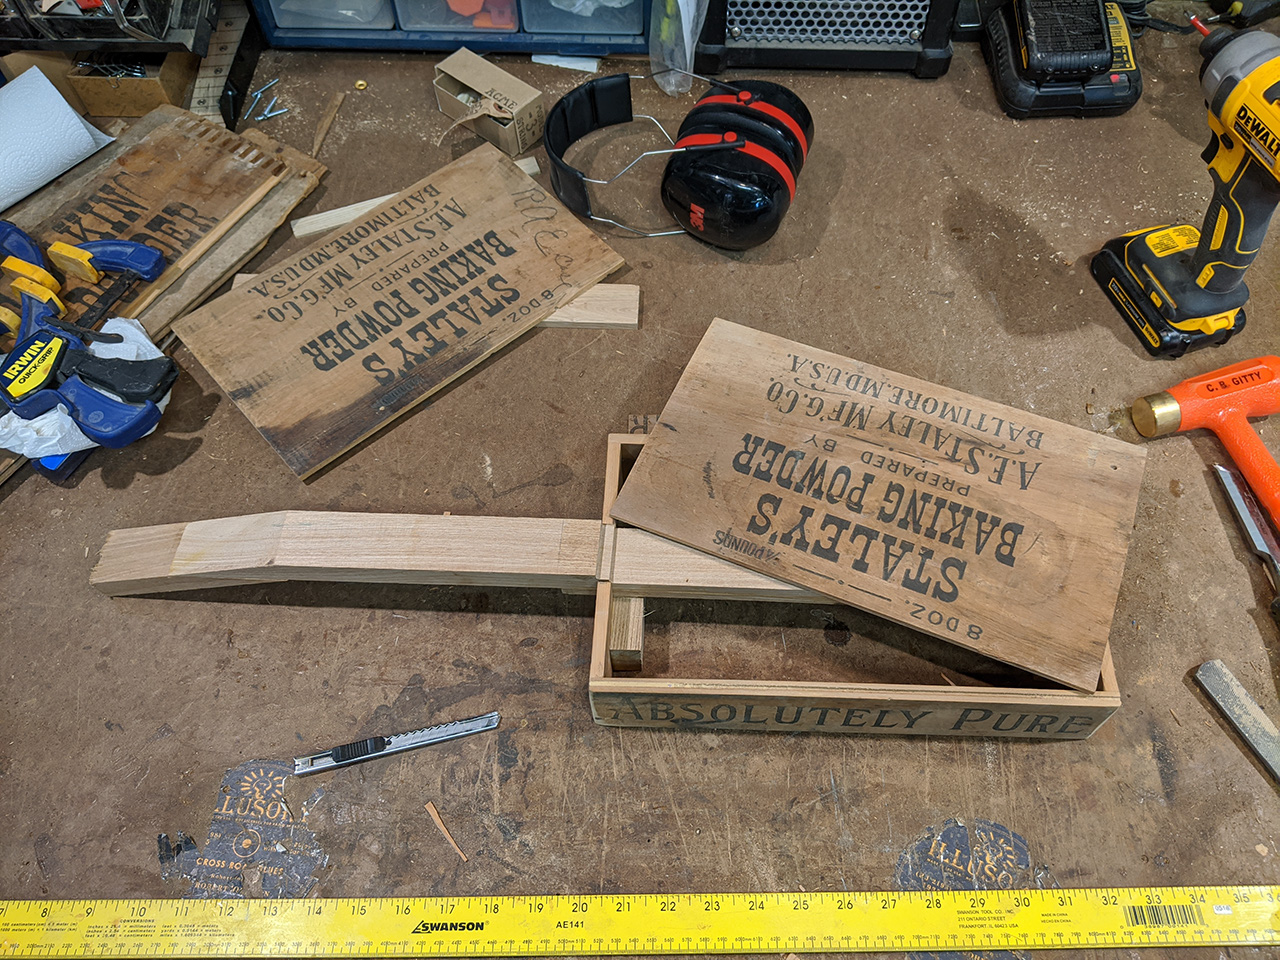
Here's a dry fit of my neck, box and what will be my top panel / soundboard. Everything was coming together nicely. |
|
|
|
|
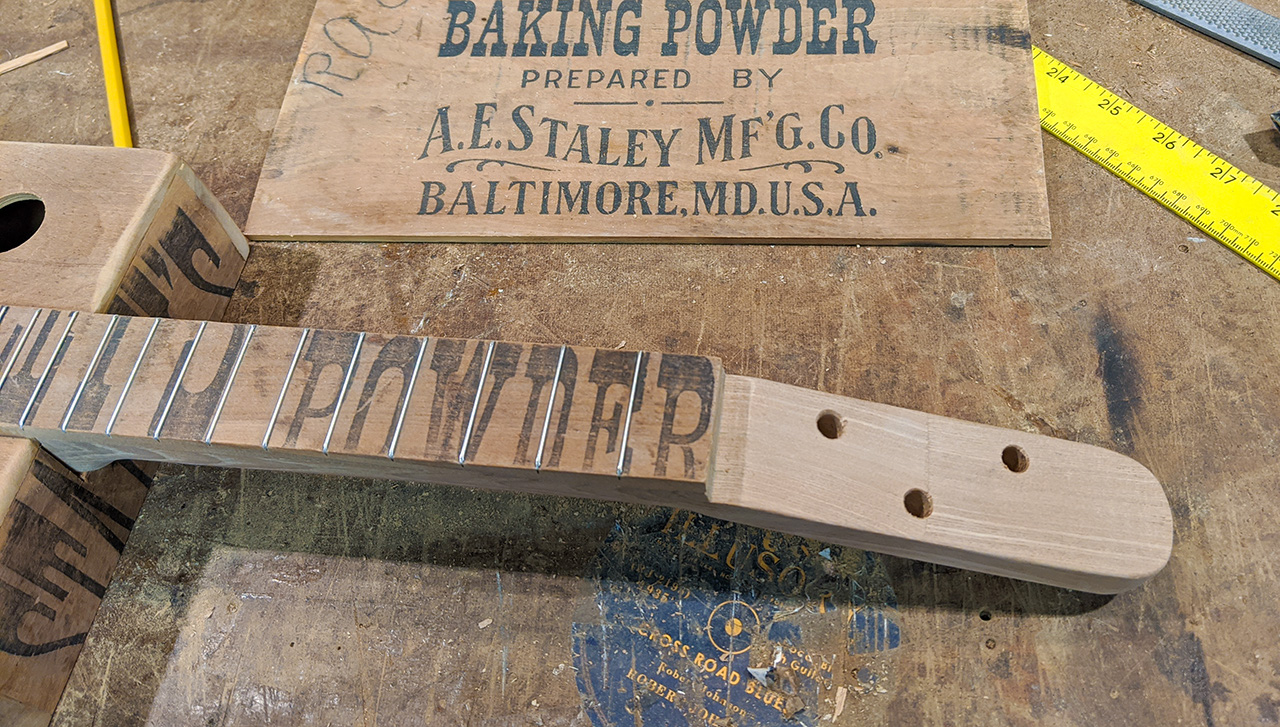
Here, I decided to shorten my fretboard a bit so it didn't extend out over the soundboard quite so much. Because of how my neck was set into the box, I knew the fretboard would be touching the soundboard and I didn't want it to affect the resonance. Plus, I knew nobody would be able to reach those frets out over the box anyway. |
|
|
|
|
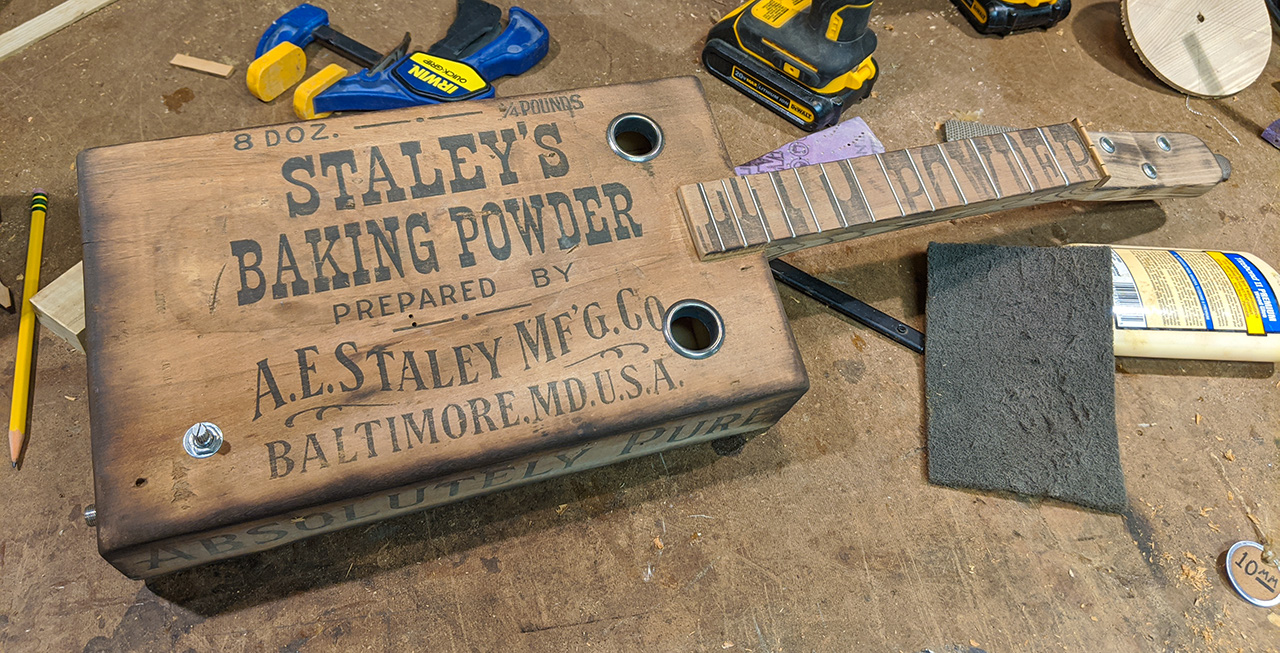
Here, I have notched my headstock to thin it down for the tuners, as well as drilling and screwing the neck to the inner box braces. If you look closely, you can see I have also rounded the back of the neck and done a good bit of sanding and smoothing of it. |
|
|
|

|
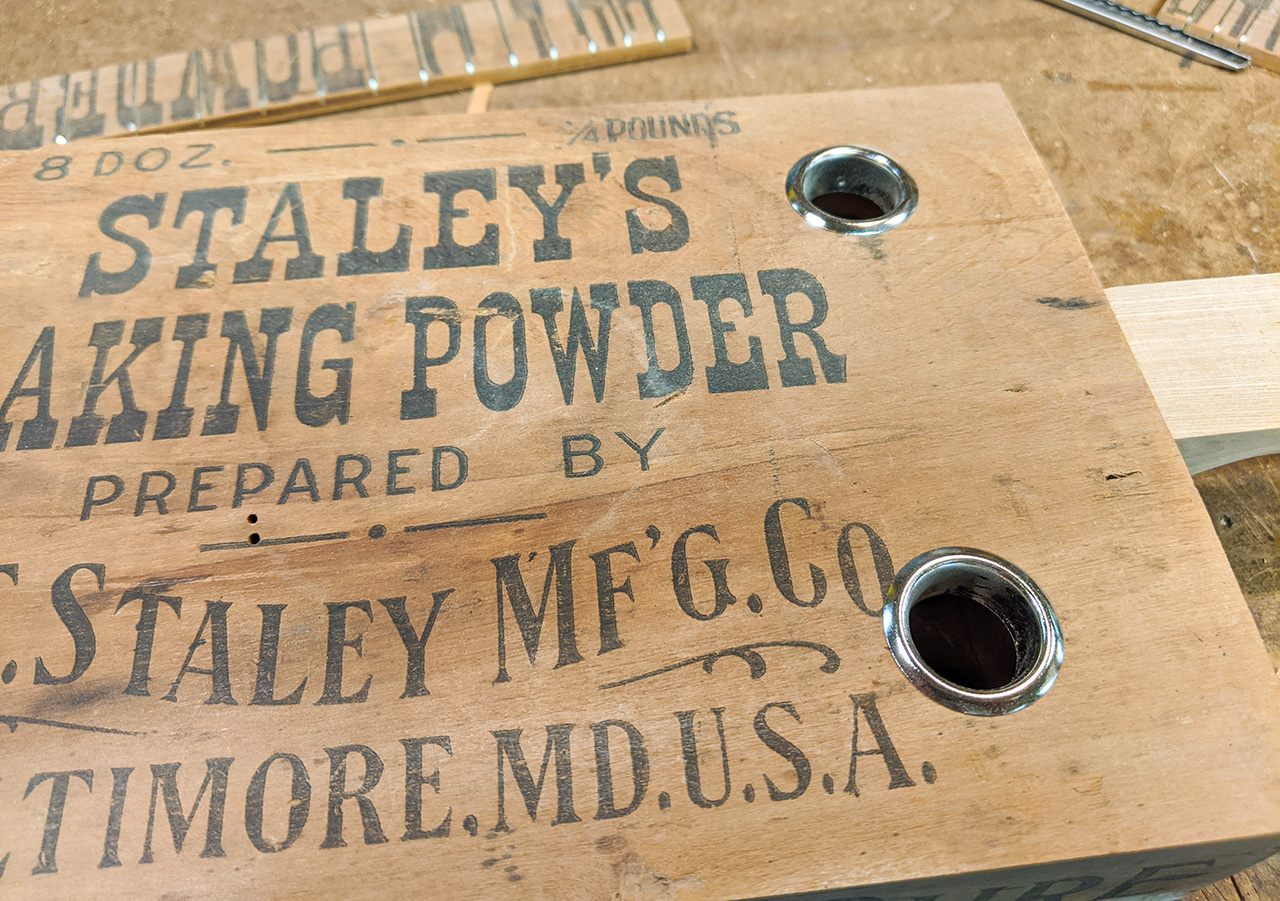
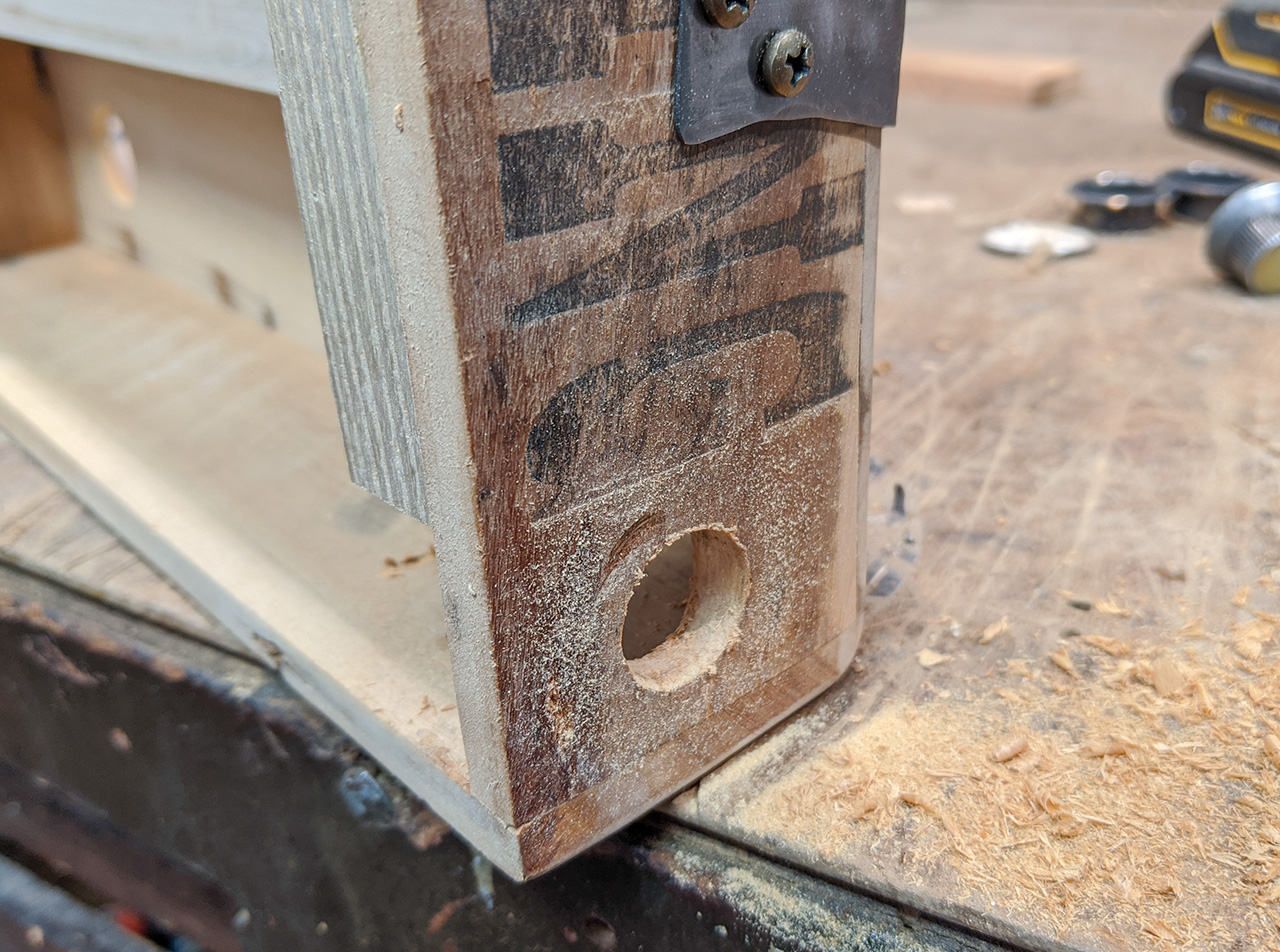
I knew I wanted sound holes in my guitar, so I mark their potential locations and prepare for drilling. I had to be careful to space them so that they wouldn't be over either the neck or other braces inside the box. |
|
|
|
|
A small 7/8" hole saw soon has the job done. Later I'll be gluing antiqued candle cup inserts in for decorative effect. |
|
|
|
|
Here's a dry fit of the not-yet-antiqued nickel-plated candle cups. I don't always use sound hole inserts like this, but I think they fit nicely with the overall look of the instrument in this case. |
|
|
|
|
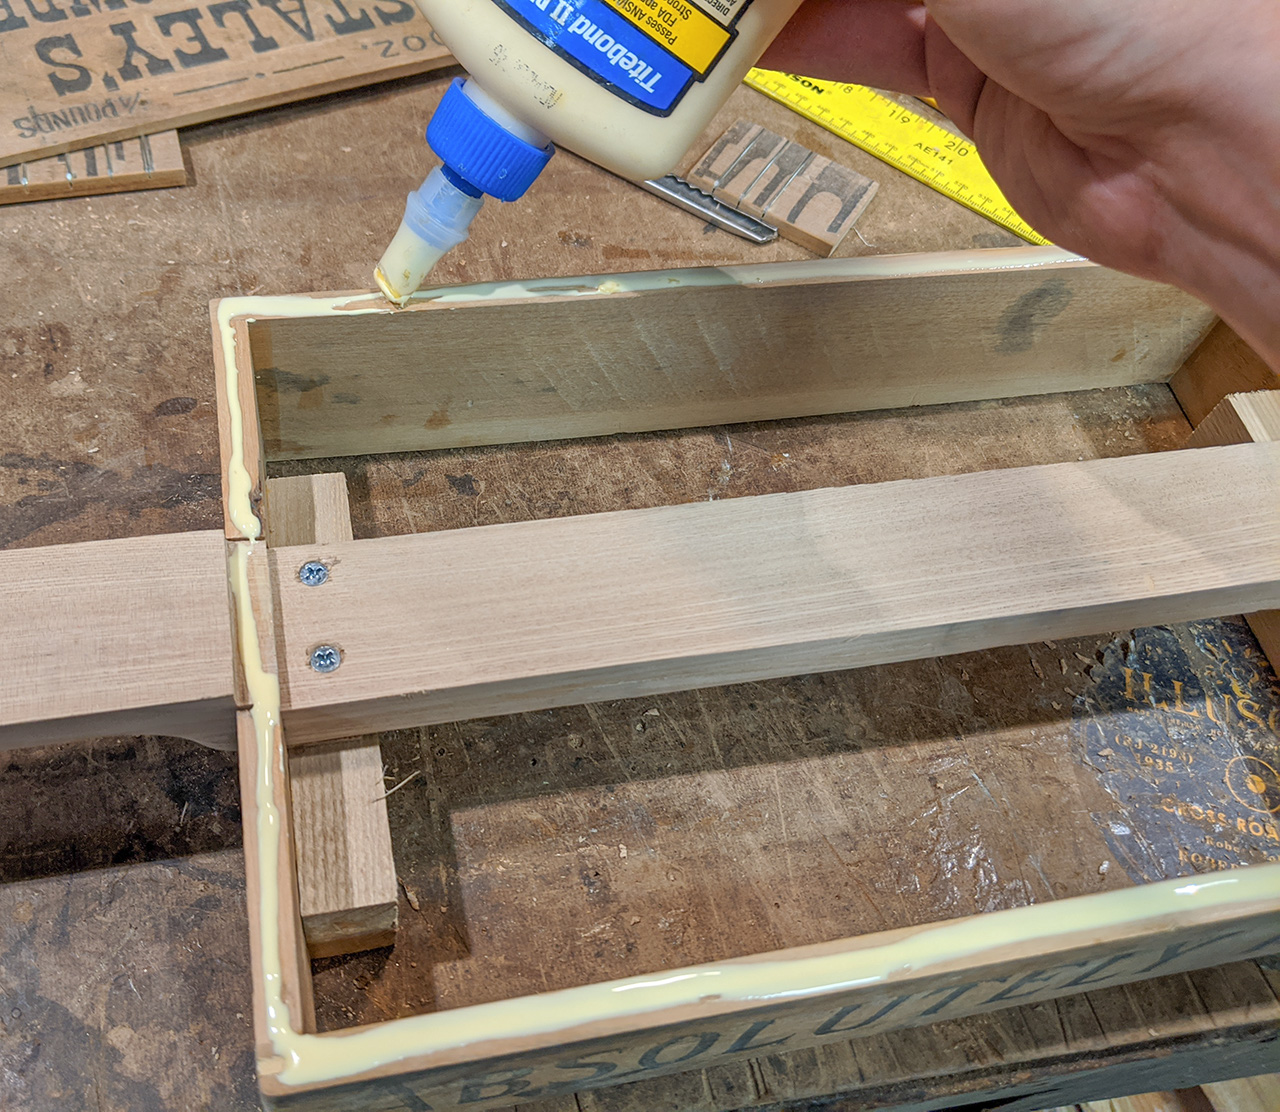
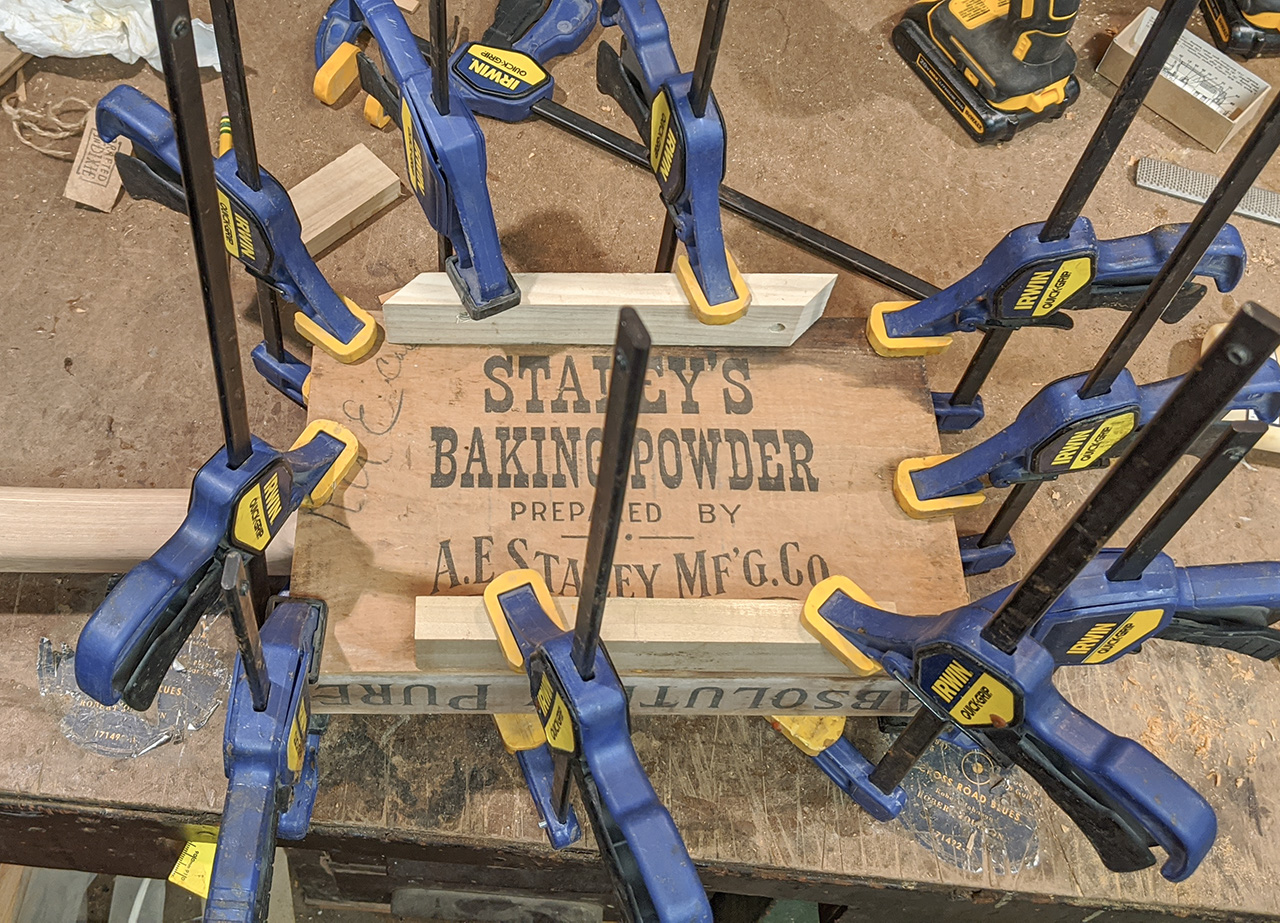
Some glue along the top rim of the box sides... |
|
|
|
|
And the clamps go on. As usual, I used some scrap pieces of wood to help distribute the clamping pressure more evenly for a nice tight seam. |
|
|
|
|
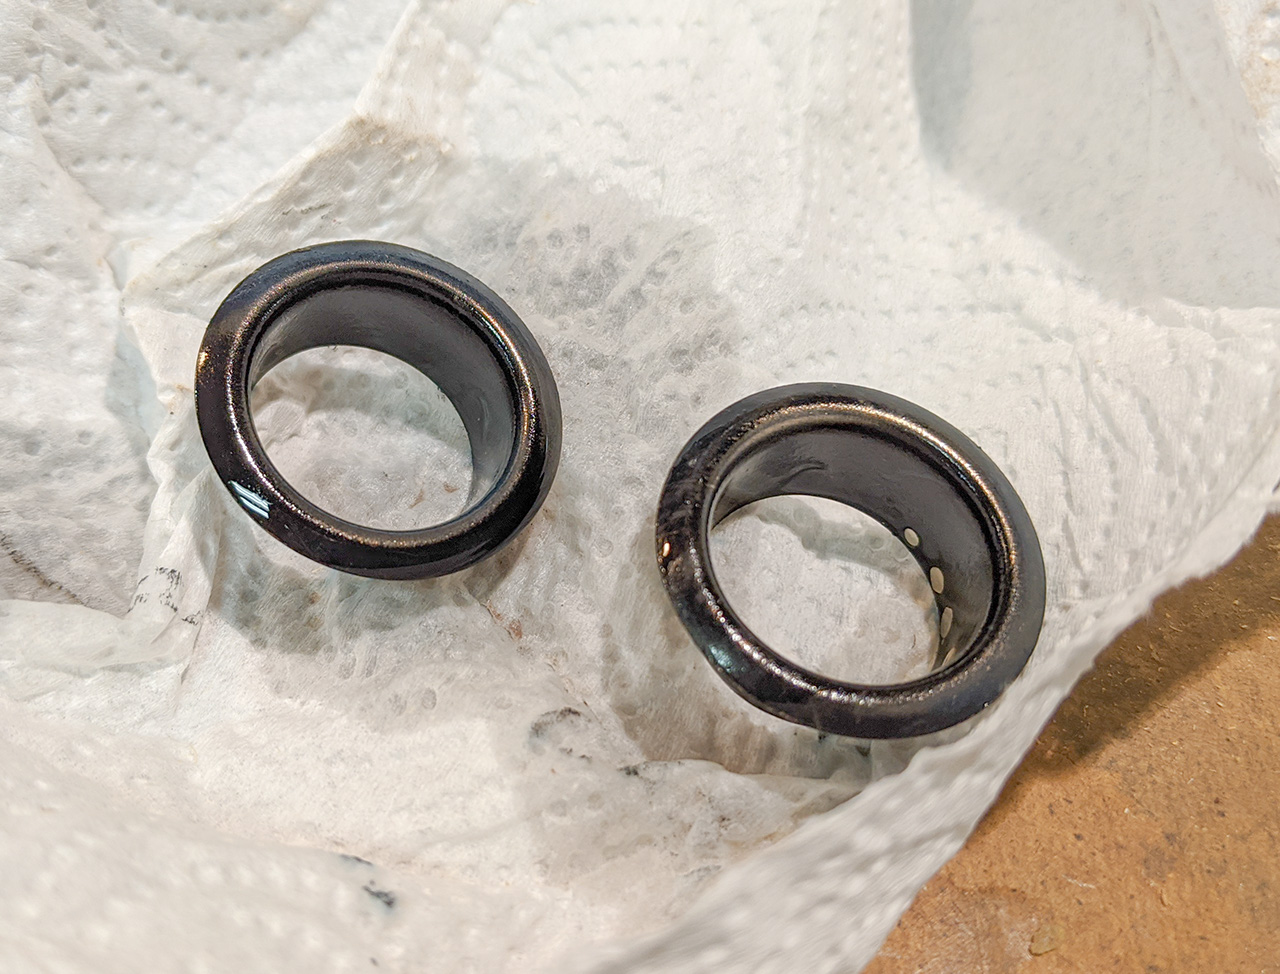
Here, I have applied some antiquing chemicals to my nickel candle cups to darken them down and make them look old and tarnished. Some of the dark coloration will buff back off, leaving a nice gun metal sort of finish. |
|
|
|
|
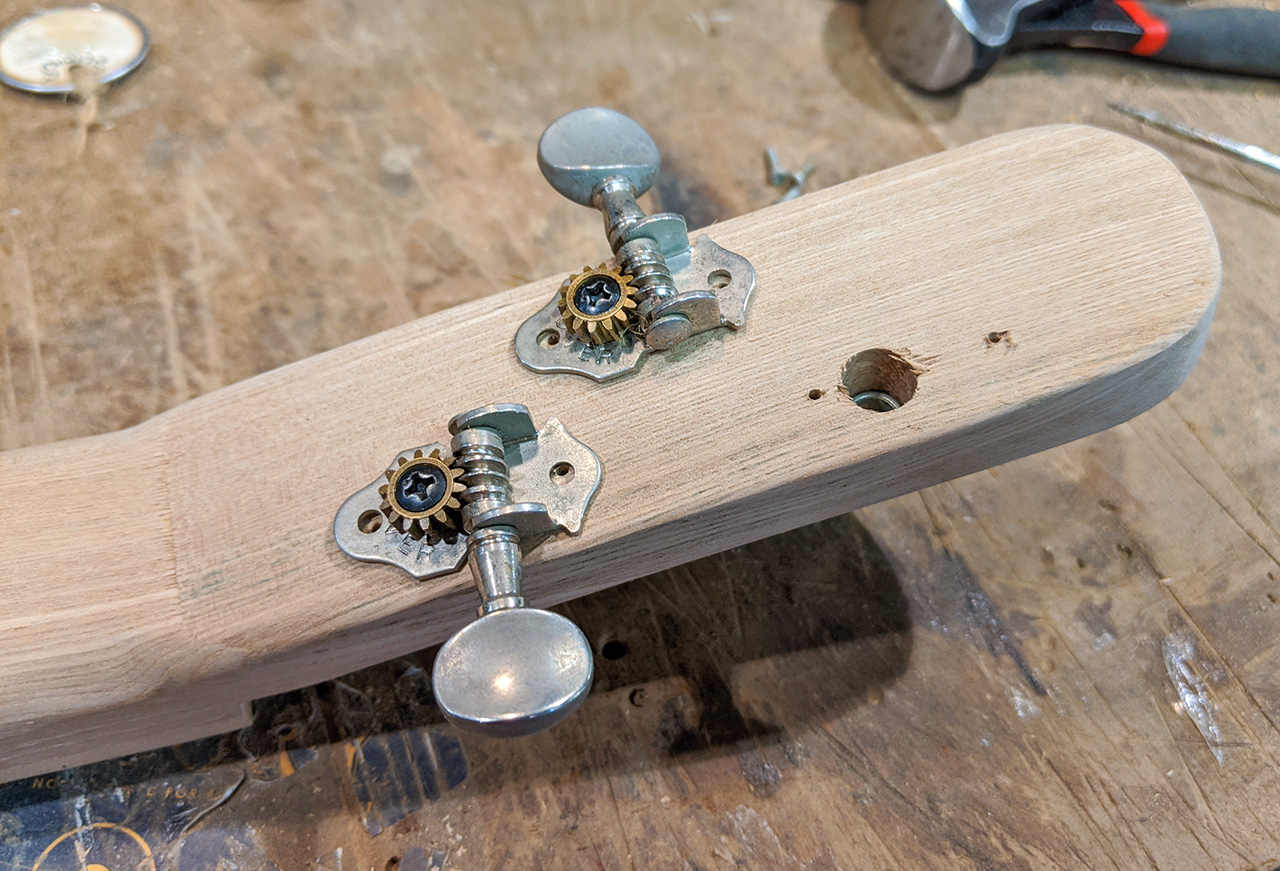
I get the headstock marked and drilled for the tuners at this point... |
|
|
|
|
And then get the tuner screw holes pre-drilled and the bushings inserted. I'll later be taking the tuners back off to apply a finish to the guitar, but I always like to do an initial "dry fit" to make sure everything is right before proceeding. |
|
|
|
|
Yep, those Red Dog relic'd tuners sure do look nice on there. |
|
|
|
|
I then turn my attention to making a nut, using a scrap piece from the original crate. It is too wide at first... |
|
|
|
|
But some time at the sander soon had it thinned down and profiled and ready to be super-glued into place. |
|
|
|
|
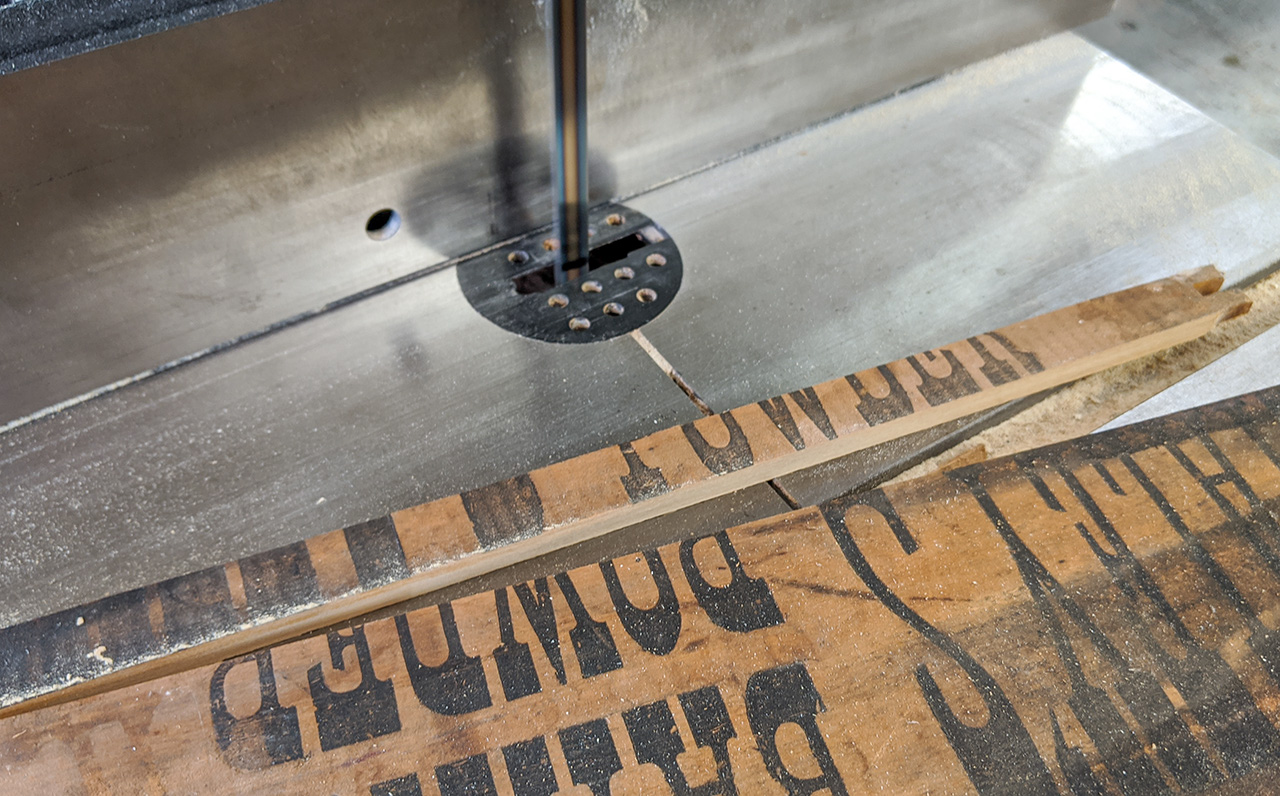
Then it was time to make a bridge. I decided to have a floating "banjo-style" bridge for this guitar, and I wanted it to have a little bit of the crate's original printing visible, so I headed over to the bandsaw to lop off a thin strip from one of the unused panels. |
|
|
|
|
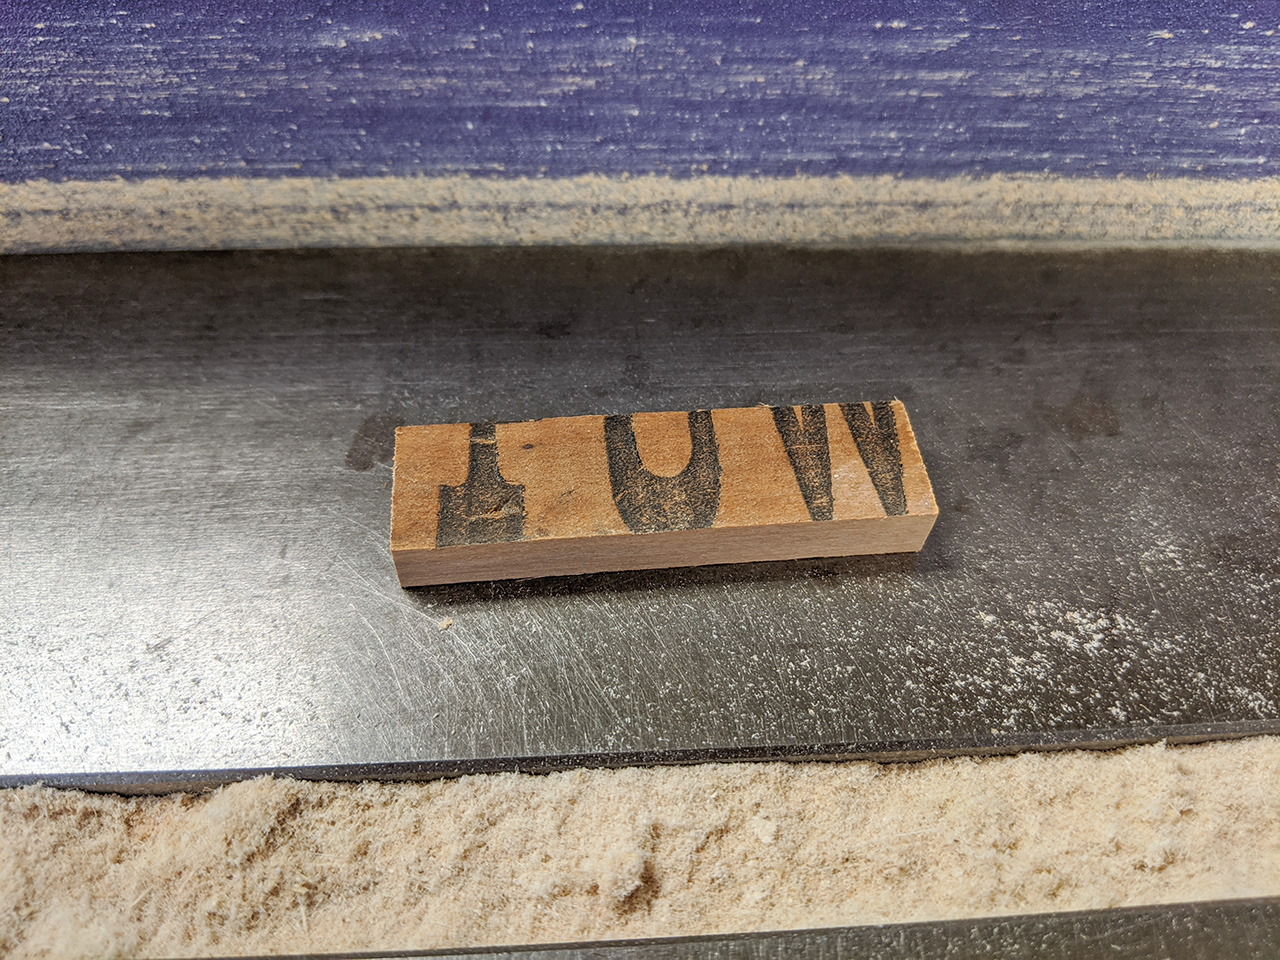
Then I cut a piece to length and head over to the edge sander for some thinning and shaping... |
|
|
|

|
And voila, a bridge is born. |
|
|
|
|
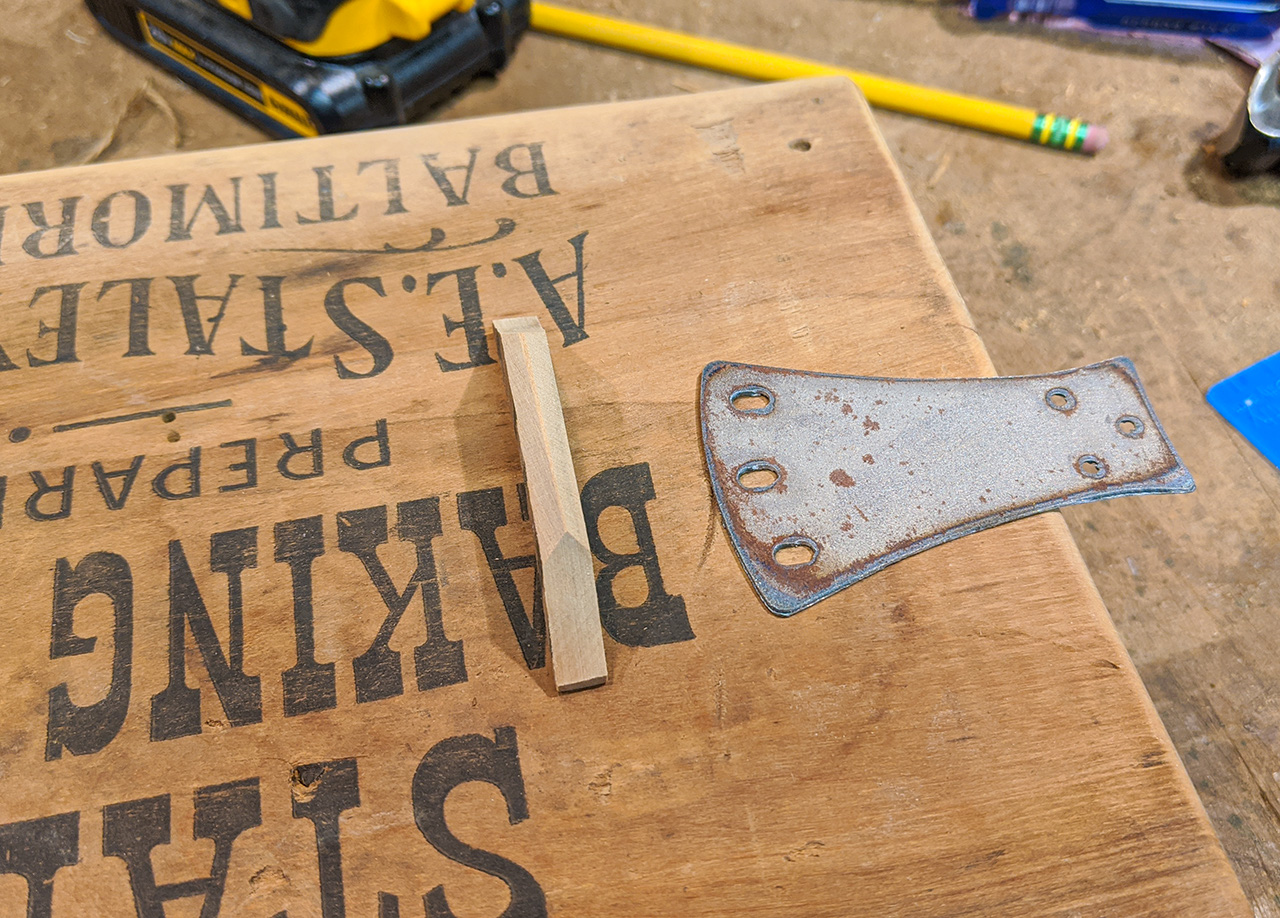
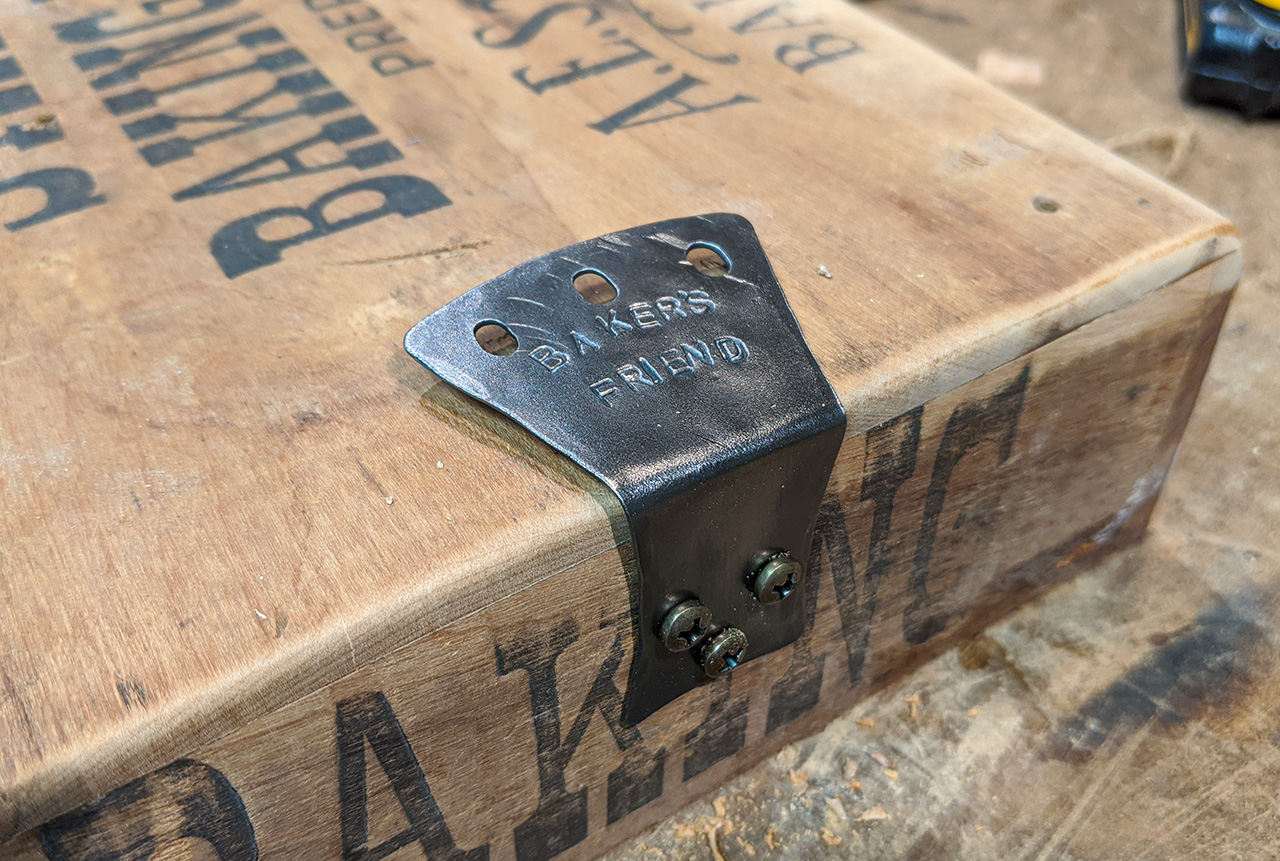
With my bridge done, I get to work on my tailpiece. I choose one of the special 3-string steel tailpieces we cut here at C. B. Gitty specifically for my Hobo Fiddle instruments, which is shown here in its "rough" state. |
|
|
|
|
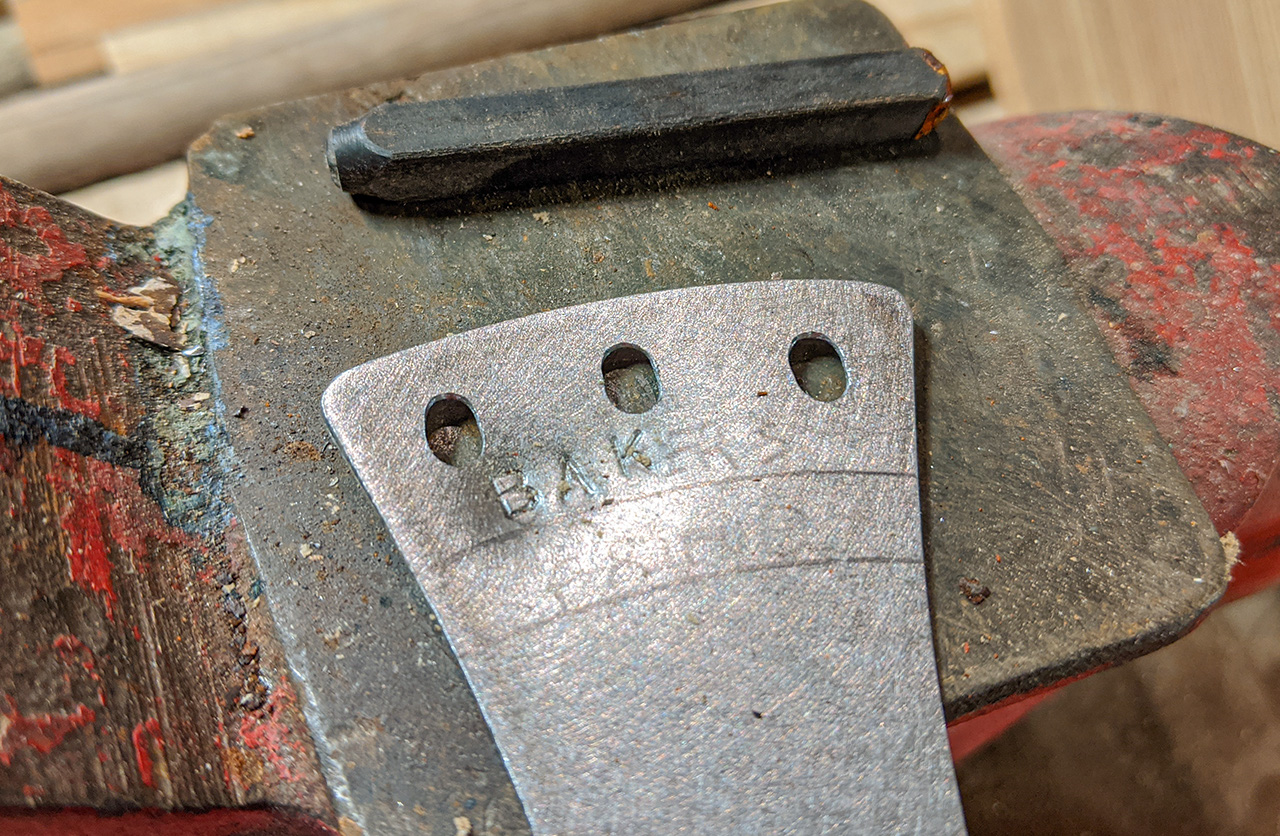
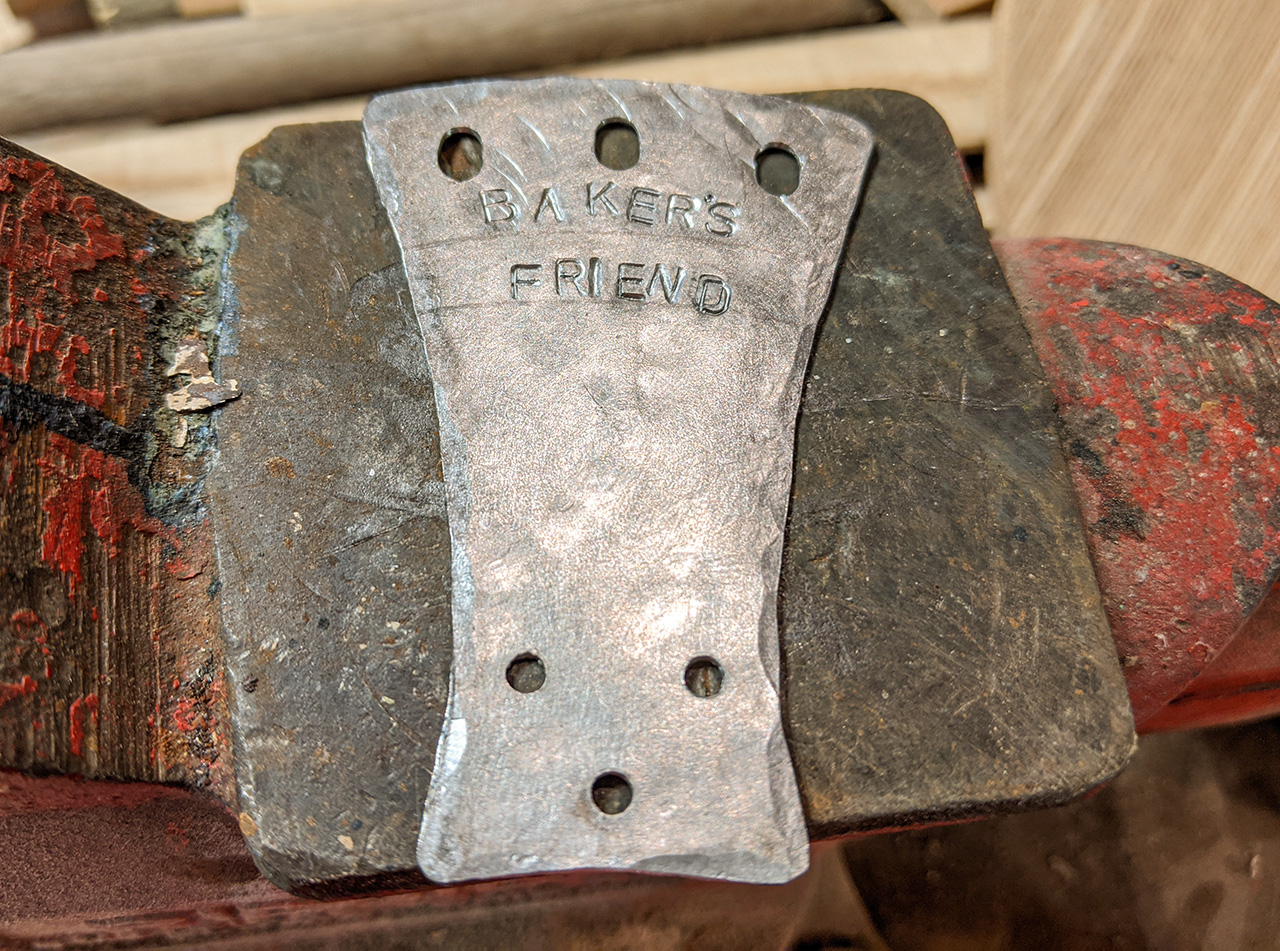
Sanded down to bare metal, I begin stamping in the instrument's moniker "Baker's Friend" using metal stamps I picked up a few years back. |
|
|
|
|
I wanted it to look hand-stamped, with just enough uneven-ness to the layout and a couple of double punches. I also did some decorative hammering of the metal to add some more character. |
|
|
|
|
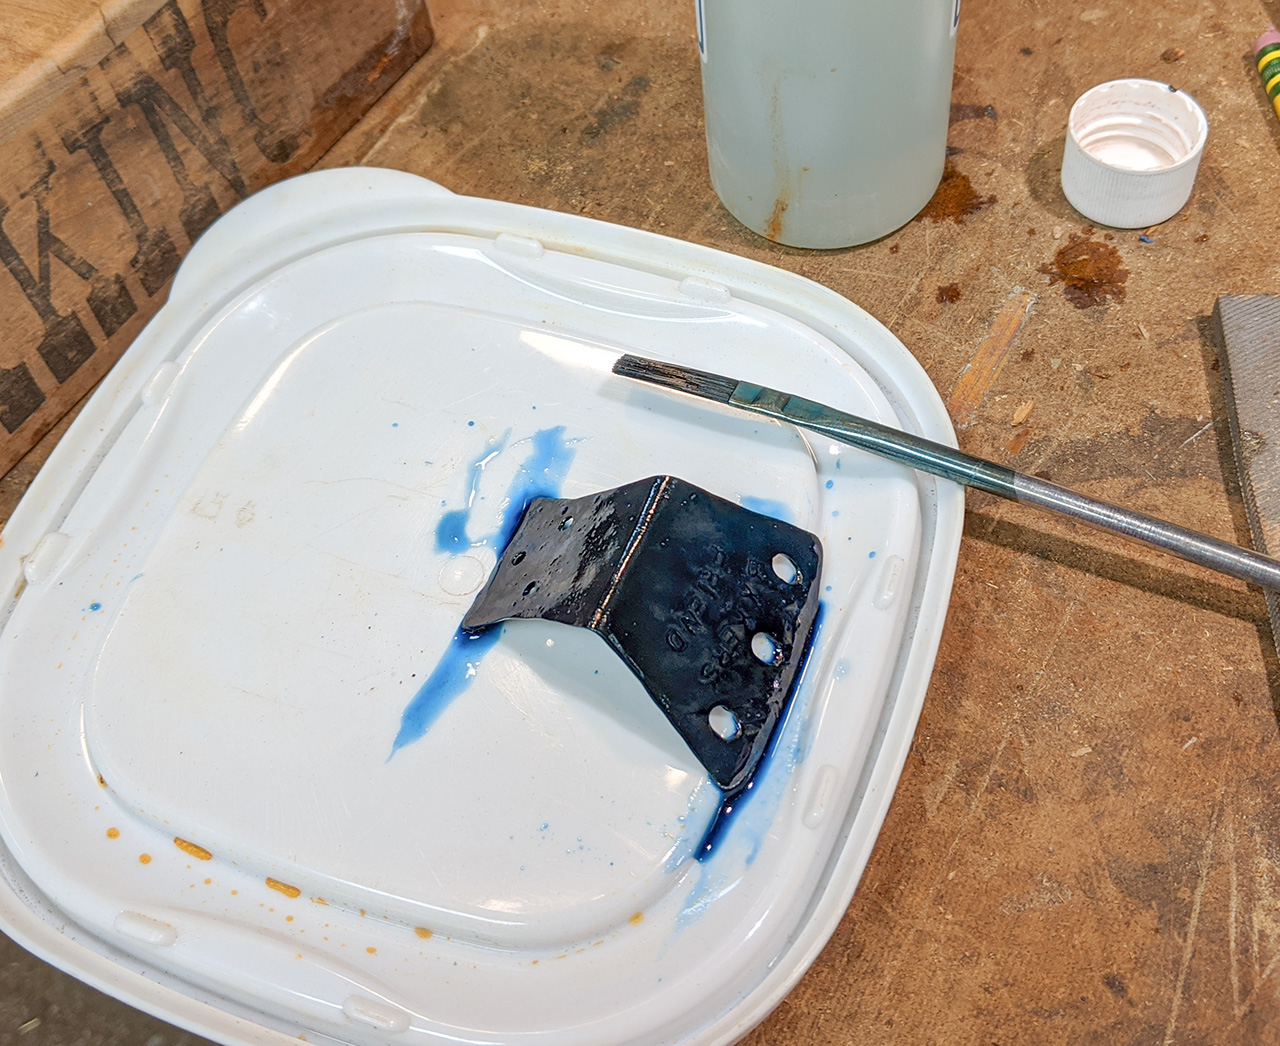
Then it was into the special chemical bath to darken the metal down. |
|
|
|
|
The end result looked pretty darn good, if you ask me. |
|
|
|
|
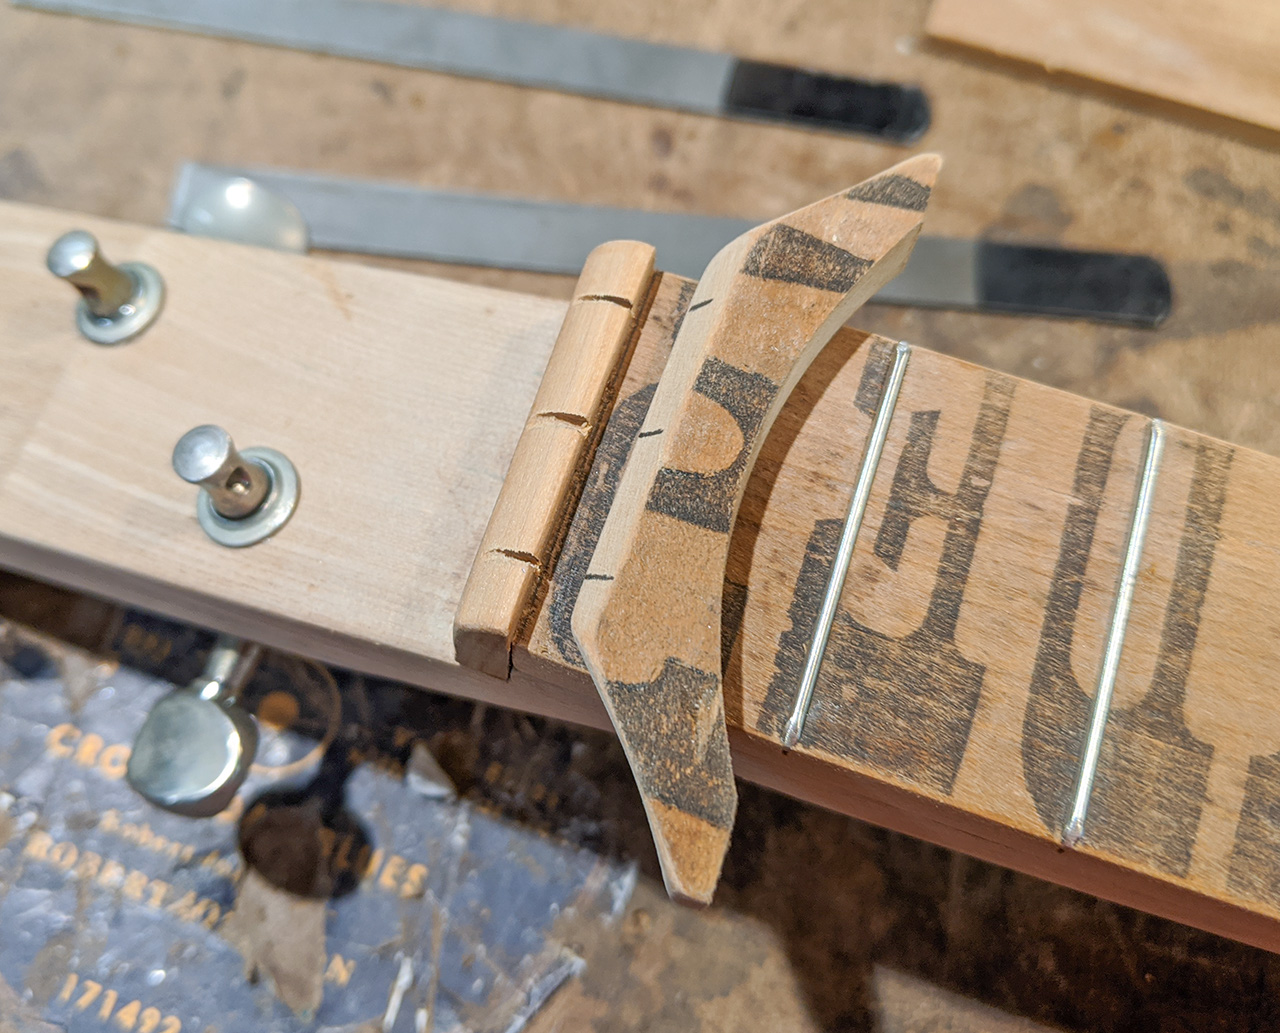
Our C. B. Gitty headstock templates include string spacing guides, so I used one to mark my nut for string notches. I went a little wider with my string spacing than the template suggests, because I like to have the strings a little more spread out on a 3-stringer. |
|
|
|
|
Once I had the notches filed into my nut, I used them to mark my bridge to just a slightly wider spread. |
|
|
|
|
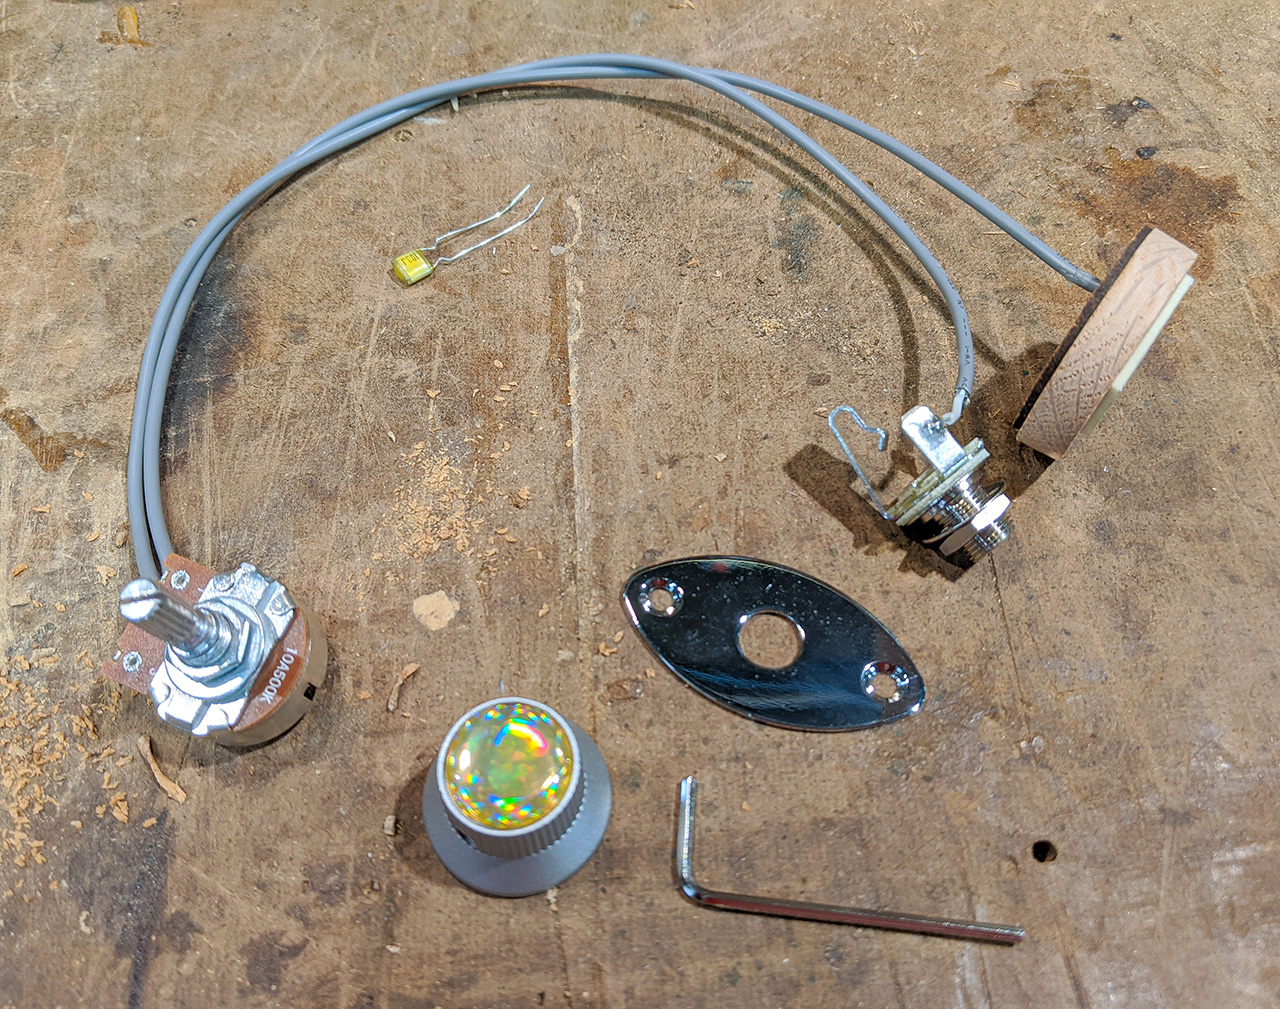
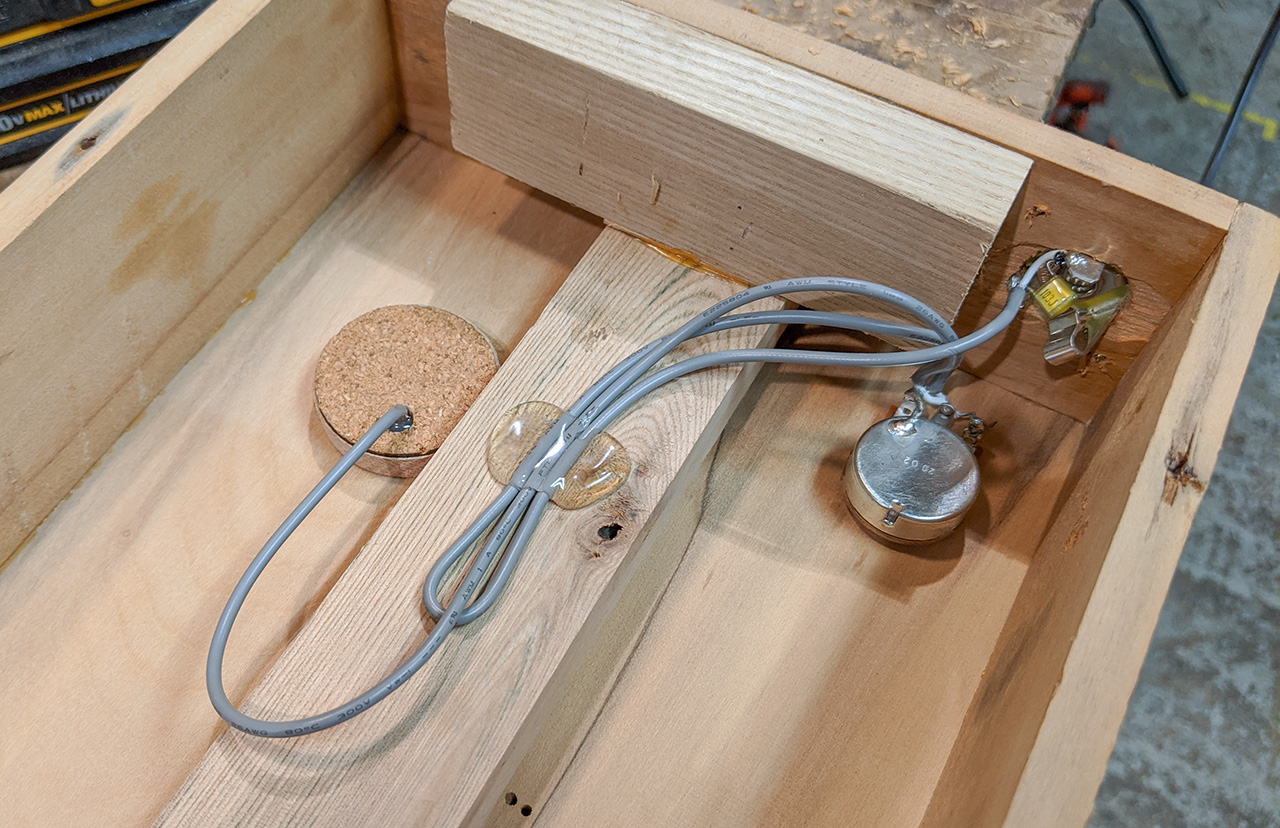
I knew that I wanted to have a pickup in this build, so I grabbed one of our C. B. Gitty "Disc-o-Tone" pickup harnesses, which feature a piezo element embedded into an oak disk and a volume control. I always like to add a 0.01uF capacitor across the hot and ground lugs on the output jack, to help bleed off some of the treble and improve the tone of the piezo. I also grabbed a nice knob and shiny chrome jack plate... |
|
|
|

|
Which didn't stay nice and shiny for long. More relic-ing work went into them to give them a nice antiqued patina. |
|
|
|

|
I used a 3/4" Forstner-style bit to make a hole for my jack and jack plate assembly (the jack plate is 1 inch wide so I knew it would cover the 3/4-inch hole. |
|
|
|
|
A nice clean cut, which I positioned carefully to avoid those interior braces. Not shown here, I also used a 5/16" drill bit through the front for mounting my volume pot. |
|
|
|
|
Here, everything has been neatly mounted into the instrument, with the wires secured from flopping around with hot glue. If you look carefully, you can see the capacitor on the output jack. |
|
|
|
|
I do some work at this point to prepare the back panel of my guitar. I loved that penciled "RAE Case" writing on one side. I am not sure what it means (maybe the name of the customer who originally bought this box of baking powder?), but it certainly has "the look. |
|
|
|
|
Before I glue on the back panel though I had to mount my sound hole inserts... it would have been a lot harder to glue them into place if the back had been on already. |
|
|
|
|
Some glue and clamps soon had the back panel in position. |
|
|
|
|
Then it was back to the sanding bench to sand everything nicely flush and smooth. Of course, this left a lot of bare edges... |
|
|
|
|
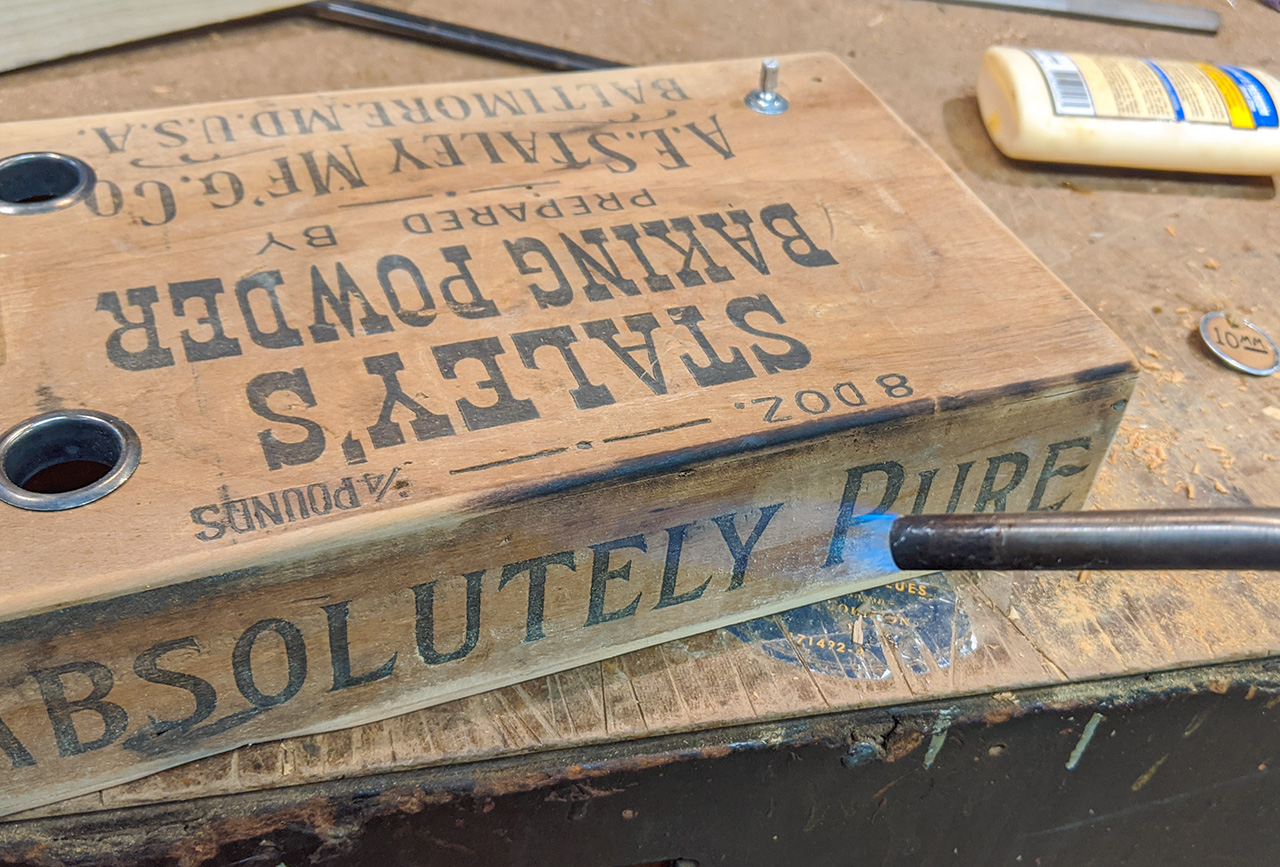
So I grabbed my propane torch and did some careful darkening of all of the lightened/cut/sanded edges of the box. I love this method for adding some aged patina to wooden boxes like this. I also used the torch to darken down some of the grain in the old American chestnut neck. |
|
|
|
|
She's looking pretty good at this point, I'd say! In this photo you can see the darkening from the torch, and also that I have removed the tuners and tailpiece in preparation for applying a finish. |
|
|
|
|
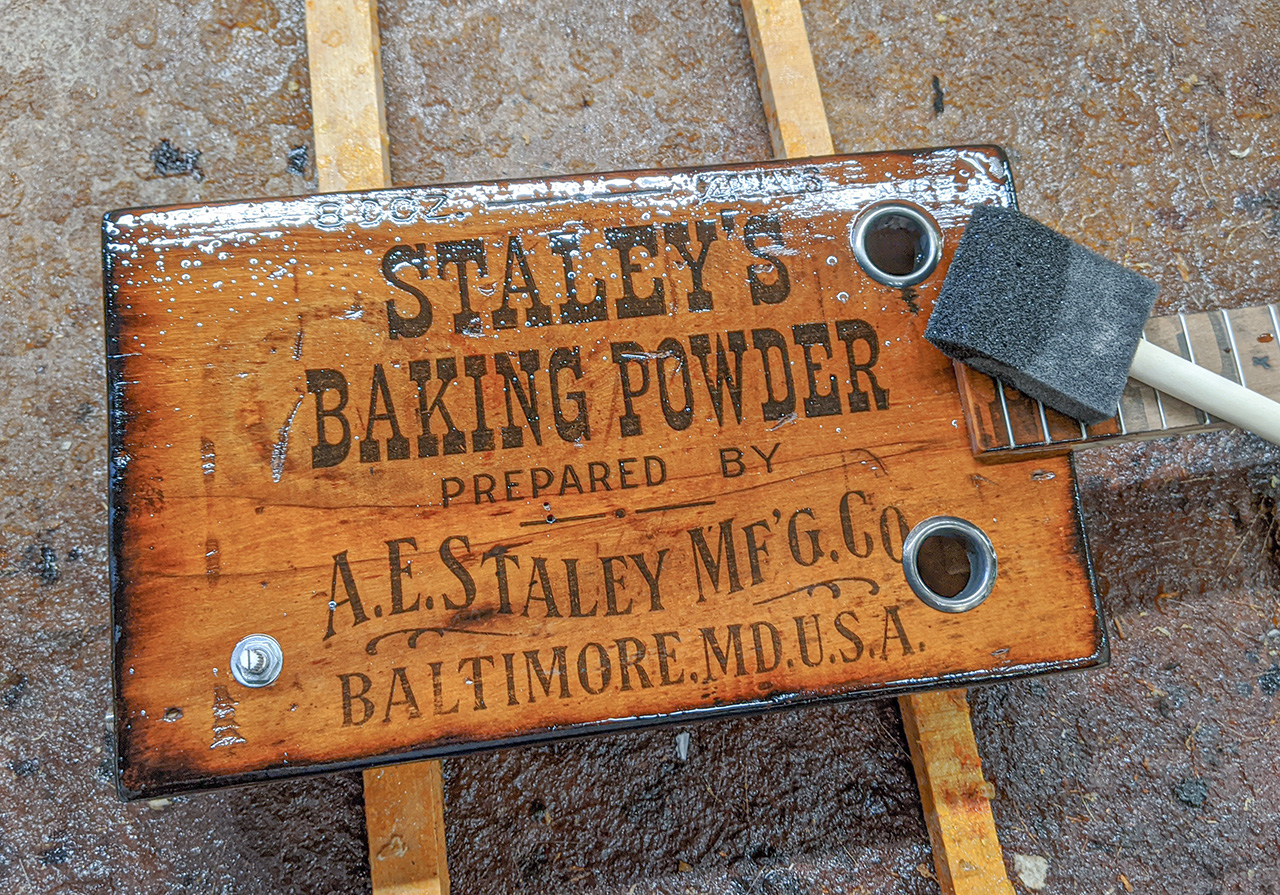
I didn't want to darken the wood any more than I had to when applying the finish... so instead of my usual linseed oil I instead used wipe-on polyurethane. |
|
|
|
|
That old wood really soaked up the poly... |
|
|
|

|
But boy didn't it look nice afterwards. Even though it did darken the wood a bit, it really brought out some great coloration as well, so I was pleased with the result. |
|
|
|
|
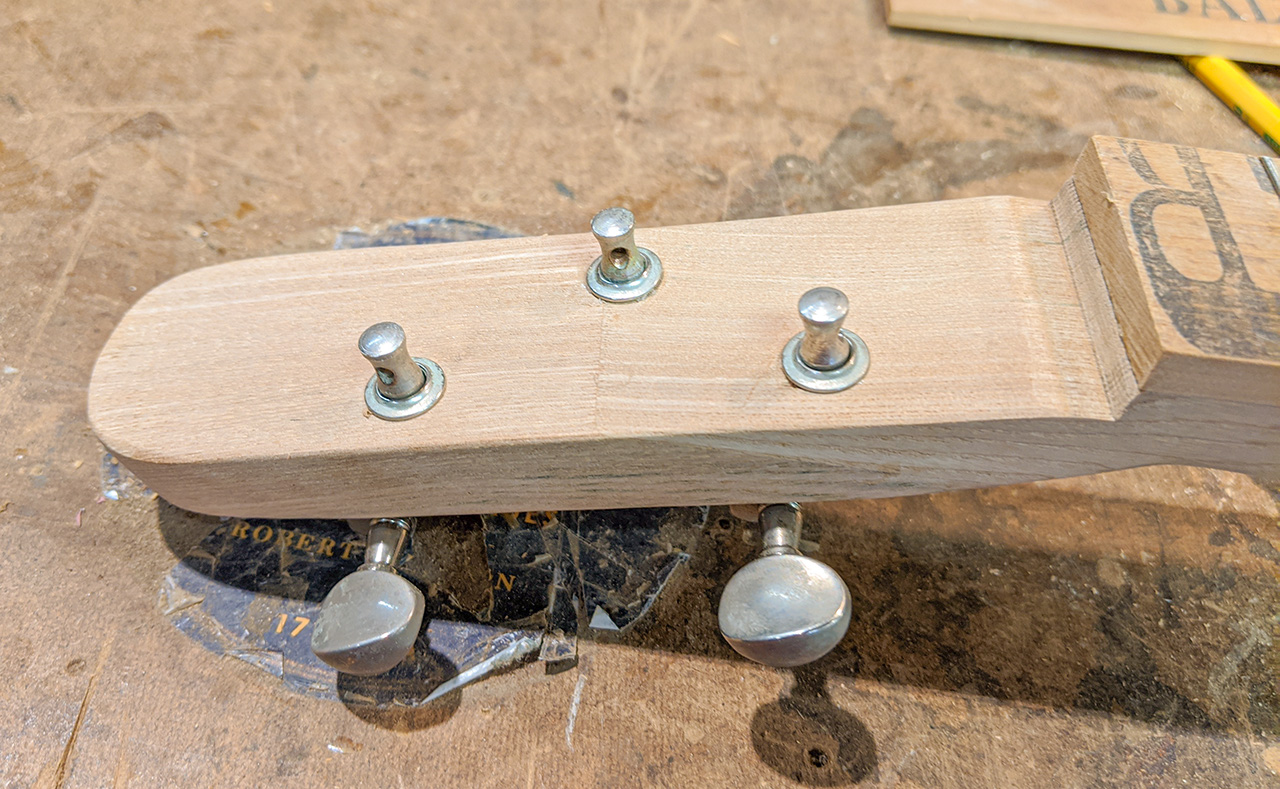
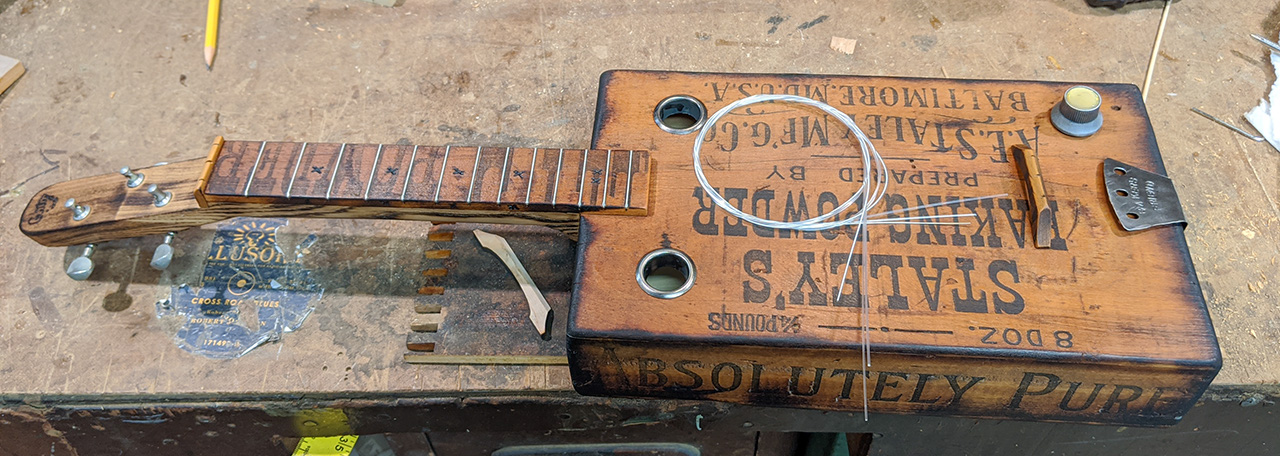
Here, I have put all of the hardware back on in preparation for stringing. I had long since decided to use nylon strings, in the same style as my Hobo Fiddles, and here I have them all ready to go. |
|
|
|
|
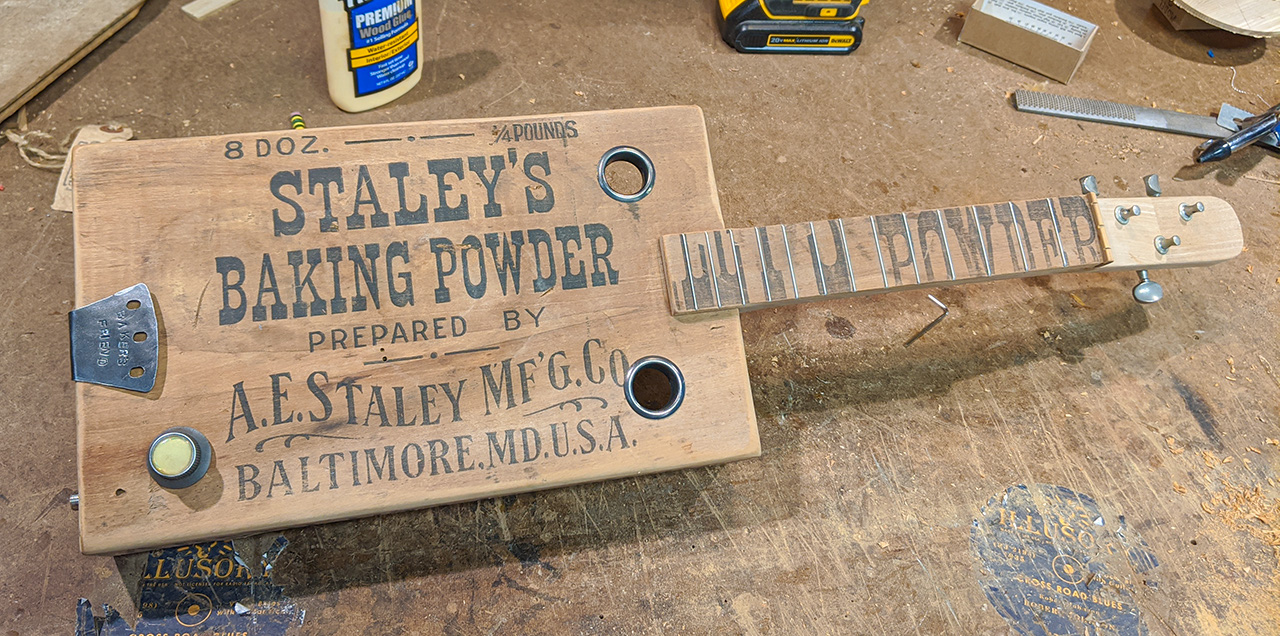
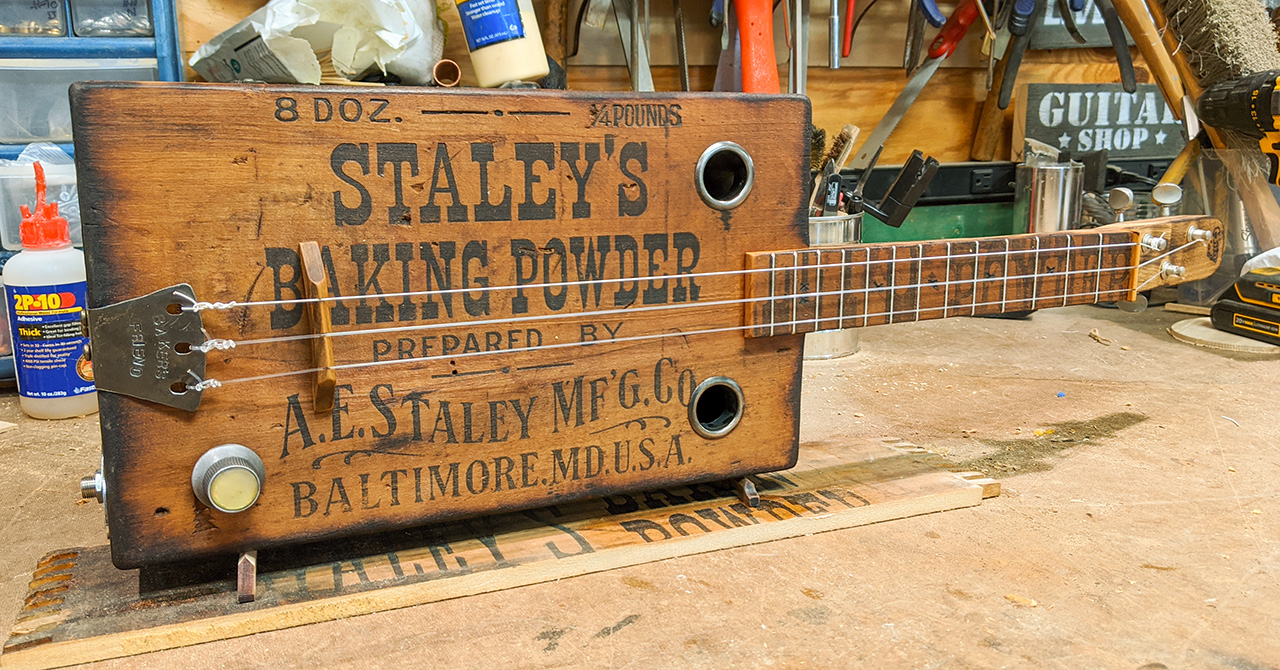
And just like that, the Baker's Friend was done. I've had her leaning against my desk next to me while working on all of these photos and writing this diary, and every few minutes I'd pick her up and pick out a little ditty. Those nylon strings are still getting broken in, but what a nice bright and warm tone this little gitty has... and of course a beautiful and distinctive look. I am thrilled with how nicely this build turned out, and I am even more in love with the concept of transforming old wooden crates into guitars. I hope that you have been inspired to try your hand at it as well. As always, happy building! |
|
|
|
Recent Posts
-
Steve Holladay's "Pocket Box Guitar"
If you're a member of the Friends of C. B. Gitty group on on Facebook, you've probably seen some of …14th Jan 2026 -

2024 World's Wildest Electric Cigar Box Guitar Build-Off Winners!!!
C. B. Gitty Crafter Supply is proud to announce the winners of the 2024 "World's Wildest Electric Ci …31st Oct 2024 -
")
Improved C. B. Gitty: Easier Than Ever! (Work in Progress)
Ben “Gitty” has been cleaning house, making our website even easier find your favorite parts, kits a …7th Oct 2024