

Building the "One Way Ticket" Steamer Trunk Guitar - A Photo Diary
There's nothing like a cluttered junk shop to set the handmade instrument builder's imagination to fizzing.
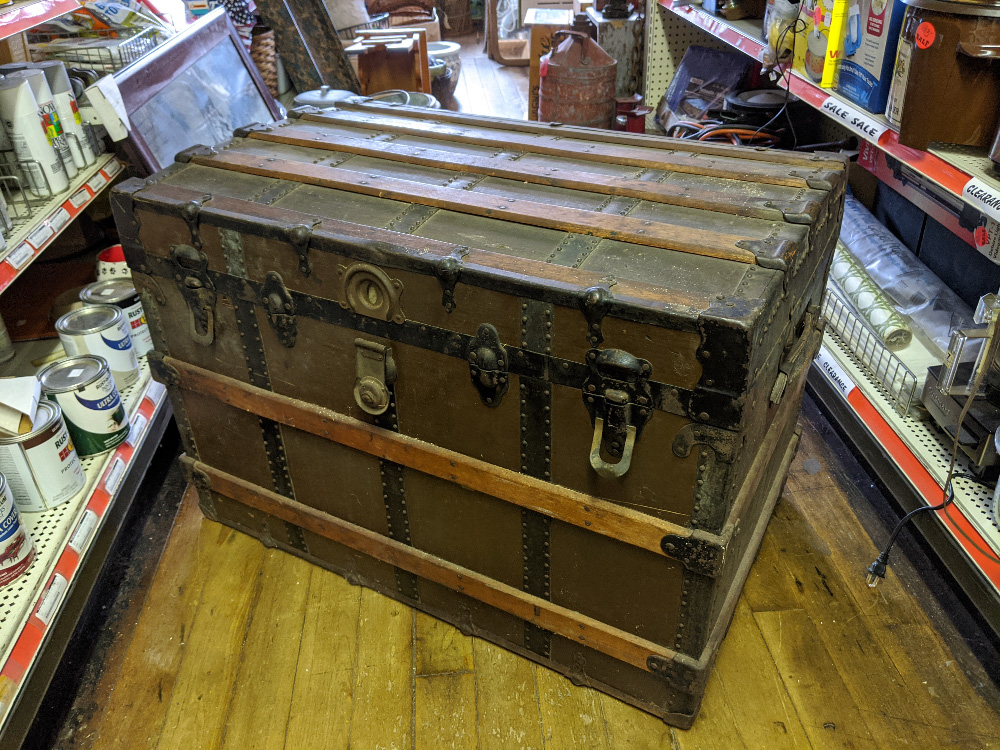
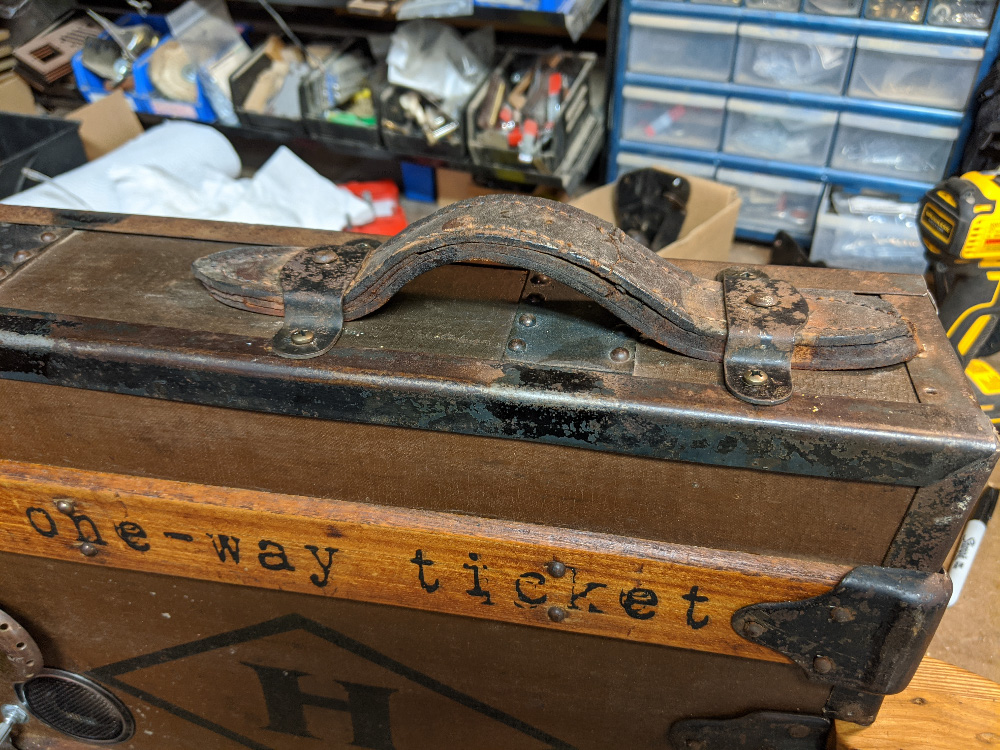
For me recently, that inspiration came in the aisle of an antique/junk/hardware store in Farmington, New Hampshire. The battered old steamer trunk sat there forlornly, its traveling days seemingly over. The hardware was rusty, the bottom slats were rotted away... but I knew deep down that it had a whole new journey to undertake...
It was not an easy journey. This build fought me every step of the way, from a split neck to broken bridges to too-low nuts too loose and buzzing frets to stripped tuner screws. I can't deny that, like many travelers who run into problems on their journey, I got a bit discouraged along the way. At one point I wanted to just throw the whole thing overboard. But finally, we made it... and the result is an amazing, one-of-a-kind heirloom instrument.
I hope you enjoy this diary of how I created this guitar, and that it inspires you to create your own amazing builds.
Guitar Specs:
- Scale Length: 25 inches
- # strings: 6
- Tuning: E A D G B E (standard 6-string)
- String Type: Phos. Bronze Wound & Steel
- Tuners: Gold Covered-Gear (antiqued)
- Pickup: Disk piezo
The One-Way Ticket Guitar Builder's Photo Diary
|
|
I went into the shop looking for old yardsticks, and came up empty handed - someone else had cleaned them out just that morning. But rounding the end aisle, a beautiful site struck my eye - a big, dirty, weathered old wooden steamer trunk, complete with time-patina'd hardware. I knew immediately what I had to do. Forty dollars later, and she was in the back of my truck headed for the C. B. Gitty workshop. These old trunks were built to last, and are heavy. The thick stamped steel hardware alone probably weighs twelve pounds. |
|
|
|
|
|
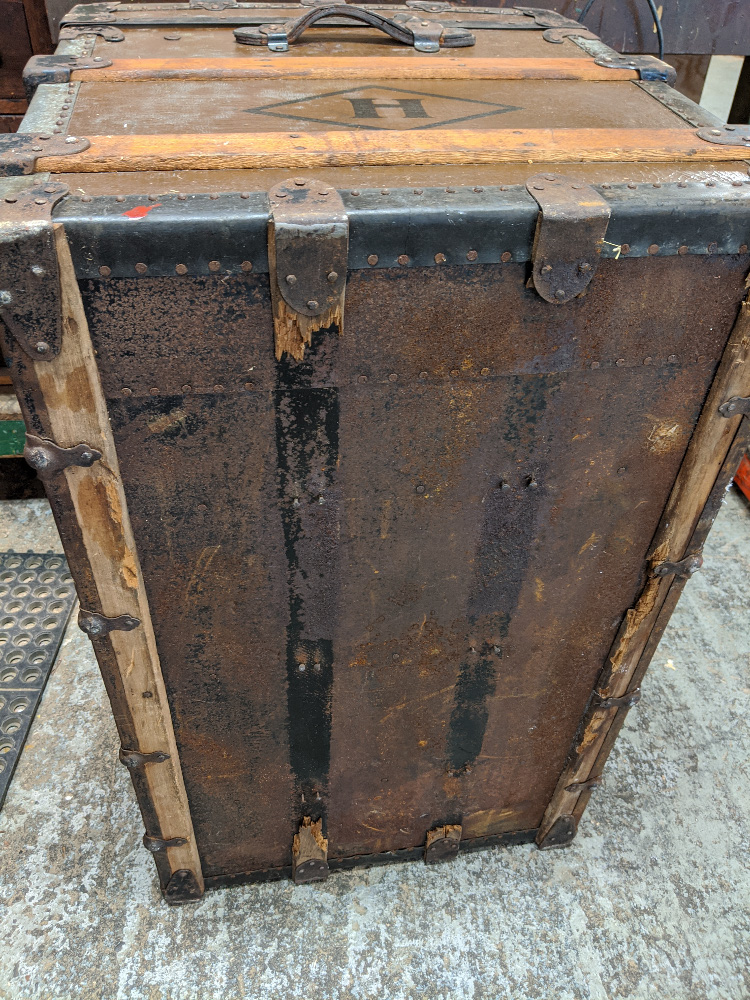
Back at the workbench, before I did anything I took photos from every angle, both for preservation purposes but also to help me remember where and how all of the great hardware pieces had been attached. |
|
|
|
|
|
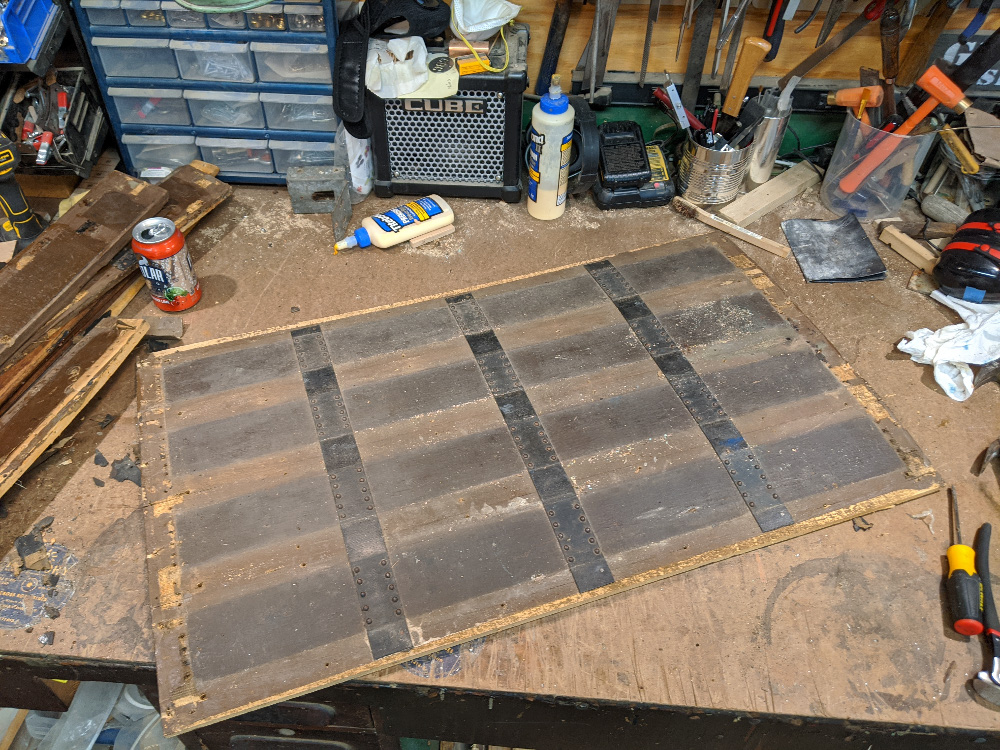
The bottom panel of the trunk was in pretty bad shape. The hardwood racing slats were mostly rotted away and gone, and the steel sheet was pretty rusted. |
|
|
|
|
|
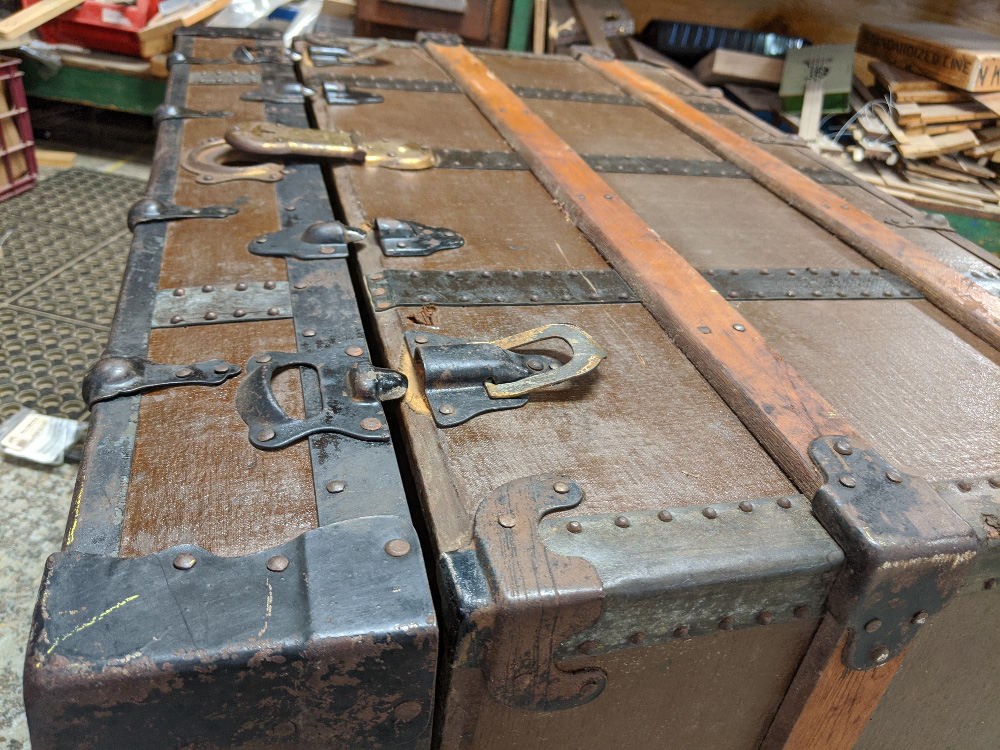
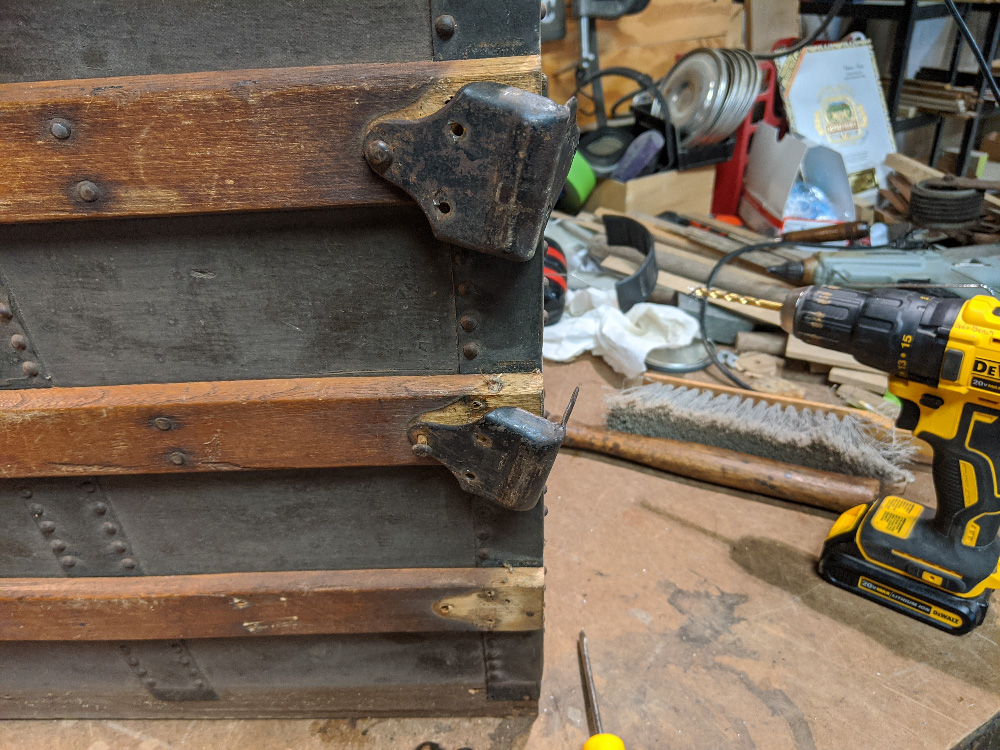
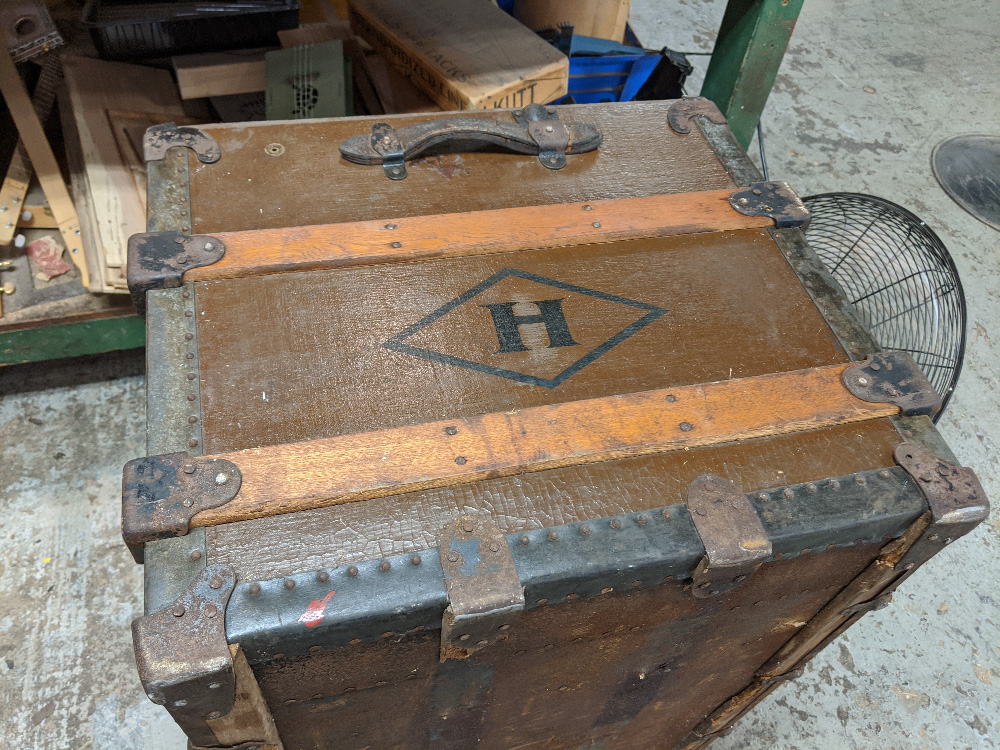
Look at that hardware, would you? All of it stamped from ~1/16" thick sheet steel. They don't make it like that any more! |
|
|
|
|
|
|
|
|
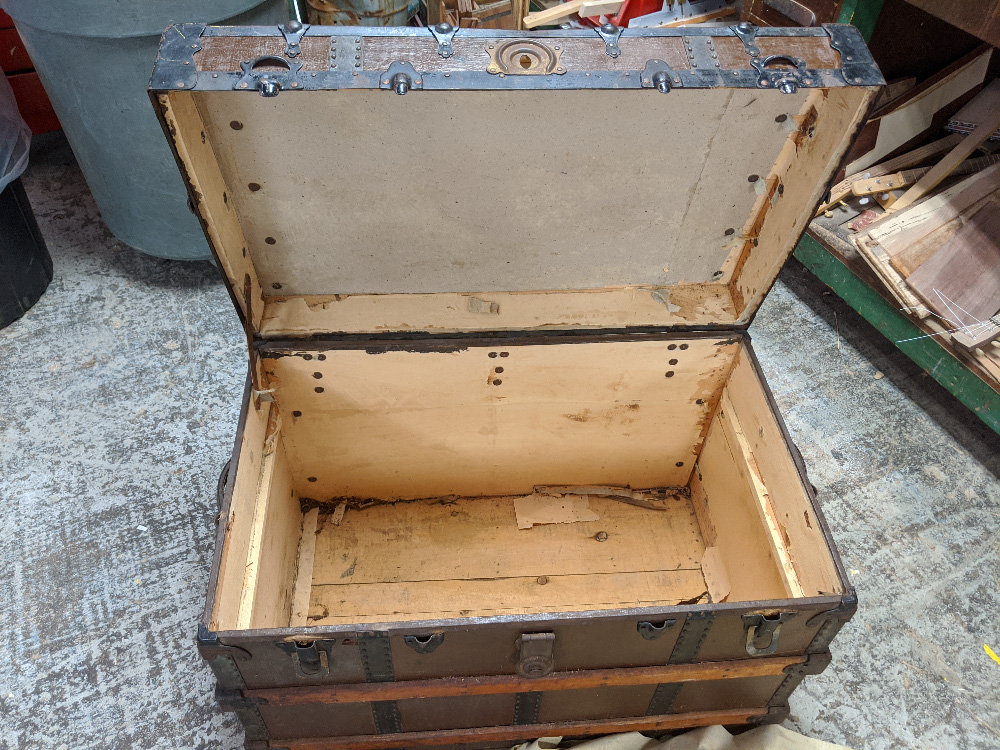
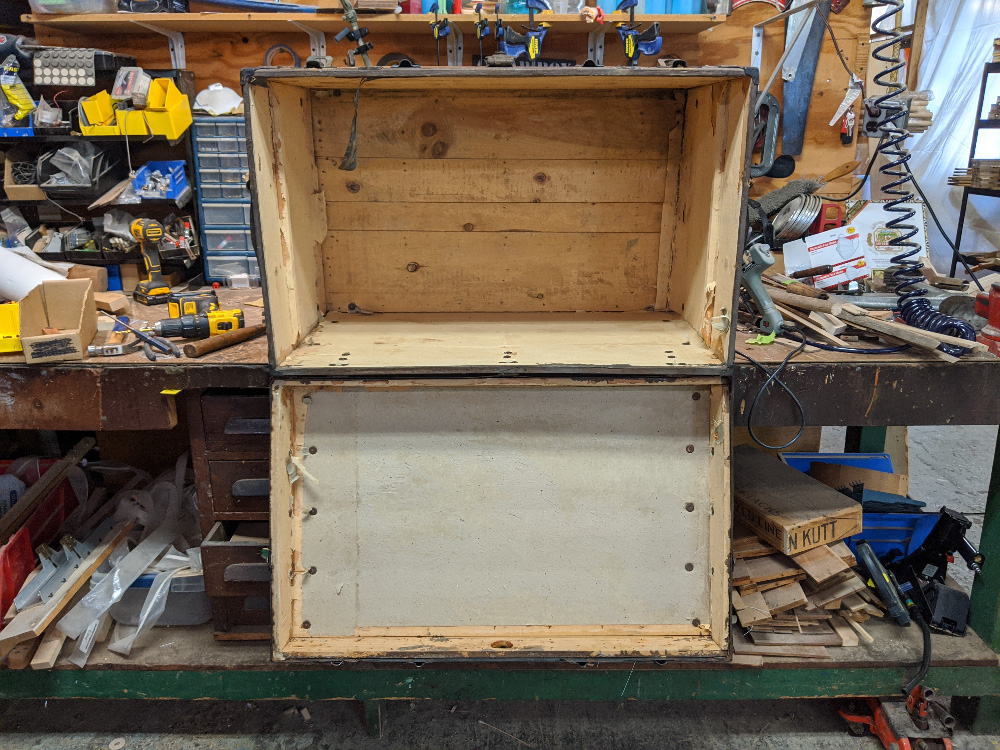
The inside of the trunk was lined with musty old canvas, which I promptly removed. The musty smell was quite strong - one of the guys came over from across the shop to ask me what the stink was. |
|
|
|
|
|
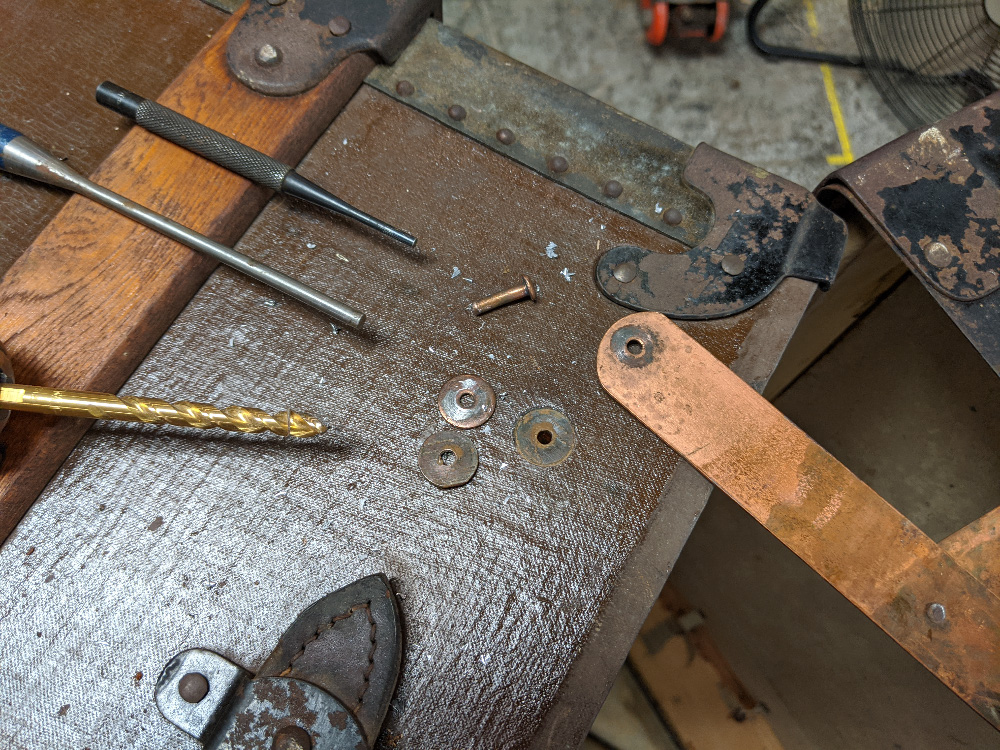
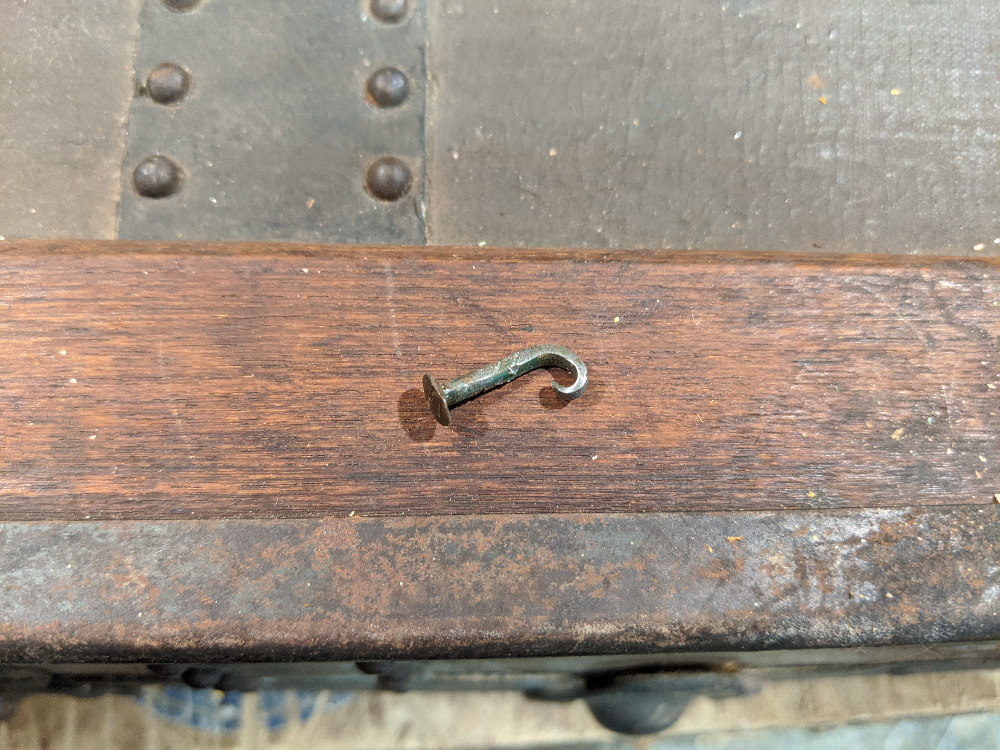
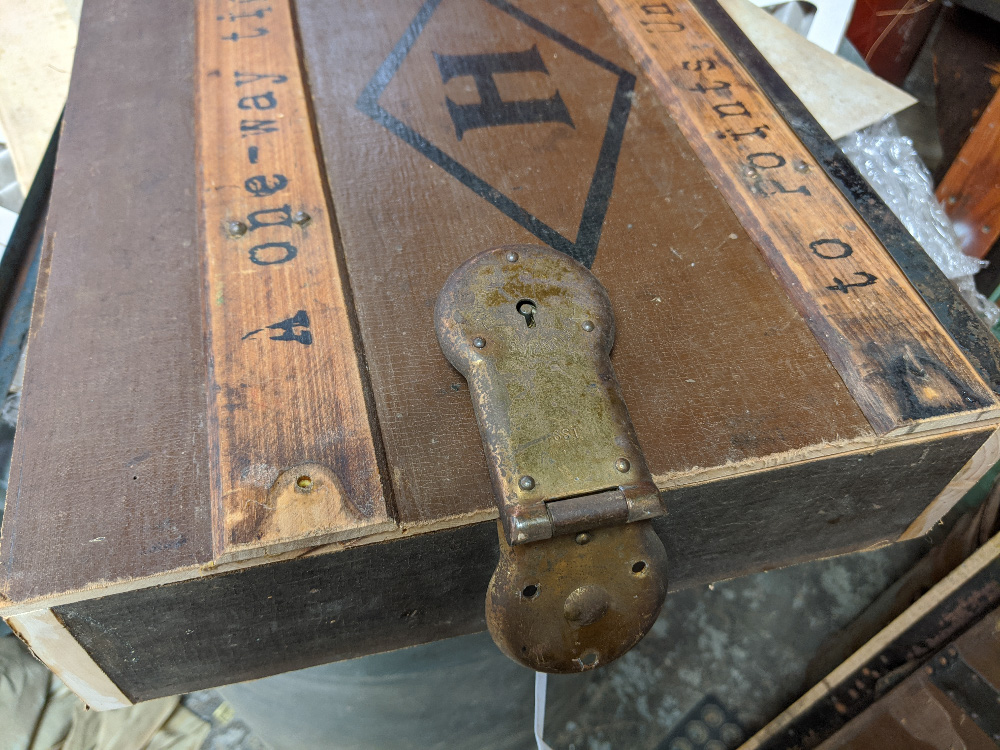
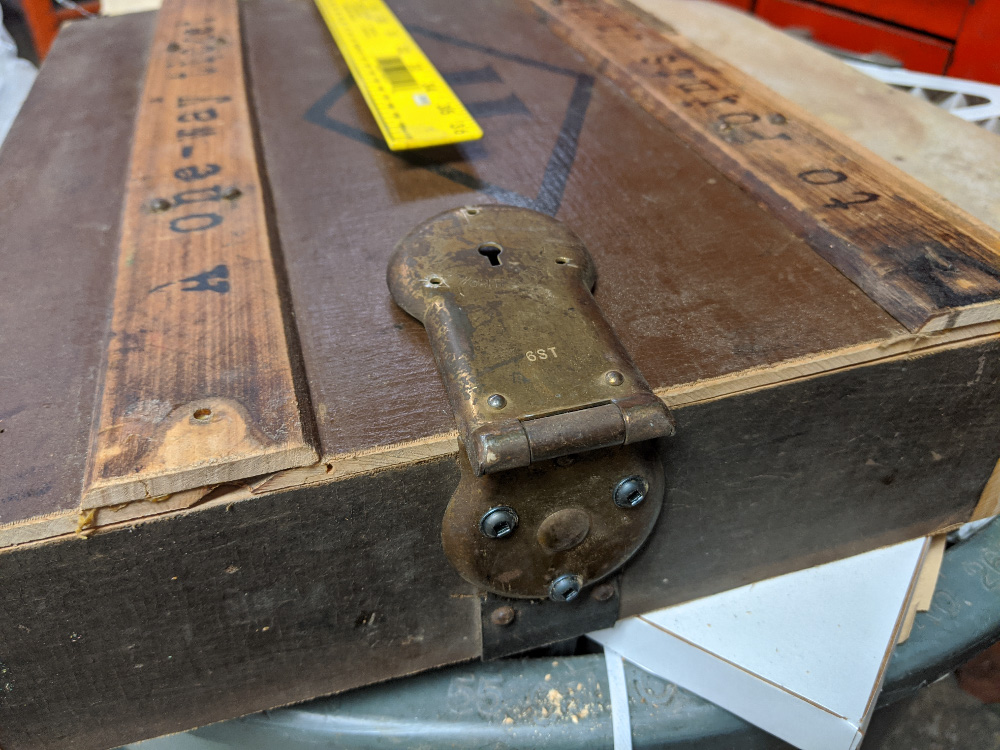
The first piece of hardware I tackled for removal was the hinge. The trunk only had one, on the left side, and it was held in place by two rivets... the same style of rivet that held most of the structural hardware onto the trunk. These are not modern pop rivets, mind you -- this is the old style, where the rivet is basically a threadless bolt that is driven through the hold and then mushroomed flat on the other side, against a washer, so it won't pull back through. Each one had to be punched and then drilled out to remove it. But more on that in a bit... |
|
|
|
|
|
In addition to the old-style rivets, the trunk was held together by little nails. A LOT OF LITTLE NAILS. The best way I could come up with to pull them out was to use a set of our fret wire nippers (which have a flush-ground face), and it worked pretty well. I couldn't understand at first why the nails were pulling out so hard... but more on that later. |
|
|
|
|
|
The opening hinge removed, I heaved the big girl up onto the bench to begin removing the three hinges that held the top to the base. Get ready for some punching and drilling... |
|
|
|
|
|
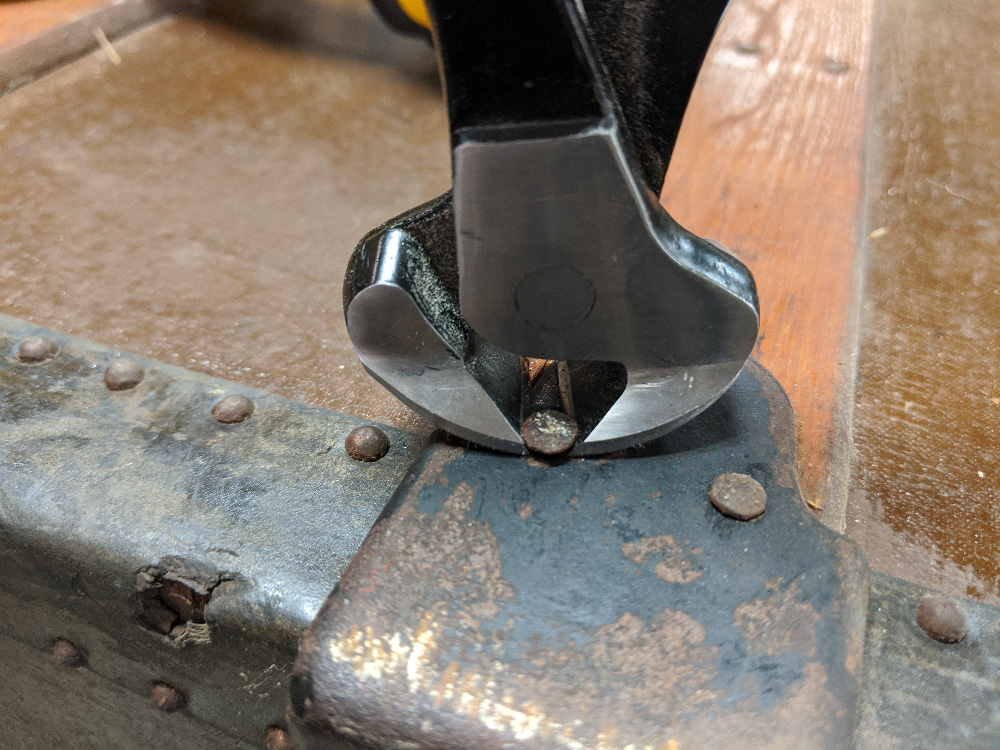
Here we go. The inside portion of each rivet, where the metal had been mushroomed out to hold it in place, had to be punched... |
|
|
|
|
|
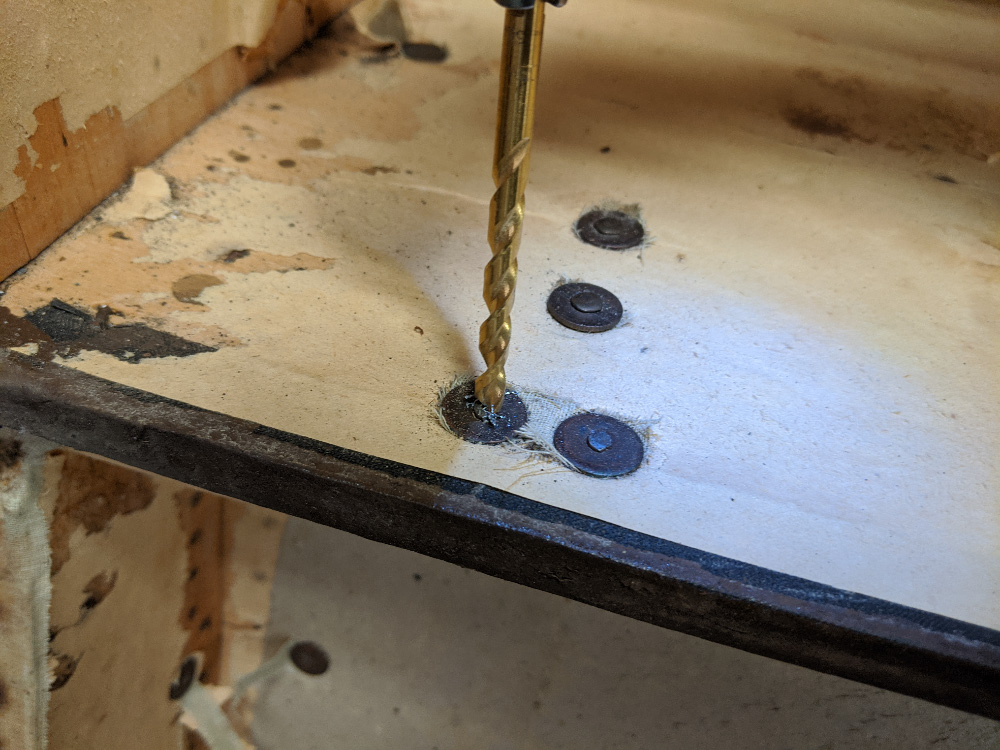
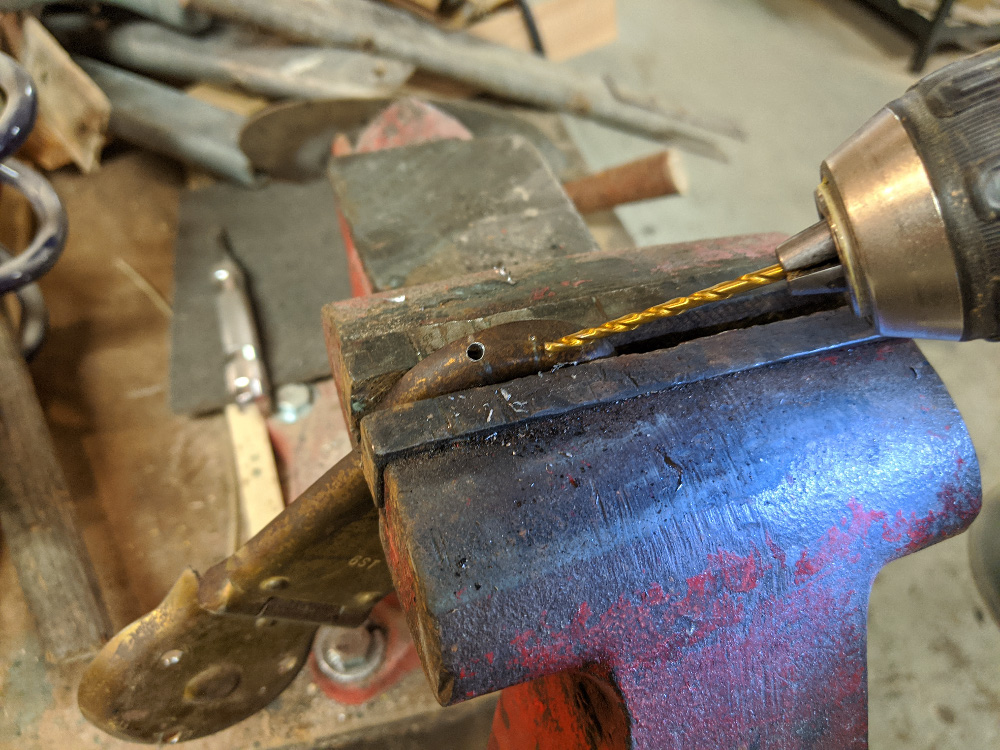
And then carefully drilled out at slow speed. |
|
|
|
|
|
As this photo shows, it was way too easy for the drill bit to slip off the rivet and gouge into the wood. But, I got this one out. One down out of twenty-four! |
|
|
|
|
|
With all 12 of the rivets on the base-side of the hinges removed, the lid was now free. I decided to proceed with fully disassembling the lid before doing anything with the base. |
|
|
|
|
|
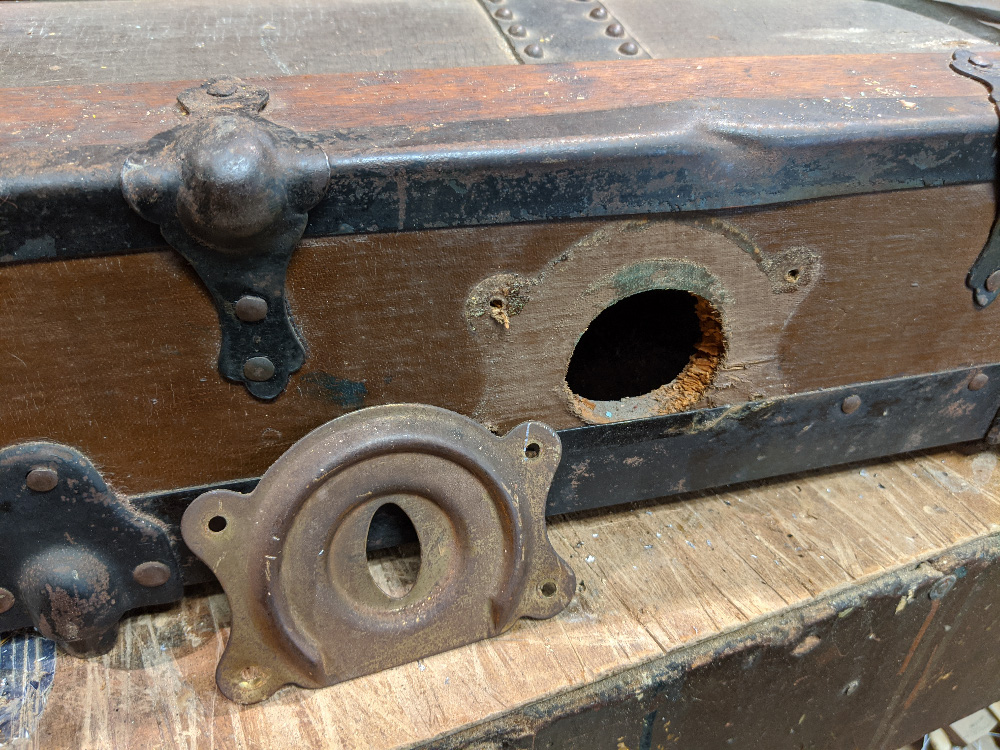
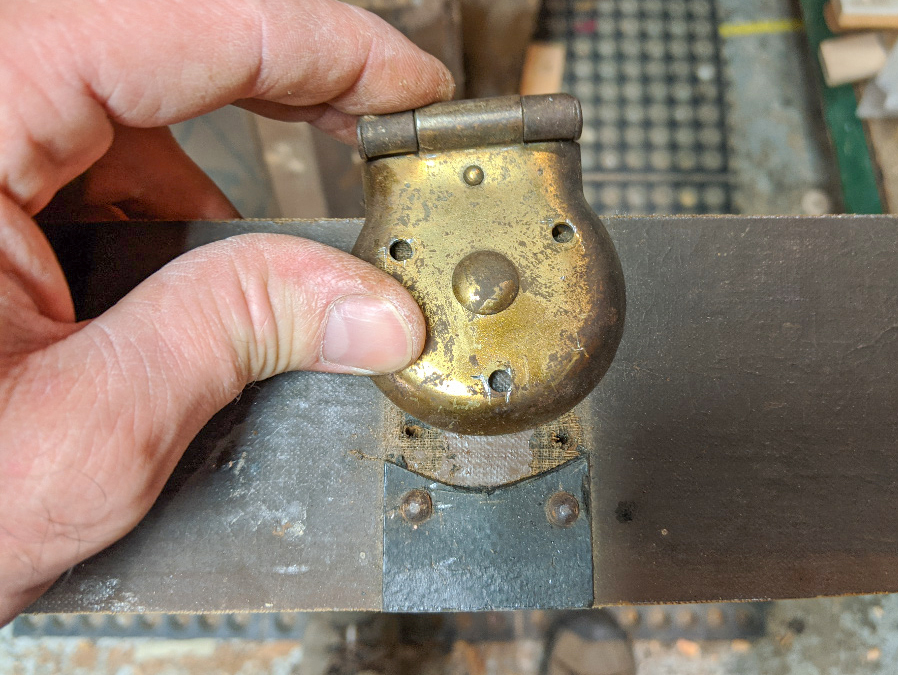
Removal of the hardware was interesting, and I saved every piece... and every rivet and nail as well. Interestingly, not a single screw was used in the construction of this trunk. In this photo, I've removed the front plate of the lock mechanism. |
|
|
|
|
|
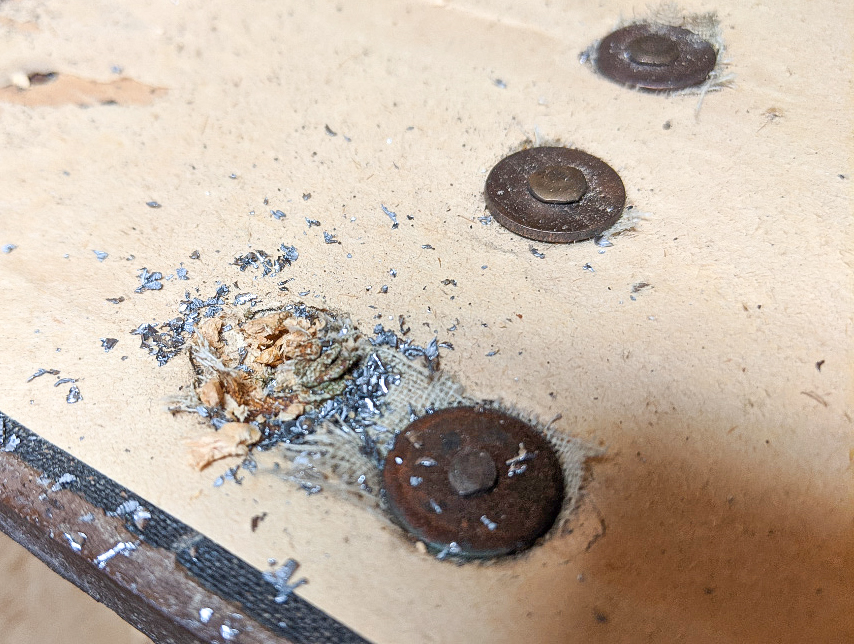
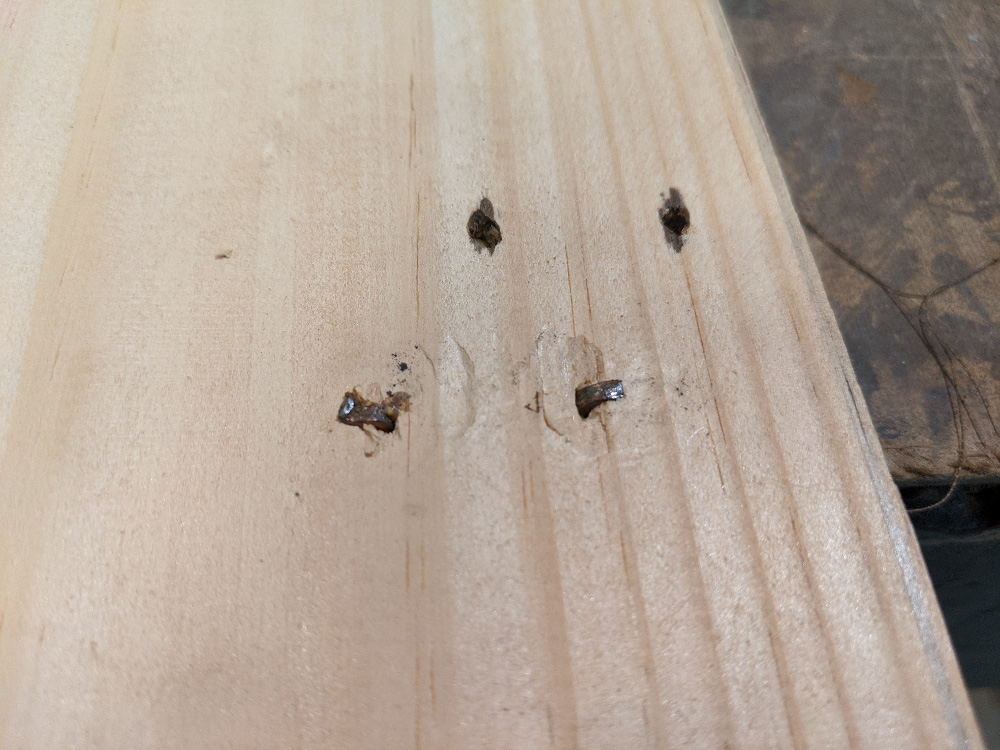
Here's a little visual of why the nails were so hard to pull out. EVERY ONE of them was bent over on the inside of the trunk to keep it in place. Many of the bent tips straightened out while being pulled, but some broke off in the wood... which later had to be dug out to keep from ruining saw blades. |
|
|
|
|
|
Disassembly of the lid continues. Much of the hardware around the metal edging band had to be removed before the band itself would come free. |
|
|
|
|
|
Finally the band is off... with some of the hardware still attached. All of this (held on by rivets of course) was later removed. |
|
|
|
|
|
The collection of hardware grows... |
|
|
|
|
|
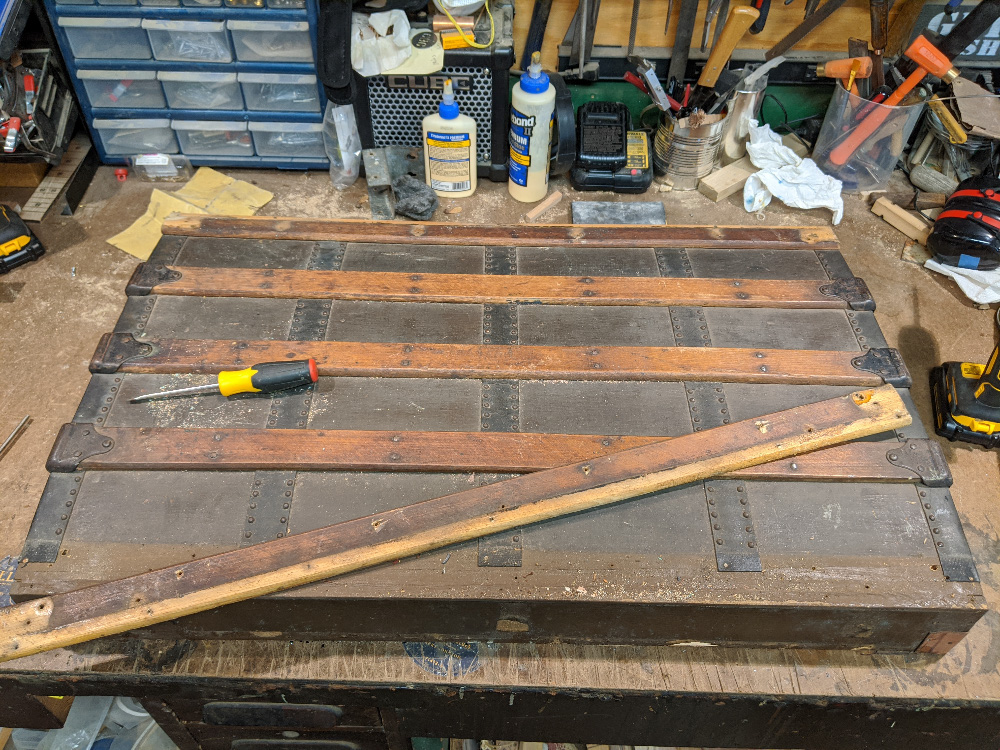
Now it was time to begin removing the hardware slats. Each was held on both by the riveted-in-place steel end braces, as well as by nails. |
|
|
|
|
|
The riveted steel end braces took a lot of drilling to remove... but only two of the six fasteners on each was a rivet, so it could have been worse. |
|
|
|
|
|
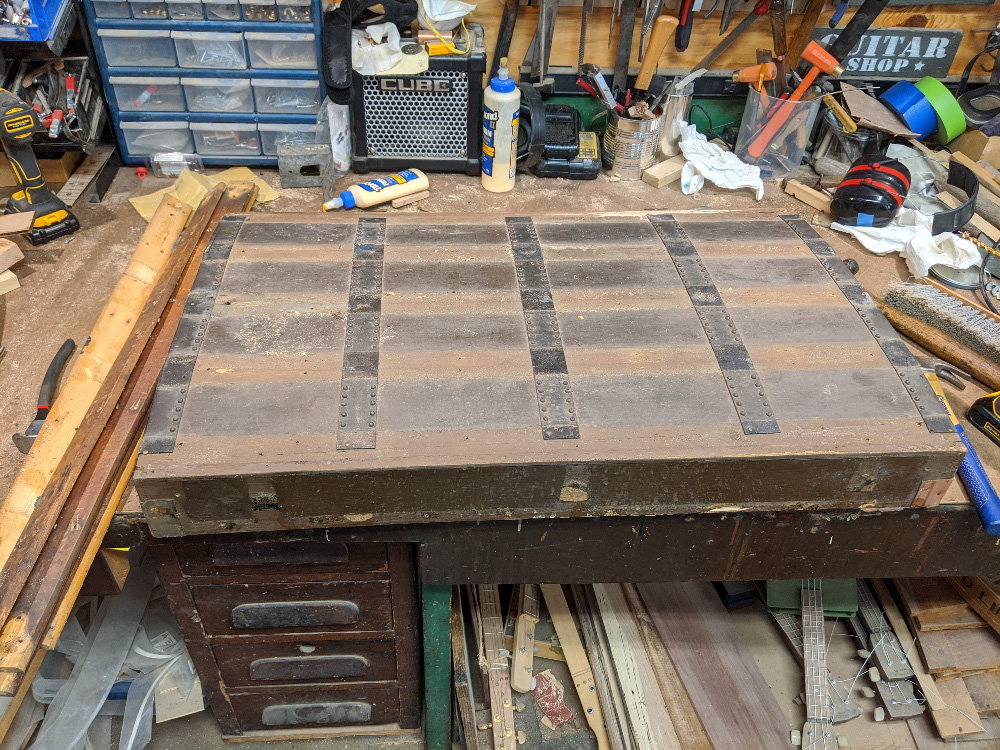
With the hardwood slats all removed, I can proceed with taking off the side walls and fully freeing the arched top panel. |
|
|
|
|
|
With the arched top panel finally free, I can proceed with taking apart the individual boards that make it up. |
|
|
|
|
|
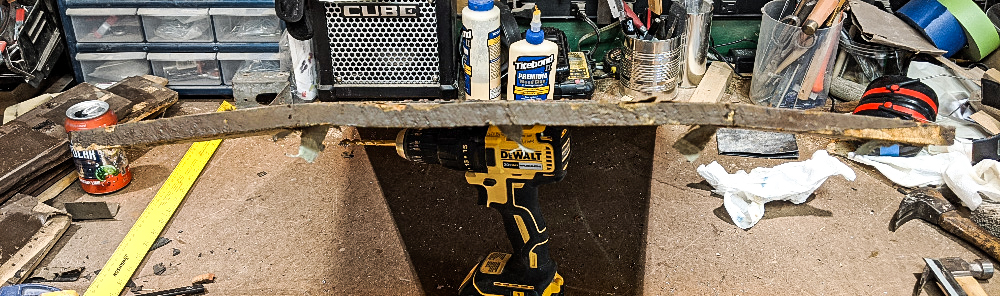
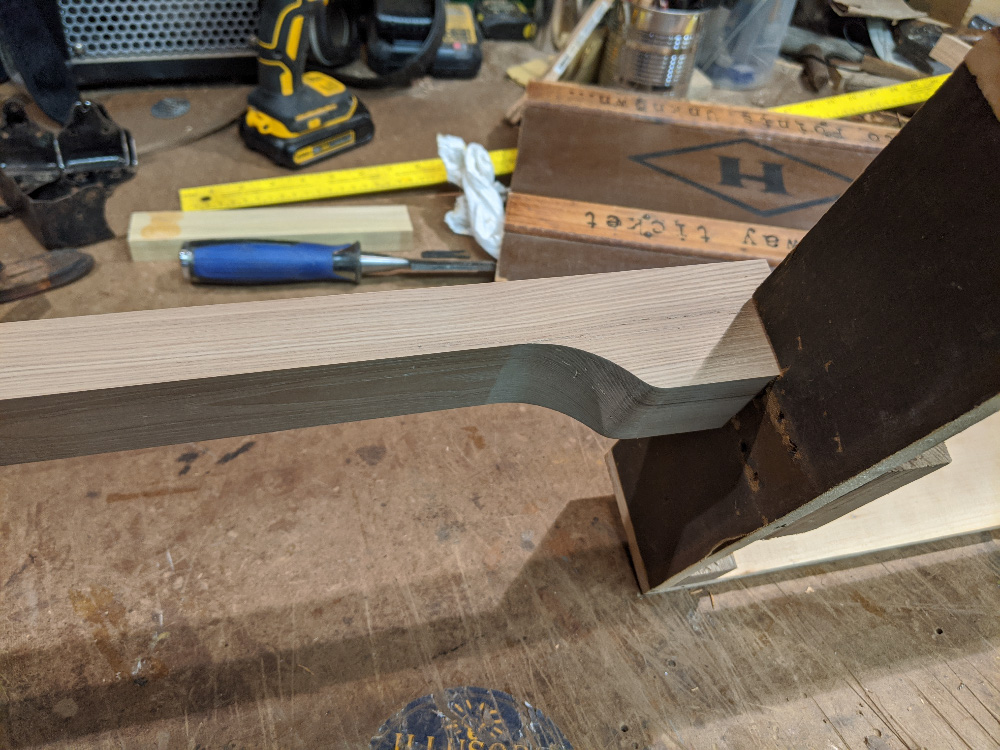
As shown in this end-profile shot, the top panel wasn't actually curved, but rather made up of several flat pieces of wood formed into an arch. I was glad to see this, as I wanted to use those boards for my guitar. |
|
|
|
|
|
At this point, with the trunk lid disassembled, I proceeded to take the larger base piece apart. Much of the process was the same... drilling out rivets, pulling out nails, removing hardware, etc. |
|
|
|
|
|
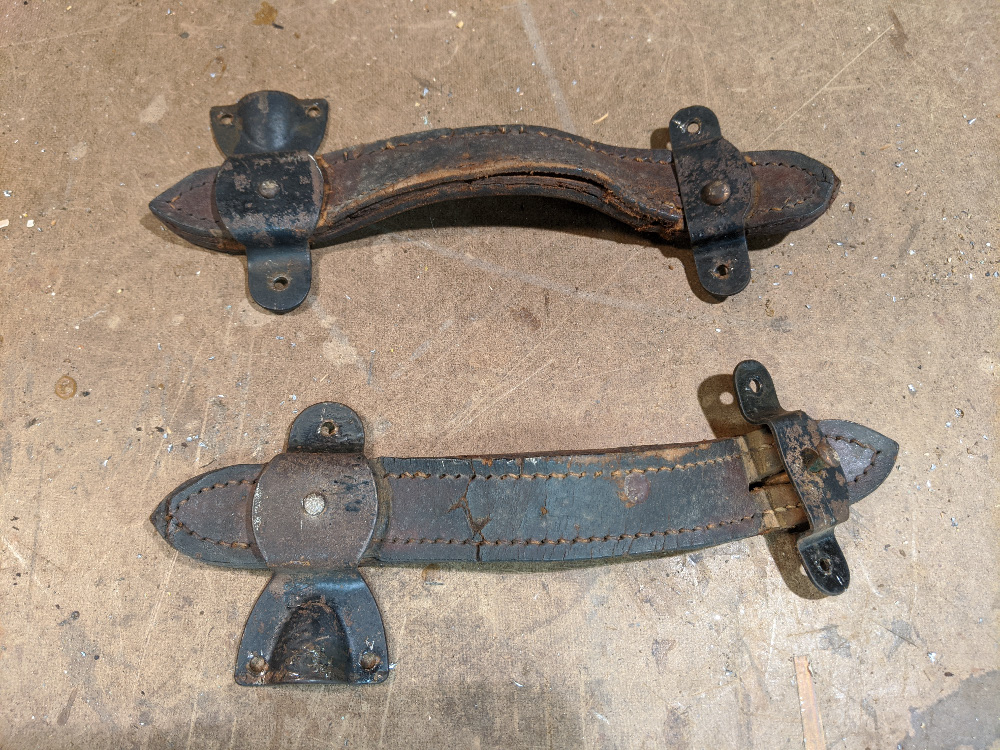
Look at those old leather handles... if only they could tell the tale of all the hands that have gripped them over the years. I knew I had to find a way to re-use at least one of them. |
|
|
|
|
|
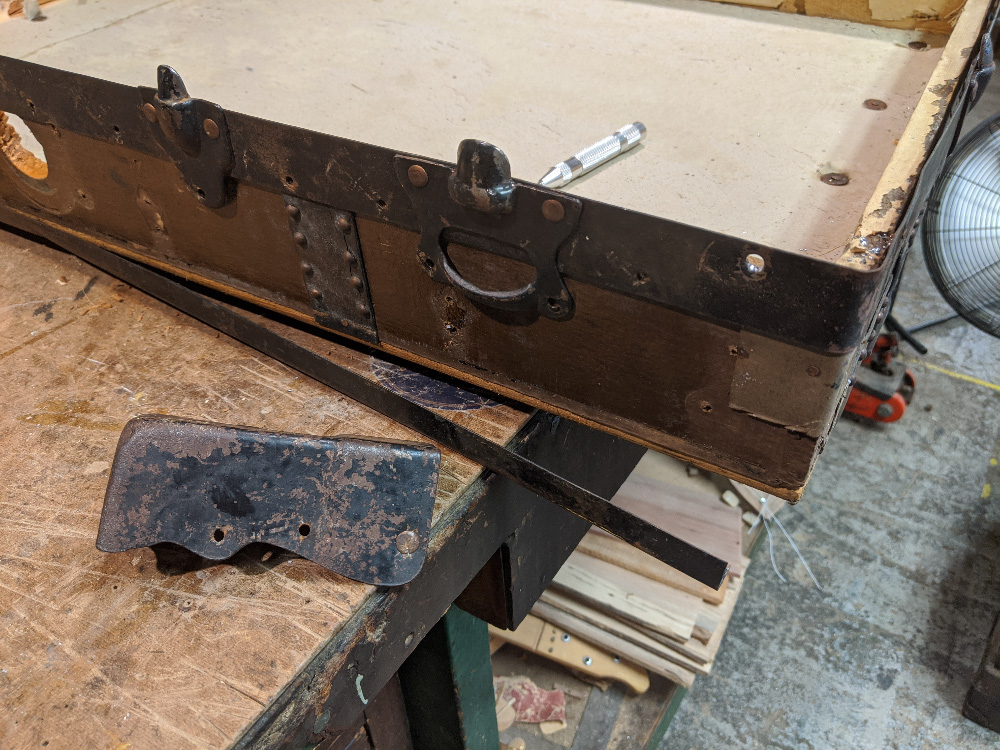
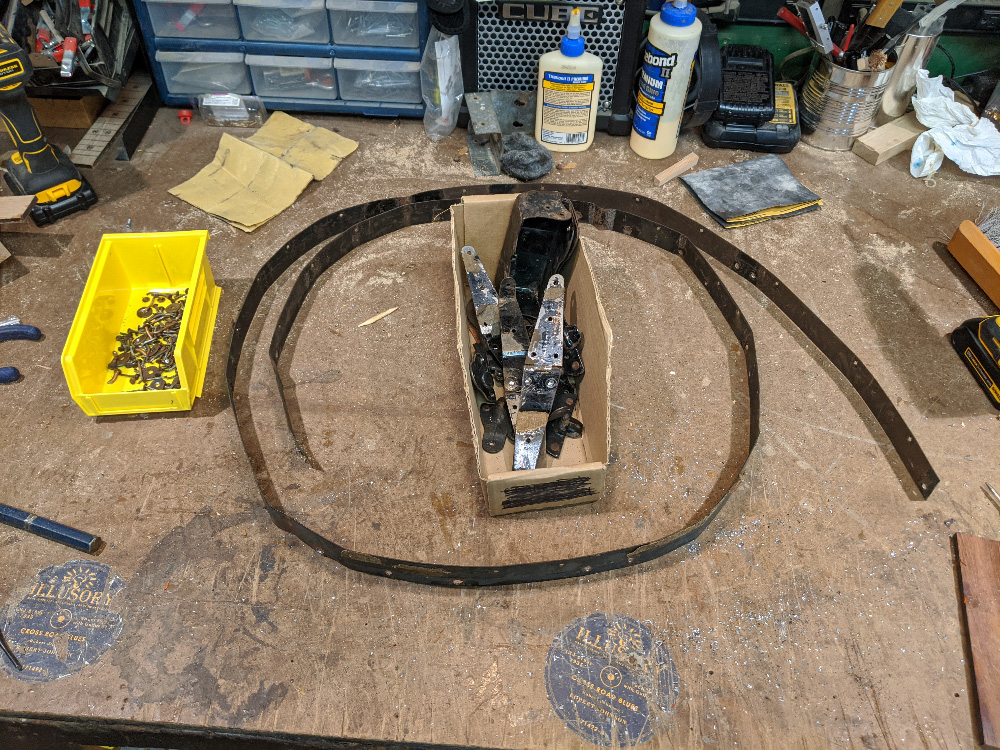
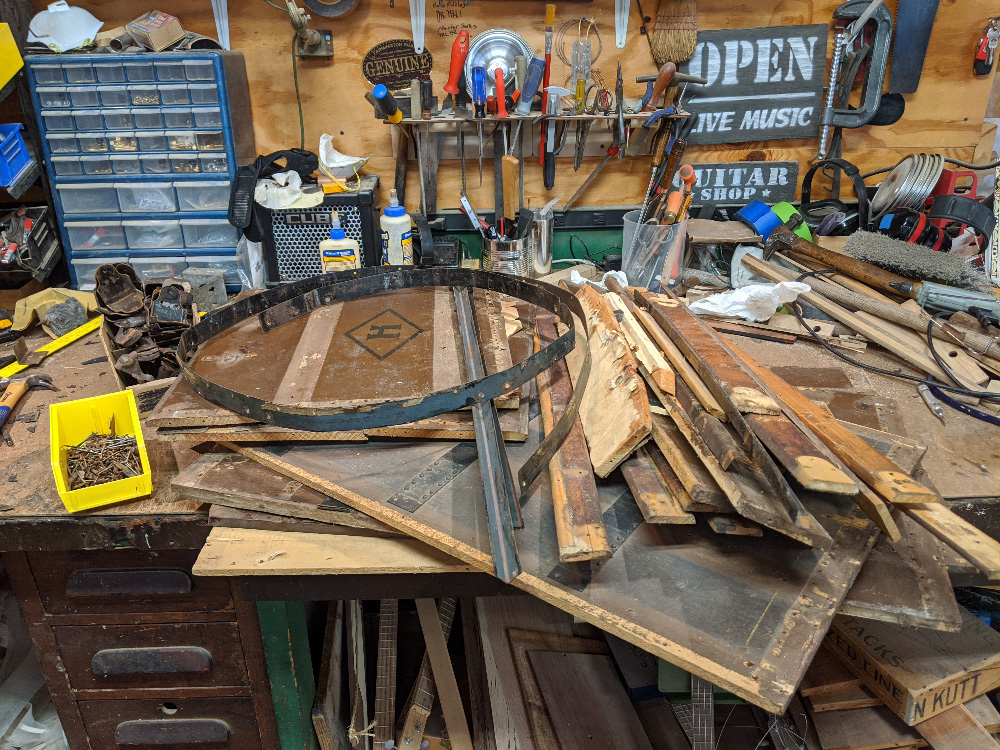
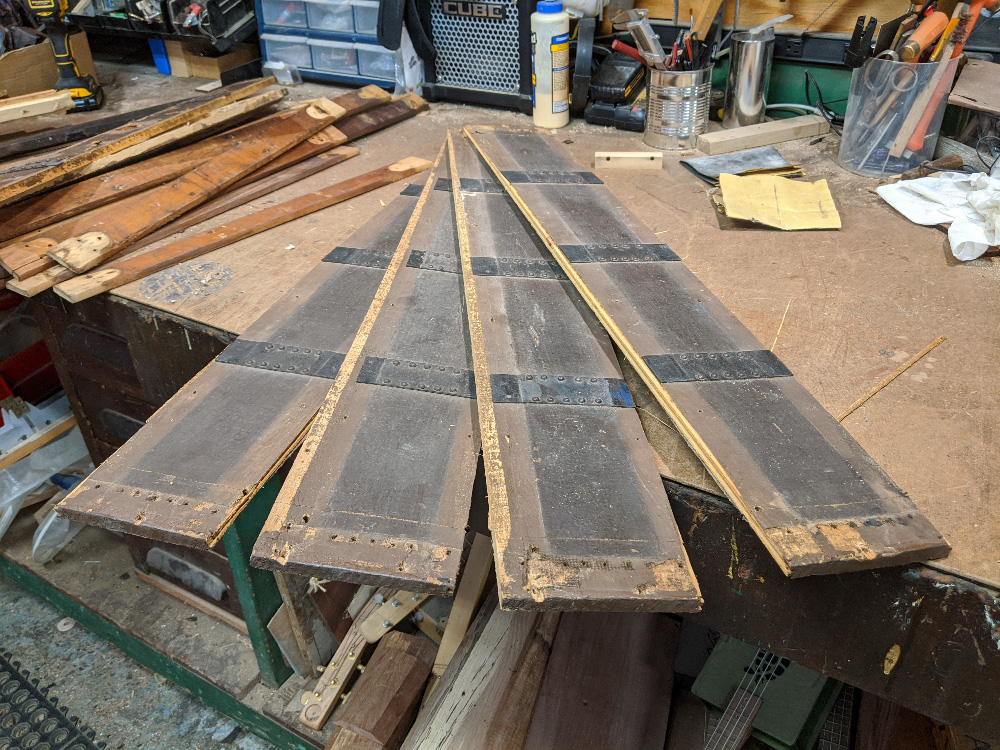
Skipping ahead a bit here, the trunk is now fully disassembled with the parts all laying on my bench. Several larger panels, a bundle of hardwood slats, some lengths of steel angle brackets, a box full of hardware and a small bin full of nails and rivets. |
|
|
|
|
|
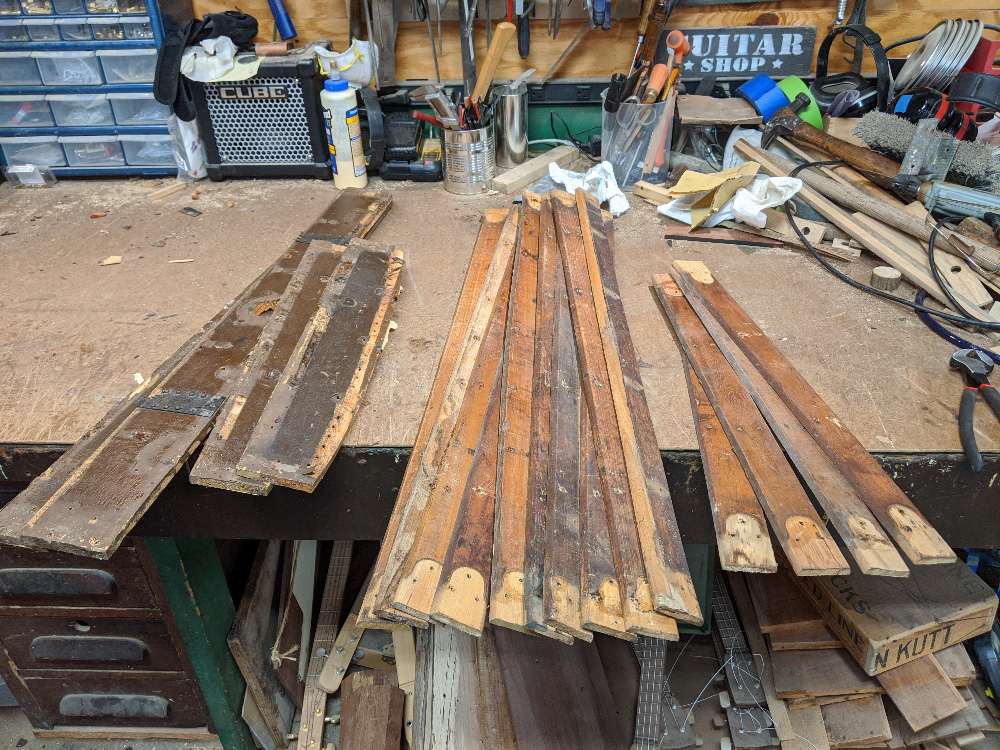
I knew these hardwood slats would be important to the instrument I'd end up building... both structurally and decoratively. In the end, I used them for the neck, fretboard and also on the soundboard. |
|
|
|
|
|
|
|
|
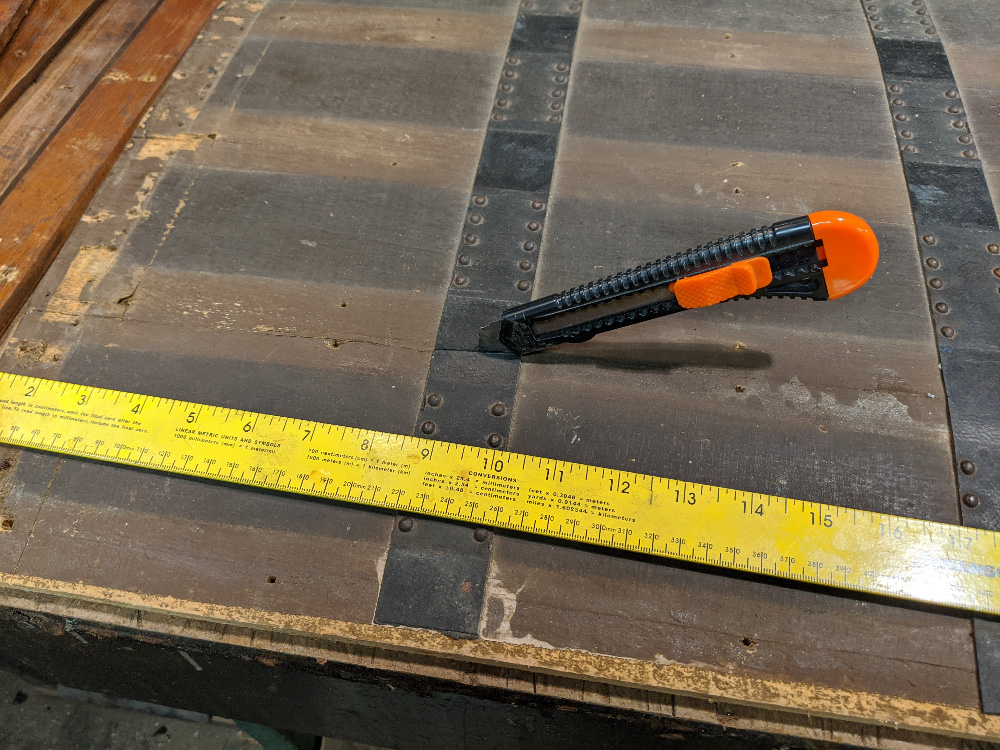
Turning my attention back to the panel I removed from the trunk lid, I use a razor knife to cut through the black rubber-like bands, to free up the individual boards. They may have originally been glued together, but they came apart fairly easily one I got that banding cut through. |
|
|
|
|
|
One board freed... |
|
|
|
|
|
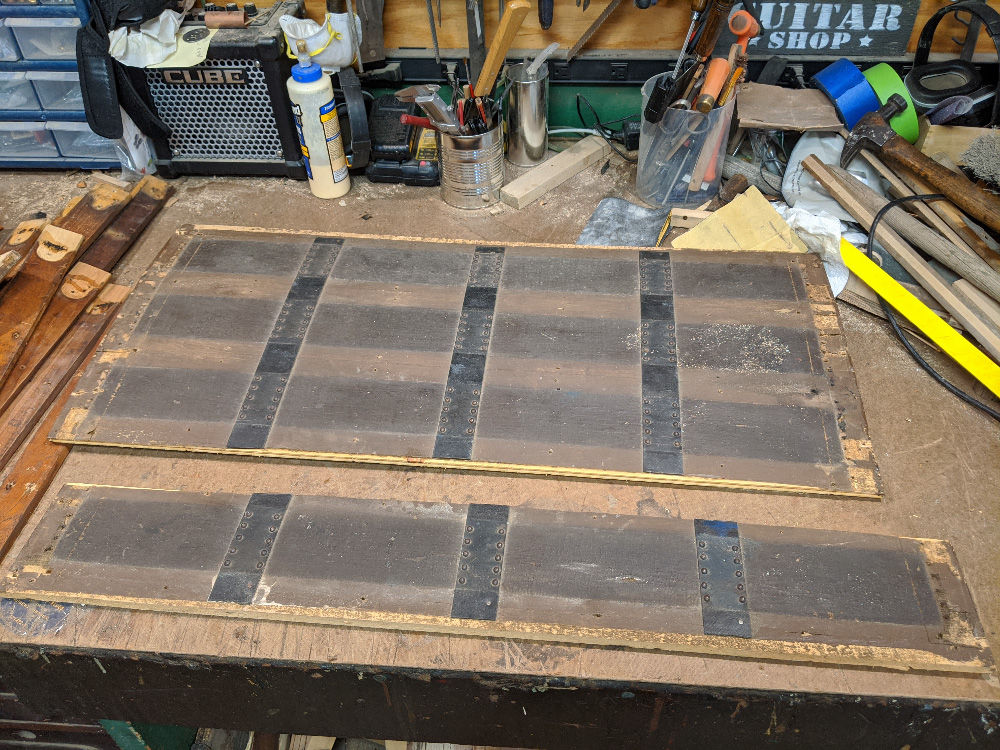
And the remainder soon follow. |
|
|
|
|
|
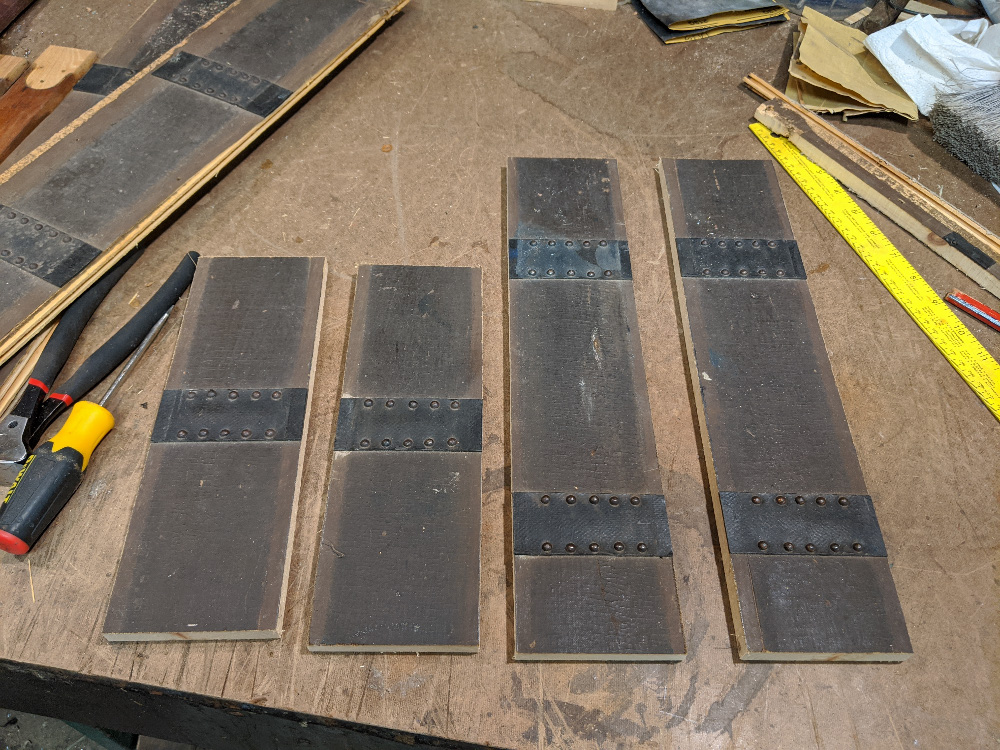
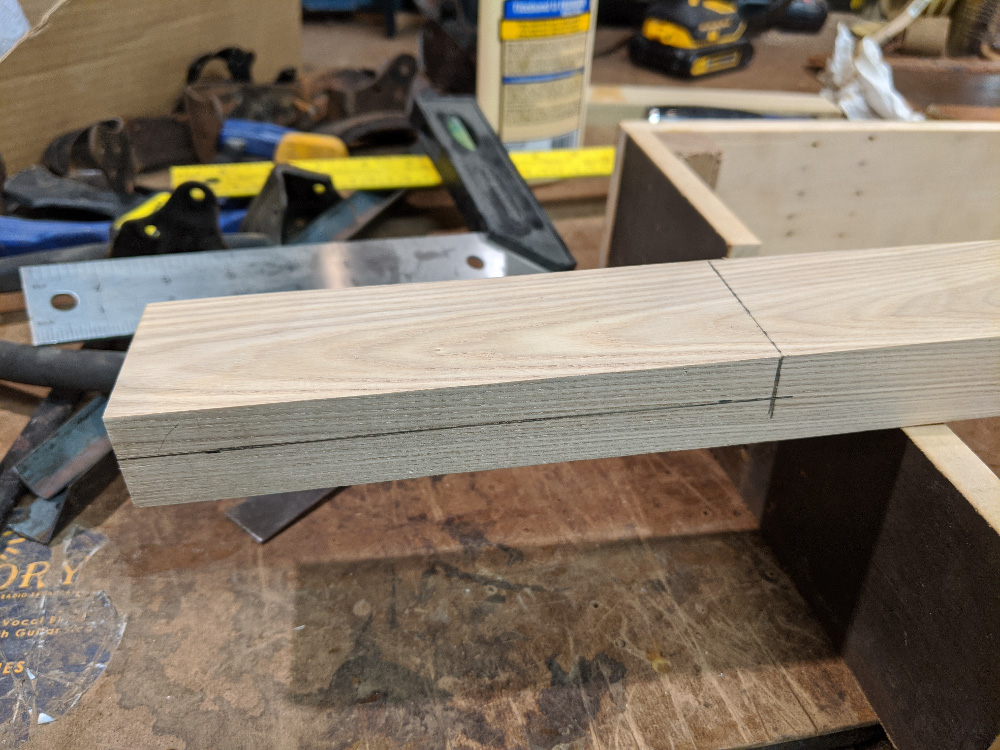
I knew these boards would form the side walls of my guitar body/box, and I didn't want to waste any. The boards were 30 inches long, but pretty banged up on the ends. I decided to make my guitar body 16 inches by 12 inches - which meant I could get one long and one short box side panel from each board, thereby using only two of them. The boards were too wide for a guitar body, so here I am measuring where I want to cut them down to... |
|
|
|
|
|
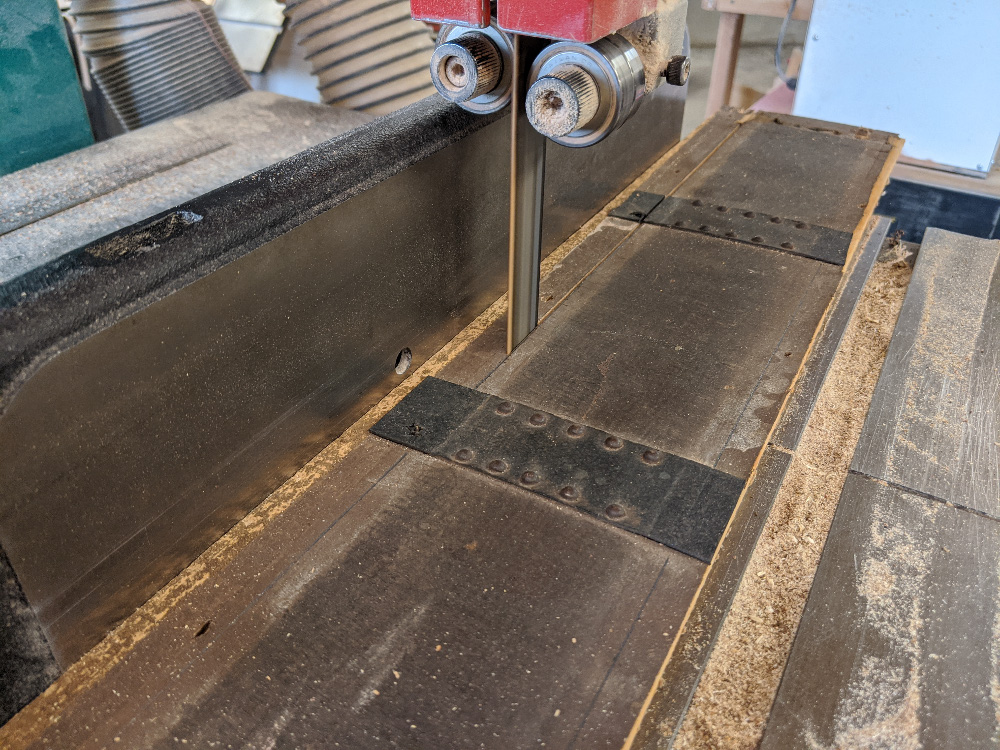
Then it's over to the bandsaw to make the cuts. I take roughly the same amount off of both sides, to remove the battered tongue-and-groove section where they had been originally joined together. |
|
|
|
|
|
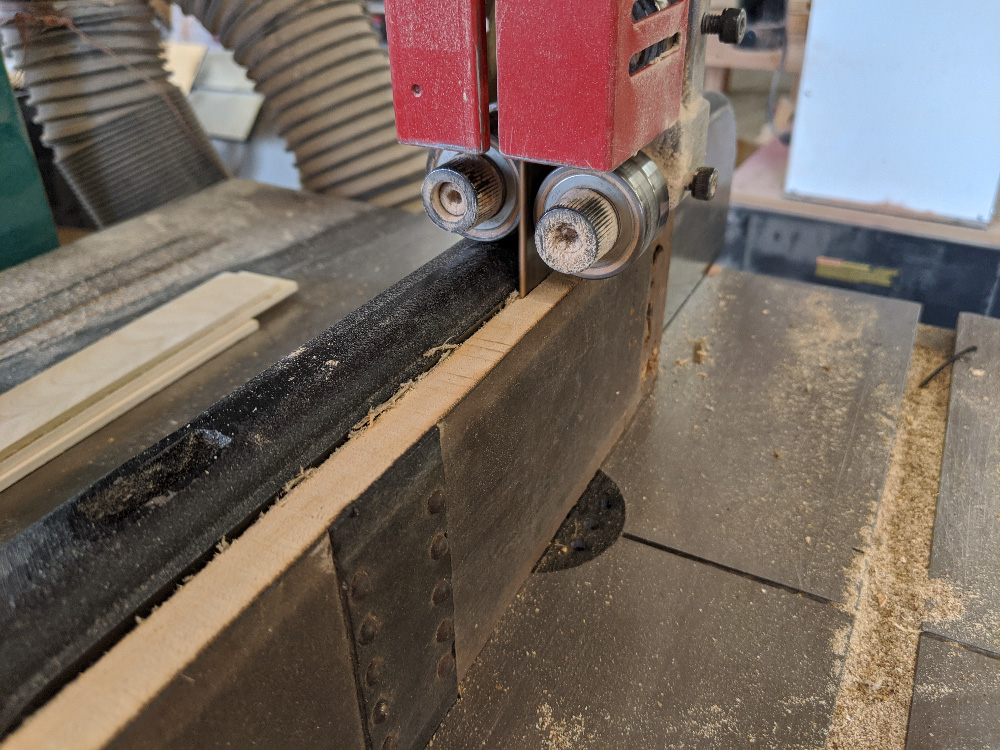
I also take this opportunity to cut a thin layer off the backs of the boards - the thin cardboard glued there was stuck on pretty good and I couldn't think of another good way to get it off. Of course, when my bandsaw blade hit those bent-over nails you can see in the black straps, it didn't like it very much. In hindsight, I probably could have just left the cardboard on, but it had that strong musty odor and I didn't want to build a stinky guitar. So, I made the cuts and the saw blade just had to suffer through. |
|
|
|
|
|
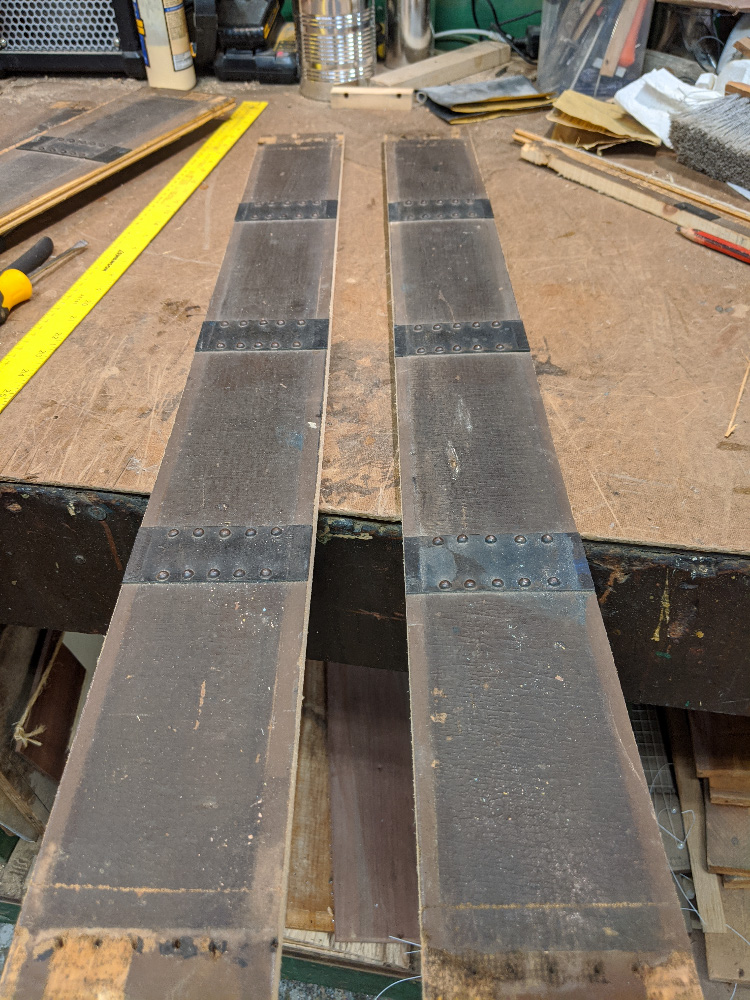
Finally, I have two cleaned-up boards ready for chopping down into my box sides. Note at this point how wide the boards are. I would later realize (after Shane Speal pointed it out to me) that this would make the box too wide for comfortable holding and playing once it was a guitar. As we'll see in a bit, the boards would end up thinner. |
|
|
|
|
|
But for now I proceed with cutting them to length on the chop saw - being careful to try to center the black bands, and of course avoid the nails. |
|
|
|
|
|
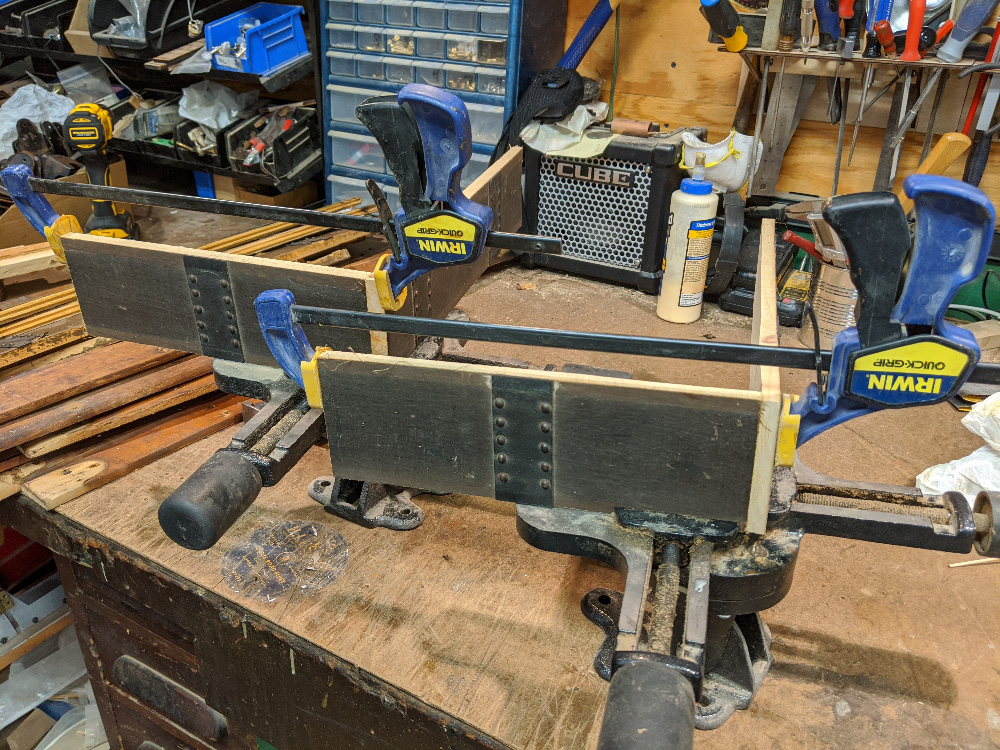
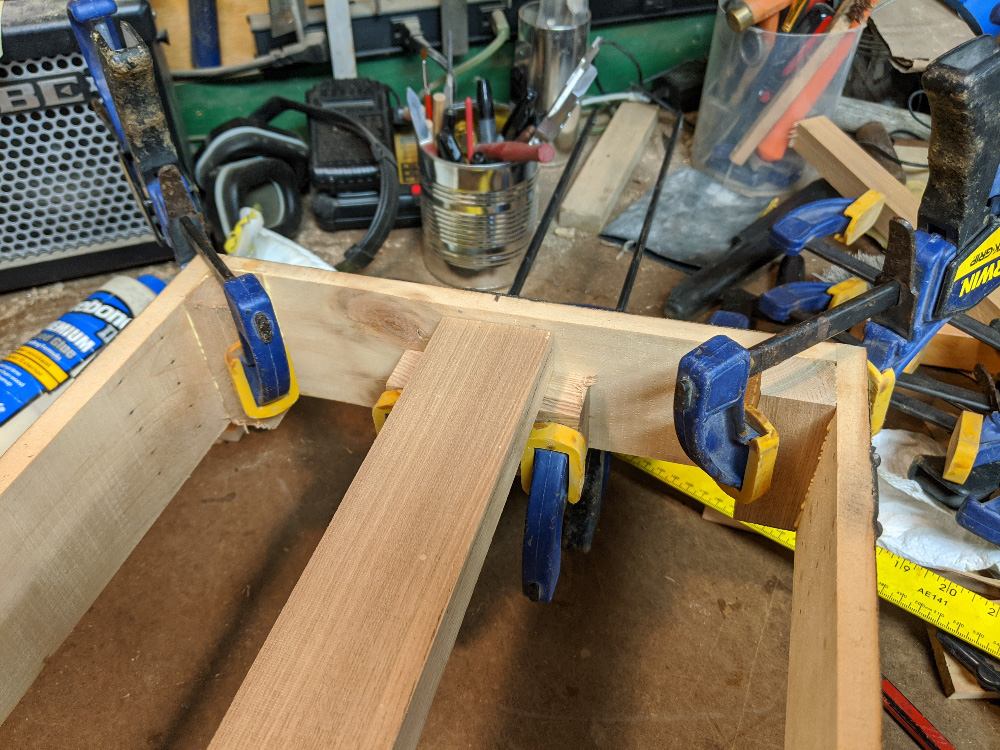
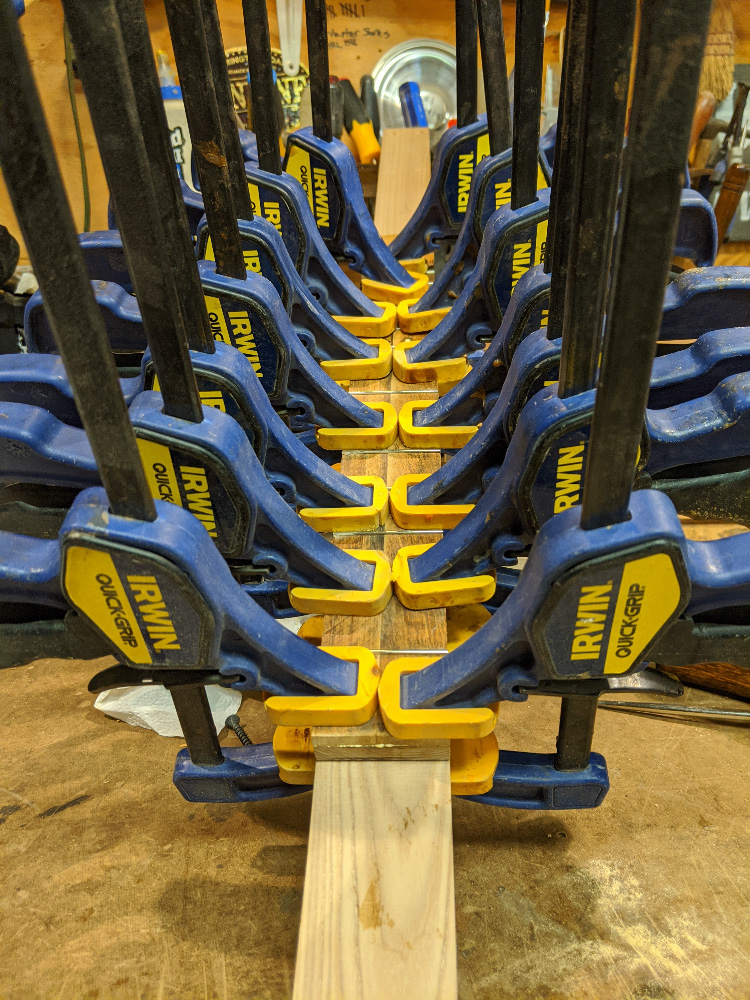
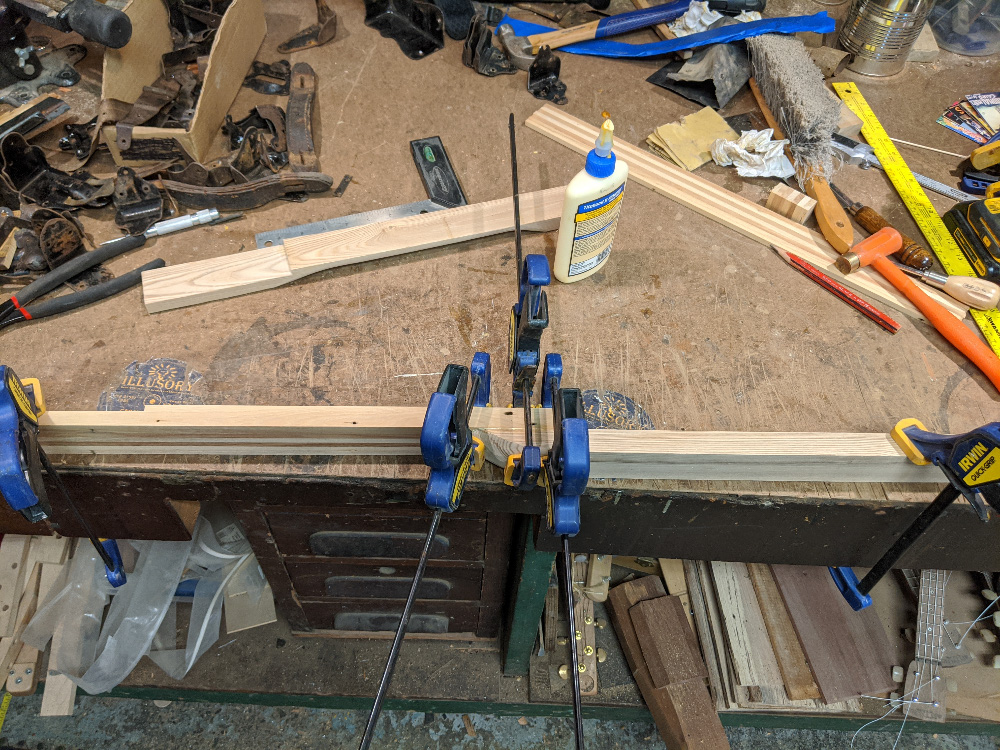
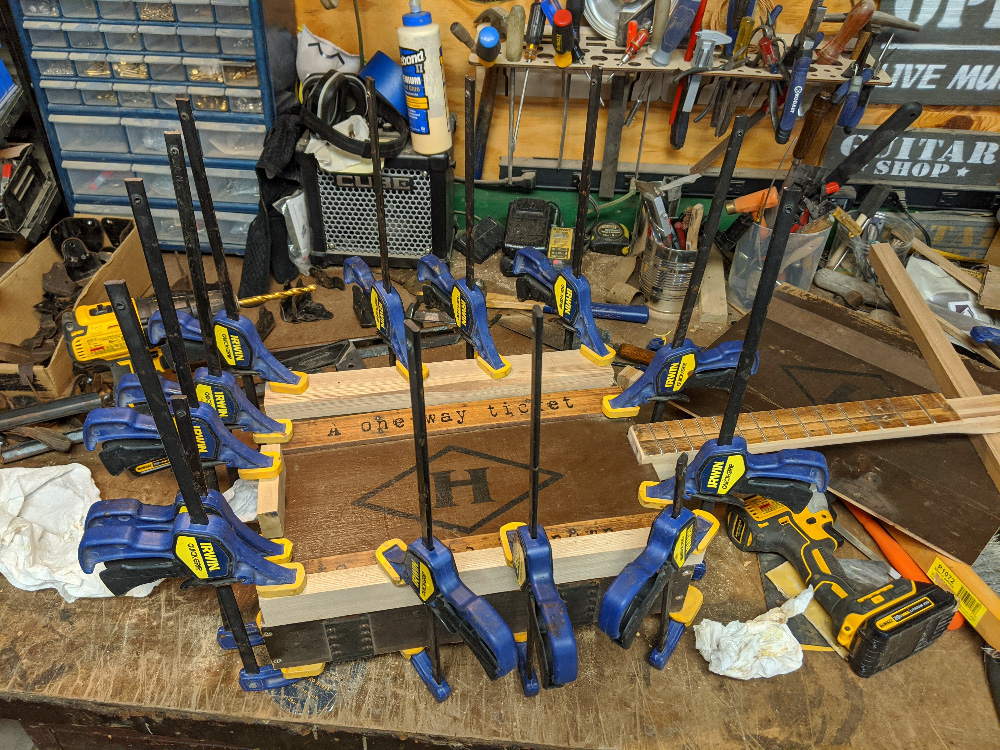
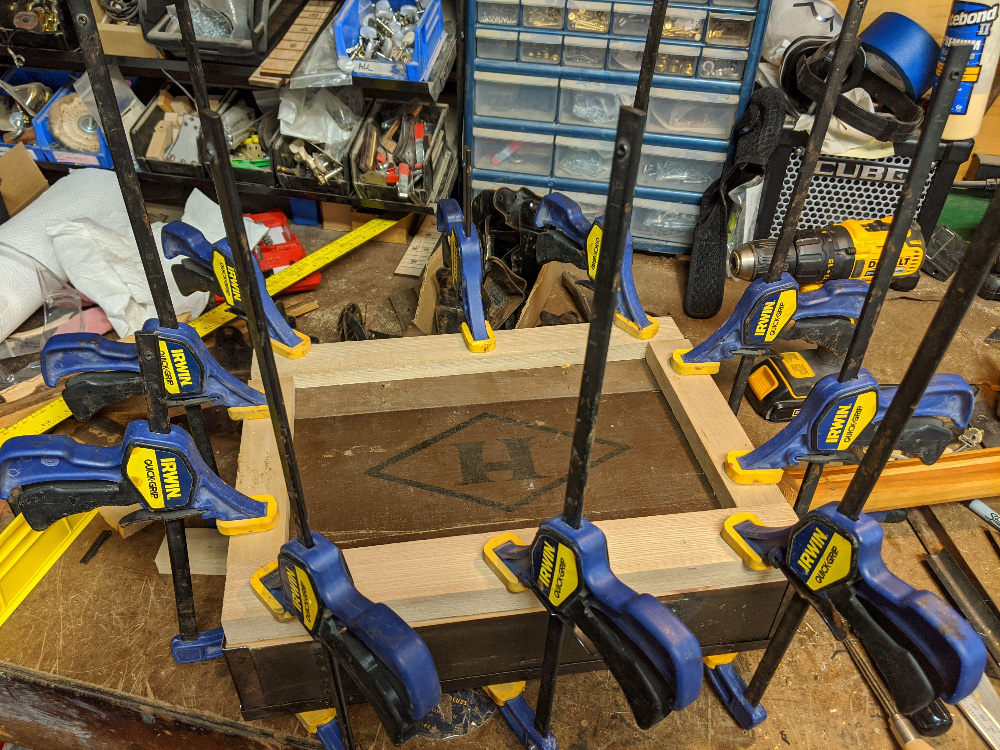
And then into the miter vises they go for gluing. Because of how tall they were, I used long squeeze clamps to pull the top of the joint in nice and snug. |
|
|
|
|
|
After the glue set, I had the frame of my box / guitar body. |
|
|
|
|
|
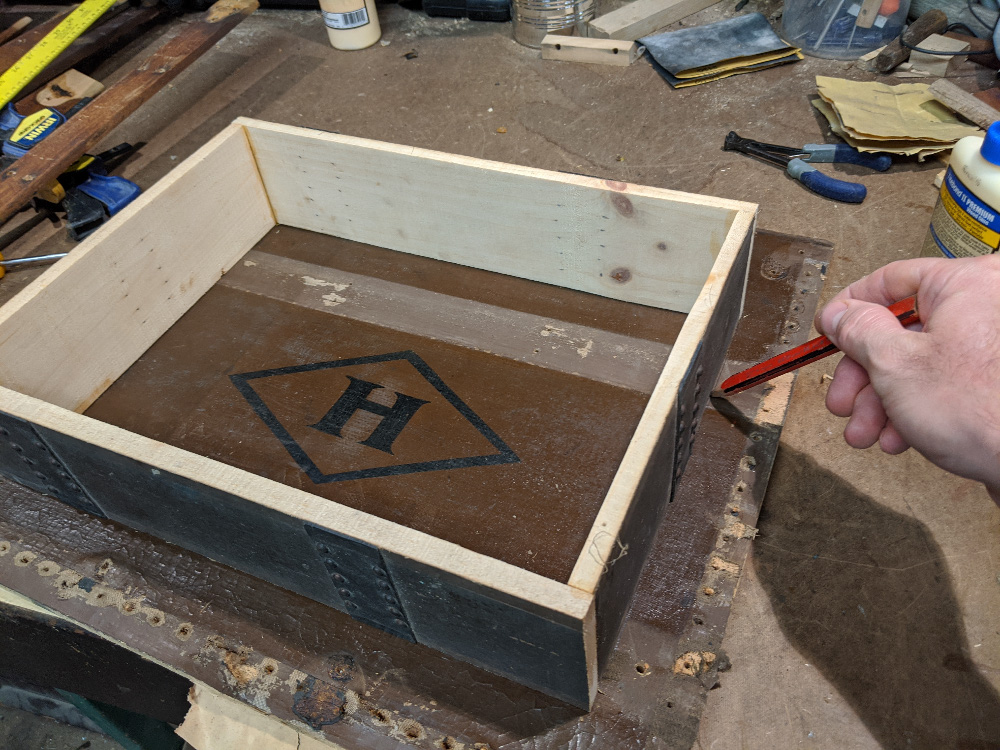
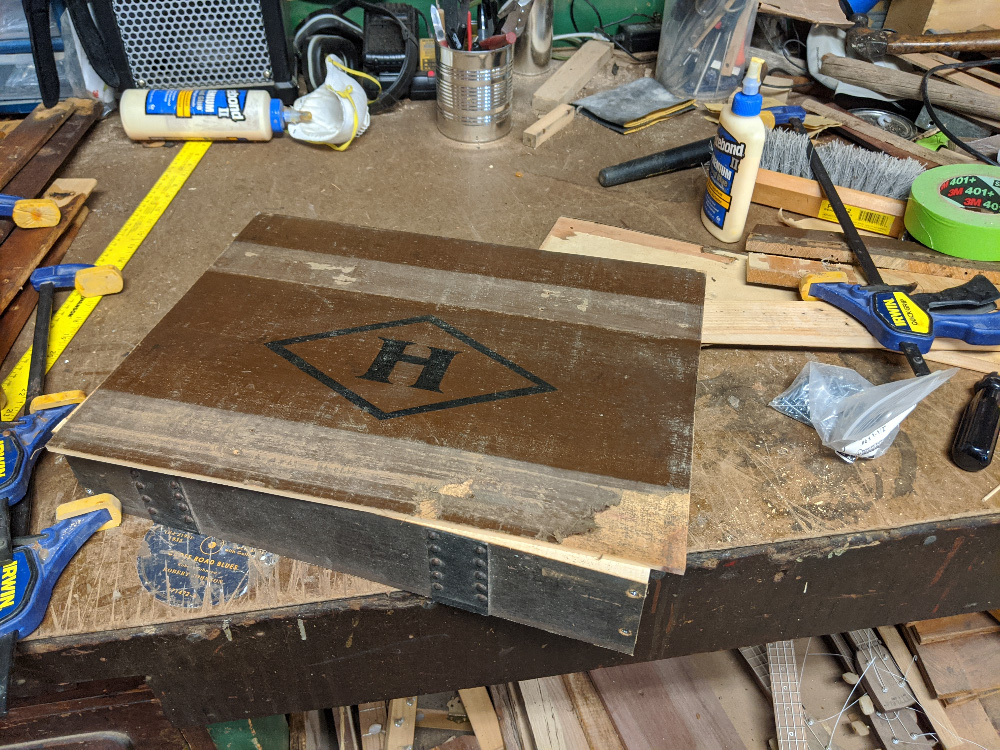
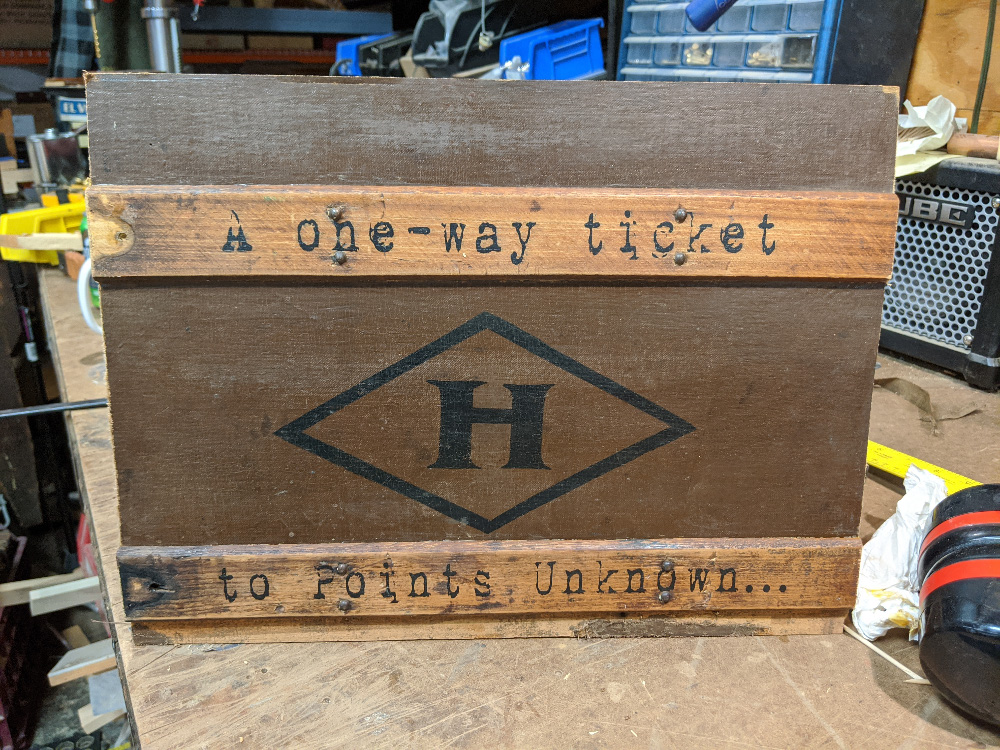
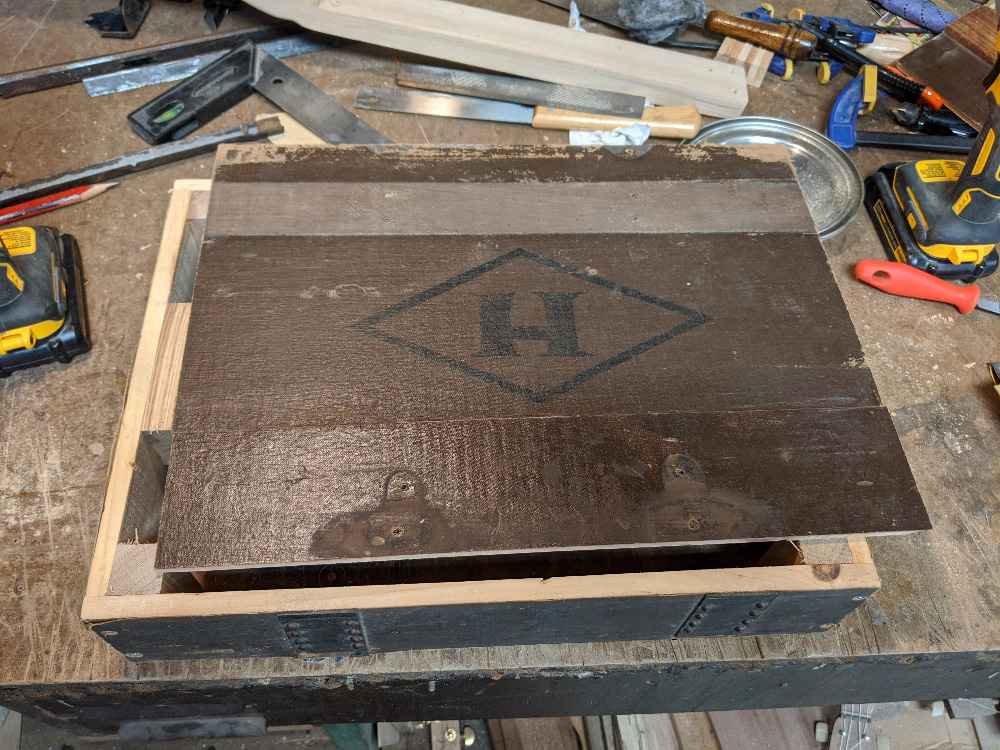
I had decided to use one of the trunk's end panels, with the distinctive "H" monogram, as the soundboard and back board of my guitar. Here, you can see I used the outer edge of the side frame to mark the cuts on the panels. I wanted the "H" monogram to be pretty much centered on the soundboard. |
|
|
|
|
|
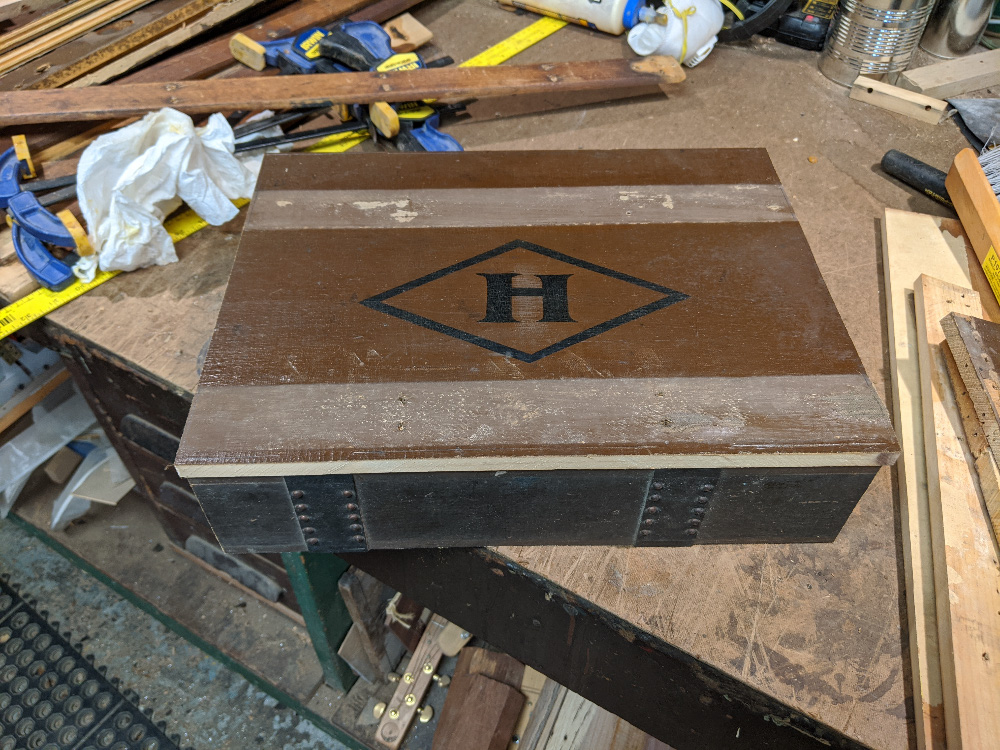
Once cut down, the soundboard-to-be looks pretty good sitting on the box. I don't glue it down yet because it is way too thick and needs a few trips through the planer. One interesting side-note here: I mentioned earlier that pulling out the little nails, with their bent-over ends, caused a good few of them to break off and leave metal embedded in the wood. I used a Garrett metal detecting wand (the same type that metal detecting enthusiasts use to locate their finds in the dirt) to find those nail ends in my trunk panels, so I could dig them out. A metal-detecting wand is a handy tool to have when using reclaimed wood, to keep from ruining blades! |
|
|
|
|
|
Ok, so a lot happened between the last picture and this one. I decided that my box was too thick, and wouldn't be comfortable to hold once built into a guitar. So, I had the idea of running the box through the big bandsaw to take a half-inch or so off. Unfortunately, the box was just a little too wide to fit through the 12" throat of the bandsaw - those little raised strap/nail areas were just enough to make it not go through. I didn't realize this until I had already started the cut and was about 4 inches in, though. So... now I had a box frame with a rough cut 4 inches into one side. What to do? I broke it back apart and cut down the sides to the new, thinner width, as shown in this photo. This was the first significant mistake I made while building this guitar, but there would be many more to come... |
|
|
|
|
|
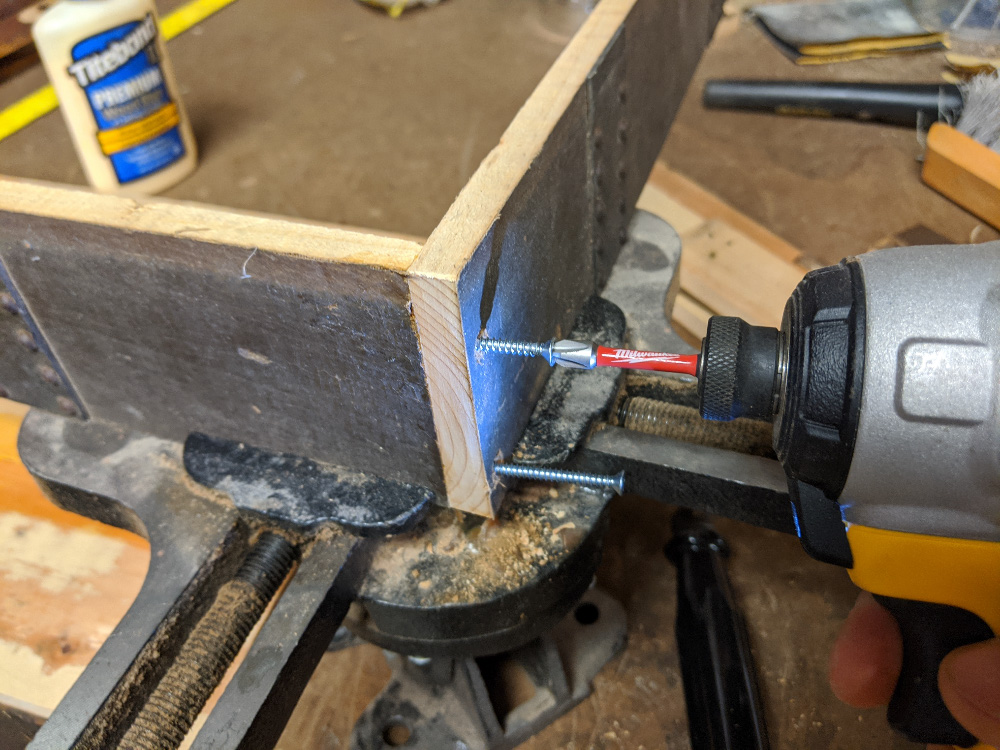
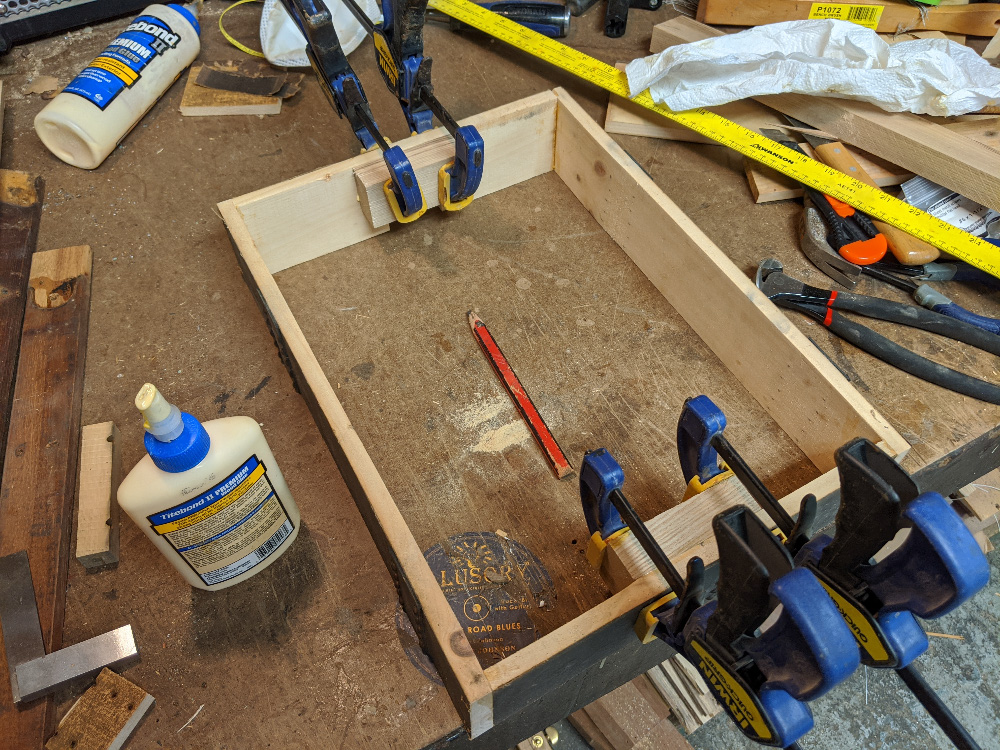
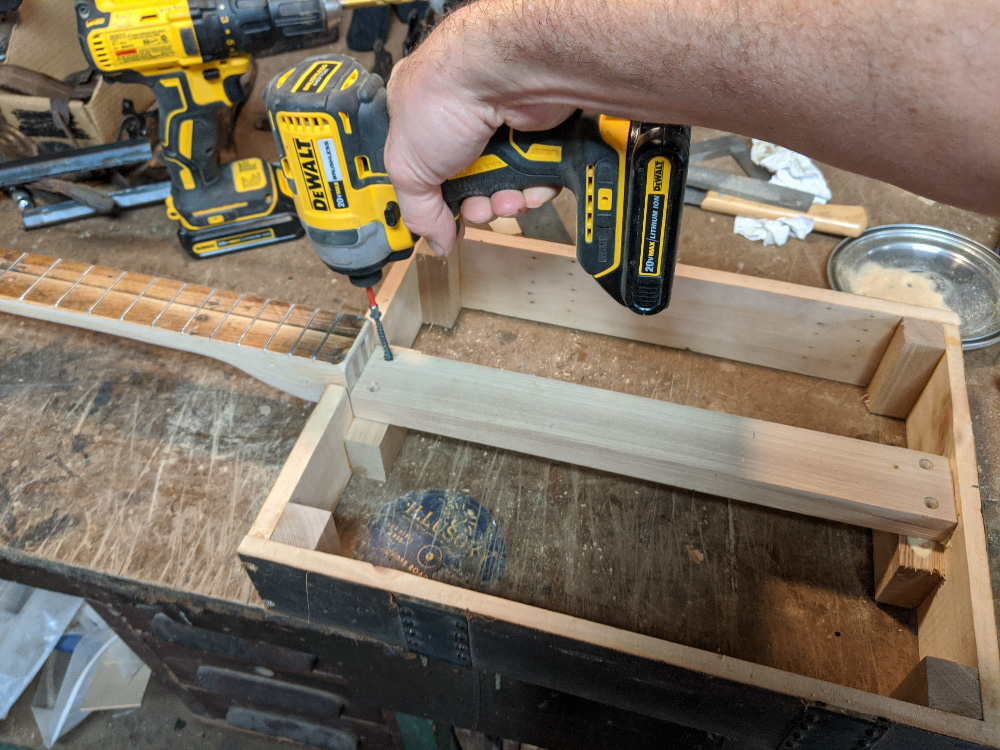
This time, when re-assembling the box, I put in some screws to strengthen those corners. I had been surprised by how easily they had snapped apart when I took the box apart for resawing. |
|
|
|
|
|
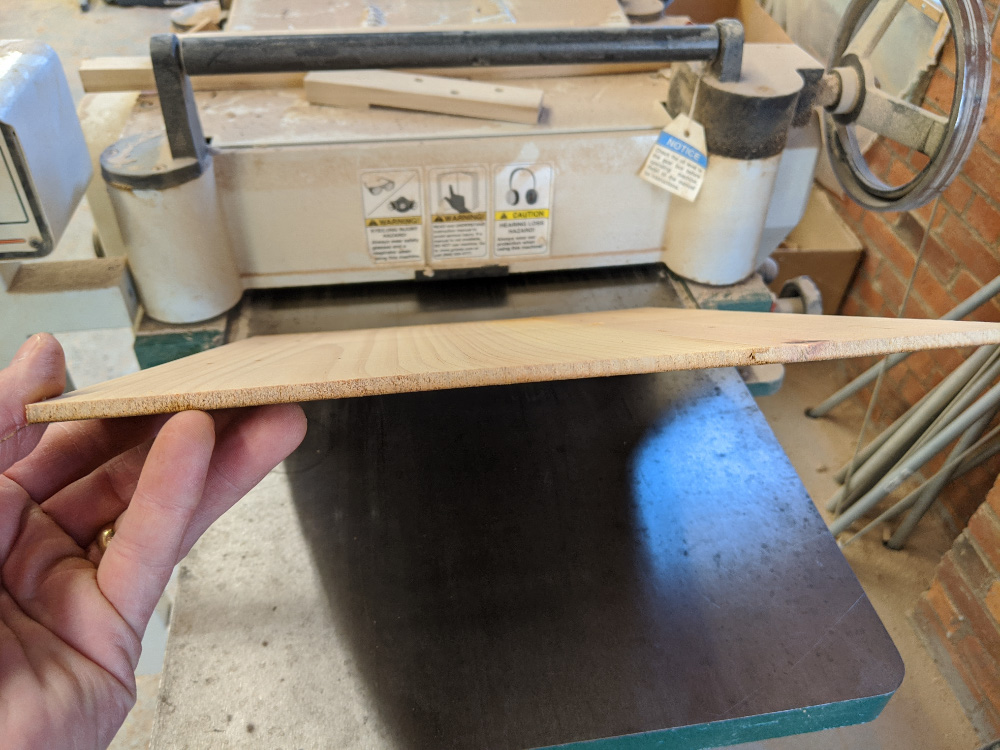
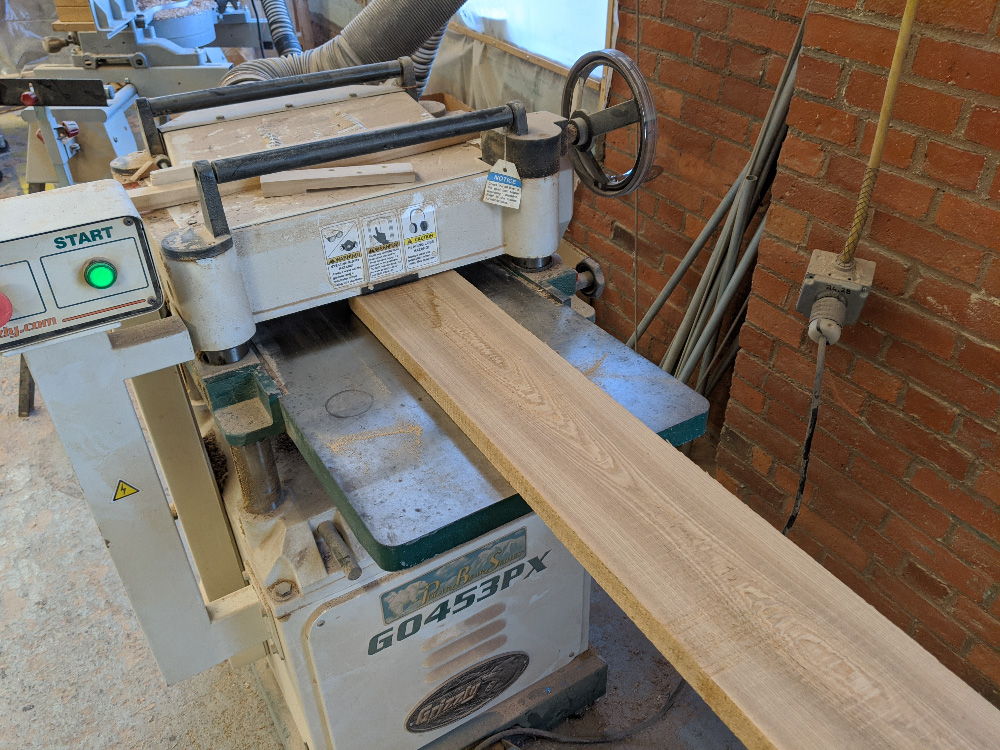
Now it was over to the planer to thin down my soundboard. A few passes through, taking about 3/32" each time, had her down to a nice 3/16" thickness. |
|
|
|
|
|
Here's my newly thinned-down soundboard sitting on the also thinned-down box frame. See that torn area in the lower right-hand corner? The trips through the planer were pretty rough on that painted canvas surface, and some tore off. When I repeated this procedure for the back panel, I used a protective plywood spacer so that the canvas didn't rub across anything, with much better results. |
|
|
|
|
|
While at the planer, I did some thicknessing of the plank of 200-year-old reclaimed American Chestnut that I intended to use for my internal brace and neck. Doesn't it look pretty? But the thing about old reclaimed wood, is that it can hide dark secrets... we'll see one such dark secret come to light in a little while. |
|
|
|
|
|
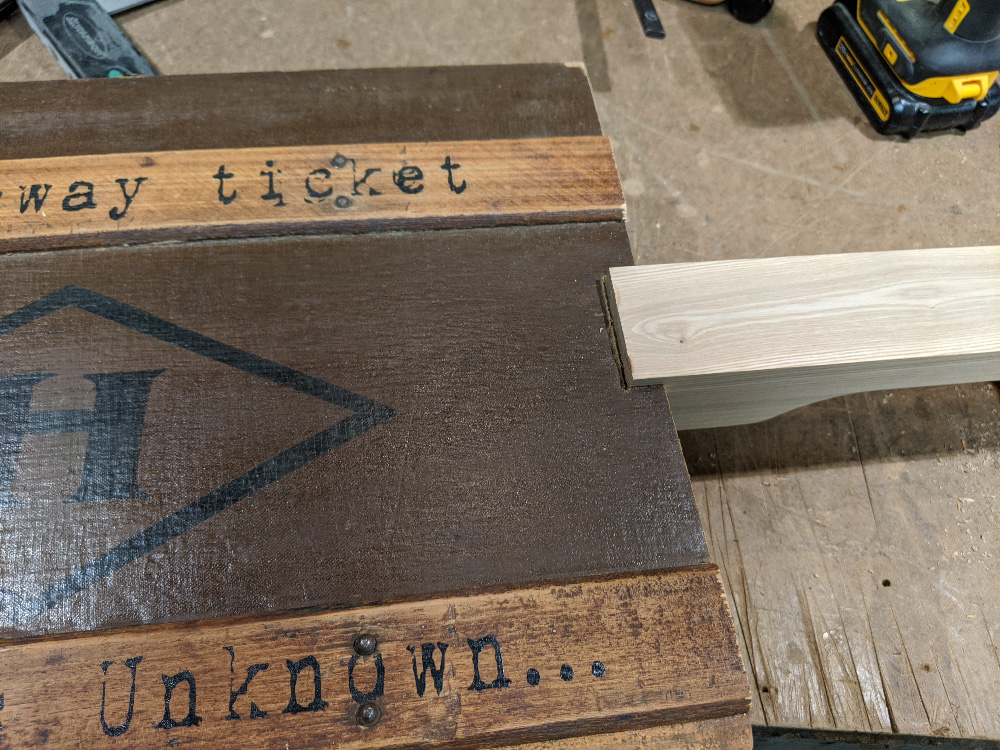
Using the butt end of my neck blank, I begin preparing to notch down into my box frame. I was careful to pre-cut the canvas covering the wood before using a saw, to keep from tearing it. |
|
|
|
|
|
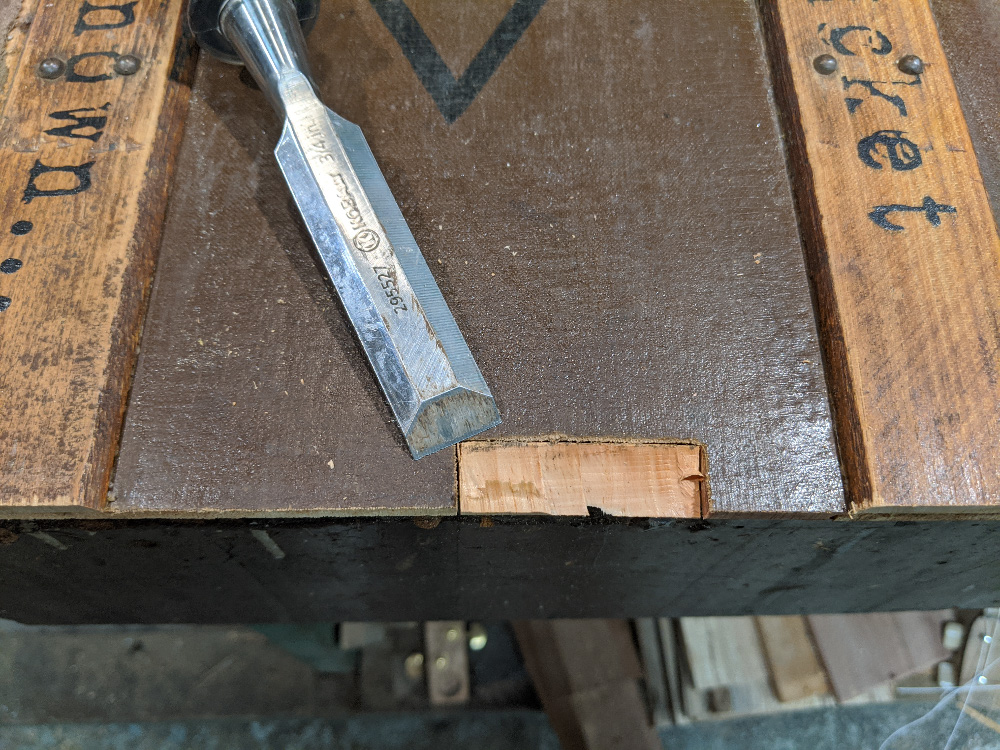
The pine of the box panels was soft enough that I was able to use a razor knife for making the horizontal cut for the bottom of my neck notch. The vertical side cuts were made with a fine-kerf pull saw. |
|
|
|
|
|
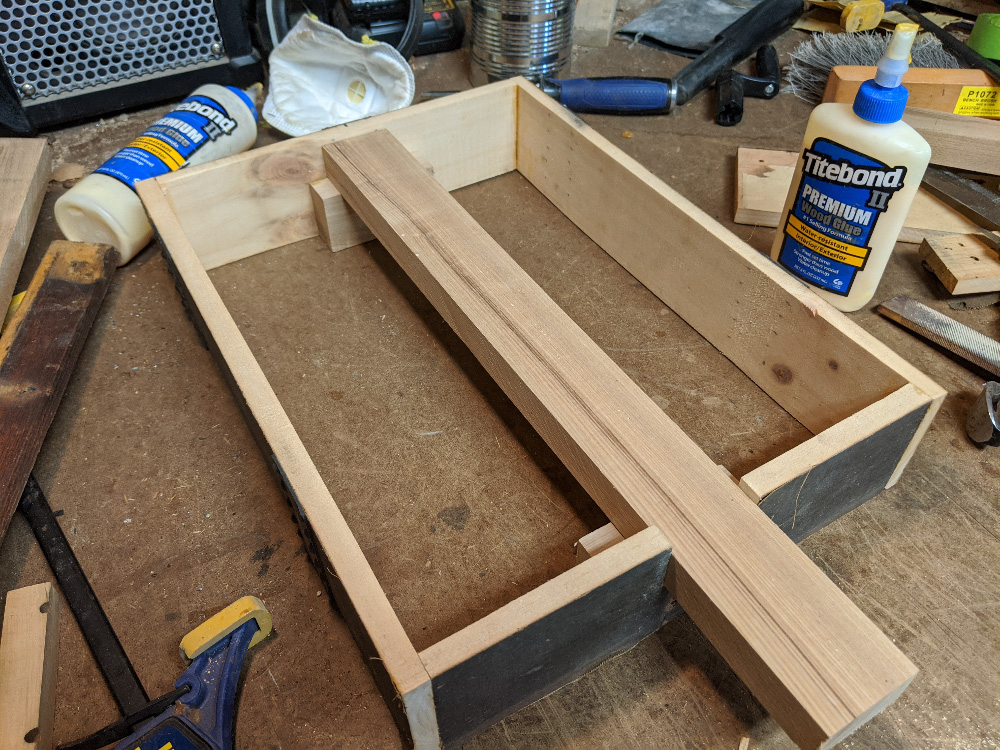
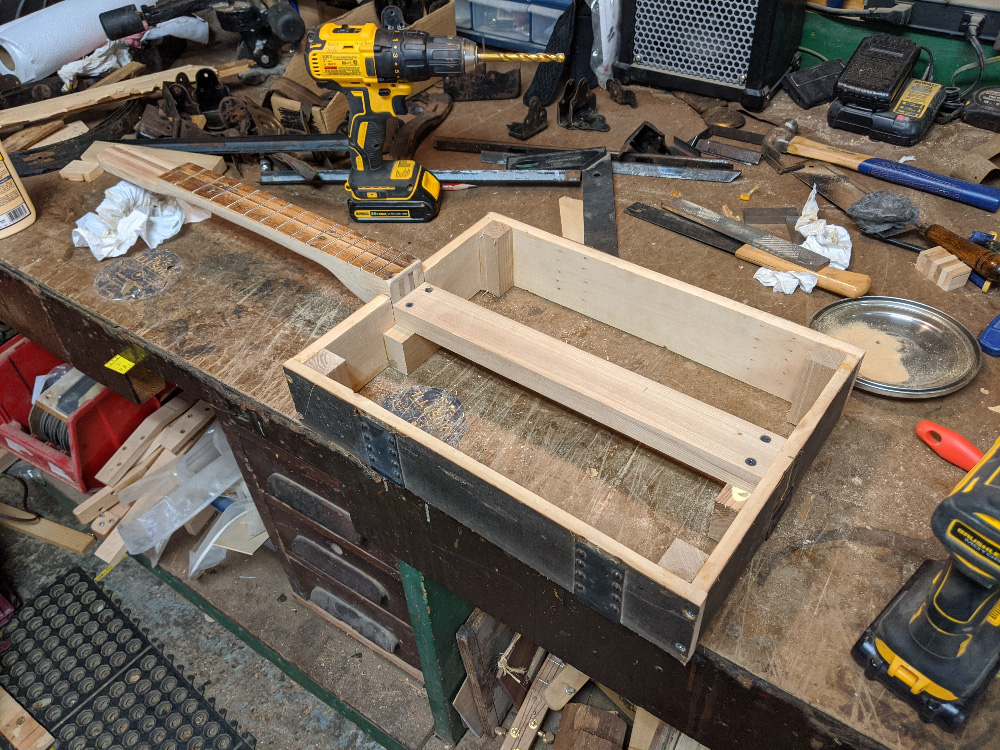
Here the chestnut neck brace is nestled into its notch, and I have also cut brace pieces for it to rest on, for additional stability. Nothing is yet glued in, this is just a dry fit. |
|
|
|
|
|
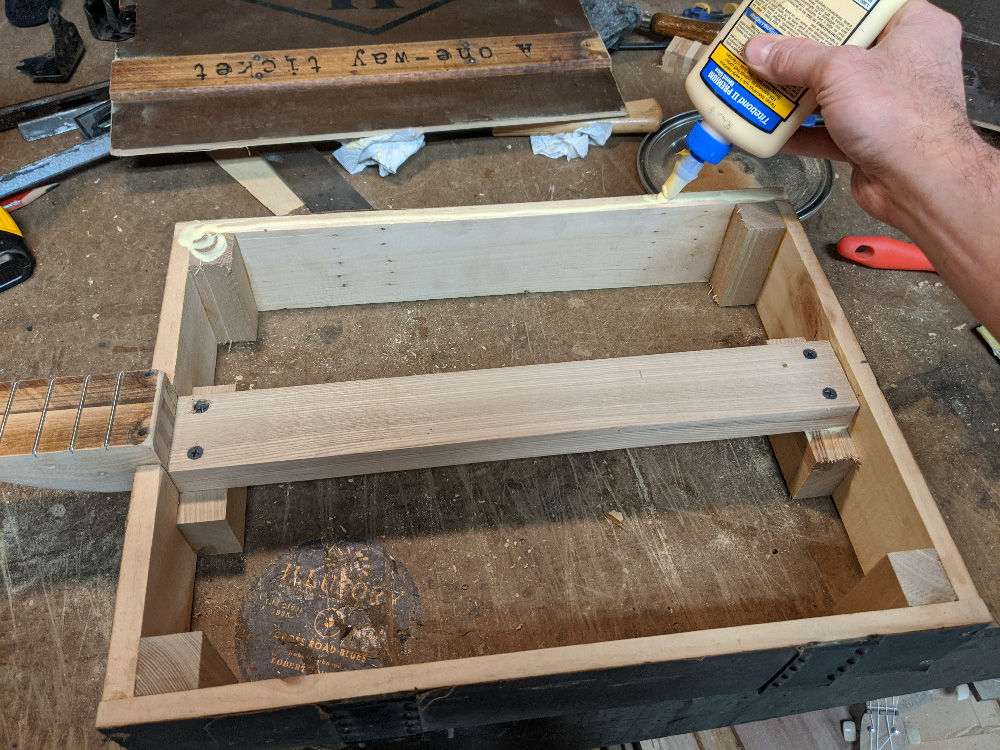
Gluing in my brace pieces... |
|
|
|
|
|
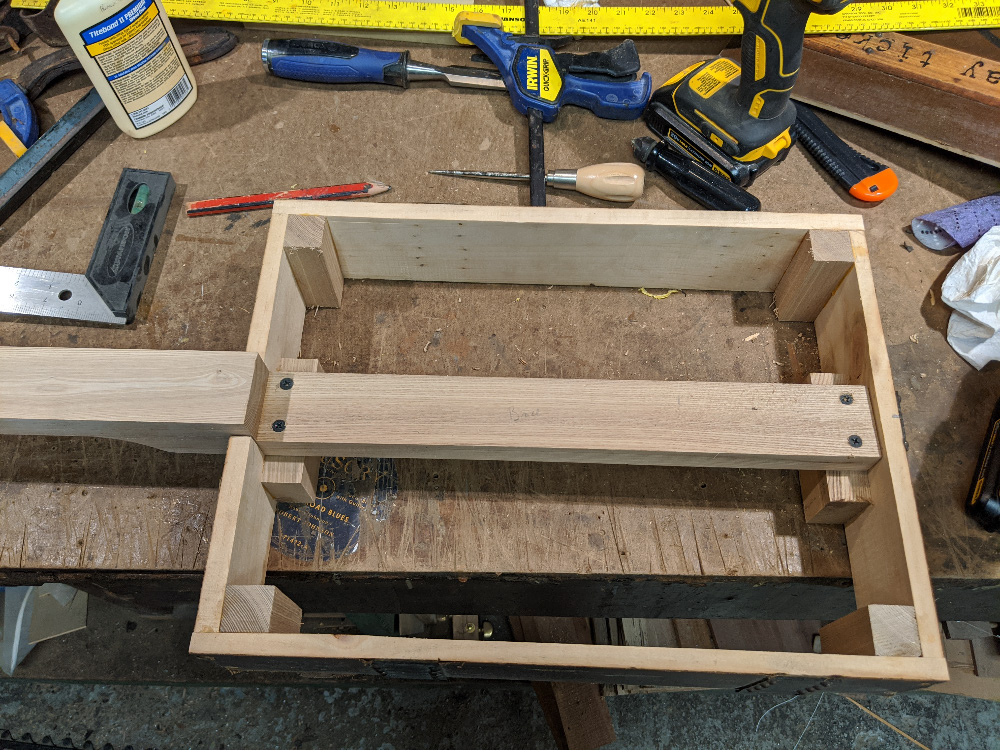
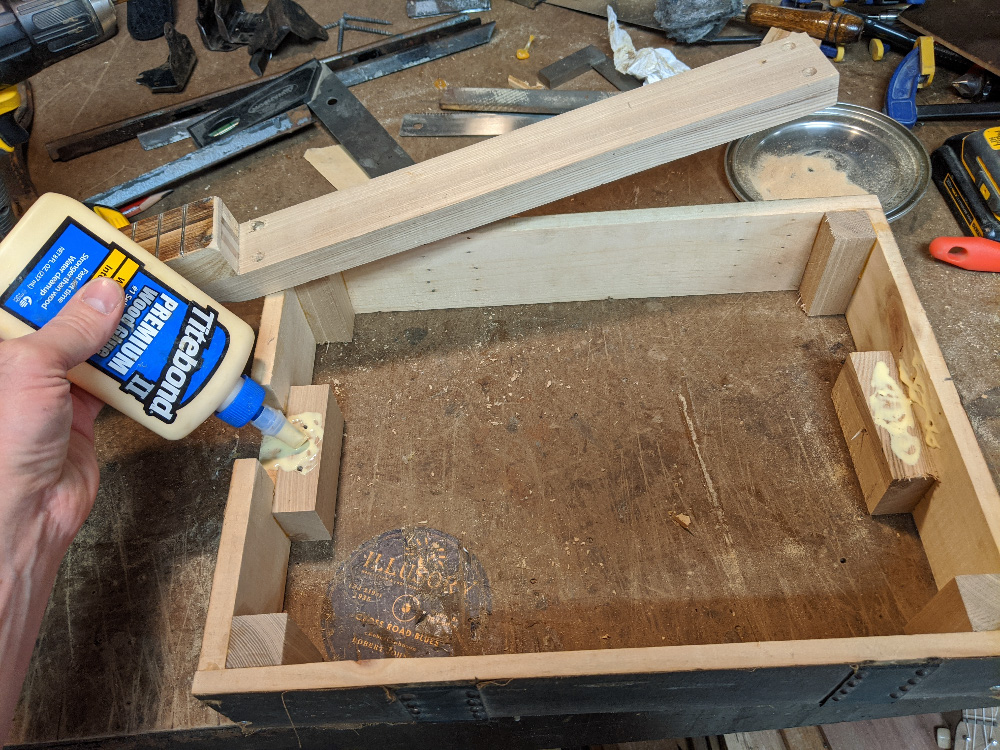
And then some corner braces into the inside corners of my box frame. These were also cut from the reclaimed American Chestnut. |
|
|
|
|
|
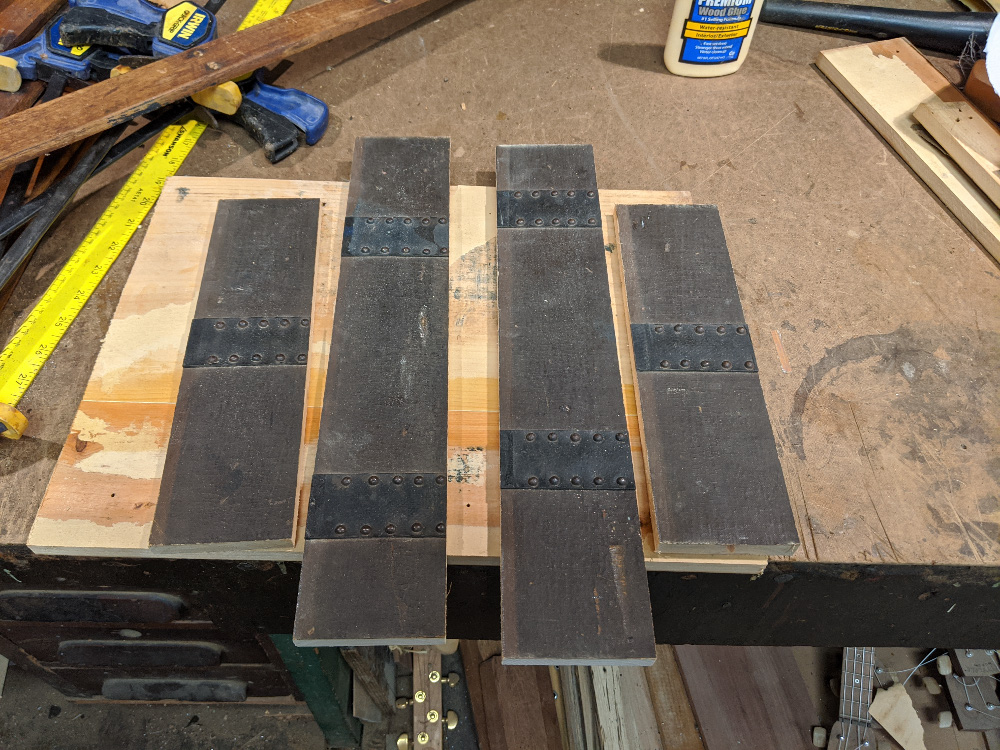
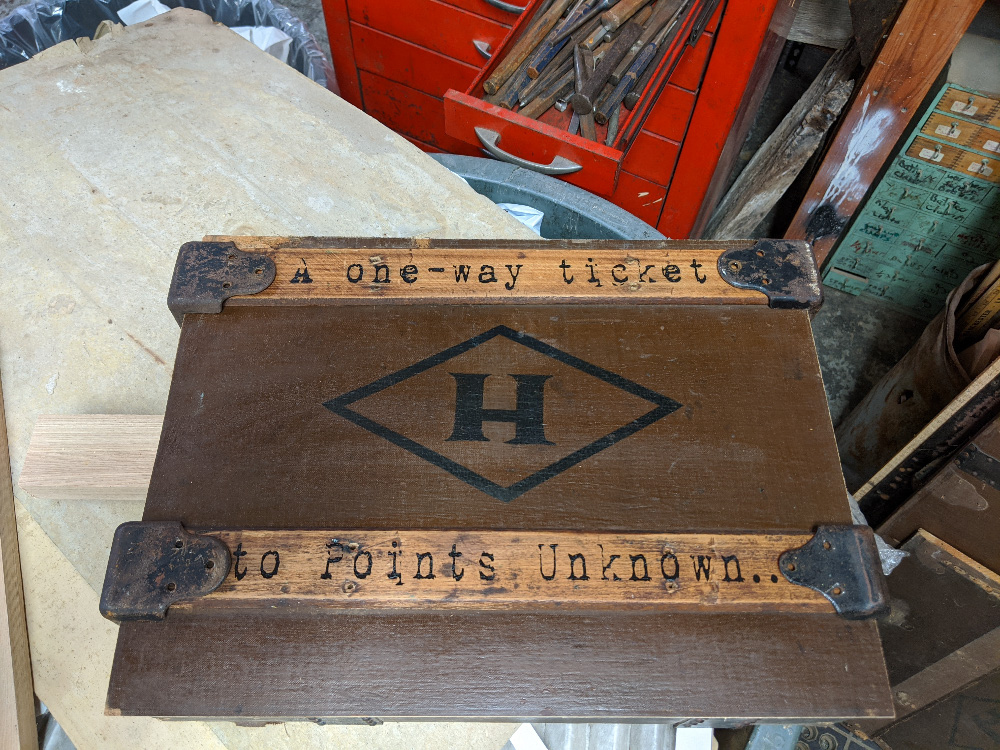
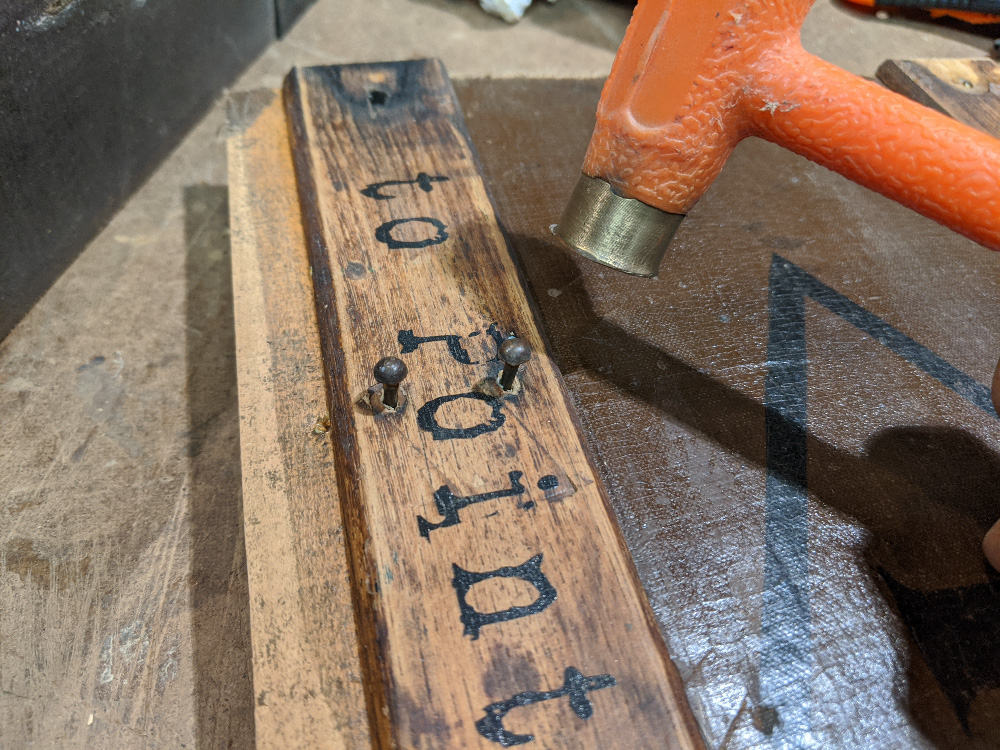
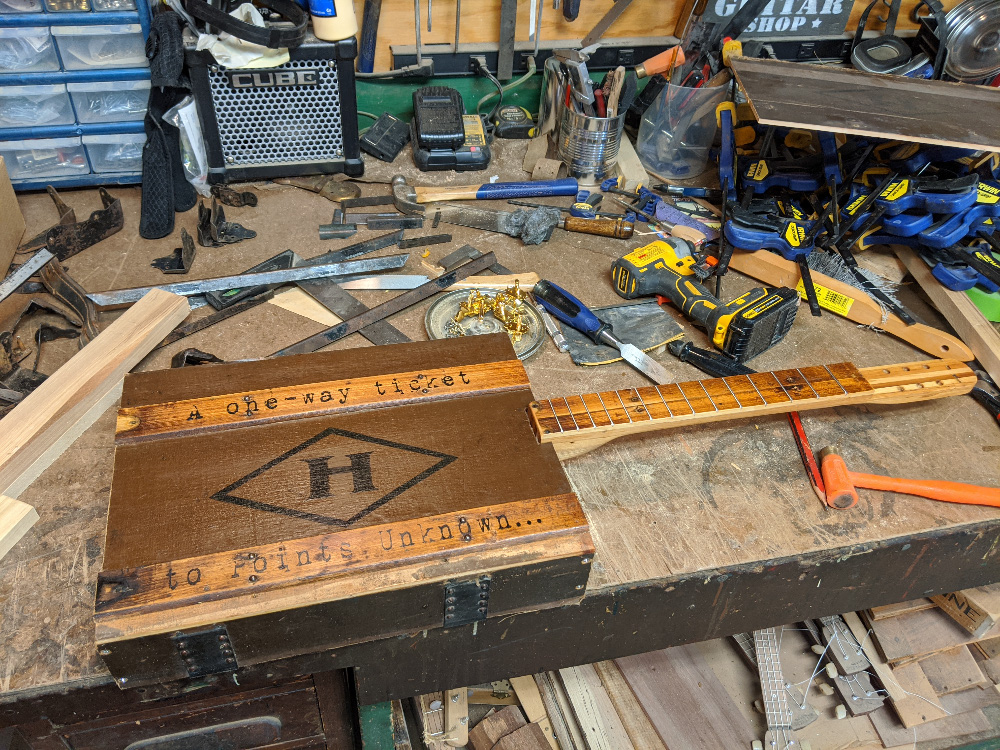
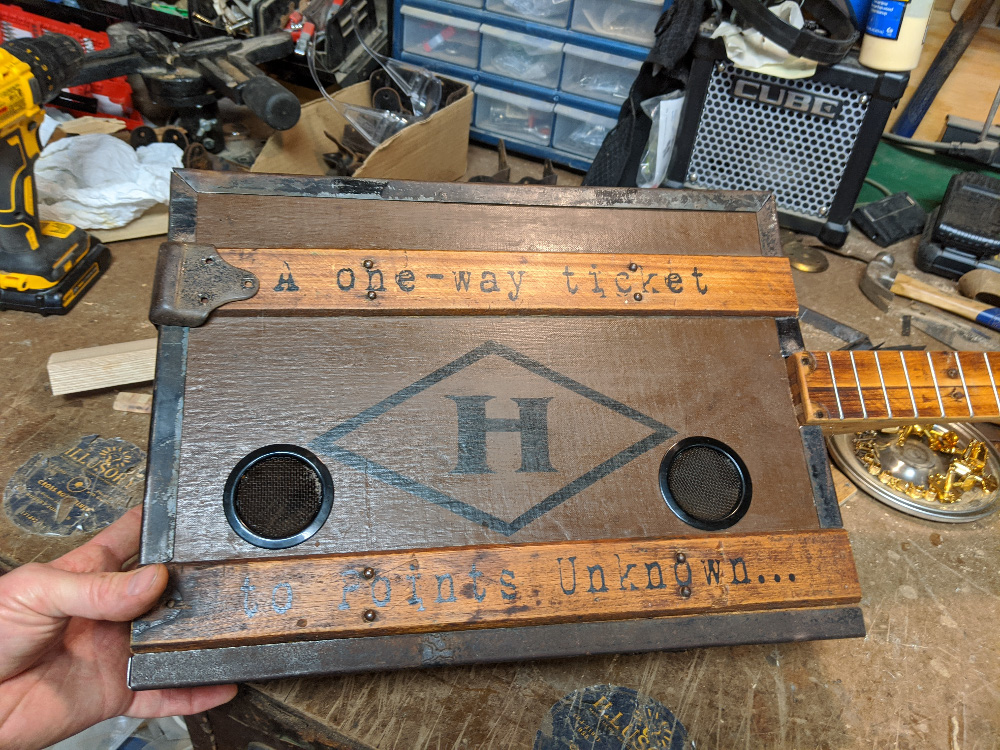
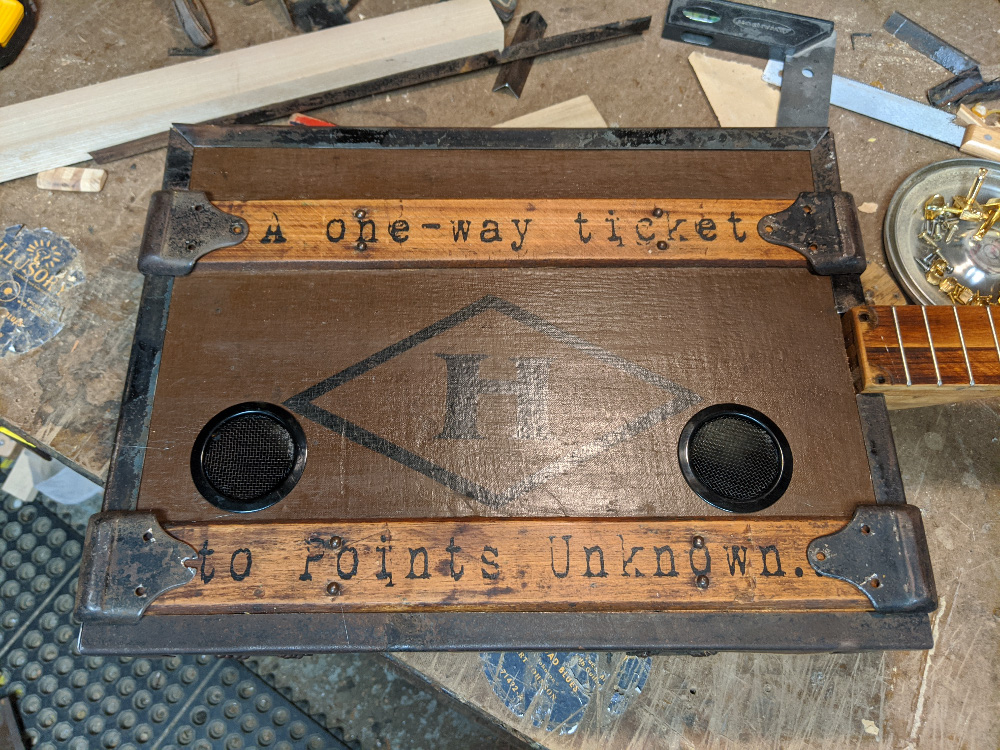
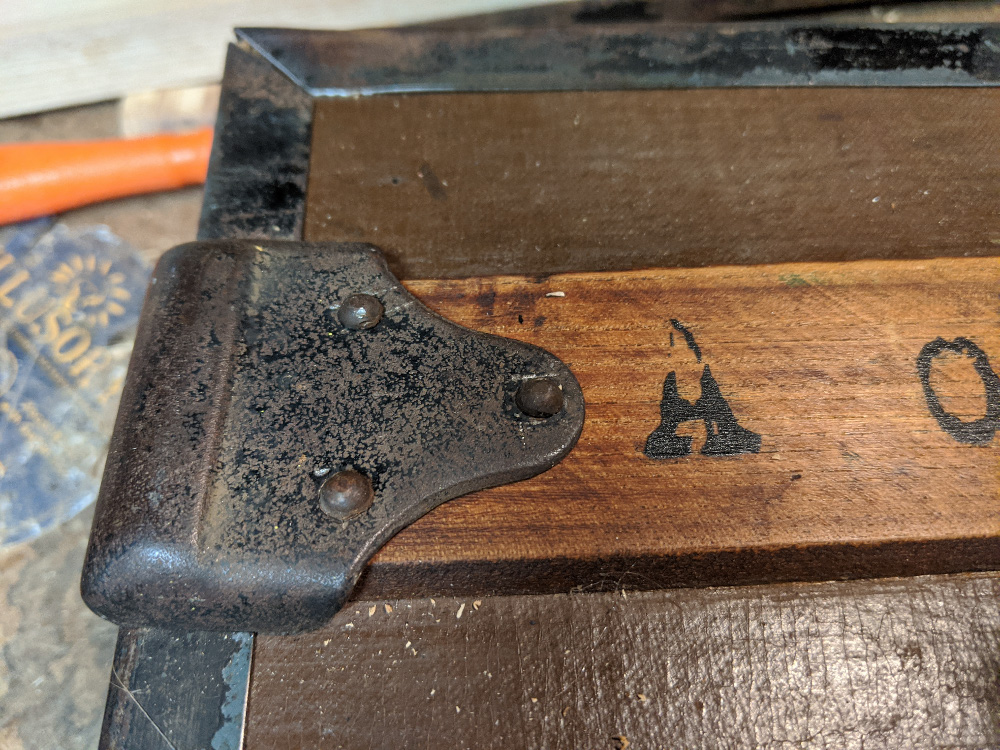
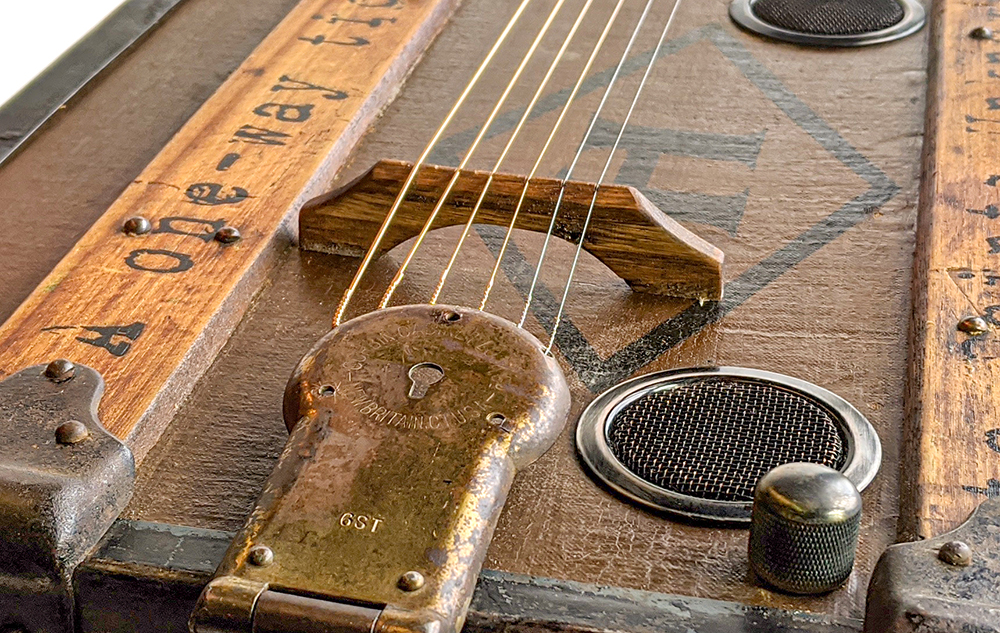
I decided that I wanted some of the hardwood slats on the front of my guitar, as well as some of the steel corner braces, to help keep the look and feel of the original trunk. This photo shows a dry fit of the pieces. I knew that doing this might dampen some of the guitar's acoustic sound... but I figured that instead of adding bracing on the underside of the soundboard, this would effectively be adding it on the top. I used our flat panel UV printer to add some text to the slats, a little phrase I came up with to allude to the wanderlust felt by many travelers. They might not know where they're going, but they have a heck of a time getting there... |
|
|
|
|
|
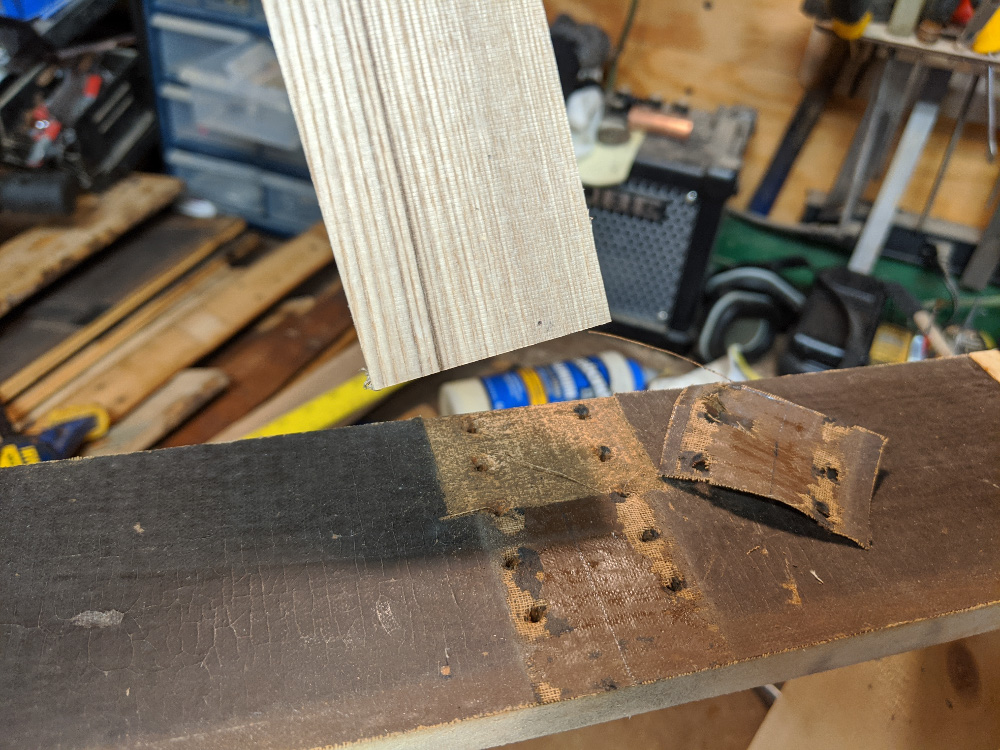
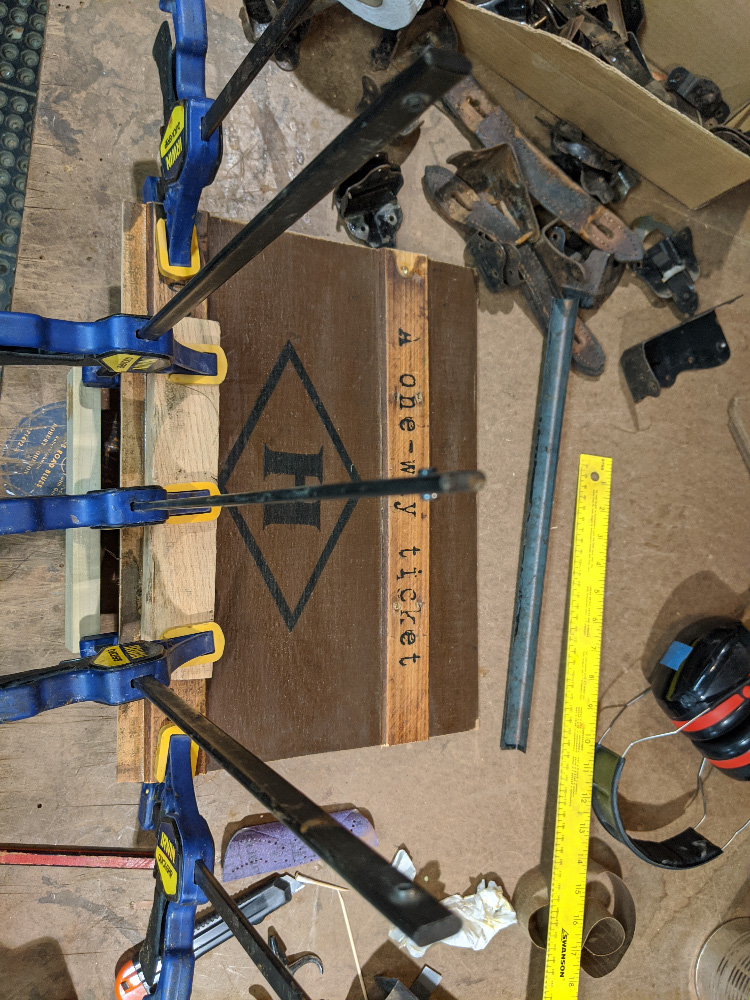
Here I'm gluing the printed slats onto the soundboard. I carefully cut away most of the canvas first, and sanded the wood underneath, to get a better glue bond. I left a little excess canvas extending under the slats so the edges wouldn't fray and lift up over time. My bench vise helps with the clamping. |
|
|
|
|
|
While the soundboard glue dries, I glue my neck and brace together, with enough overlap to provide good strength and allow for a nice rounded heel. |
|
|
|
|
|
Then the second slat gets glued on... taking care to make sure they would be aligned correctly when the guitar is held in playing position. After the upside-down-soundboard experience on the Toolshed Guitar, I learned to pay very close attention to this step. |
|
|
|
|
|
I used some of the rounded-head nails/tacks that I had previously pulled out when disassembling the trunk to re-fill their original holes in the hardwood slats that now were part of my soundboard. |
|
|
|
|
|
And in keeping with the original design, I bent them right over on the back side! |
|
|
|
|
|
Here's my finished soundboard, with slats applied and decorative nails in place. I'm pretty happy with it at this point! |
|
|
|
|
|
In this photo you can see I've done some initial shaping of the neck brace heel. I'm drilling pilot holes for the screws that will help mount the neck brace to the inner braces. |
|
|
|
|
|
A close-up shot of the neck brace and heel fitting into the notch. |
|
|
|
|
|
Getting ready to cut the recess for my headstock. The savvy woodworkers out there might have already noticed the grain on my chosen neck stock... I didn't pay close attention, when choosing it, just how flat the grain was, a non-ideal situation for a guitar neck. But hey, what could go wrong? |
|
|
|
|
|
Here I've temporarily mounted my neck/brace assembly into the box frame to check the fit - no glue has been applied yet. |
|
|
|
|
|
Because of how I chose to have the neck extend into the inner edge of the box wall, I have to make a little notch for the soundboard to fit around it. |
|
|
|
|
|
Once cut, the notch fits nicely around the neck. One reason for leaving this little bit of extra neck, instead of cutting it to the outside edge of the box, is to give that area just a little more strength to stand up to the string tension. Probably not necessary, but it didn't hurt. |
|
|
|
|
|
Here I've made my headstock notch cut, and done some sanding. You can also see I've rounded over the edges on the back of the neck for more comfortable playing. Looking great, right? What could go wrong... right? |
|
|
|
|
|
Now I turned my attention to the fretboard. I chose two more pieces of the trunk's outer hardwood slats for use. I knew I'd have to glue them together to get a wide enough fretboard for my neck (they were only about 1.5 inches wide once the rounded edges were removed, and my neck was about 1 7/8 inches wide). |
|
|
|
|
|
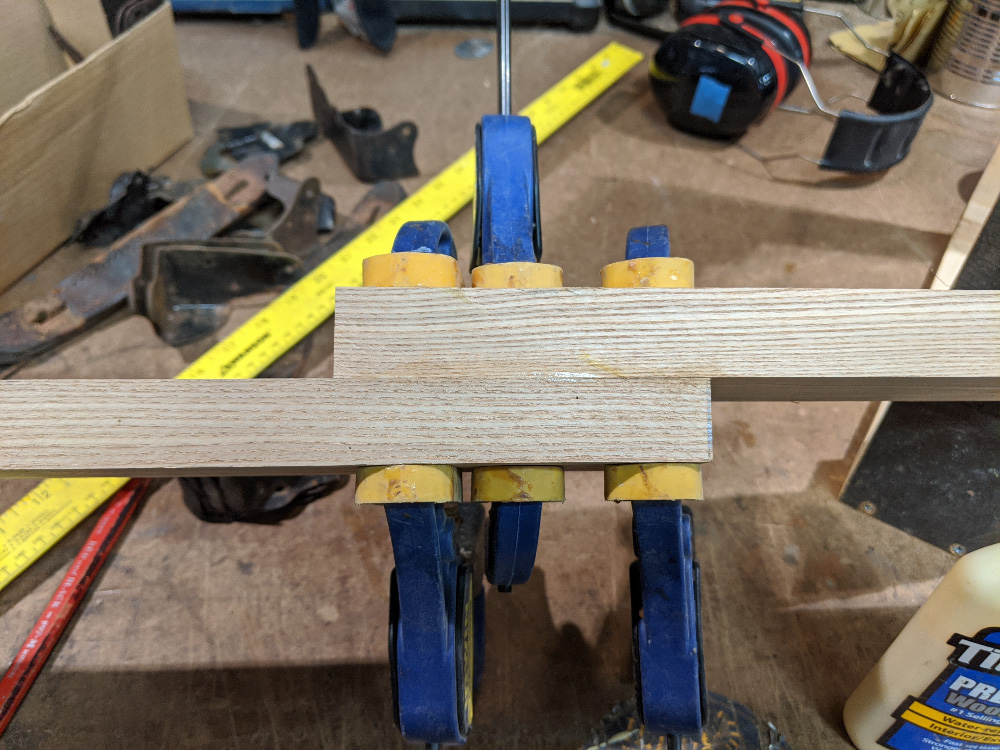
Here I'm using my painter's-tape-protected gluing rails to get my fretboard pieces glued together. |
|
|
|
|
|
While the fretboard glue set, I began work on the tailpiece for the guitar. I couldn't think of a better thing to use than the old locking clasp mechanism from the trunk. It was a perfect fit. |
|
|
|
|
|
I cut away some of the black leather strapping in a rounded shape so that the back end of the tailpiece would nestle nicely into place, and then pre-drilled the mounting screw holes. |
|
|
|
|
|
I chose to use antique brass finish square-drive washer-head screws to mount the tailpiece. |
|
|
|
|
|
Then it was time to drill the string holes in the front edge of the tailpiece. I measured carefully to get them spaced evenly, and used a machinist's spring-loaded divot punch to help start the holes. |
|
|
|
|
|
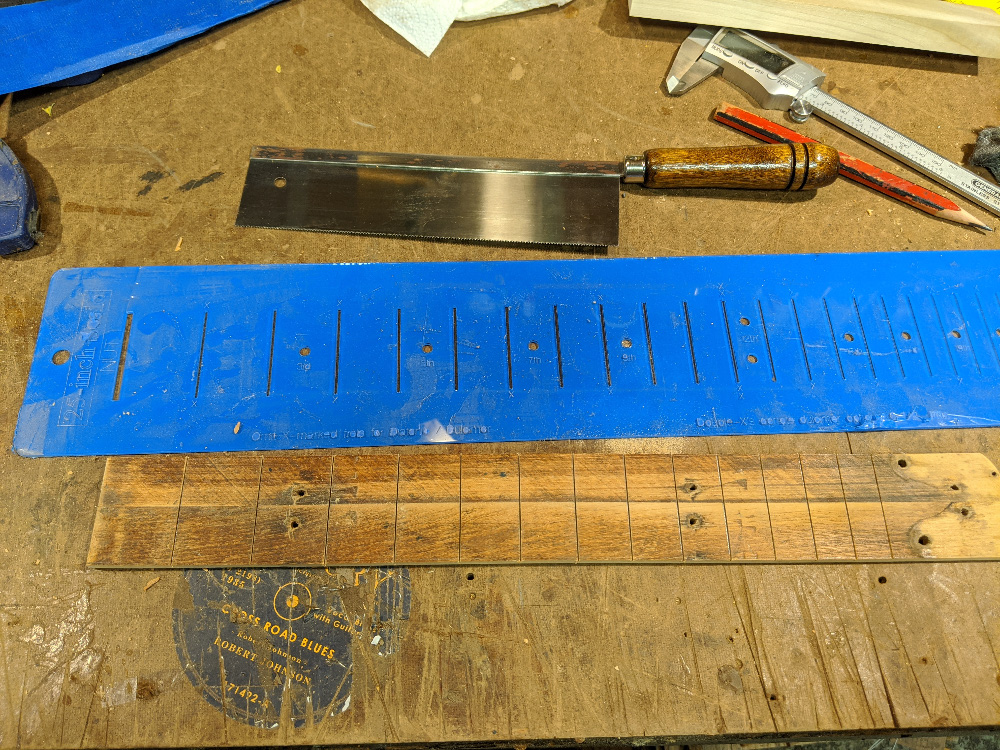
Now I marked and slotted my fretboard using a handy-dandy C. B. Gitty acrylic fretting template. Soon after, I headed over to the fretting bench and installed the medium/medium nickel-silver fretwire. |
|
|
|
|
|
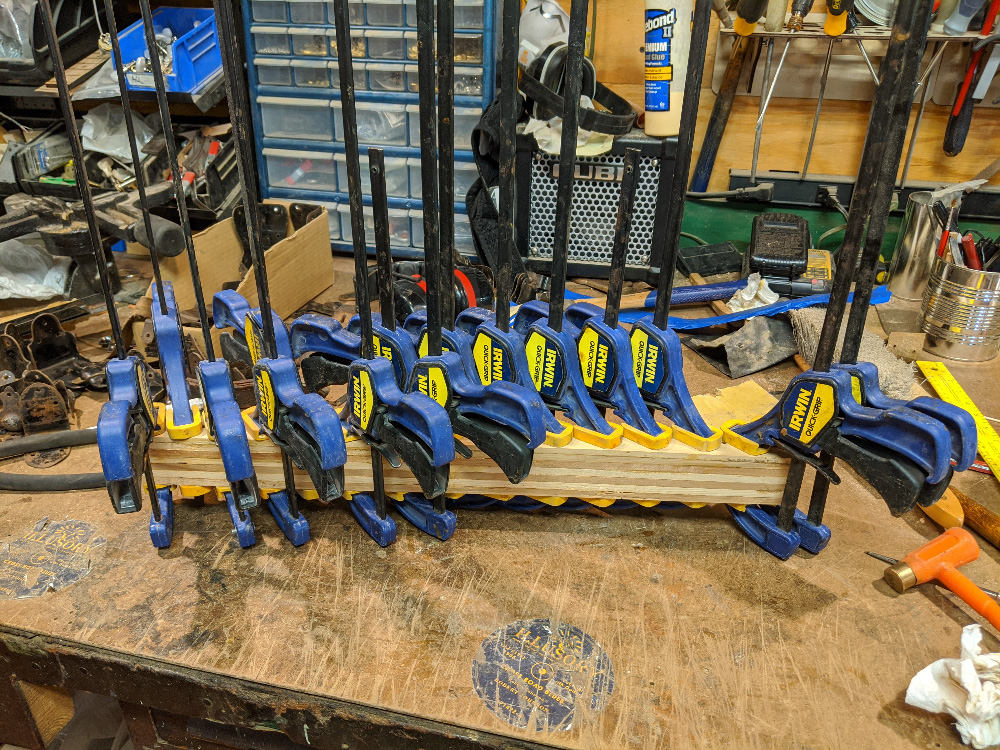
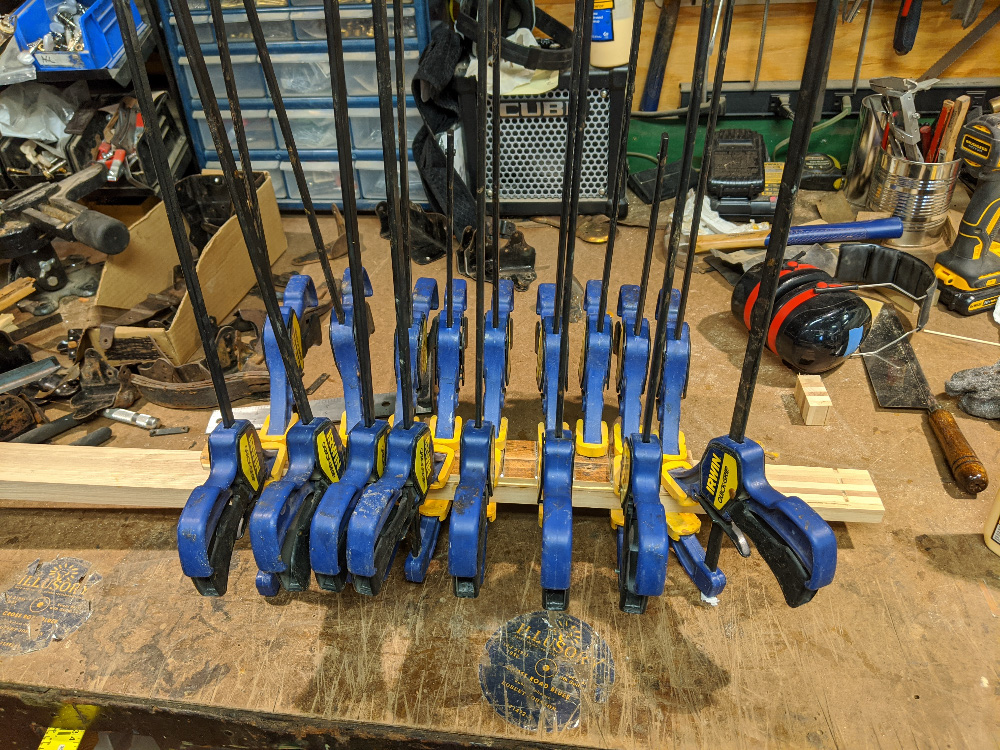
Then it was time to glue the fretboard onto the neck. No such thing as too many clamps for this step! Once the fretboard was glued on, I headed back over to the edge sanders to even everything up. I also decided to do some additional rounding of the back of the neck, to slim it down and make it a little less baseball bat-ish. Everything was going great, right up until... |
|
|
|
|
|
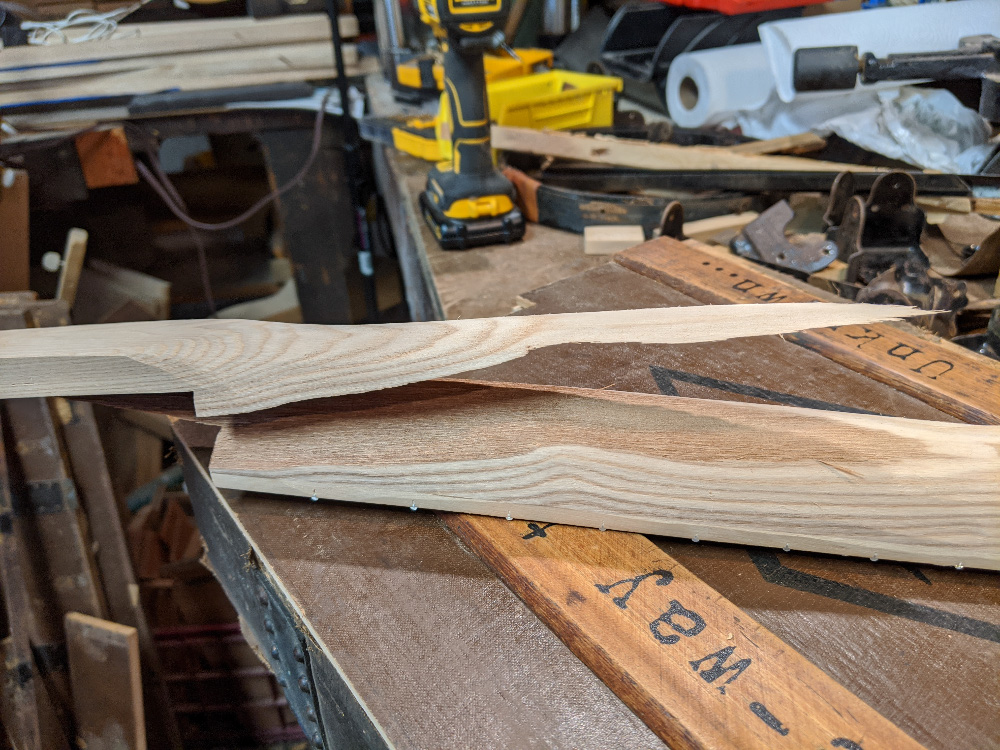
WOE IS ME. Disaster. I had removed just enough material through sanding that a long-hidden fissure in the wood was able to let go. Who knows how long this fault had been in that timber, hiding, waiting for its chance to break free. Well, it finally had its chance, and I had a ruined neck in my hands. Oh, I tried to salvage it, to re-glue the joint... but I knew from the start it wouldn't work. Even if the glue held... this neck was no longer good enough for the level of guitar I wanted to build. I wanted to create an heirloom, and heirlooms don't start their lives with major faults. I knew I had to start over. |
|
|
|
|
|
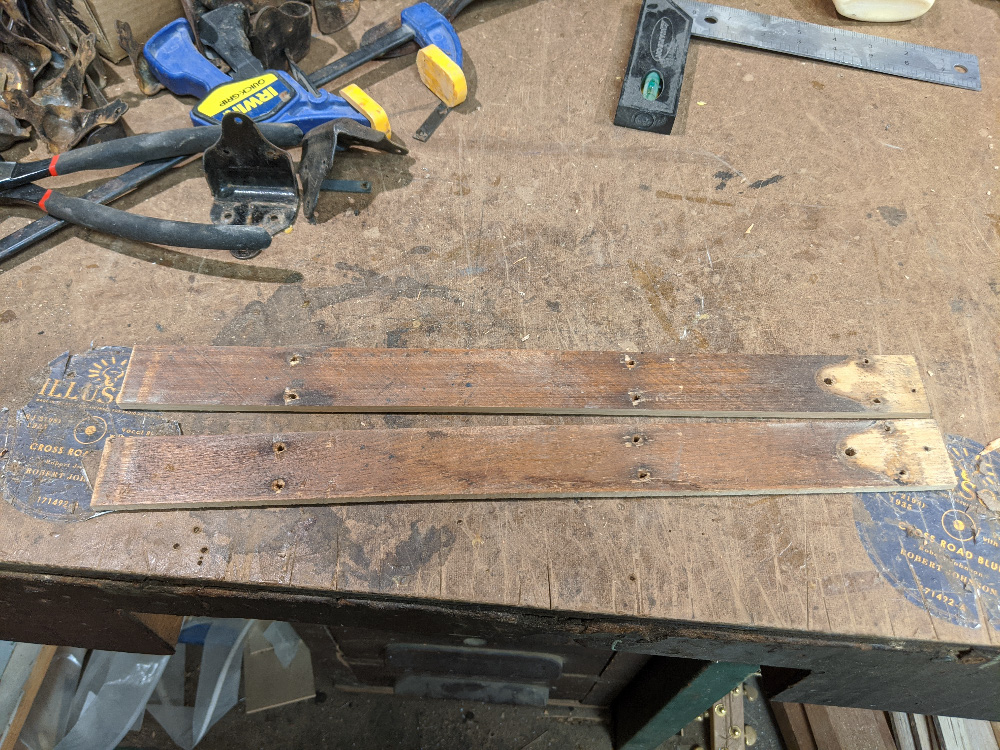
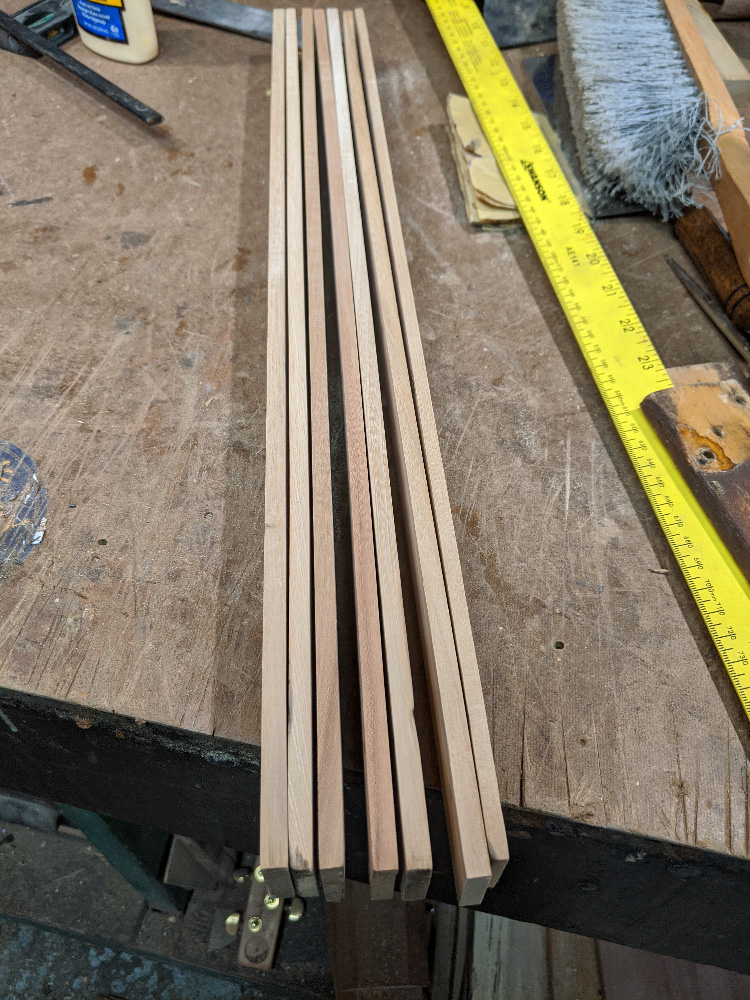
So, since I had to start over, I decided to forego the reclaimed chestnut for the neck and instead make a neck using more of the hardwood slats from the original trunk. This took more work than just forming a new neck from a plank of wood, but re-using more of the original parts of the trunk felt right. Step one was to cut the rounded edges off of a collection of the slats, and plane them down smooth... being careful to remove no more material than absolutely necessary to get a good gluing surface. |
|
|
|
|
|
|
|
|
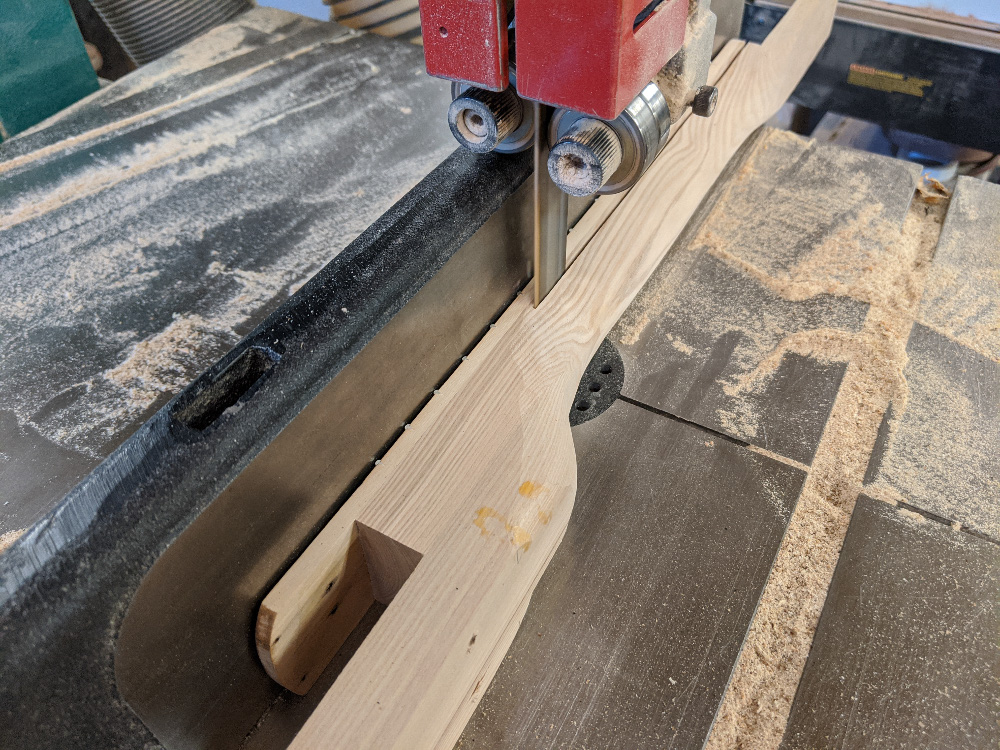
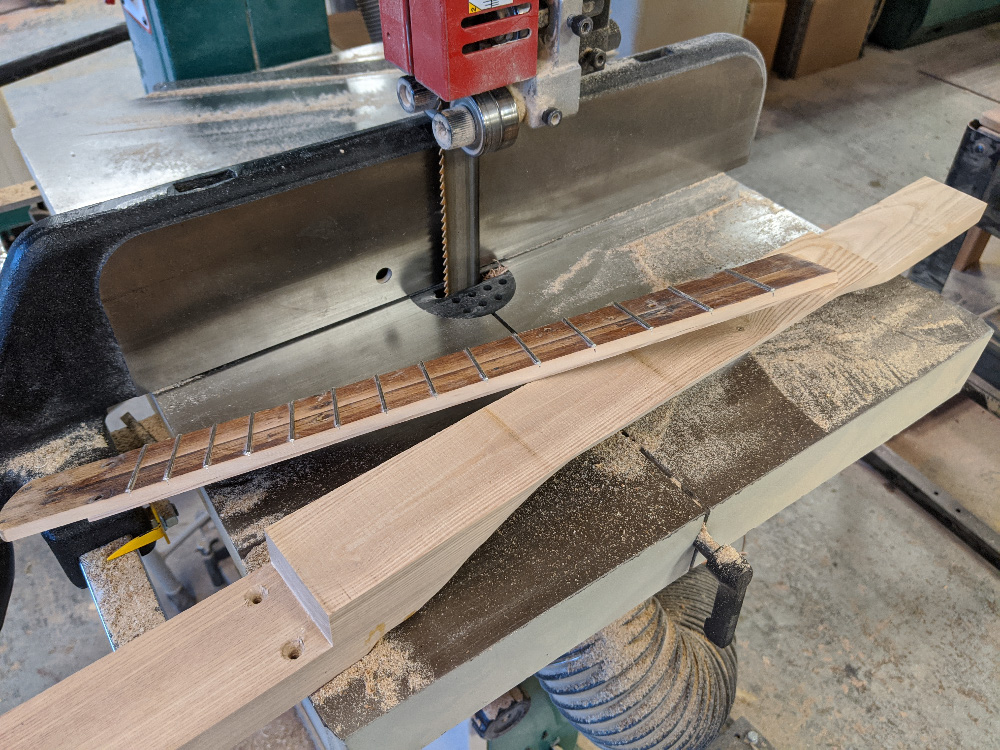
Then I took the old ruined neck over the bandsaw to salvage the fretboard and also the brace piece with its rounded heel. |
|
|
|
|
|
Fretboard dissection complete. |
|
|
|
|
|
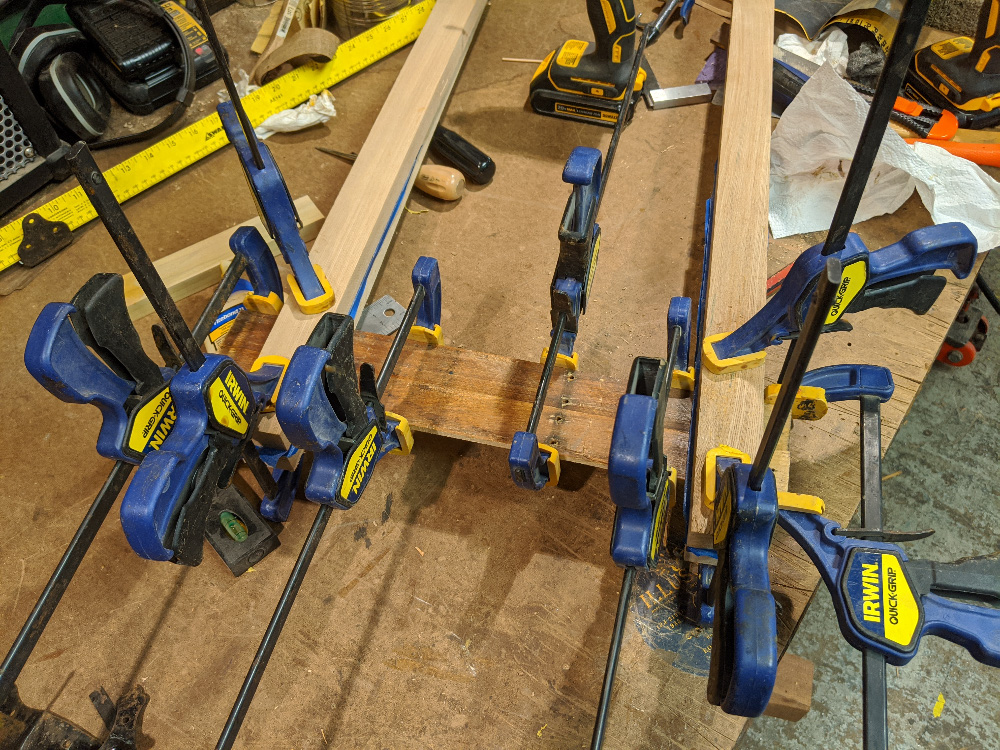
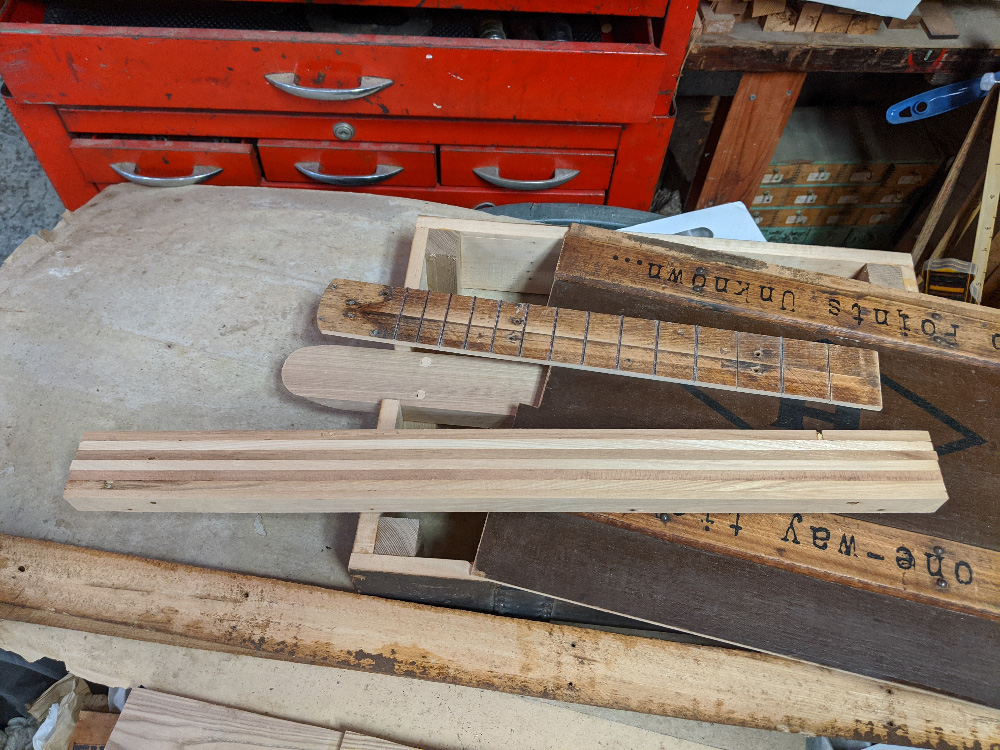
Here I'm gluing the slats together to form my new neck blank. Yet another testament to the wonders of Titebond II wood glue. |
|
|
|
|
|
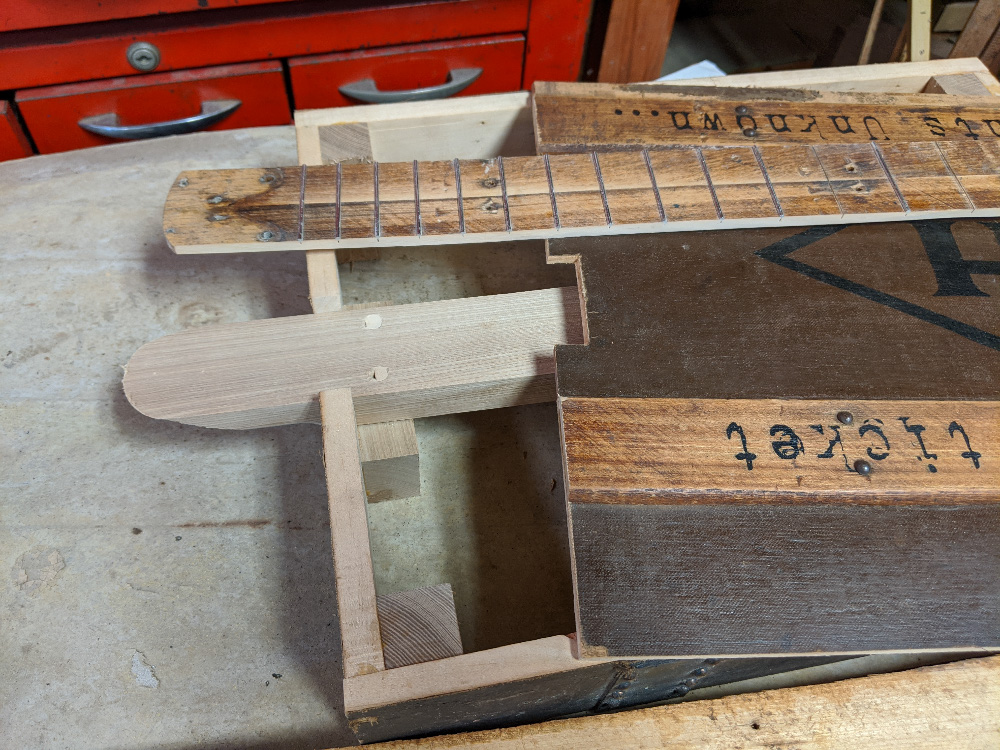
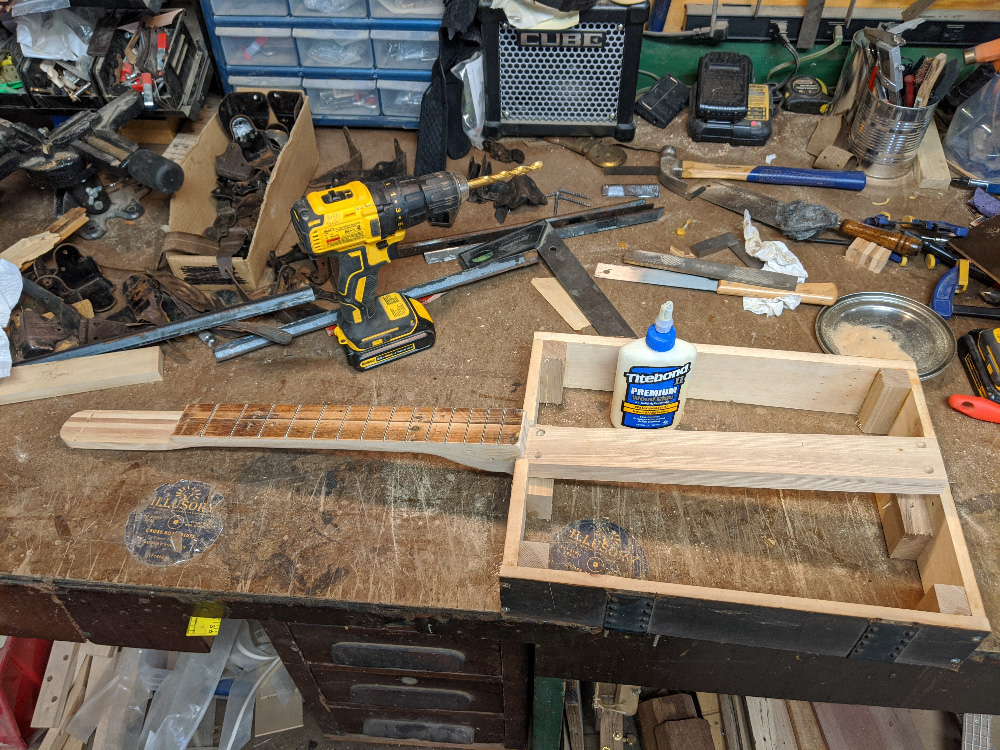
Here the salvaged heel and fretboard rejoin the guitar body. |
|
|
|
|
|
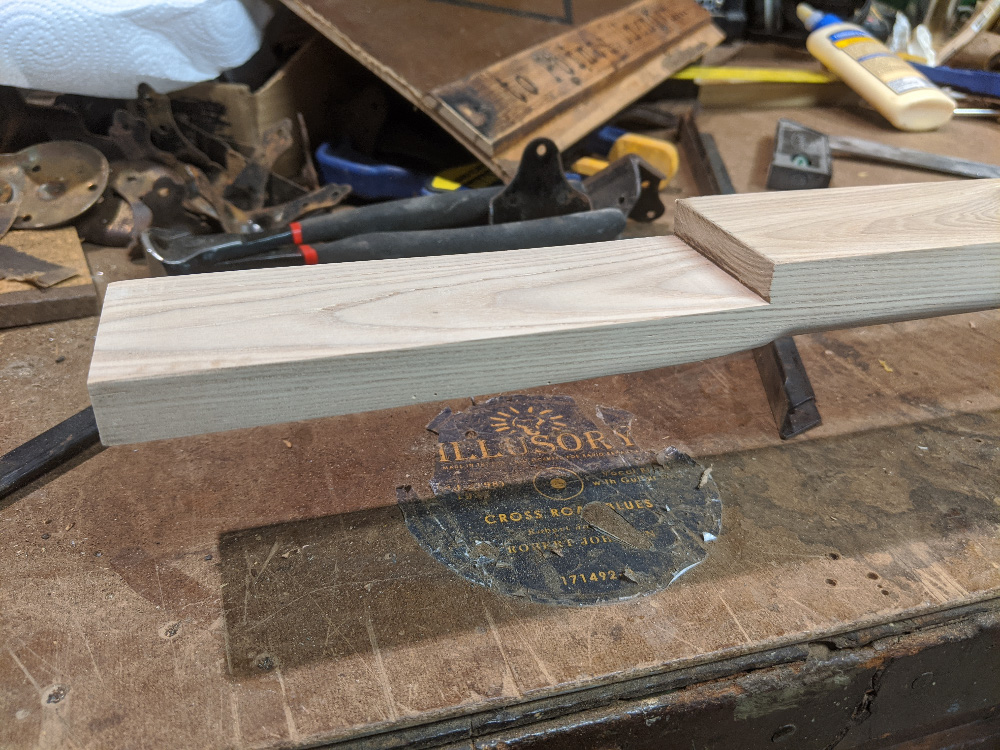
Finally, with my laminated neck blank ready to roll, I can proceed with getting the neck and brace glued together and shaped. |
|
|
|
|
|
First I glue the neck and brace together... |
|
|
|
|
|
Then on goes the salvaged fretboard. |
|
|
|
|
|
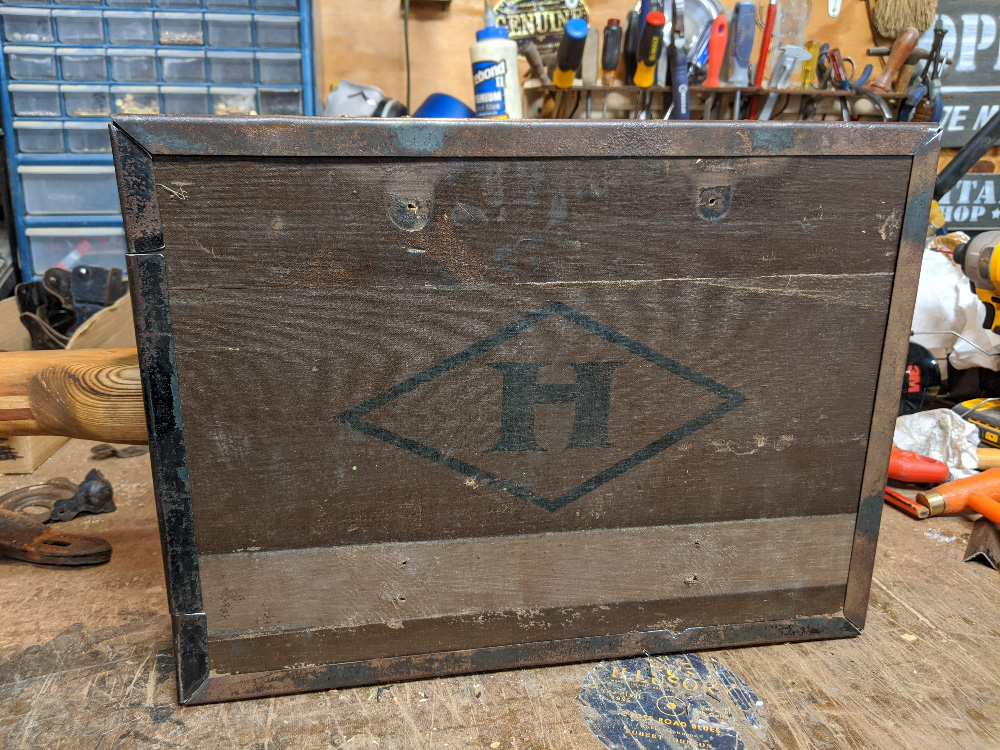
While all of the glue was drying, I turned some attention to the back panel of my guitar. For this I used the other end of the trunk with the matching "H" monogram, but this time I used a protective spacer piece of plywood as it went through the planer, so the canvas face didn't get torn up. |
|
|
|
|
|
Here the remade neck is about to be glued and screwed into the box frame. |
|
|
|
|
|
I use glue where the neck brace will touch the inner braces, for extra strength and support. Because I knew I was building a six-string guitar, I wanted to give that neck as much support as I could to stand up to the tension over time. |
|
|
|
|
|
Wood screws down through the neck brace and into the inner box braces completed the job. |
|
|
|
|
|
Here she is, starting to look somewhat guitar-like, with the neck mounted cleanly into the body. |
|
|
|
|
|
Now I decide it's time to glue the soundboard on. I apply the glue both to the top edges of the side panels, as well as the top edges of the internal corner braces. Note that the top of the neck brace inside the box is set to be about 1/4 inch under the bottom surface of the soundboard, for better resonance. |
|
|
|
|
|
Put the clamps to it! I used pieces of scrap wood as clamping cauls to help spread the pressure around, for a nice tight join. |
|
|
|
|
|
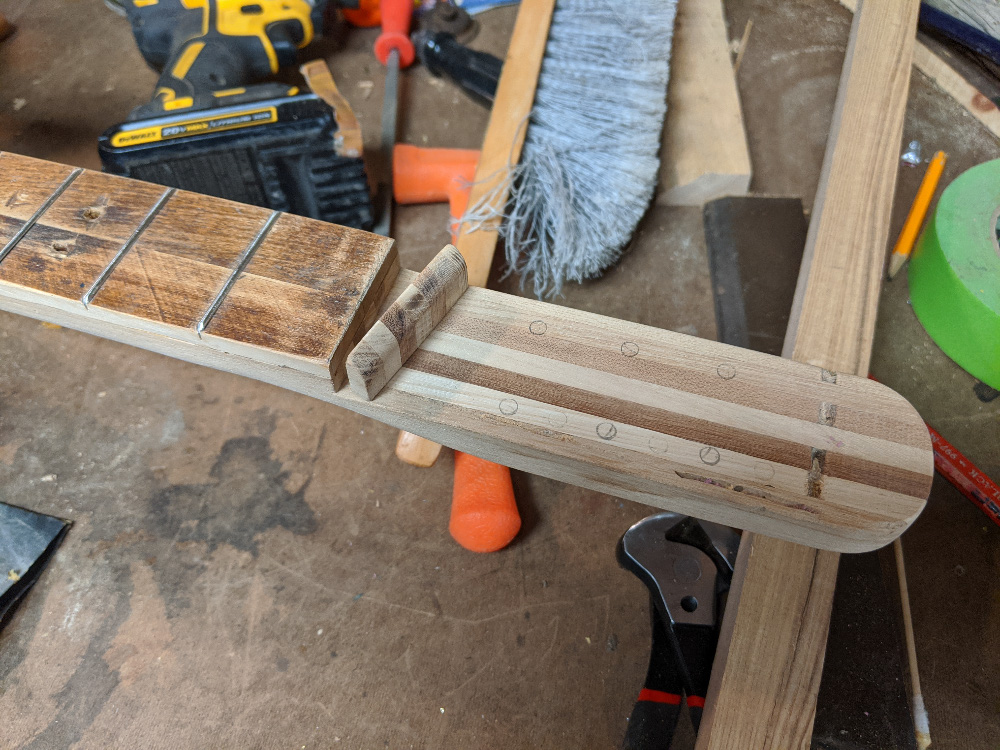
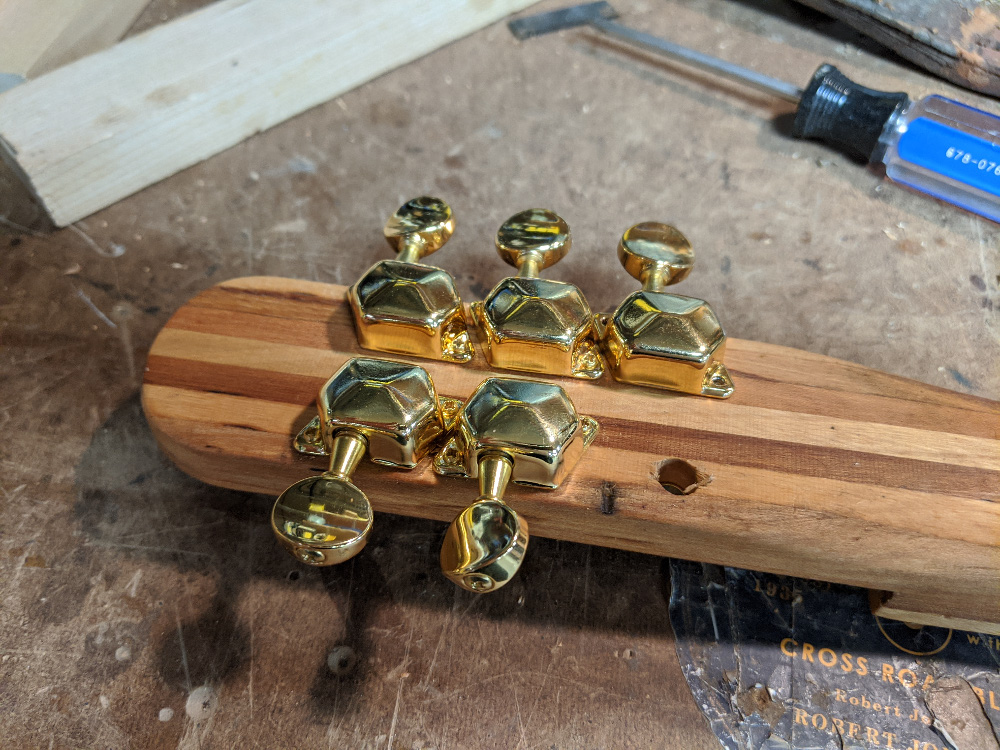
While the soundboard glue set up, I worked on forming a nut out of a piece of leftover laminated neck wood. This actually wouldn't end up being the final nut (it wasn't high enough). I also mark out the tuner holes on the headstock. They ended up being too close together for the Wilkinson-style covered-gear tuners I wanted to use. Oops. Mistake number... oh heck who's even counting anymore. |
|
|
|
|
|
With the soundboard glued into place and the edges evened up, it's starting to look even more like a guitar. If you look closely, you can see I've also drilled the tuner holes up on the headstock. I have also applied a coat of linseed oil to the neck in between the last picture and this one. |
|
|
|
|
|
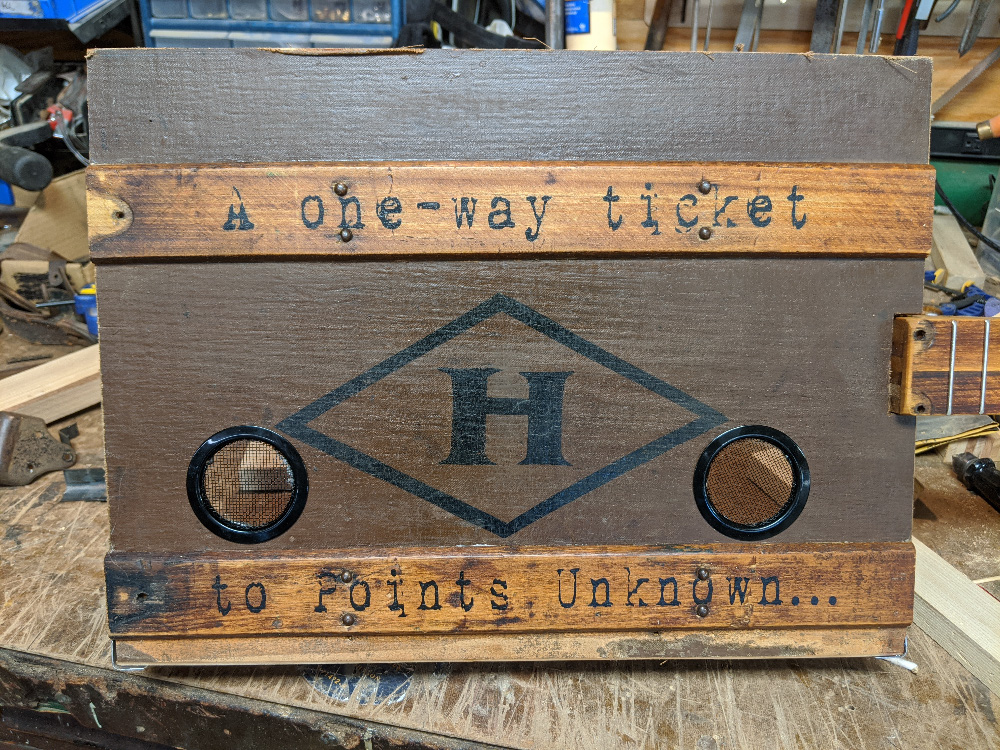
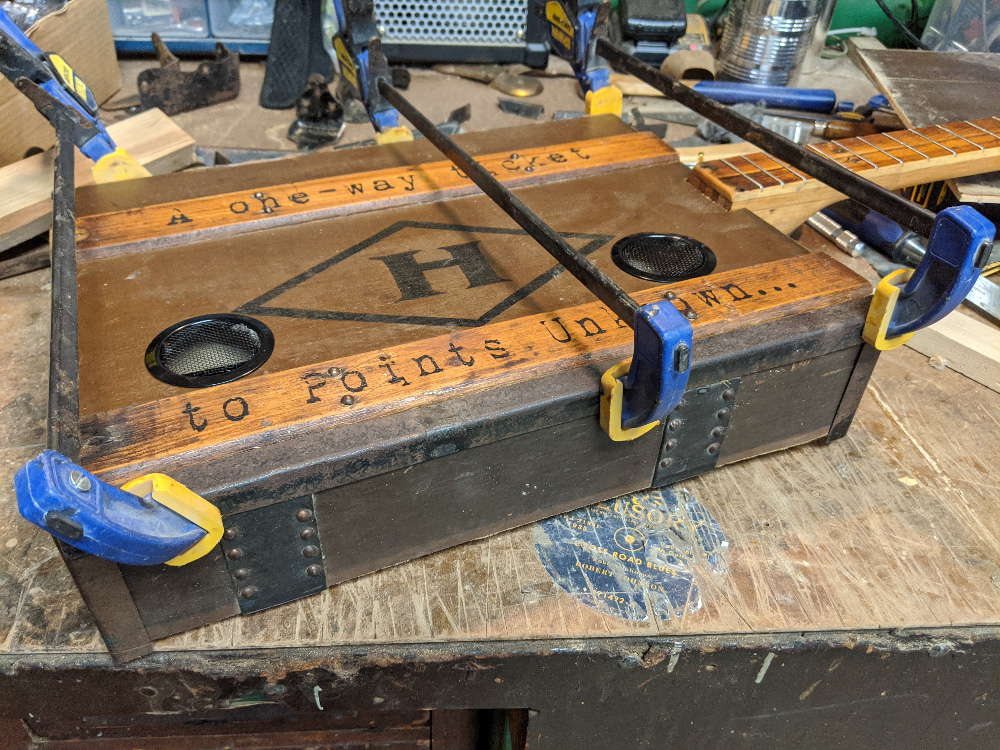
Now I cut in a couple of sound holes and install some screened dobro-style inserts. Later I do some roughing up of their shiny black surface to make them better fit the overall look of the instrument. |
|
|
|
|
|
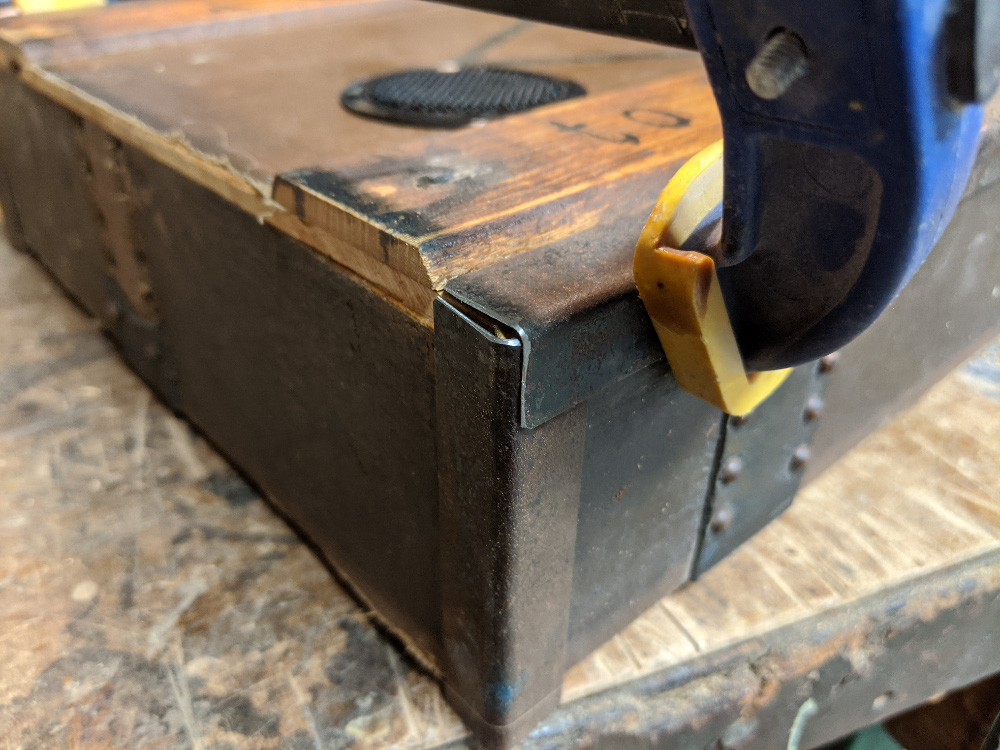
Now I begin cutting and gluing on some of the leftover steel angle pieces from the original trunk, all around the edges where the soundboard and back panel edges meet the side frame. This ended up being quite a process! |
|
|
|
|
|
Figuring out how to get the cleanest possible joins of the metal pieces took a bit of doing. |
|
|
|
|
|
But the end look was worth it, I think! |
|
|
|
|
|
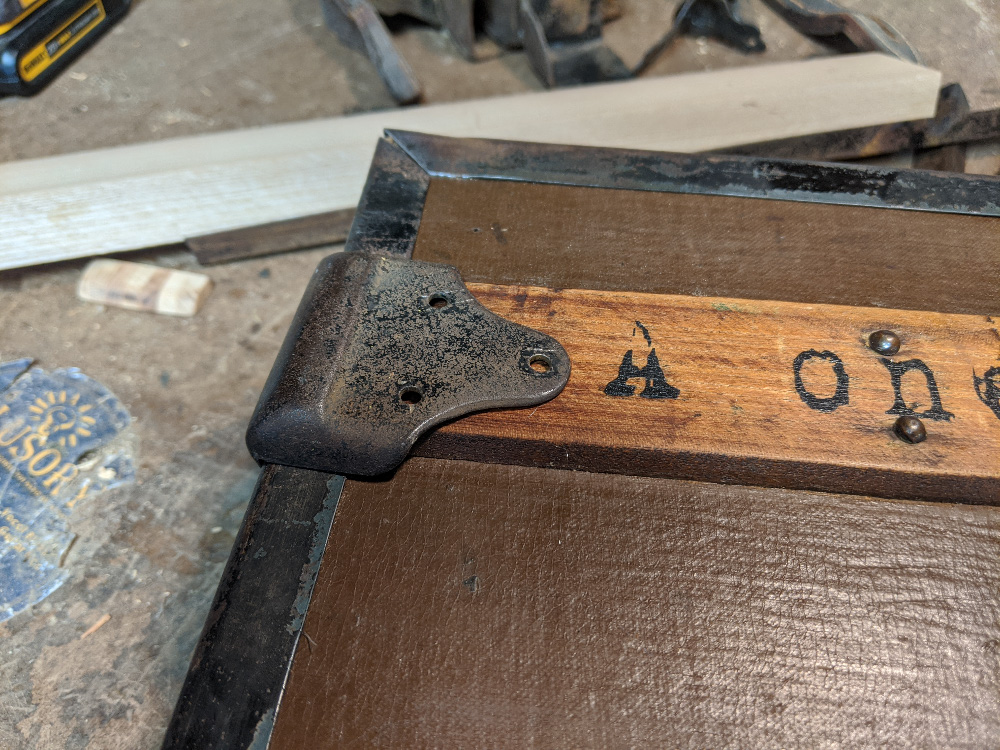
Now I begin installing the corner brace pieces onto the front of the guitar. Even though I knew they might dampen the acoustic sound a bit, I felt it was worth it to get that awesome look. |
|
|
|
|
|
All four braces laid out in a dry fit to get an idea of how they will look. |
|
|
|
|
|
And then installing using more of the round-headed little nails from the original trunk. Pre-drilling the holes and adding a drop of superglue before tapping in the nails should help keep them from working loose over time. |
|
|
|
|
|
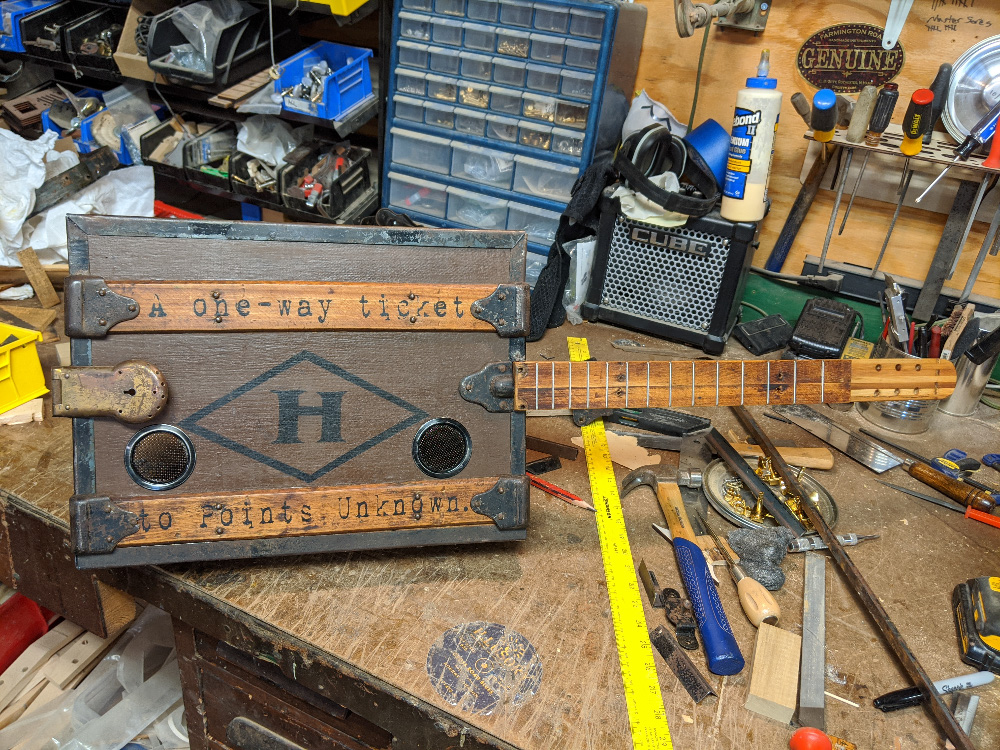
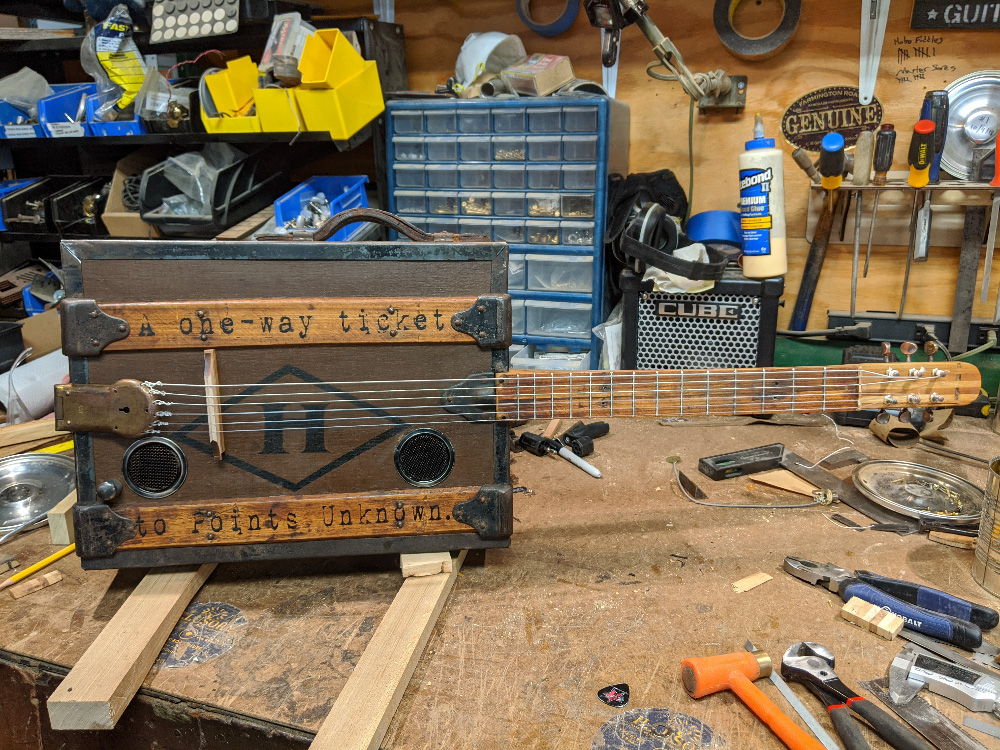
Here she is with the corner braces, lock hasp tailpiece and a couple of other decorative touches added. It's been a long road, but it's really starting to realize the look I had been shooting for. |
|
|
|
|
|
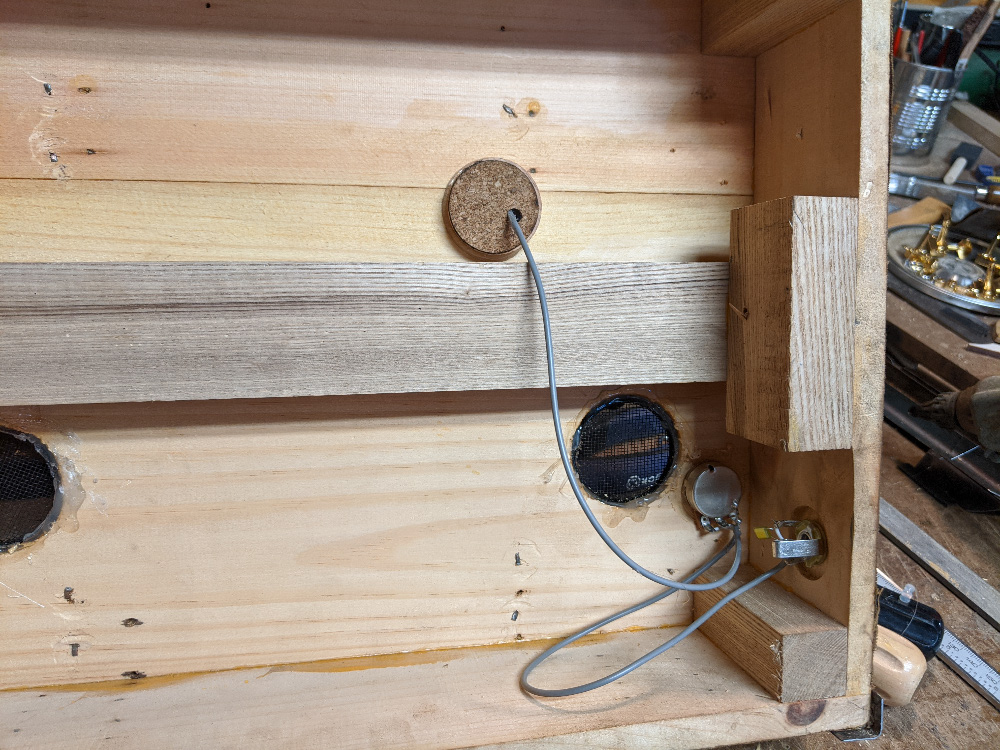
Before closing the box by gluing on the back panel, I install one of our C. B. Gitty "Disc-o-Tone" piezo harnesses, which includes a volume control. I add one little extra touch - a 0.01uF capacitor connecting the positive and ground lugs of the jack, to trim off some of the treble of the piezo and calm it down even more. |
|
|
|
|
|
Then it's back to the clamps to glue on the back panel. I didn't take any pictures of it, but after the glue has set, I take the guitar over to the finishing bench and apply a thick coat of wipe-on polyurethane to the back panel to help seal it and protect the canvas. |
|
|
|
|
|
Once the panel is in place, I add the steel angle pieces to complete the look |
|
|
|
|
|
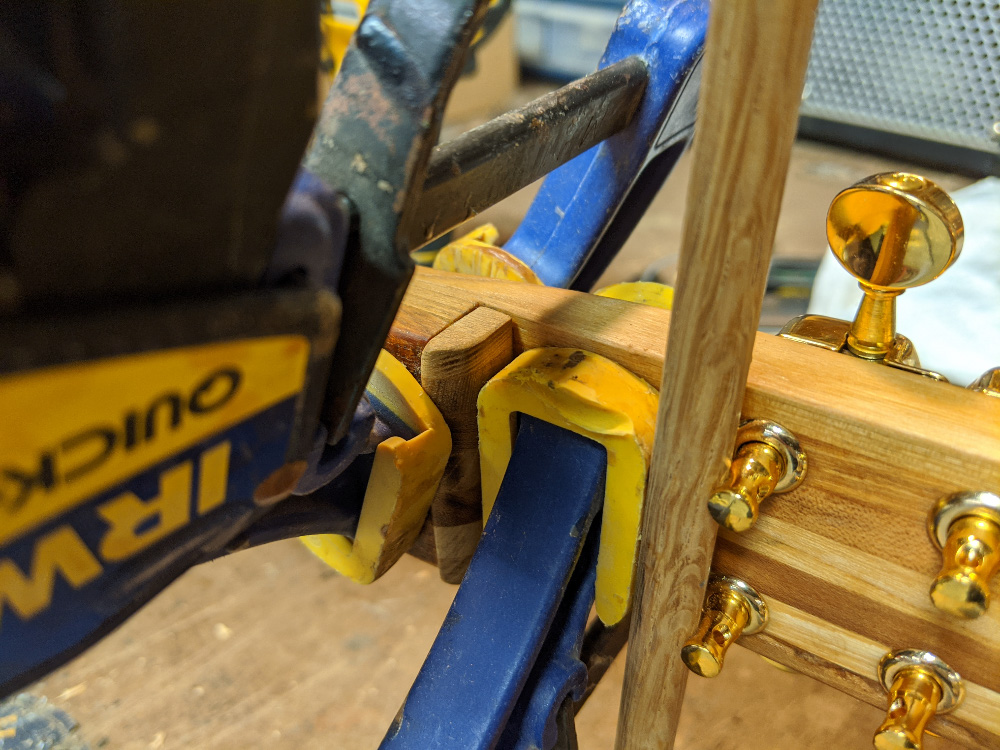
Now it's time to get the tuners installed. I do a dry fit and pre-drill my pilot holes |
|
|
|
|
|
I then proceed to glue my nut into pace. |
|
|
|
|
|
While the nut glue is setting, I take one of the old leather trunk handles and install it on the top edge of the guitar. This handle isn't just decorative, either - this guitar is pretty heavy (from all of that steel hardware!) and this handle makes it easier to lug it around! |
|
|
|
|
|
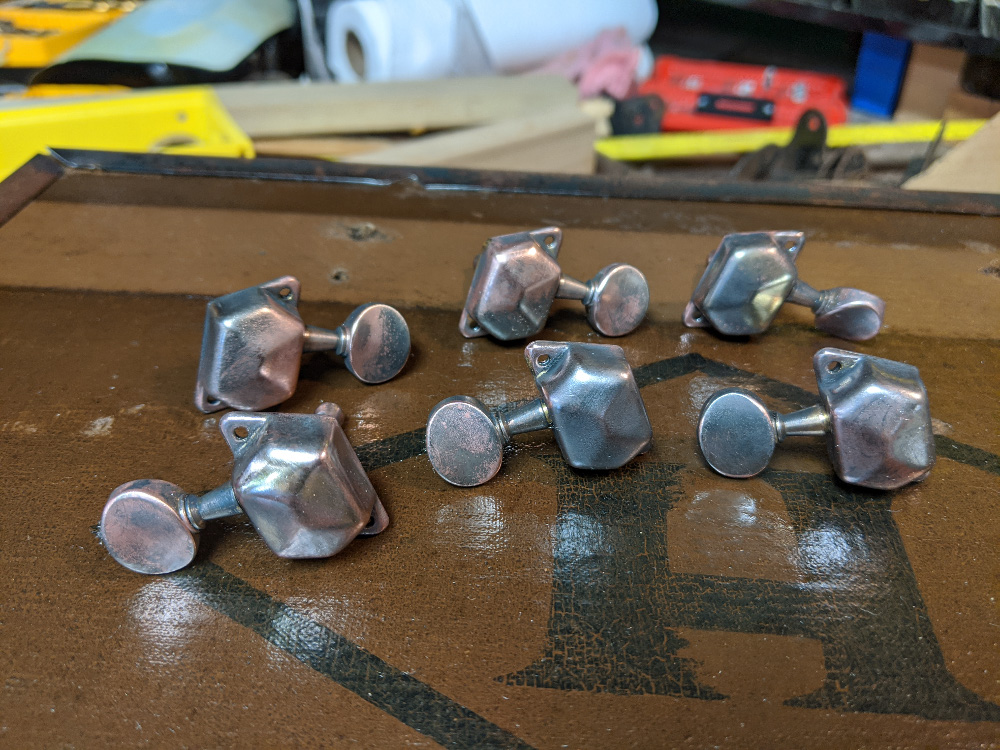
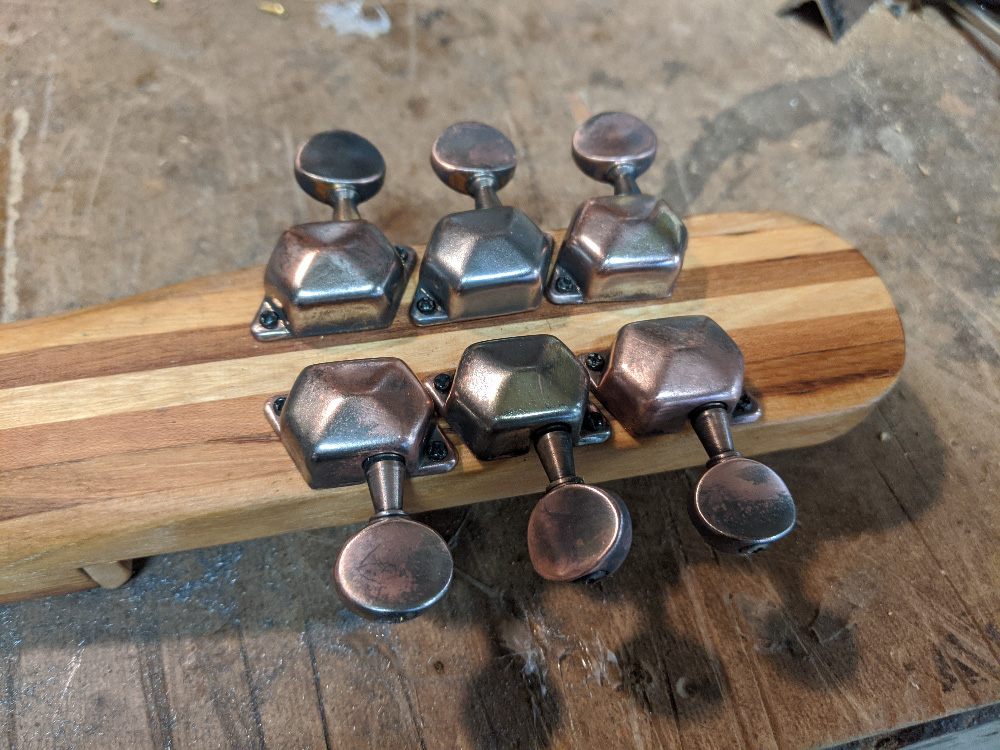
I realize that the shiny gold tuners don't match the overall aesthetic of the guitar, so I uninstall them and do a bit of antiquing. This process actually took a while with multiple steps: buffing/wire brushing to remove most of the gold finish, then applying special metal relic-ing chemicals to add a tarnished look, then buffing with steel wool. The end result was worth the effort though, as now they match the overall look of the guitar much better. |
|
|
|
|
|
Here's another view of those lovely antiqued tuners, re-installed onto the headstock. |
|
|
|
|
|
Well, here she is, strung up for the first time with nylon strings and a temporary bridge. Unfortunately, even with the bridge (and action) quite high, there was a lot of buzz. Upon inspection, the frets have some big issues with unevenness. I have to admit to succumbing to frustration a bit at this point. As the frustration grew, I stopped taking photos and it sort of became a slog to the finish line. I removed the strings, and filed, flattened, re-crowned and superglued down fret ends... all to no avail. Finally I gave up entirely on that fret installation, pulled them all, and re-installed. Even so it took a lot of tang-crimping, fret end supergluing and flat-filing to get them right... but finally I got there. |
|
Then I formed a bridge out of a leftover piece of my laminated-together neck blank. While sanding it, of course it broke... so I had to re-glue it. In the end though it held up. I also made a new-taller nut (also from neck blank leftover) during this stage, thinking that the old one was too low and contributing to fret buzz. |
|
|
Finally, I restrung the guitar with a set of extra-light equivalent acoustic strings, put in the bridge, and tuned it up. It took a couple of adjustments to lower the bridge and the string slots in the nut... and dealing with a couple of stripped-out tuner screws, but finally... finally... it was done. Let me tell you about that first rich, resonant strum. I can't deny getting a little misty. The old girl fought hard... damn hard... but in the end, she gave up and agreed to become a guitar. This was by far the most challenging build I've taken on, thus far... the end reward is more than worth it. This guitar has the best sound of any instrument I've ever built, and the look... well, let's just say that I feel that the spirit of that original steamer trunk lives on in it. |
|
|
|


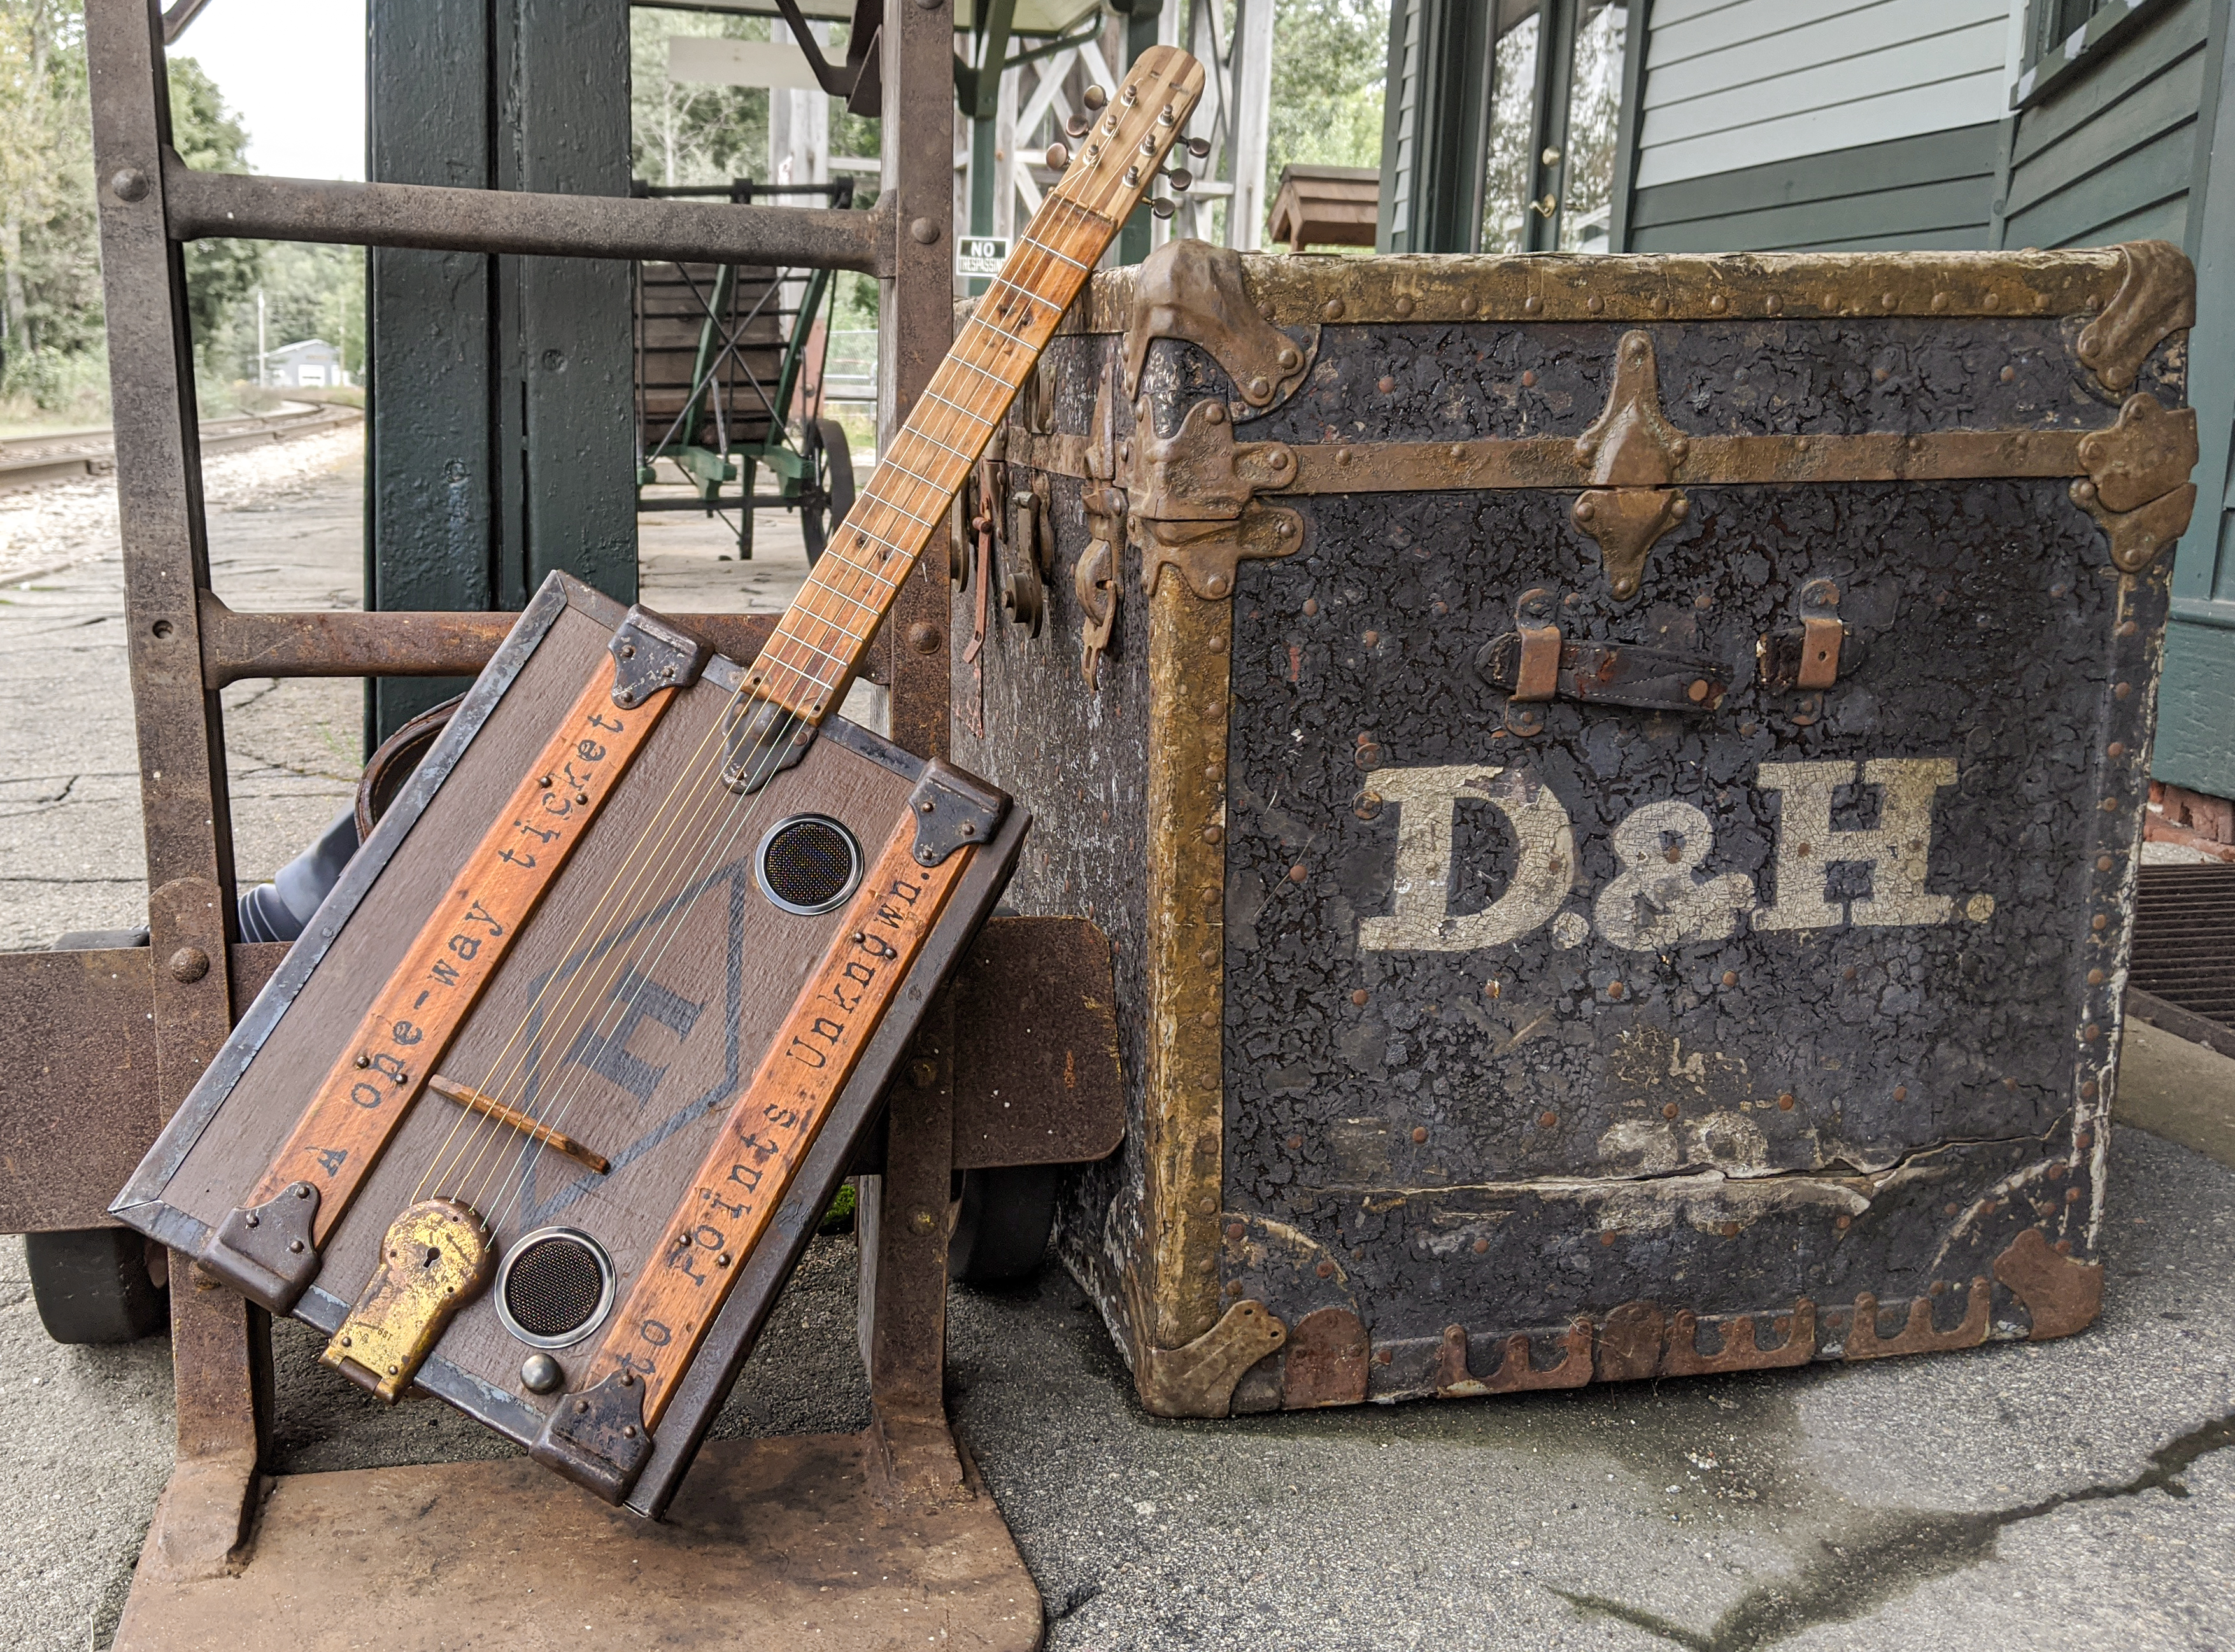
Well, that's it - the story of the One-Way Ticket guitar, built from an old wooden steamer trunk. Do I ever intend to take apart another steamer trunk? No, no I do not. But I sure am glad I did this one... and there are a lot of leftover raw materials, so perhaps another guitar is yet to be born from it. A solid-body electric, perhaps?
At any rate, I hope you've gotten a bit of inspiration from this chronicle of my build, both the triumphs and the mistakes. Happy building!
Recent Posts
-
Steve Holladay's "Pocket Box Guitar"
If you're a member of the Friends of C. B. Gitty group on on Facebook, you've probably seen some of …14th Jan 2026 -

2024 World's Wildest Electric Cigar Box Guitar Build-Off Winners!!!
C. B. Gitty Crafter Supply is proud to announce the winners of the 2024 "World's Wildest Electric Ci …31st Oct 2024 -
")
Improved C. B. Gitty: Easier Than Ever! (Work in Progress)
Ben “Gitty” has been cleaning house, making our website even easier find your favorite parts, kits a …7th Oct 2024