

Building "The Quarryman" Dynamite Crate Guitar - A Photo Diary
A guitar whose roots go down into the bedrock bones of the earth...
I grew up in Marblehead, Ohio, a rocky peninsula that juts out into Lake Erie. The center of that peninsula is one giant limestone quarry, where for nearly 200 years men have been blasting out the stone, cutting it into blocks for building and crushing down into gravel. On nearby Kelley's Island out in the lake, similar work was done. For many years dynamite was used to blast the stone free, and that dynamite came in beautifully printed wooden boxes and crates. With this build, I seek to honor that legacy of quarrying, and the many men (and some women) who have done the work over the years. That Marblehead limestone has been taken all around the country and all around the world, making cement, building breakwalls, building homes and businesses, and providing the grist for construction of all sorts. This guitar pays tribute to the hard-working people who risk their lives to blast out the bones of the earth that our modern world is built on."
The body of this guitar is formed from an old wooden "Red Diamond" dynamite crate, from Cleveland, Ohio - just the sort that might have been used in those limestone quarries back home. The neck is made from a piece of reclaimed white oak that Ben found in an old stone crusher complex over on Kelley's Island, just a few miles north of Marblehead out in Lake Erie. Those white oak planks were part of the mechanism that controlled the flow of crushed limestone from the storage bins into narrow-gauge railroad hoppers. The black walnut fretboard is from an old fence post Ben's grandpa salvaged from a field on the edge of the quarries (black walnuts once were plentiful around Marblehead). Together, these deeply storied components form an amazing hand-crafted heirloom instrument that looks just as good hanging on the wall as it sounds when being played.
Guitar Specs:
- Scale Length: 23 inches
- # strings: 3
- Tuning: G D G
- String Type: Phos. Bronze Wound
- Tuners: Black Covered-Gear
- Pickup: Cap-o-Tone piezo
The Quarryman Builder's Photo Diary
|
|
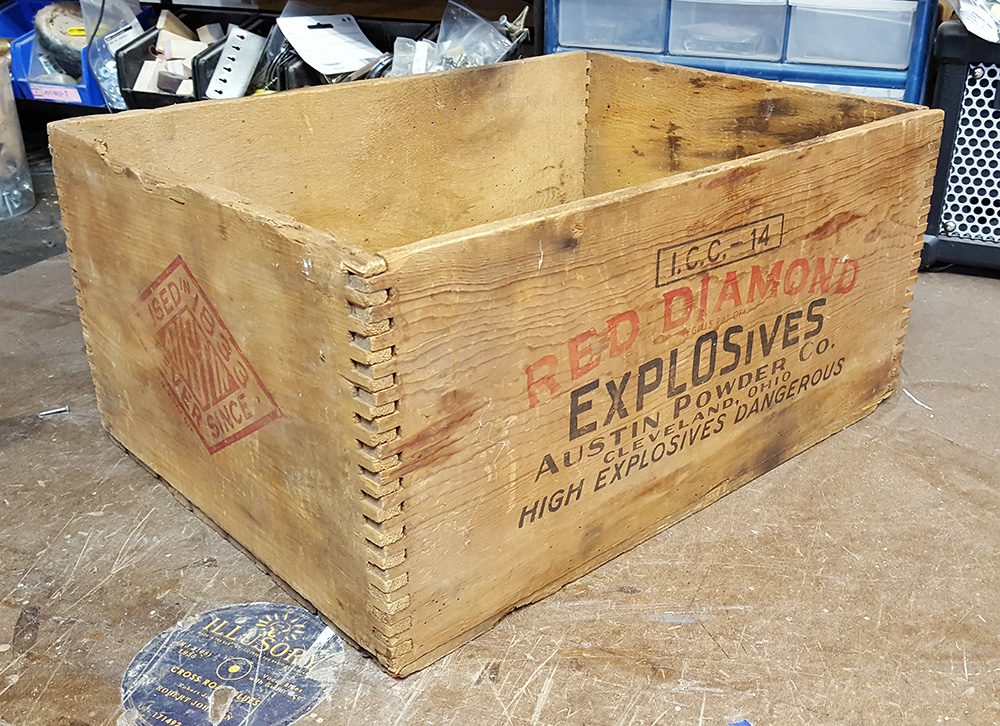
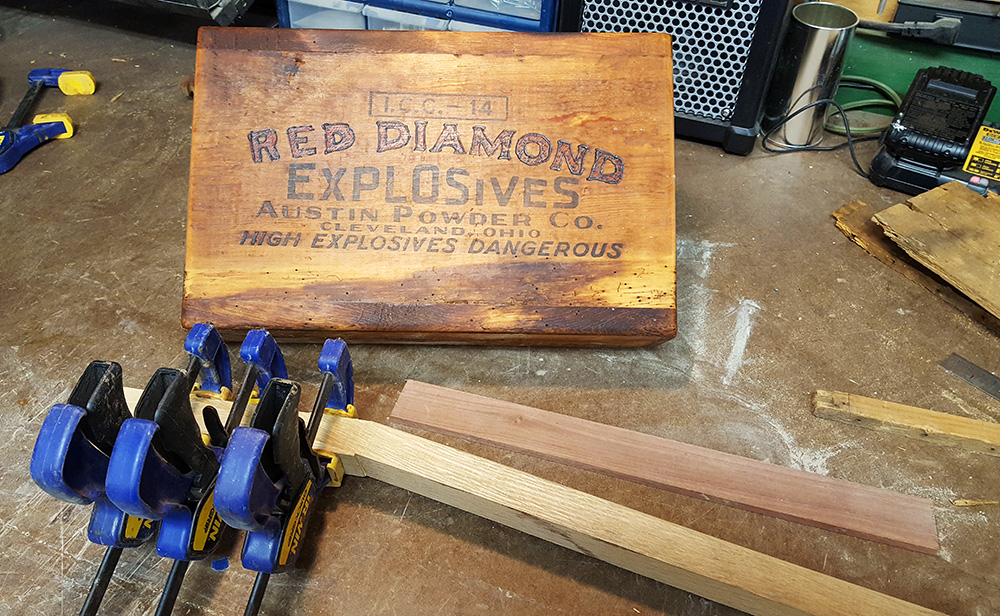
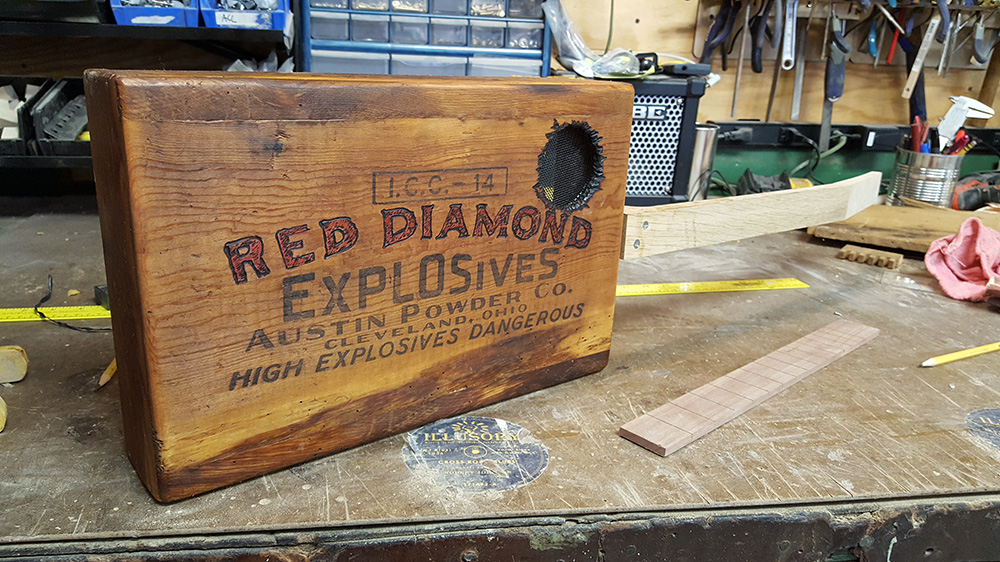
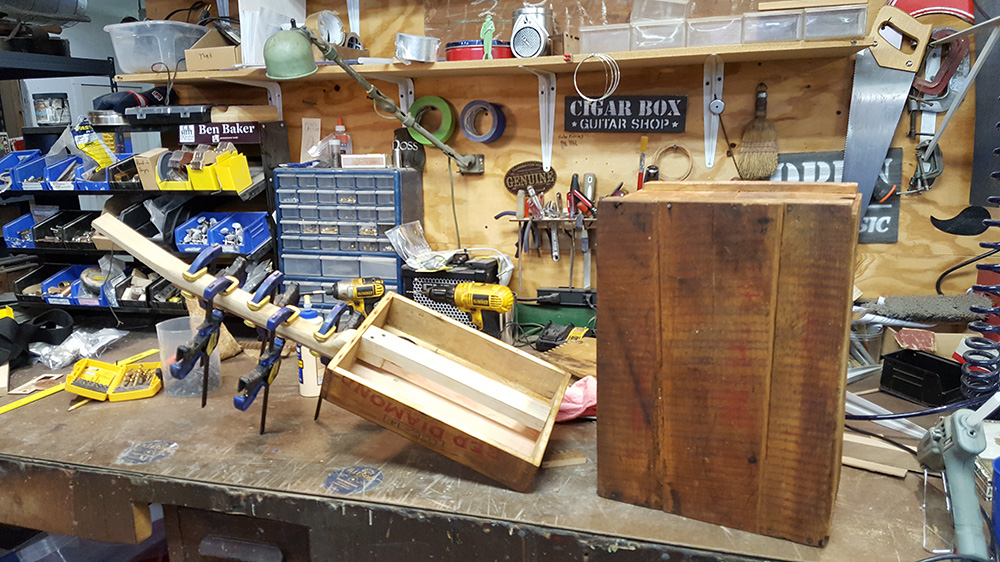
The kernel of the idea for this guitar came when I found this old wooden dynamite crate. Though I found it in a junk shop in New England, it had originally come from Cleveland, Ohio, just 50 miles or so from my hometown of Marblehead. I knew then that building a guitar based on the area's deep history with stone quarries would be a great use. I also happened to have a piece of oak I had found in one of the old limestone quarries back home, which would be perfect for the neck. The core of an amazing build had formed... |
|
|
|
|
|
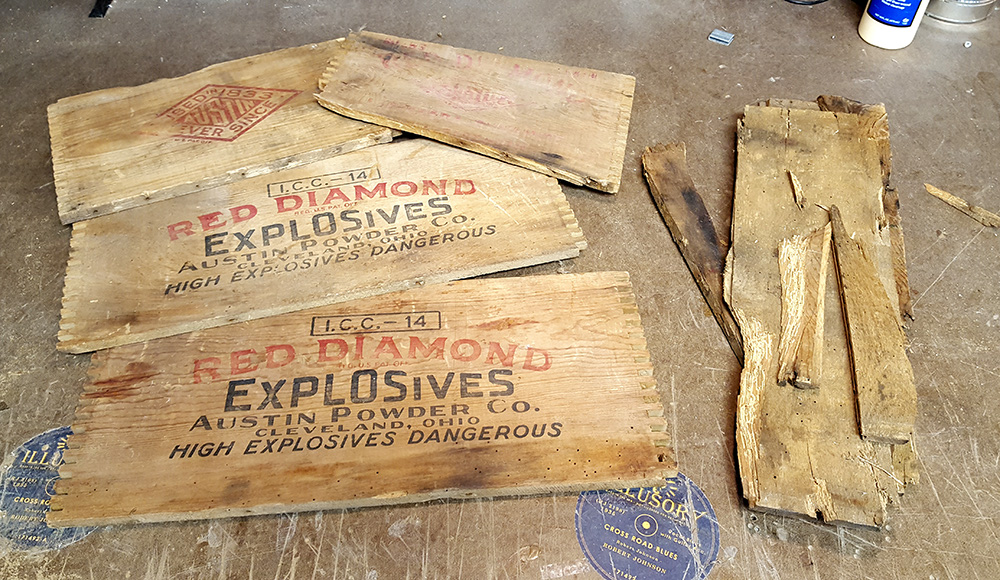
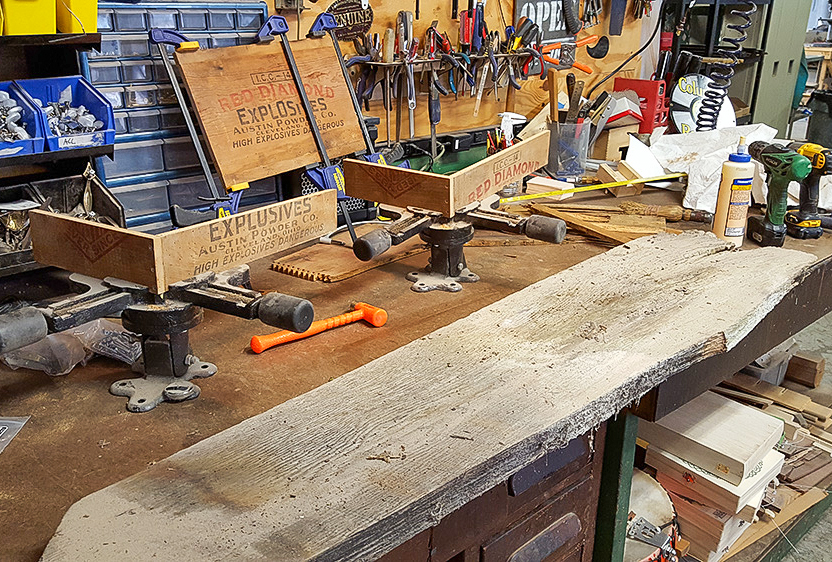
Step one was to take apart the old crate, being careful to preserve as much of the wood (and especially the panels with the printing) as possible. Unfortunately the bottom panels were badly rotted - the crate had likely been sitting on the ground or a damn floor for a good while. |
|
|
|
|
|
The next step was to saw down the panels into the parts of my guitar body. Again, my focus was on retaining as much of the printing/writing as possible, in a way that showed it off to the best effect. In this photo, the two shorter lengths to the left will be the end panels of my box; the longer lengths on top will be the side panels, and the 3-part panel on the bottom will be the soundboard. I had to glue those narrow extensions onto the main piece of the soundboard to make it large enough to match the box sides. |
|
|
|
|
|
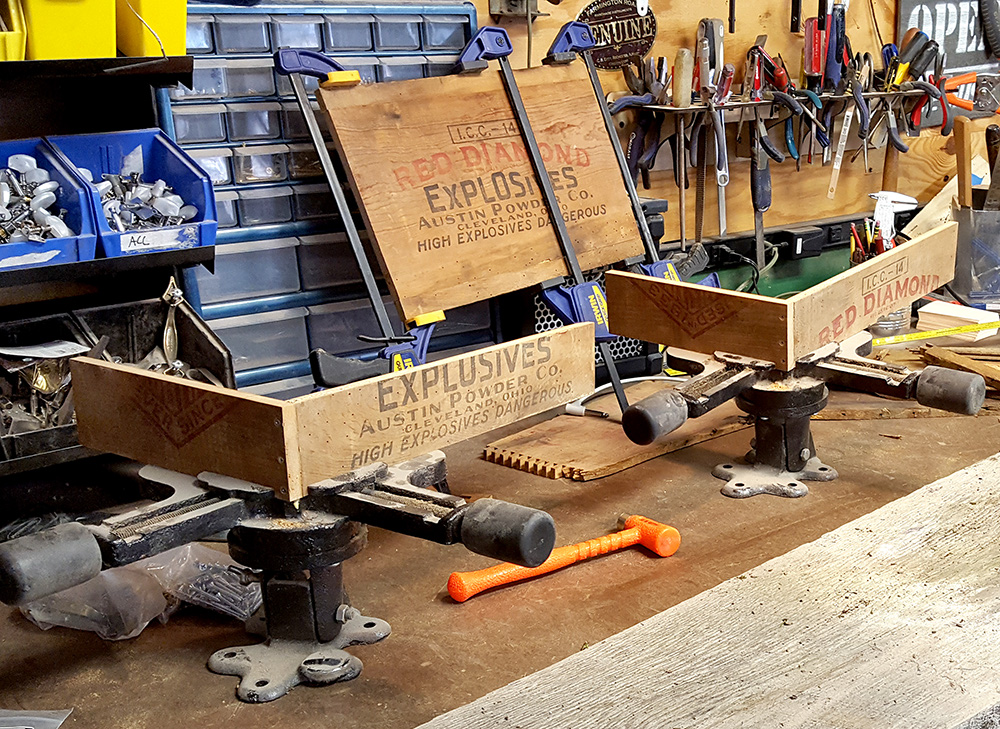
Here I begin gluing up my box sides, and also the soundboard. Miter vises make it a lot easier to glue up box sides, but using right-angle jigs made from scrap wood works fine too. Notice how the box's original printing will be prominently displayed on those side panels. |
|
|
|
|
|
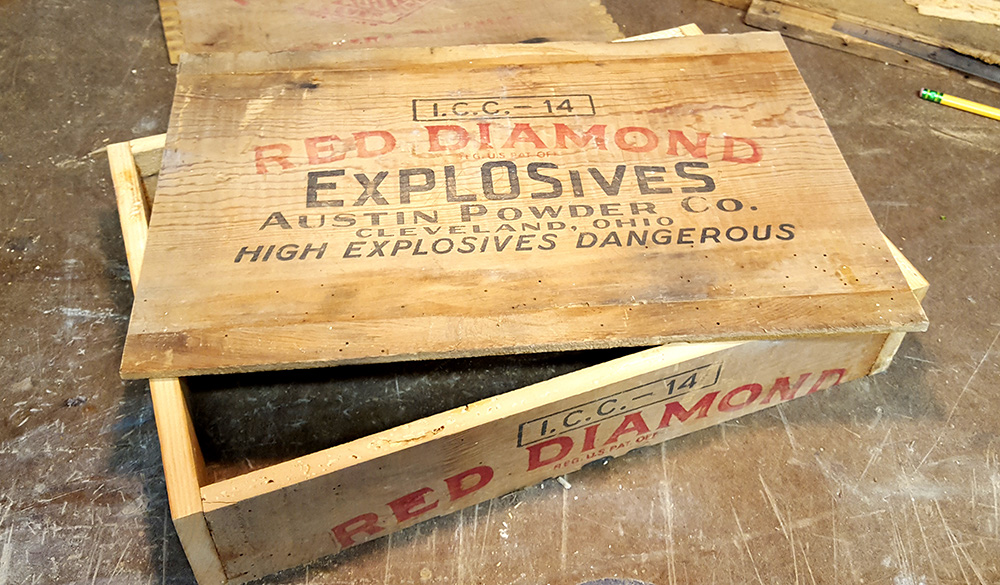
Here I have my box sides and soundboard ready to go. |
|
|
|
|
|
|
|
|
In the foreground of this photo is the plank of reclaimed white oak that was the source of the neck for this guitar. I found this piece of wood while exploring the ruins of an old stone crusher and lime kiln complex on Kelley's Island, which is located just a few miles north of my hometown, out in Lake Erie. The limestone quarries on Kelley's Island were owned by the same company that operated the quarries on Marblehead. I knew this piece of wood, which came from a quarry, would be a perfect addition to this heirloom guitar build. |
|
|
|
|
|
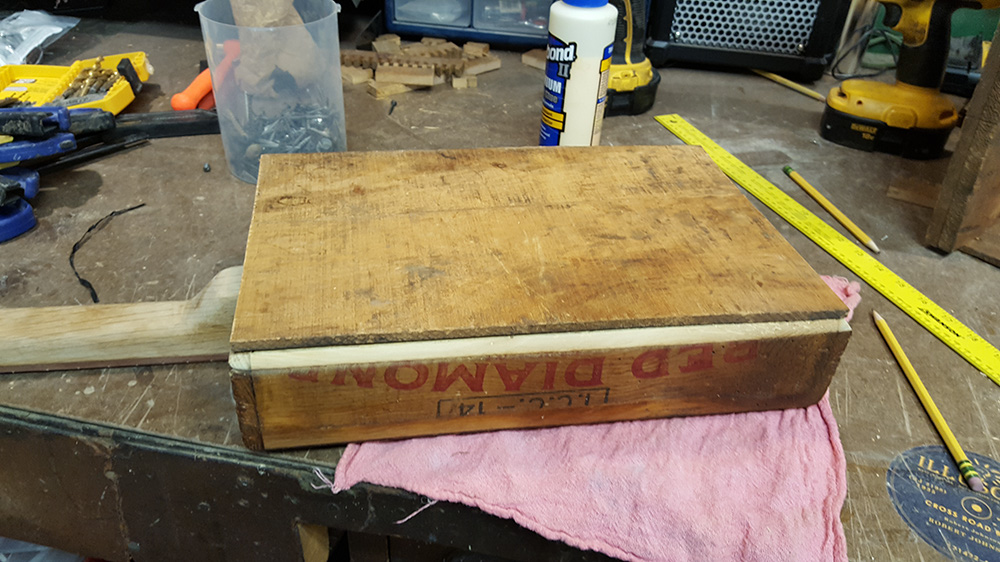
Here I have done a little detailing of the sound board to make the RED DIAMOND lettering stand out a bit stronger, and I've also applied a coat of linseed oil to the box to liven up the wood. Below that, you can see that I've cut a scarf joint for my headstock, and also milled a fretboard. The wood for this fretboard came from an old black walnut fence post that my grandpa had salvaged from a field on the edge of an abandoned part of the Marblehead quarries. Black walnut trees were once very plentiful on the Marblehead peninsula, until land clearing for quarrying removed most of them. At this point I have glued my soundboard onto the box - I don't show a photo of this, because it's basically just a lot of clamps. |
|
|
|
|
|
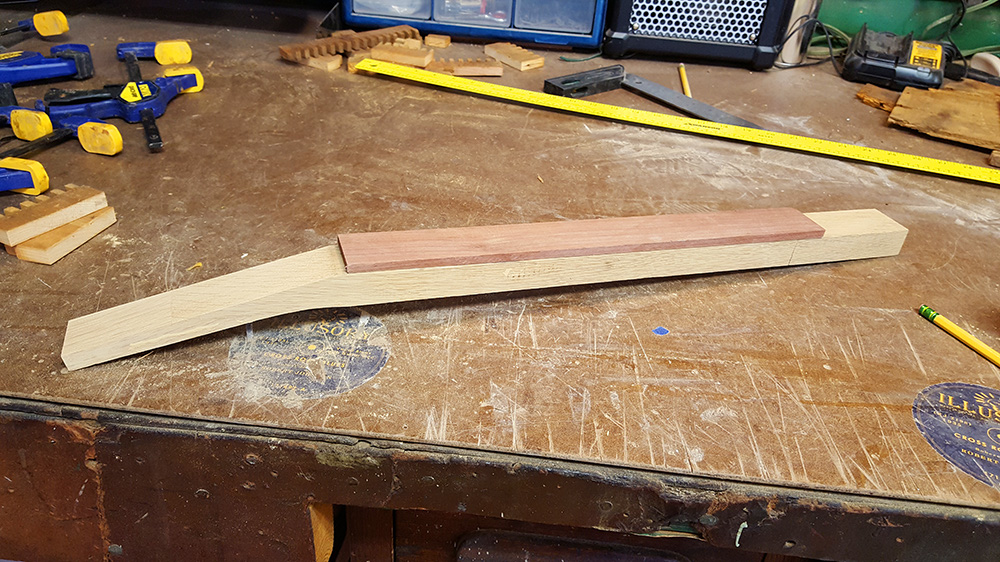
Here my neck and fretboard are laid out and ready to proceed. I have not yet glued the fretboard to the neck, this is just a dry fit. |
|
|
|
|
|
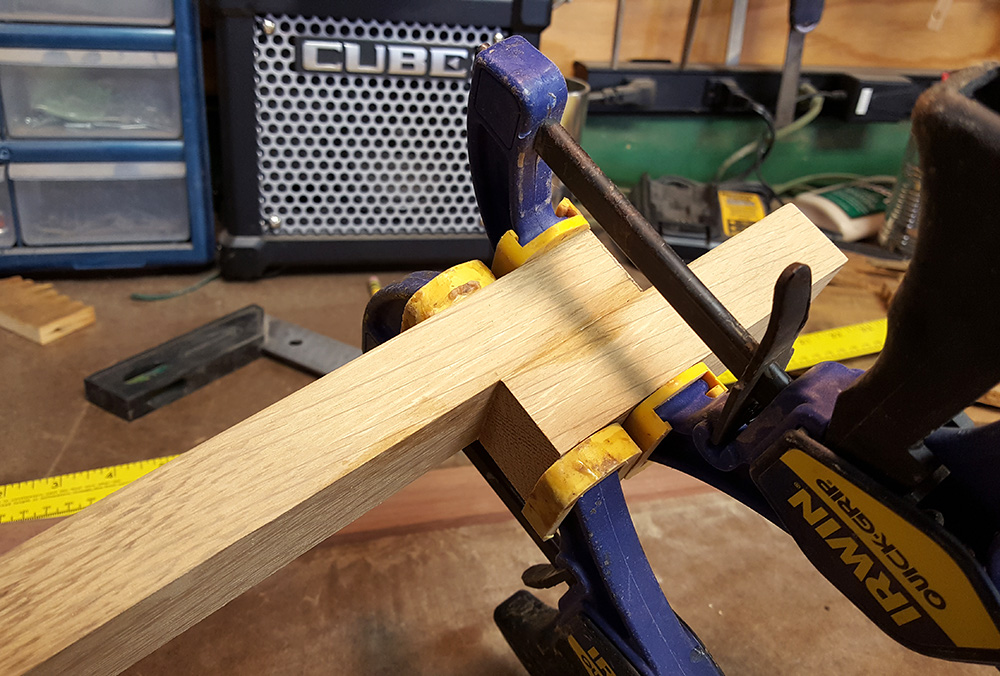
I decide to go with a heel and internal brace for mounting the neck into this guitar. Here I am gluing the heel onto the main part of the neck. |
|
|
|
|
|
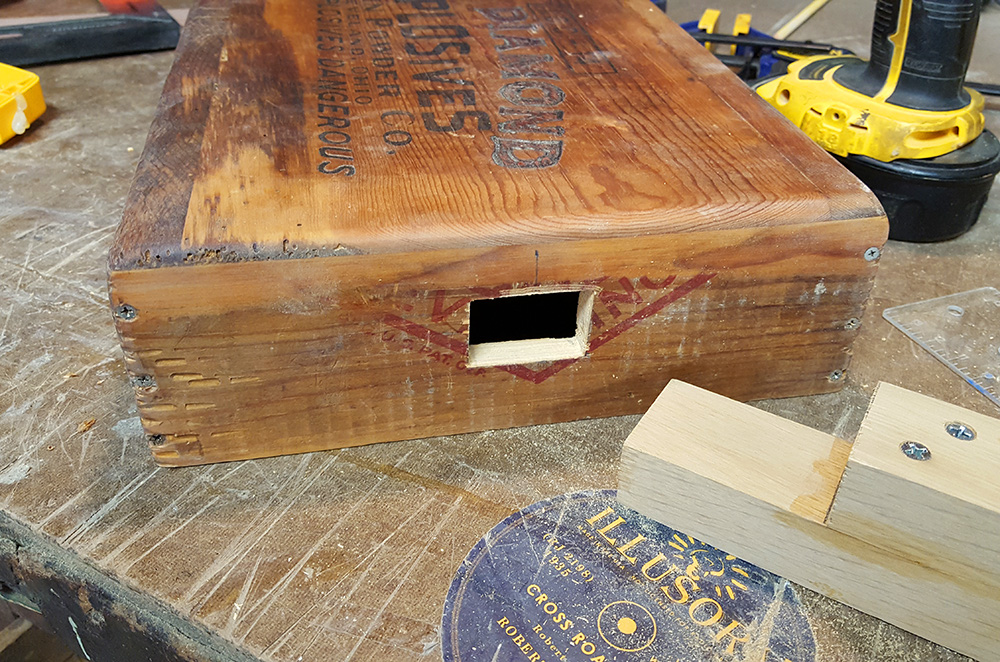
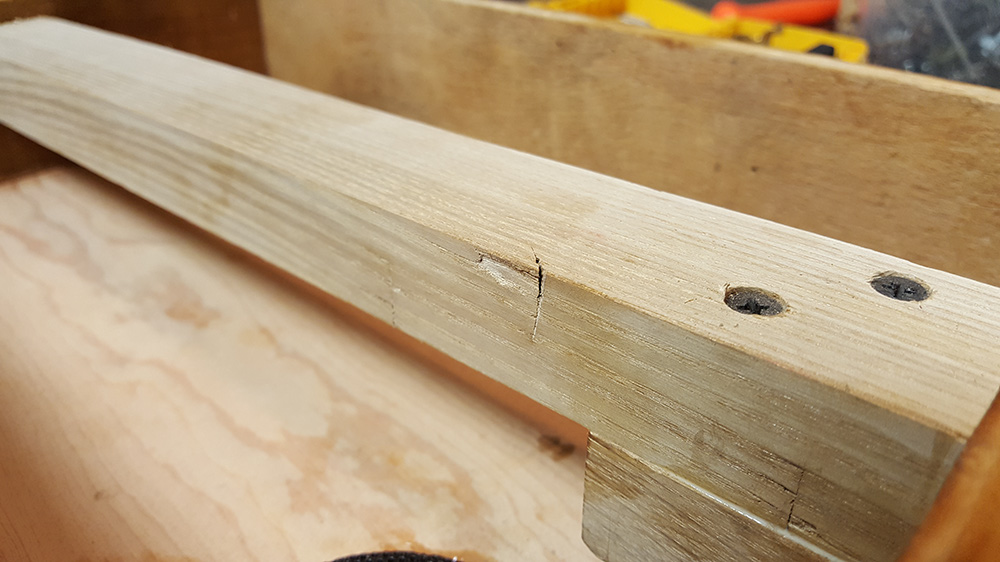
This style of neck mounting requires cutting a rectangular hole in the front side panel of the box, so that the heel stub can extend through. |
|
|
|
|
|
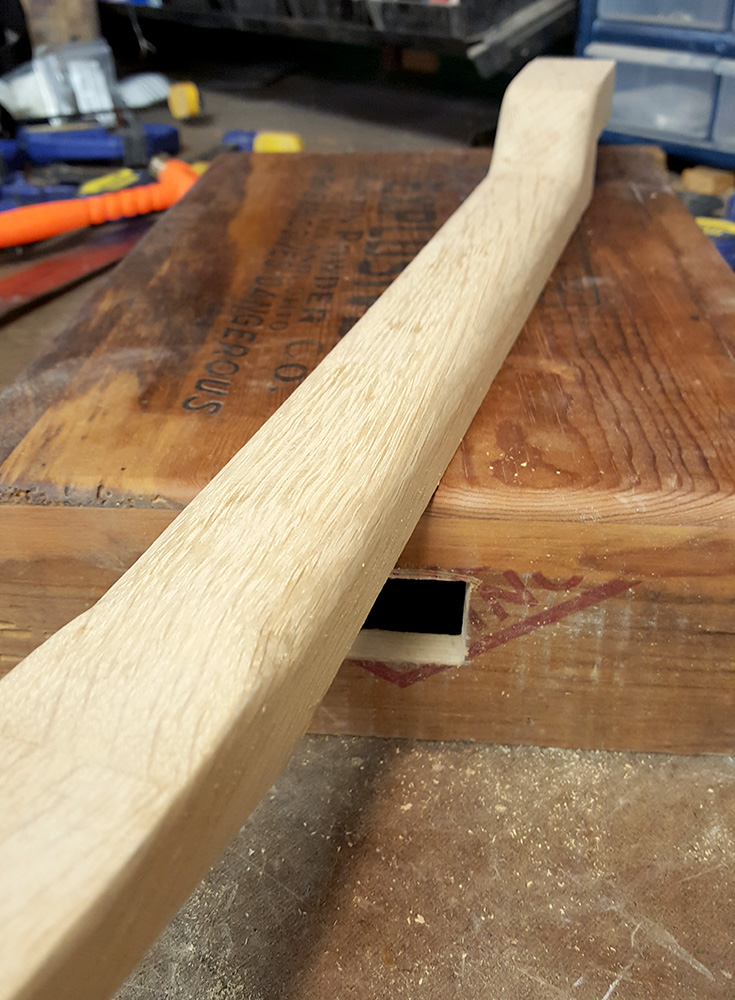
Here I have rounded the back edges of my neck, and done some shaping of the heel to make everything nice and smooth. |
|
|
|
|
|
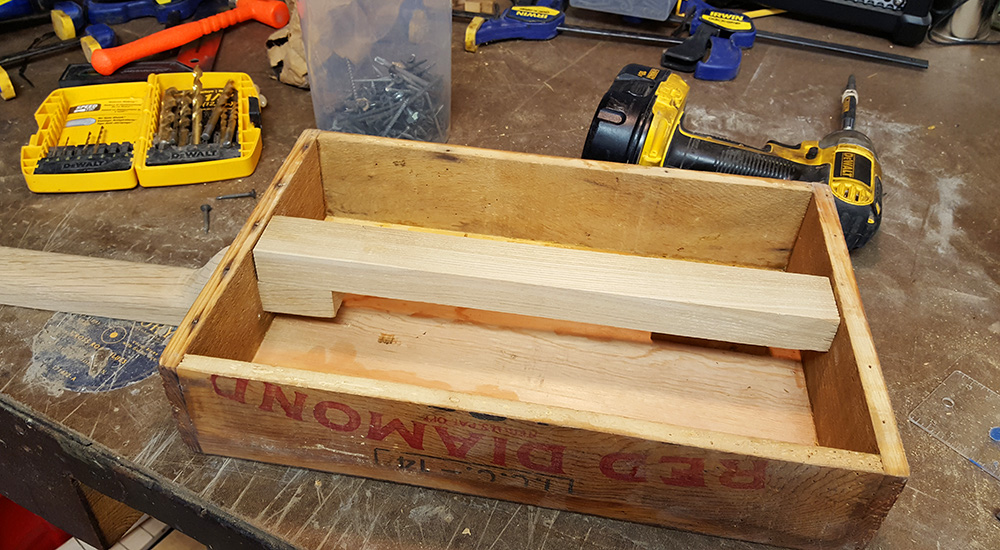
For the brace inside the box, I choose a piece of 200-year-old reclaimed American Chestnut wood, which was salvaged from an old barn in Maine. Though not directly related to any quarries, it is great old wood and I always enjoy including it in a build. |
|
|
|
|
|
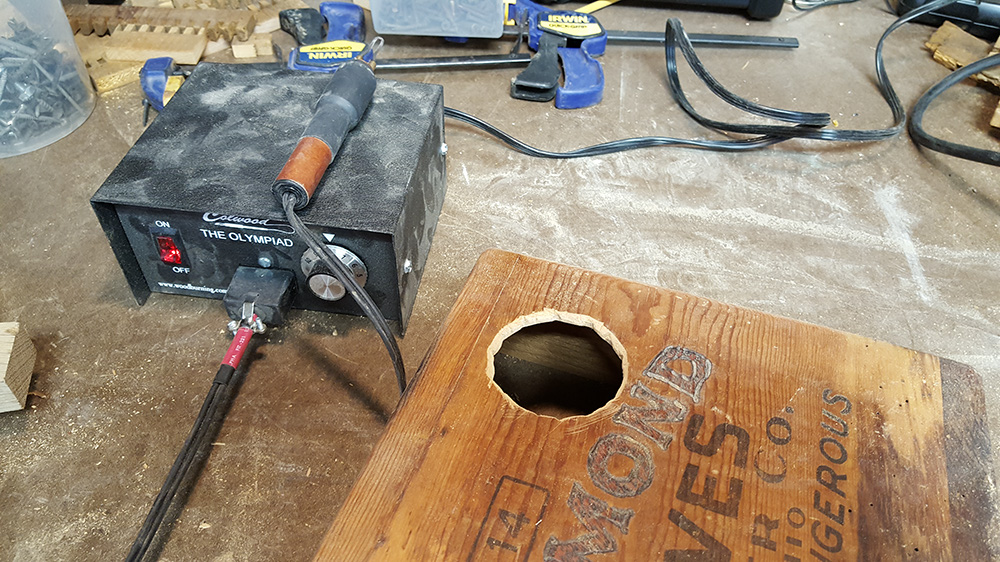
While waiting for some glue to set up, I use a hole saw to cut a sound hole into the soundboard. Because the guitar body is fairly large (9 1/2 x 14 3/4 inches), I cut a 2 1/4 inch hole. |
|
|
|
|
|
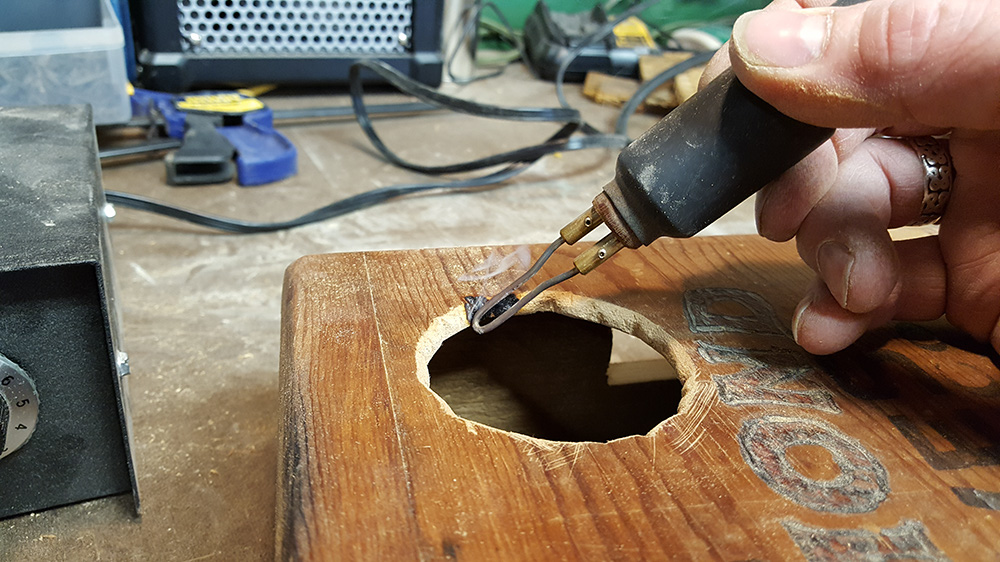
One of my favorite techniques for sound holes is to use a woodburner to burn and distress the edges. It seemed especially appropriate for this build, as it made it look like some dynamite had blasted right through, or perhaps that it had been burned through by a fuse. I have also done some detailing of the RED DIAMOND text using my wood burner, to help it stand out a bit more against the oil-darkened wood. |
|
|
|
|
|
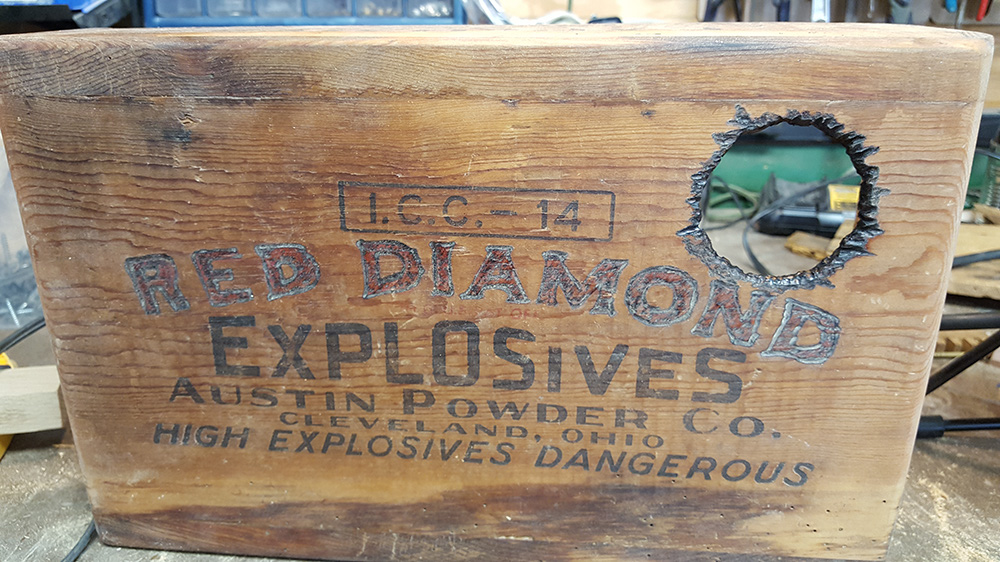
The finished sound hole. You can see that the box soaked up that first coat of linseed oil and was looking pretty dry... |
|
|
|
|
|
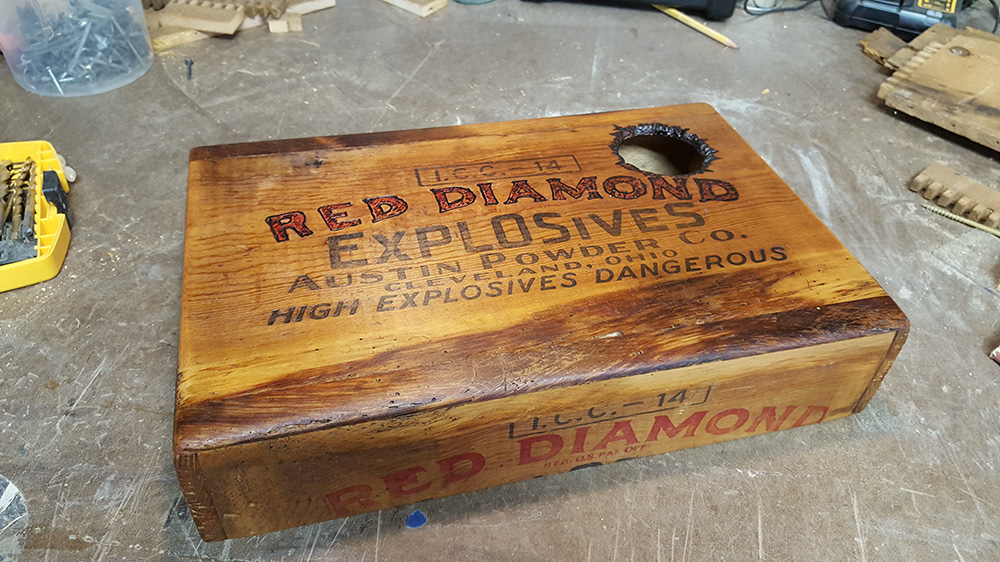
So, I give it another one and it really makes her glow. |
|
|
|
|
|
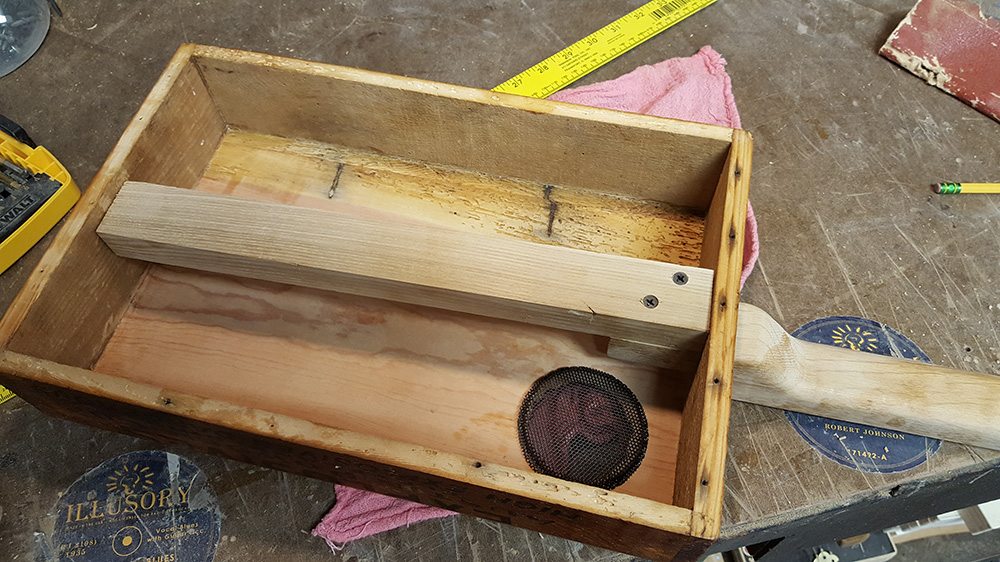
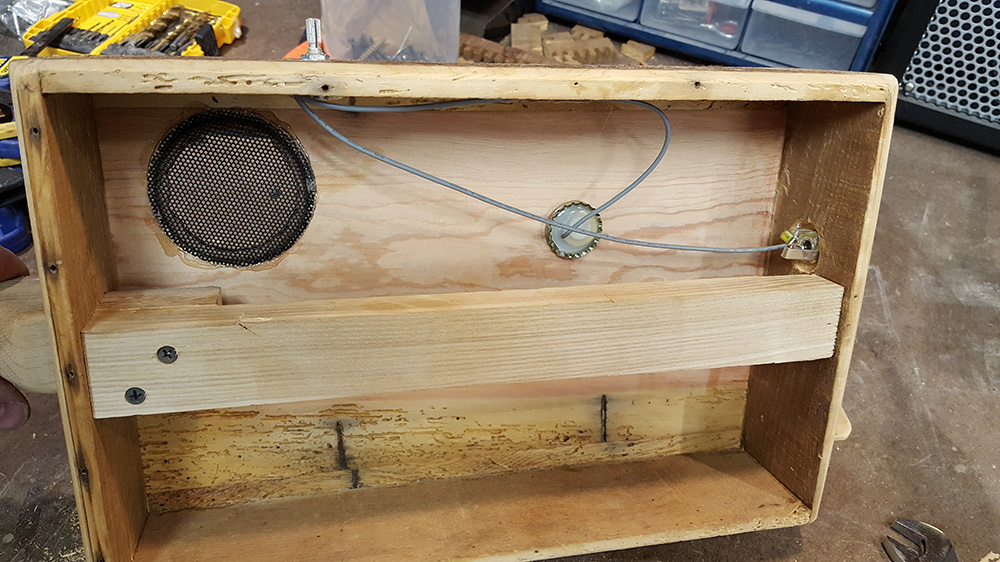
I now glue and attach the neck heel to the brace and prepare to mount it into the box. Also note the black screen I glue in on the underside of the sound hole. I use a piece of black metal speaker grill for this, which gives it a really nice look. |
|
|
|
|
|
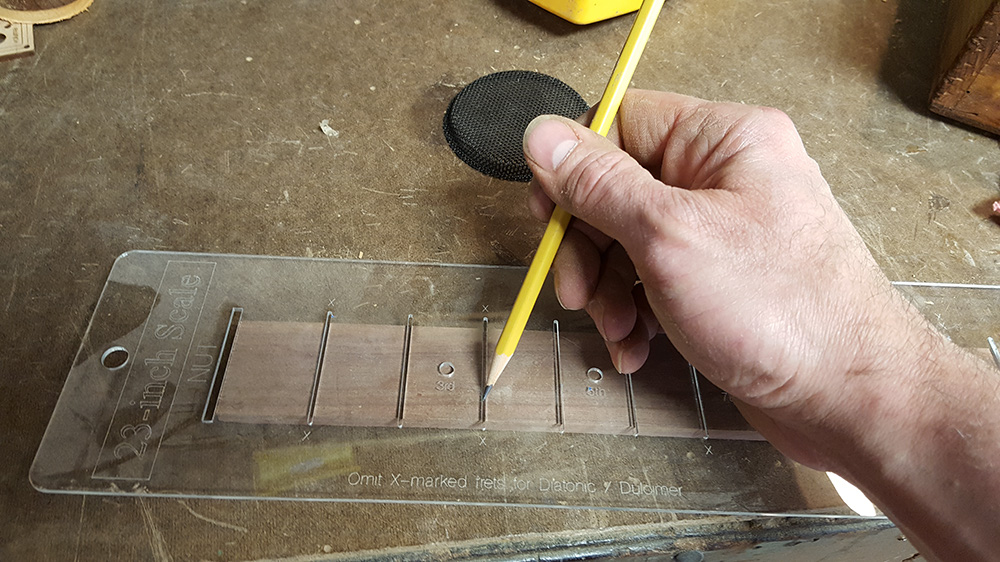
Now it's time to get that fretboard fretted up. I begin by marking my positions using a C. B. Gitty 23-inch acrylic fretting template. |
|
|
|
|
|
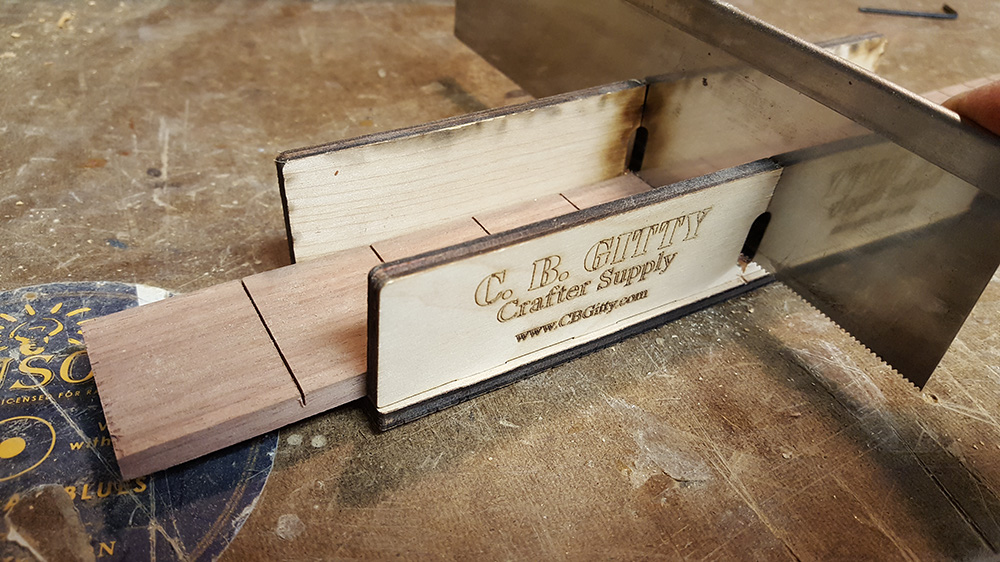
Then I use a C. B. Gitty fretting miter box and saw to get the slot cuts to the right depth. |
|
|
|
|
|
With the neck mounted in place, I'm ready to get that fretboard done and glued on. |
|
|
|
|
|
Check out this detail of the internal brace. As mentioned before, this is a piece of 200-year-old American Chestnut wood, from a barn up in Maine. The bark was built around 1820, and by counting the rings on the timber this piece came from, they determined that the trees were around 200 years old when they were cut down... which means they started growing around 400 years ago. This mark in the wood is the remnants of one of the axe/adze marks from when those timbers were originally shaped, when that barn was being built 200 years ago. I just love little details like this, and knowing the stories behind them. |
|
|
|
|
|
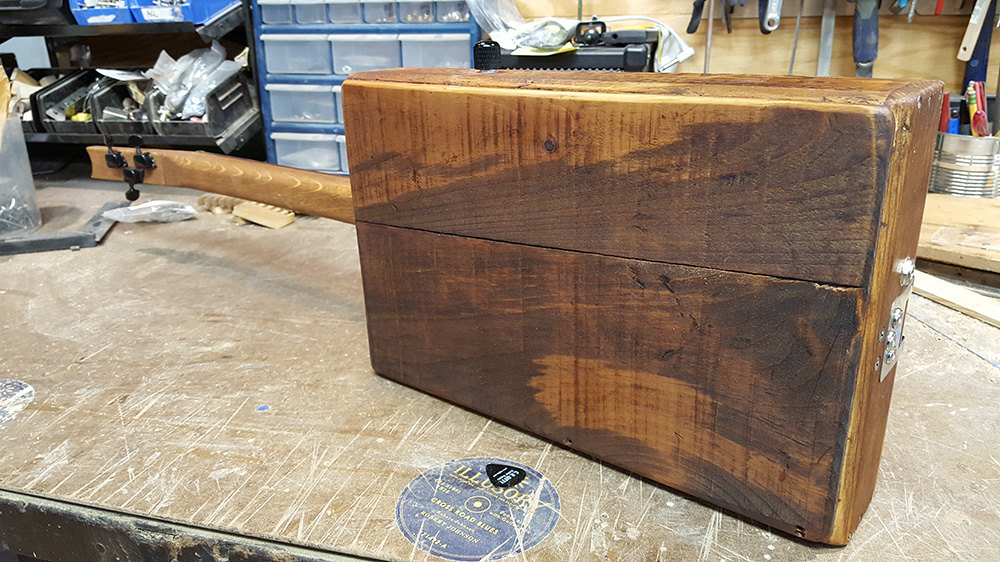
I didn't have enough wood left over from the original crate to form the back panel of my guitar, so I found another suitable wooden crate of unknown origin to get the job done. Also in this picture you can see the fretboard being glued into place on the neck. |
|
|
|
|
|
Creating the back panel involved removing the slats from the source crate, sanding a clean gluing edge onto them, and then gluing them together to form a single panel. |
|
|
|
|
|
For a pickup, I used a C. B. Gitty. "Cap-o-Tone" pickup harness which includes a volume control. These harnesses embed a piezo disk in hot glue inside a bottle cap, which helps tame the overly hot piezo disk for good acoustic tone. |
|
|
|
|
|
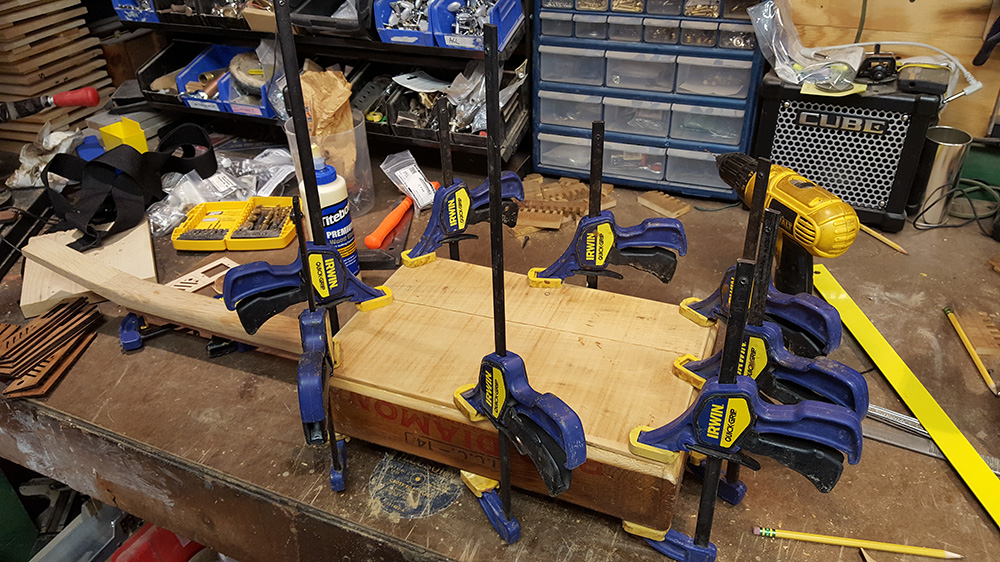
Everything inside the box is done, so now it's time to glue the back panel into place. |
|
|
|
|
|
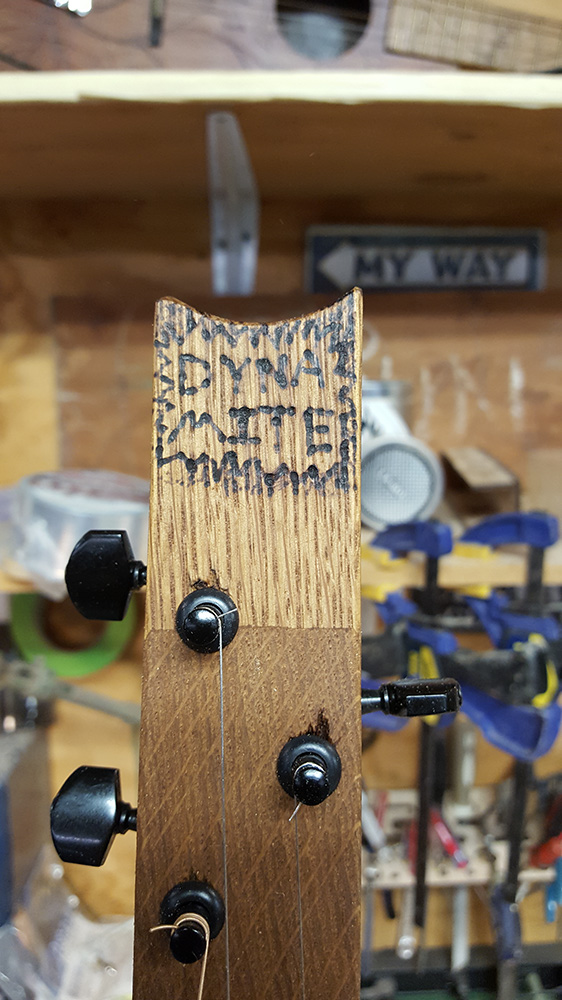
The tailpiece has been installed and the fretboard has been sanded flush and smoothed. I have also added some fret markers to the fretboard with my woodburner. If you look closely at the headstock area, you'll see that I have also installed a nut, drilled the tuner holes, and added a "DYNAMITE" headstock decoration. |
|
|
|
|
|
Close-up detail of my woodburned headstock decoration. |
|
|
|
|
|
|
|
|
I apply some stain to the back panel to darken it down a bit, so that it better matches the rest of the guitar. |
|
|
|
|
|
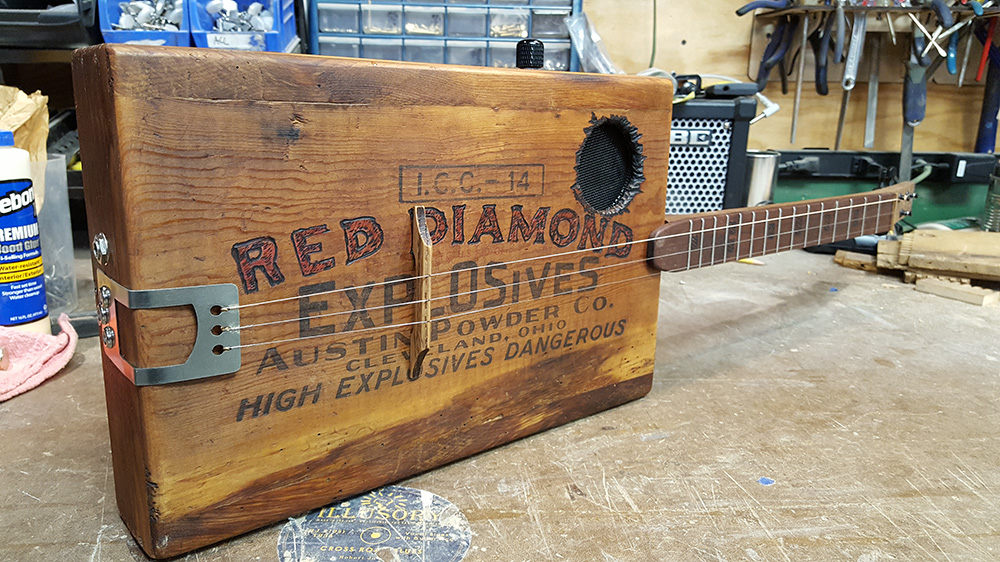
All strung up and ready to go! Originally I used a higher "folk" set of strings on this guitar (one wound and two plain steel), but it just didn't have the sound I wanted. I then switched it to a lower "blues" set, with three wound strings, and that gave it the low growly sound I wanted. |
|
|
|
|
|
Here she is, ready to go - the Quarryman Guitar! |
|
|
|


For me, there's just nothing better than building a guitar from materials that have a story behind them, and carrying that story forward into what I've built. I hope you've gotten a bit of inspiration from this chronicle of this process, and it will inspire you to create some "story-full" instruments of your own. Happy building!
Recent Posts
-
Steve Holladay's "Pocket Box Guitar"
If you're a member of the Friends of C. B. Gitty group on on Facebook, you've probably seen some of …14th Jan 2026 -

2024 World's Wildest Electric Cigar Box Guitar Build-Off Winners!!!
C. B. Gitty Crafter Supply is proud to announce the winners of the 2024 "World's Wildest Electric Ci …31st Oct 2024 -
")
Improved C. B. Gitty: Easier Than Ever! (Work in Progress)
Ben “Gitty” has been cleaning house, making our website even easier find your favorite parts, kits a …7th Oct 2024