
Cigar Box Guitar Builder's Diary: The 7-20-4 (Part 1)
Howdy folks! My name is Nick Lanciano, and I am one of the newer folks over here at C. B. Gitty.
This is a build progress diary I wrote for the building of my second Cigar Box Guitar, a 3-String Electric Cigar Box Guitar using a 7-20-4 Cigar Box (one of my personal favorites).
Without further ado, here is a recap of what happened during this build!
Step One: The Box
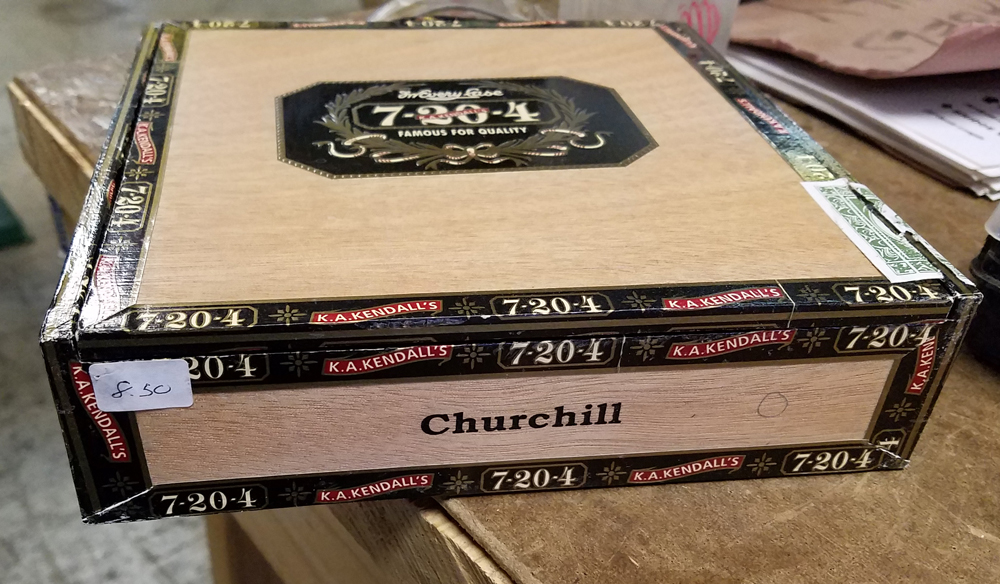
Like a lot of builders out there, I started with a box. Not just any box however, this was a box that I had some history with.
I had sold it to Gitty a few years previous while working at a local Cigar Bar. I had found it tucked away in the corner of storage with the price sticker (that I had personally written) still intact. It was a stroke of destiny that shaped this build.
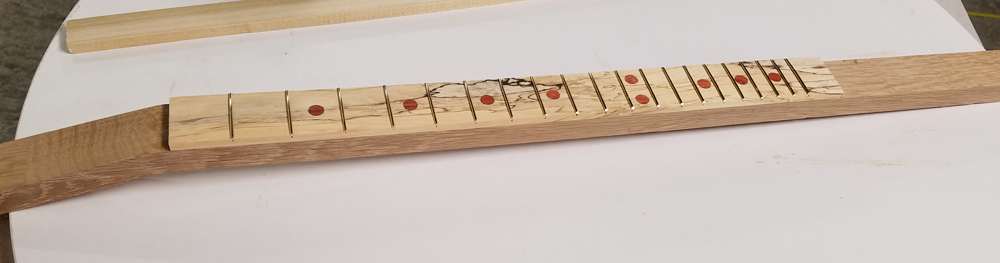
Step Two: The Fretboard
This was the first step I took. I was given a piece of Spalted Maple by my coworker, Farley after she had pre-cut a few of these as fretboards for herself to try out. I found out later that it can be a bit tempermental when trying to hold down frets.
I set about marking the frets and fret markers with one of the templates we use (and sell in shop) for a scale of 25 inches. From there I cut the slots for the frets, drilled down in with a forstner bit for the position, and set about gluing the fret dots in. Once they had dried and I got it all sanded down, I put in the frets themselves. Medium/Medium Gold EVO.
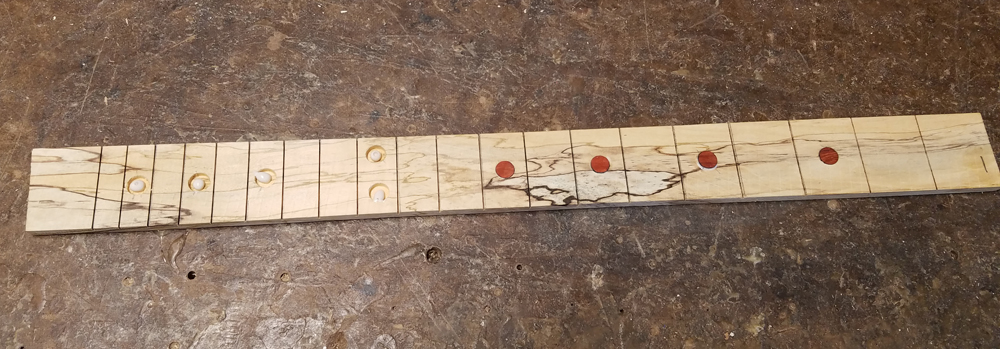
Spalted Maple is known to be a bit punky, but the piece I had was fairly solid. For the most part it took and held the frets fairly well.
This was an exhilarating step for me, because it was the first time I had made something like this. And it came out beautifully.

Step Three: The Neck
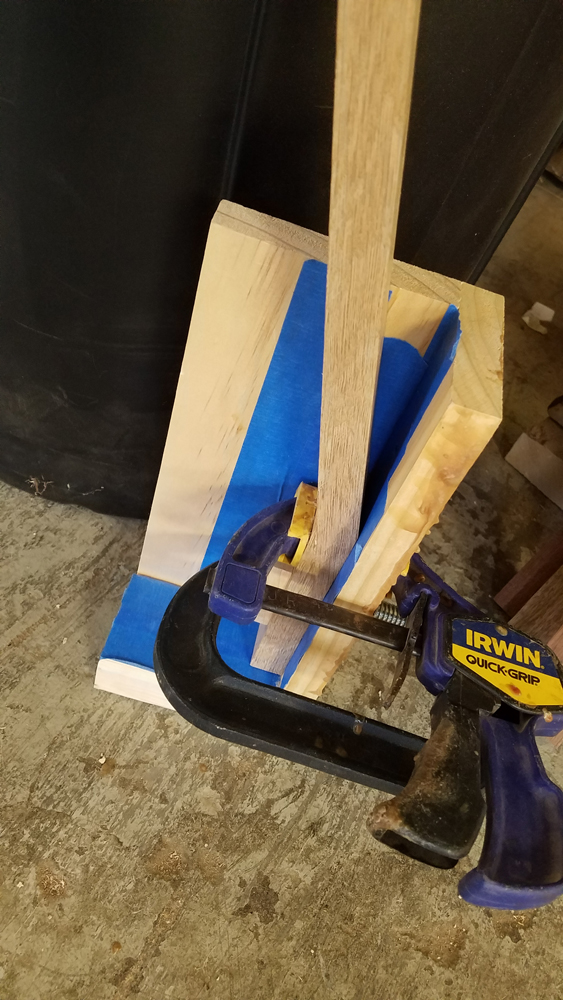
I grabbed a piece of 1x2 oak that was already pre-ripped for a neck, but had some minor cosmetic defects. I put a scarf joint on it using one of the saws in the workshoup and carefully set it to glue overnight. I put some painter's tape down on a jig designed for to make the joint as flush as possible.
I clamped it all together and did the difficult thing of letting it sit overnight.This is the same style of neck that C. B. Gitty sells premade. I had also toyed around with the idea of adding an extension to the headstock, but I was admittedly too impatient, so decided to leave that for a future build.
From there I did a little bit of sanding to smooth any rough edges left behind from the scarf joint. I lined up the fretboard and set about gluing it along.
This was the first real hiccup to the build. When I took the clamps off I found that I had a small gap between parts of the fretboard and the neck. I had learned an important lesson about clamping: you can never have too many of them.
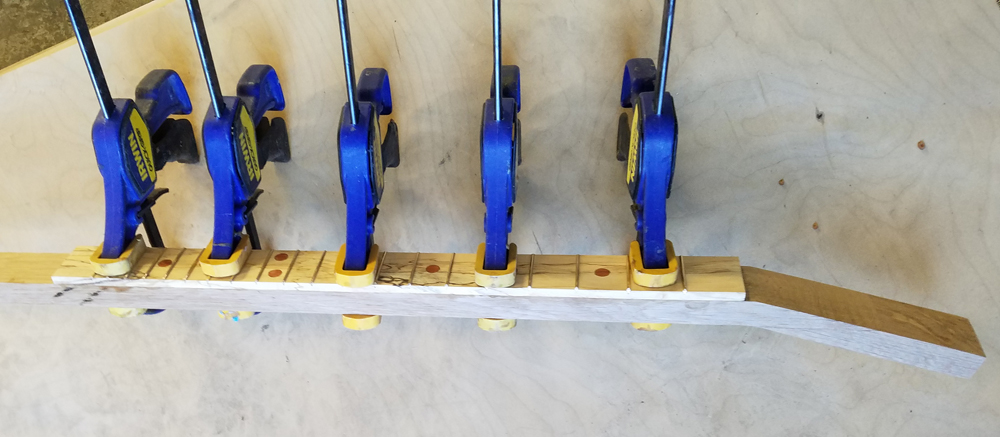
I put some glue on a piece of paper and slid it in between the widest gap and clamped her down again. Luckily it seemed to work, and there were no more gaps. So I started about some more sanding to get the fretboard and the neck flush.
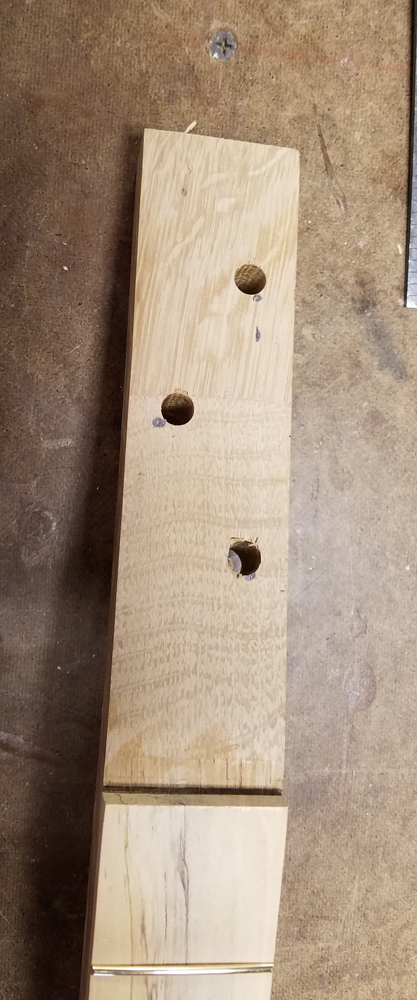
I then drilled the holes for the tuners and set the neck aside to work on the box itself.
Step 4: The Body
This is where the build got a little challenging for me, as I was still developing some of the skills necessary, and figuring out what tools did what (I was a bit of a novice when it came to woodworking when I started here).
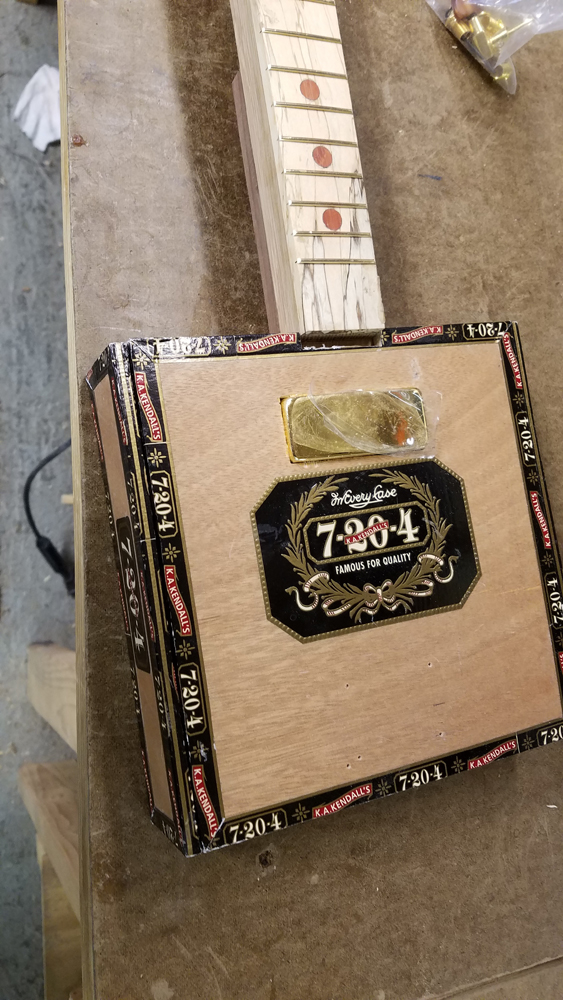
I already knew that I wanted to use a "Snake Oil" Humbucker Pre-wired Mini Pickup, and put it around the neck position for no other reason than I wanted to be able to see the 7-20-4 Logo as clearly as possible.
I started by measuring out the position of the Neck Notch and got to work with a pull saw and a file.
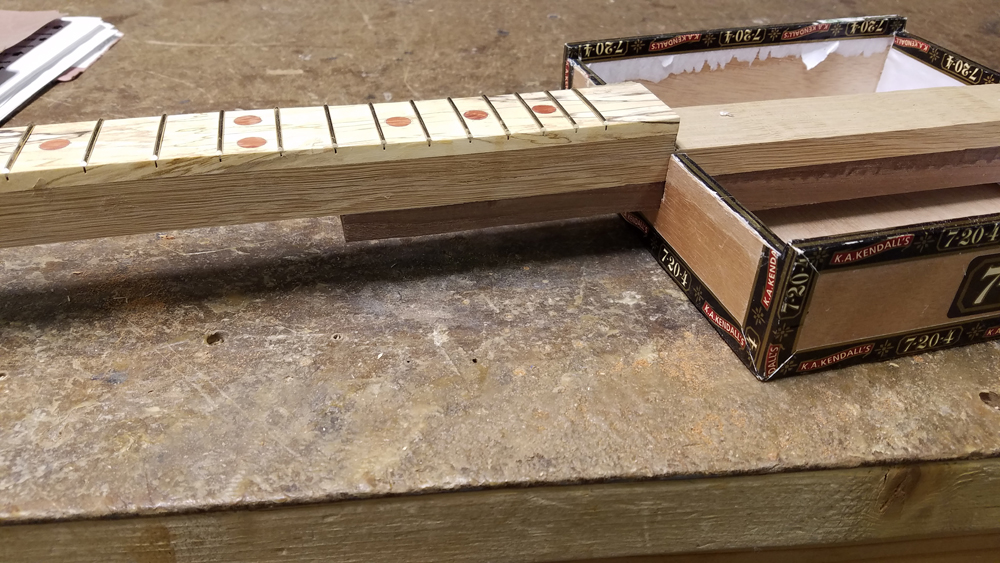
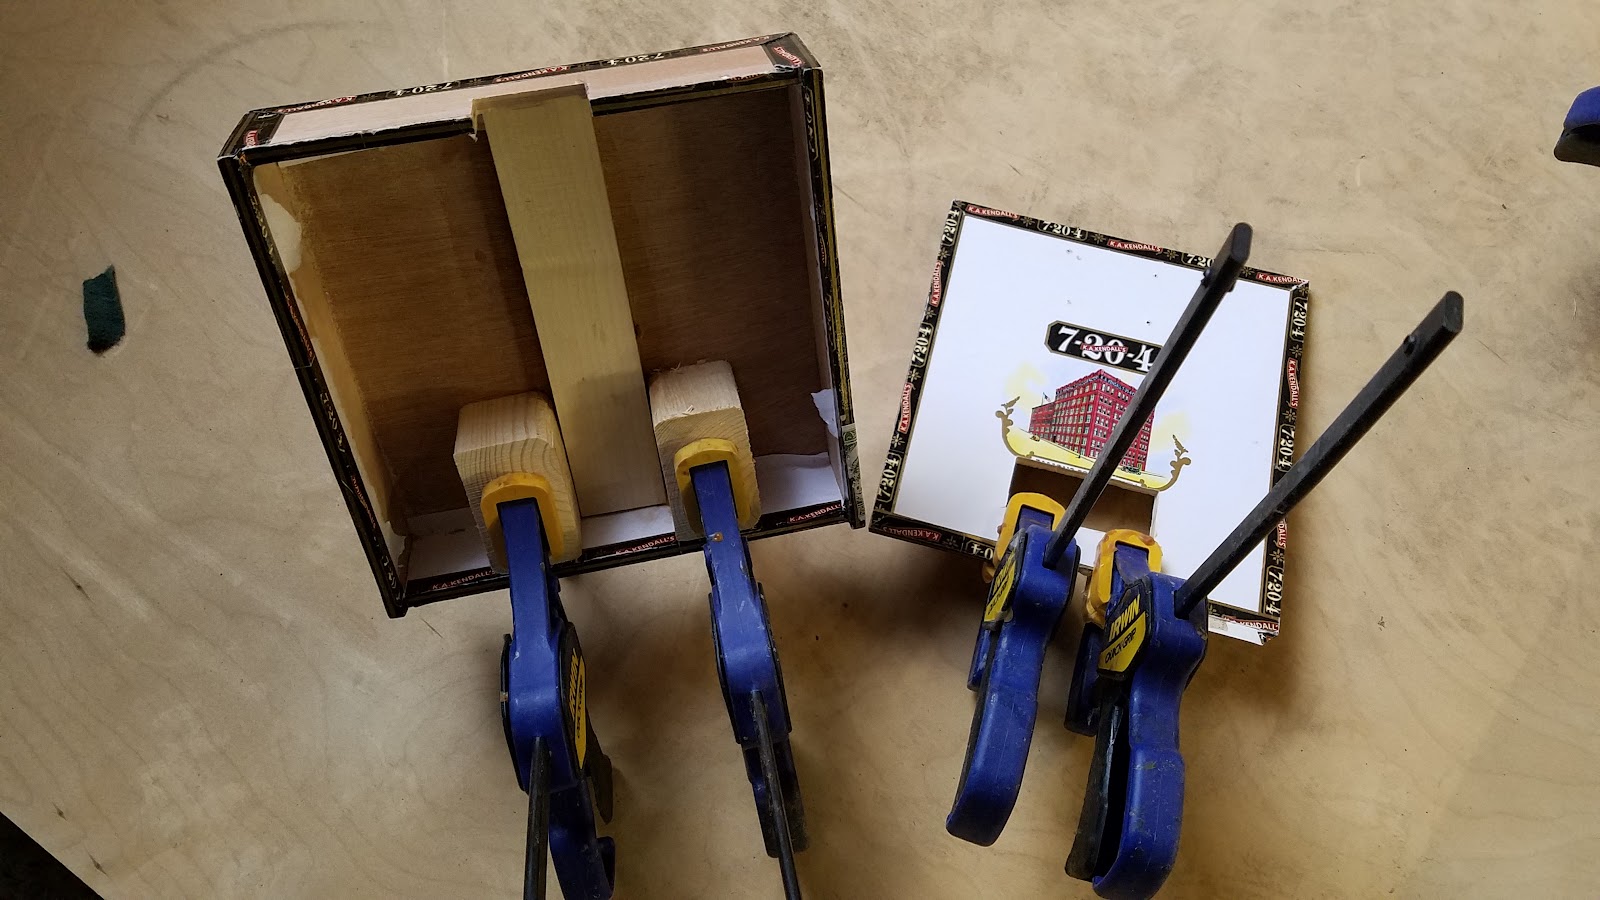
After some discussion with my coworkers, I decided to add a brace to the back of the guitar. As I had intended this to be a 4-string, it would help keep the neck from warping under the tension. And it would serve a dual purpose of bridging a sizeable gap between the neck and the box.
I chose a scrap of Peruvian Walnut and glued it on and sanded it down flush with the rest of it. And cut the notch so that the top of the box sat flush just below the bottom of the fretboard.
The box was rather shallow and I was hesitant to deepen the notch (and it was a pretty notch) so I improvised a bit and cut a piece out of the neck where it met the box, and fit it down in. I wish I had done this with a little more planning, as I had made it a little too wide, but it worked out alright.
There was about a ¼” gap between the neck and the bottom of the box, that I would eventually have to figure out a way to bridge, but I left that for another day.
At this point I had planned on this guitar as a 4 string build. Even going so far as to (prematurely) glue some supports in the box to attach the bridge to (This would come back to bite me). I also cut and glued a ¼” piece to the bottom of the box to cover that gap.
I cut the top off the box to more easily modify it for the pickup and volume pot. At this point I had decided to do everything by hand, so I used a pull saw and made it through the box fairly quickly.
Due to my haste I caused a bit of a break on the box while cutting out the opening for the pickup. I threw some glue on it, clamped it, and hoped for the best. It seemed to hold up alright, without any major (external) signs that this had happened, and I was able to get the pickup to fit through the hole.
I had trouble getting the top of the box to sit flush so I cut a notch next to the neck, figuring the neck could sit flush.… turns out I cut too much out, and it left a sizeable gap. After a moment of channeling my inner sailor, I decided to keep it as a reminder of what to do better the next time around.
At this point I had decided to make it a 3 string. I was bent on using the bridge style I had chosen, and the only one available in 4 string was bottom loading. It’s not impossible, but in a mixture of impatience and want for a fretted GDG guitar, I decided to go with a gold 3-string hard-tail bridge.
I realized then that I had made an error. I hadn’t given any thought to the scale length in relation to the box. I had fabricated the neck and fretboard for a 25 inch scale. I didn’t have enough room left on the box, because of my earlier decision to flip the box.
I put the bridge as close to the mark as I could, but gave myself enough room and decided to throw it out there and marked and pre-drilled my holes.
This is the point where I give a shout out to the “Mi Amor” 3 String guitar from C. B. Gitty, designed and built by Glenn Watt. It heavily influence a lot of this build. I was (and still am) mesmerized by that instrument. There are a lot of inspirations (See: Directly lifted ideas) off of that guitar. Gold "Snake Oil" Pickup, Padauk Mini Humbucker Pickup Ring, 3-string Gold Hart-tail Bridge and the idea for the Padauk fret dot markers.
I cut my notch for the pickup in the neck. This turned out to be a challenge. I jumped right in without double checking measurements, and made more work for myself by getting the box and neck to sit flush.
See you next Wednesday for the conclusion! Same Gitty Time, Same Gitty Channel!
Recent Posts
-
Steve Holladay's "Pocket Box Guitar"
If you're a member of the Friends of C. B. Gitty group on on Facebook, you've probably seen some of …14th Jan 2026 -

2024 World's Wildest Electric Cigar Box Guitar Build-Off Winners!!!
C. B. Gitty Crafter Supply is proud to announce the winners of the 2024 "World's Wildest Electric Ci …31st Oct 2024 -
")
Improved C. B. Gitty: Easier Than Ever! (Work in Progress)
Ben “Gitty” has been cleaning house, making our website even easier find your favorite parts, kits a …7th Oct 2024