
Cigar Box Guitar Builder's Diary: The 7-20-4 (Part 2)
Hey folks! Nick again with the second part of my 7-20-4 build.
Step 4: The Bridge
The bridge turned out to be a bit of a stalling point on the build.
As I mentioned in the last article, I had settled on the 3-string Gold hard-tail bridge. When I went to attack my bridge for a mockup, I found that the screws lined up perfectly on one side… and ended up hitting the corner of the very corner of the neck, and caused a blowout due to there not being enough meat to grab.
This was where I realized the folly of pre-gluing the braces for the screws and I ended up shelving the project for a week or so while I tried to come up with a solution.
The braces were pine, and I thought I could maybe chip it away fairly easily. But after a few pulls with a saw, I quickly gave it up as a bad job and far more work for myself than was necessary, and decided to rethink my plan.
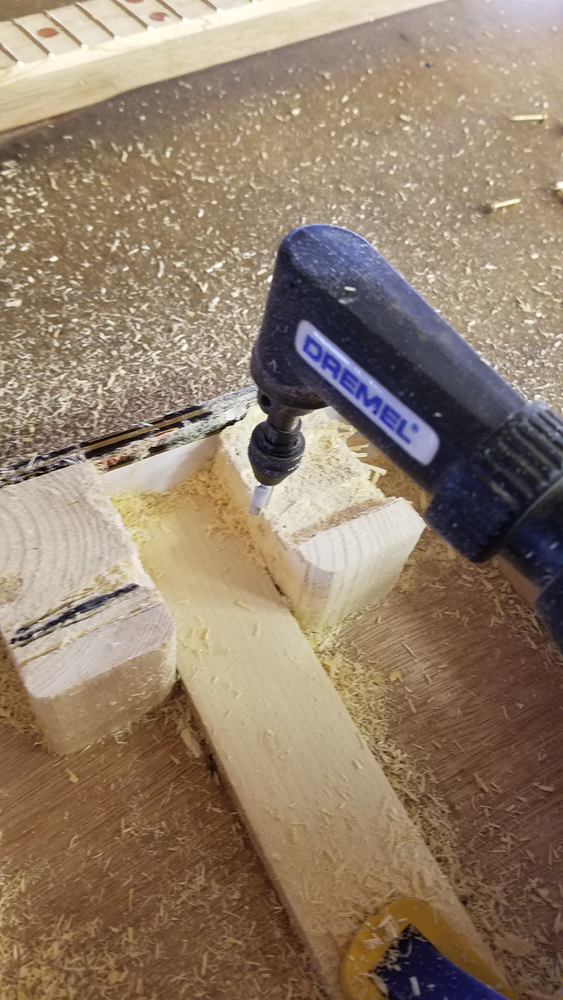
After a bit of thought on how to pull myself out of this rut, and a recommendation from Glenn, I used a hand-held router and dug a trench about ½” into the supports at the same depth that the screw had blown out of the neck. I then cut the same amount off the top of the neck.. if I had to guess, I would say it was a bit over a 1/4" down.
I then cut a piece of scrap (I got lucky and found one that was really close) to fit in this trench and screwed it down on either side. This would serve the dual purpose of keeping the neck in place, and giving enough meat for the screws of the bridge to grip.
I had to mess around with it a little bit, sanding and routing (as I found I had not routed it quite level... and I couldn't get in there with sandpaper to smooth it out) so that it would sit flush. But it was actually a speedy fix. I made a few quick cuts, sanded the top down and I got it to sit perfectly.

At this point I drilled holes for the jack and the volume pot.
I found another learning experience when I couldn’t figure out why the neck of the volume pot wouldn’t go through enough to screw down. And after looking at an in-process guitar, I had the moment of clarity (The DUH moment) and used a forstner bit to drill a bit into the top to give the pole enough clearance to be able to fasten it down with the washer and nut.

After that, I finally put it together. I put the bridge on, because I was impatient to see what she looked like, and I wanted to test to make sure the brace worked, and the screws had plenty to bite into.
I got the pickup ring in place. I had decided on using the Padauk pickup rings laser-cut here at C. B. Gitty specifically for Mini Humbuckers like the Snake-Oil pickup. (Important note, these things look great, but be gentle. I did end up with a small crack in mine).
This was amazing, I could see the entire guitar coming together. It was when I got all the hardware on and stood back to look at my handiworked... and I realized that she was off center just slightly. The neck was at a fairly noticible angle compared to the body.
Keeping in mind to be more careful, I still grinned like an idiot. Soon I would have my gitty.
Step Five: The Finishing Touches
The last few steps weren’t documented by pictures as much as I got caught up in the process. It was mostly sanding anyway.
I rounded out the back of the guitar, mostly chewing off the corners to give the back more of a round surface, and sanding the back of the headstock so that I could install the tuners.
I did at one point lose a fret, as the Spalted decided to then release it’s hold. But I was able to crimp the fret and hammer it back in. And then I put some boiled linseed oil to her as a finish.
I chose a bone nut, mostly because I prefer the sound and look of them, and because I was at least familiar somewhat with their installation, having “interned’ at a music store awhile back.
I learned an important lesson that shaping the bone nut really should be done off the guitar, as it is a little easier to work. But I managed to give it a rudimentary shape, and cut slots for the strings.

At this point I admit to getting caught up in the moment and rushing a little bit. I was impatient to hear the first note. So I got the box in place, threw the knob on top of the volume pot and secured the box top with gold corners.
I strung her up with extra light strings, as I was worried about the box not being stable enough.
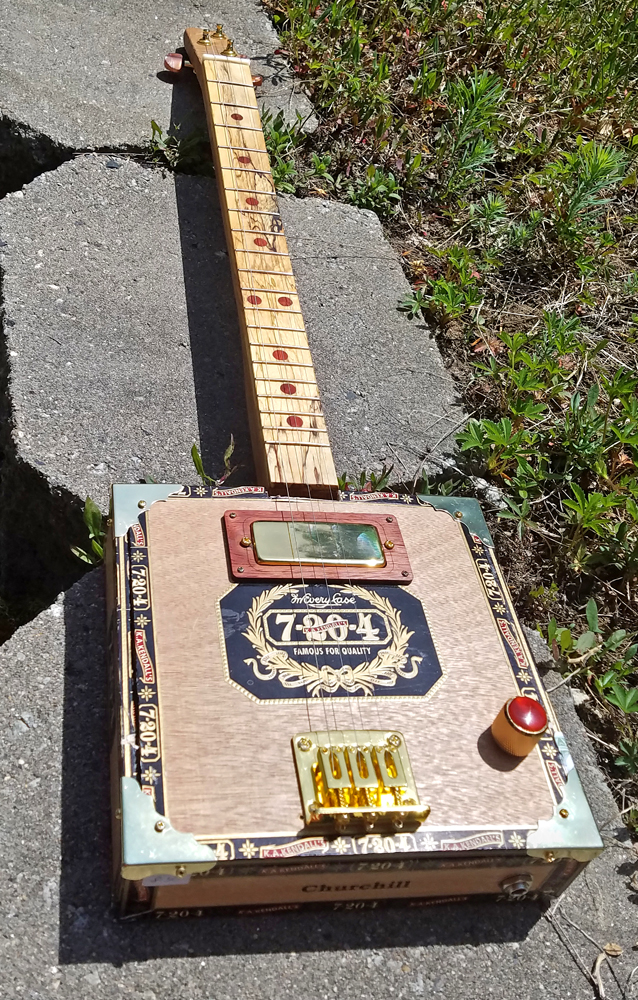
There she was. I had her all good to go.

I realized afterI had strung her up that I wasn’t as careful as I should have been and the box was a bit scratched up in places. The neck was slightly off center, due to my pre-gluing the braces and cutting the mini-notch in the neck where it met the notch already in the box. Thankfully it didn't affect the overall playability of the final guitar.
One thing I hadn’t accounted for was the brace work-around that I had made to solve the issue with the bridge:
Imagine that you put full tension on guitar strings, and there is nothing anchored beneath the bridge to keep it from bowing. Well I didn’t do that at first run, and the top of the box on the bottom of the guitar started to bow upwards from the tension of the strings.
I was able to solve this issue for the most part by popping the top of the box off and sinking a drywall screw into the brace, through the neck, and to the strip of wood on the bottom of the guitar. It gave it enough strength to hold, so I solved the bowing for the most part. There is still a tiny gap, but I think I'll leave it as a reminder to myself of the process, and what I can do better next time.

Thanks for giving this a read!
Recent Posts
-
Steve Holladay's "Pocket Box Guitar"
If you're a member of the Friends of C. B. Gitty group on on Facebook, you've probably seen some of …14th Jan 2026 -

2024 World's Wildest Electric Cigar Box Guitar Build-Off Winners!!!
C. B. Gitty Crafter Supply is proud to announce the winners of the 2024 "World's Wildest Electric Ci …31st Oct 2024 -
")
Improved C. B. Gitty: Easier Than Ever! (Work in Progress)
Ben “Gitty” has been cleaning house, making our website even easier find your favorite parts, kits a …7th Oct 2024