

The Yankee Yardstick Guitar - A Builder's Diary
One hot August morning I decided to head out to the Gitty workshop and build something. I'd been spending too much time at my desk, you see, and while the air conditioning is nice, I needed an "inspiration" break.
There's nothing like making some sawdust, and turning a crazy idea (and a pile of unlikely sticks) into an amazing instrument, to re-stoke the creative fires.
The result was the Yankee Yardstick guitar, a beautifully rustic and unique instrument creation that sounds even better than it looks.
This builder's photo diary is meant to guide you through the steps (and mistakes) I made while building this little instrument, in the hopes of inspiring you on your own DIY journey. If you ARE inspired by this and create your own amazing build, please share it with us!
Specs:
- Scale Length: 19 inches
- # strings: 3
- Tuning: G D G
- String Type: Nylon - #4 (D), #3 (G) and #2 (B) from a classical six-string set
- Neck Wood: American Chestnut (reclaimed)
- Tuners: Chrome Open-Gear
- Pickup: Embedded rod piezo direct to jack
Yankee Yardstick Guitar Builder's Photo Diary

|
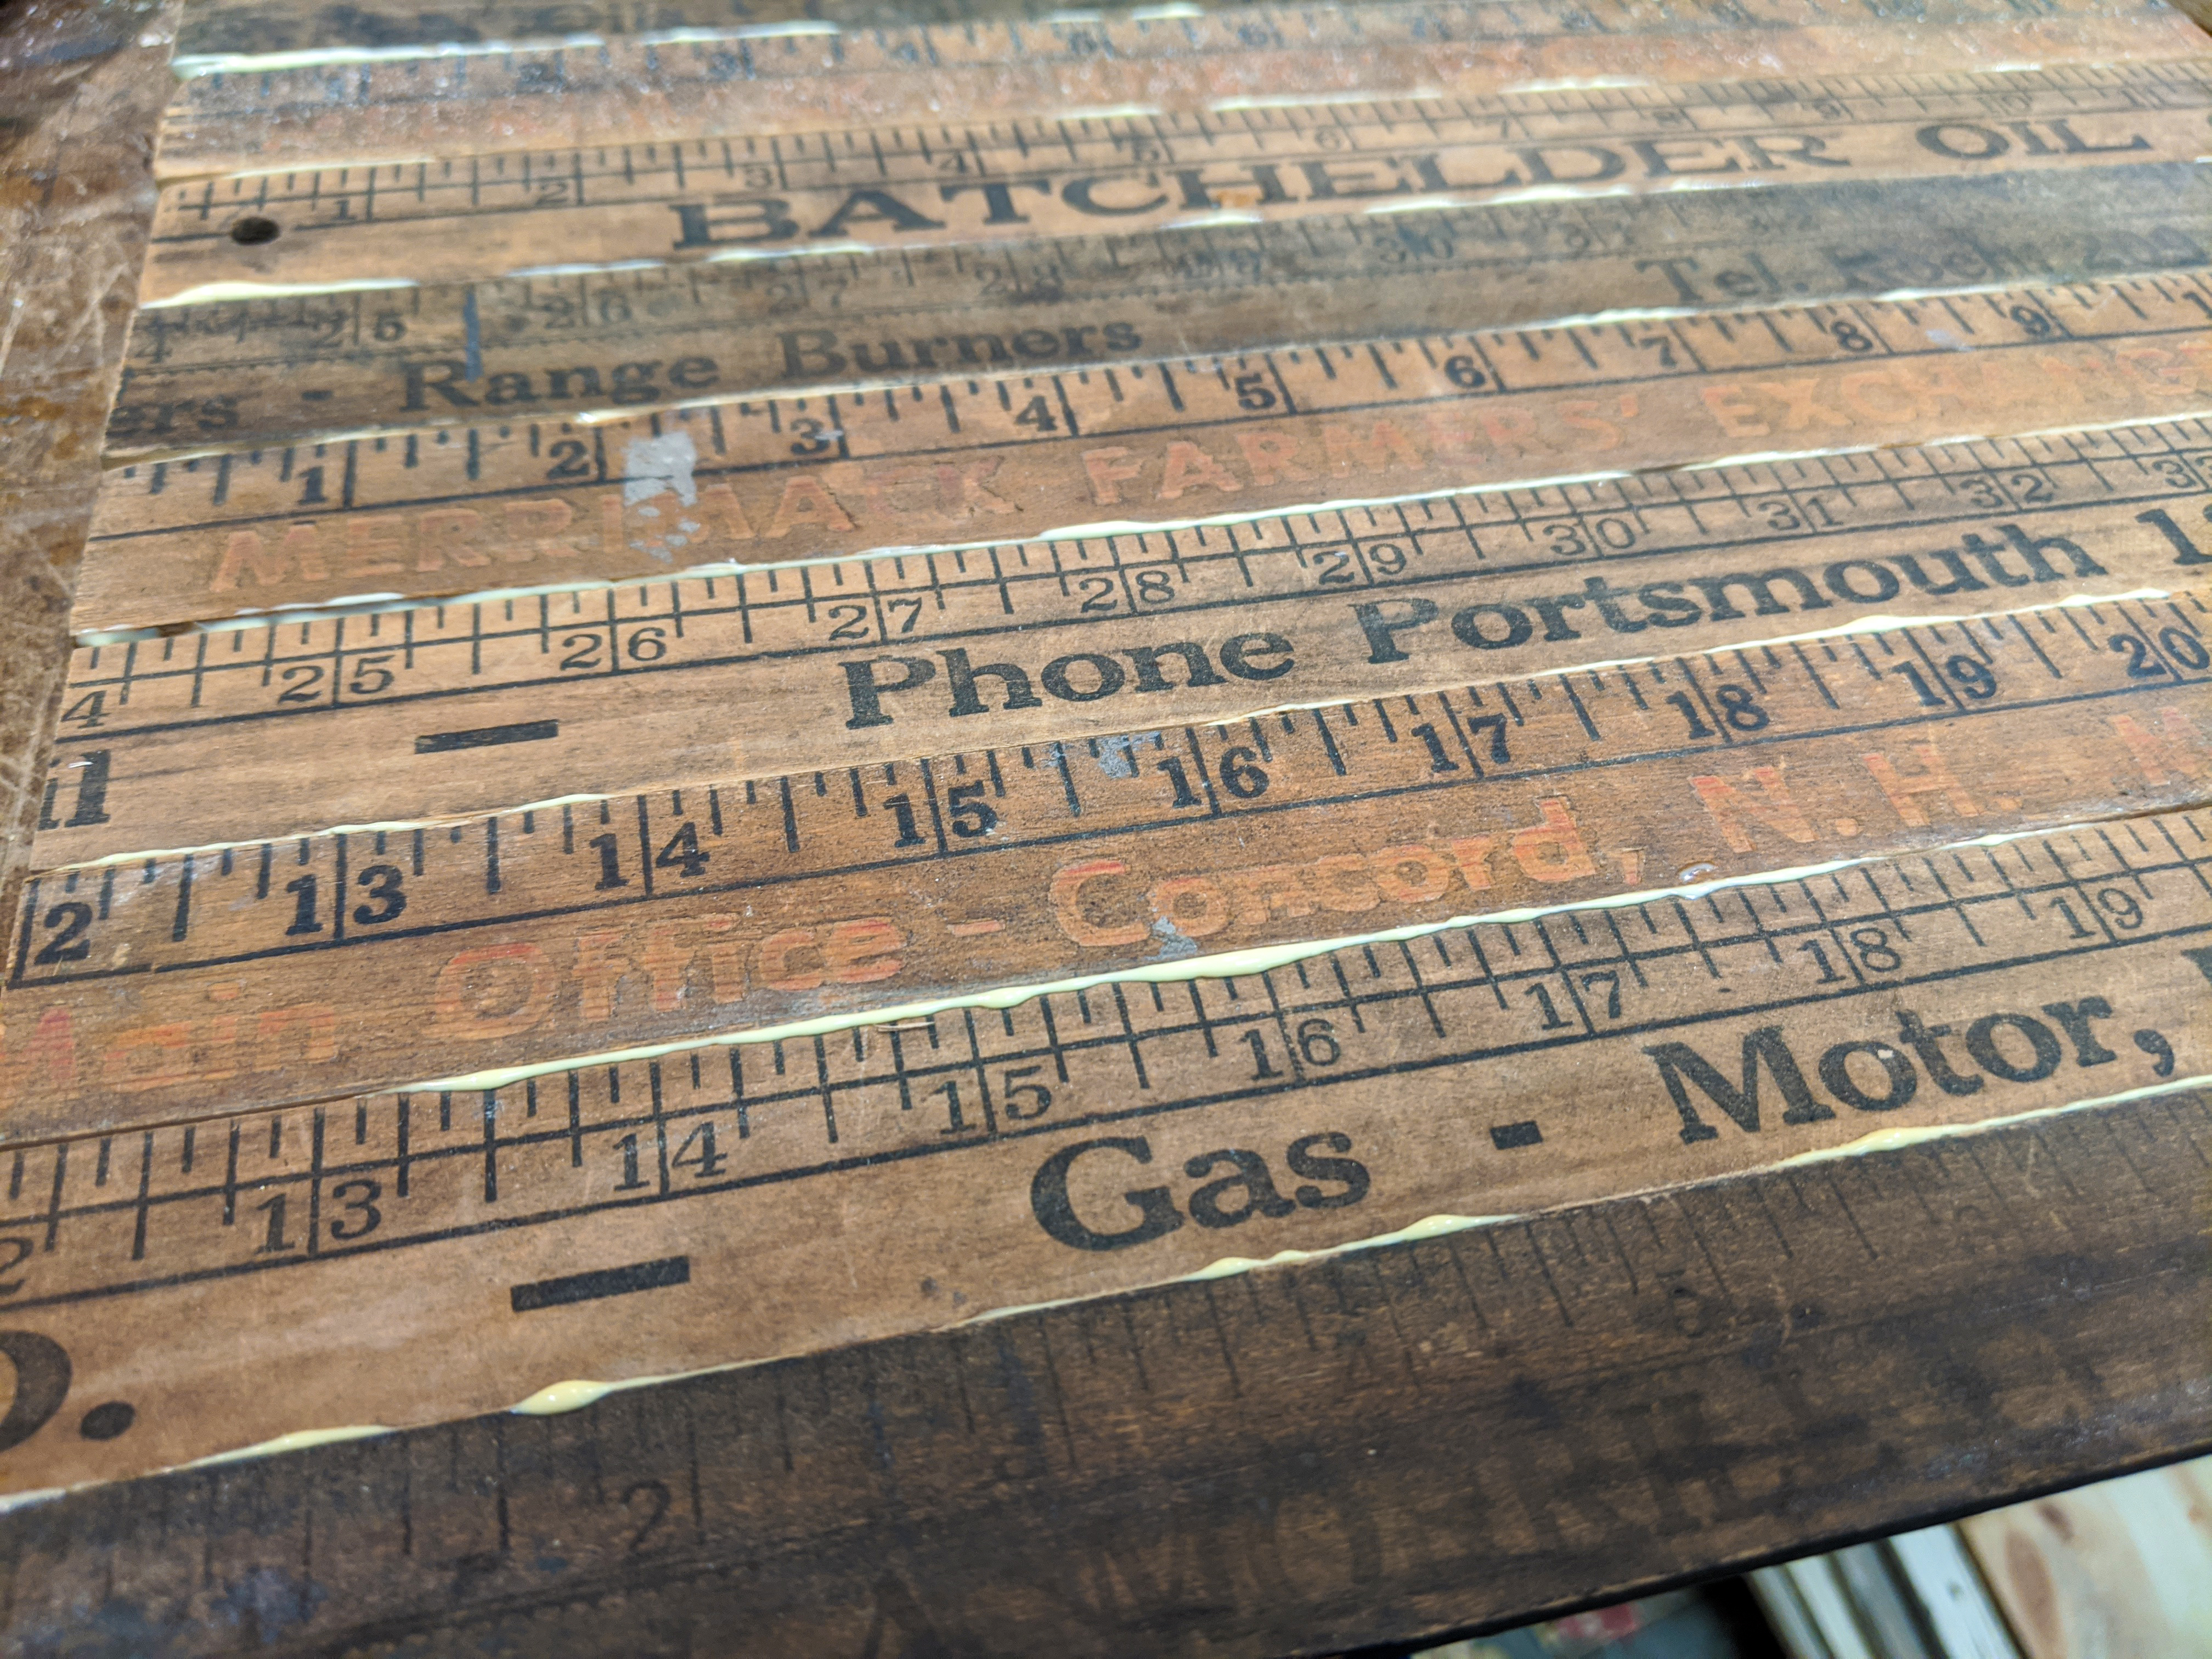
The Starting Point When I headed out to the bench that day, I really didn't know what I was going to build... but almost immediately my gaze fell on a bundle of old wooden yardsticks I had stuck in a metal bucket next to my bench. Suddenly I had my inspiration - instead of just using a yardstick for the fretboard (as many have done) - why not build a guitar ENTIRELY from yardsticks? This photo shows my collection of yardsticks that I've accumulated over the years at junk shops and flea markets. They are pretty easy to find, and usually pretty cheap. |
|
|
|
|
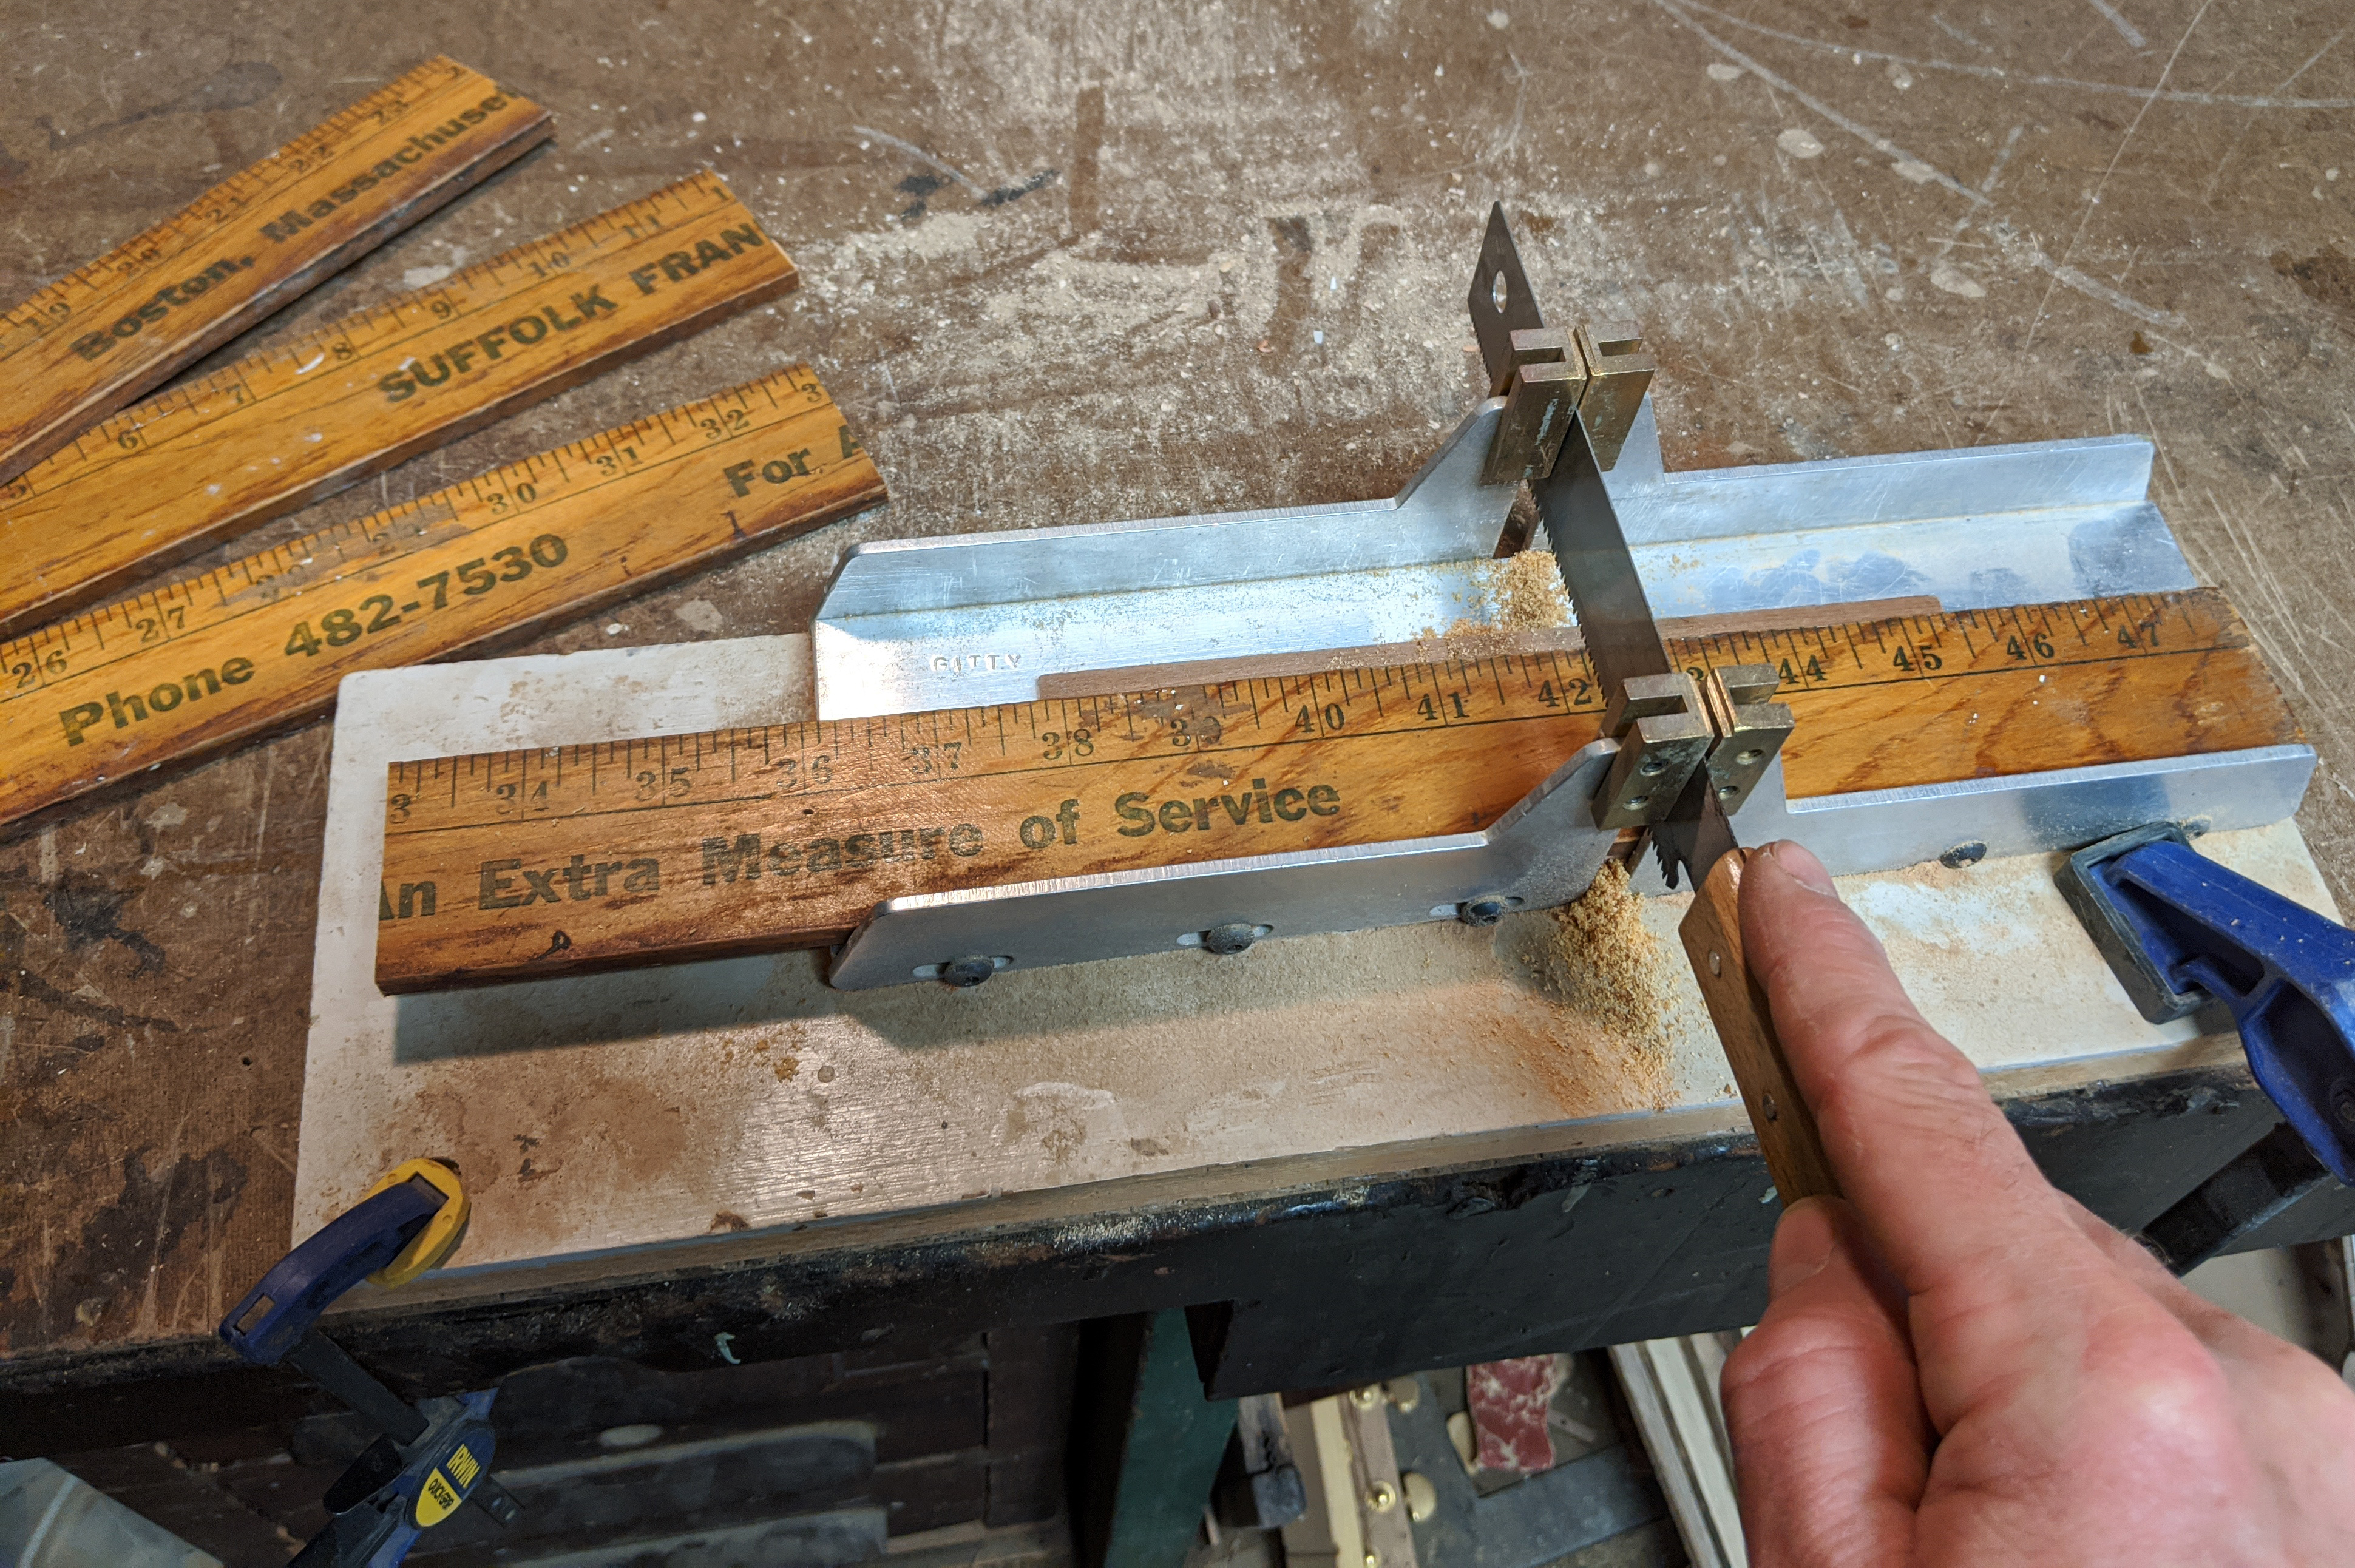
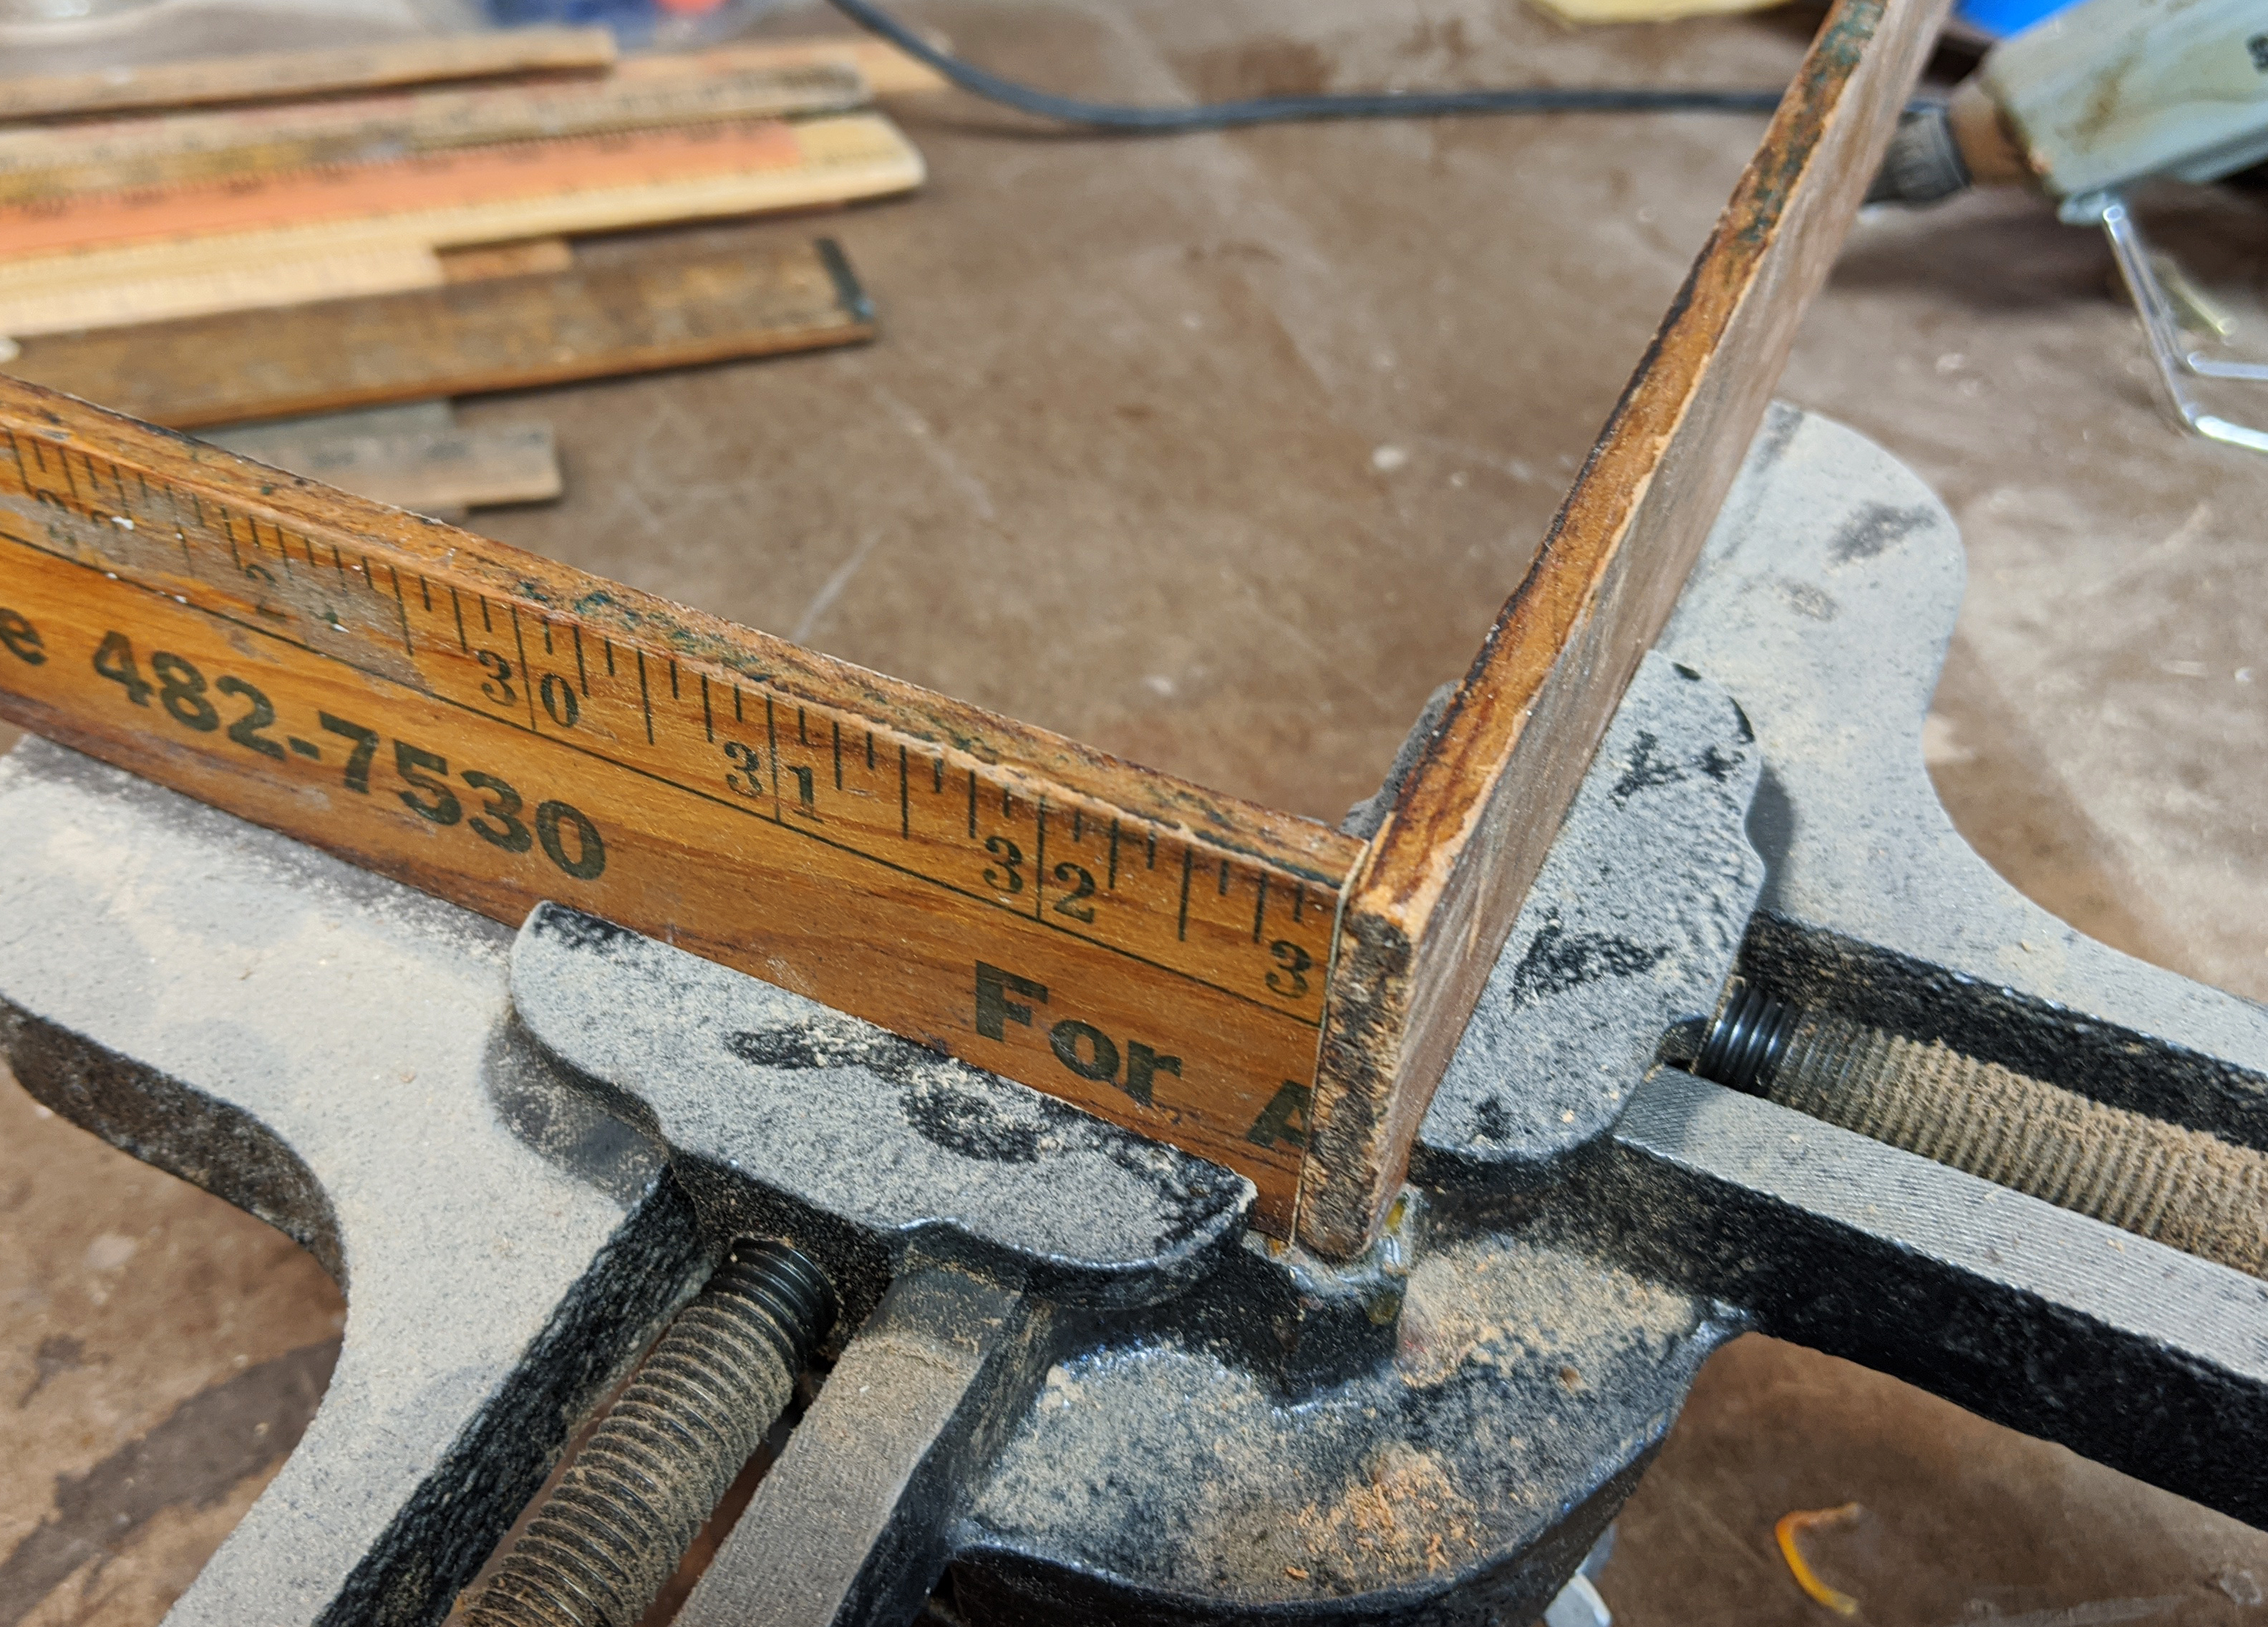
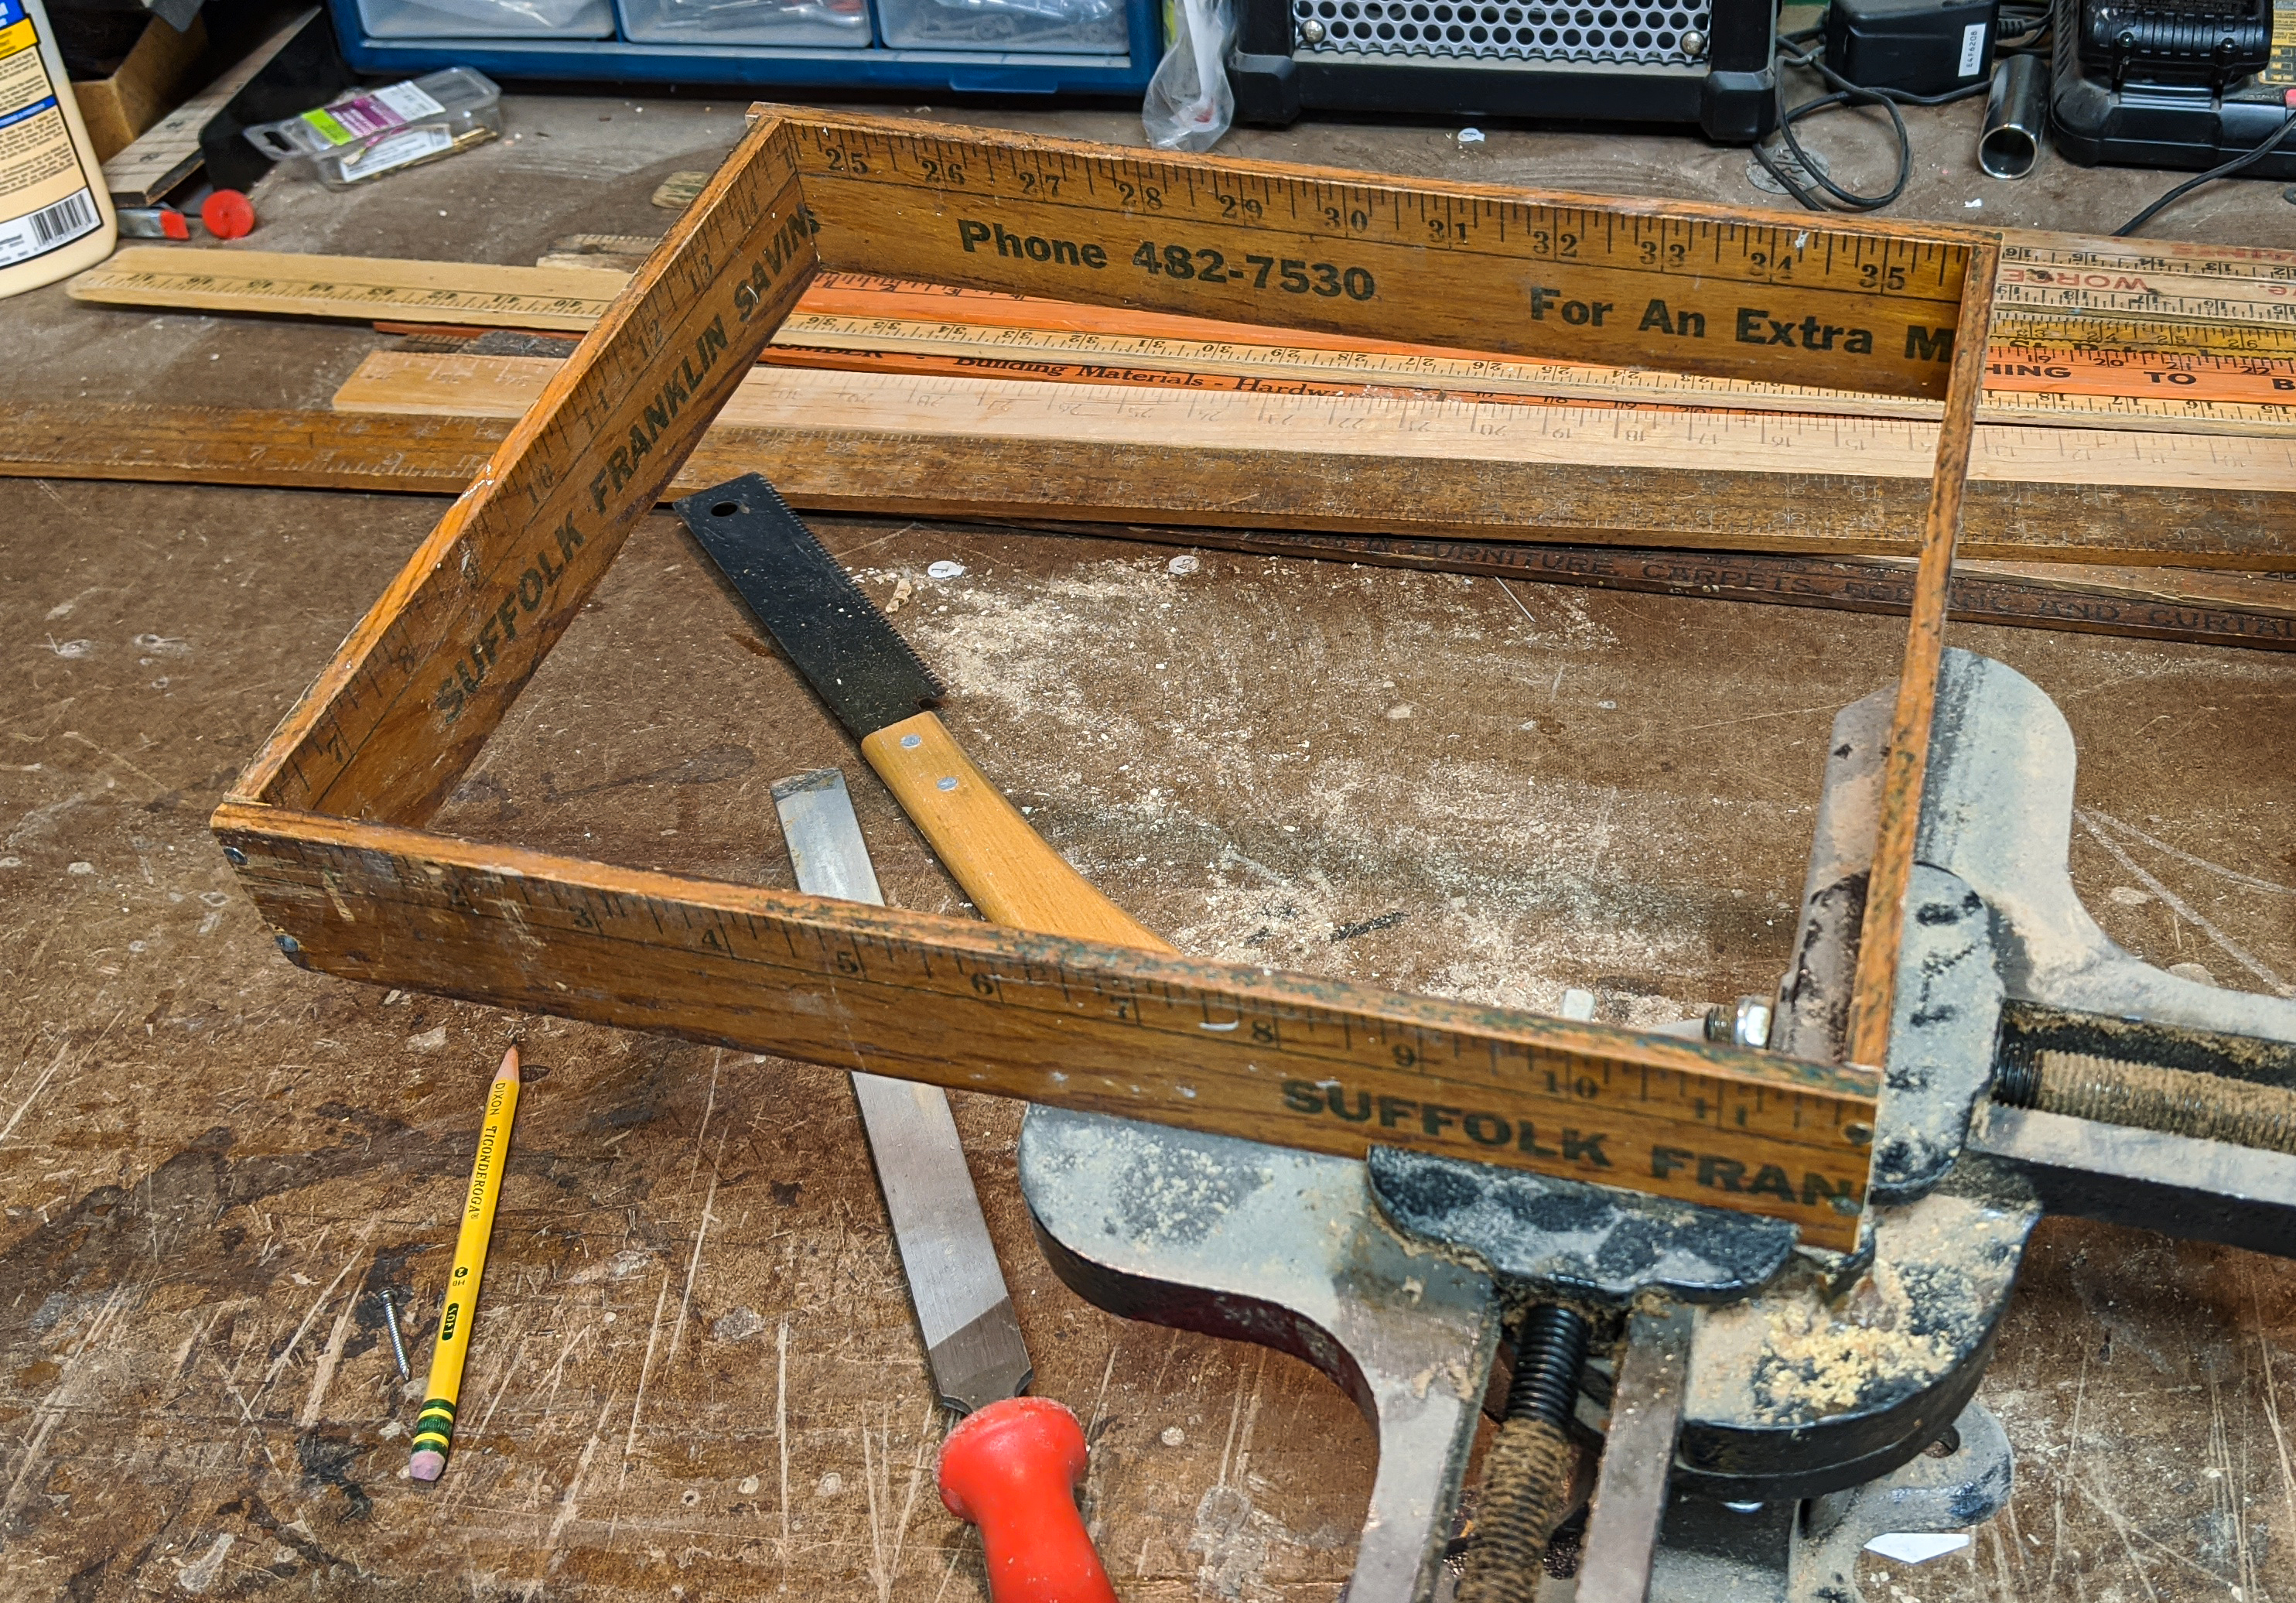
Making the Box Step one was to make the frame of the box that would be my guitar's body. I chose one of the larger/wider yardsticks that has a nice look, and used a miter box to cut my side panels. I chose a size of 9 inches by 12 inches for my box. The panels were about 1/4" thick, so the final outside dimensions of my box/instrument body will be about 9.5 inches by 12 inches. I tried to retain the naturally darkened/worn edges of the yardsticks wherever possible, but I knew I could darken any fresh-cut edges with stain to make them blend in. |
|
|
|
|
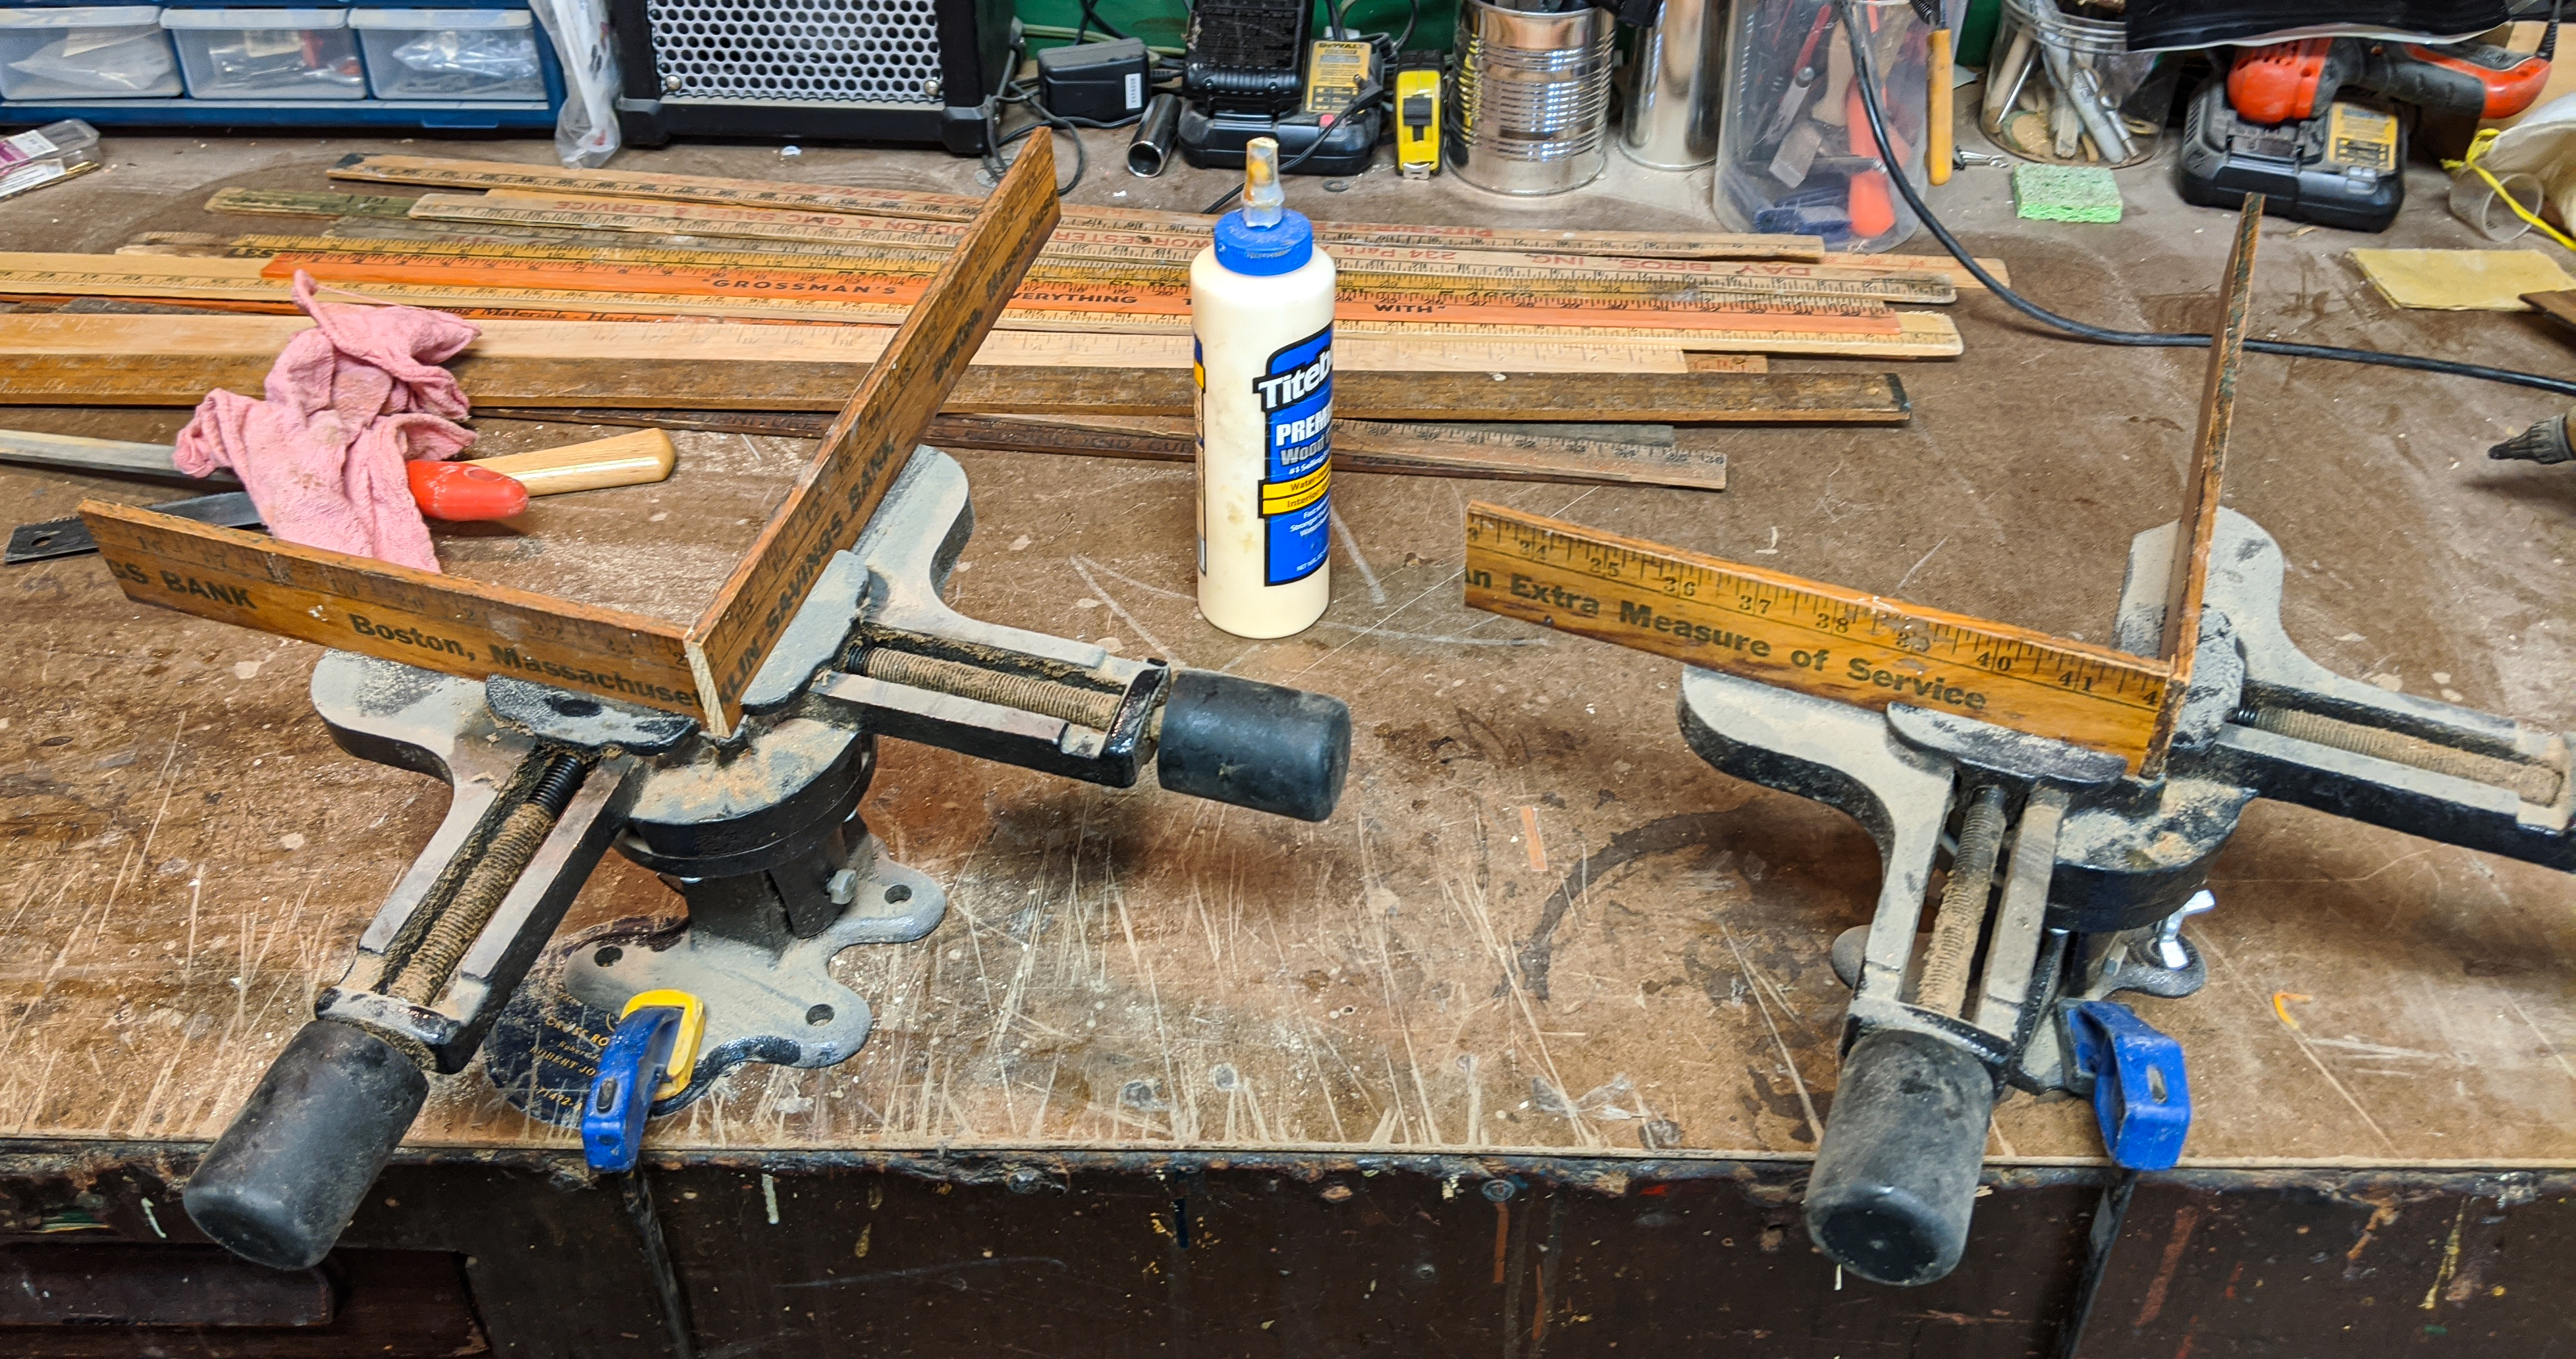
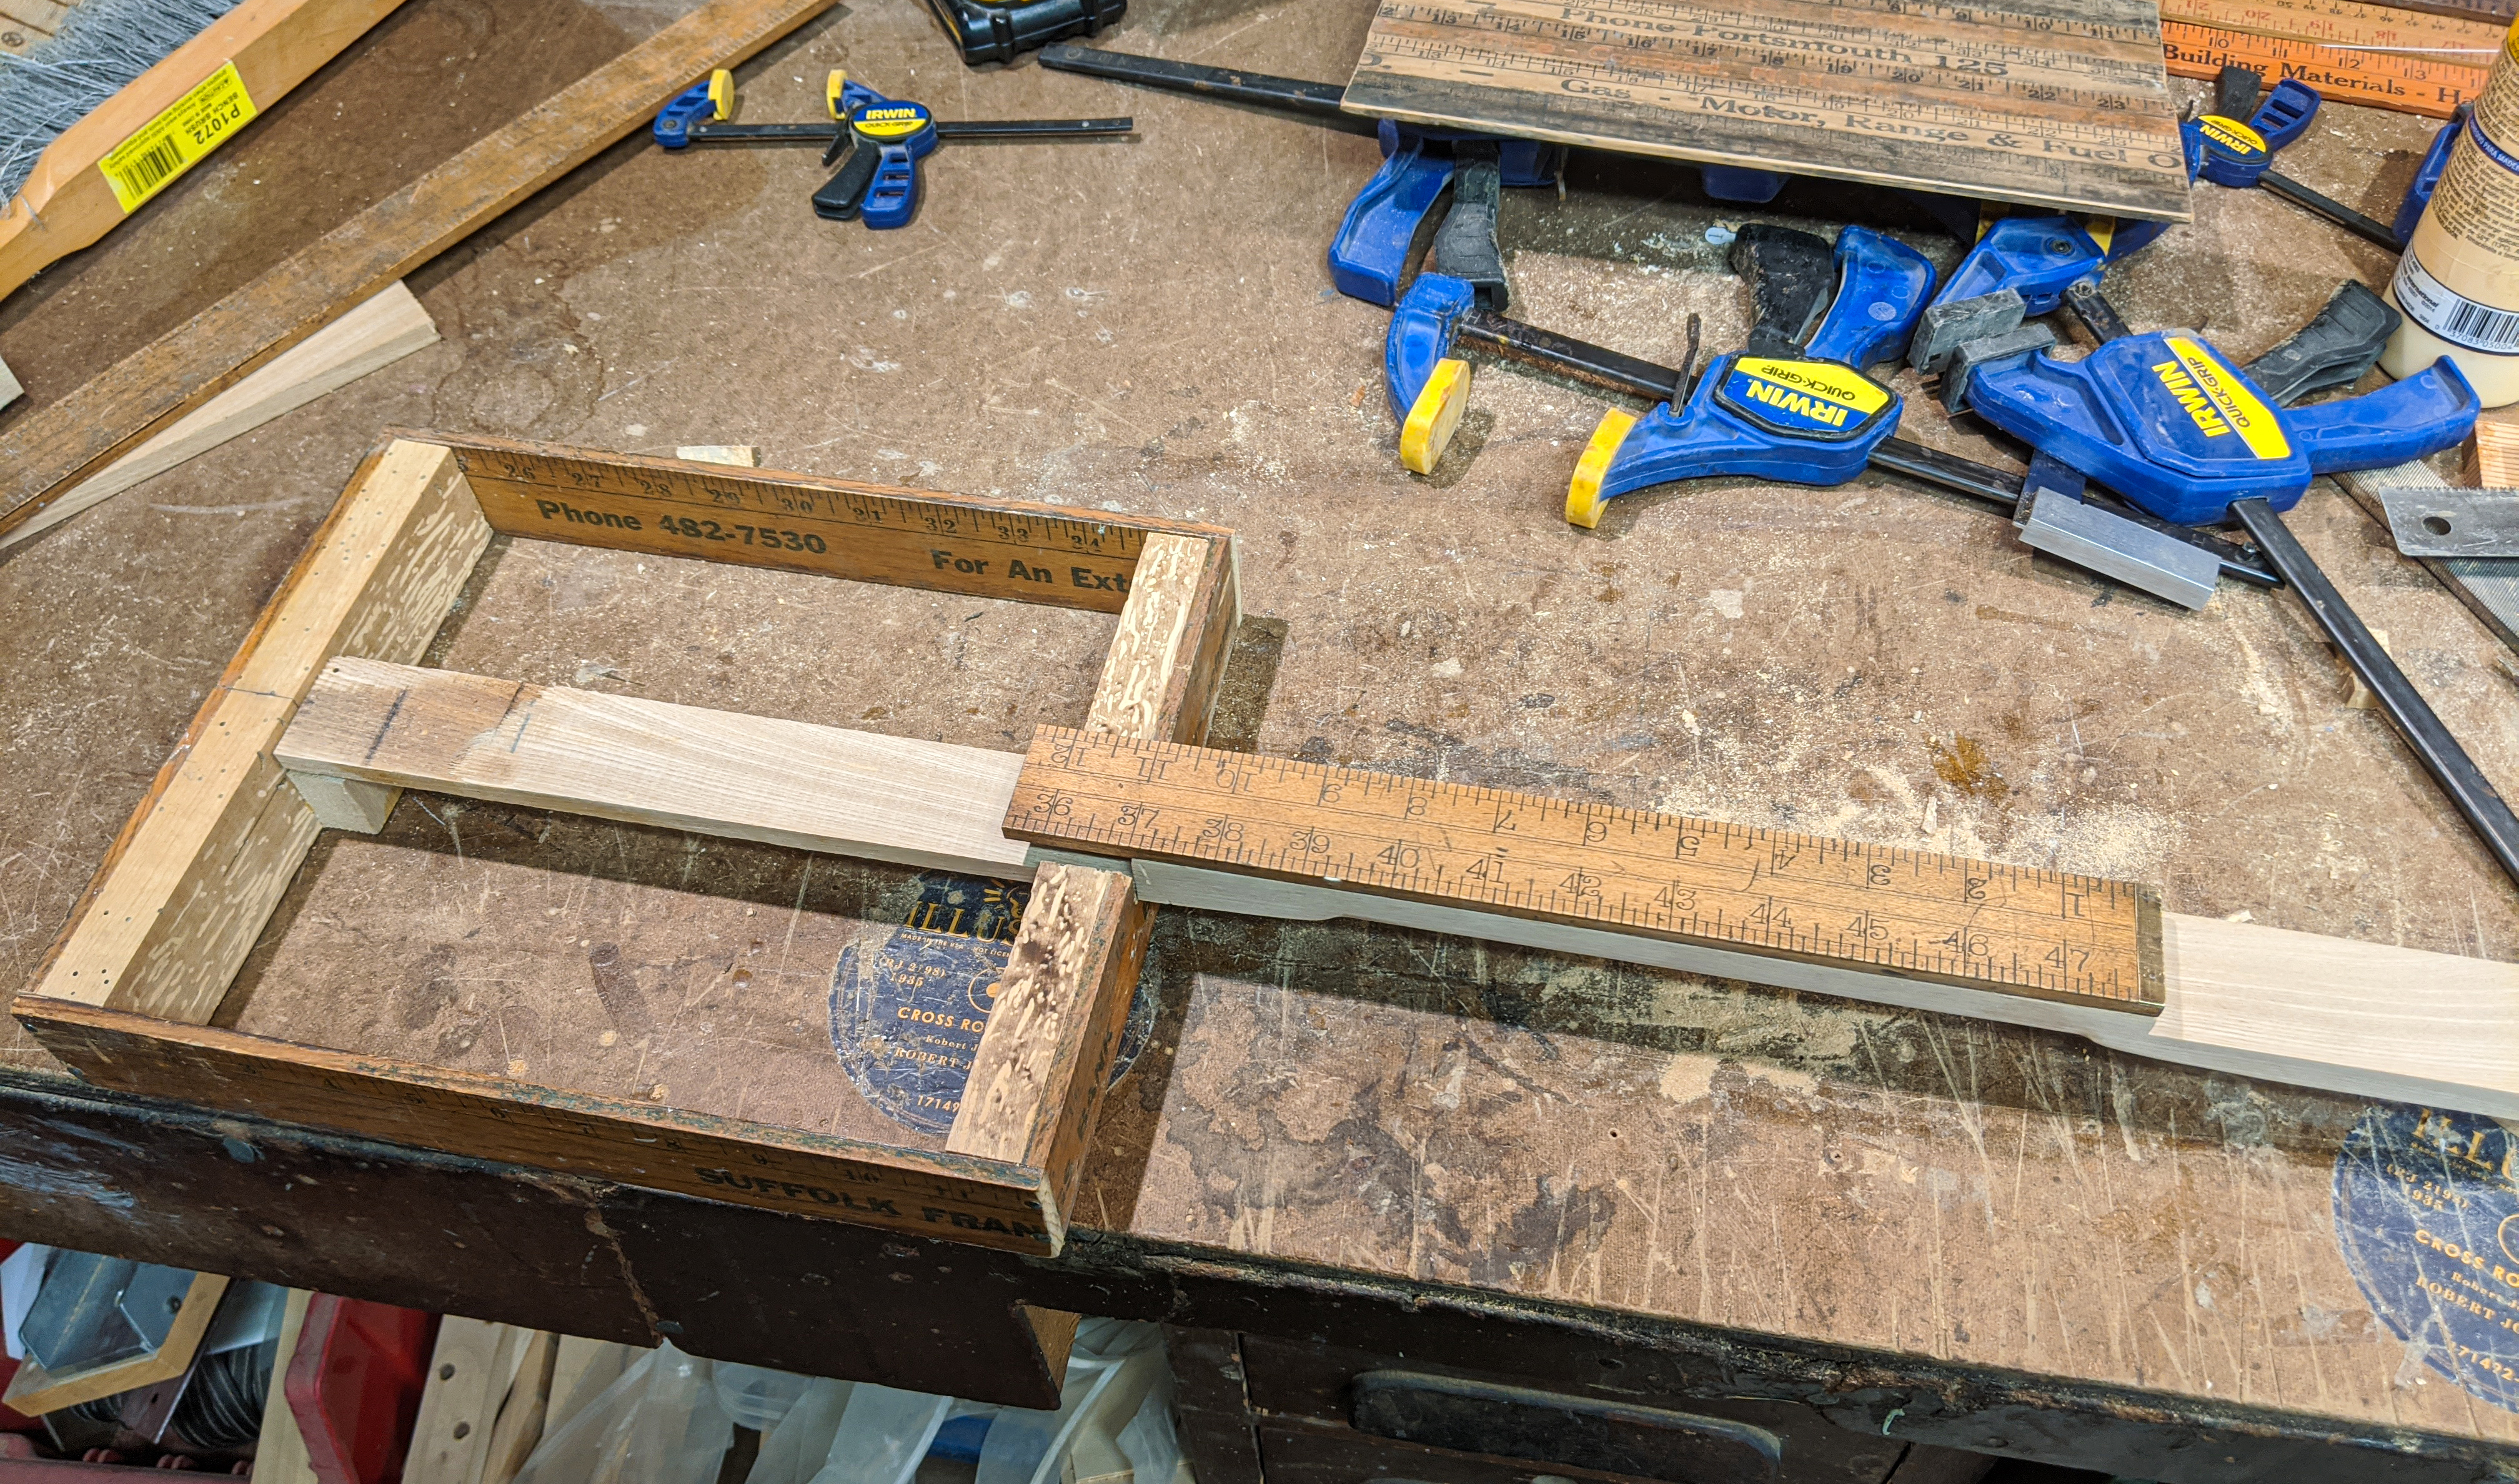
Making the Box (2) 90-degree angle/miter vises make gluing boxes up a lot easier, but of course most folks don't have these. You can make a 90-degree gluing jig pretty easily out of scrap wood, and use blue painter's tape to help keep the glue from binding the jig to your box panels. I decided to build this box in a "butt joint" style, rather than trying to miter the ends to 45 degrees. I wanted this guitar to have a rustic, rough-cut style. |
|
|
|
|
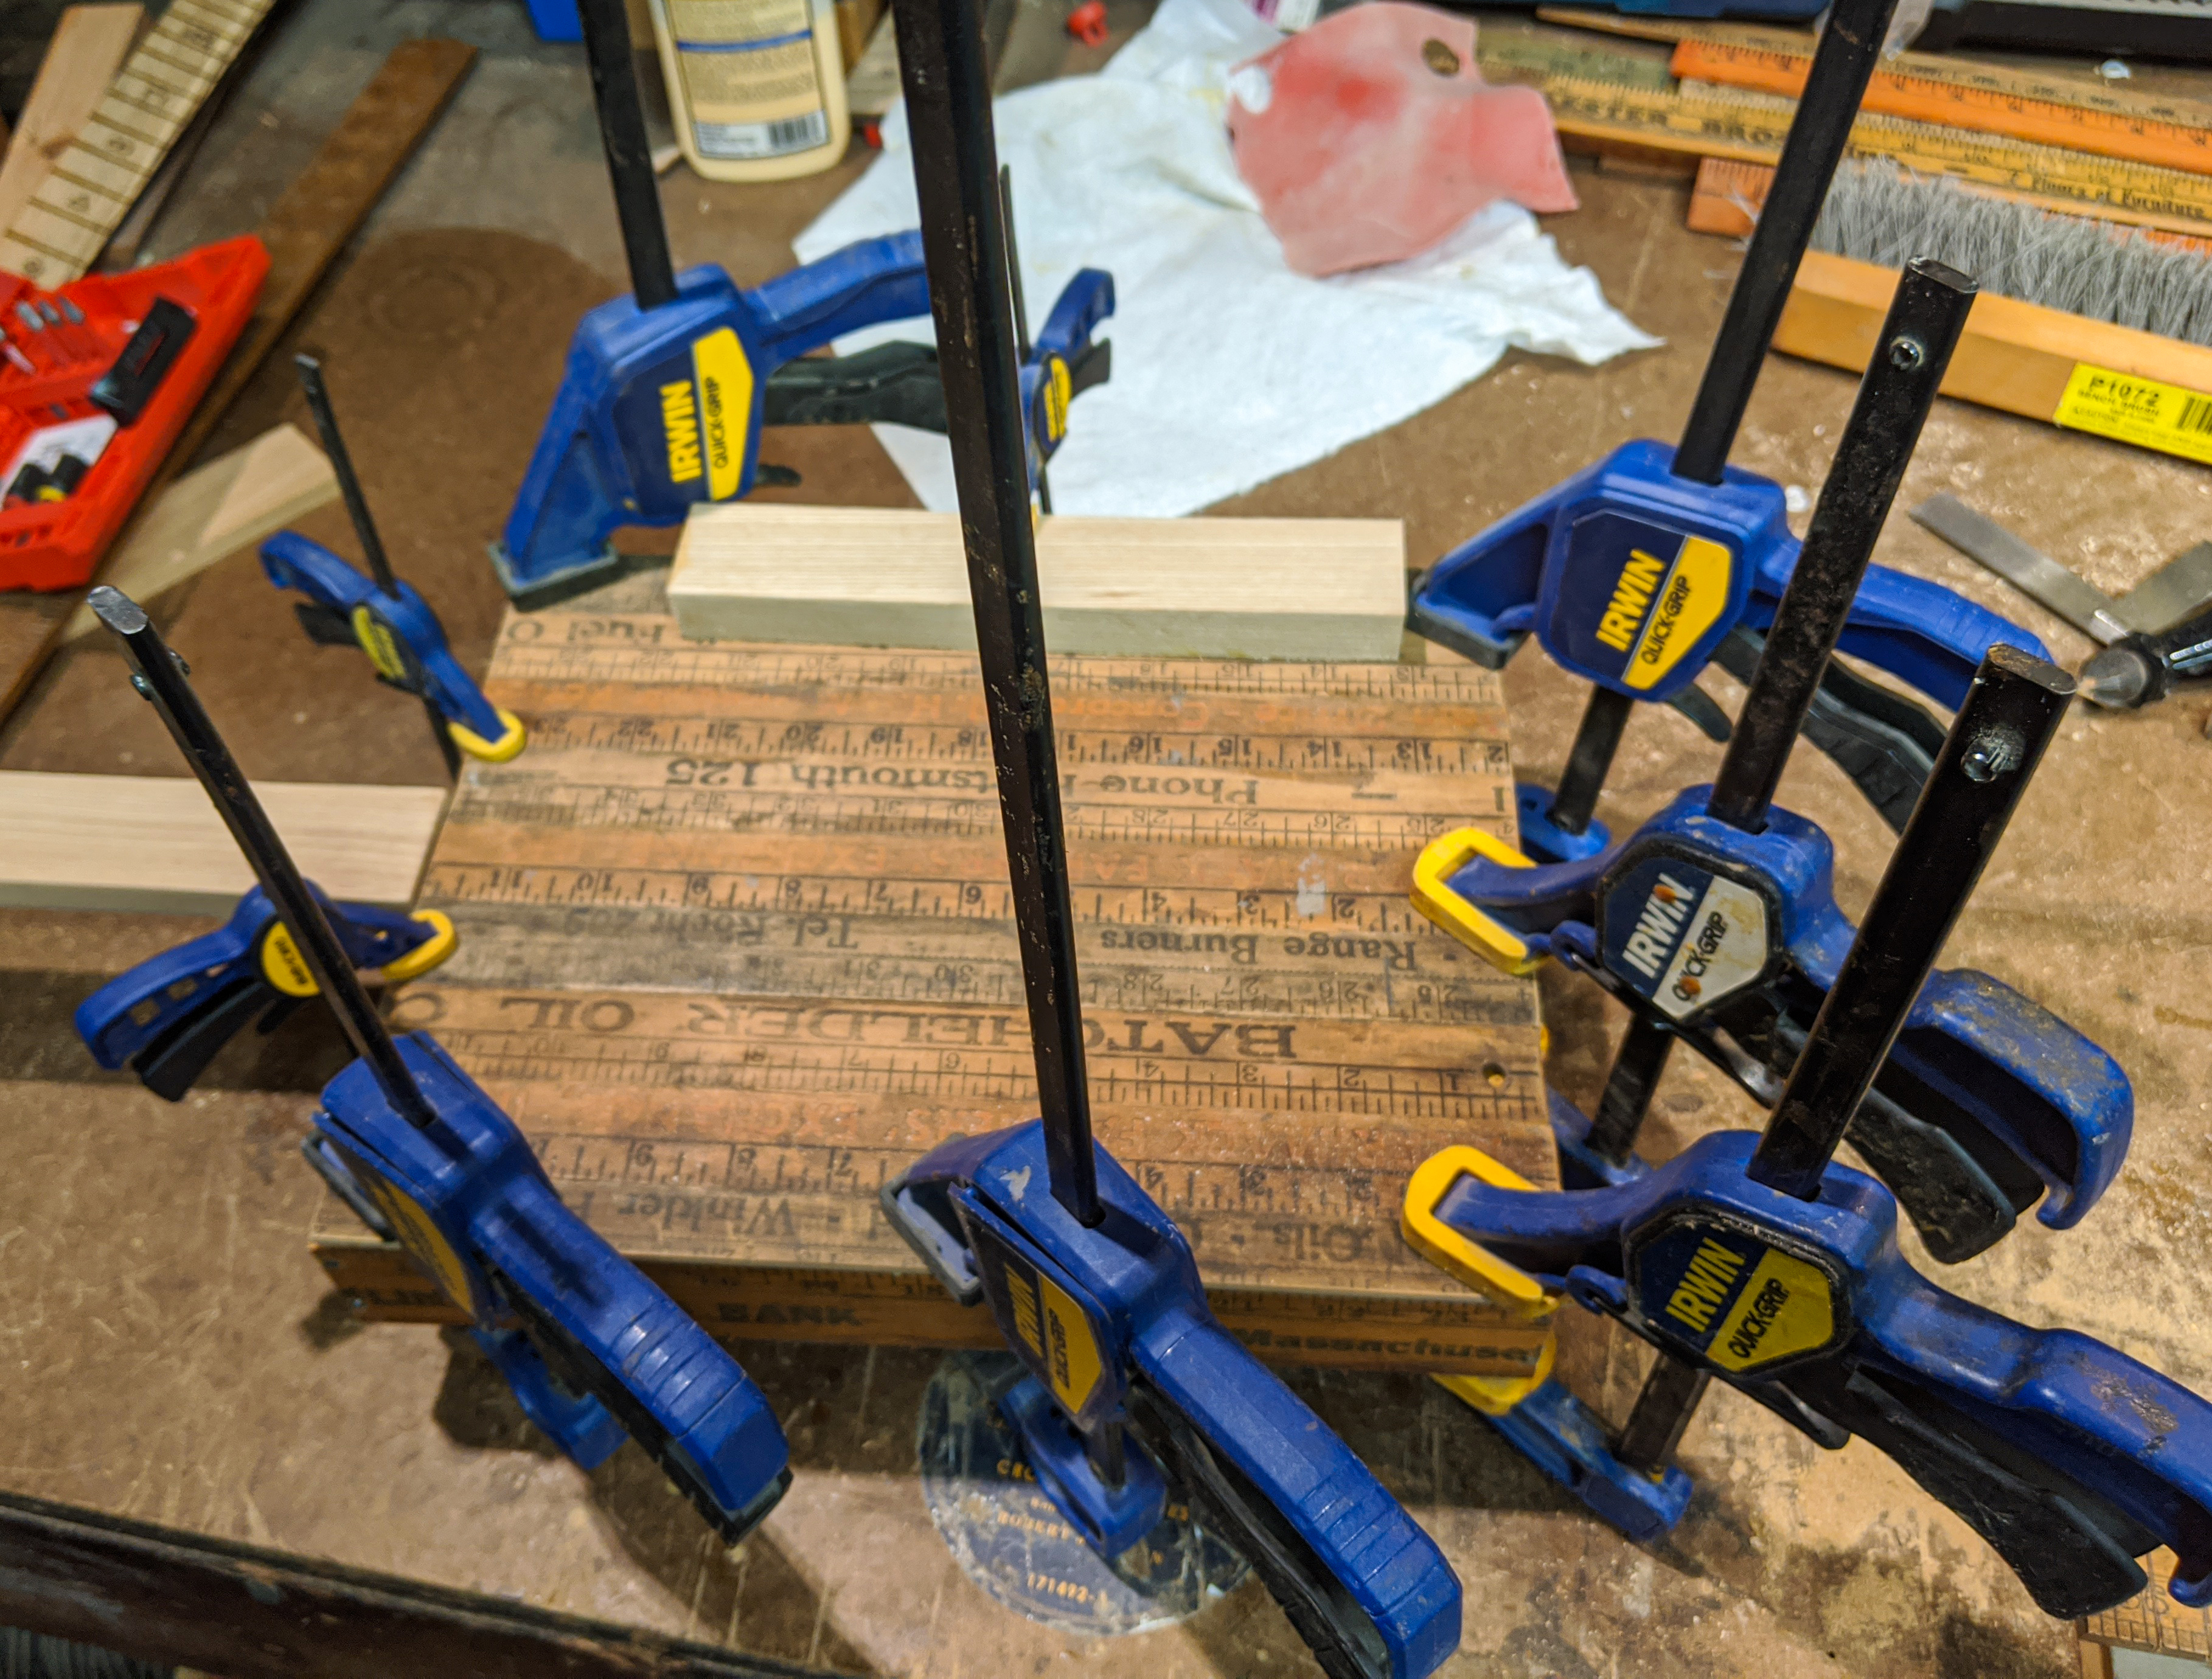
Making the Box (3) Two vises are better than one. Having specialty tools can certainly speed up some parts of a build, but they definitely aren't required. Some of the best joys of a build can be found in discovering ways to get a job done using what you already have. |
|
|
|
|
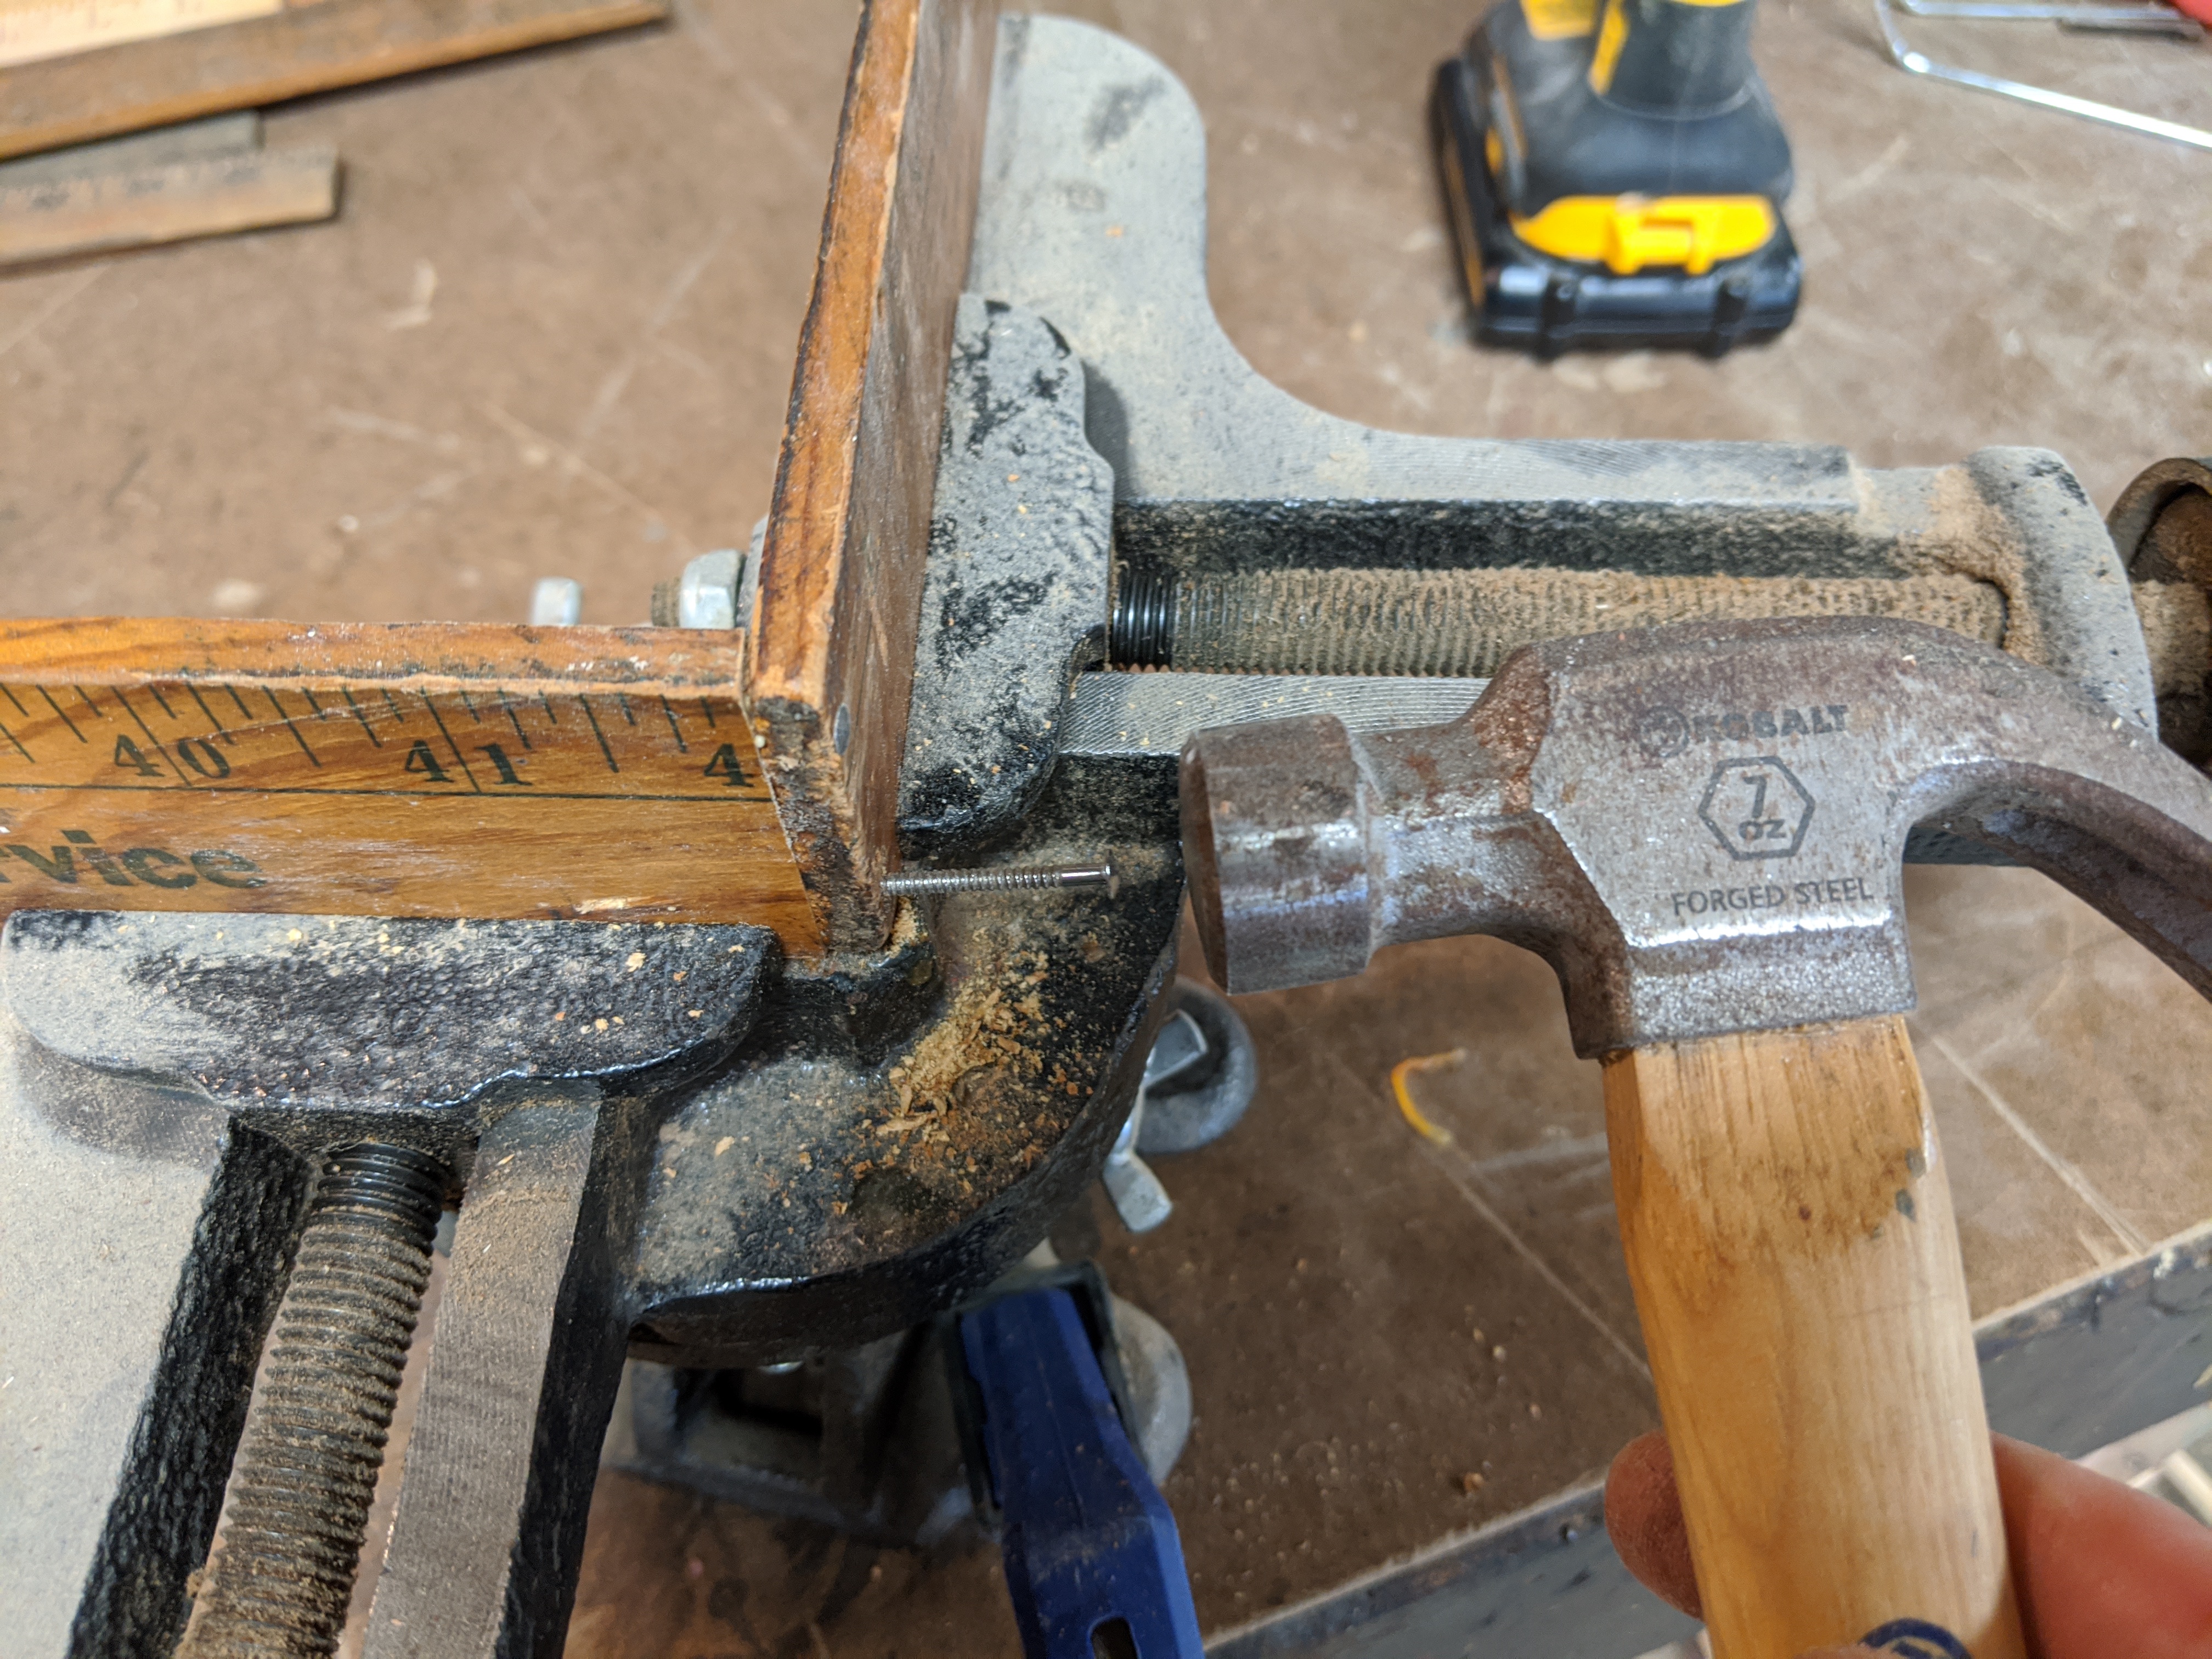
Making the Box (4) I decided to drill pilot holes and tap in small screws, to help strengthen my box. In hindsight, I would have skipped this step and just glued in corner braces instead - it is way easy to blow a nail out the side of such thin panels. Still, the nails do give the box a nice rustic sort of look. |
|
|
|
|
Making the Box (5) Once the first two joints are glued and cured, the remaining two can be done. Once all four joints are glued (and optionally nailed/screwed), you have yourself the frame of your box. |
|
|
|

|
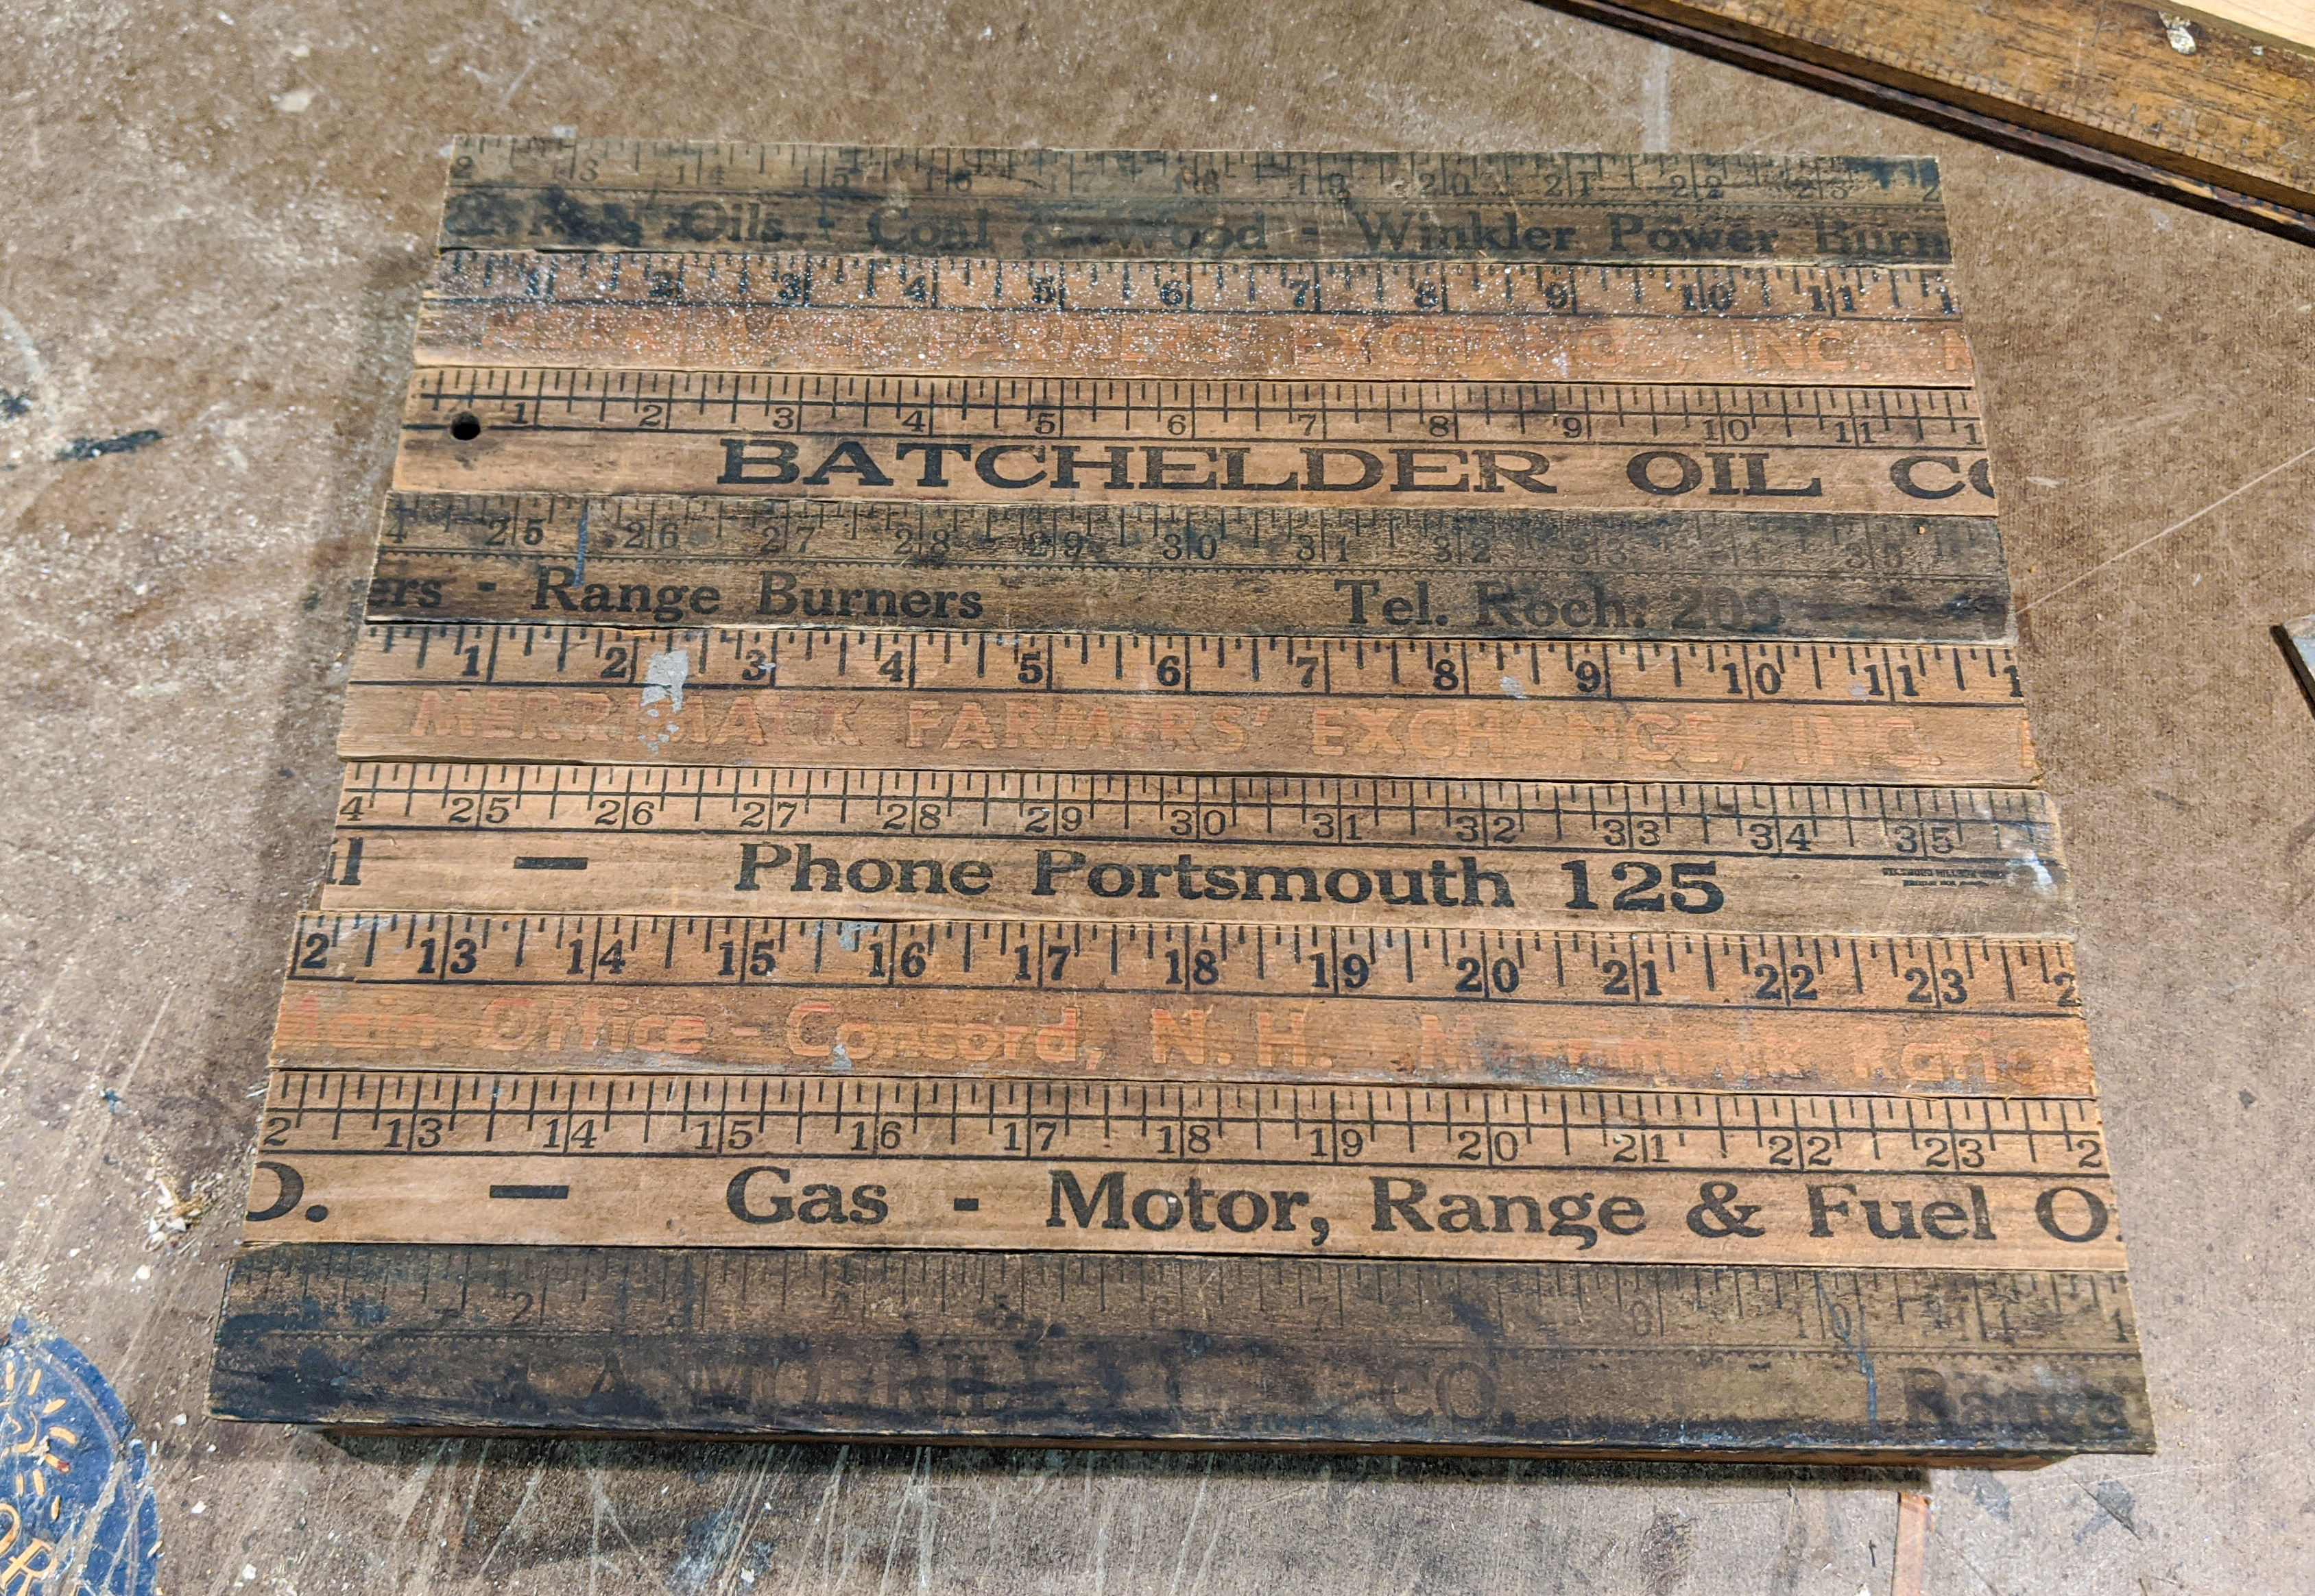
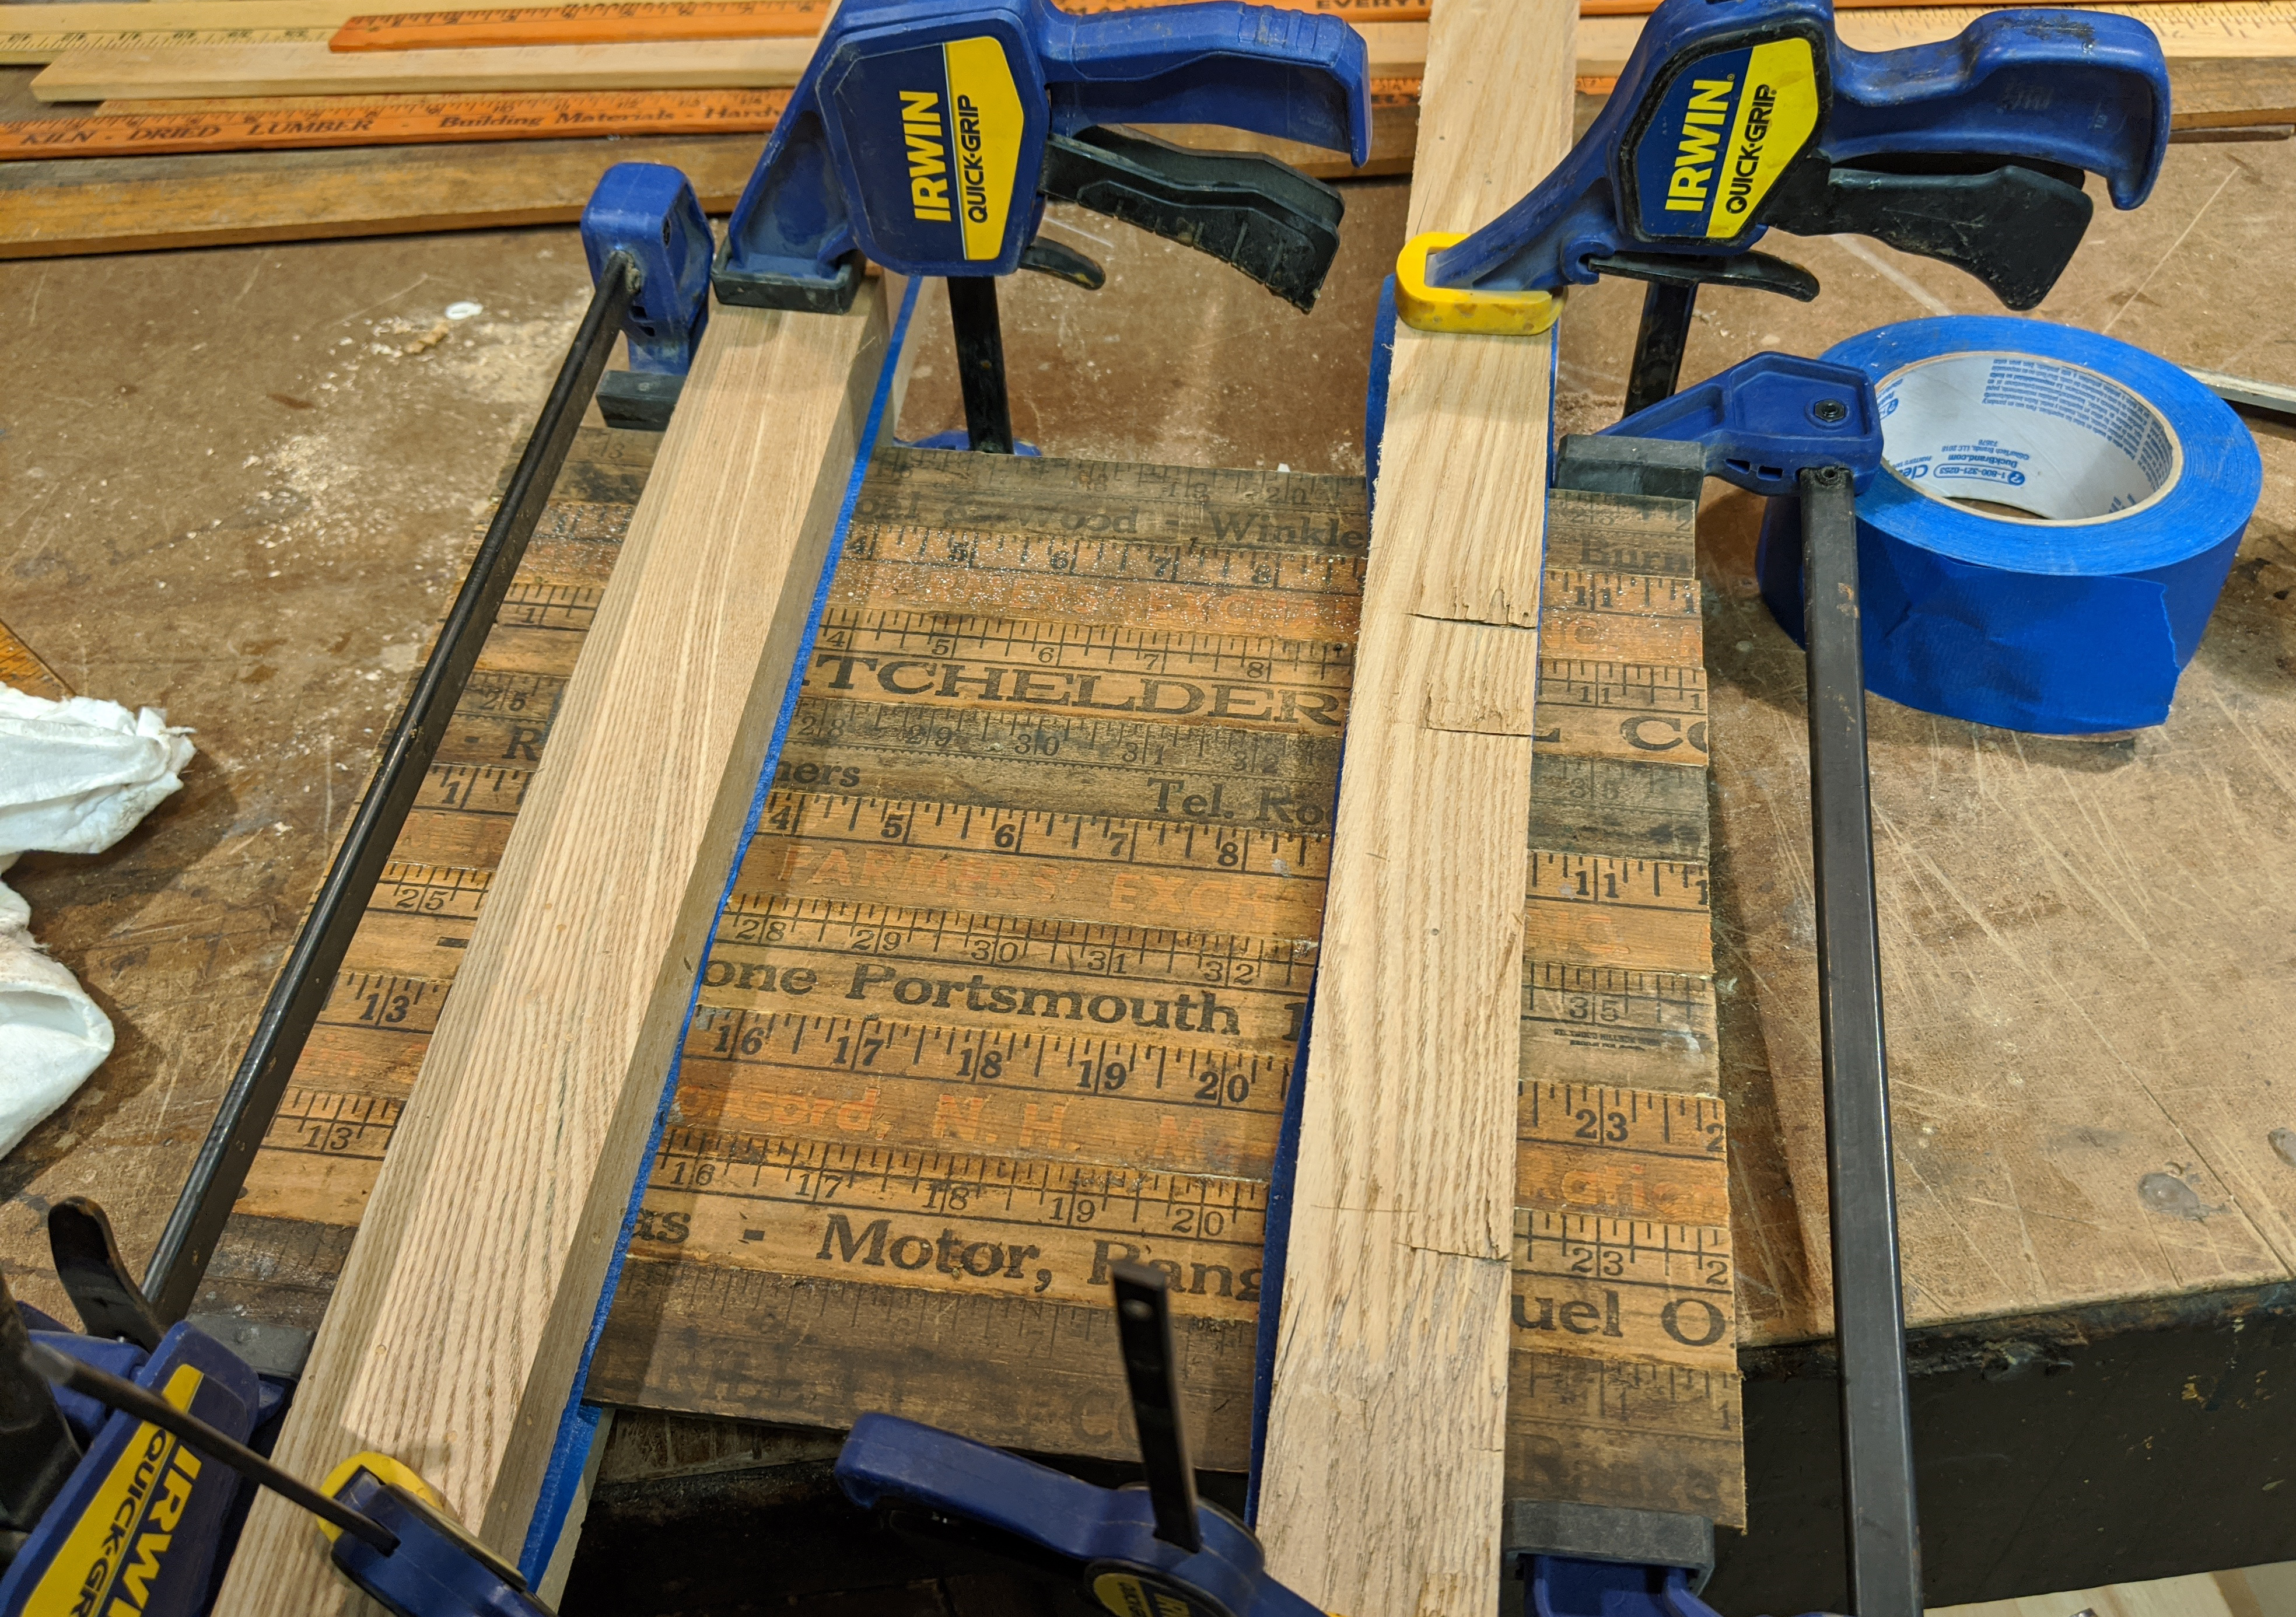
Making the Soundboard With the box sides frame fully assembled, now it is time to start working on what will be the top panel/soundboard of the instrument. To do this, I select three of my yardsticks that have the best weathering and printing, and begin cutting them to 12-inch lengths. Because yardsticks are 3 feet long, I get three lengths from each. I discover it will take three yardsticks to create a panel large enough to cover my box (and there will be a bit left over that will have to be trimmed away). I used the standard 1-inch wide yardsticks for this, which were about 1/8-inch thick, and made from softwoods. I wanted a nice thin softwood top for my box for best acoustic sound. |
|
|
|
|
Making the Soundboard (2) Once I have enough lengths cut, I lay them out in the order I want, trying to get as much of the distinctive printing facing upwards. This will be the sound board of my instrument, so I want it to be the most visually appealing aspect of the whole instrument. |
|
|
|
|
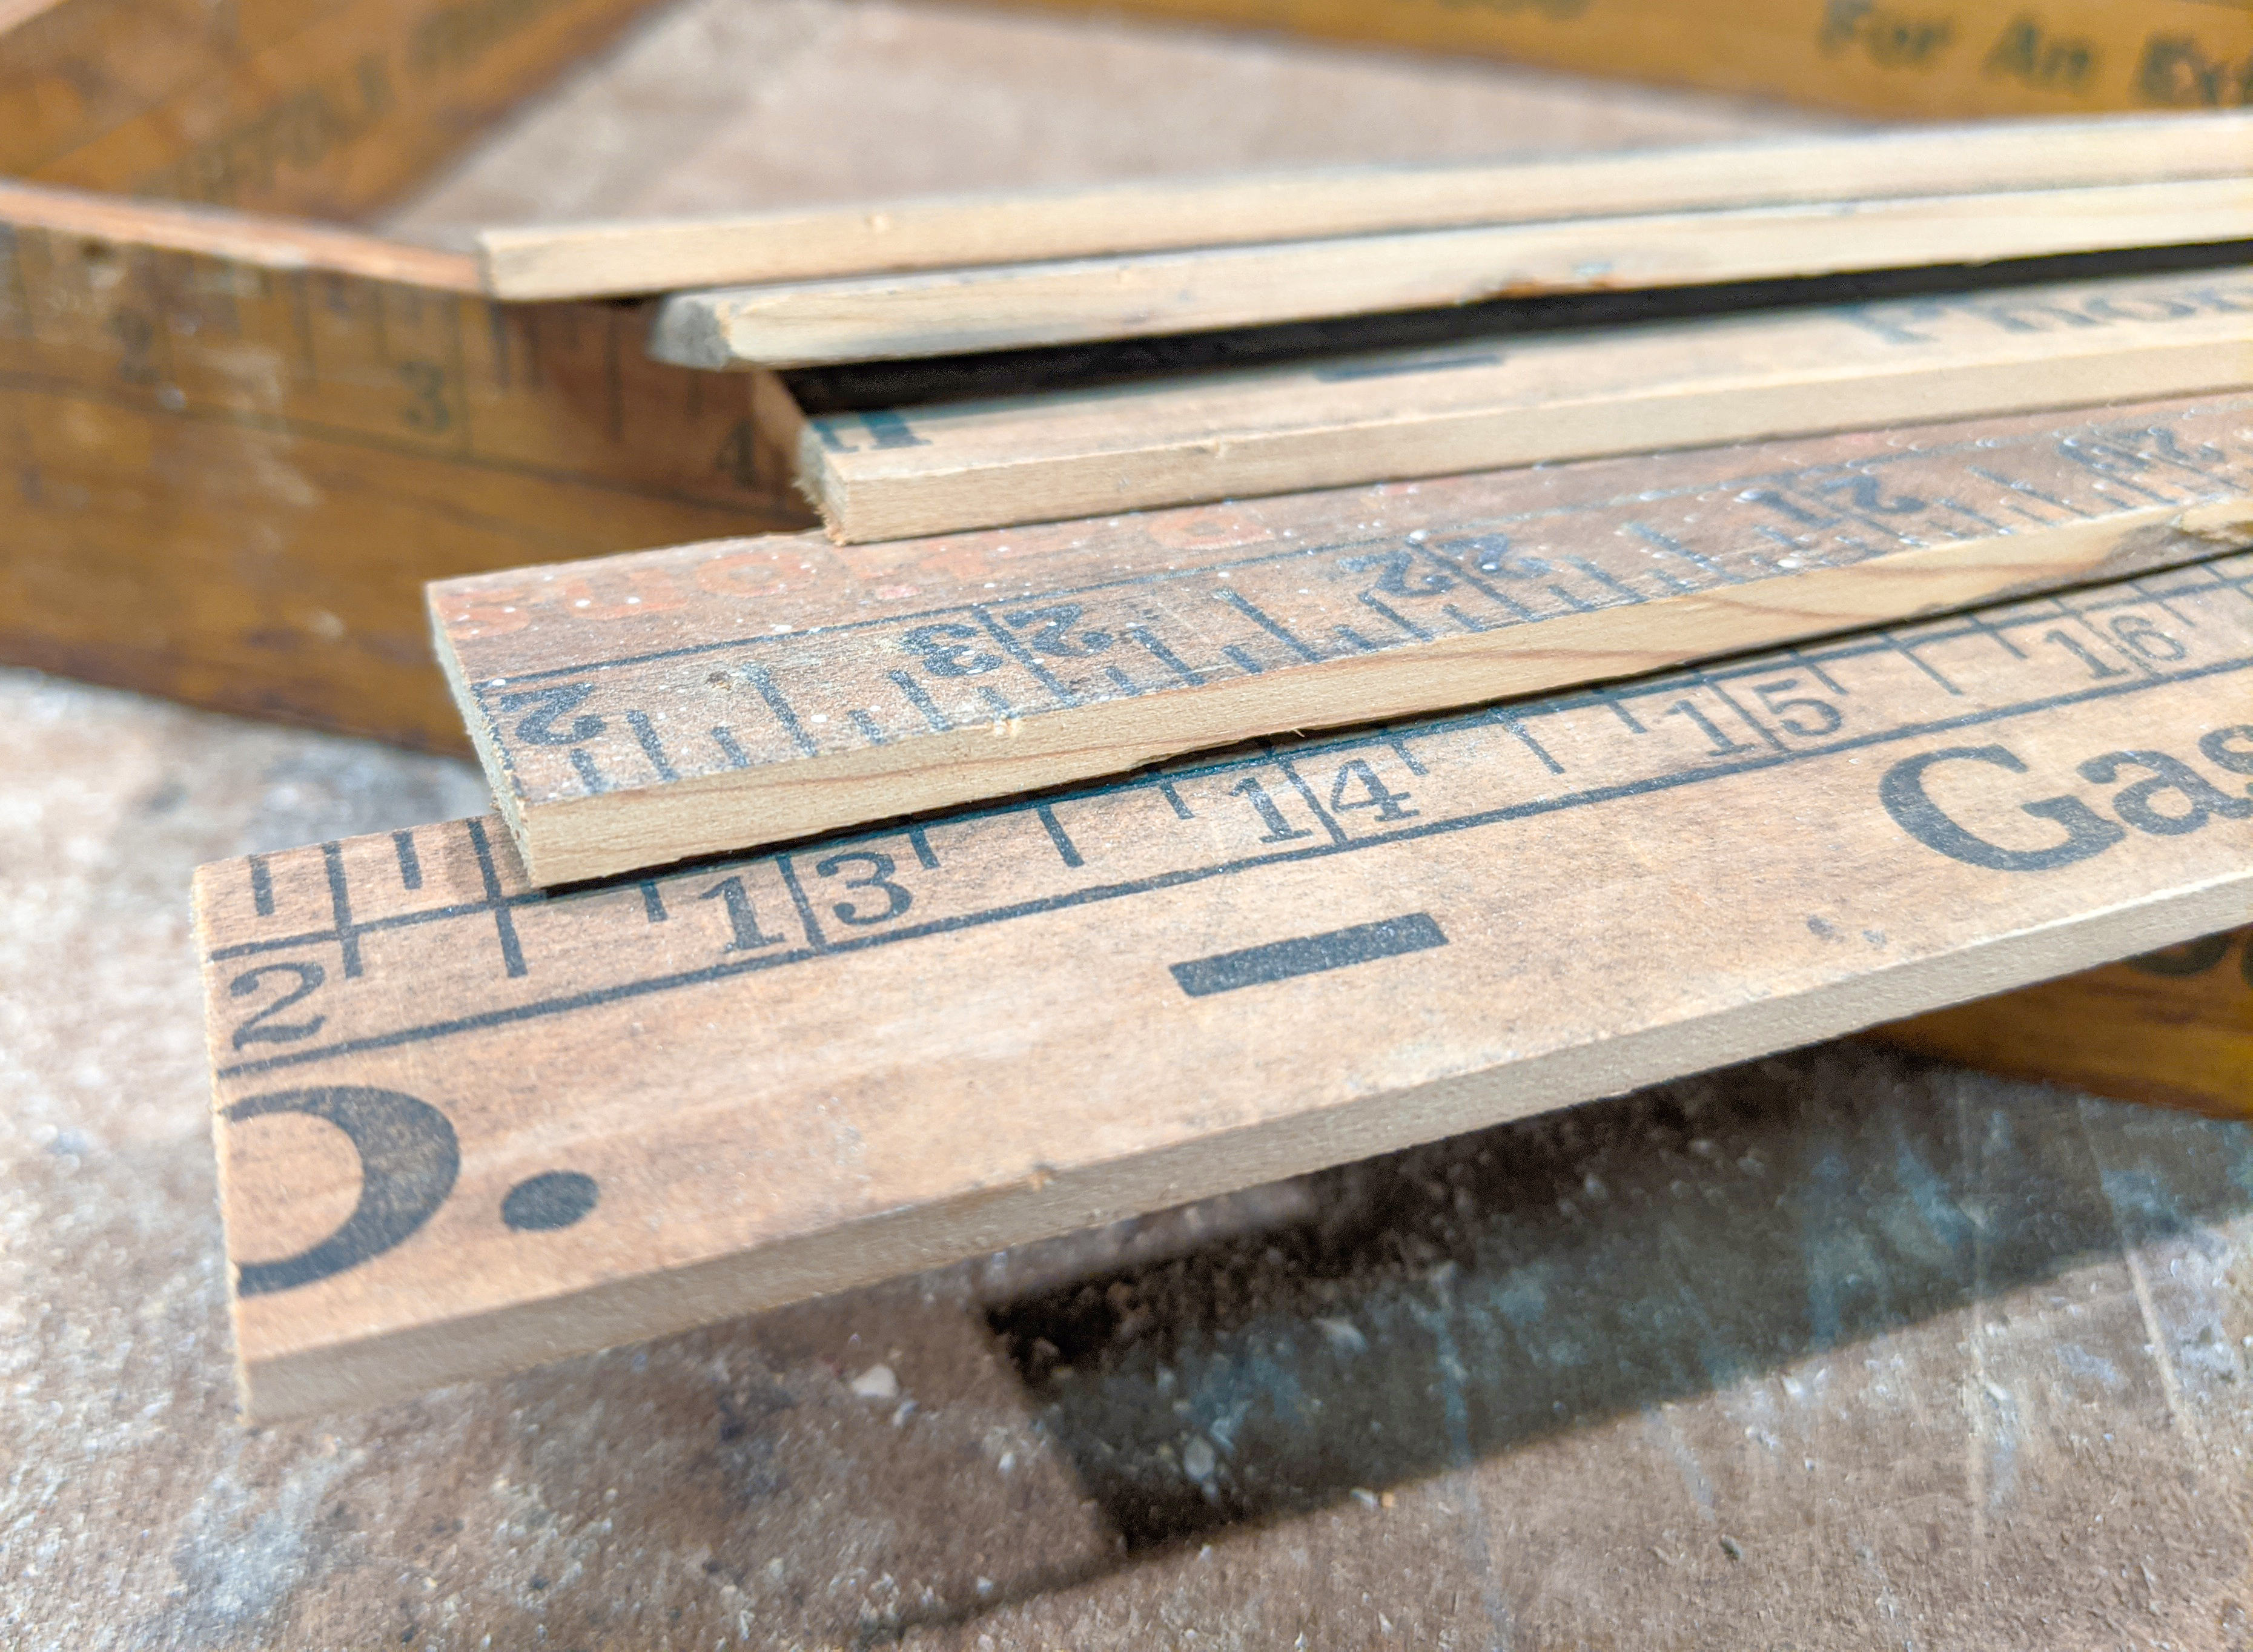
Making the Soundboard (3) Because my intent is to glue all of these thin strips together into a single panel, I lightly sand all of the edges. This exposes some of the bare wood, and will make for a stronger glue joint. An edge sander makes this a snap, but of course you can get good results by hand as well. Just be careful not to sand any dips or divots into the gluing edge if you can help it. |
|
|
|
|
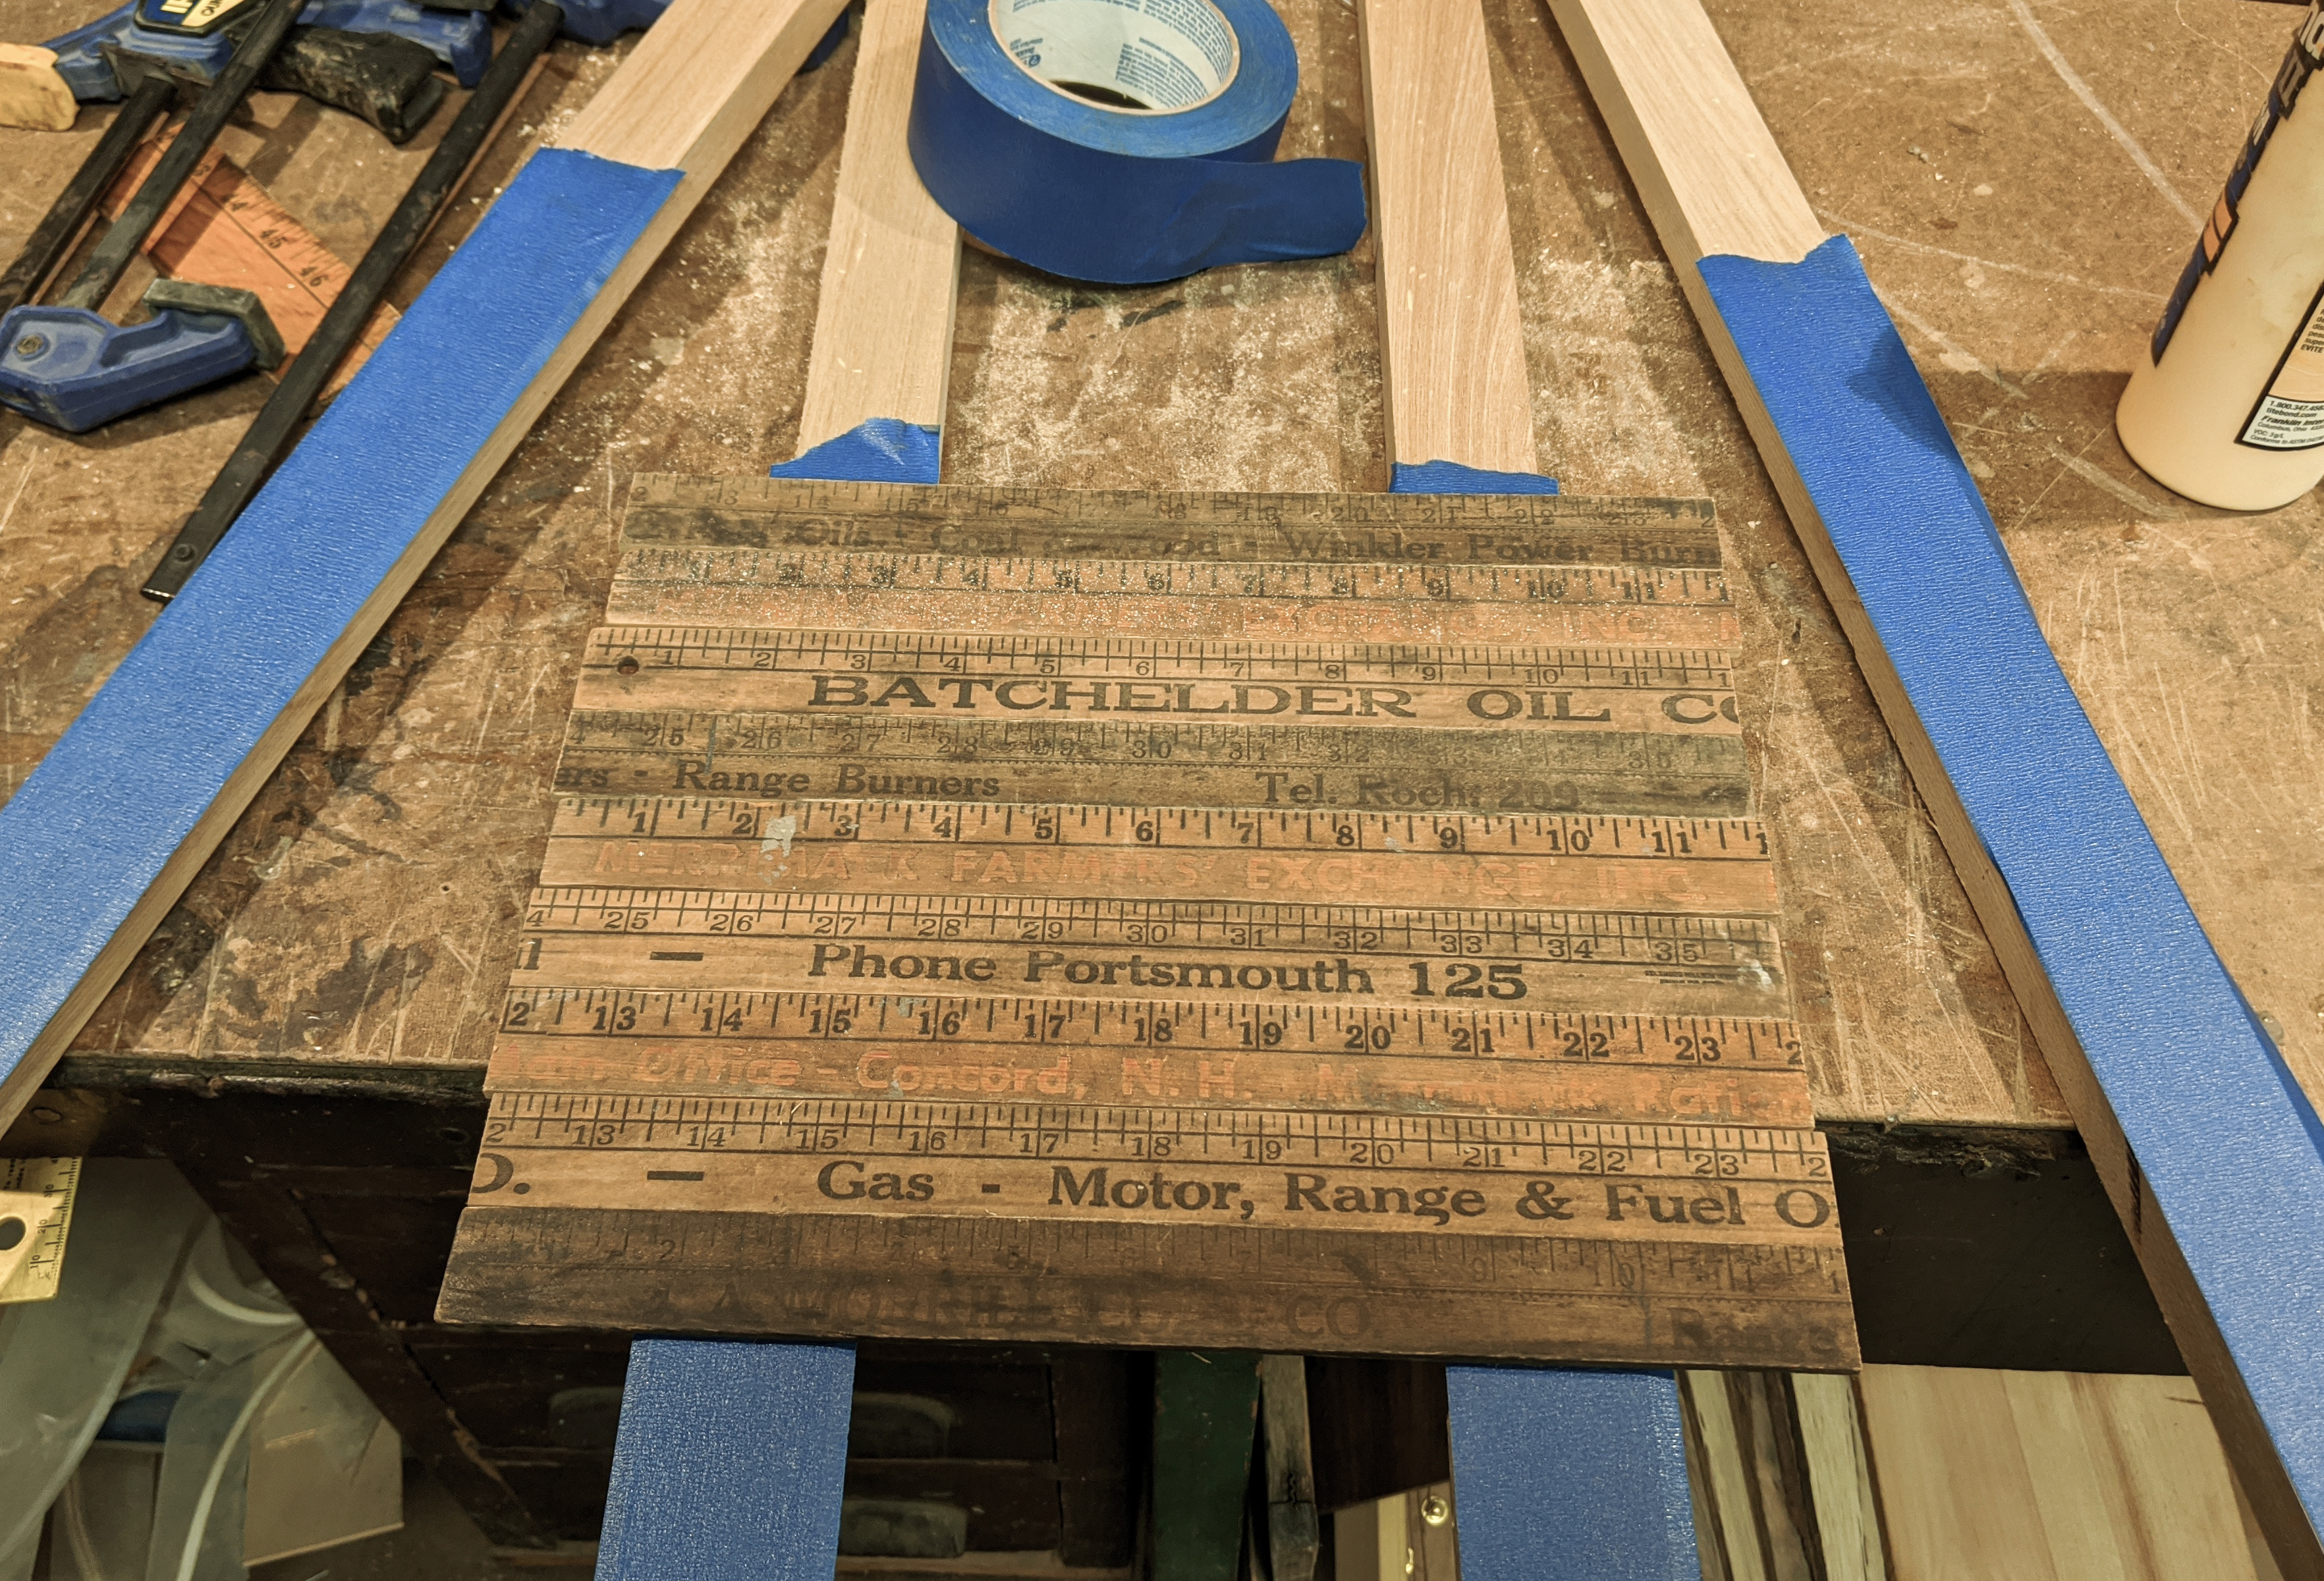
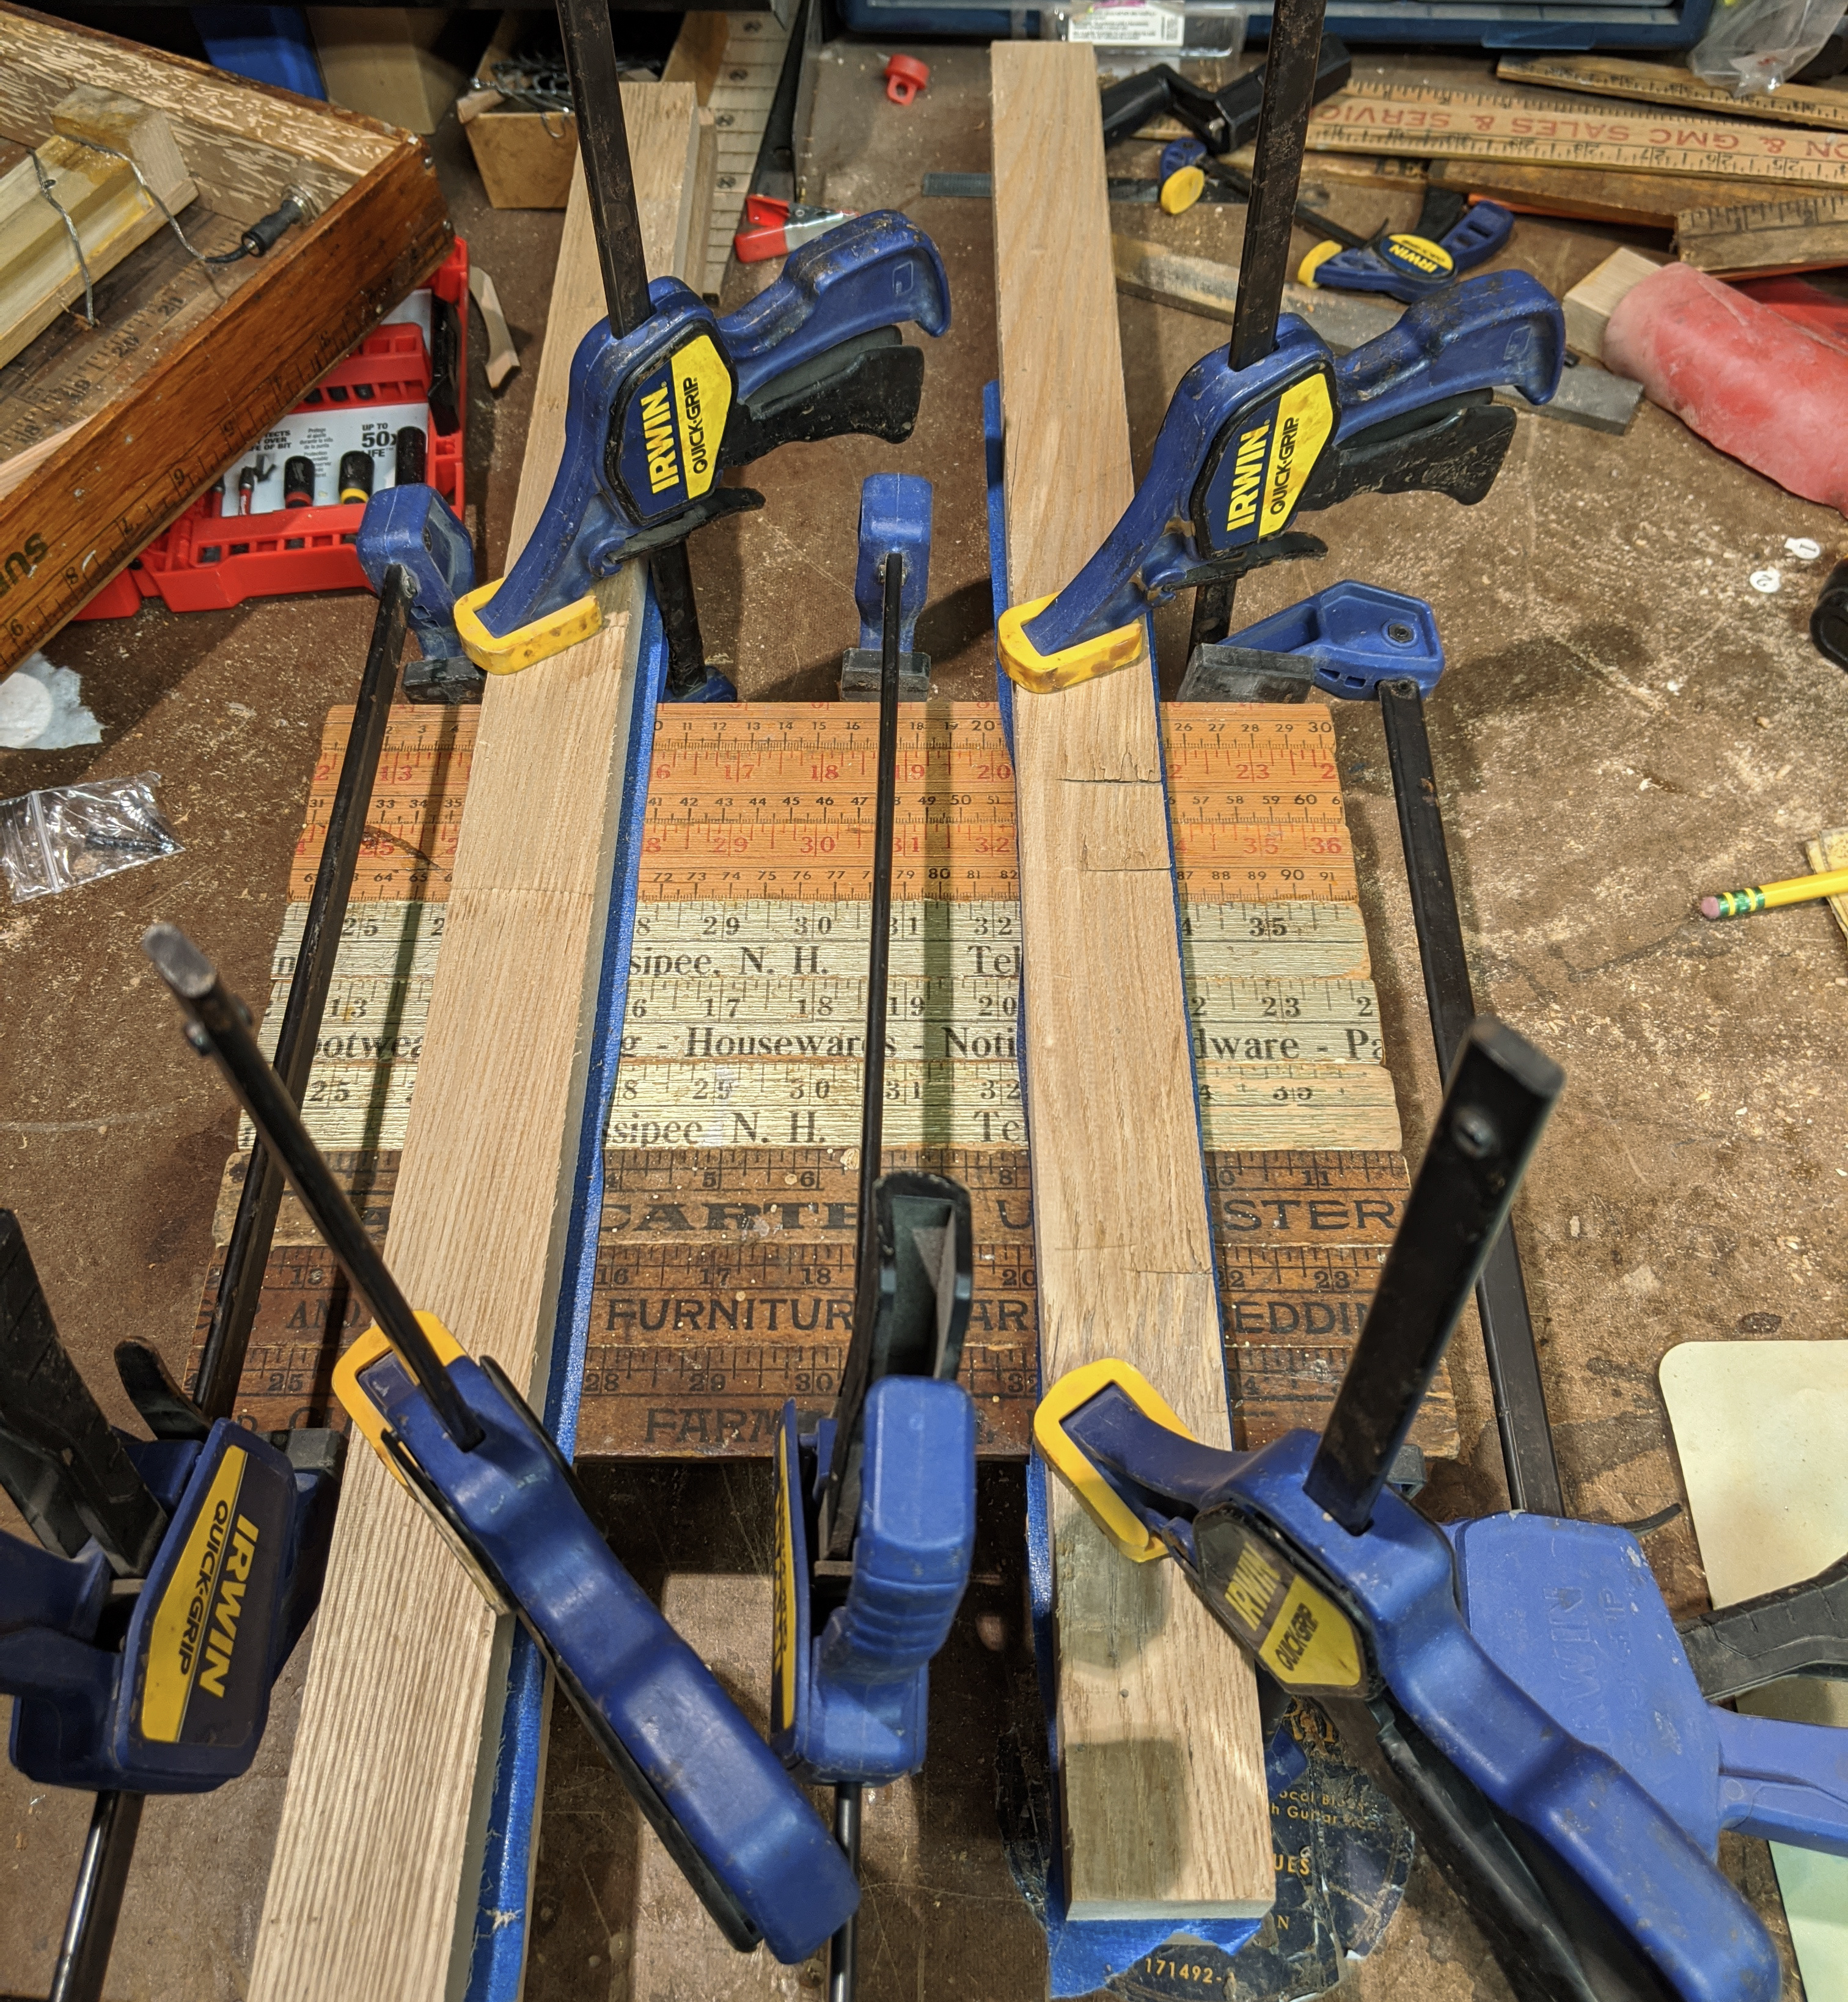
Making the Soundboard (4) Now I take four straight pieces of wood (I'm actually using 1x2 neck stock here), and line the surface with painter's tape. These will be my clamping rails, which will hold all of the thin strips flat and keep them from buckling as I apply pressure with clamps to squeeze them tightly together. In hindsight, it would have worked even better to use the narrower edge for this, to reduce the surface area exposed to the glue squeezing out. |
|
|
|
|
Making the Soundboard (5) Here, I have put a thin bead of glue down the edge of each panel, and pressed them together (on the clamping rails) in preparation for clamping. Wiping off excess glue as you go is highly recommended. Especially wiping it off of the zone where the clamping rails will go is a good idea. |
|
|
|
|
Making the Soundboard (6) Here, I've first clamped the rails together over the top and bottom of the panel... nice and snug but not super tight. This keeps the panel flat and keeps the individual strips from buckling. Then, I use longer clamps to squeeze the strips together into a nice tight panel. I adjusted the flushness of the fit between some of the strips by hand to try to get them to line up better with no distinct ridges. I knew I didn't want to do any sanding of the top (which would remove lettering and markings), so I wanted them to match up as closely as possible. There can be slight differences in thickness between different yardsticks, so try to choose ones that are very similar in thickness for your soundboard, as it will make for a more smooth and even panel. |
|
|
|
|
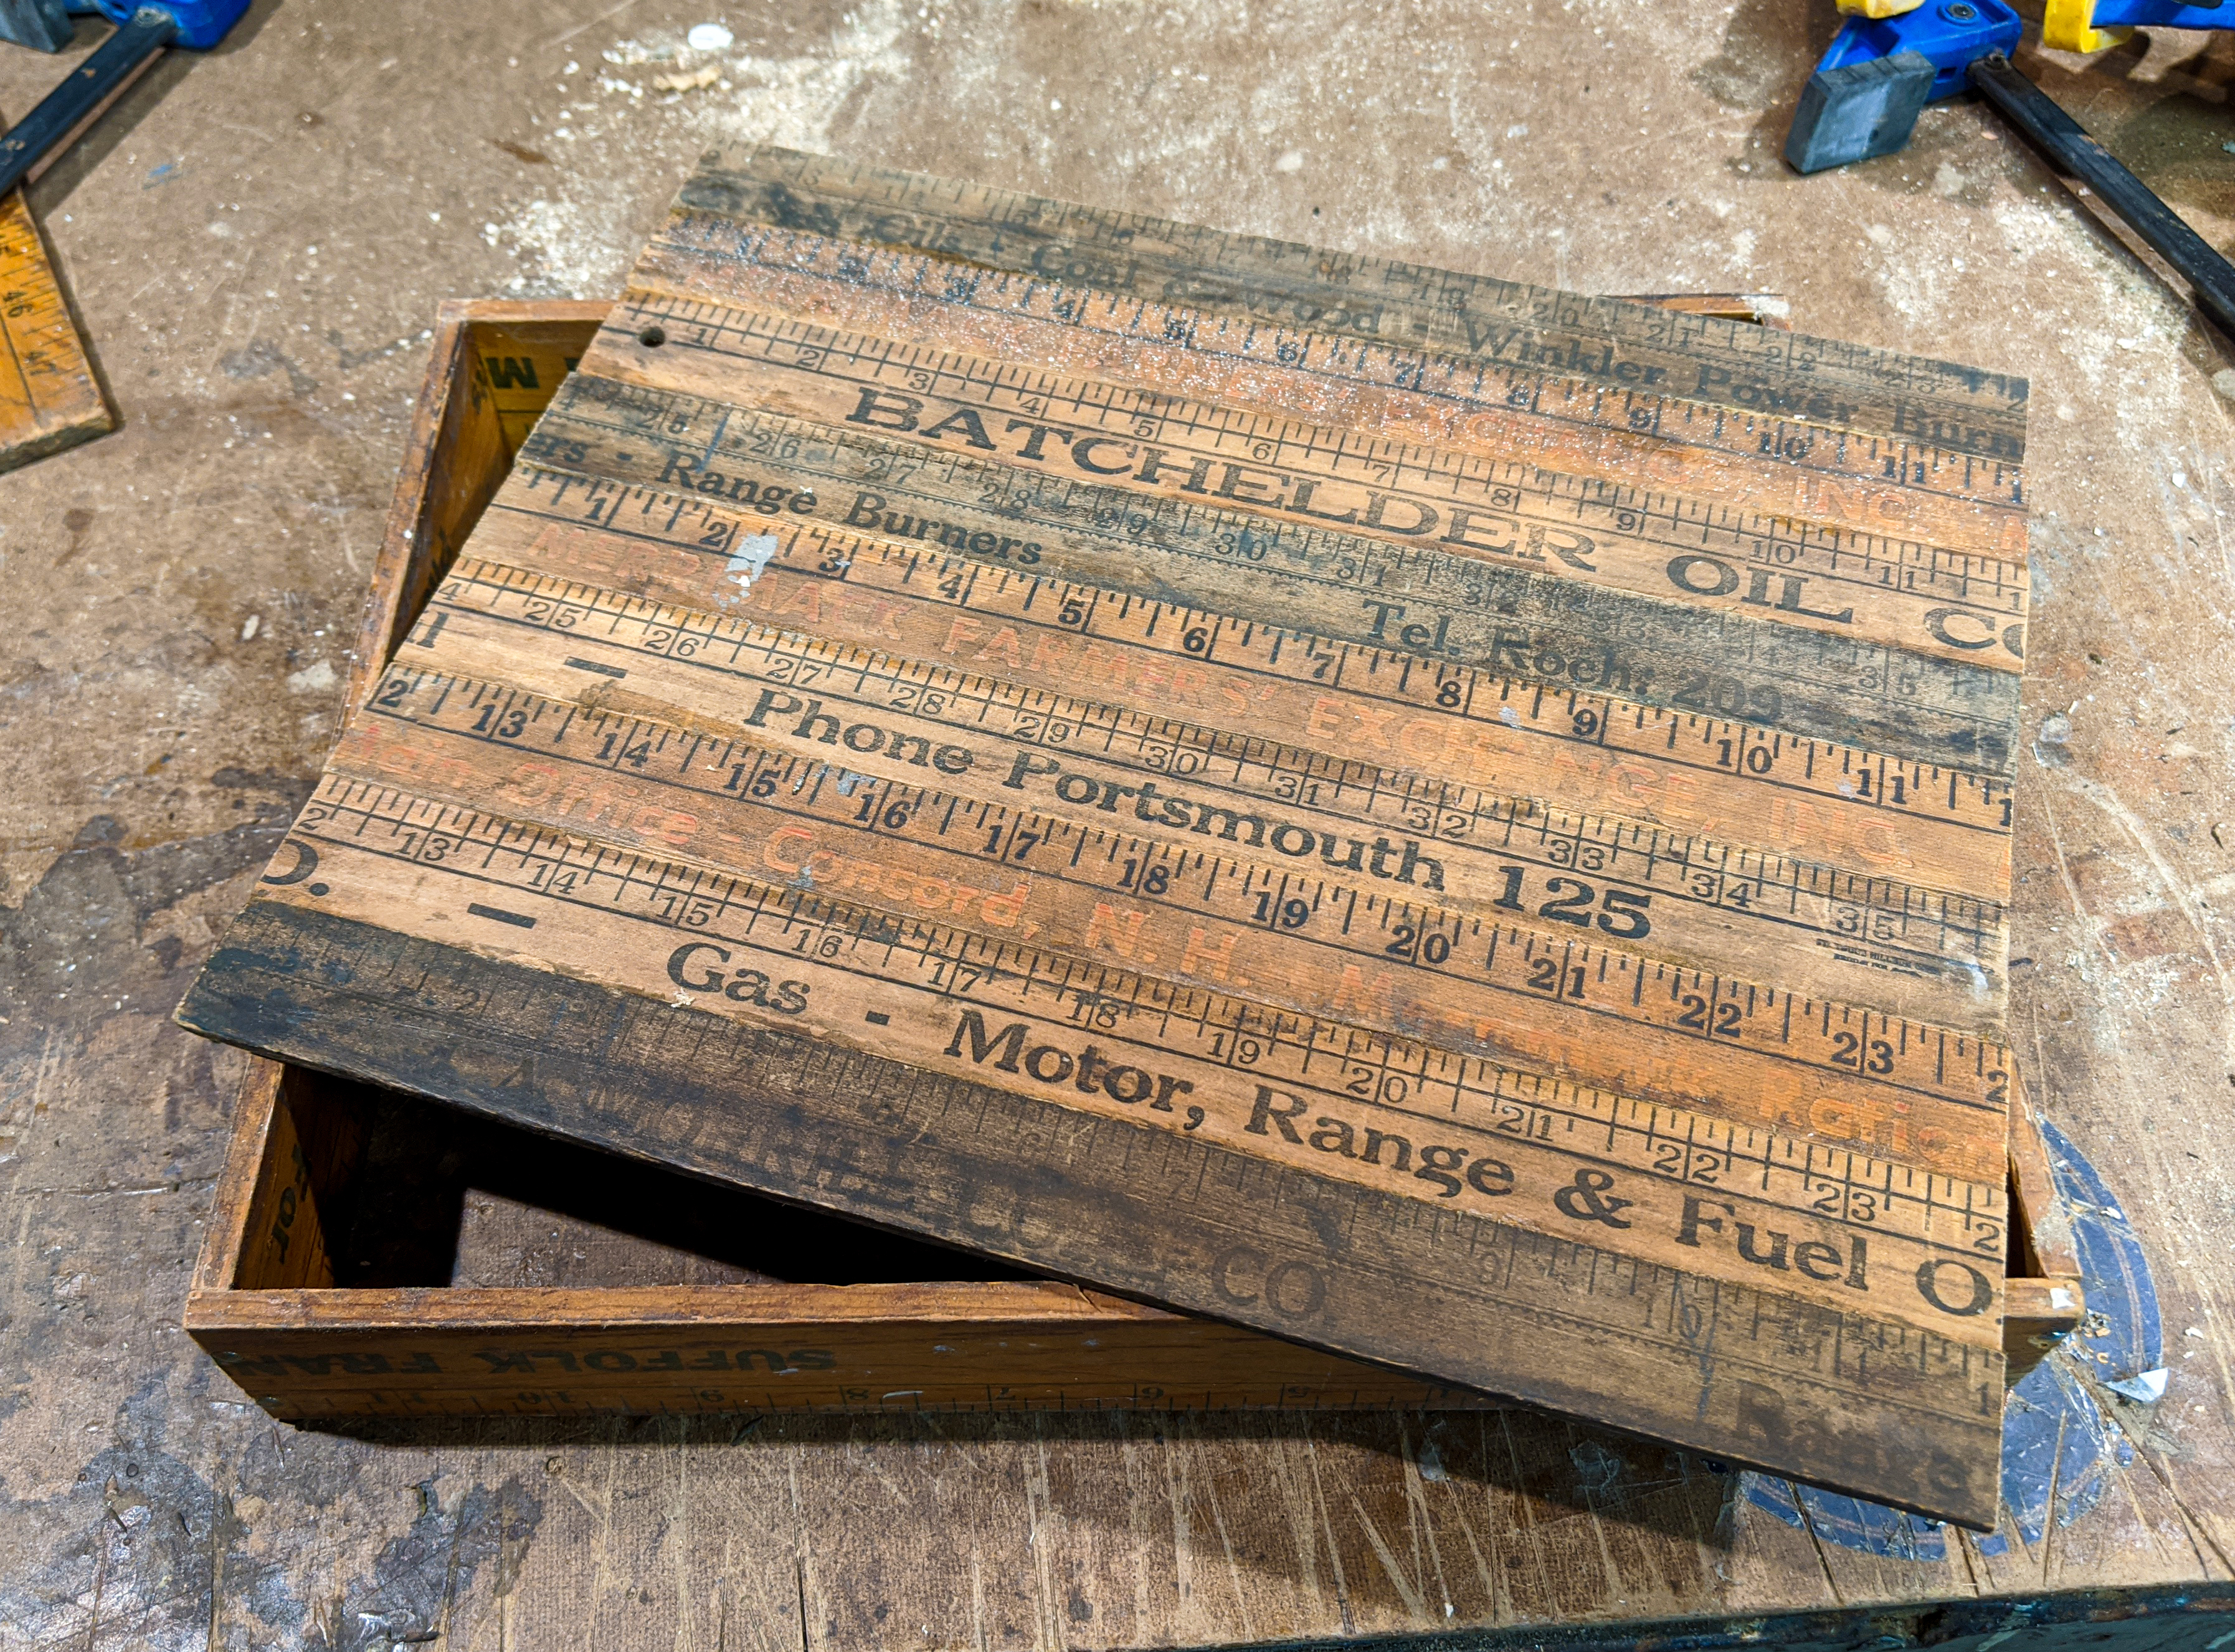
Making the Soundboard (7) And here it is, the finished sound board panel! Overall, I am very happy with how it turned out. Going into this project, I have never tried creating a panel in this way from smaller strips, so I am pleased that it turned out so well. |
|
|
|
|
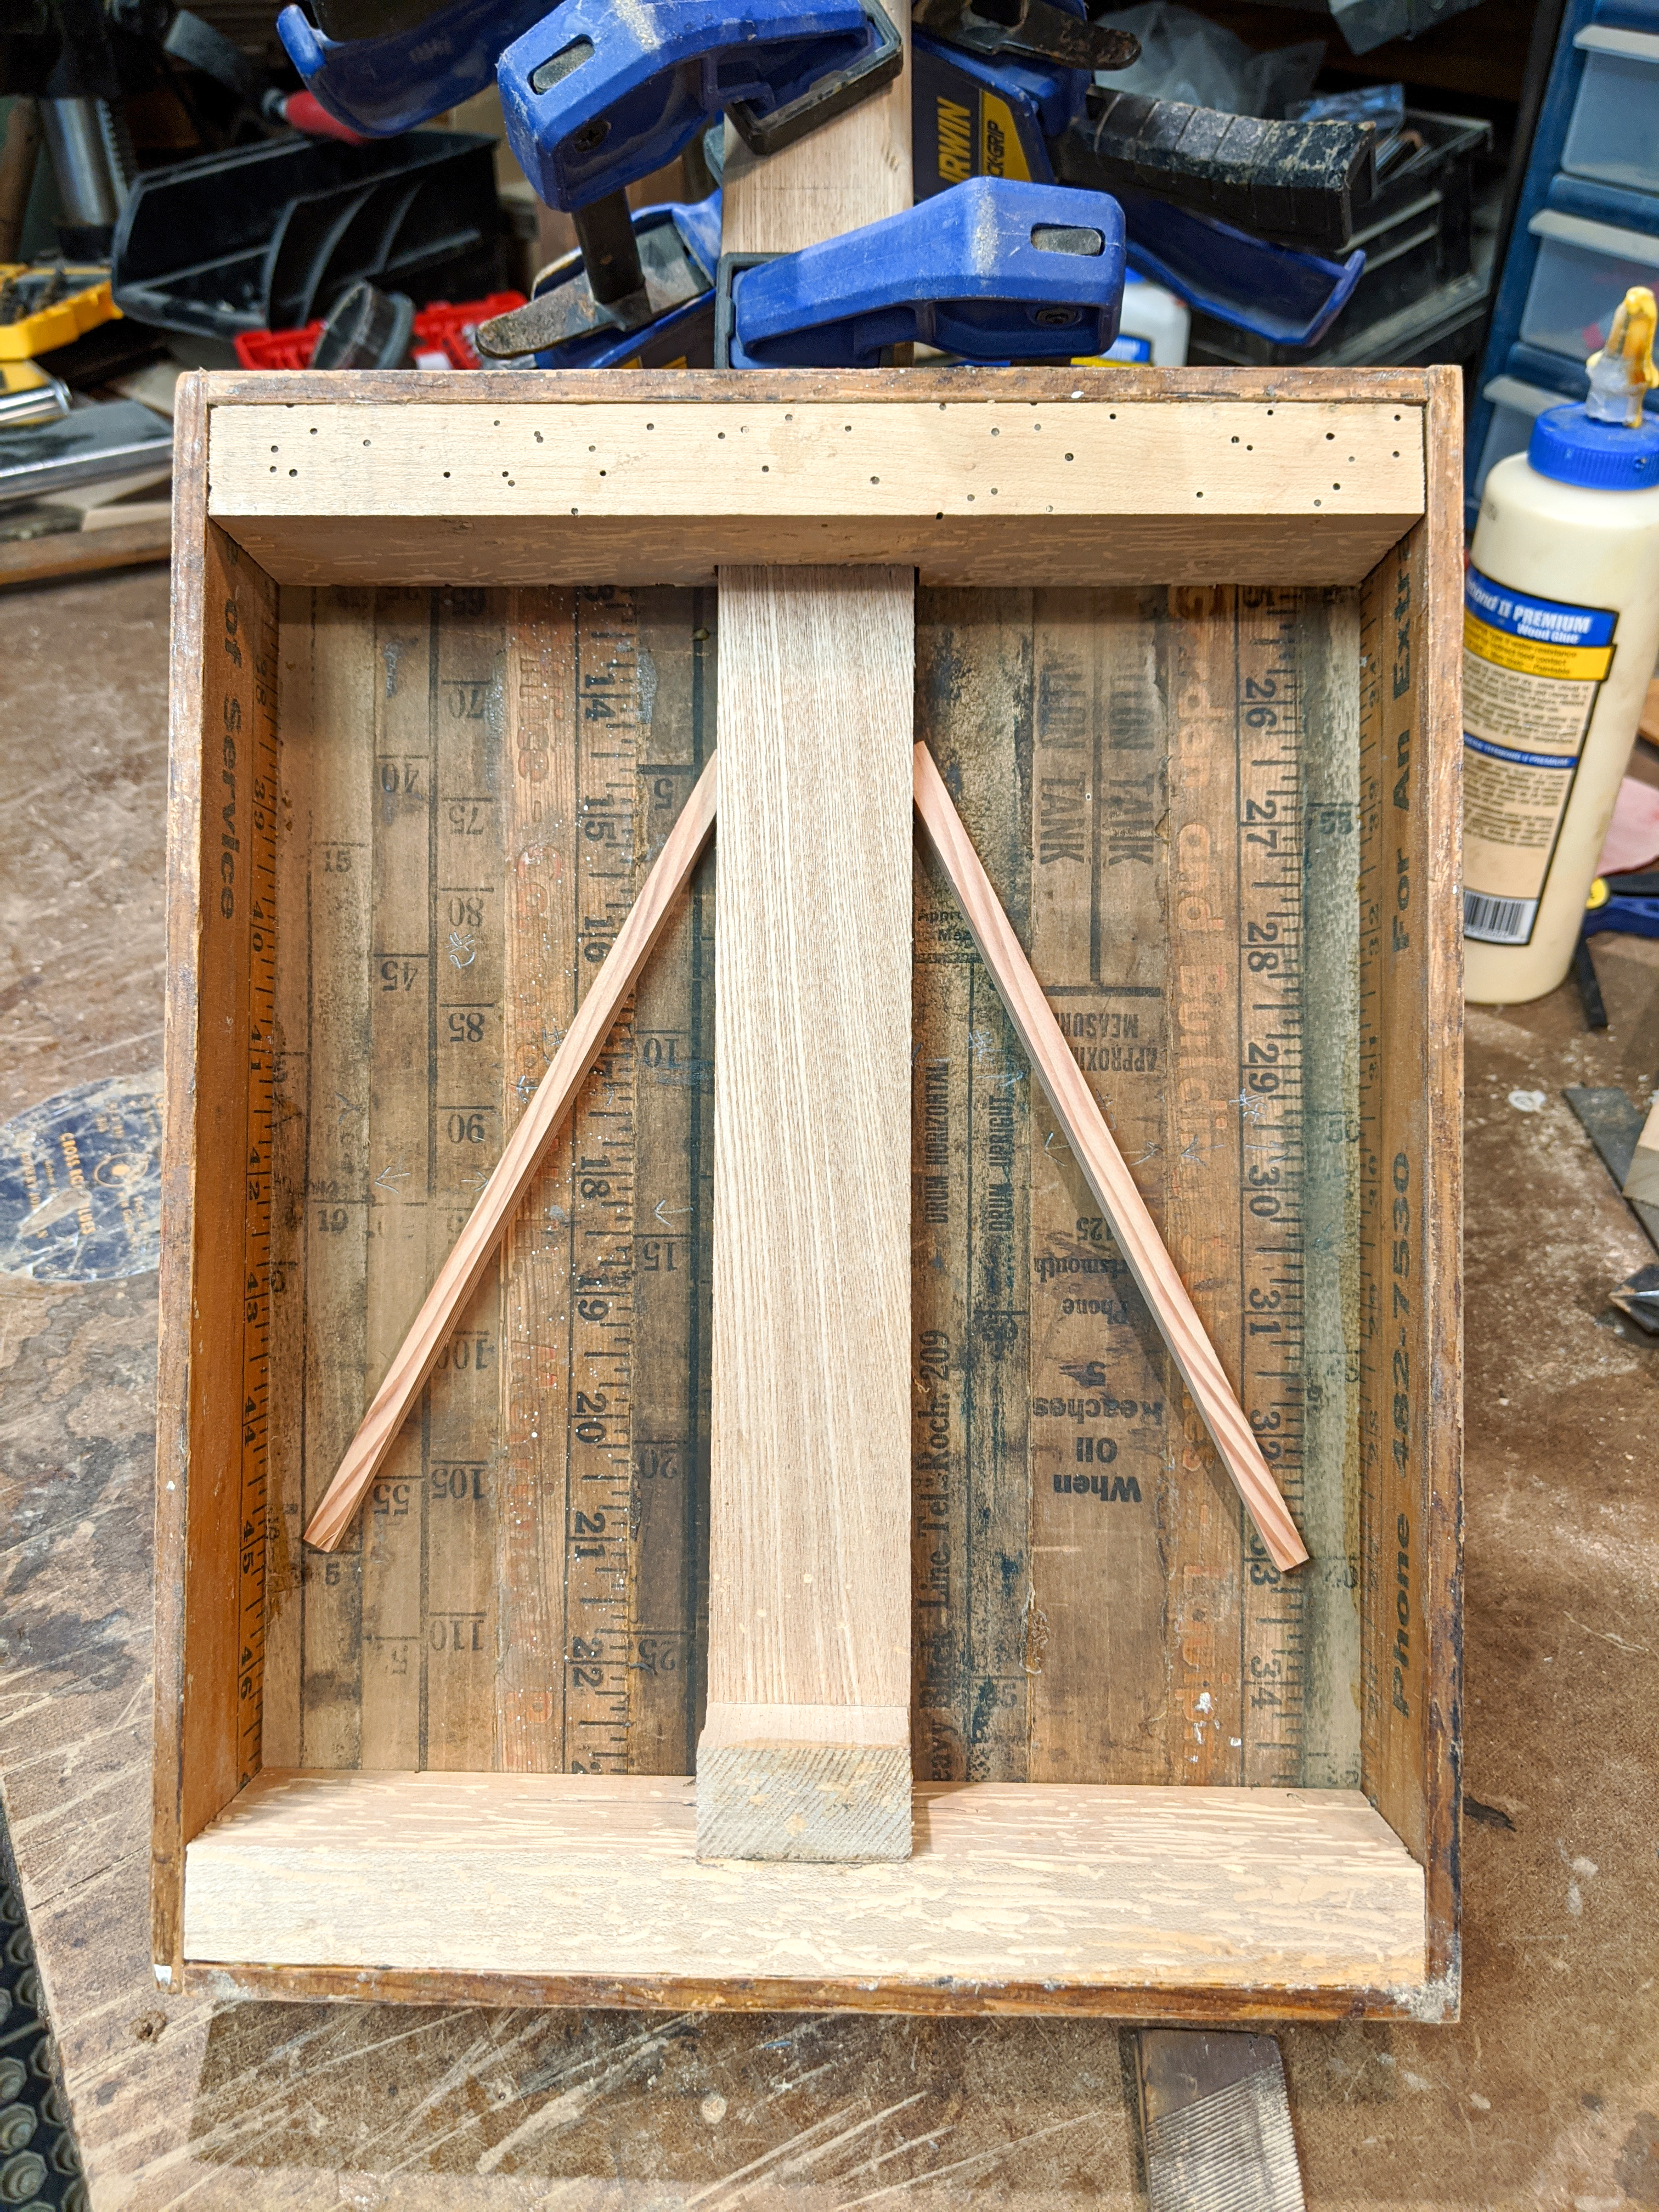
Gluing in Braces Because of how thin the box's side panels are, I knew I'd need some bracing. I knew I was intending to do a neck-through style build, and that the neck itself would handle most of the string tension (which I miscalculated, as we'll see later). Because of this, I decided to only brace the front and back sides and not all the way around. To prepare for gluing in my braces, I sanded the inside edge of the front and back panels, to expose some bare wood for more effective gluing. |
|
|
|
|
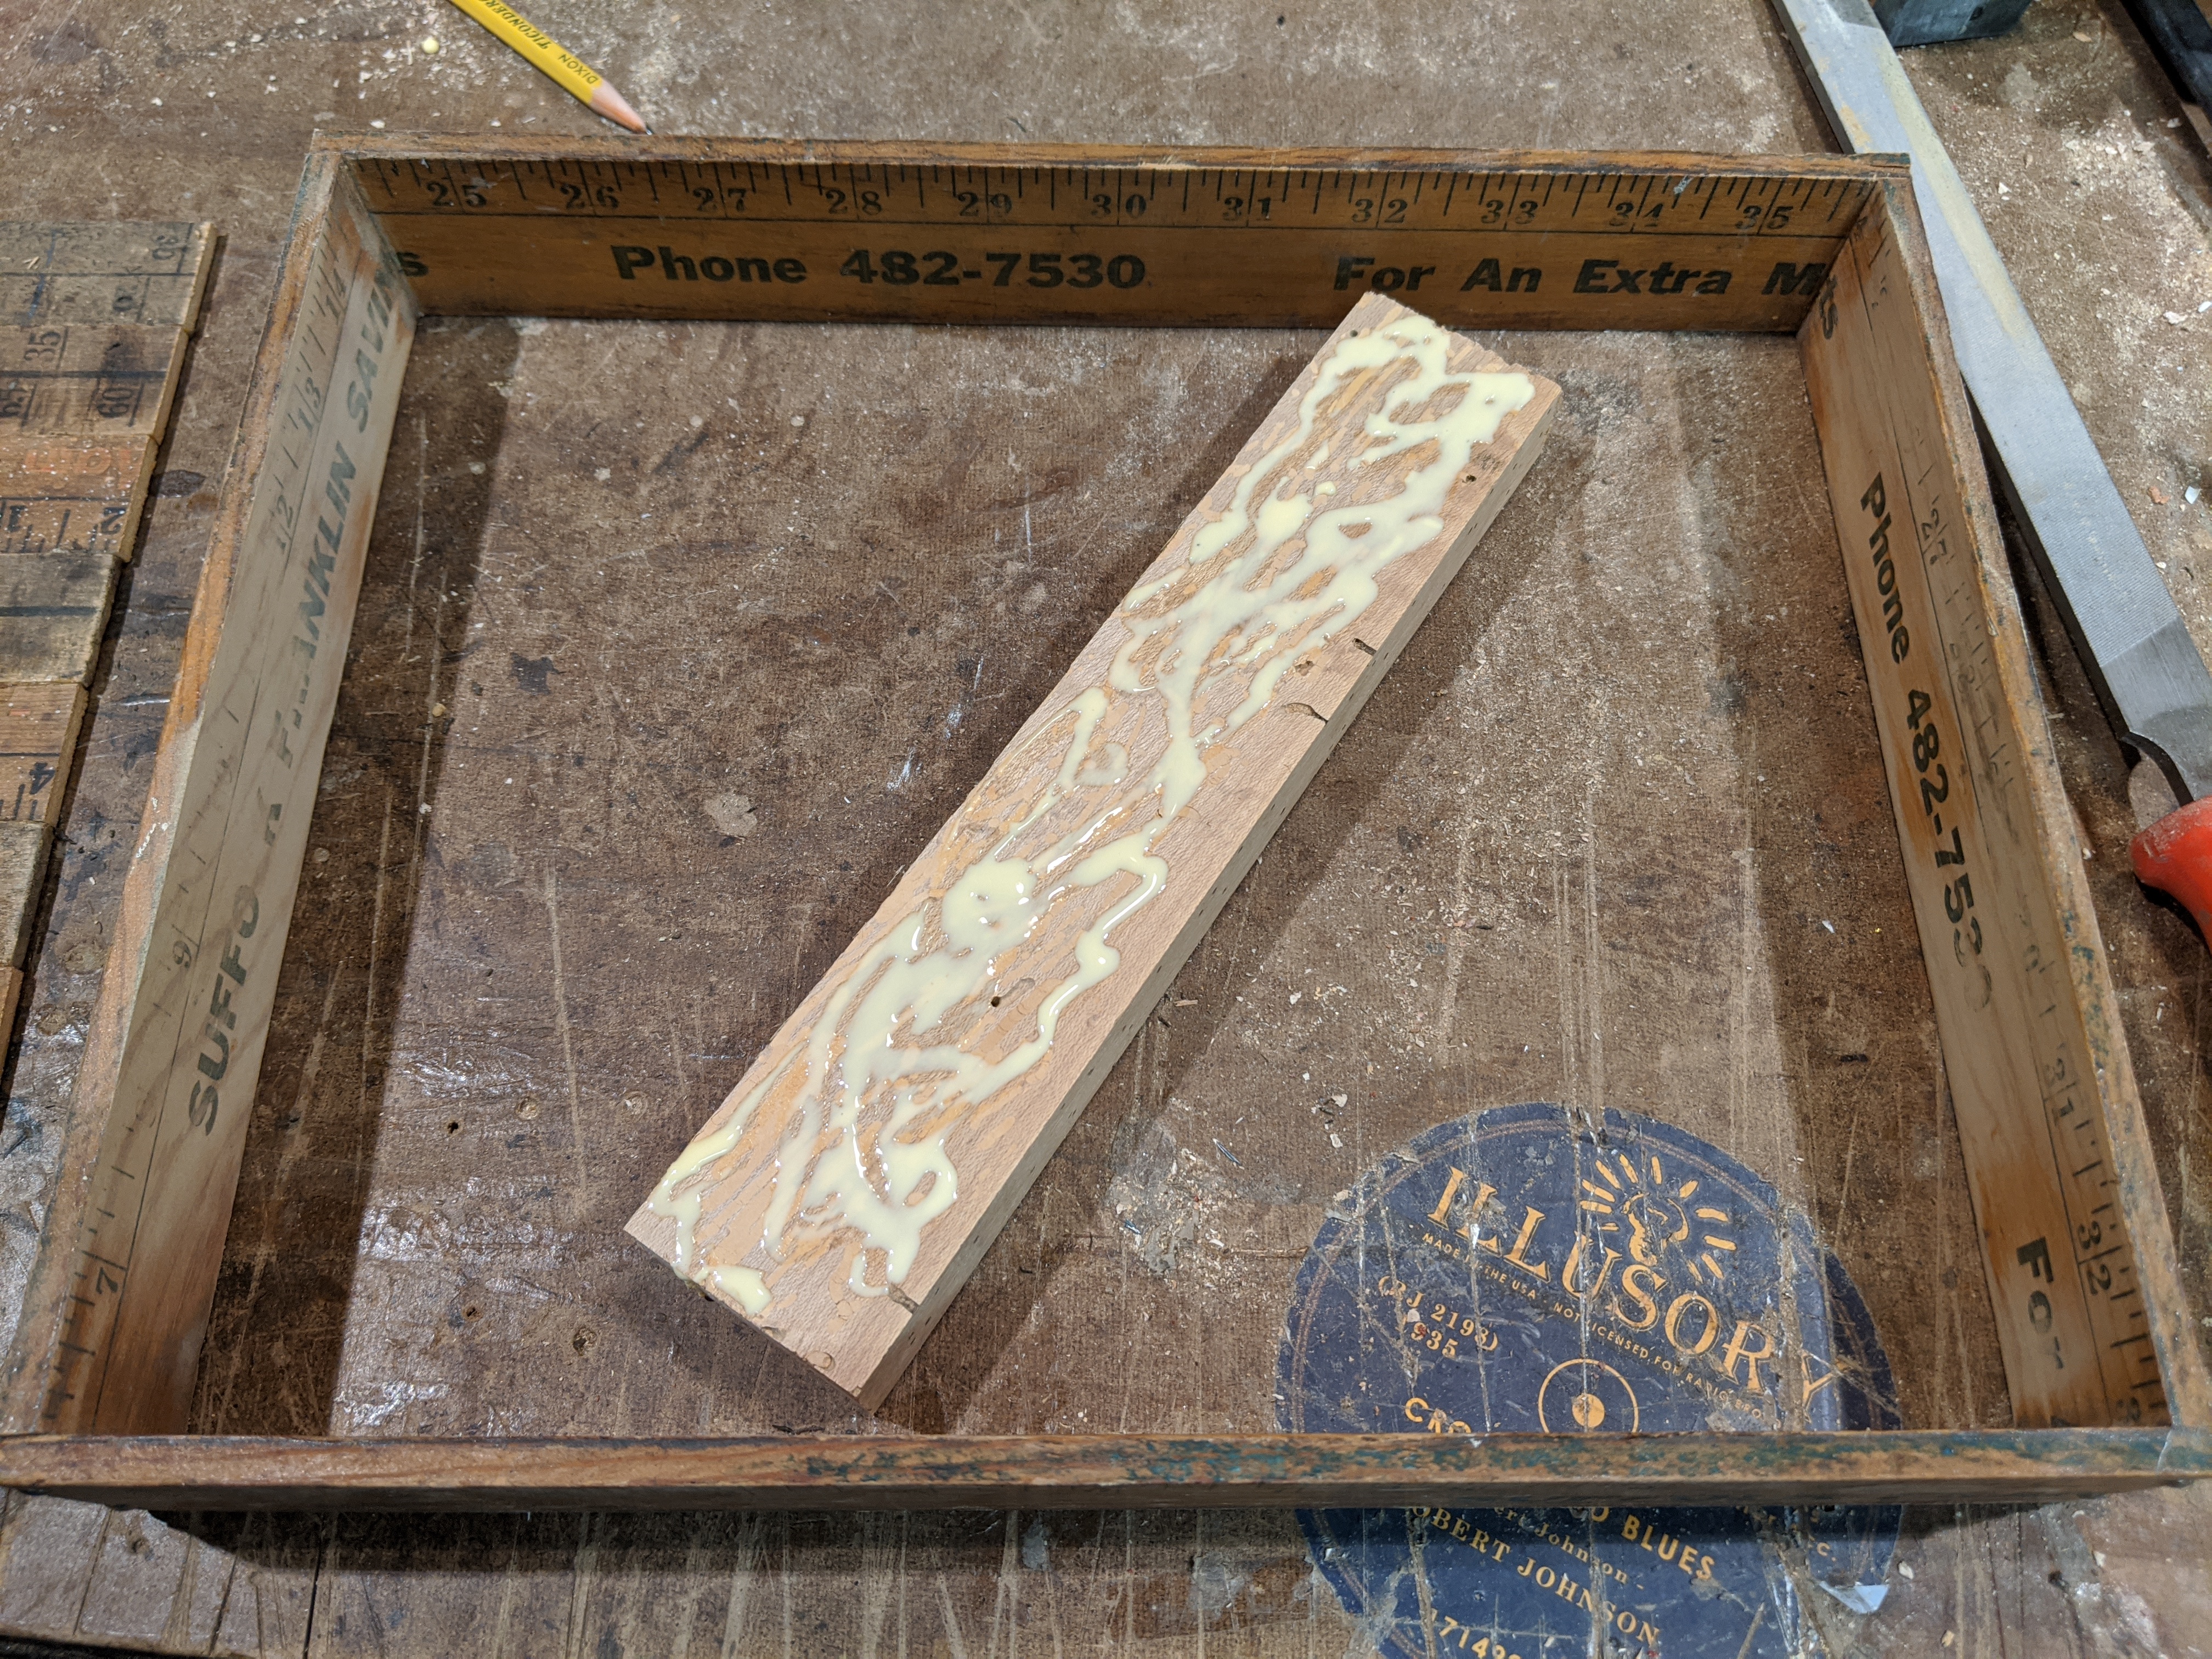
Gluing in Braces (2) While my original idea had been to build a guitar ENTIRELY from yardsticks, I soon realized I didn't have enough of them (or at least enough hardwood ones), to make that feasible. So, I chose a piece of worm-eaten reclaimed hard maple to use for my interior bracing. At the same time I chose a nice piece of 200-year-old American Chestnut, which had been reclaimed from an old barn in Maine, to use for the neck. Here I have cut one of my braces to length and added the glue, in preparation for clamping into place. |
|
|
|
|
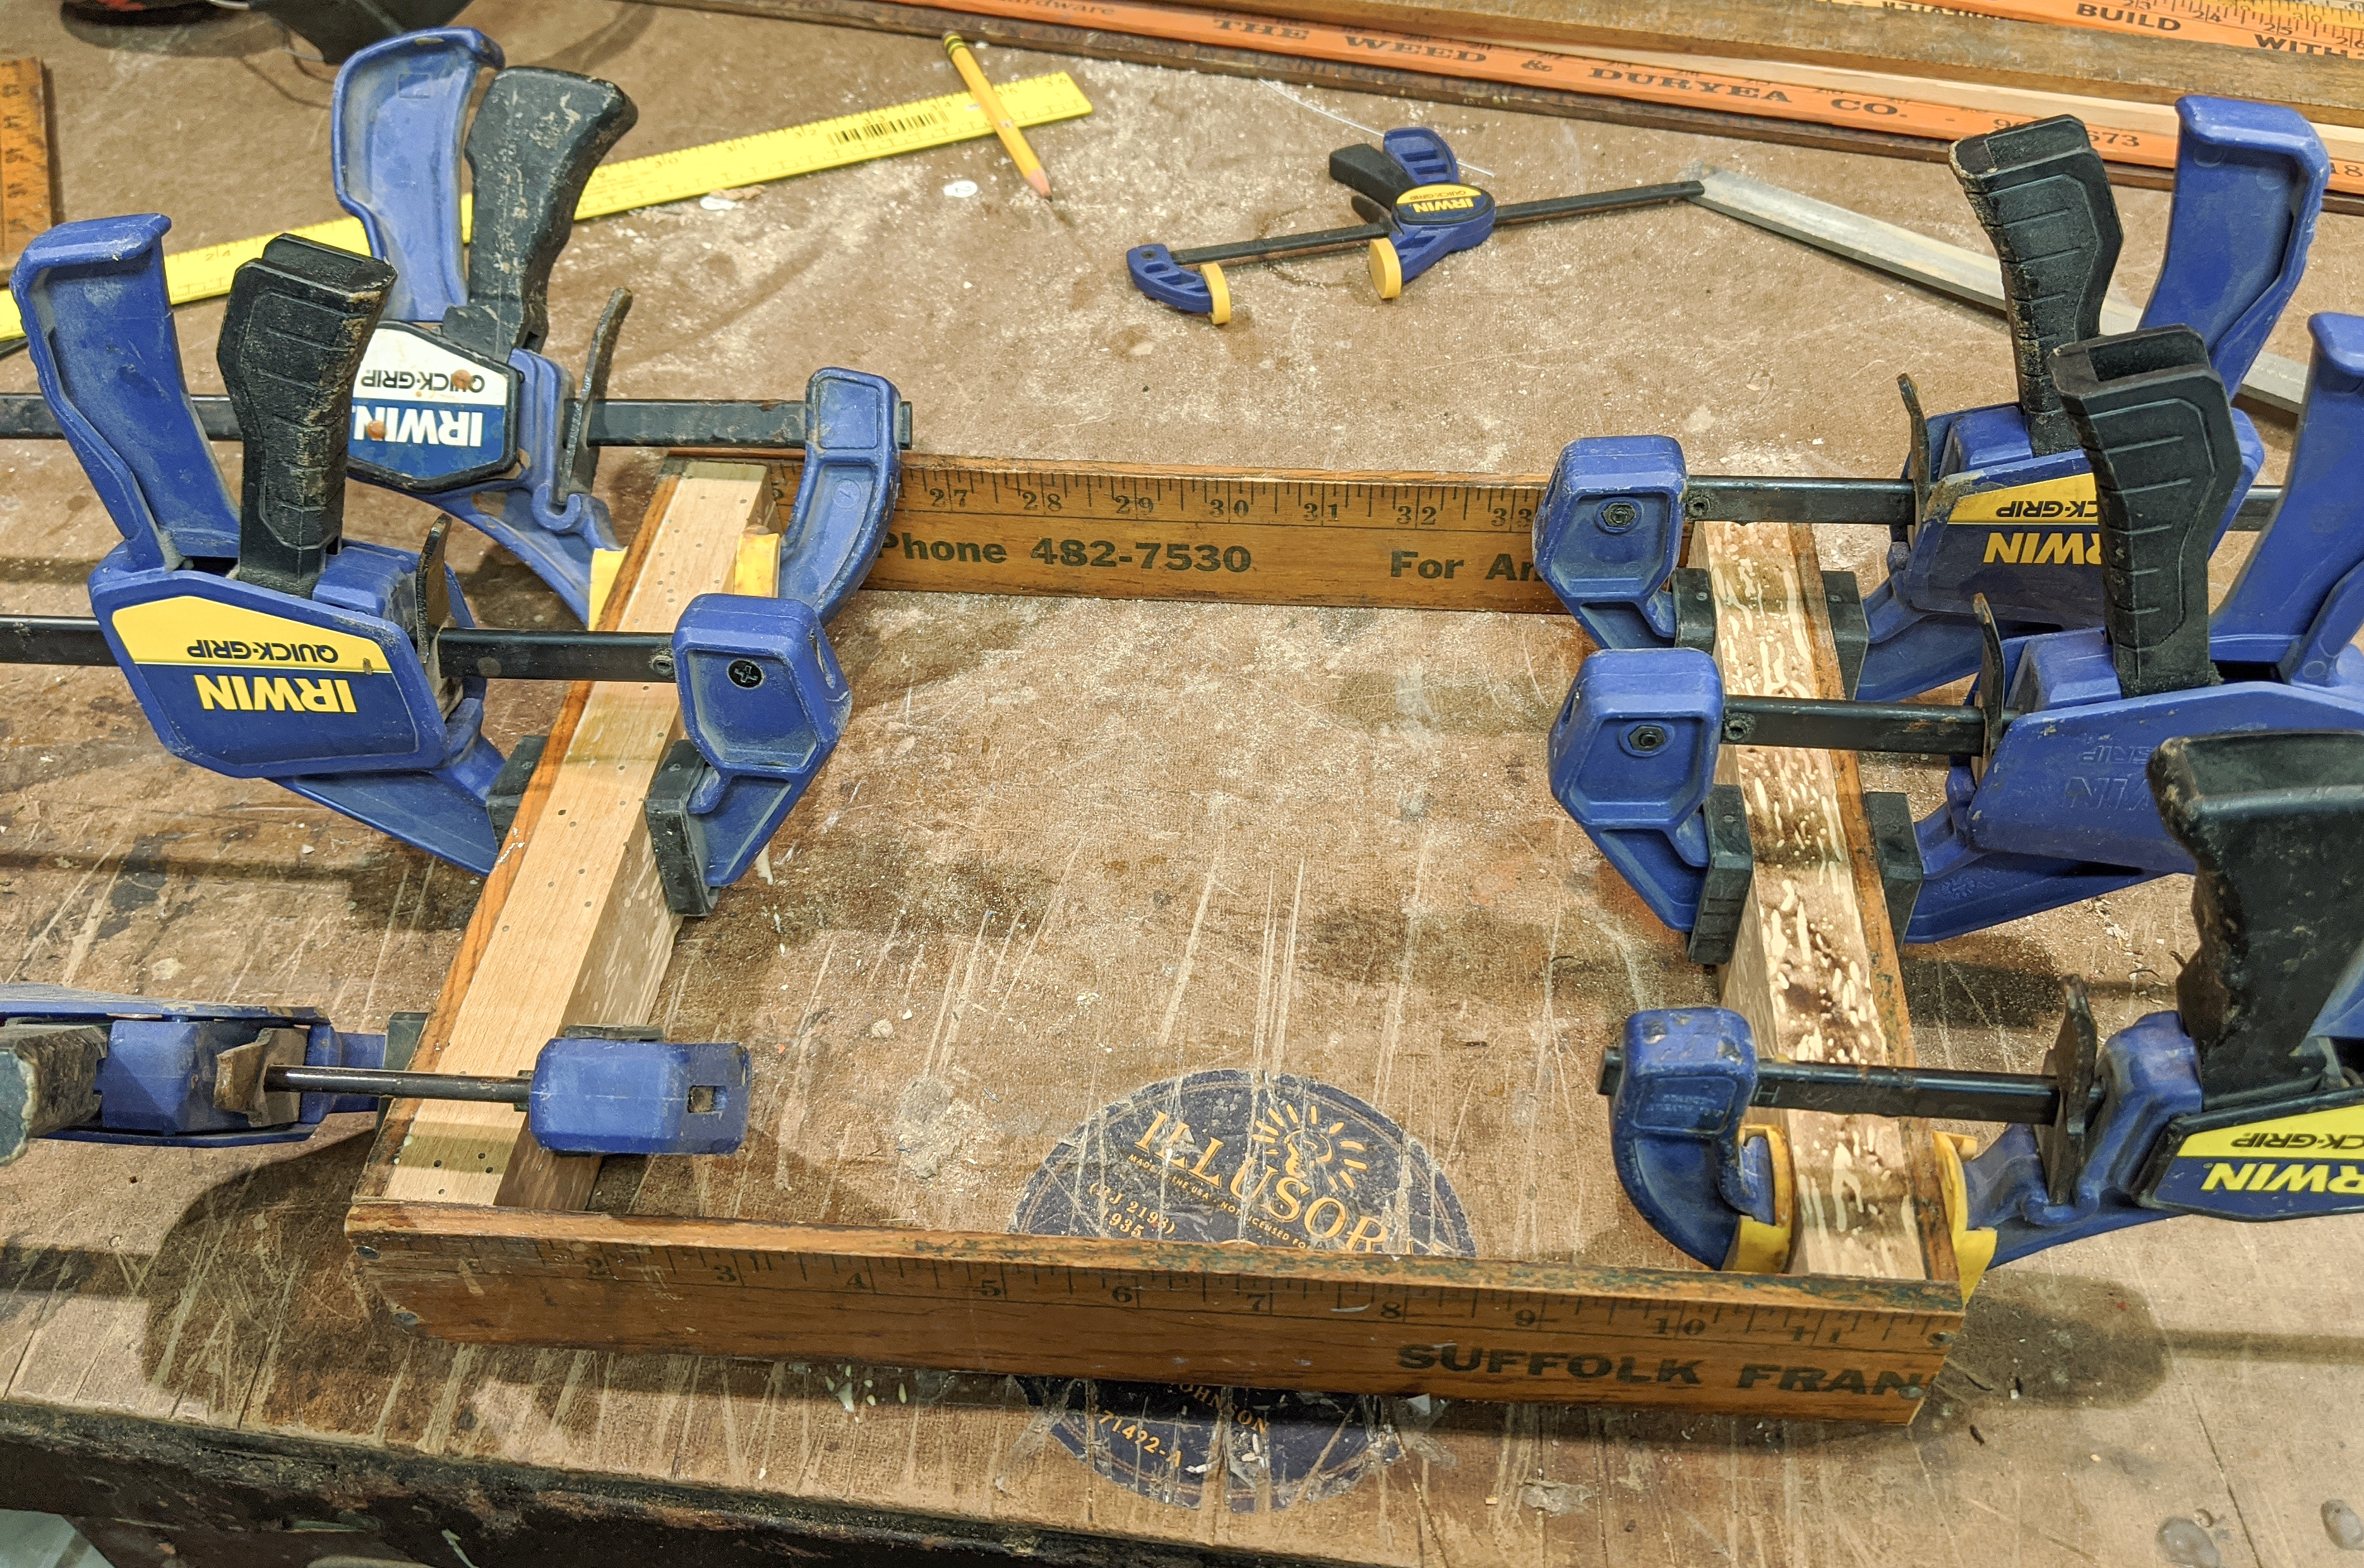
Gluing in Braces (3) Here both braces are clamped into place while the glue sets. I carefully cut and sanded my braces to make them the exact same height as my box sides |
|
|
|
|
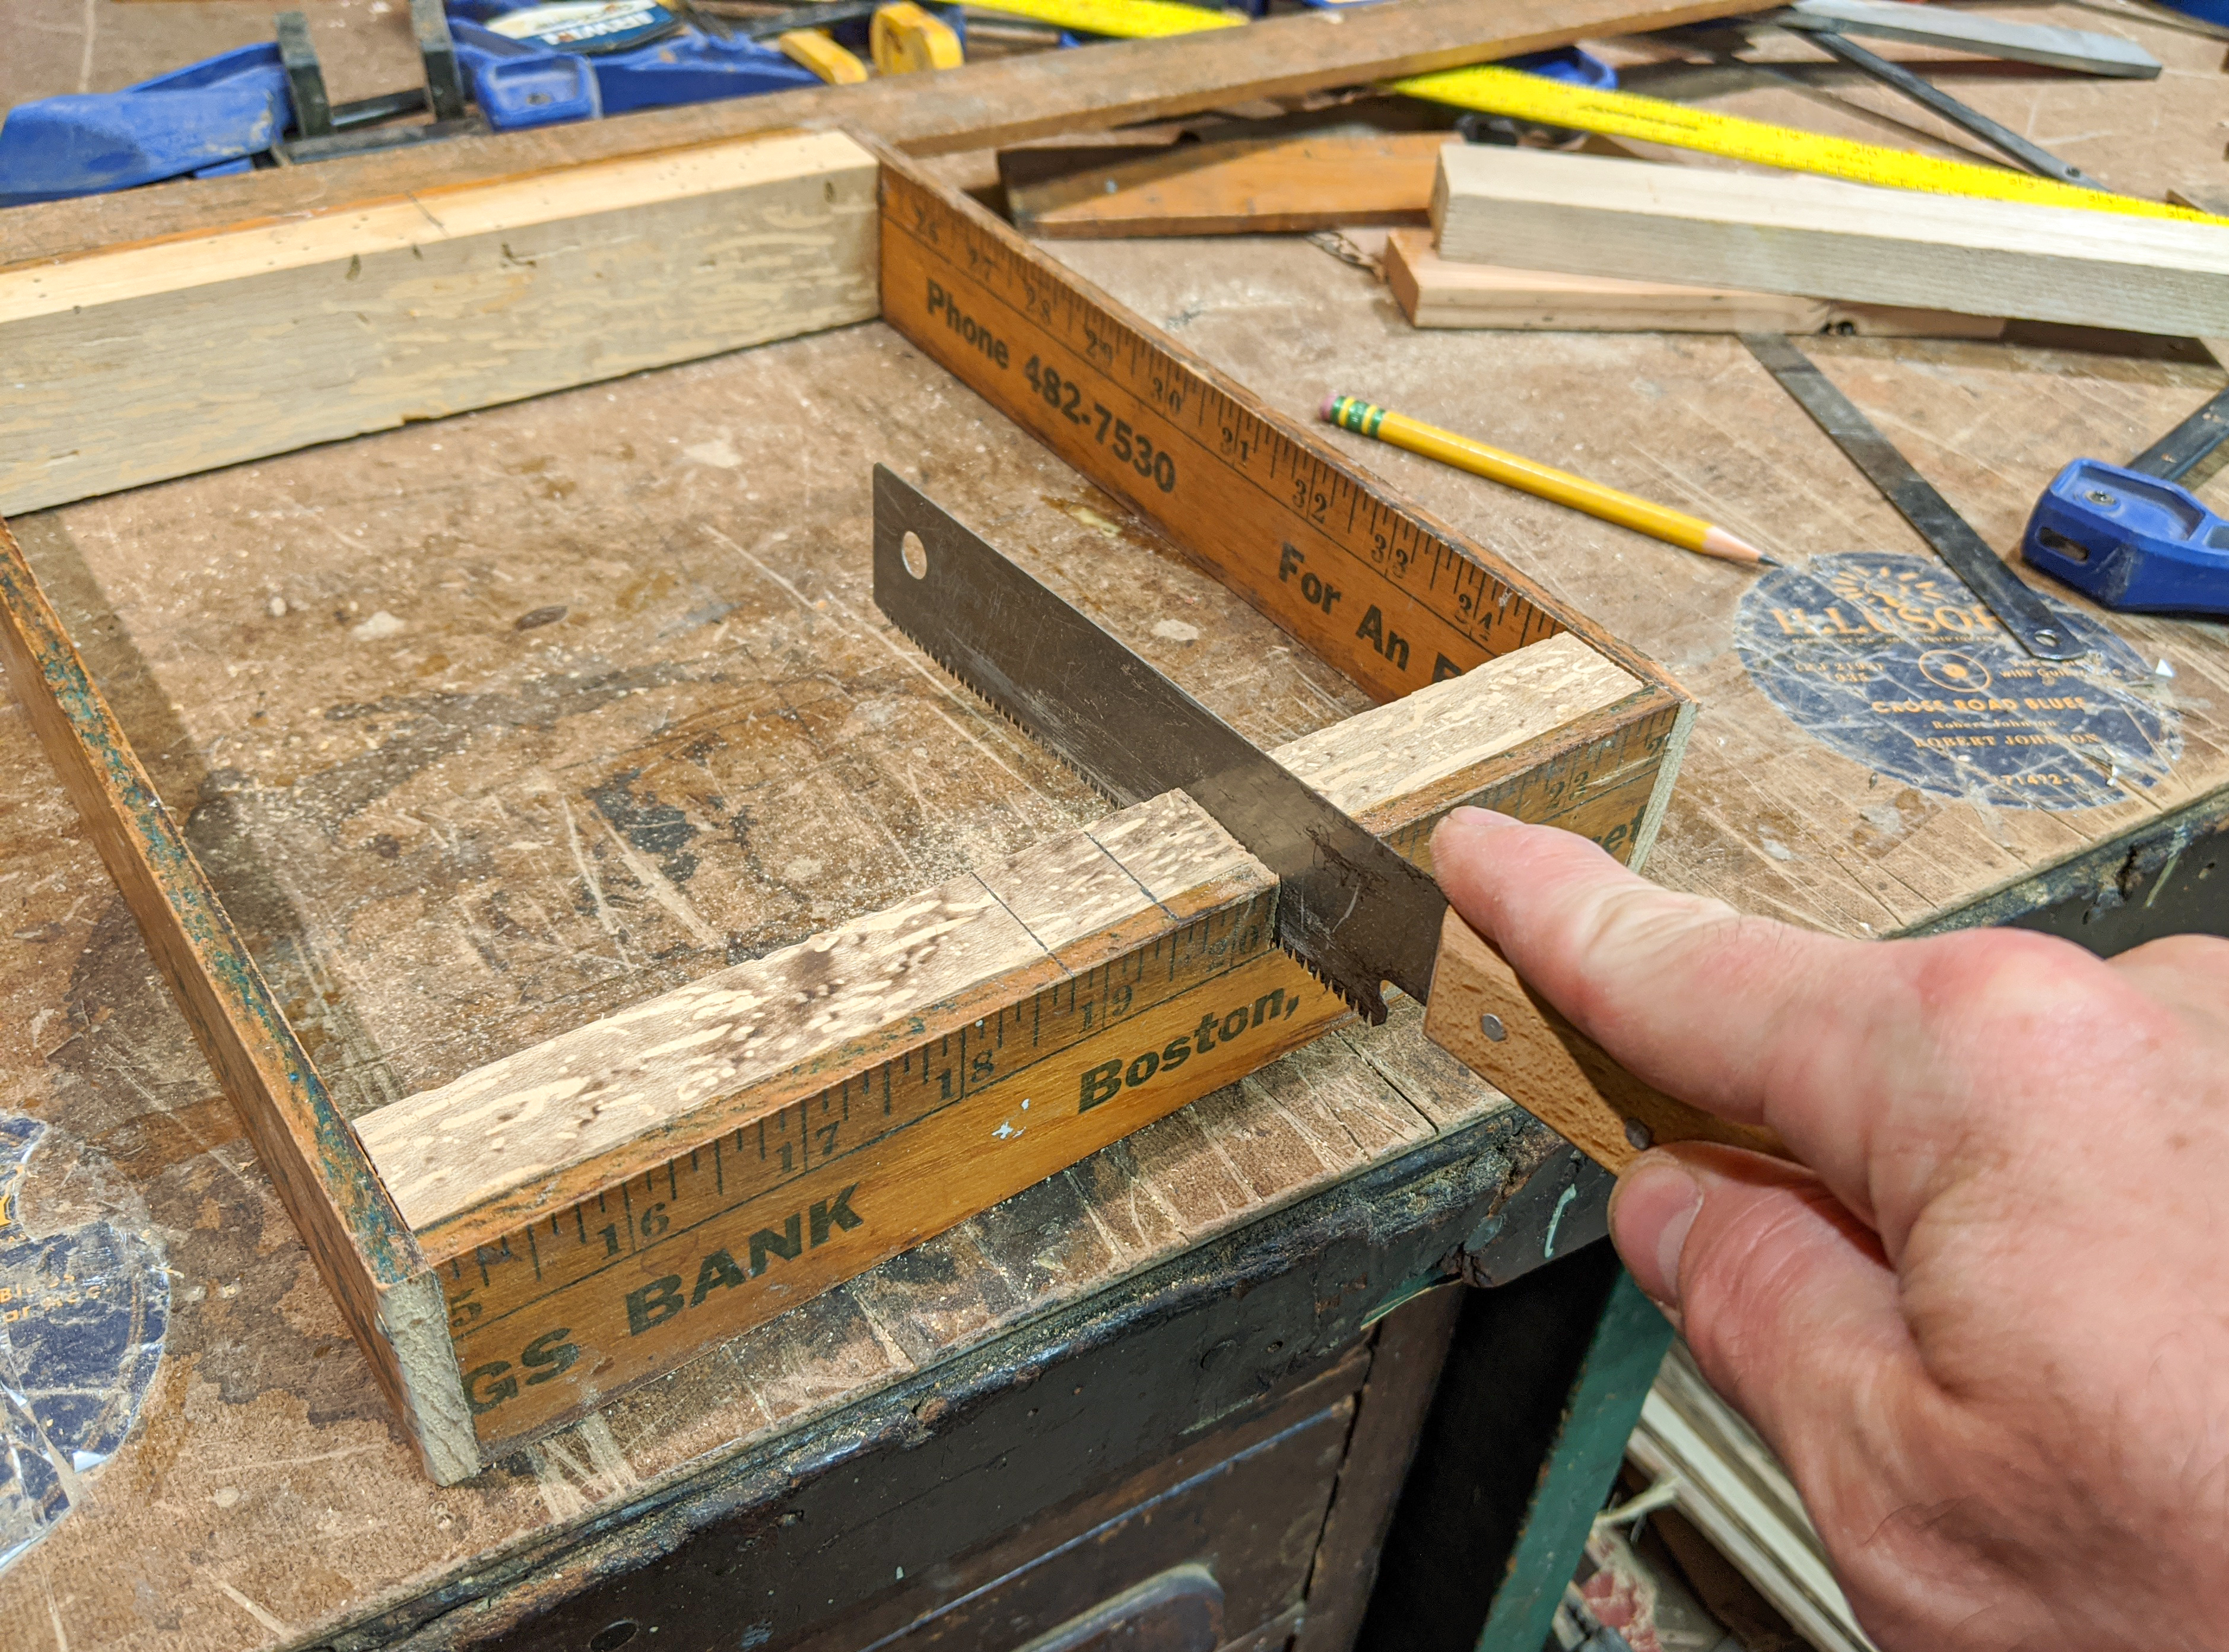
Notching for the Neck I knew from the beginning of the build that I wanted to do a neck-through style, and so now I started cutting the notch in the front panel and brace for the neck to run through. In hindsight, it would have been a lot easier to notch the brace before gluing it in, as it took a lot of cutting with the handsaw to get this done after the fact. I couldn't use a handsaw here because the other end of the box would block the blade. |
|
|
|
|
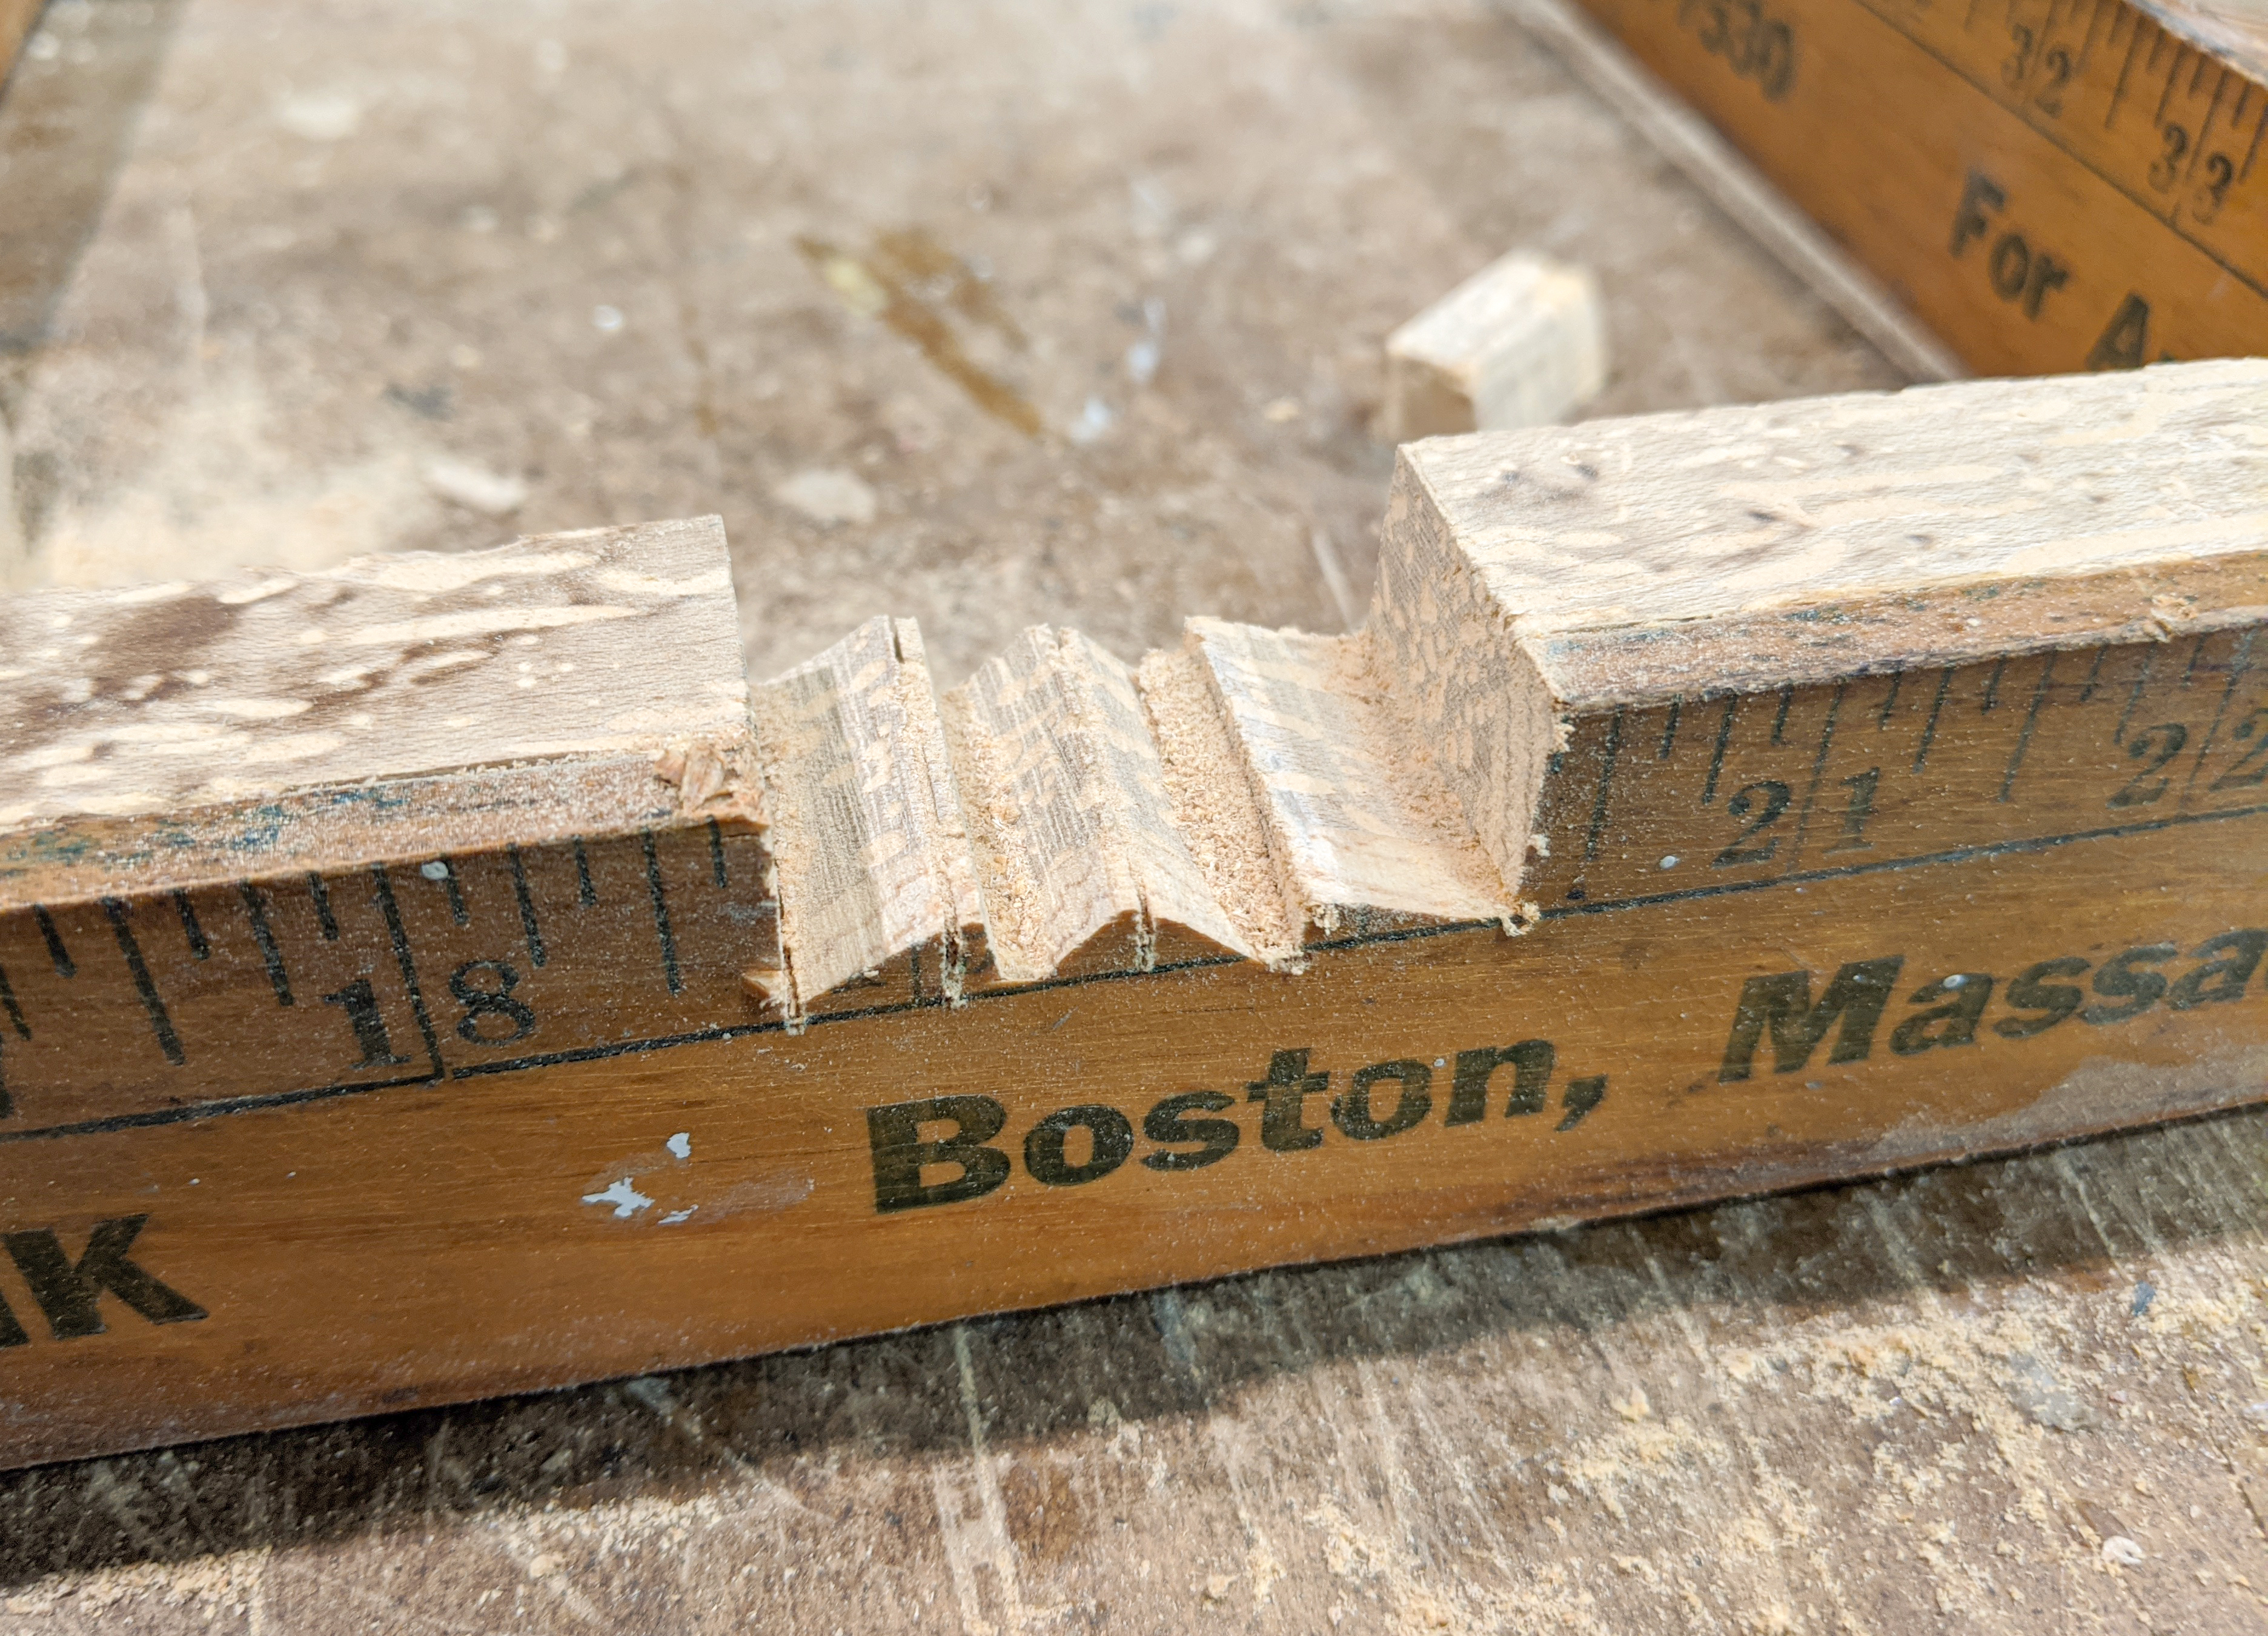
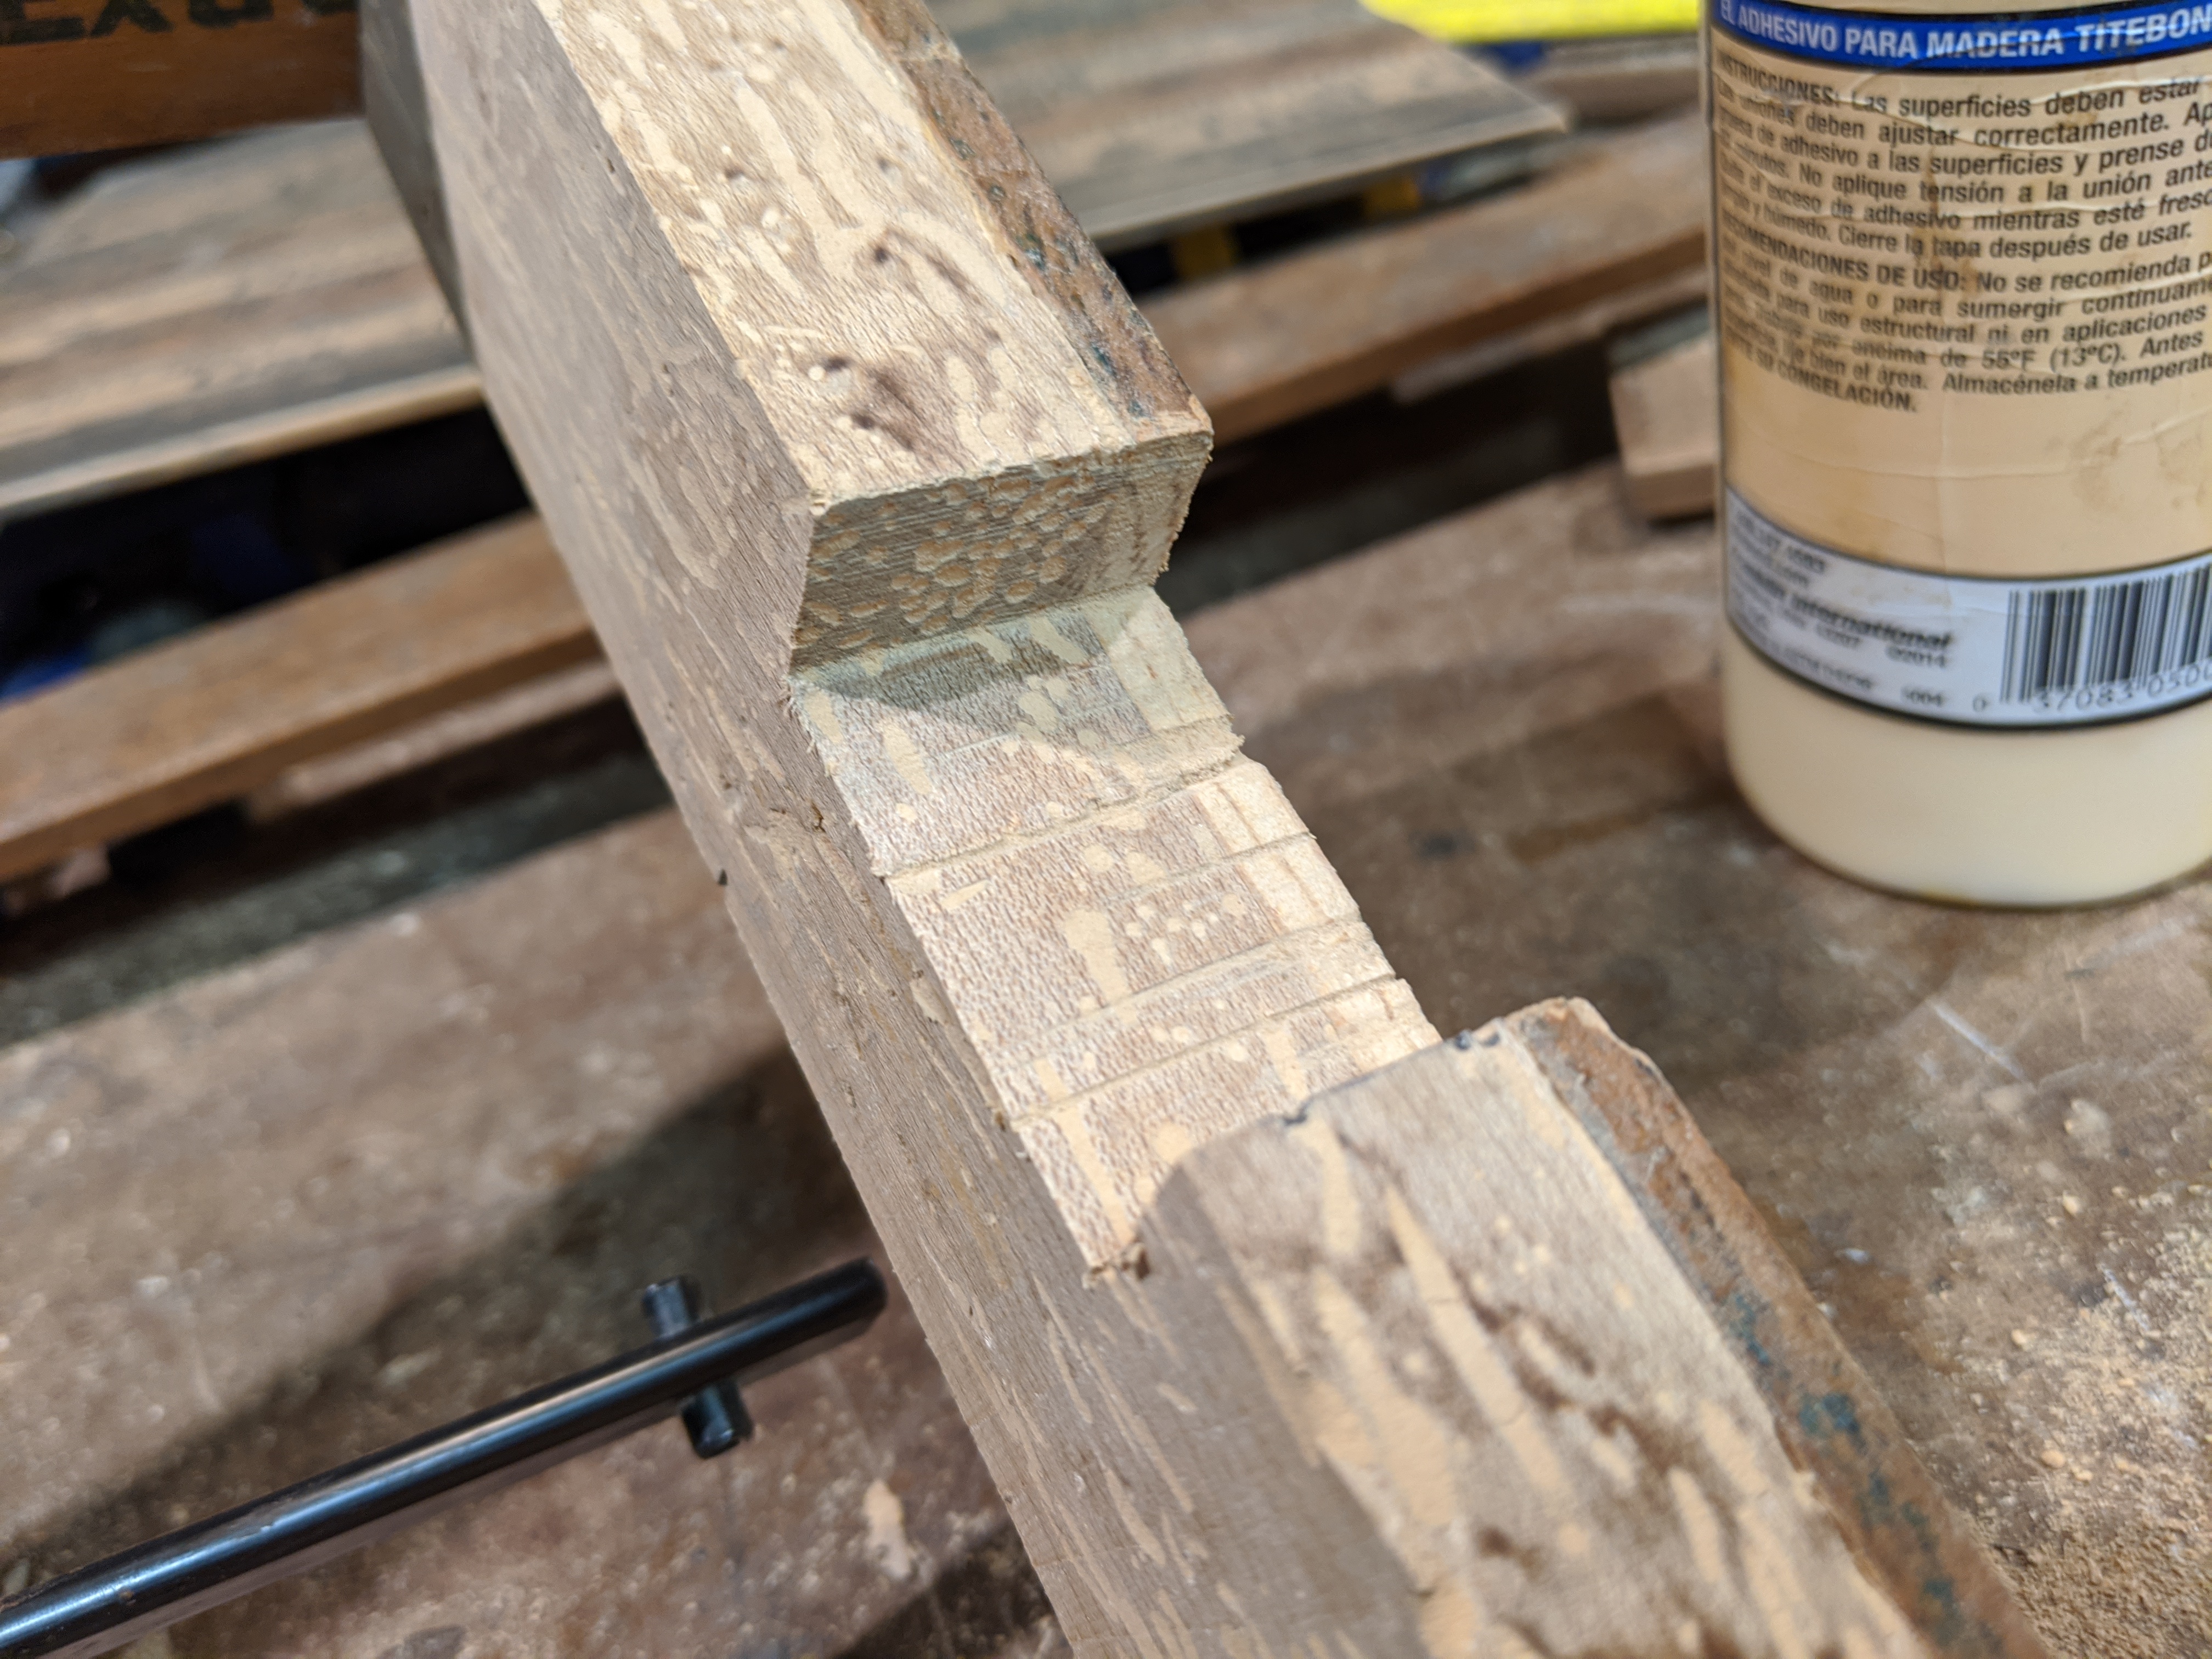
Notching for the Neck (2) In the end, it took quite a few cuts with the handsaw to get my notch cut. As for the depth of this notch - I know that getting it right can be tricky for newer builders (and even more experienced ones as well). Here's how I went about it: I knew I would be gluing on a fretboard, and I wanted it to be suspended just over the surface of the soundboard. I also knew my neck was just over 3/4-inch thick, and that I would be notching down into it where it passed through the box, so that it wouldn't touch the underside of the sound board. So, I kindof eyeballed it and figured that a notch about 5/8-inch deep would do - it would keep my fretboard height around where I wanted it, and I knew I could adjust the height of my bridge to get the action right later on... so I went with it. |
|
|
|
|
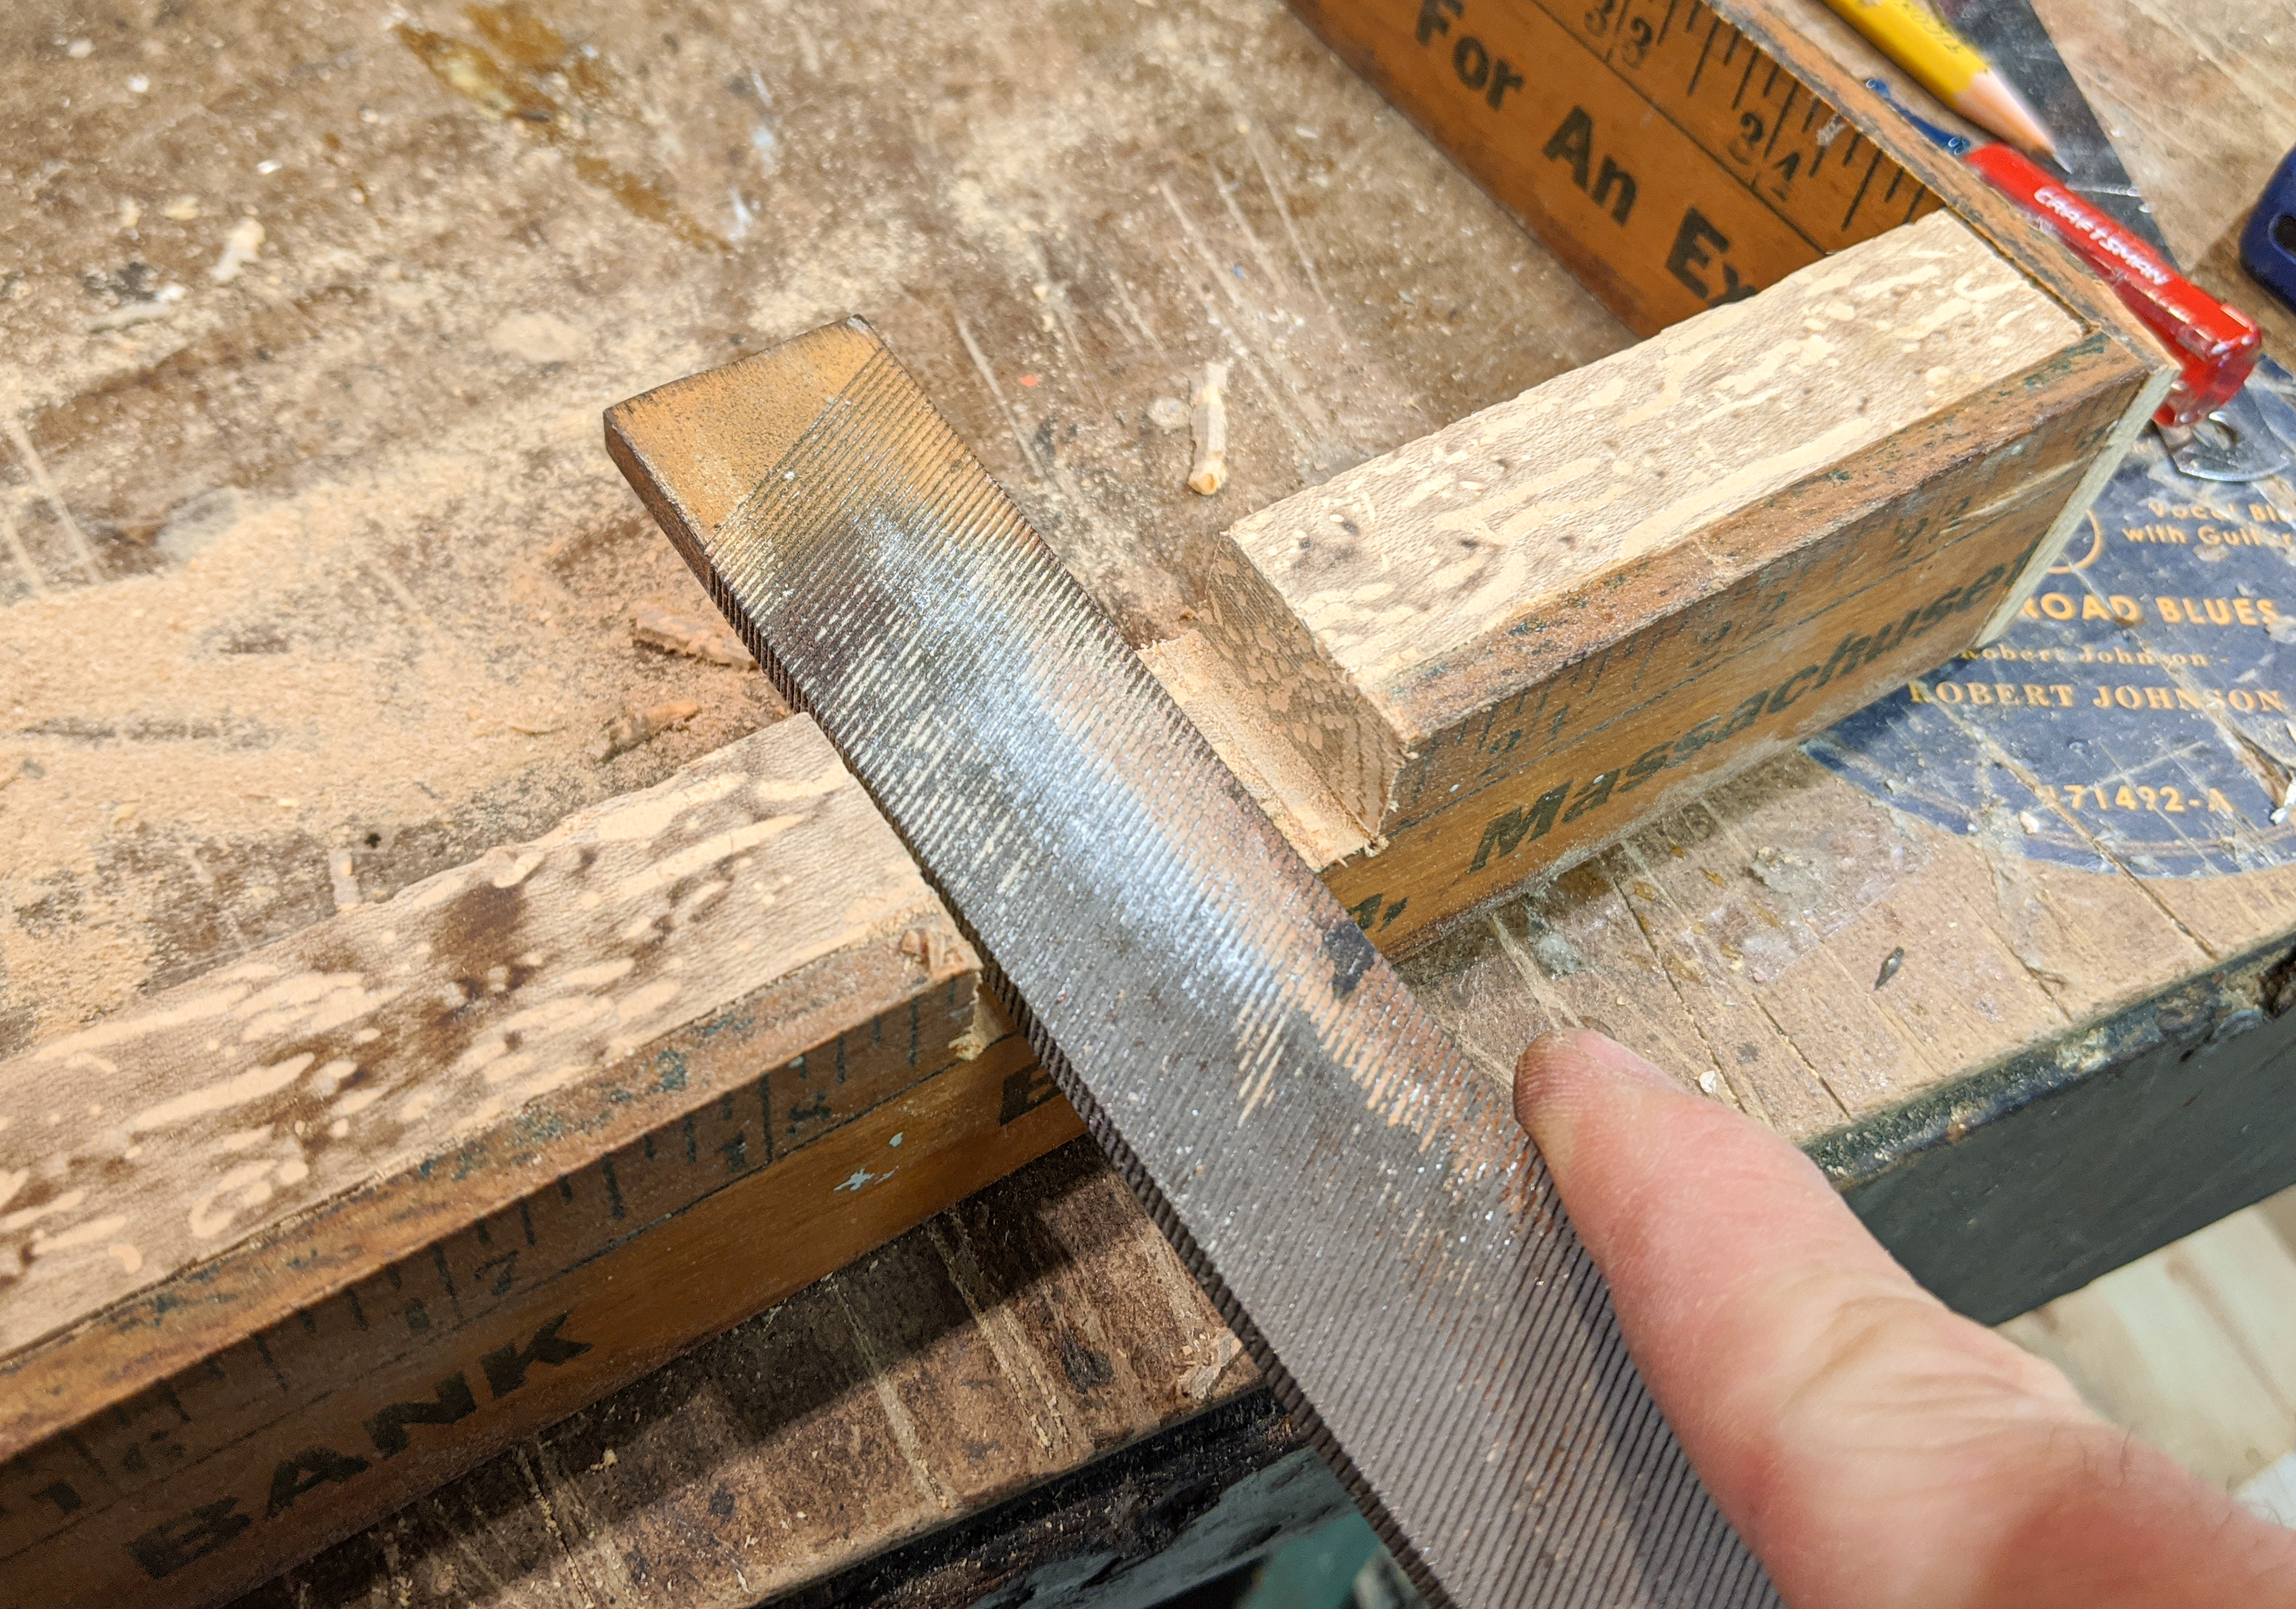
Notching for the Neck (3) And then, the smoothing. Even when building a rustic-style guitar, you don't really want rough and jagged visible edges. I like my neck notches to be nice and smooth so the neck fits cleanly into the notch... and so, it was time to file away the rough bumps. This took some time and elbow grease, but there really wasn't any way around it. |
|
|
|
|
Notching for the Neck (4) In the end, I decided that a LITTLE roughness wouldn't hurt and that it didn't need to be COMPLETELY smooth. This shot really shows some of the character of that worm-eaten maple. I can't remember exactly when I got that wood, but I do know it came from another old barn in Maine and really had some nice character. It seemed a shame to hide it inside the box in this way... but I know it's in there, and sometimes that's what matters. |
|
|
|
|
Installing the Neck OK, you caught me, I got carried away and forgot to take a couple of pictures. So just imagine at this point that I have carefully measured, marked, and notched my neck, thinning down the portion that will go into the box from 3/4-inch to about 3/8-inch thick. The reason for this is so that this portion of the neck won't touch the underside of the sound board, as it doing so would dampen the acoustic. sound considerably. So what this photo shows is me gluing in a small brace piece to the bottom/end panel brace inside the box, which the butt end of the neck will be fastened to. You'll see a visual of this in one of the photos to follow. You'll also see that I notched the neck a bit too deeply, overly weakening it, and that additional bracing was then necessary. Part of the fun of building homemade instruments from scratch is figuring out how to fix or work around mistakes like these. |
|
|
|
|
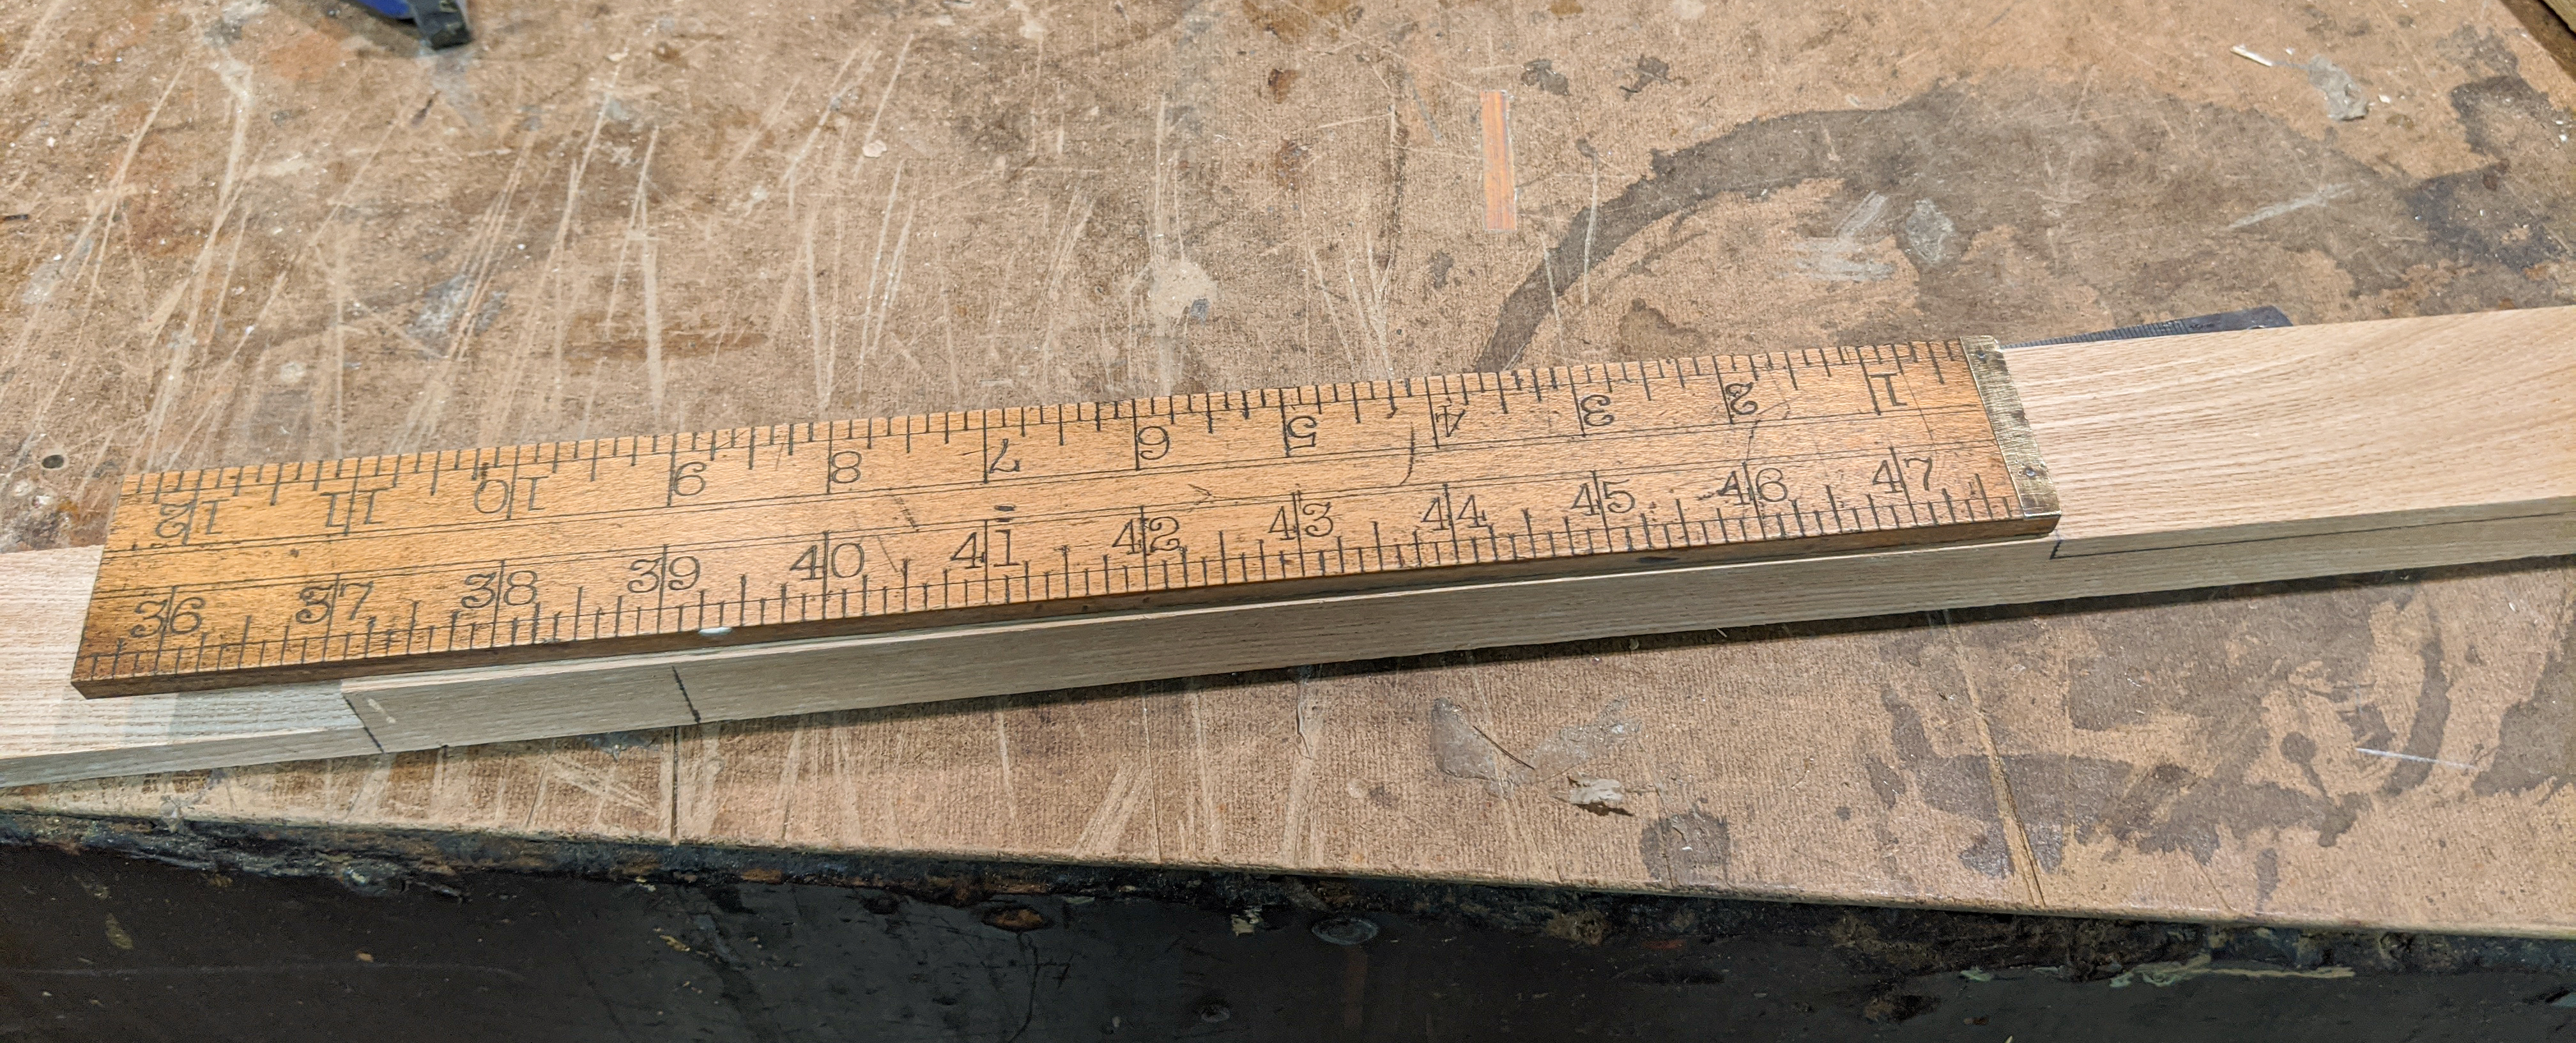
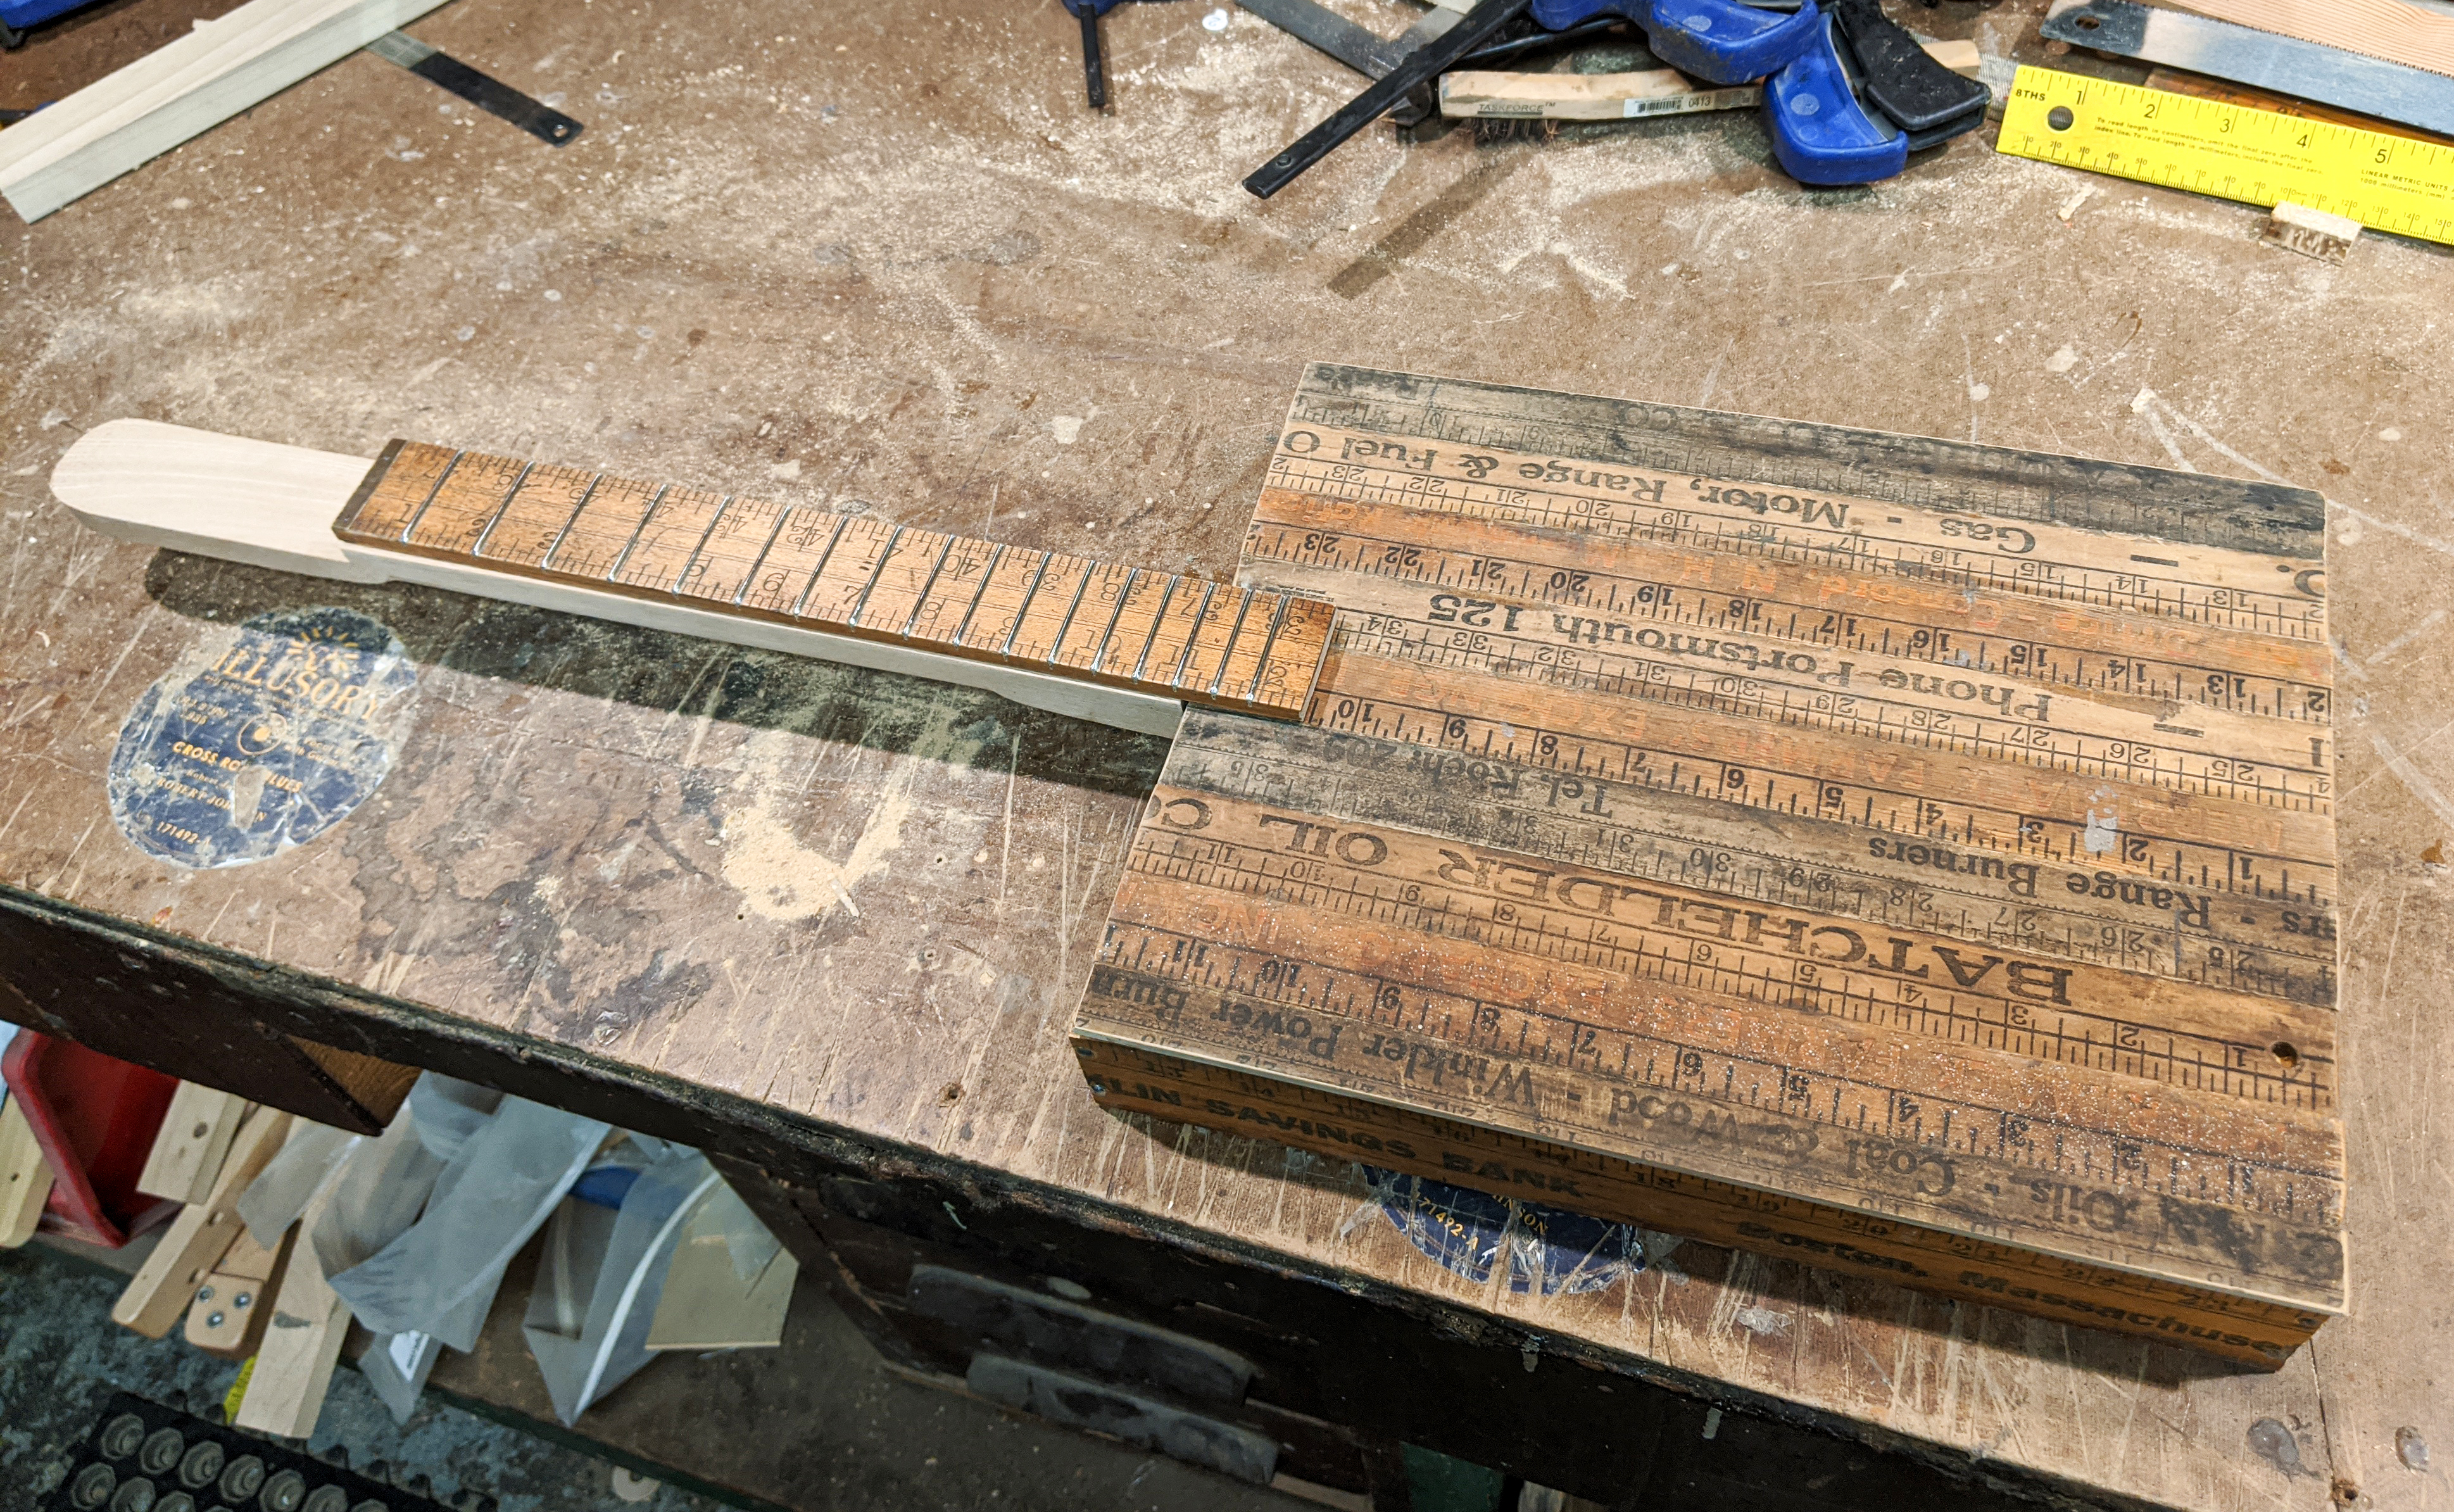
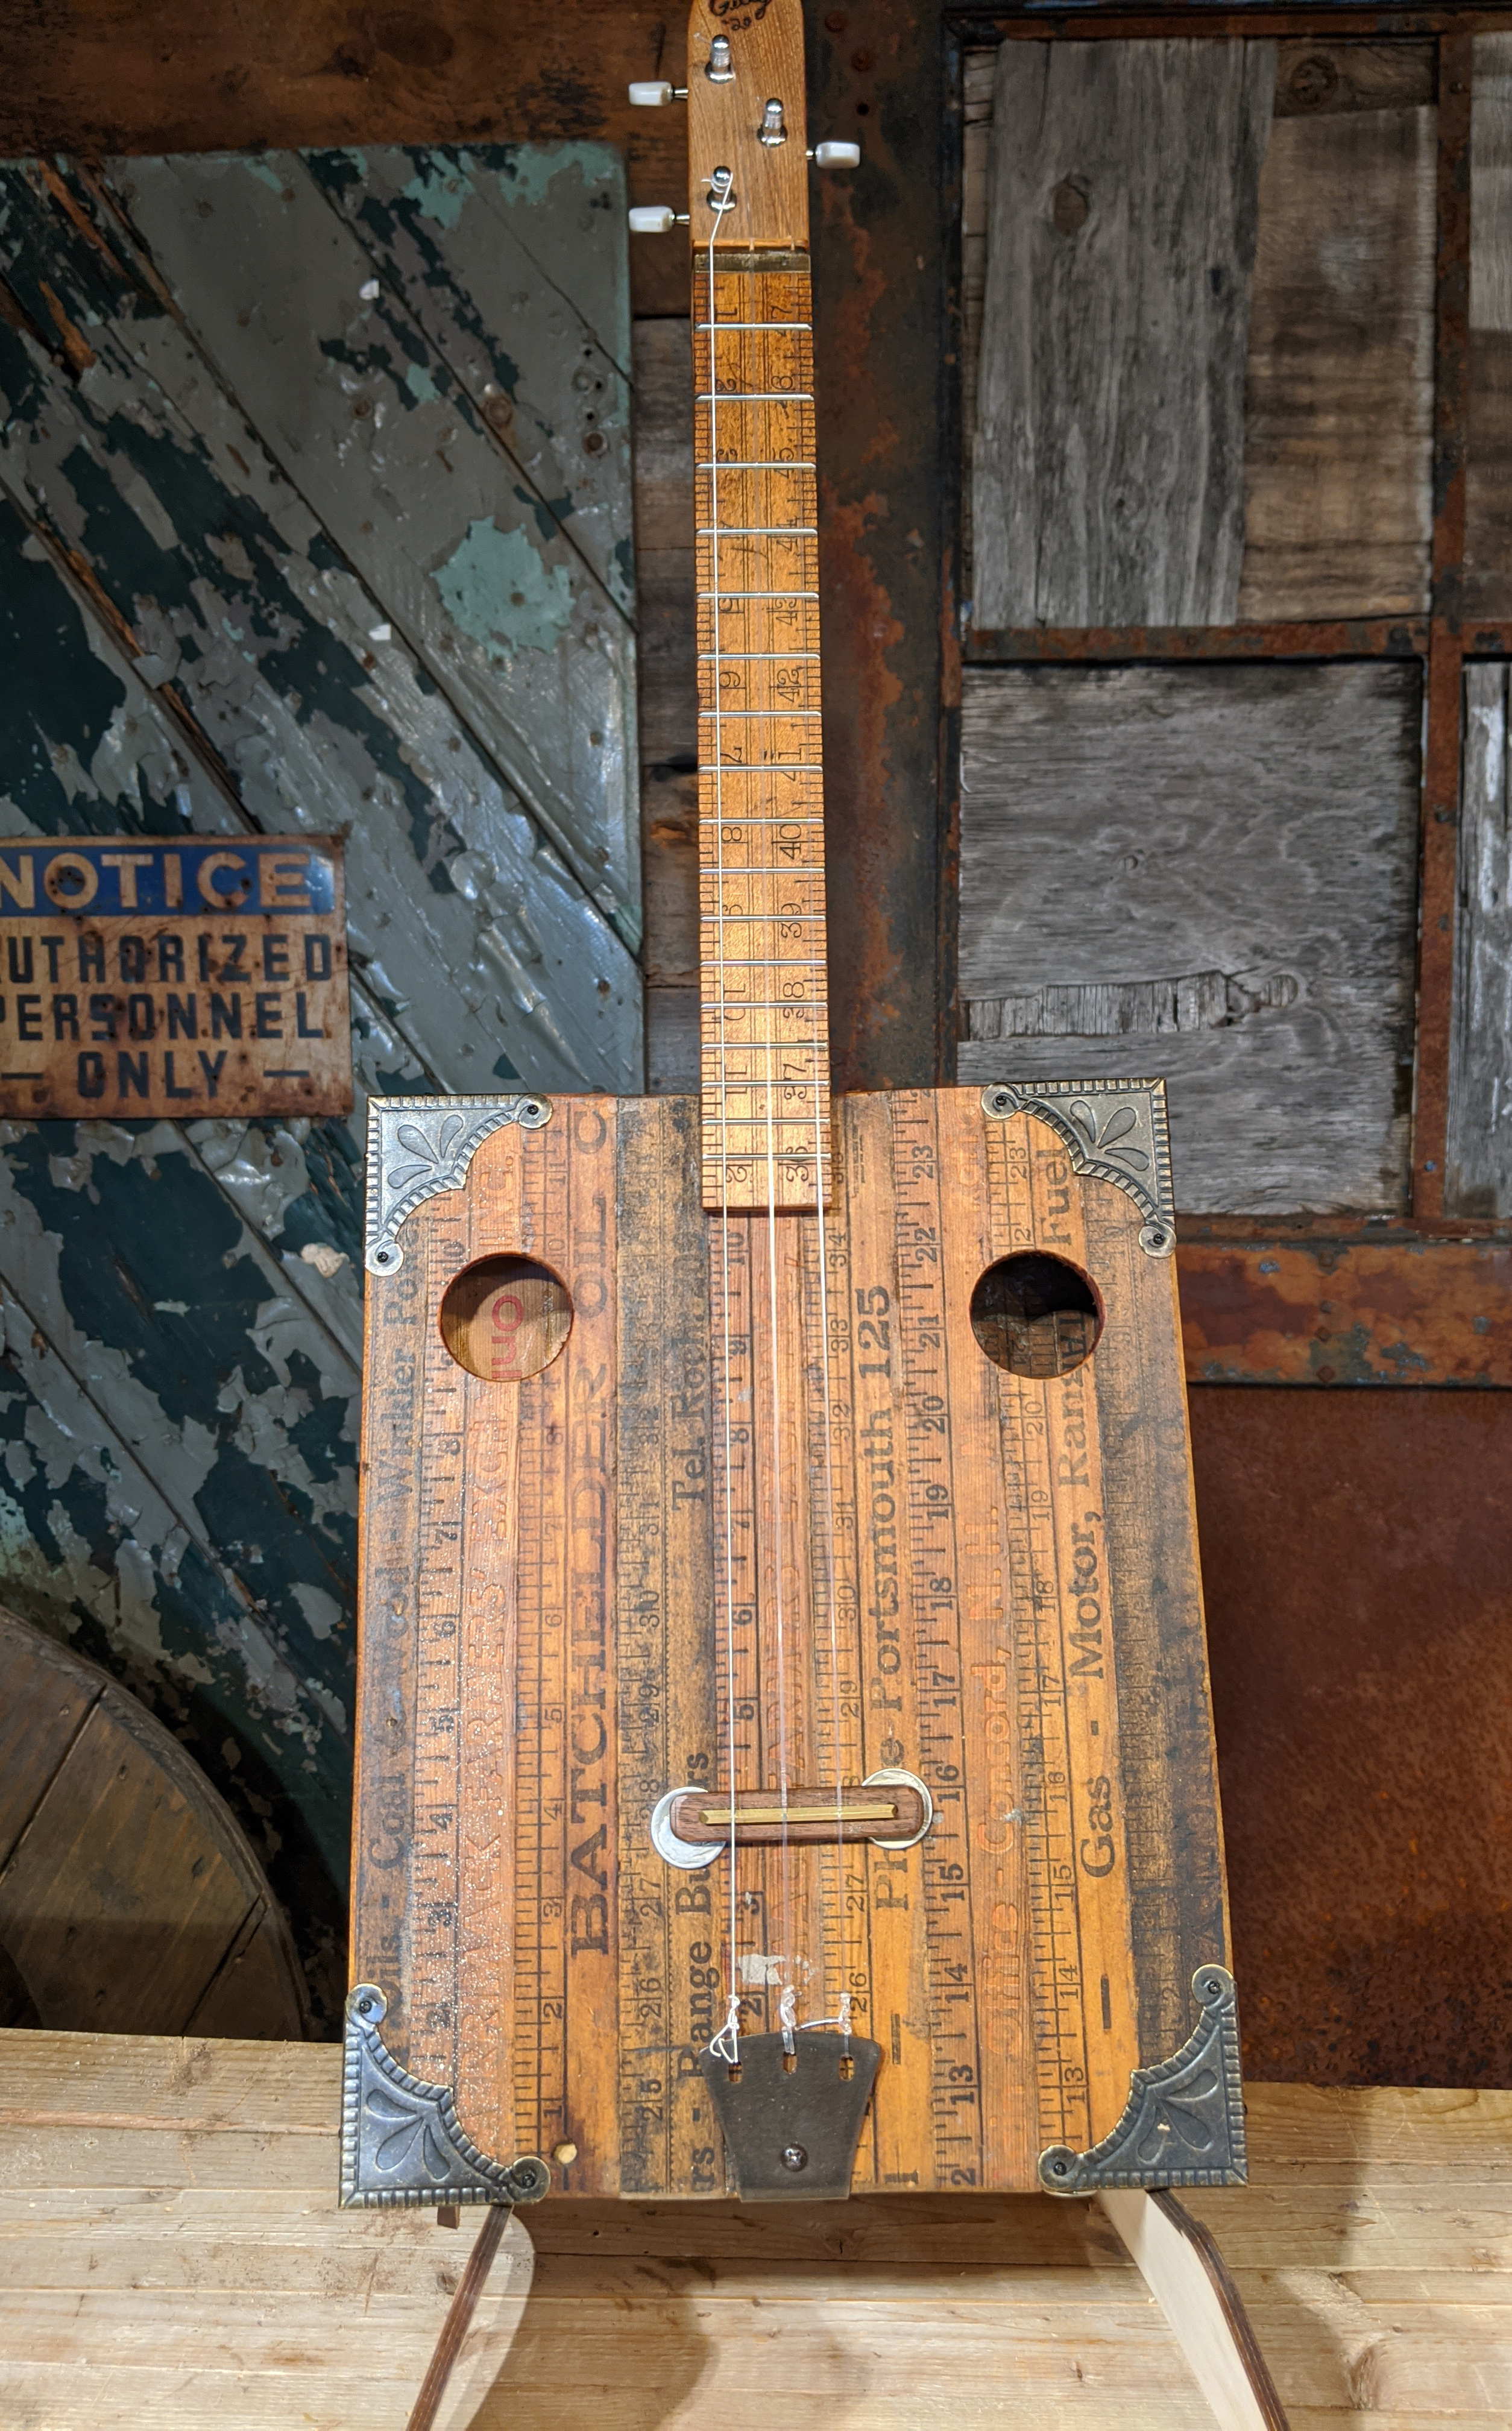
Installing the Neck (2) Now I turned my attention to my fretboard. From the beginning I'd known which yardstick I wanted to use for this - a beautiful old hardwood one with nice brass end caps and distinctive markings. I also knew that I wanted this instrument to have a 19-inch scale length (distance from the nut to the bridge), so I did some measuring and determined how long my fretboard needed to be. I wanted it to extend out over the body of the instrument a couple of inches, so its overall length came out to 12 1/2 inches. The photo to the left shows it sitting on the neck. If you look closely you can see the notch in the neck that I made for where it would go through the instrument body... and you can also see that I have marked the other end for the headstock notch, but not yet cut it. |
|
|
|
|
Installing the Neck (3) Here, I've done a dry fit of the neck and fretboard into the body frame. You can see that I've also notched the headstock, and if you look closely you can see that I've also rounded off the back of the neck (in between the headstock and body) using a router. In between this and the next photo, I attached the neck to the bracing blocks inside the box using screws, to secure it in place. The fretboard is not yet glued on at this point - it can't be glued into place until the top panel is on, since it will extend out over it. |
|
|
|
|
Gluing on the Soundboard With the neck installed, I decide it's time to glue on the soundboard. Before squeeze out any glue though, I lightly sand the top edges of the box panels, and the outer edge of the underside of the top panel, to expose a bit of bare wood to help the glue work better. Some of these old yardsticks can be pretty grimy and can have some grease or oil soaked into them, which can make it harder for the glue to work. If you have trouble getting it to adhere you can always use some small screws to secure it. I used a number of squeeze clamps to glue on the sound board, as you can see. Using short, straight pieces of scrap wood can be a good idea to more evenly distribute the clamping pressure over a larger area. |
|
|
|
|
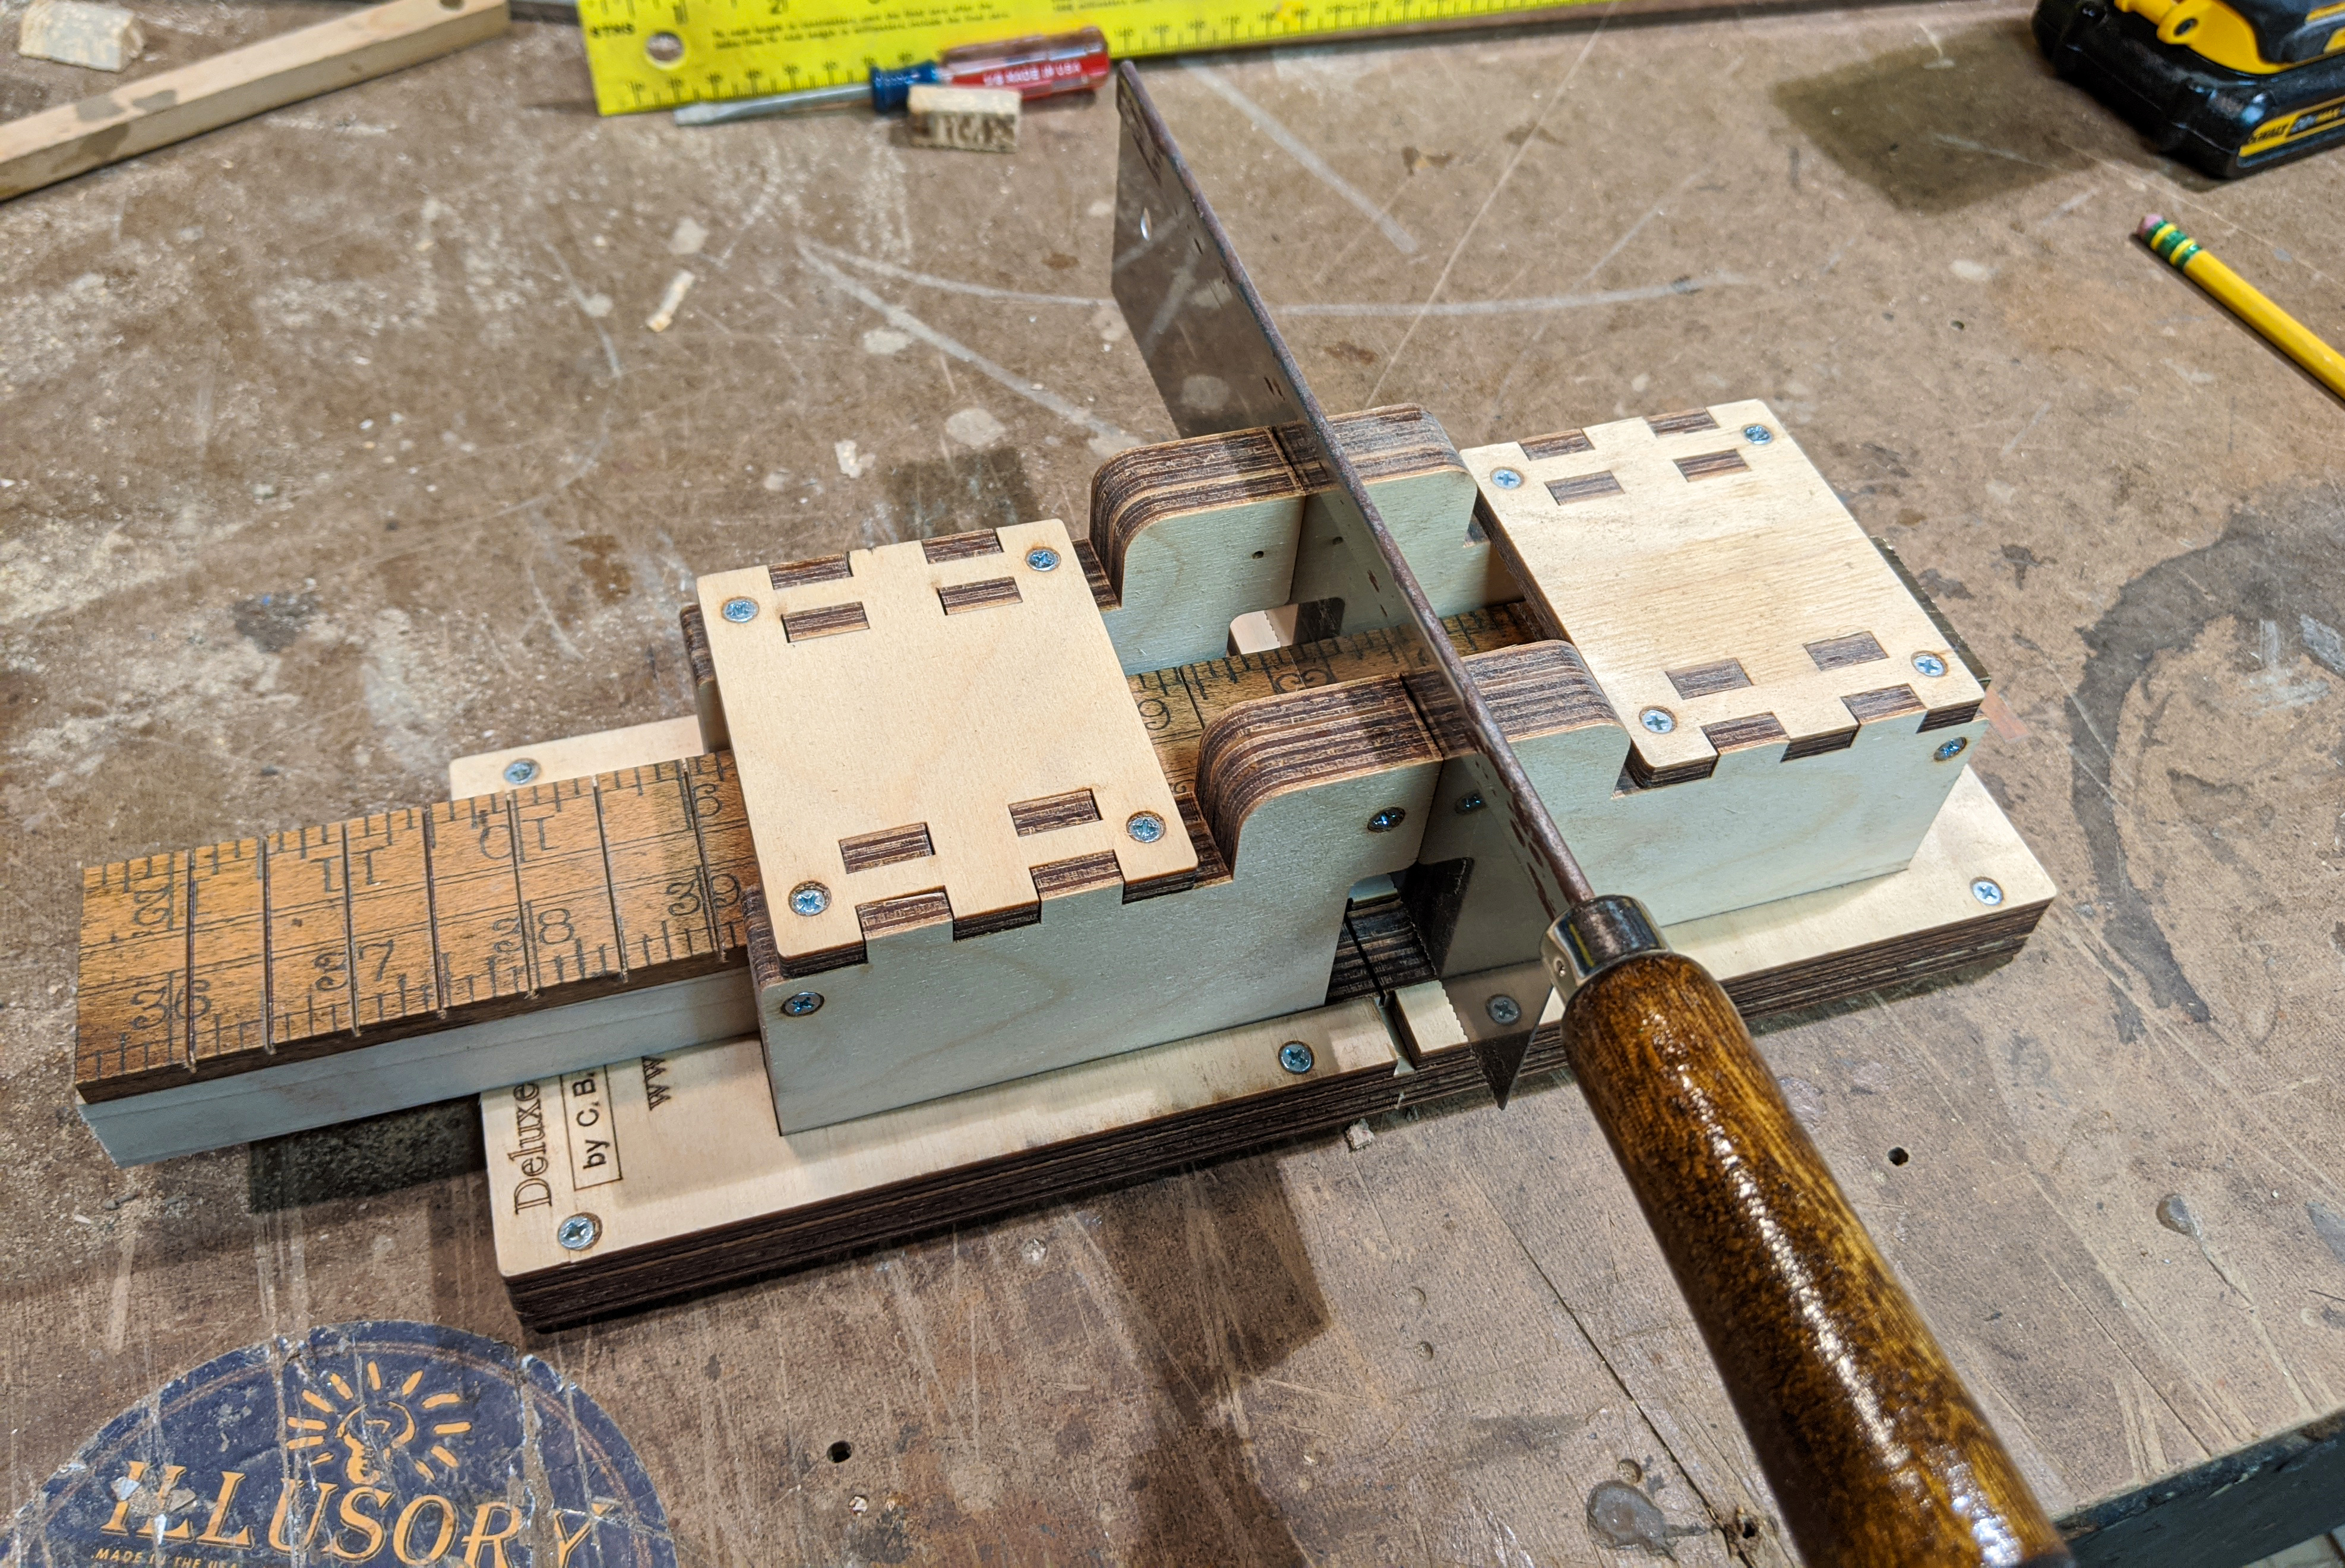
Finishing the Fretboard While the top panel glue was setting, I decided to get my fretboard done. As mentioned above, I knew I wanted a 19-inch scale length, so I used one of our C. B. Gitty Acrylic Fretting Templates to mark the lines, and then our Fretting Saw and Deluxe Miter Box to get the slots accurately cut. |
|
|
|
|
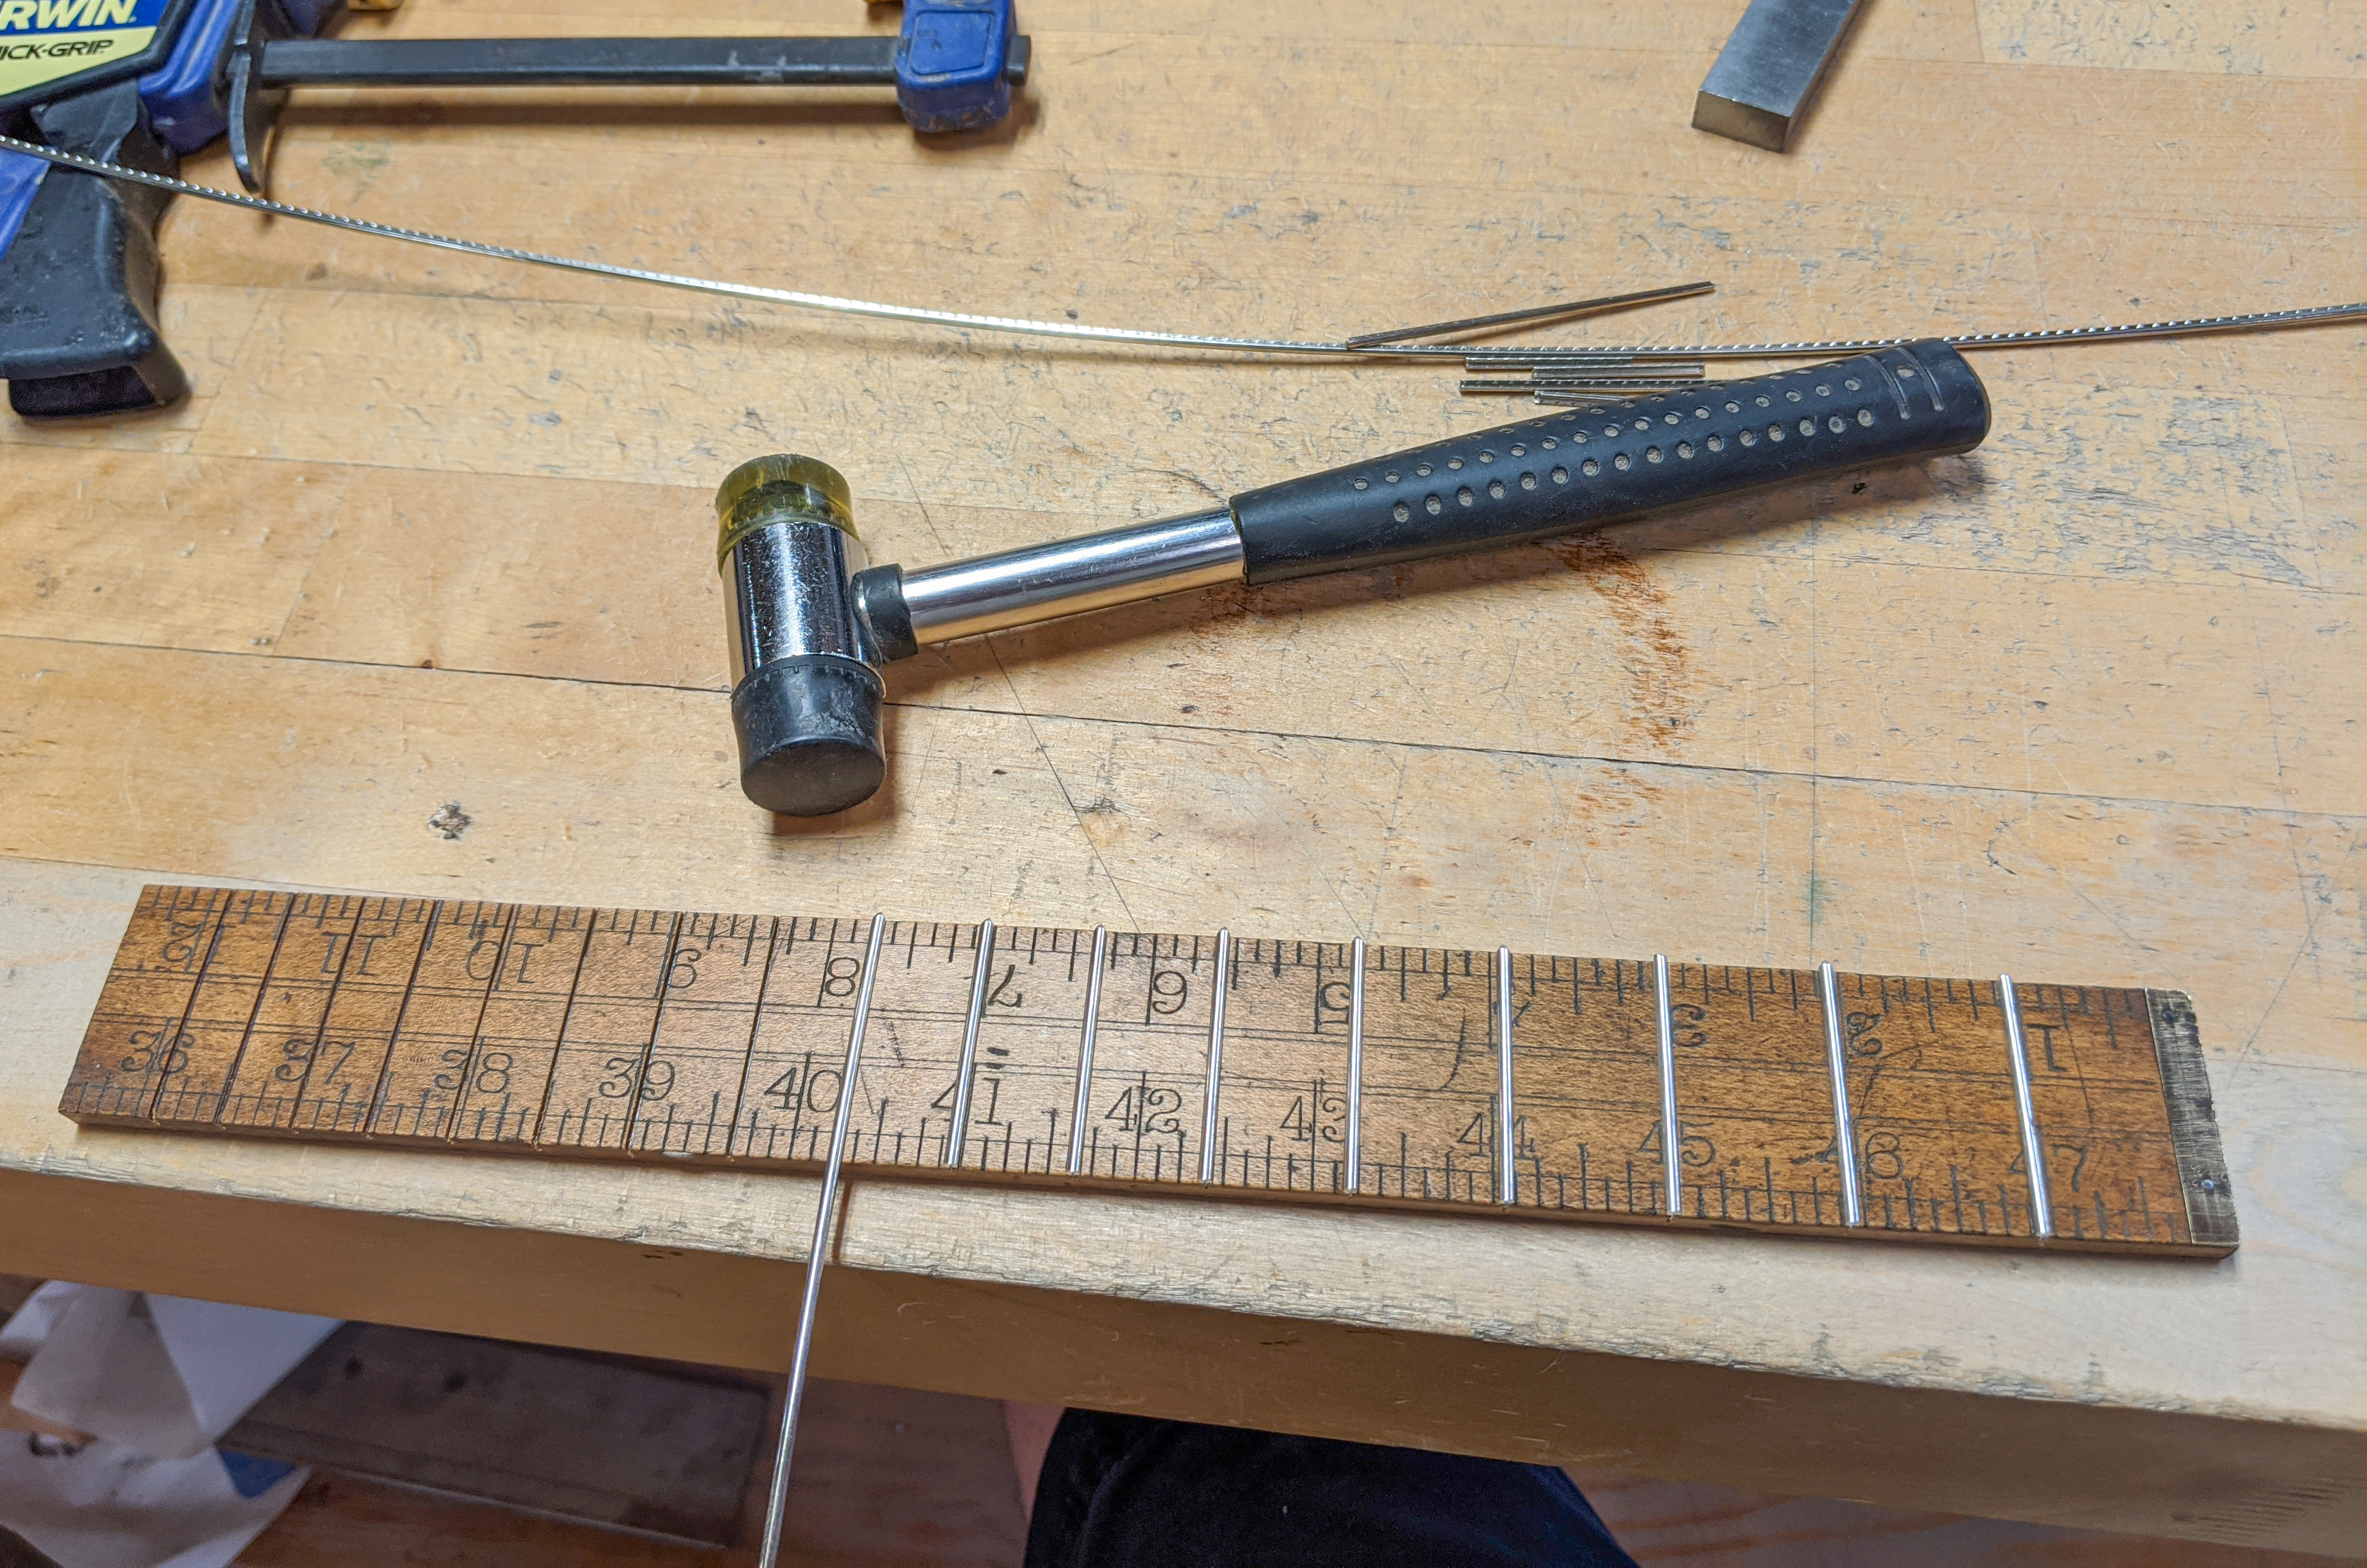
Finishing the Fretboard (2) Once my slots were cut, it was over to the fretting bench to install some C. B. Gitty Medium/Medium Nickel-Silver Fretwire. |
|
|
|
|
Finishing the Fretboard (3) here, the finished fretboard is layed out on the neck ready for gluing down. The box top glue has set, and I've sanded around the edges to smooth and round things down, with no overlaps, to make it as comfortable as possible when being played. Soon after, I spread on some glue and clamp the fretboard into place. In the next photo below, you can see the clamps holding it down. |
|
|
|
|
Adding Soundboard Braces Because the yardsticks making up the top panel were thin softwood, I decide to glue in a couple of braces on the under side of the panel, just to help strengthen it. I use a couple of scrap pieces of reclaimed red pine for this, thinning and shaping them on a belt sander until I have the profile I want. I used hot glue to attach them. I spaced and angled them in this way to as to leave room for sound holes in the top portion of the sound board, to be drilled later. |
|
|
|
|
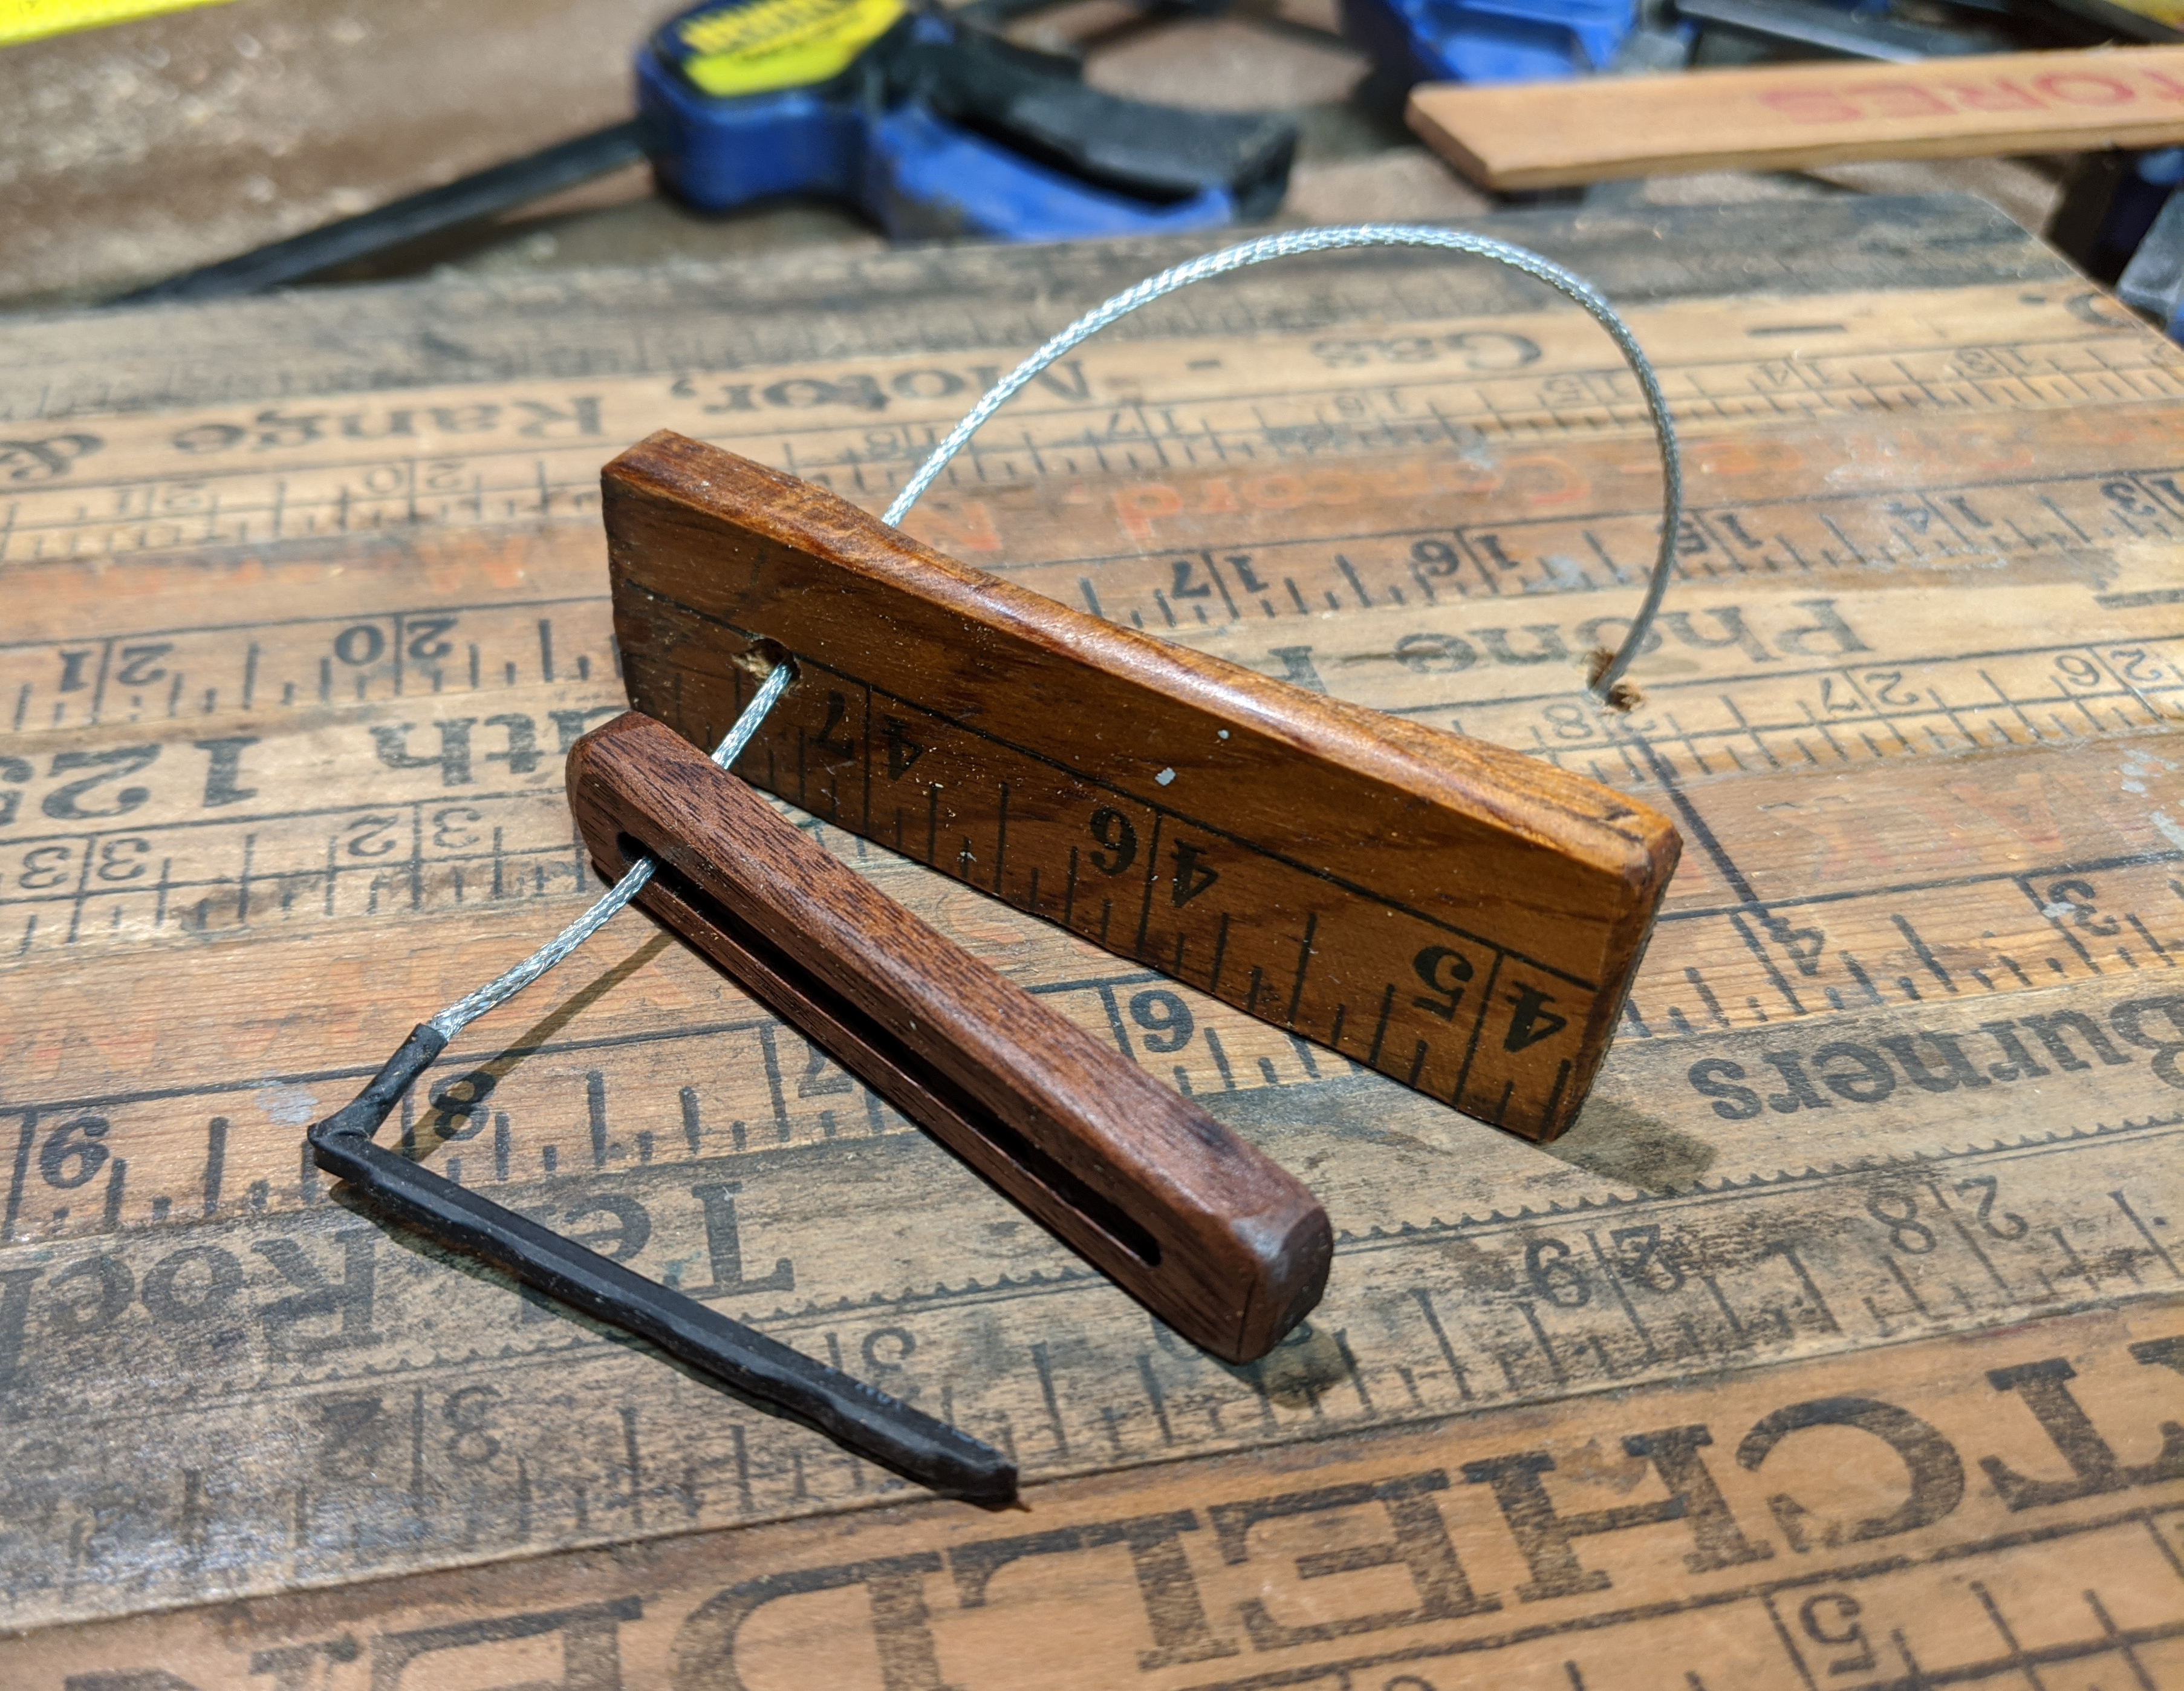
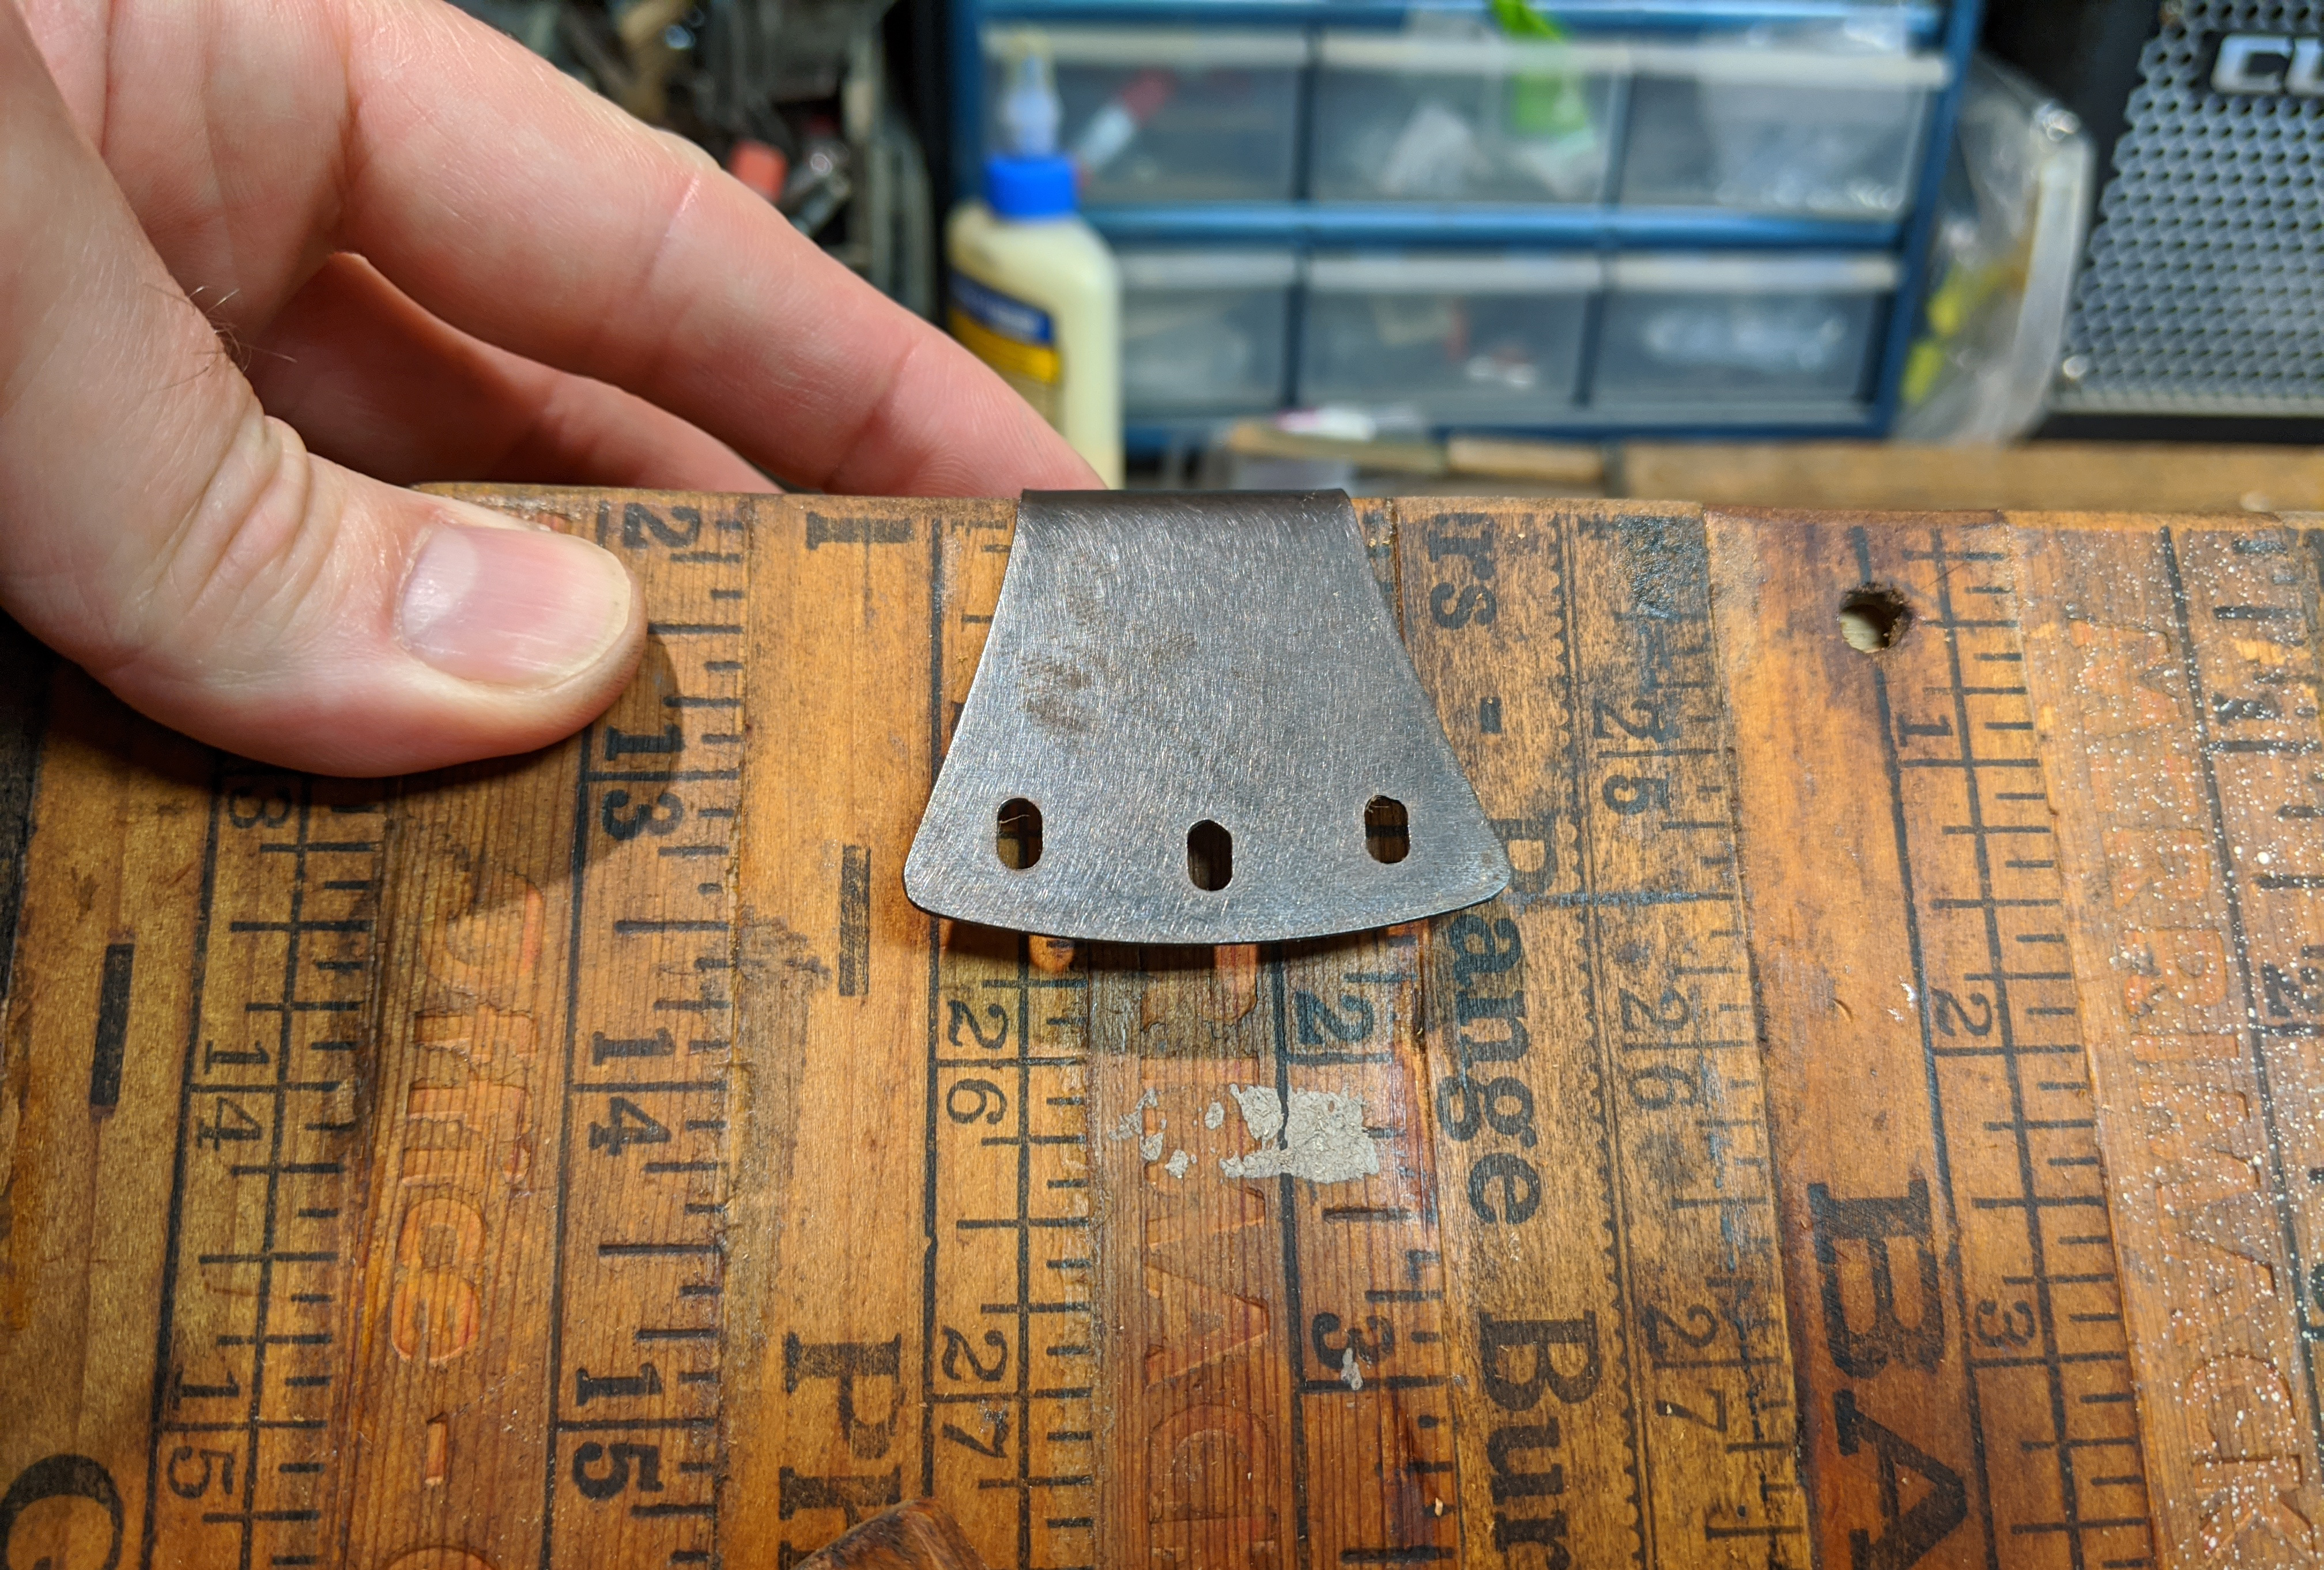
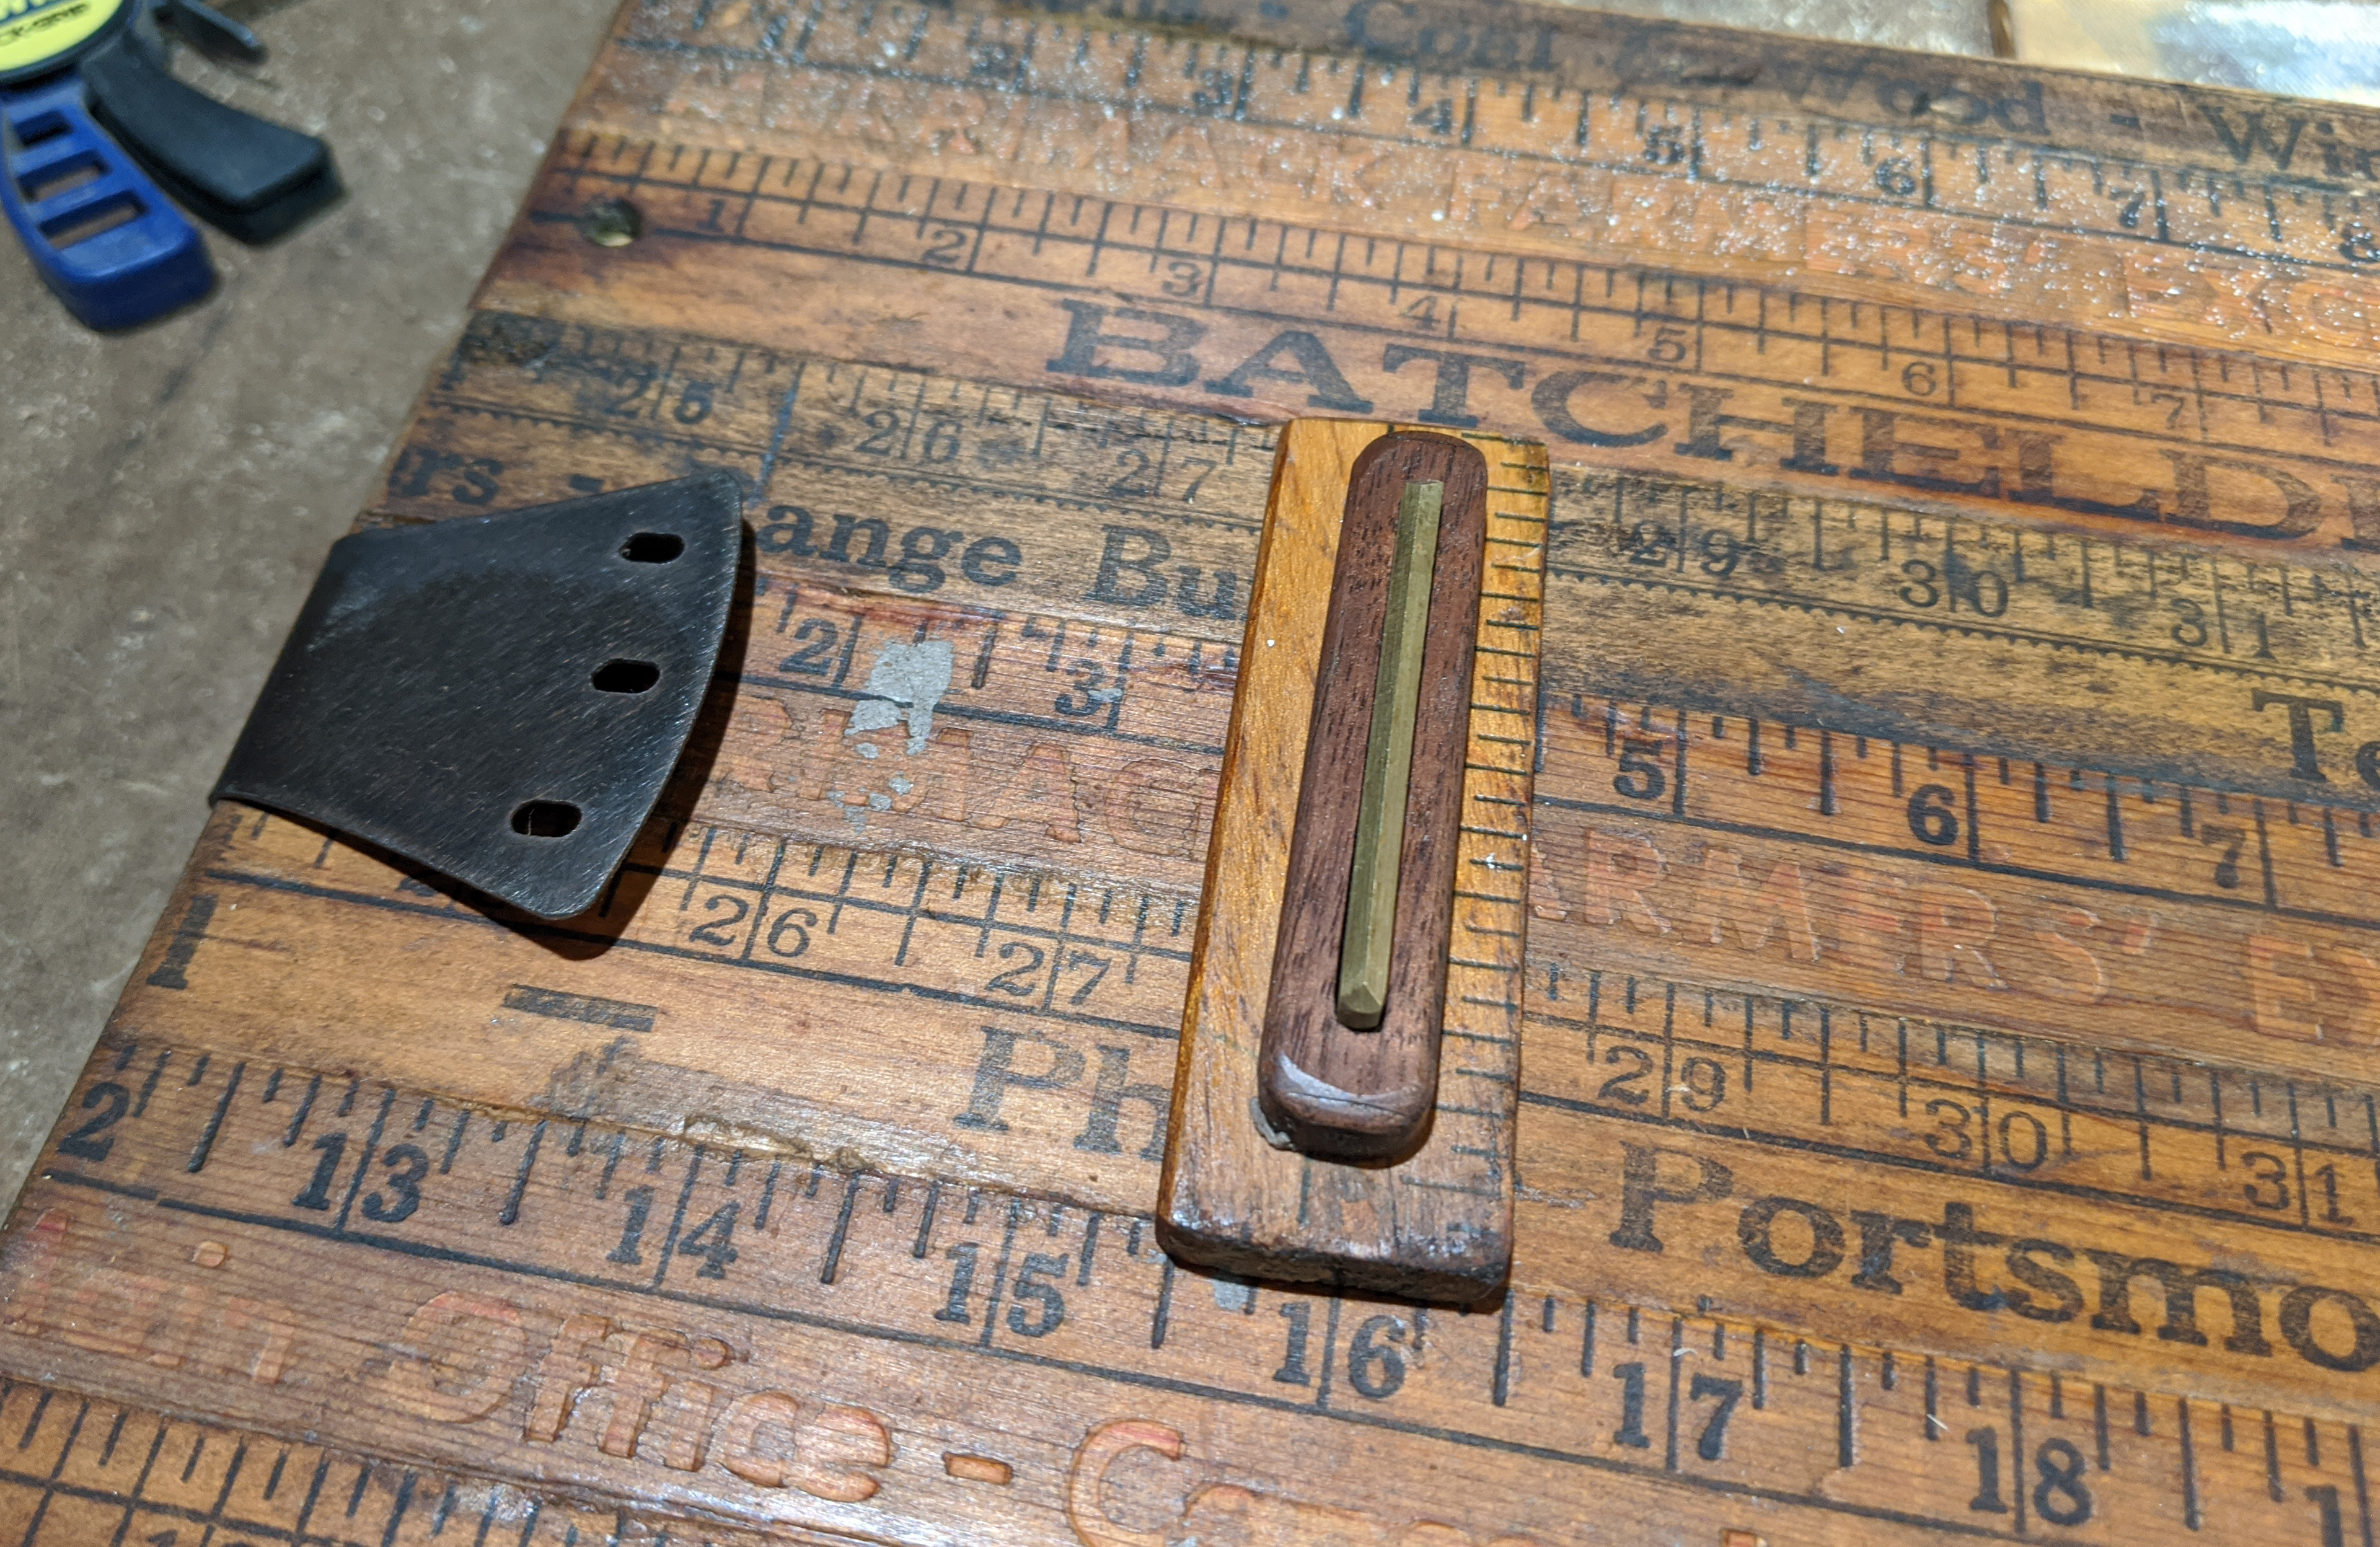
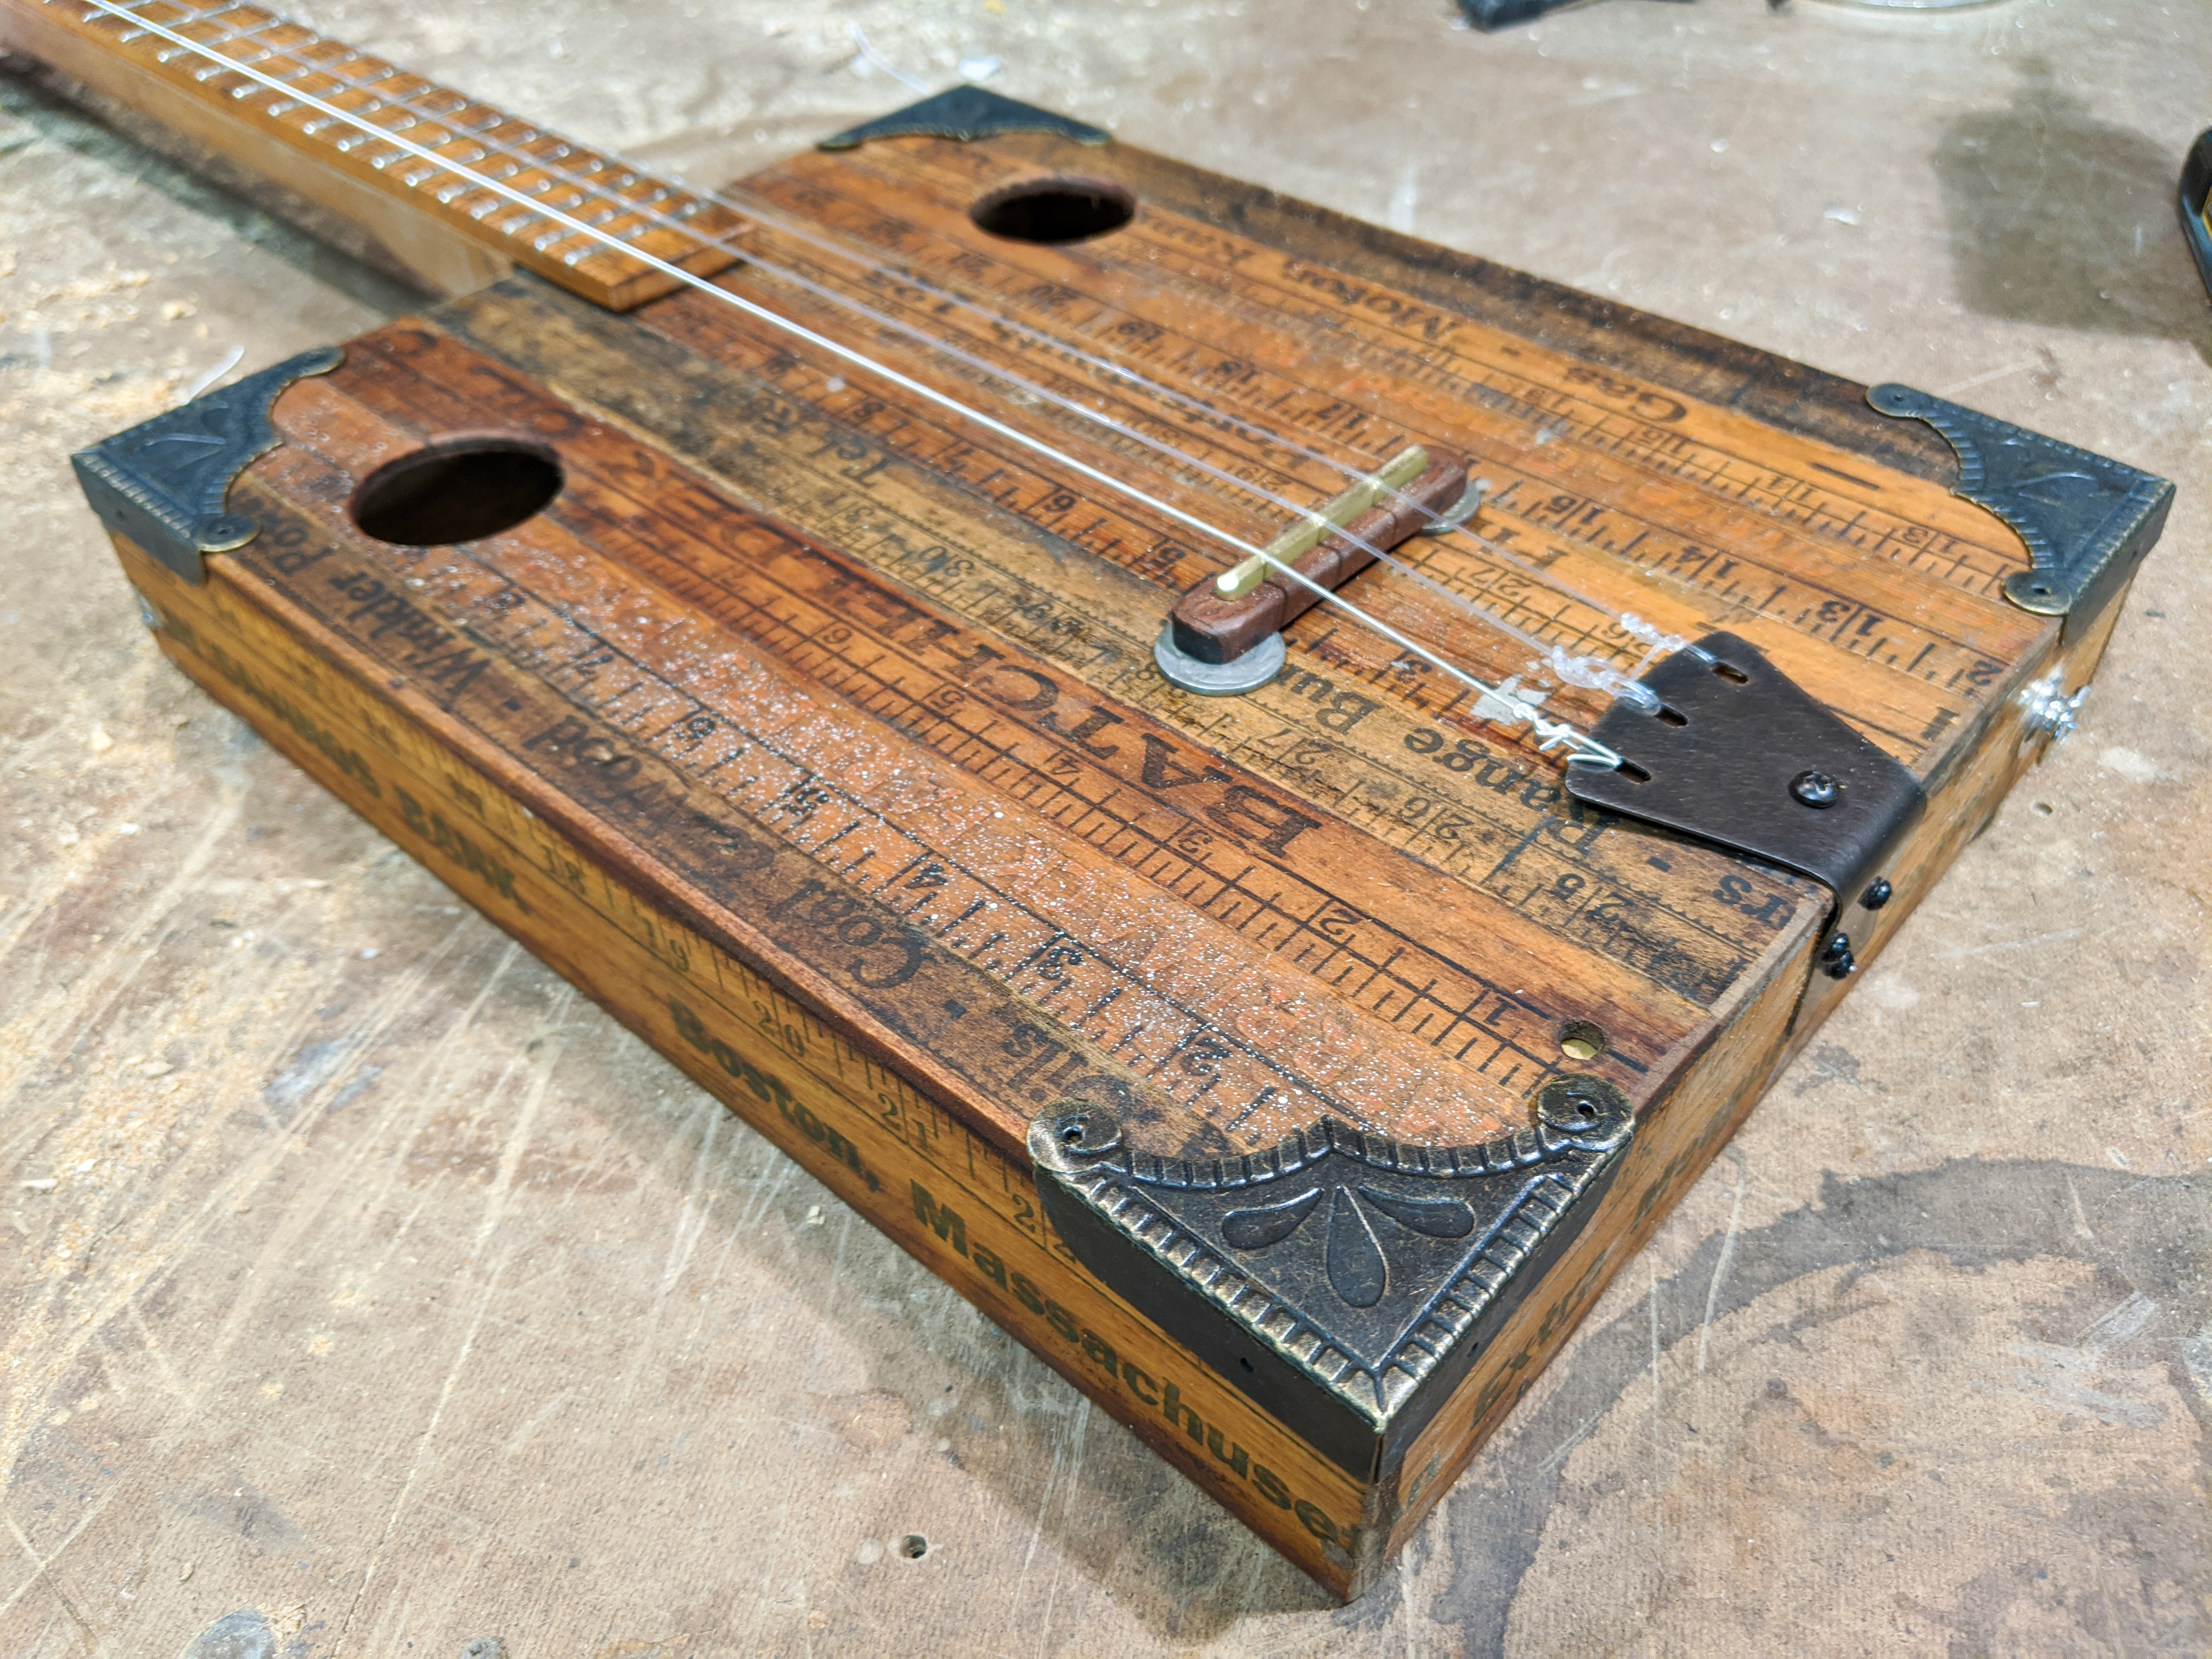
The Bridge I have decided by this point that I want to electrify my instrument, and instead of just gluing in a piezo disk I decide to go a little fancier and use a disk piece. This photo shows the bridge assembly (minus the brass saddle rod) that I created, using a modified version of one of our Rail Runner bridges. Because I thought the bridge height would be too low, I crafted a shim piece from a leftover chunk of yardstick to raise it up... later, I discovered this to not be needed, so I removed it. |
|
|
|
|
Good Progress So Far... I'd say she's starting to look like a Gitty! In this shot I have treated the body and neck with some linseed oil, to seal it and bring out some of the good coloration. This is optional of course, but I like to add some linseed oil so that the instrument doesn't look so "dry and dusty" when finished. However, adding any sort of finish will usually darken the wood a bit, which might make some of the printing and details a bit harder to make out. Usually it's still worth it though for the overall effect. You can also see in this photo if you look closely, that I have already glued the nut into place. I used a leftover piece of yardstick wood for this. |
|
|
|
|
Installing the Tailpiece For this guitar I decided to use one of the special 3-string tailpieces we make in-house for use on my Hobo Fiddle instruments. They are cut from stainless steel, and that didn't have quite the look I wanted, so I treated it with a chemical bronzing bath specially made for treating stainless, which darkened it down nicely. I then positioned it exactly in the middle of the lower edge of the box, and screwed into into place. The screws were long enough to go through into the bracing block (to which the neck was attached), to make for a nice sturdy structure. |
|
|
|
|
Hardware in Place Here's a shot of the sound board with tailpiece and bridge in place. Note that I haven't yet realized that I don't need the bridge shim - I figure that out shortly (and some other things too) when I start stringing her up. |
|
|
|
|
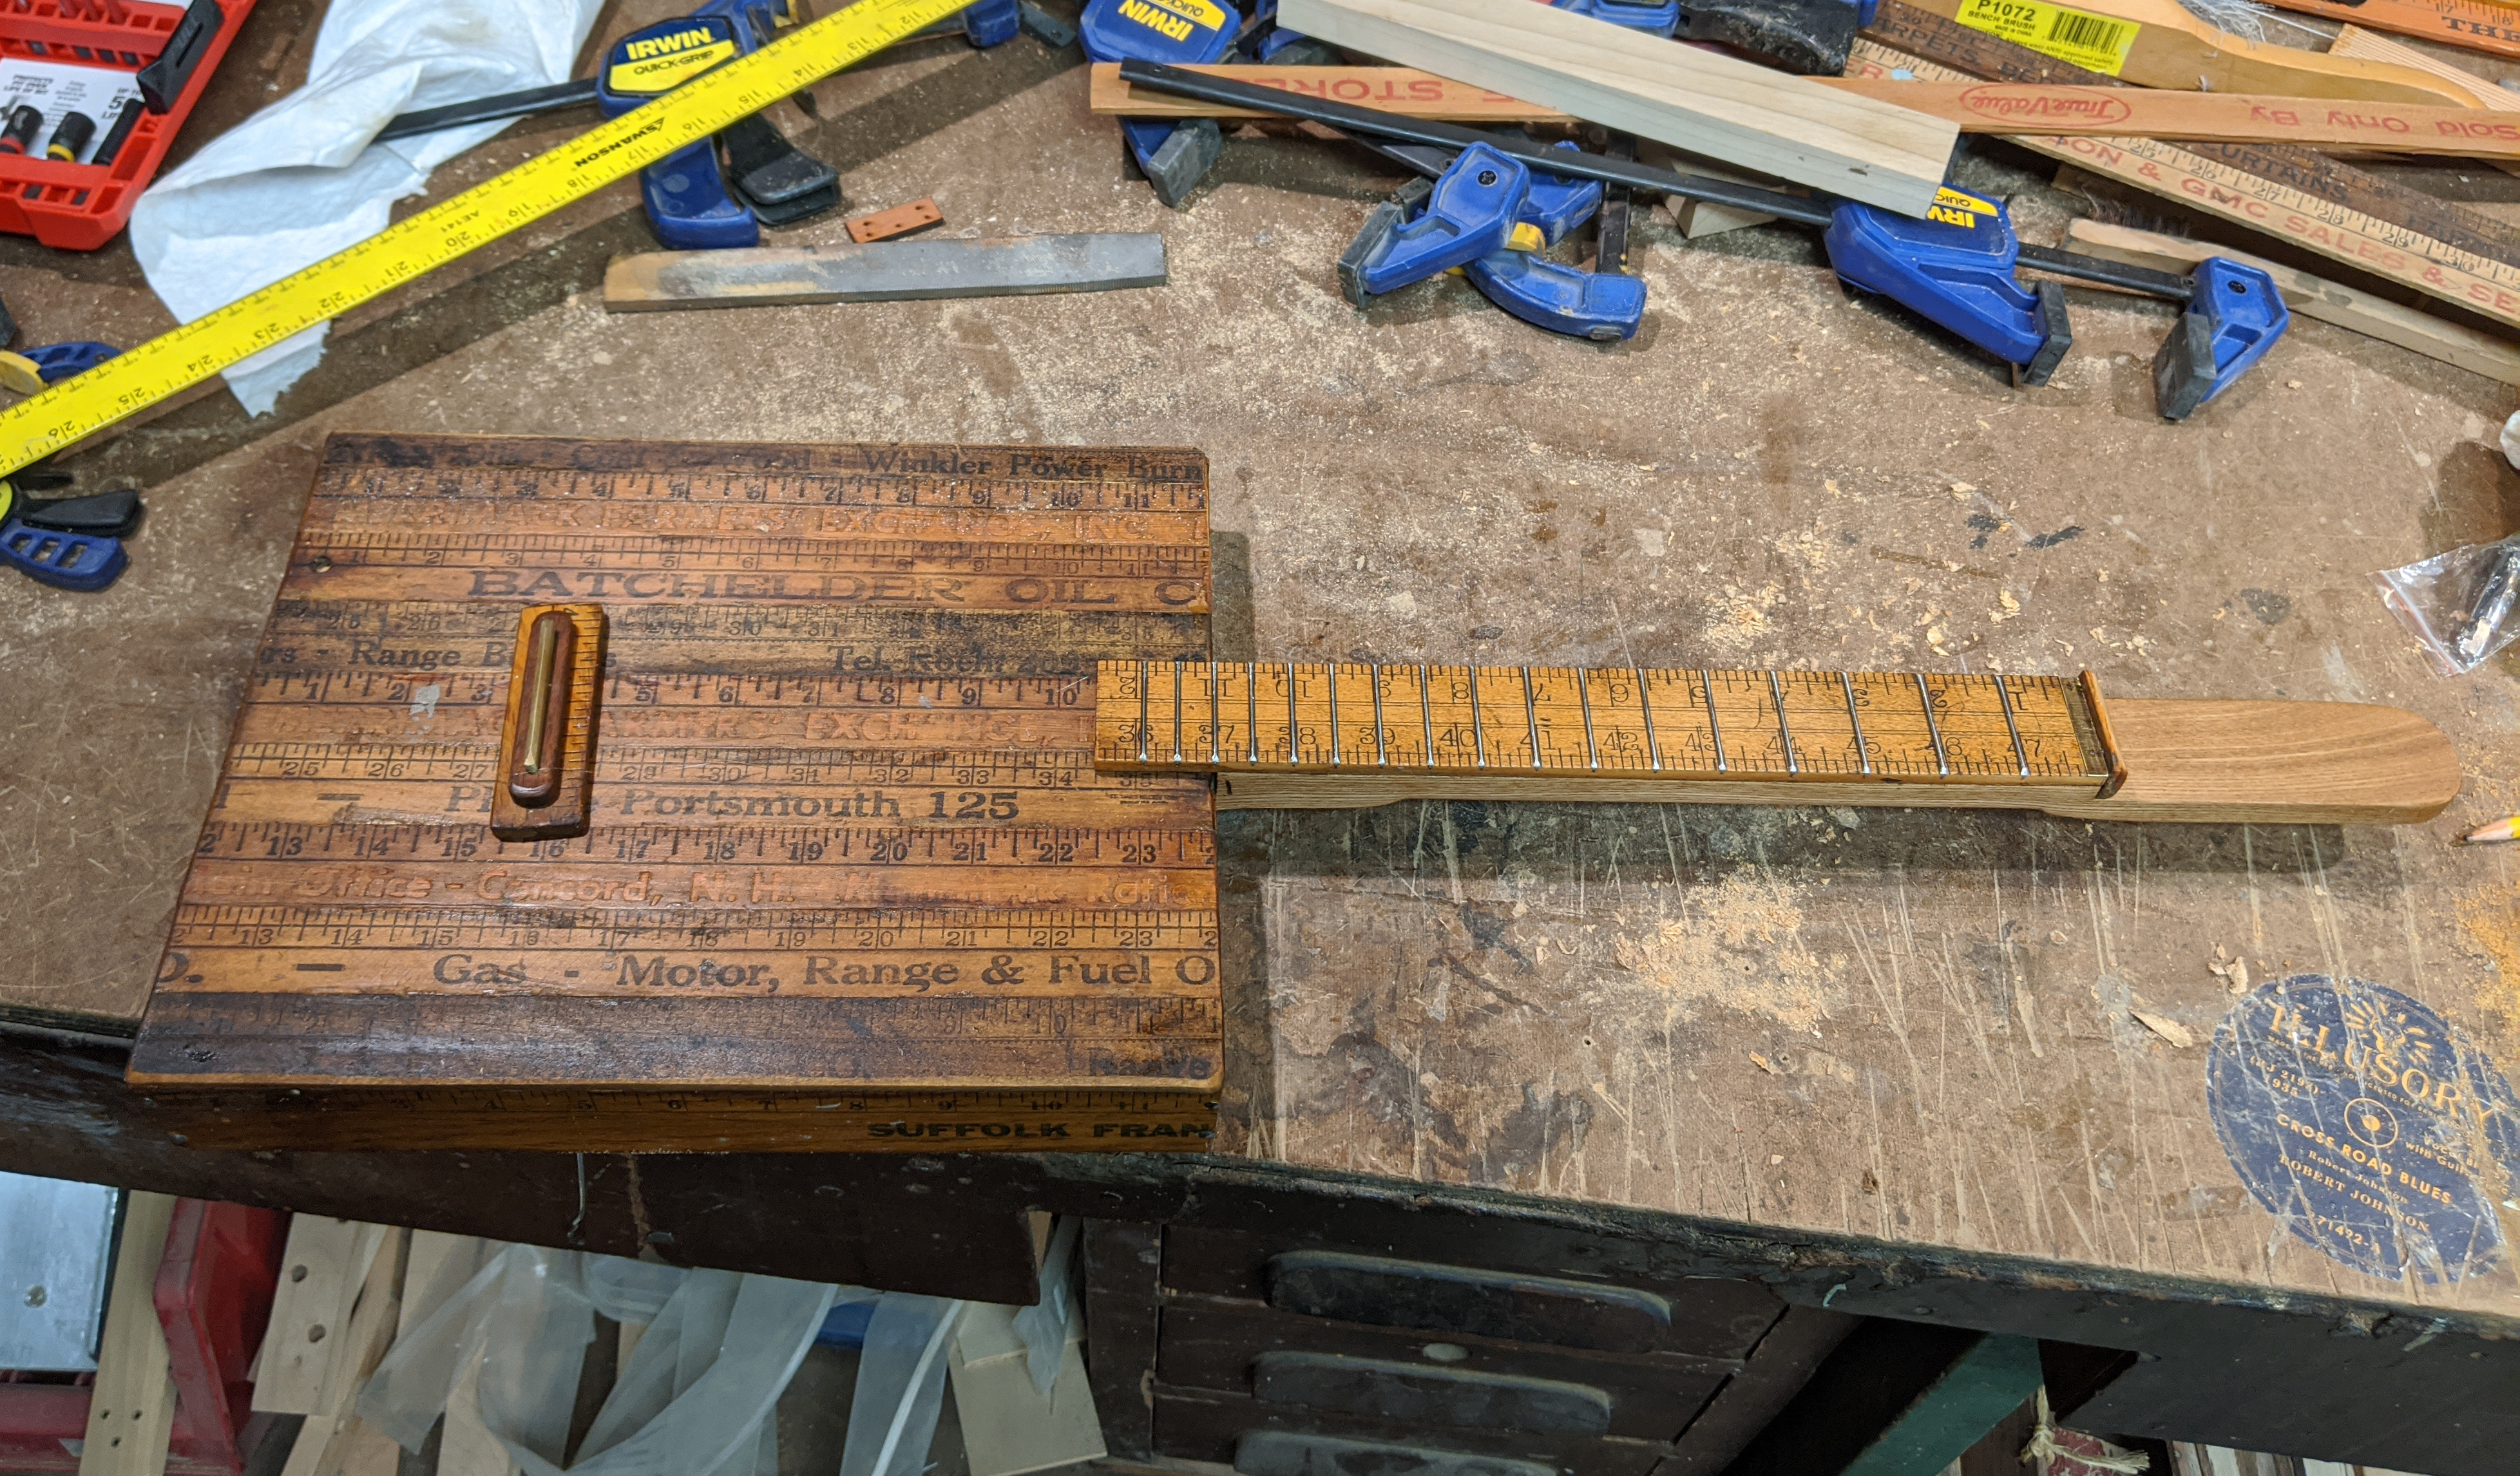
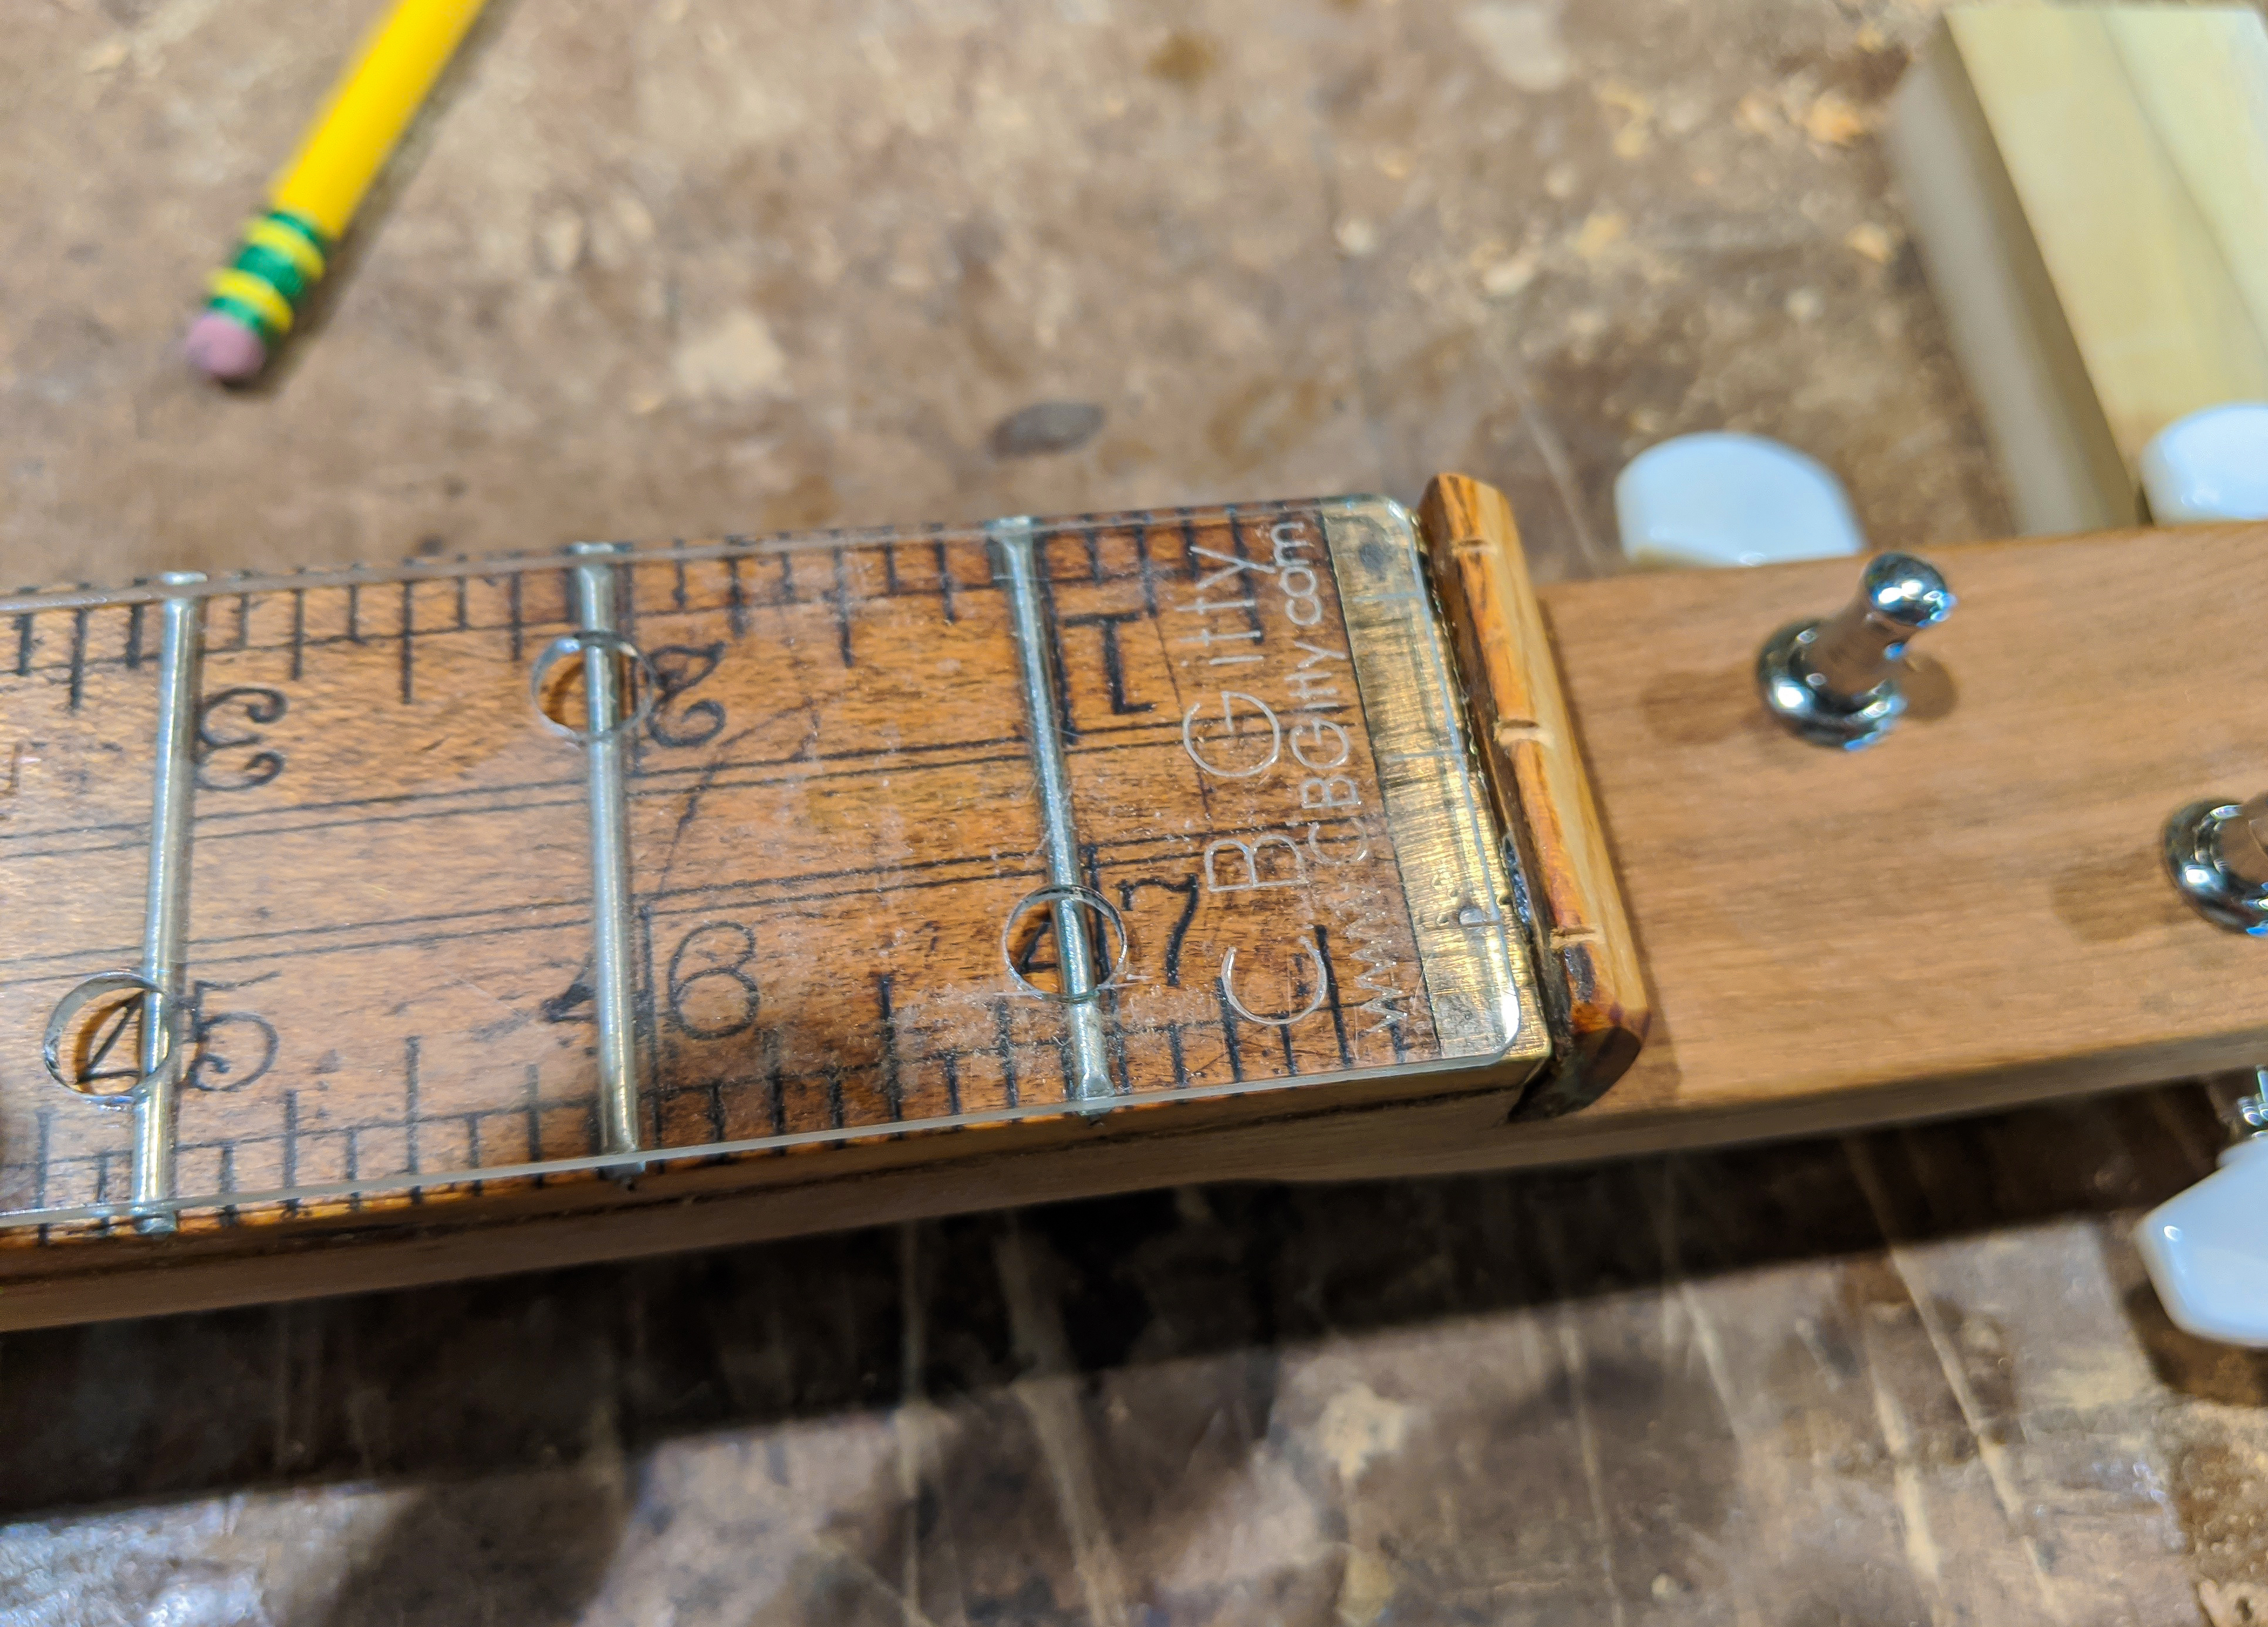
Installing the Tuners & Notching the Nut In this photo, you can see I have already drilled and installed the tuners in the headstock. I didn't take photos of this since it is a pretty standard procedure. I used our standard C. B. Gitty Open-Gear Tuners for this build, which are quite popular with homemade instrument builders. I used the acrylic headstock template you can see laying on the fretboard for marking out the tuner hole positions, and in this photo I am using it to mark and notch the nut with the string grooves. This Gitty is almost ready to be strung up! |
|
|
|
|
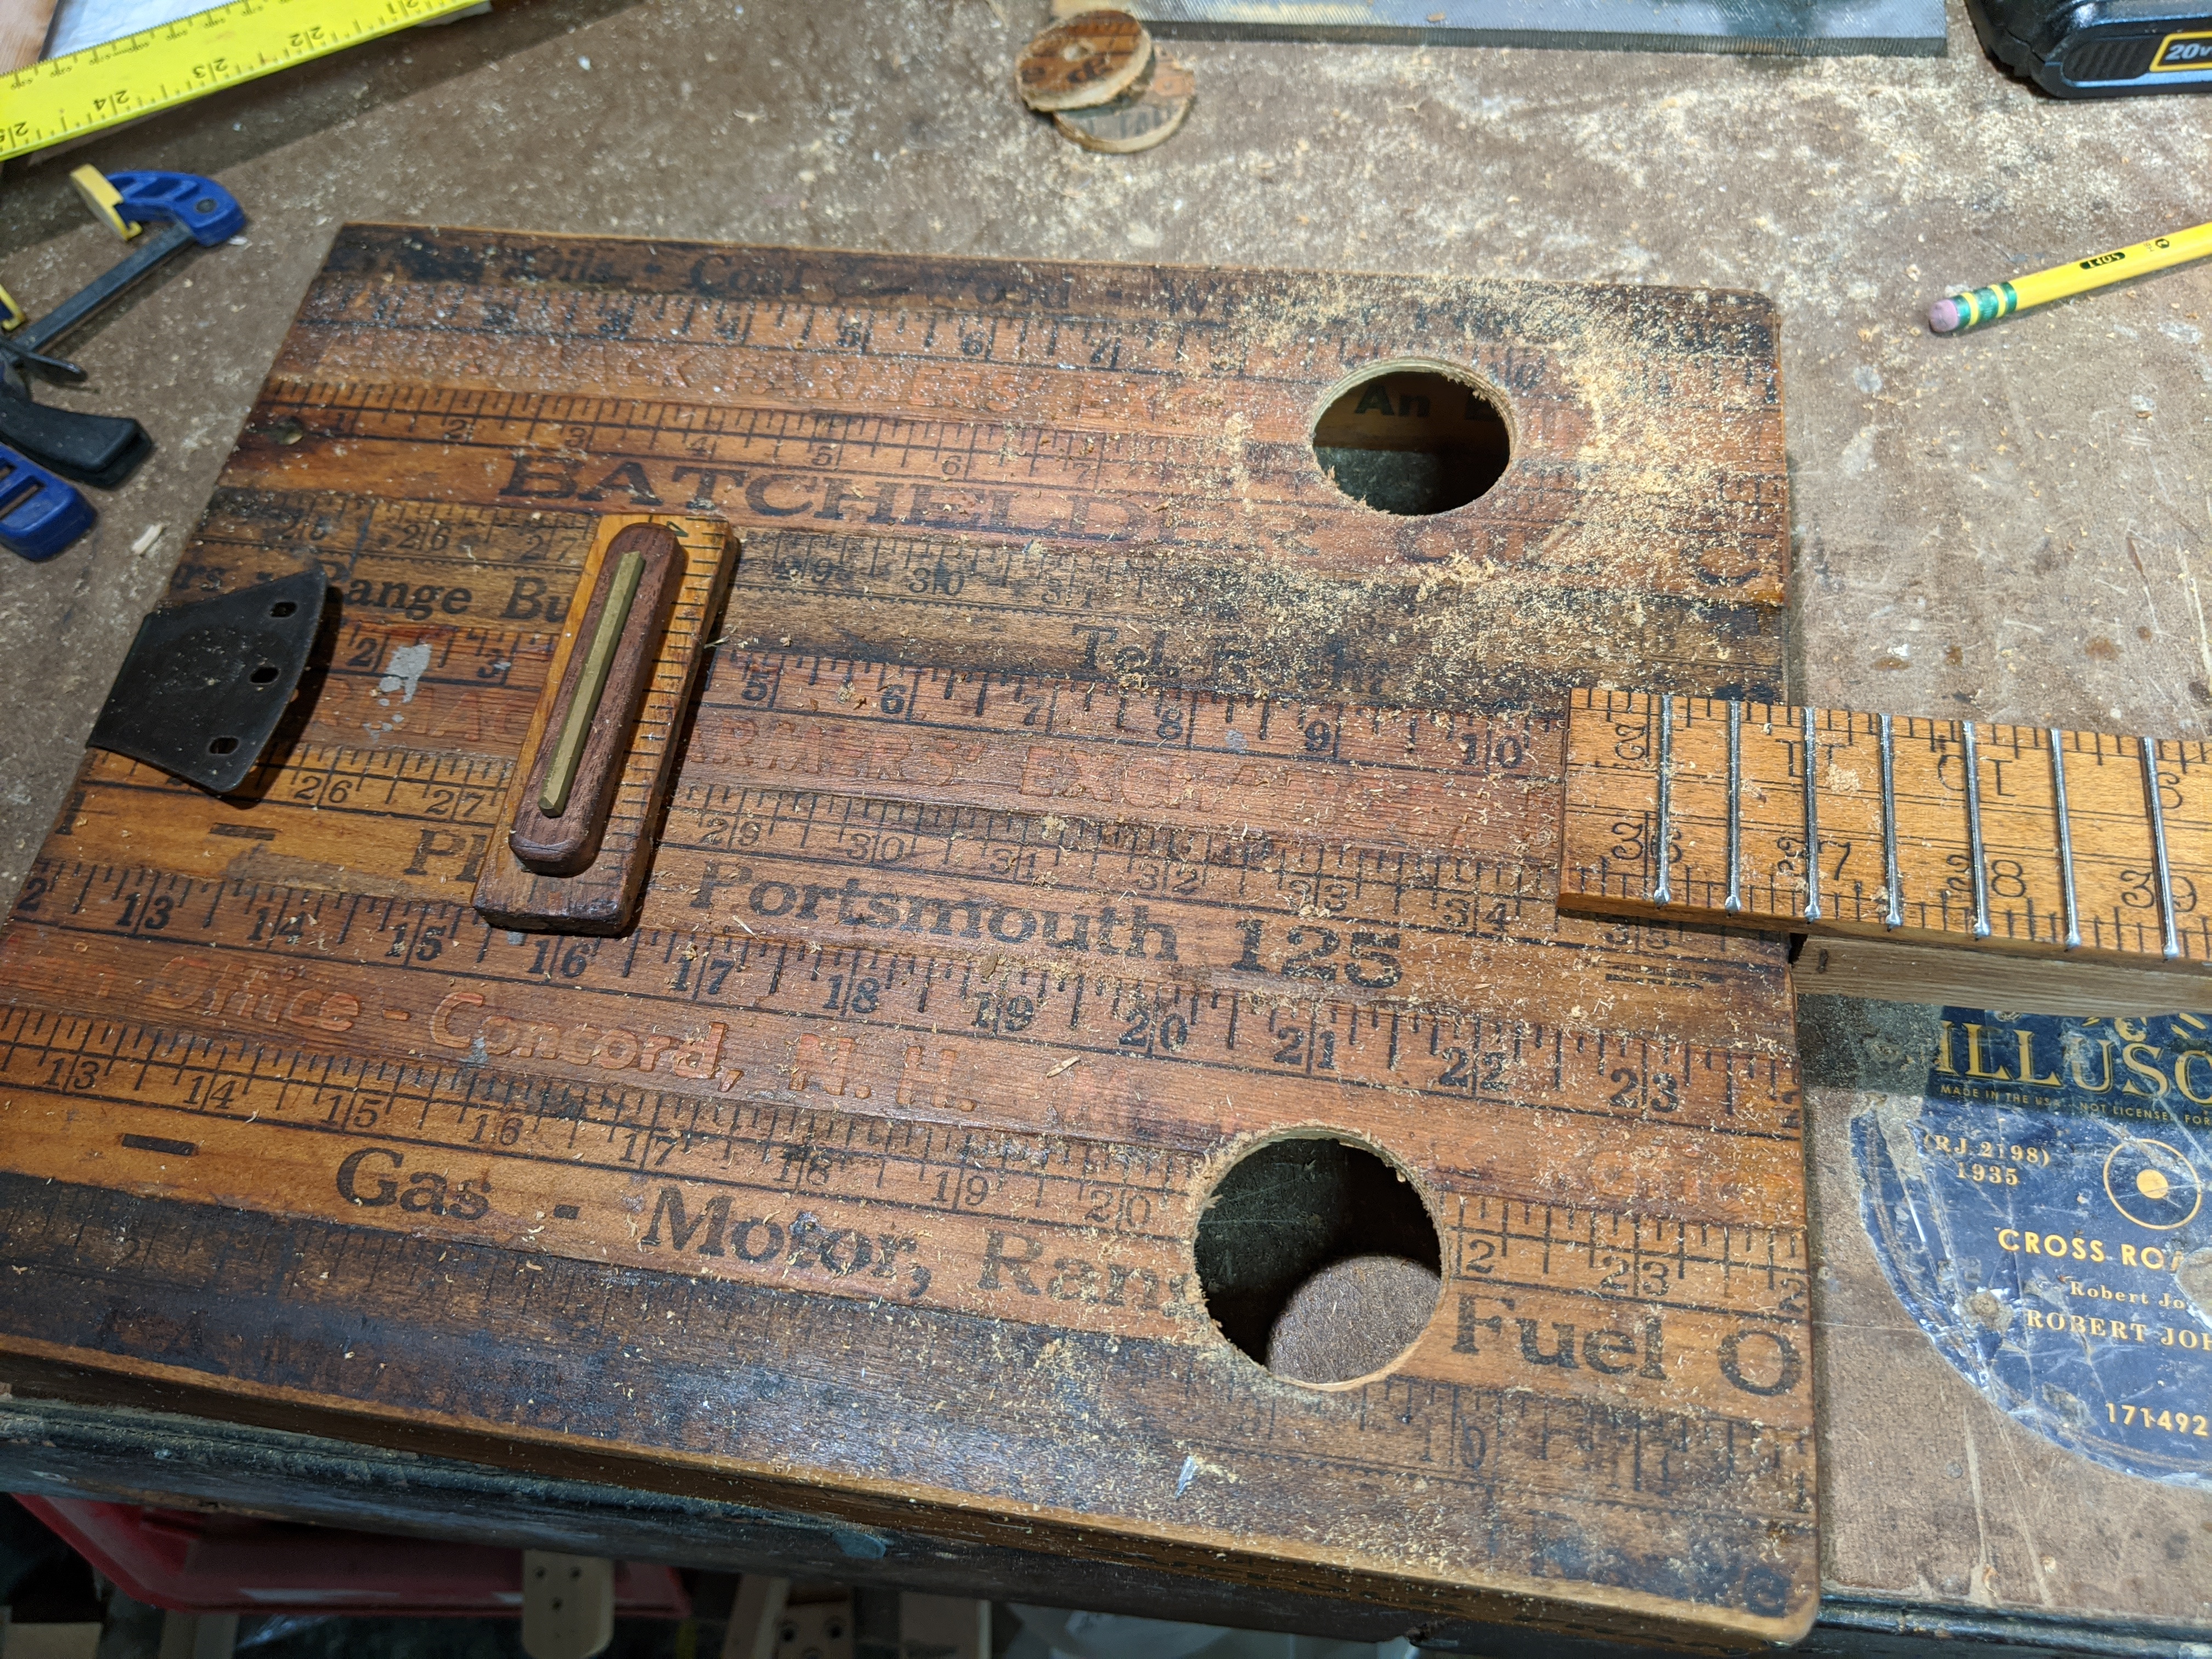
Drilling Sound Holes Before stringing her up though, I decide to drill in some sound holes. I used a 1 1/4-inch hole saw for this, and decided to go with two of them. I made them a little larger than I normally would, because I wanted the inside surface of the box's eventual back panel (which would also be made of yard sticks) to be visible. |
|
|
|

|
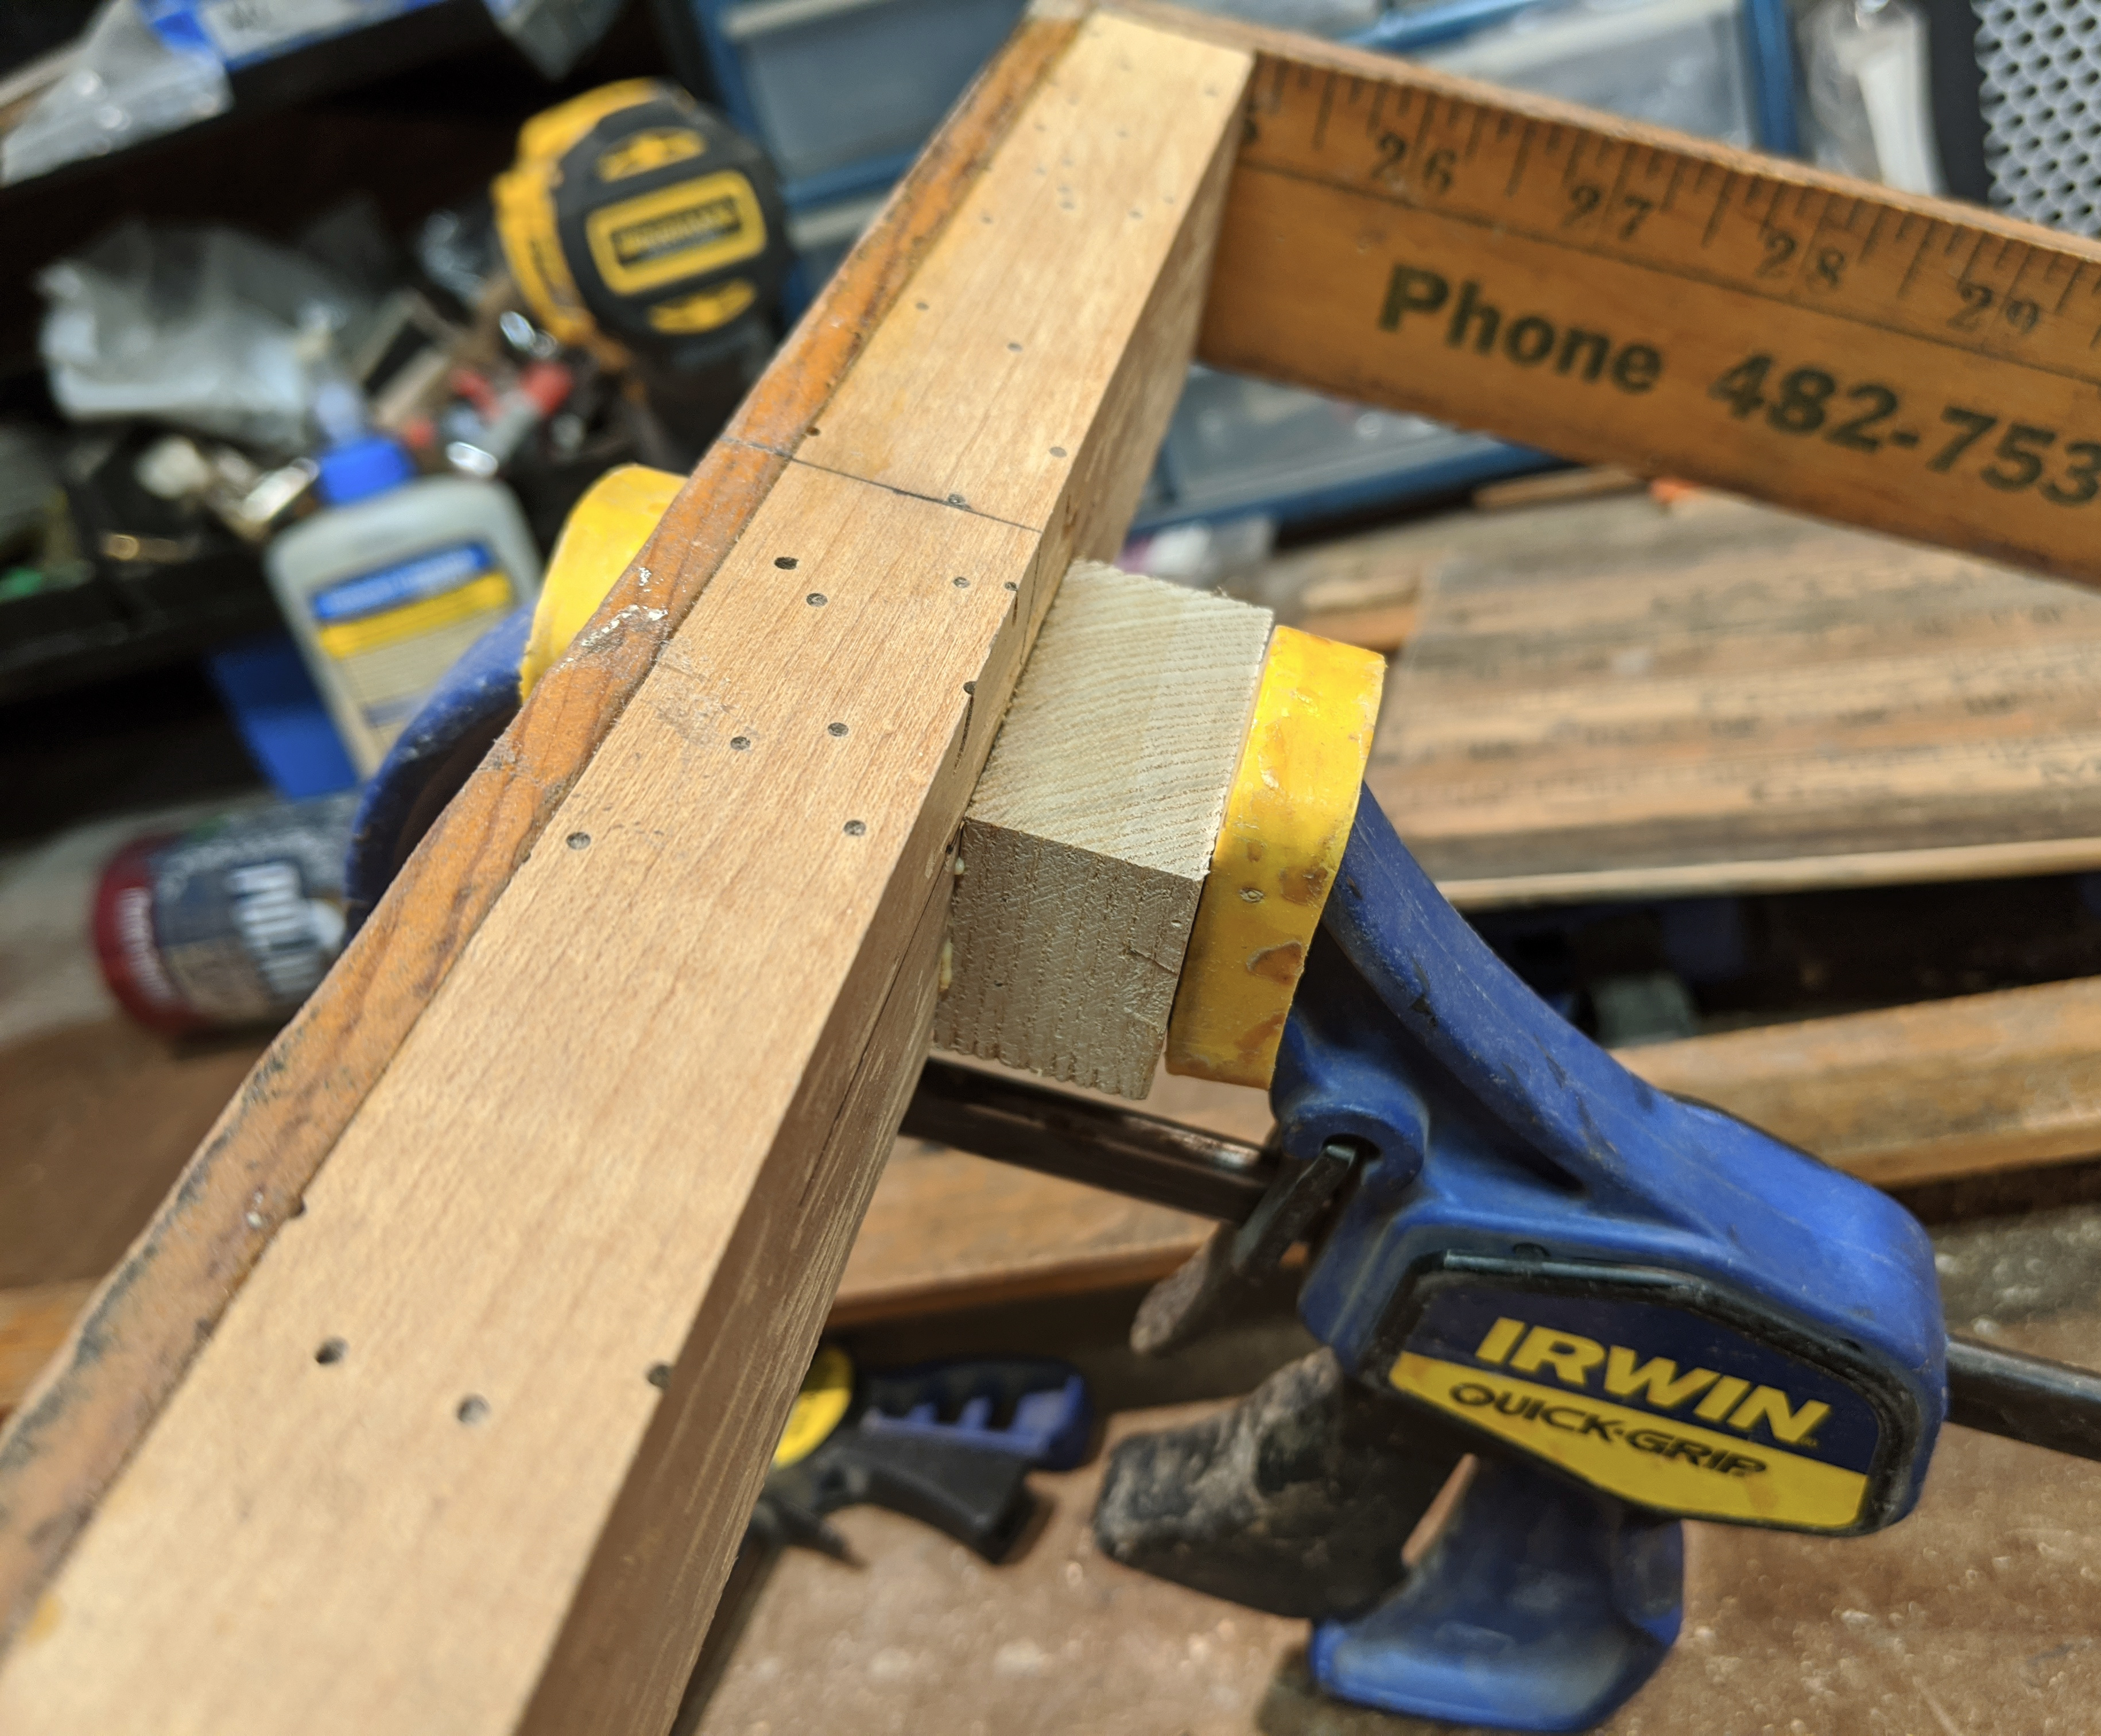
Oops, Need More Bracing! So... in between the last photo and this one, I started stringing up my guitar. I was using nylon strings (in the style of a hobo fiddle) and I really thought that my neck would stand up to them, even with the extra-deep notch. I was wrong. As I tightened the strings, the neck pulled more and more forward. Inside the box, the thin neck extension also visibly bowed. Clearly, there wasn't enough wood left to handle even the fairly light tension. So, I did some more bracing. As shown in this photo, I used a metal chair brace (sanded down to make it fit and also to change the angle a bit so it would pull the neck back) screwed to the neck and through the box into the front brace. This helped somewhat, but the neck portion inside the box was still visibly bowing. So, I took a piece of 1 x 2 poplar scrap and cut it to fit into the box along the back side of the neck (right up against the surface shown in this photo), and glued/screwed it in place. Unfortunately I forgot to take a picture of this step. These two bracing maneuvers combined to strengthen the neck enough so that it didn't pull forward any more. Also while doing this, I discovered that my bridge was way too high, so I removed the spacer pad shown in earlier photos and replaced it with two buffalo nickels. I had to cut a notch into one of the nickels so that the lead from the rod piezo could pass through. |
|
|
|
|
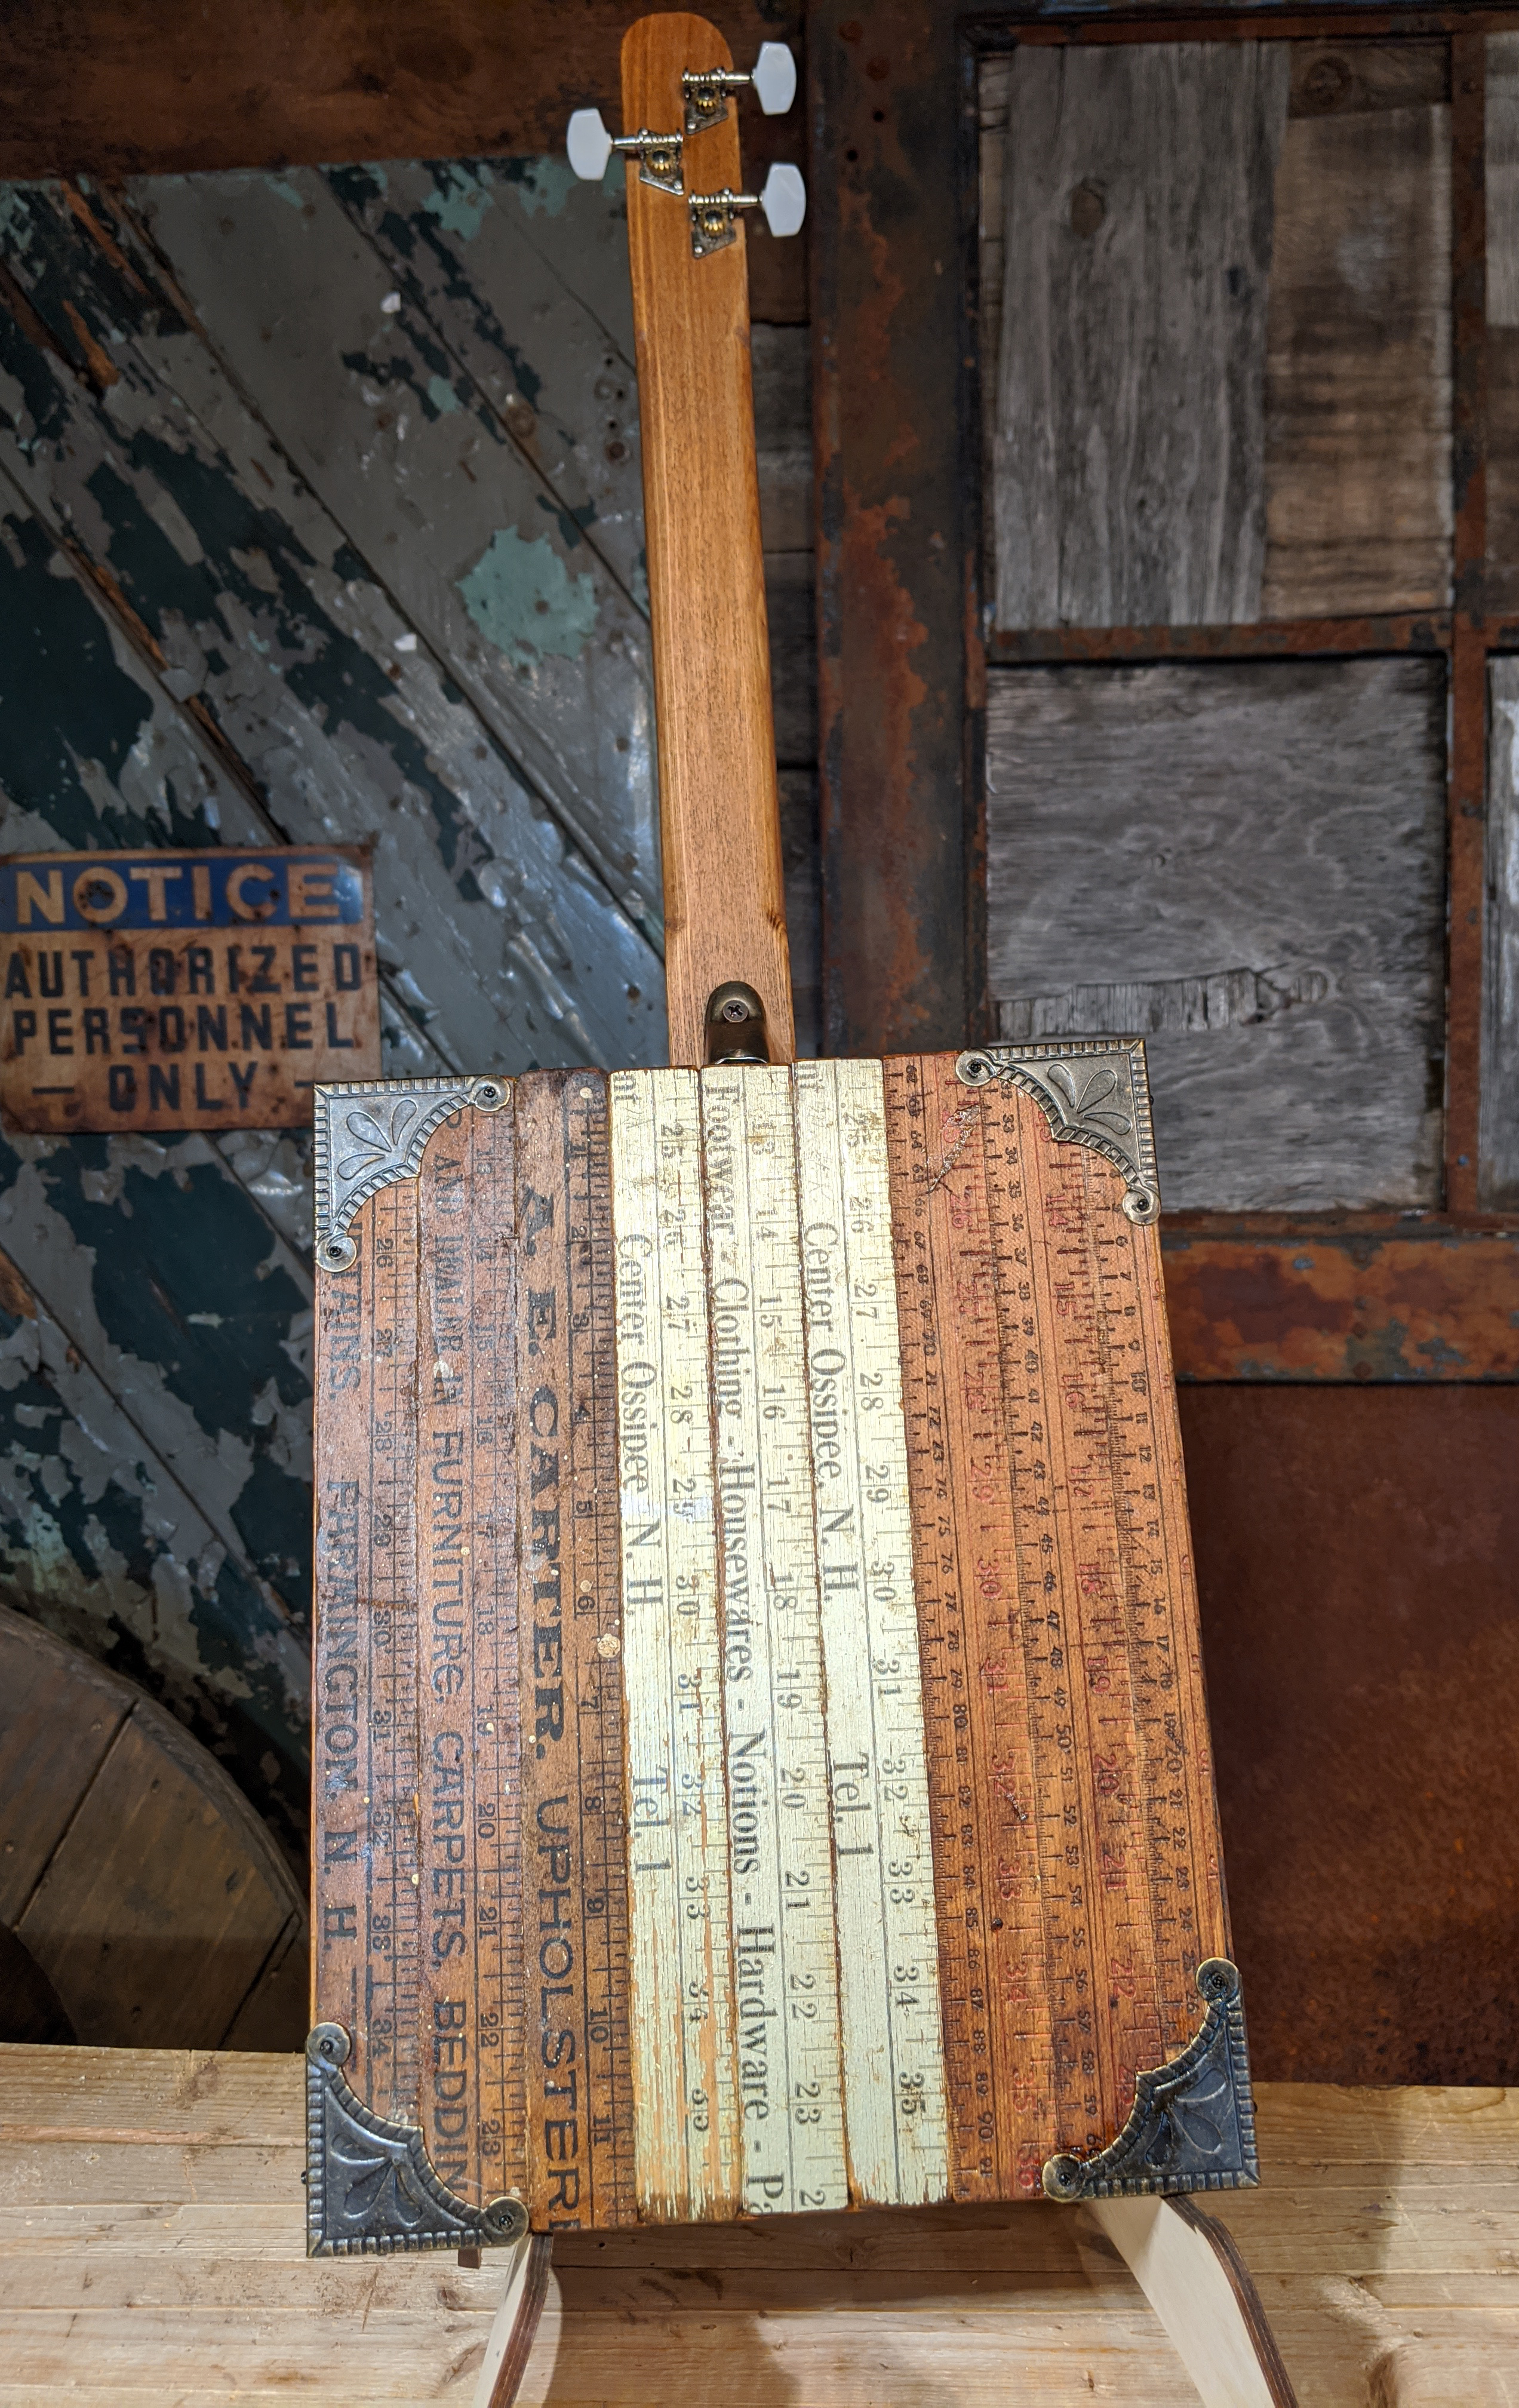
Creating the Back Panel With all of the bracing and structural emergencies sorted out, it was time to create the back panel for my guitar. For this, I used the same process shown above that I used for the top panel/soundboard. Once again three yardsticks were needed, and I used my tape-protected gluing rails method to get them joined up. As with the top panel, I was careful to make sure the most visually distinctive sides faced outward. |
|
|
|

|
Gluing on the Back Panel Once the glue set up, it was time to attach the back panel to the instrument. Before I did this, I drilled a hole for my output jack, plugged the rod piezo lead into it, and tested with an amp to make sure it was working. Because I intended to glue the back panel in place, I knew everything had to be fully set before I did so. Once everything was set and working, I sanded my edges to reveal some bare wood, put on some glue, and clamped her down. Once the glue set, I did some sanding to round edges and smooth things down. |
|
|
|
|
Add Some Bling As a final decorative touch, I added some of our decorative antique brass box corners to all eight corners of the box. This style of corner really works well with rustic, antique-looking builds, and I am very happy with the result. Also if you look close in this photo you can see my buffalo nickel bridge shims, and also a screw I put through the tailpiece to keep it down tighter against the soundboard - I did this to ensure a stronger break angle of the strings across the bridge. |
|
|
|
|
Finis! And with that, she was done! There is nothing better than hearing that first strum of a new instrument you build yourself, and my experience with this one was no exception. Those thin softwood yardsticks were never meant to make music, and certainly weren't selected for their tone wood properties, but what a rich, mellow acoustic tone they have. |
|
|
|
|
Here's a look at the back of the instrument, showing the nice effect of the antique brass box corners against the old yard sticks.
This instrument looks just as beautiful as it sounds, and is a truly unique creation that I am very proud of! |
|
|
|
Thank you for taking the time to walk through this special build with me. I hope that seeing my process helps inspire you to dream up your own unique creations.
Happy building!
Recent Posts
-
Steve Holladay's "Pocket Box Guitar"
If you're a member of the Friends of C. B. Gitty group on on Facebook, you've probably seen some of …14th Jan 2026 -

2024 World's Wildest Electric Cigar Box Guitar Build-Off Winners!!!
C. B. Gitty Crafter Supply is proud to announce the winners of the 2024 "World's Wildest Electric Ci …31st Oct 2024 -
")
Improved C. B. Gitty: Easier Than Ever! (Work in Progress)
Ben “Gitty” has been cleaning house, making our website even easier find your favorite parts, kits a …7th Oct 2024