Violin-style Rod Piezos EXPOSED - How to Cut and Use These Handy Pickups
While a lot of cigar box guitar builder attention goes to disk piezos and standard acoustic guitar-style rod piezos, there is another option that can be a great addition to your toolbag: the violin-style rod piezo. These little pickups sound great in cigar box guitars, especially when put through one of our pre-amp units.
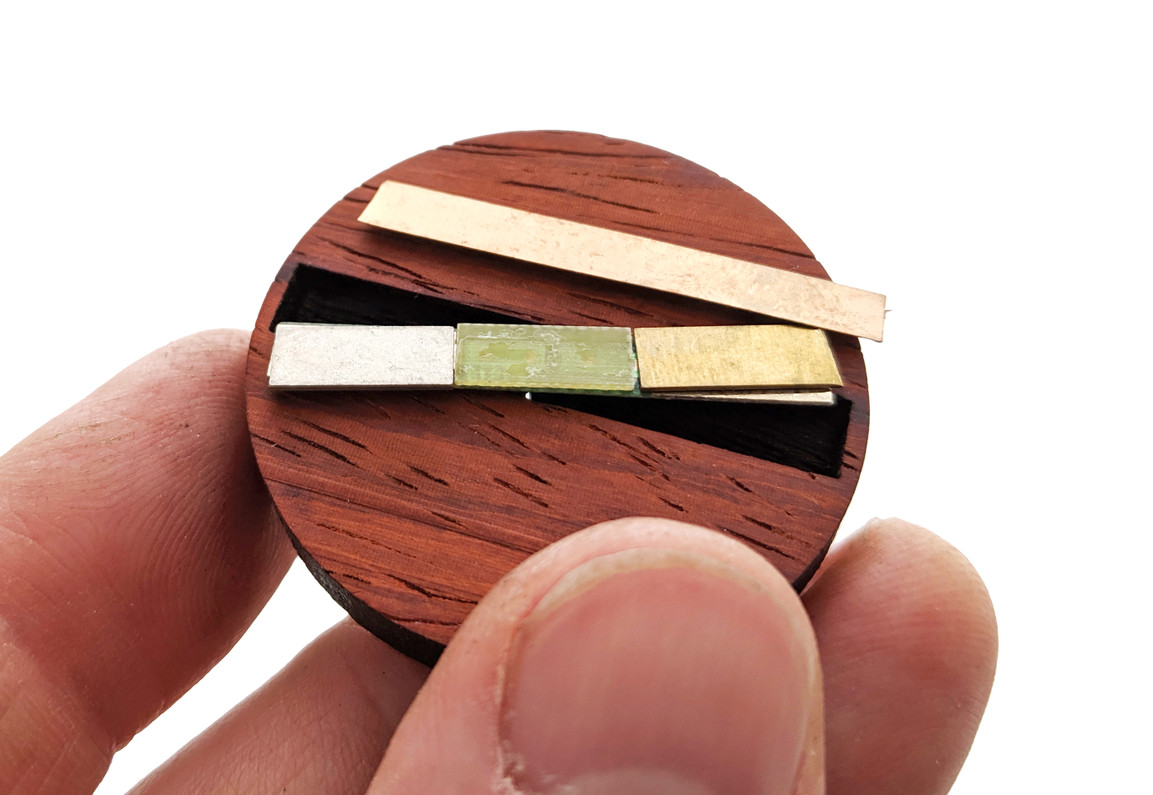
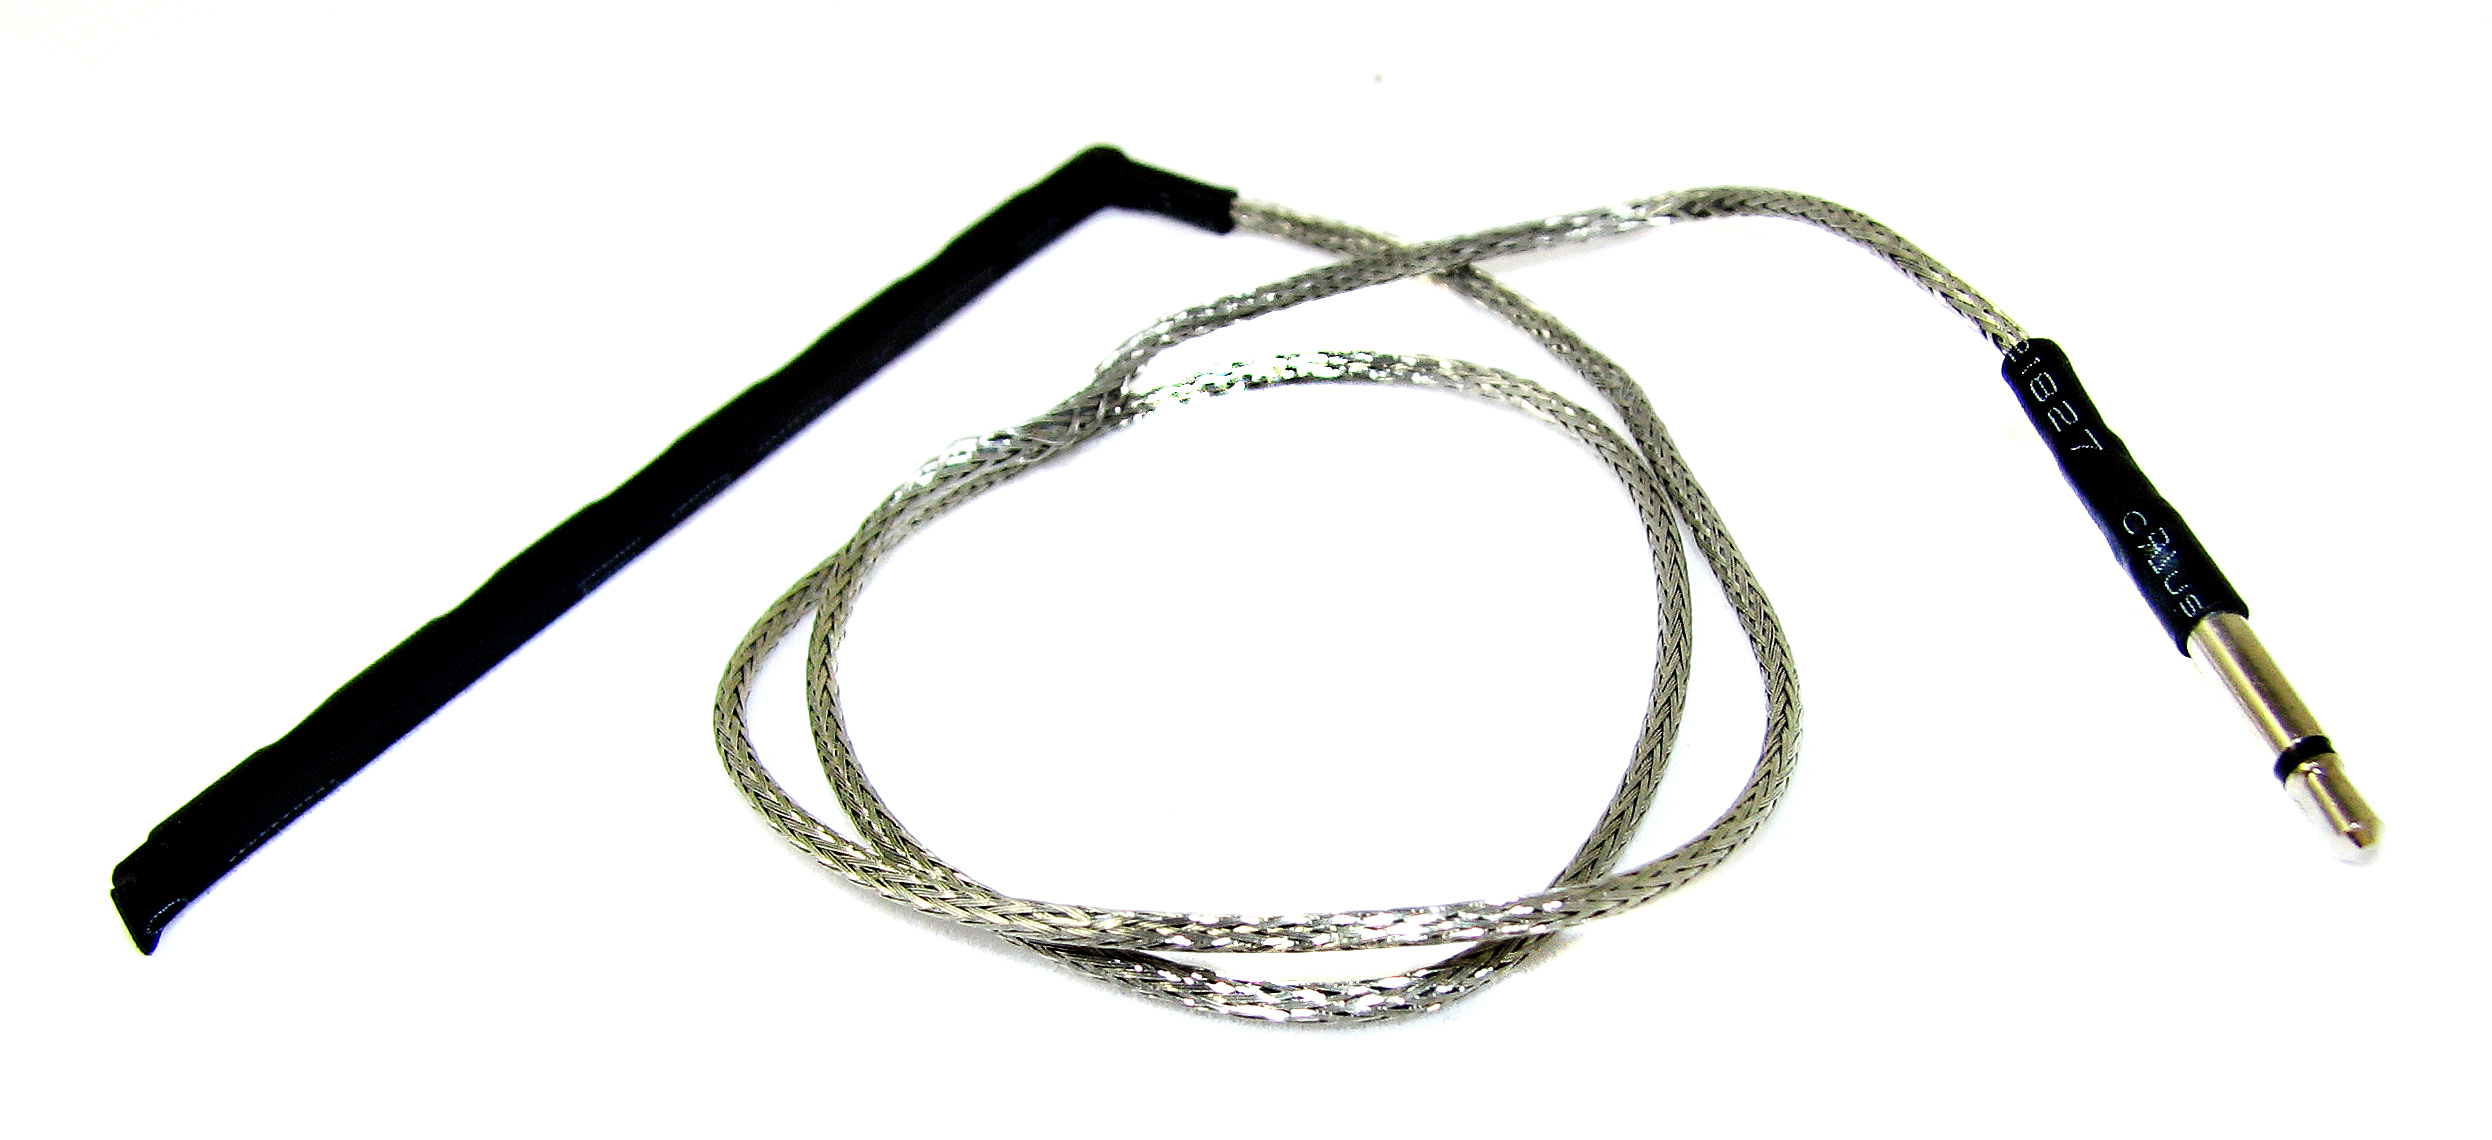
While standard rod piezos have a lead that comes off of one end (shown to the right), the violin-style (shown above) has a central lead that sticks straight down from the main piece. This makes it perfect for using with biscuit-style bridges on resonator builds, or any other time you prefer a wider, flatter pickup with a central lead.
In this article we will "expose" the innards of one of these great little pickups, and show you how you can modify one to meet your needs.
The violin-style rod piezos that we sell here at C. B. Gitty come with an outer layer of black shrink tubing, which hides the inner parts from view. We'll be cutting this off to show you the inner components. IMPORTANT: if you are intending to actually use your violin-style rod piezo, do not cut off the shrink tubing!
The photo below shows you the components that make up the violin-style piezo.
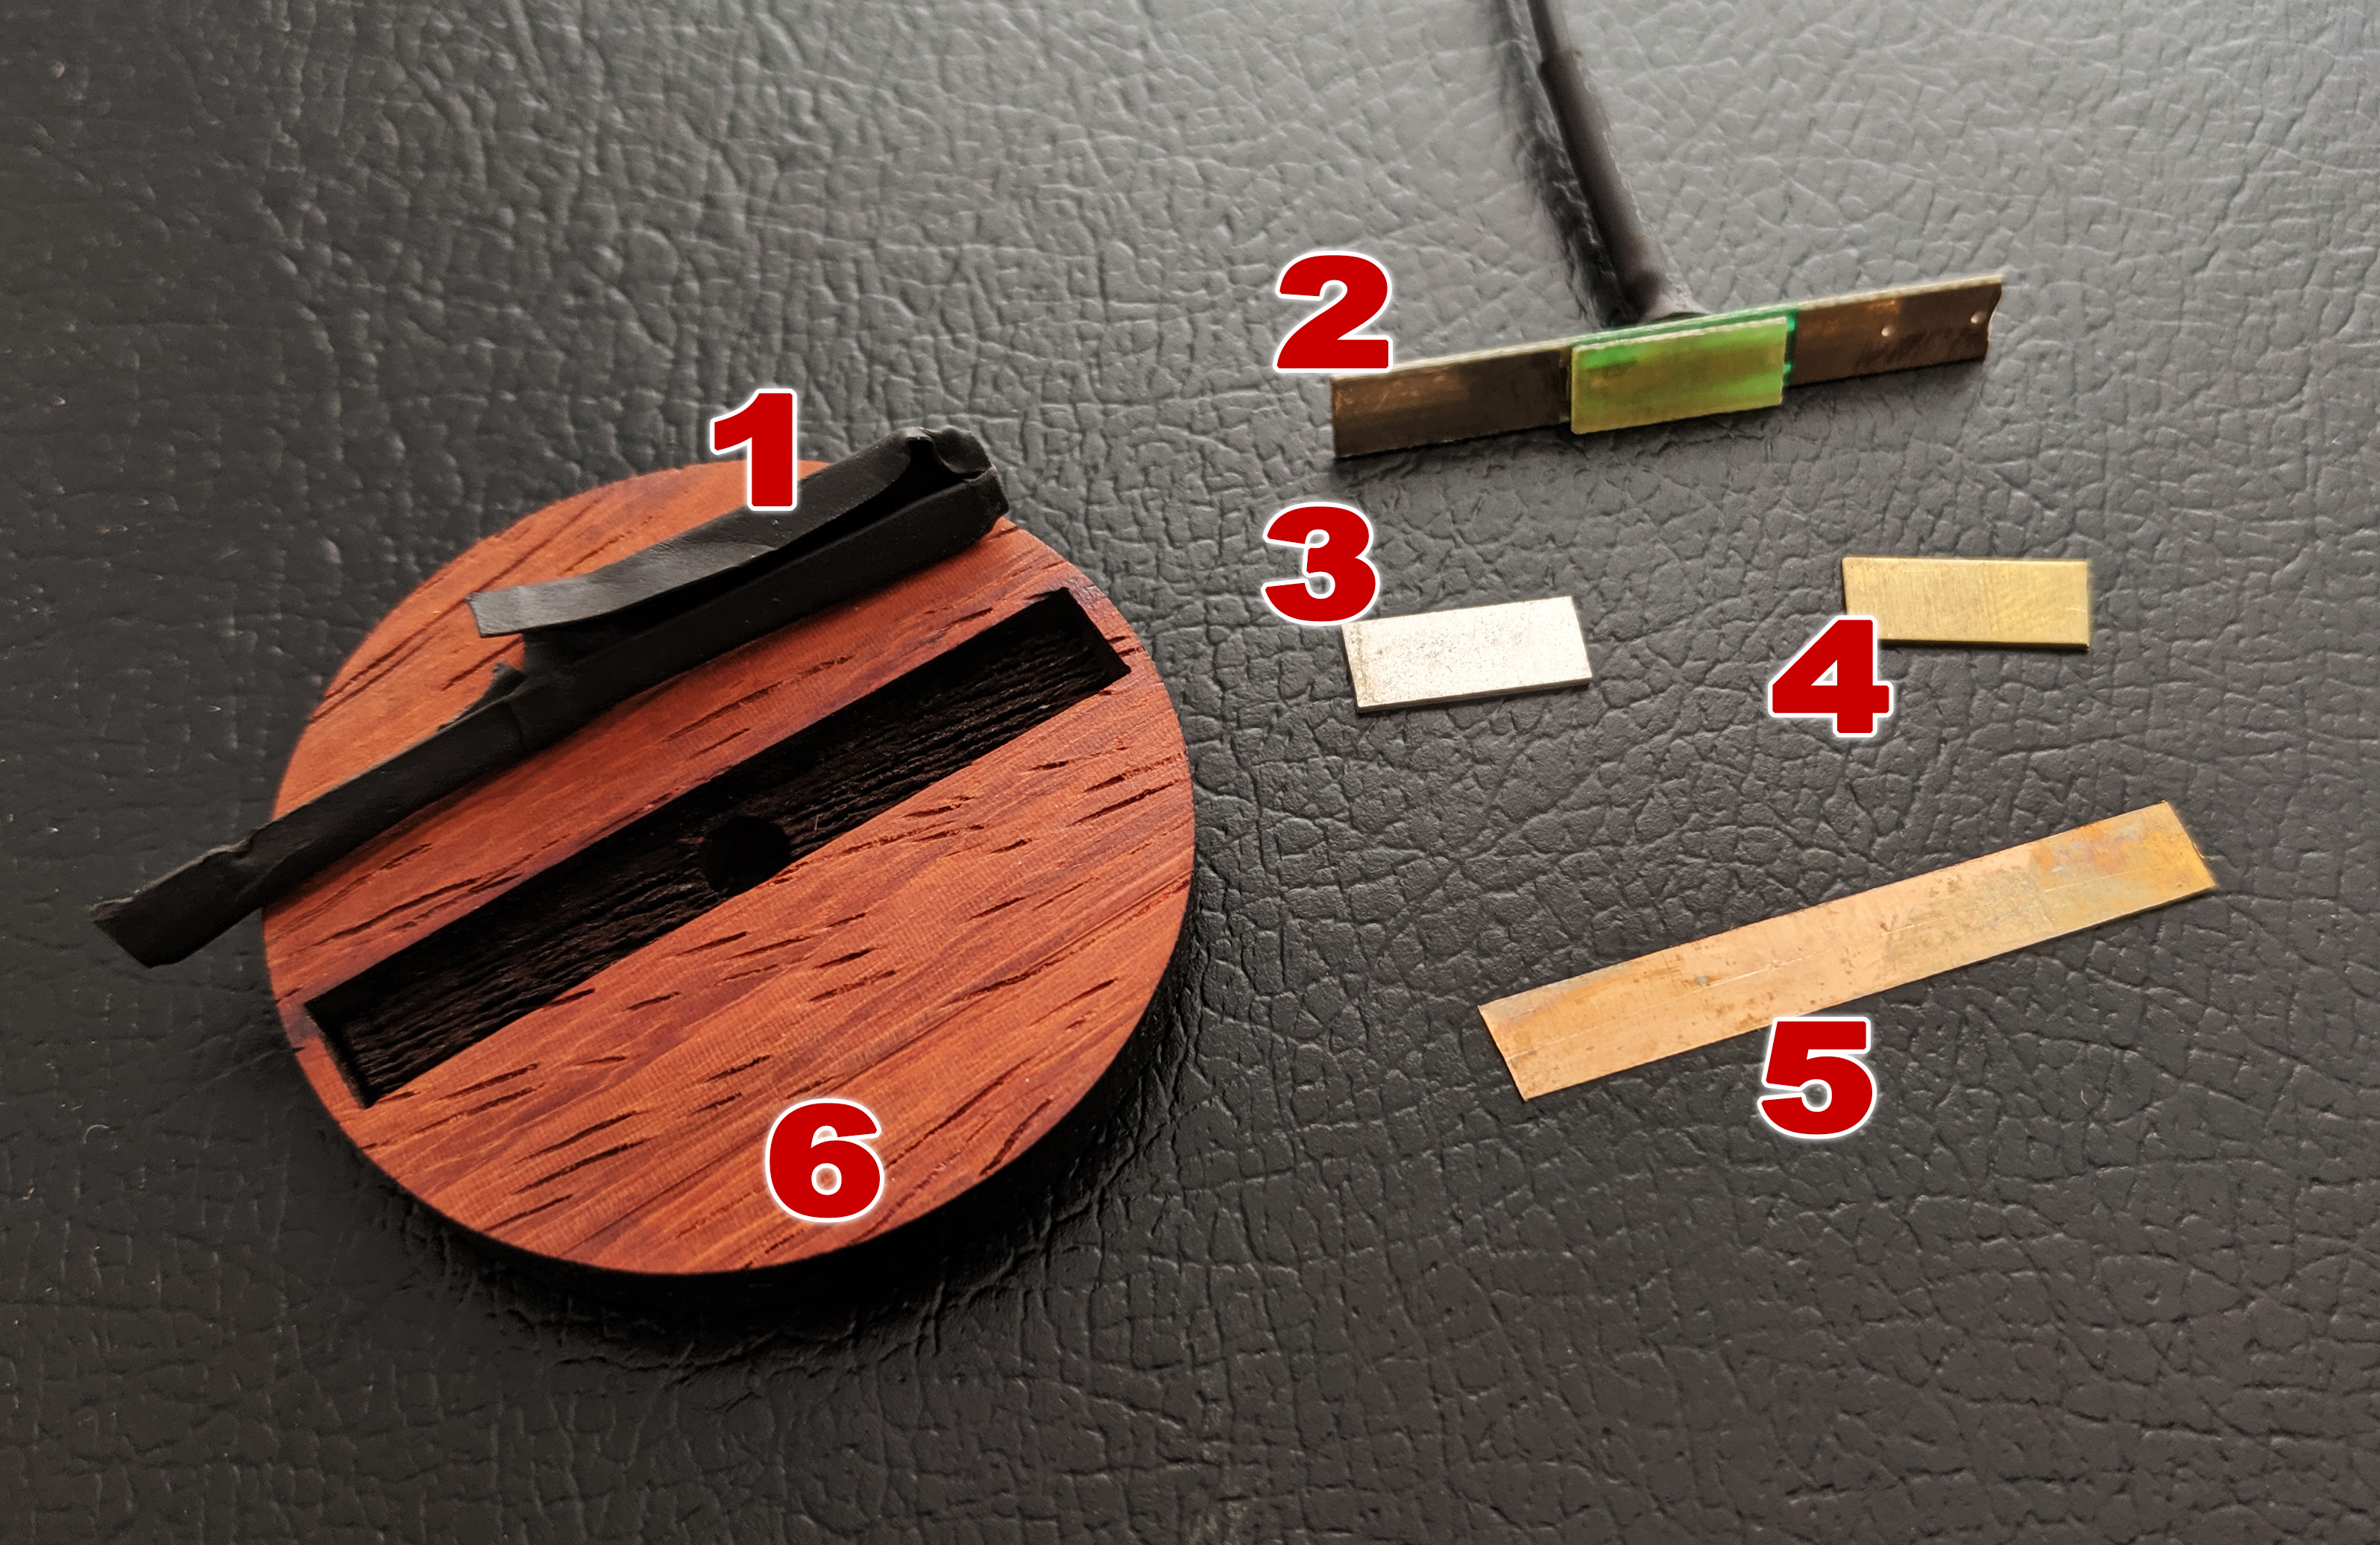
1. The black shrink tubing wrapper that we've removed.
2. The brass base plate of the pickup, with lead and insulating spacer wafer attached.
3. Ceramic wafer
4. Brass wafer
5. Top copper strip.
6. A padauk biscuit bridge, available from C. B. Gitty, shown for reference
The ceramic wafer, brass wafer and top copper strip are not glued/attached to the base plate, and when you take off the shrink tubing they are easily lost, so be sure to leave the shrink material in place while working with them.
Here is a short overview of how these pickups work: The base plate is actually two separate pieces of metal, joined together and with the insulating spacer wafer attached. The positive wire in the lead is attached to one side, and the ground/negative lead to the other side. The ceramic wafer is placed on one side of the base plate, and the brass wafer on the other. The thin copper strip is placed over the top.
When installed in a guitar, the downward pressure from the vibrating strings excites the piezo, and that vibrational pressure causes small amounts of voltage to be generated. You can research exactly how piezoelectric elements work online, but suffice to say a circuit is formed through the rod piezo, and the vibrations create tiny voltage flows which, when amplified, reproduce the acoustic sound of the instrument. The circuit flows up one lead wire, into one side of the base plate, through the ceramic wafer, then through the copper strip, then through the brass wafer, then down into the other side of the base plate, and out the other lead.
The photo below shows another view of the components arranged closer to their proper places.
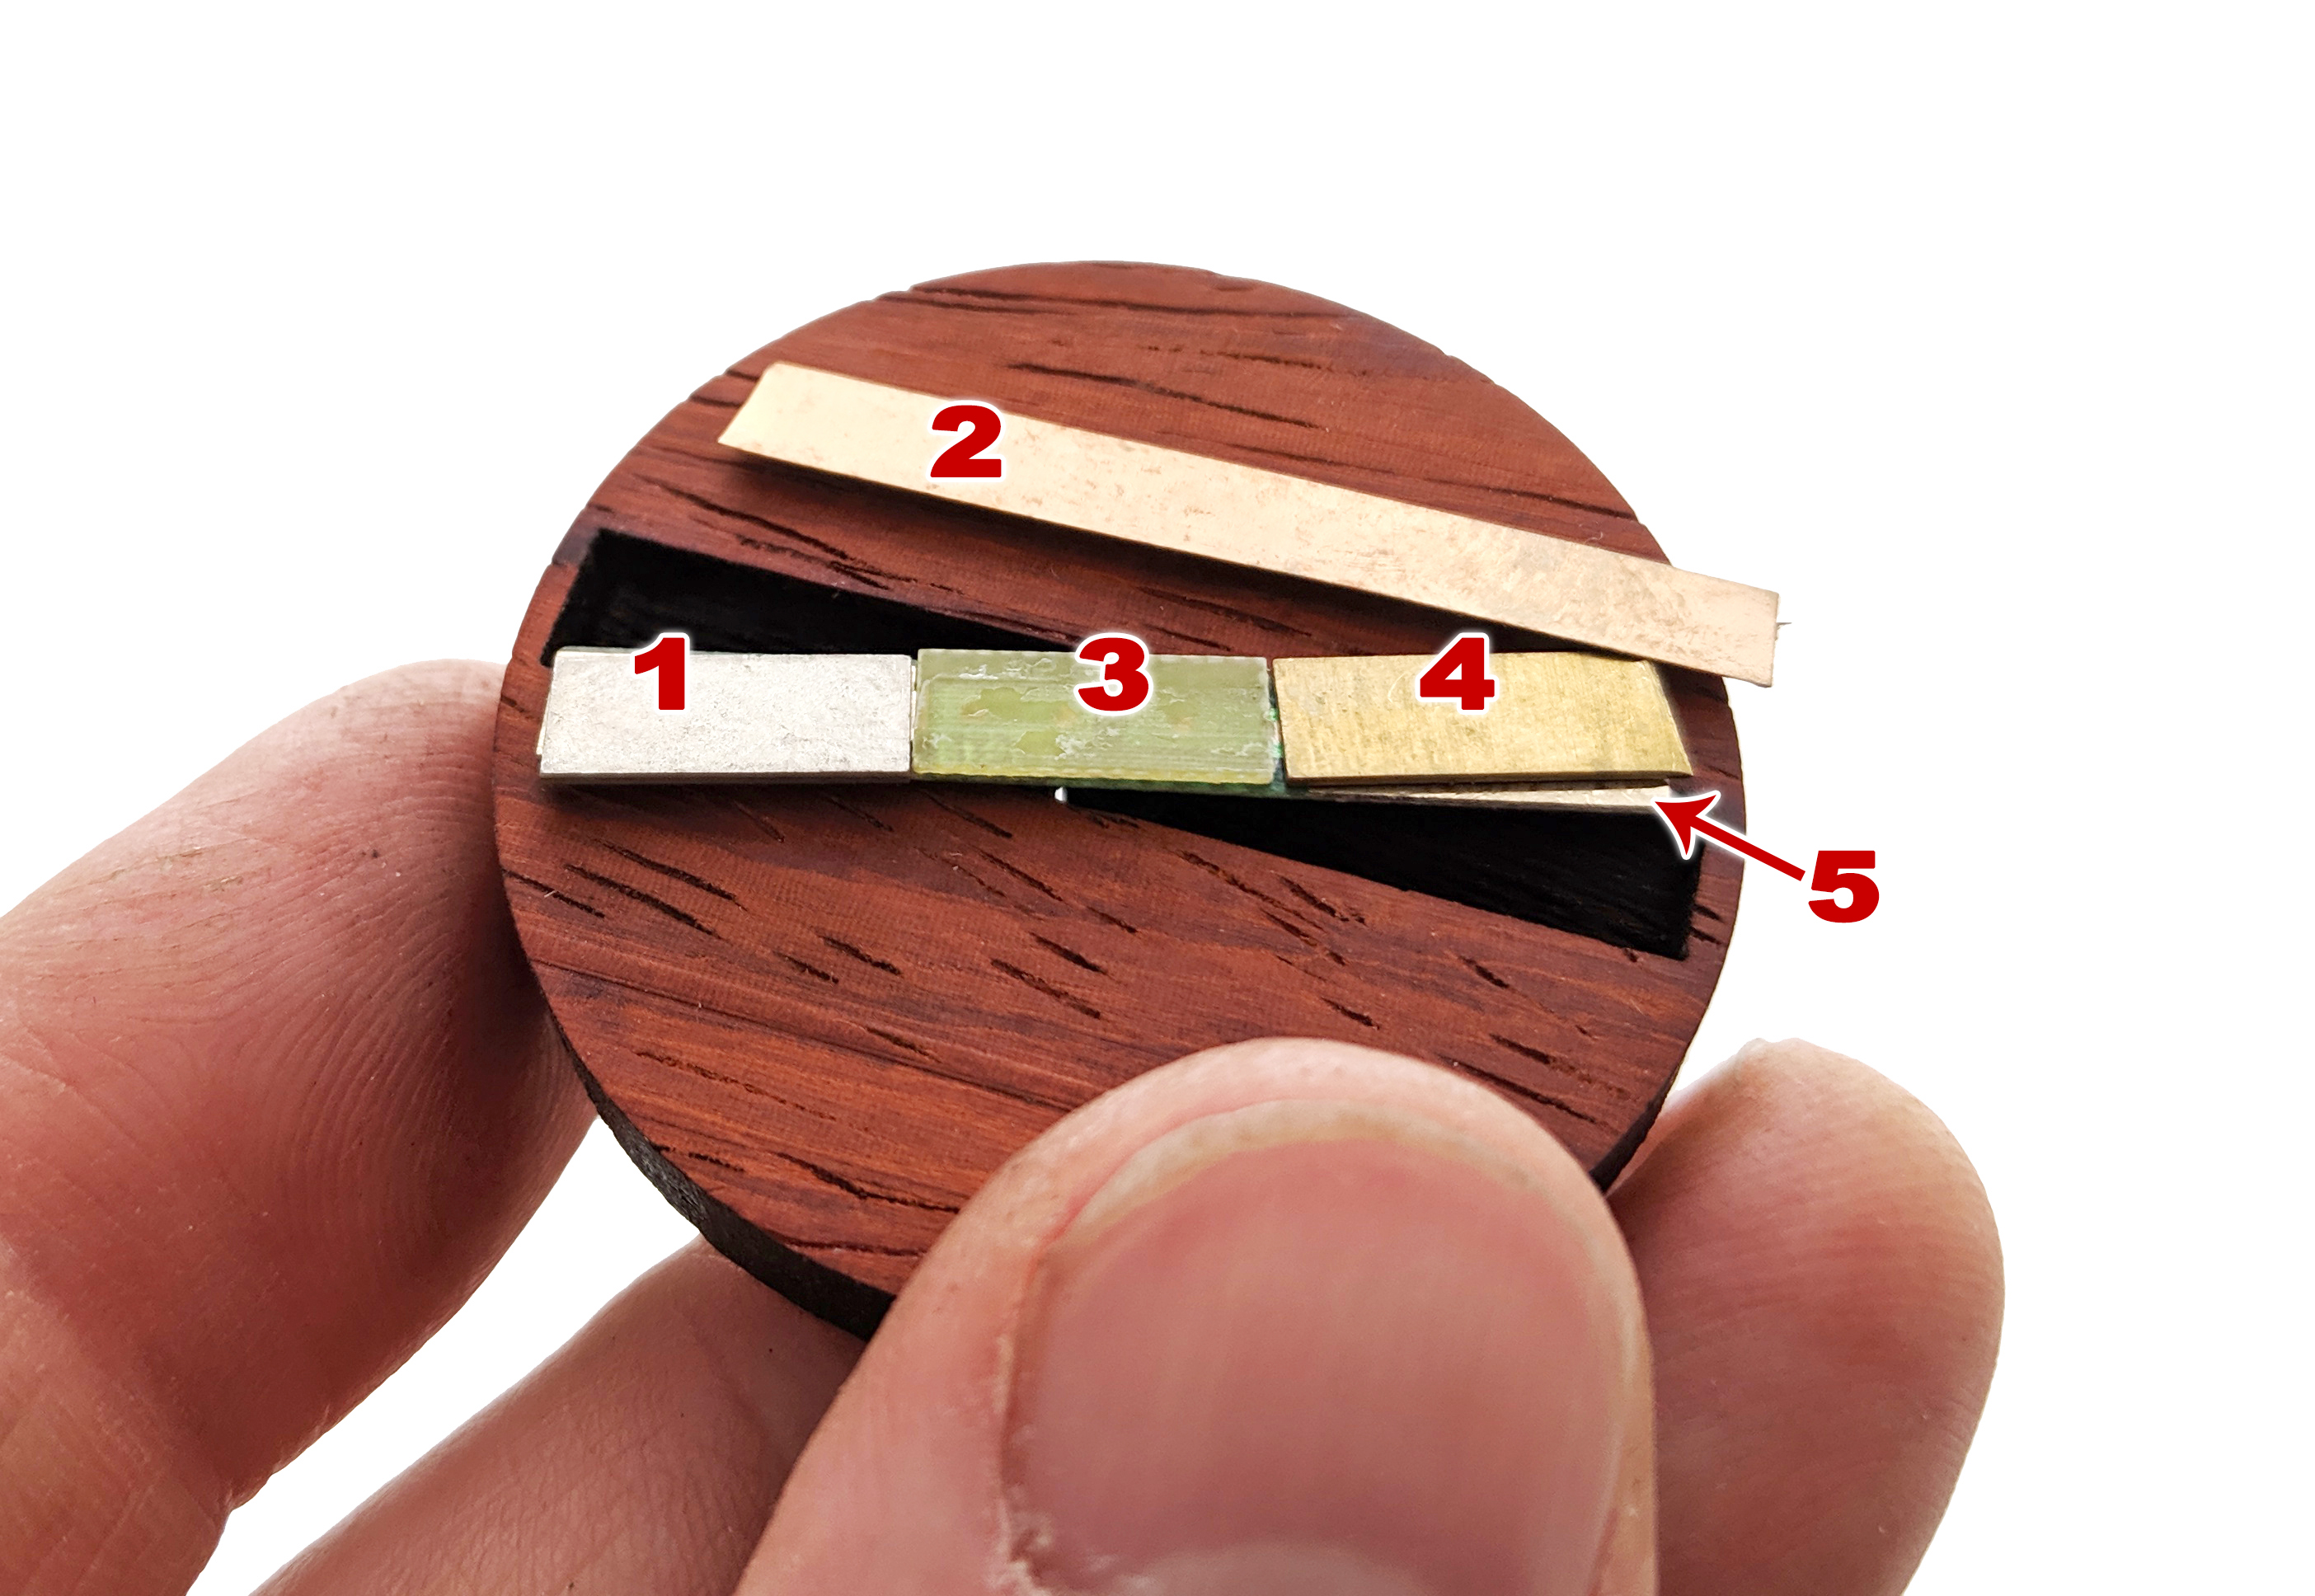
1. Ceramic wafer
2. Top copper strip
3. Spacer/insulator wafer
4. Brass wafer
5. Base plate
Because of how these rod piezos are designed, you can fairly easily cut the ends shorter to fit smaller slots (such as the one on our biscuit bridges). Up to 1/8-inch (0.125 inches) or so can be safely trimmed from both ends without seeming to effect the audible performance of the pickup. Trying to cut them length-ways is not recommended.
Use a good pair of sharp side cutters for this operation, as shown in the photo below. Cut smoothly and quickly down through the end of the pickup, with the shrink tubing still in place, for a nice clean cut.
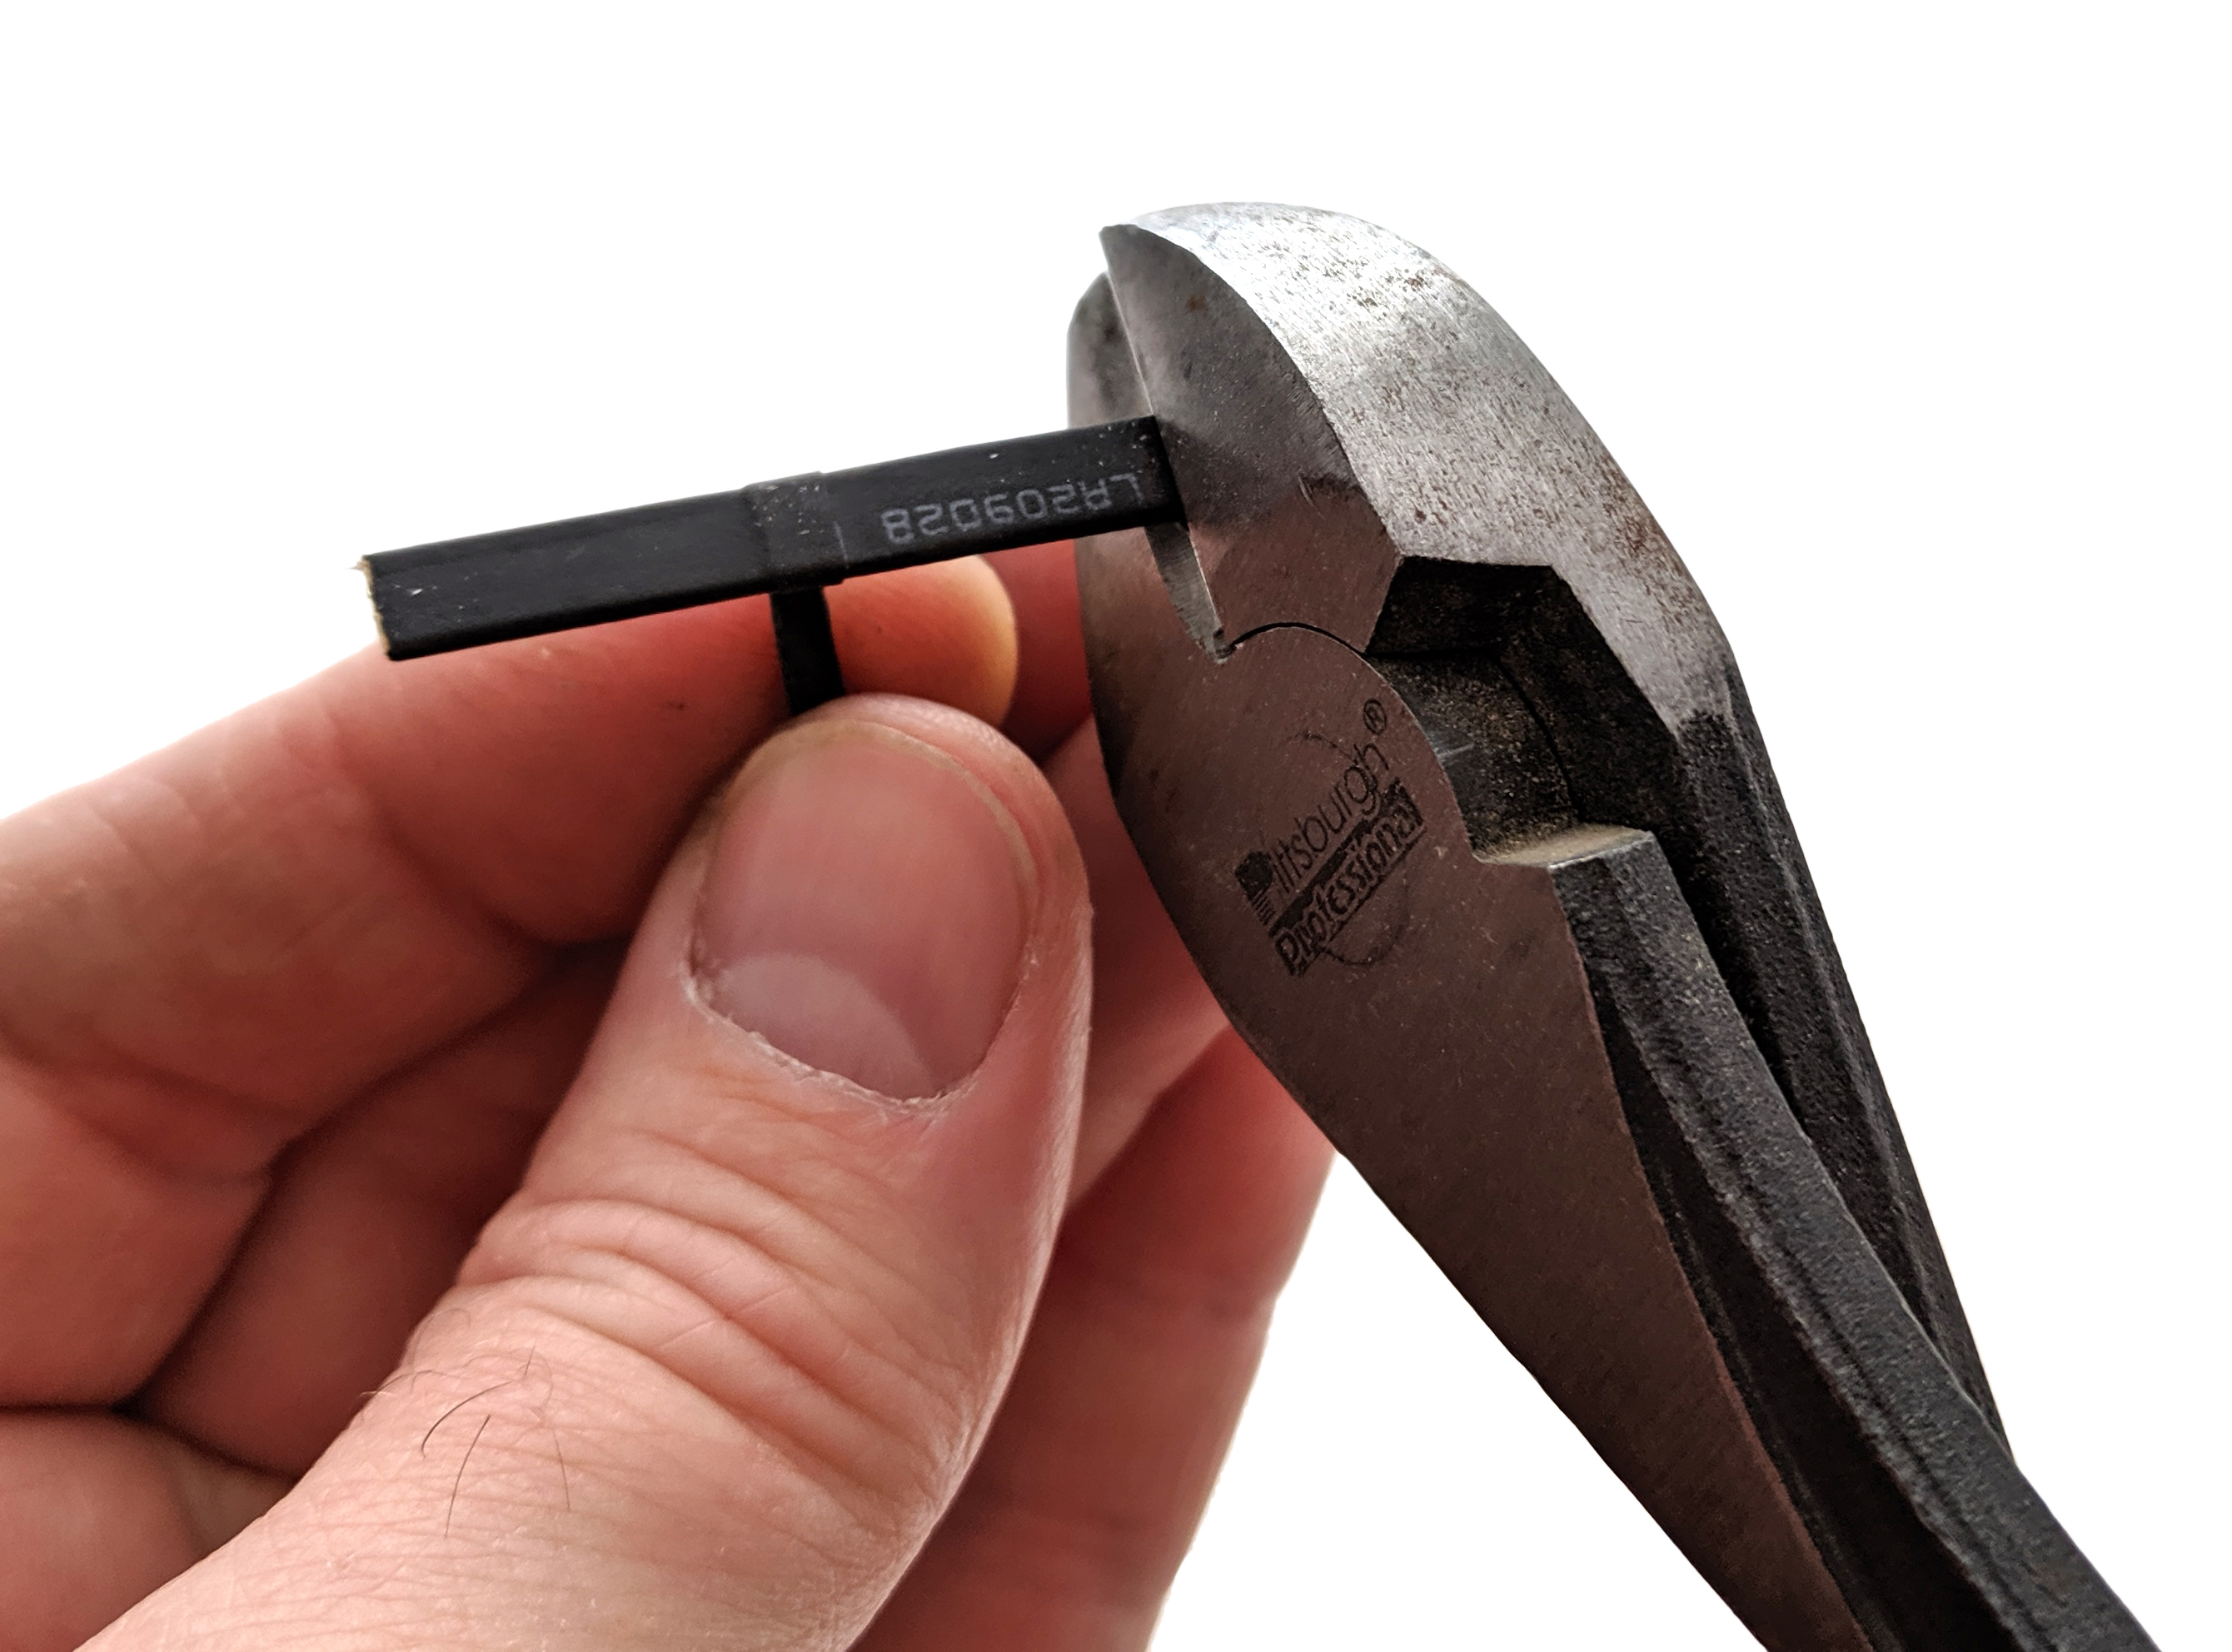
After cutting, be careful that the thin wafers don't fall out - they shouldn't, due to being squeezed in place by the shrink tubing, but be careful nonetheless.
Once cut, the rod piezo should fit cleanly into place.
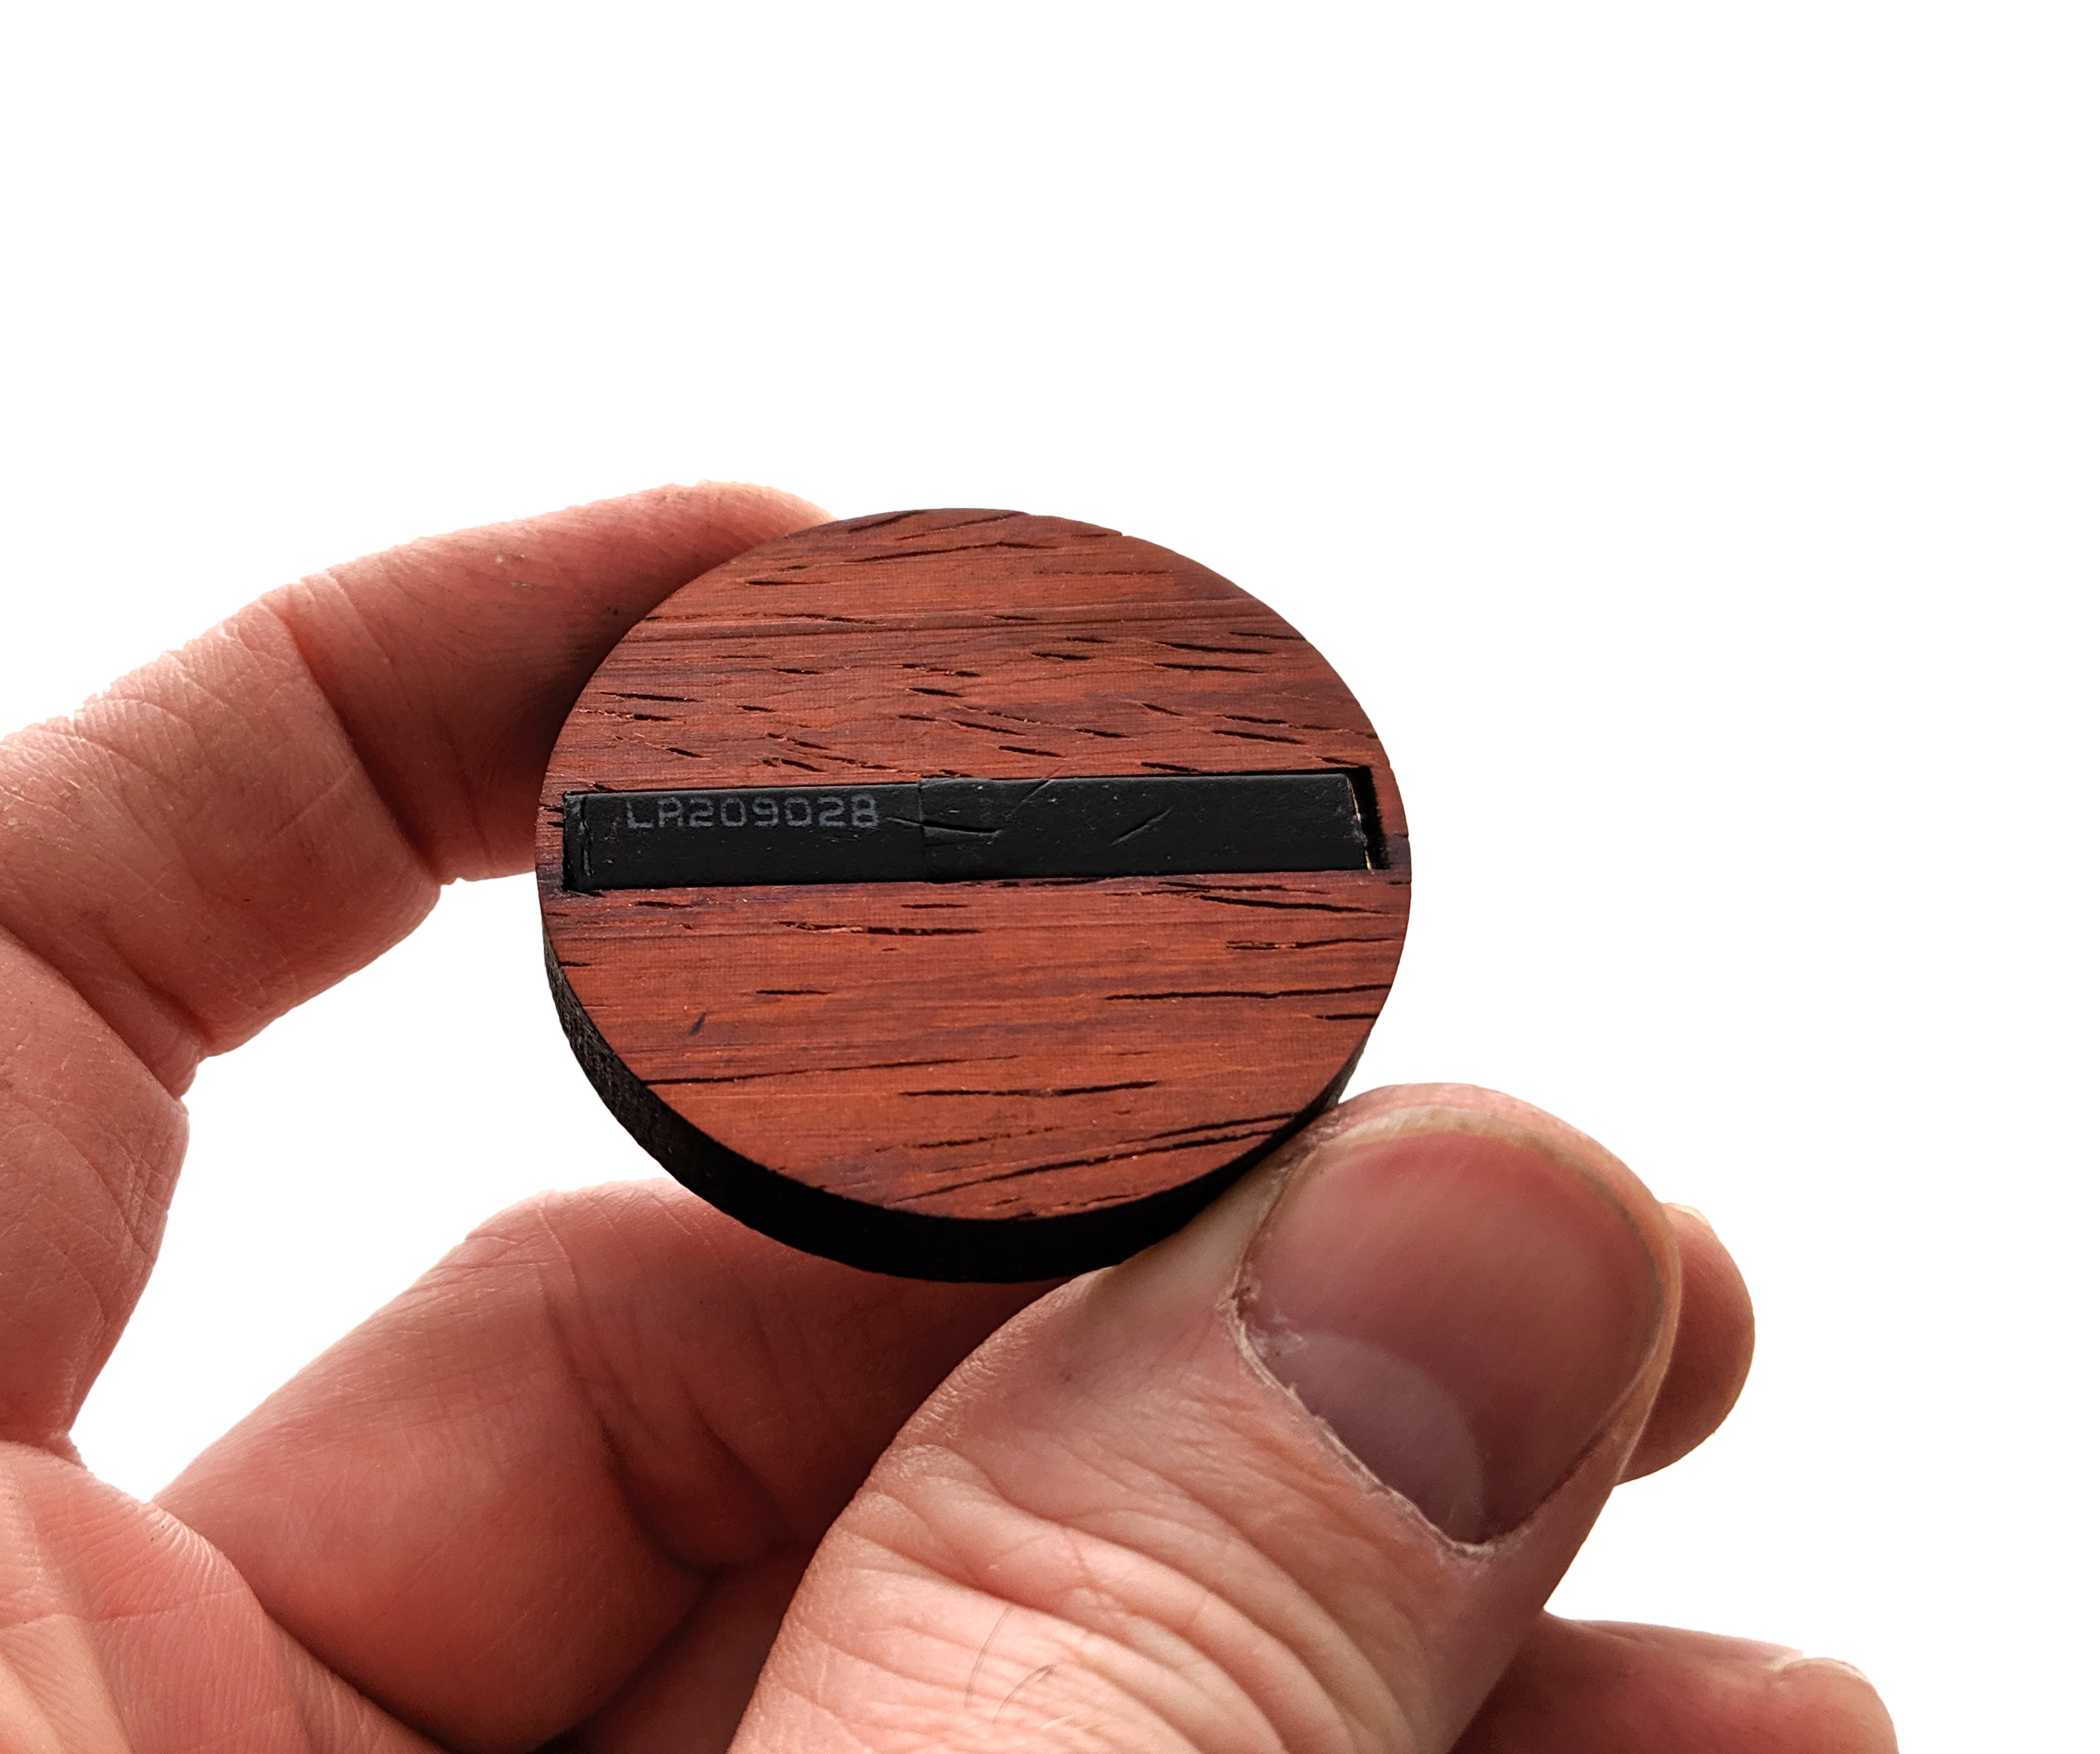
That's about all there is to it! By following the steps above, there isn't much that could go wrong with trimming your violin rod piezos, but if you run into trouble don't hesitate to reach out to us by e-mail at support@cbgitty.com! I hope that you'll give violin-style rod piezos a try in your next cigar box guitar build!
Recent Posts
-
2024 World's Wildest Electric Cigar Box Guitar Build-Off Winners!!!
C. B. Gitty Crafter Supply is proud to announce the winners of the 2024 "World's Wildest Electric Ci …31st Oct 2024 -
Improved C. B. Gitty: Easier Than Ever! (Work in Progress)
Ben “Gitty” has been cleaning house, making our website even easier find your favorite parts, kits a …7th Oct 2024 -
Build-Off Contest 2024: The World's Wildest ELECTRIC Cigar Box Guitar
CBGitty.com is looking for the WILDEST, LOUDEST & MOST DIABOLICAL electric cigar box guitar ever …6th Sep 2024

