

The Reso-Electro Cigar Box Guitar Project - Pt. 2: Fitting Neck to Cigar Body + Location of Hubcap Reso
Part 2 in Shane Speal's four-string cigar box guitar project shows how to properly align the neck to the center of the Hubcap resonator cone. It also shows a great way to notch out a neck using a Forstner bit on a drill press. The end result has the box, neck and resonator becoming three perfect puzzle pieces that fit together seemlessly.
(Click here for Part 1 of the article)
Photos, video & text by Shane Speal
Tools used in this chapter:
- Scroll saw
- Sharp chisel
- CBGitty.com Electric Pickup Mounting Route Template
- Straight yardstick
- Drill press with Forstner bit
In Part 1, I described all the parts needed to make the Reso Electro cigar box guitar. The first thing I did is was to determine where the bridge would sit on the body. I knew I wanted the Hubcap Resonator Cone to sit on the left side of the box and the pickup to be close to the neck.
Note: I don't get into exact measurements in this tutorial because every cigar box is different. If you make a guitar based on these instructions, your routes, cuts and layout will vary depending on the box size. Even if you use the same Padron box shown here, there will still be differences. I've found that two boxes that held the identical cigars can have variances in lid thickness, width and other dimensions.
Remember, cigar boxes are nothing but packaging material to the cigar factories. They're made as cheaply as possible to transport the cigars and look good as a point-of-sale display in a tobacco shop. (This is also a point that makes me love cigar box guitars so much. They shouldn't work, but they do! There's beauty in making a discarded box sing.)
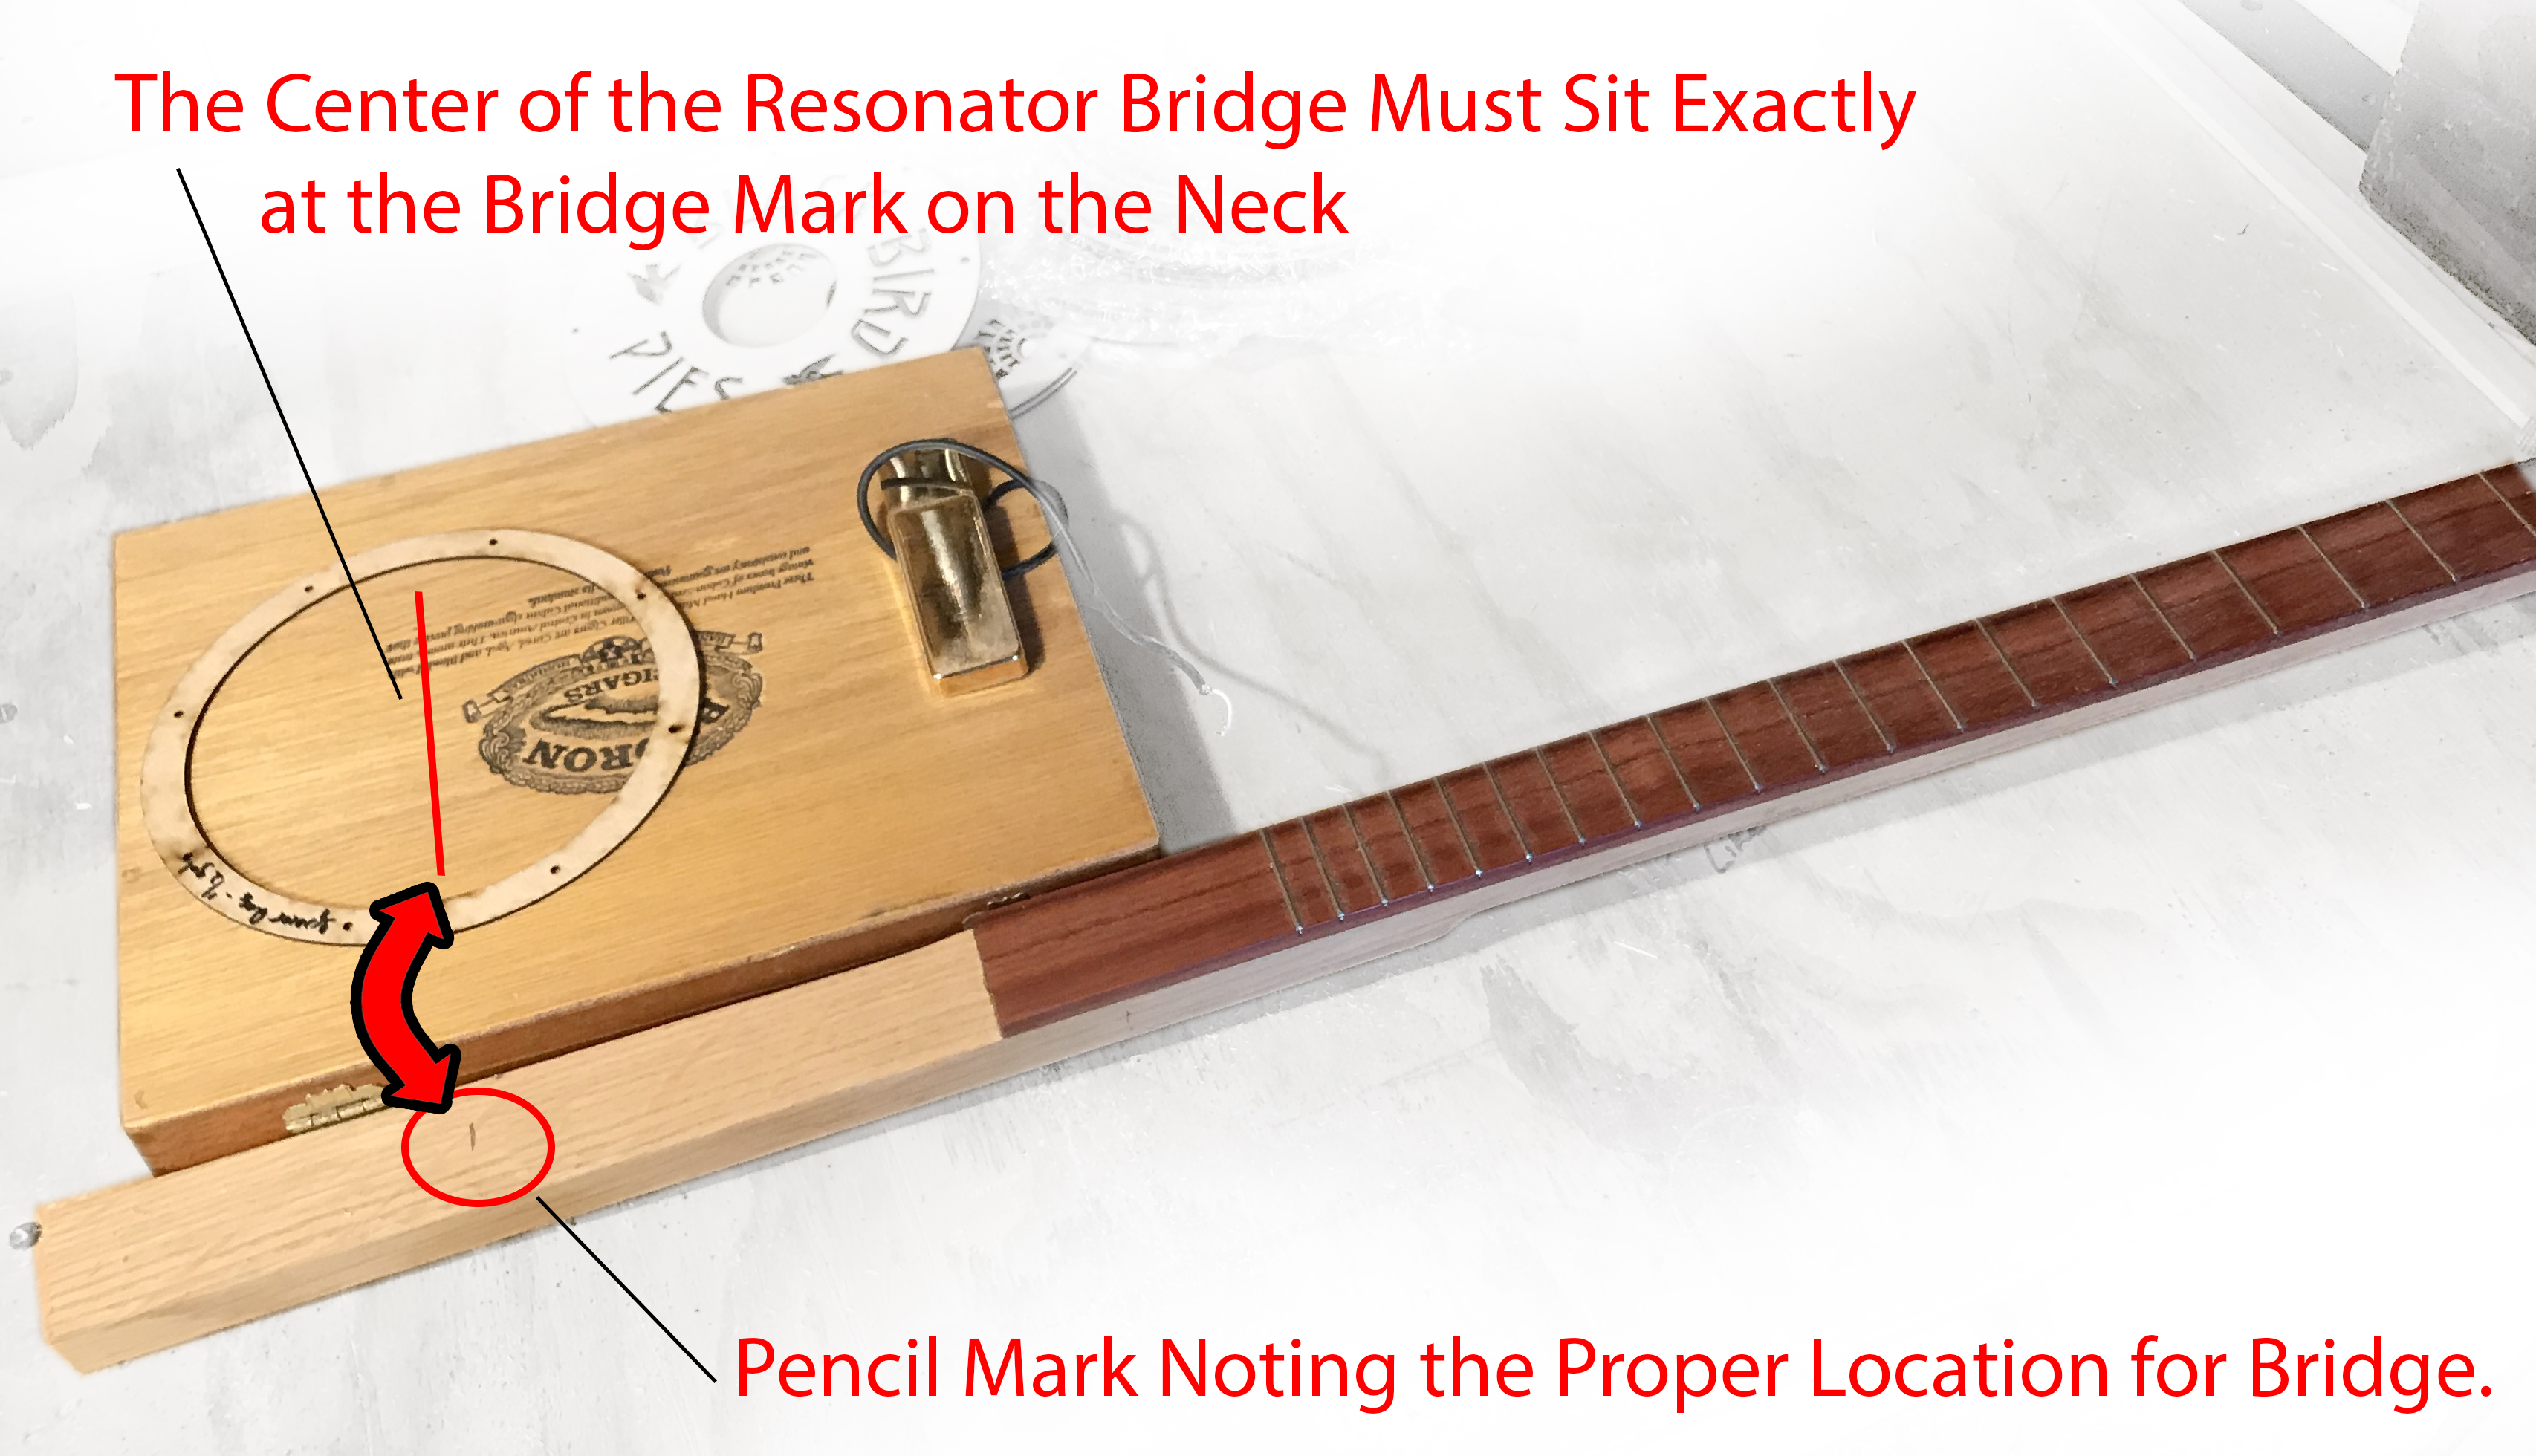
The photo above shows how I determined the bridge location. CBGitty.com Premium Fretted Necks come with a pencil mark showing the proper location for the bridge. When installed, the center bridge location of the Hubcap Resonator Cone must sit directly above the bridge location of the neck.
I marked the box at the location of the bridge and then used the new Hubcap Mounting Rings as my template.
The next steps are covered in the video blog below. They include:
1. Using the Hubcap Mounting Rings as a cutting template
2. Creating the perfect pickup hole in the box using a CBGitty.com Electric Pickup Mounting Route Template
3. Cutting out the Hubcap Reso Cone hole and the pickup hole
4. Removing the extra fretboard wood near the body
5. Problem Solving: Contemplating string height by determining how deep I should route out the Hubcap space on the neck-through area.
6. Routing areas in the neck-through area by using a Forstner Drill Bit and a drill press.
7. Routing even deeper to make the Hubcap Reso Cone fit and determining that I need a scrap piece of wood to "beef up" the neck-through area.
Here's some photos to go along with the video blog to show extra detail:
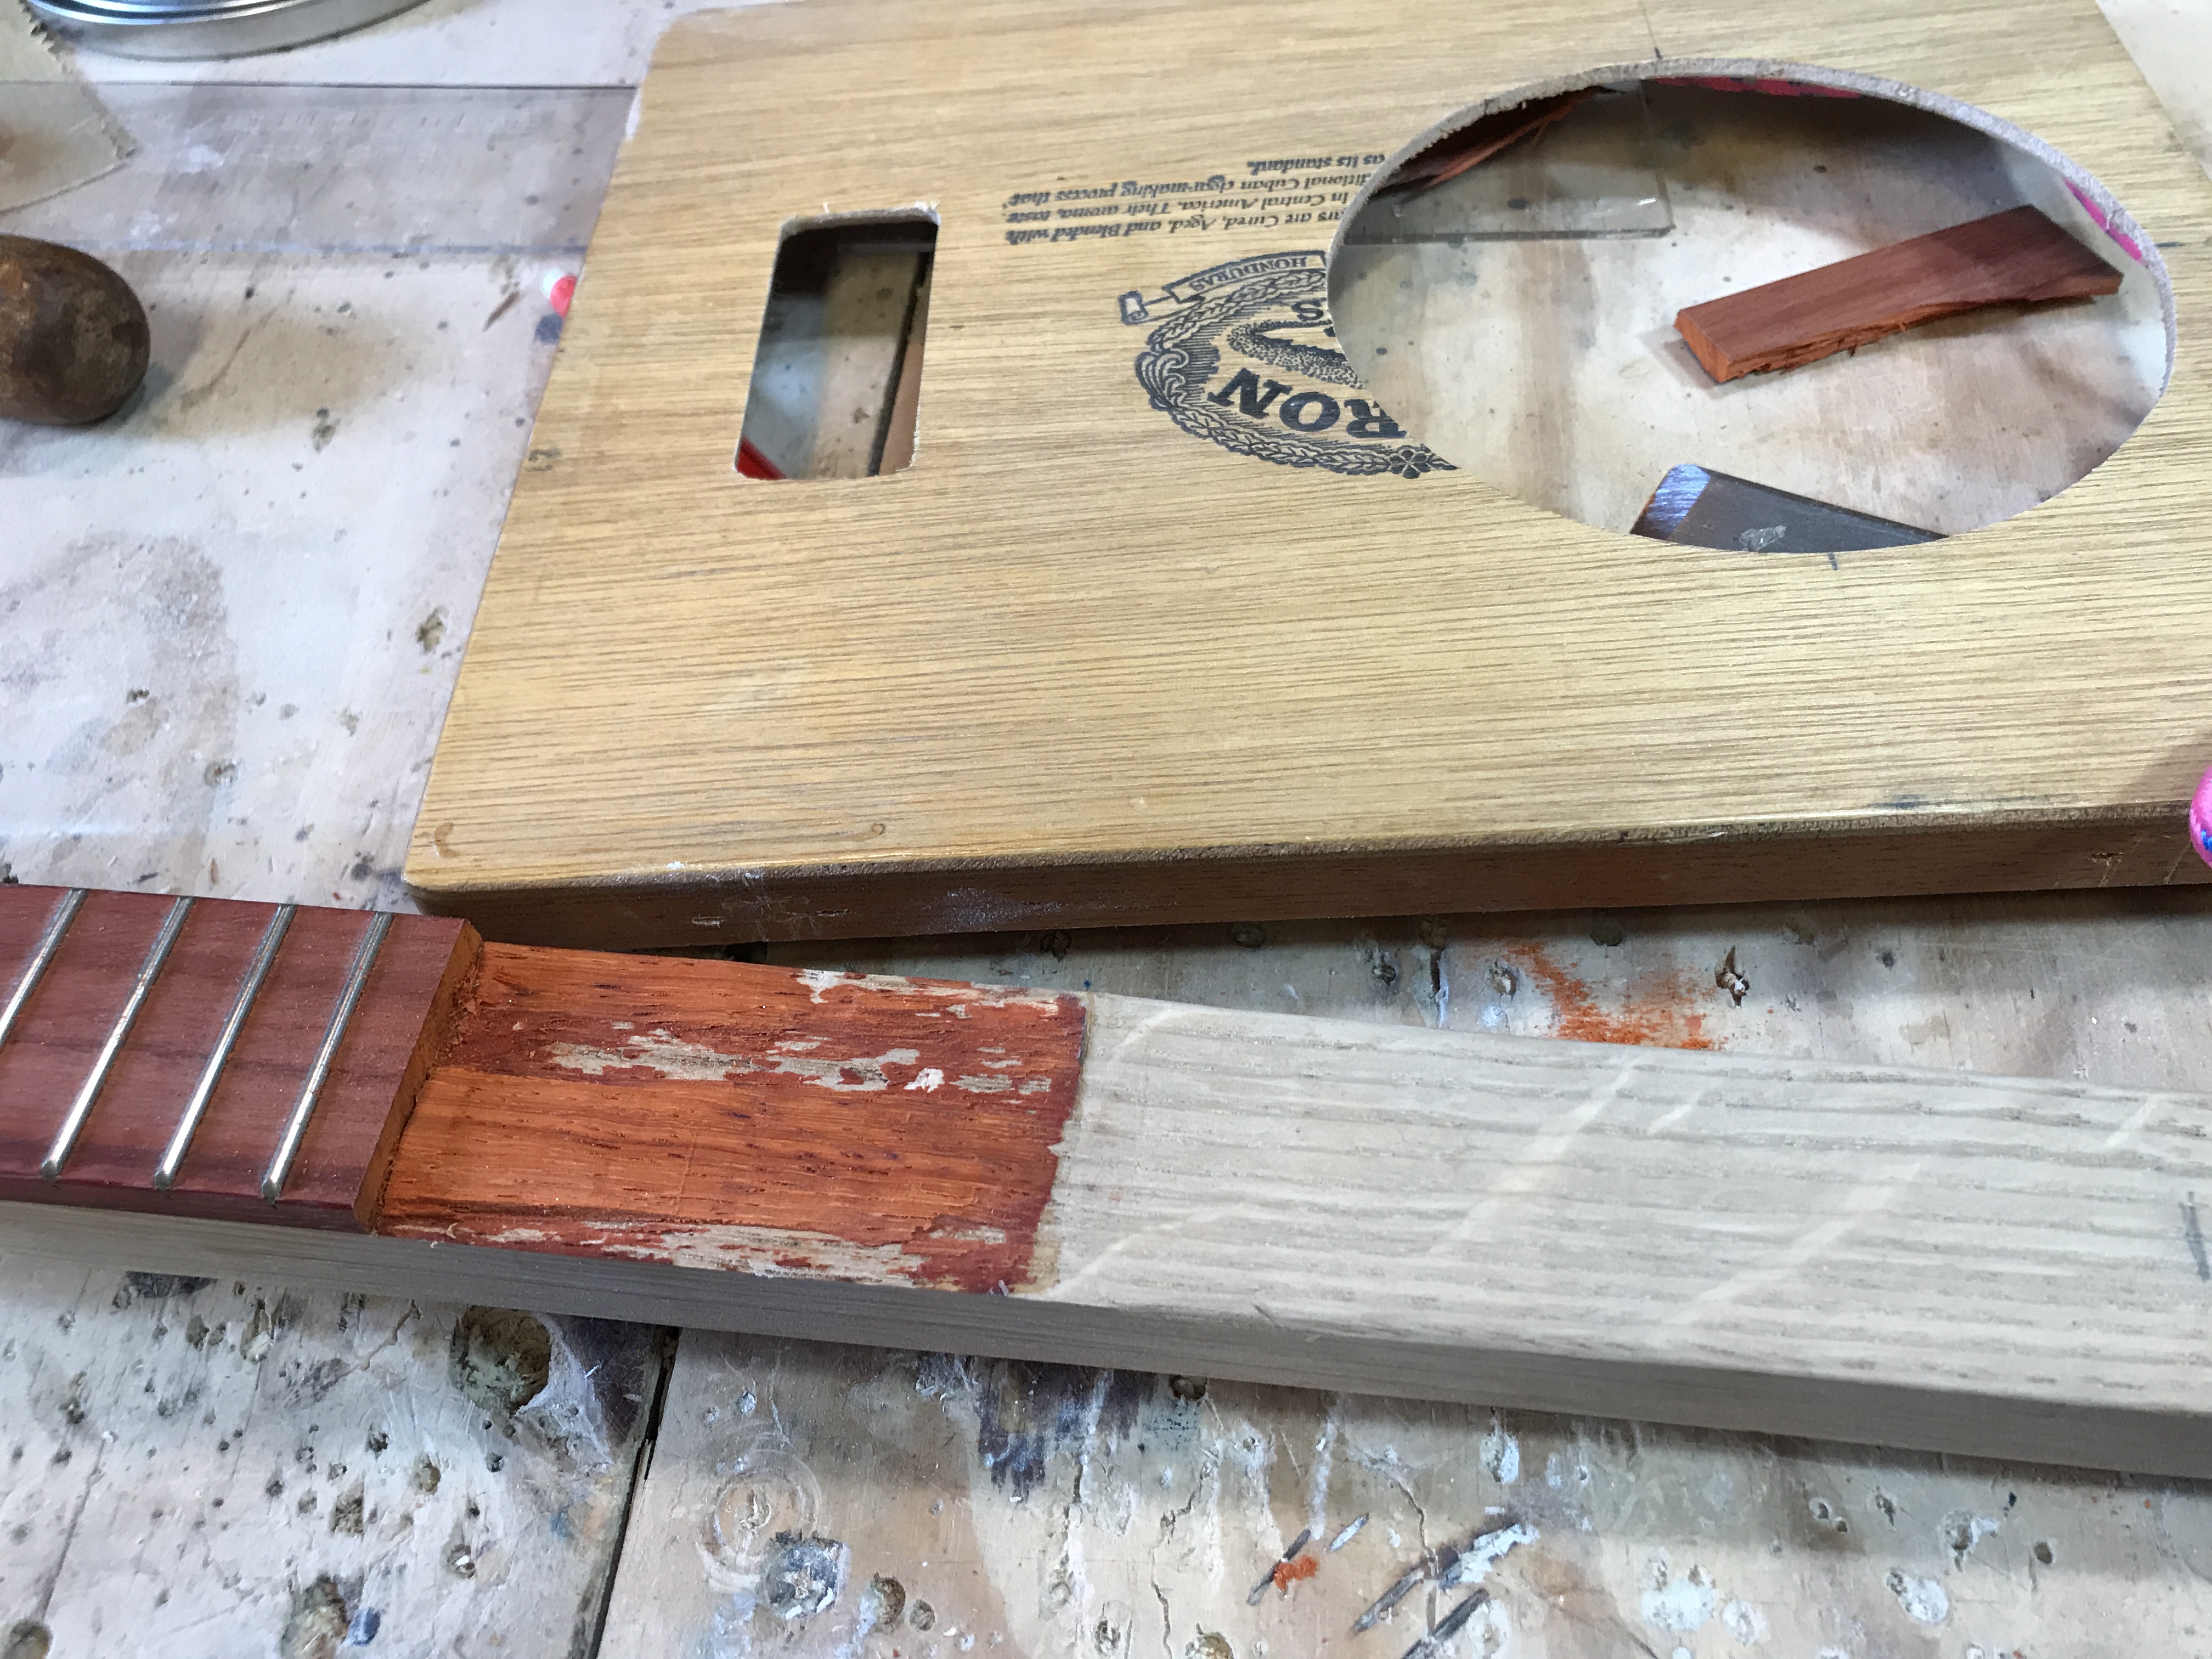
Above: You can see the area of the fretboard that I started to remove. CBGitty.com uses some pretty tough glue on their necks, so it a sharp chisel with gentle strokes to clean all the old padauk fretboard off the white oak neck.
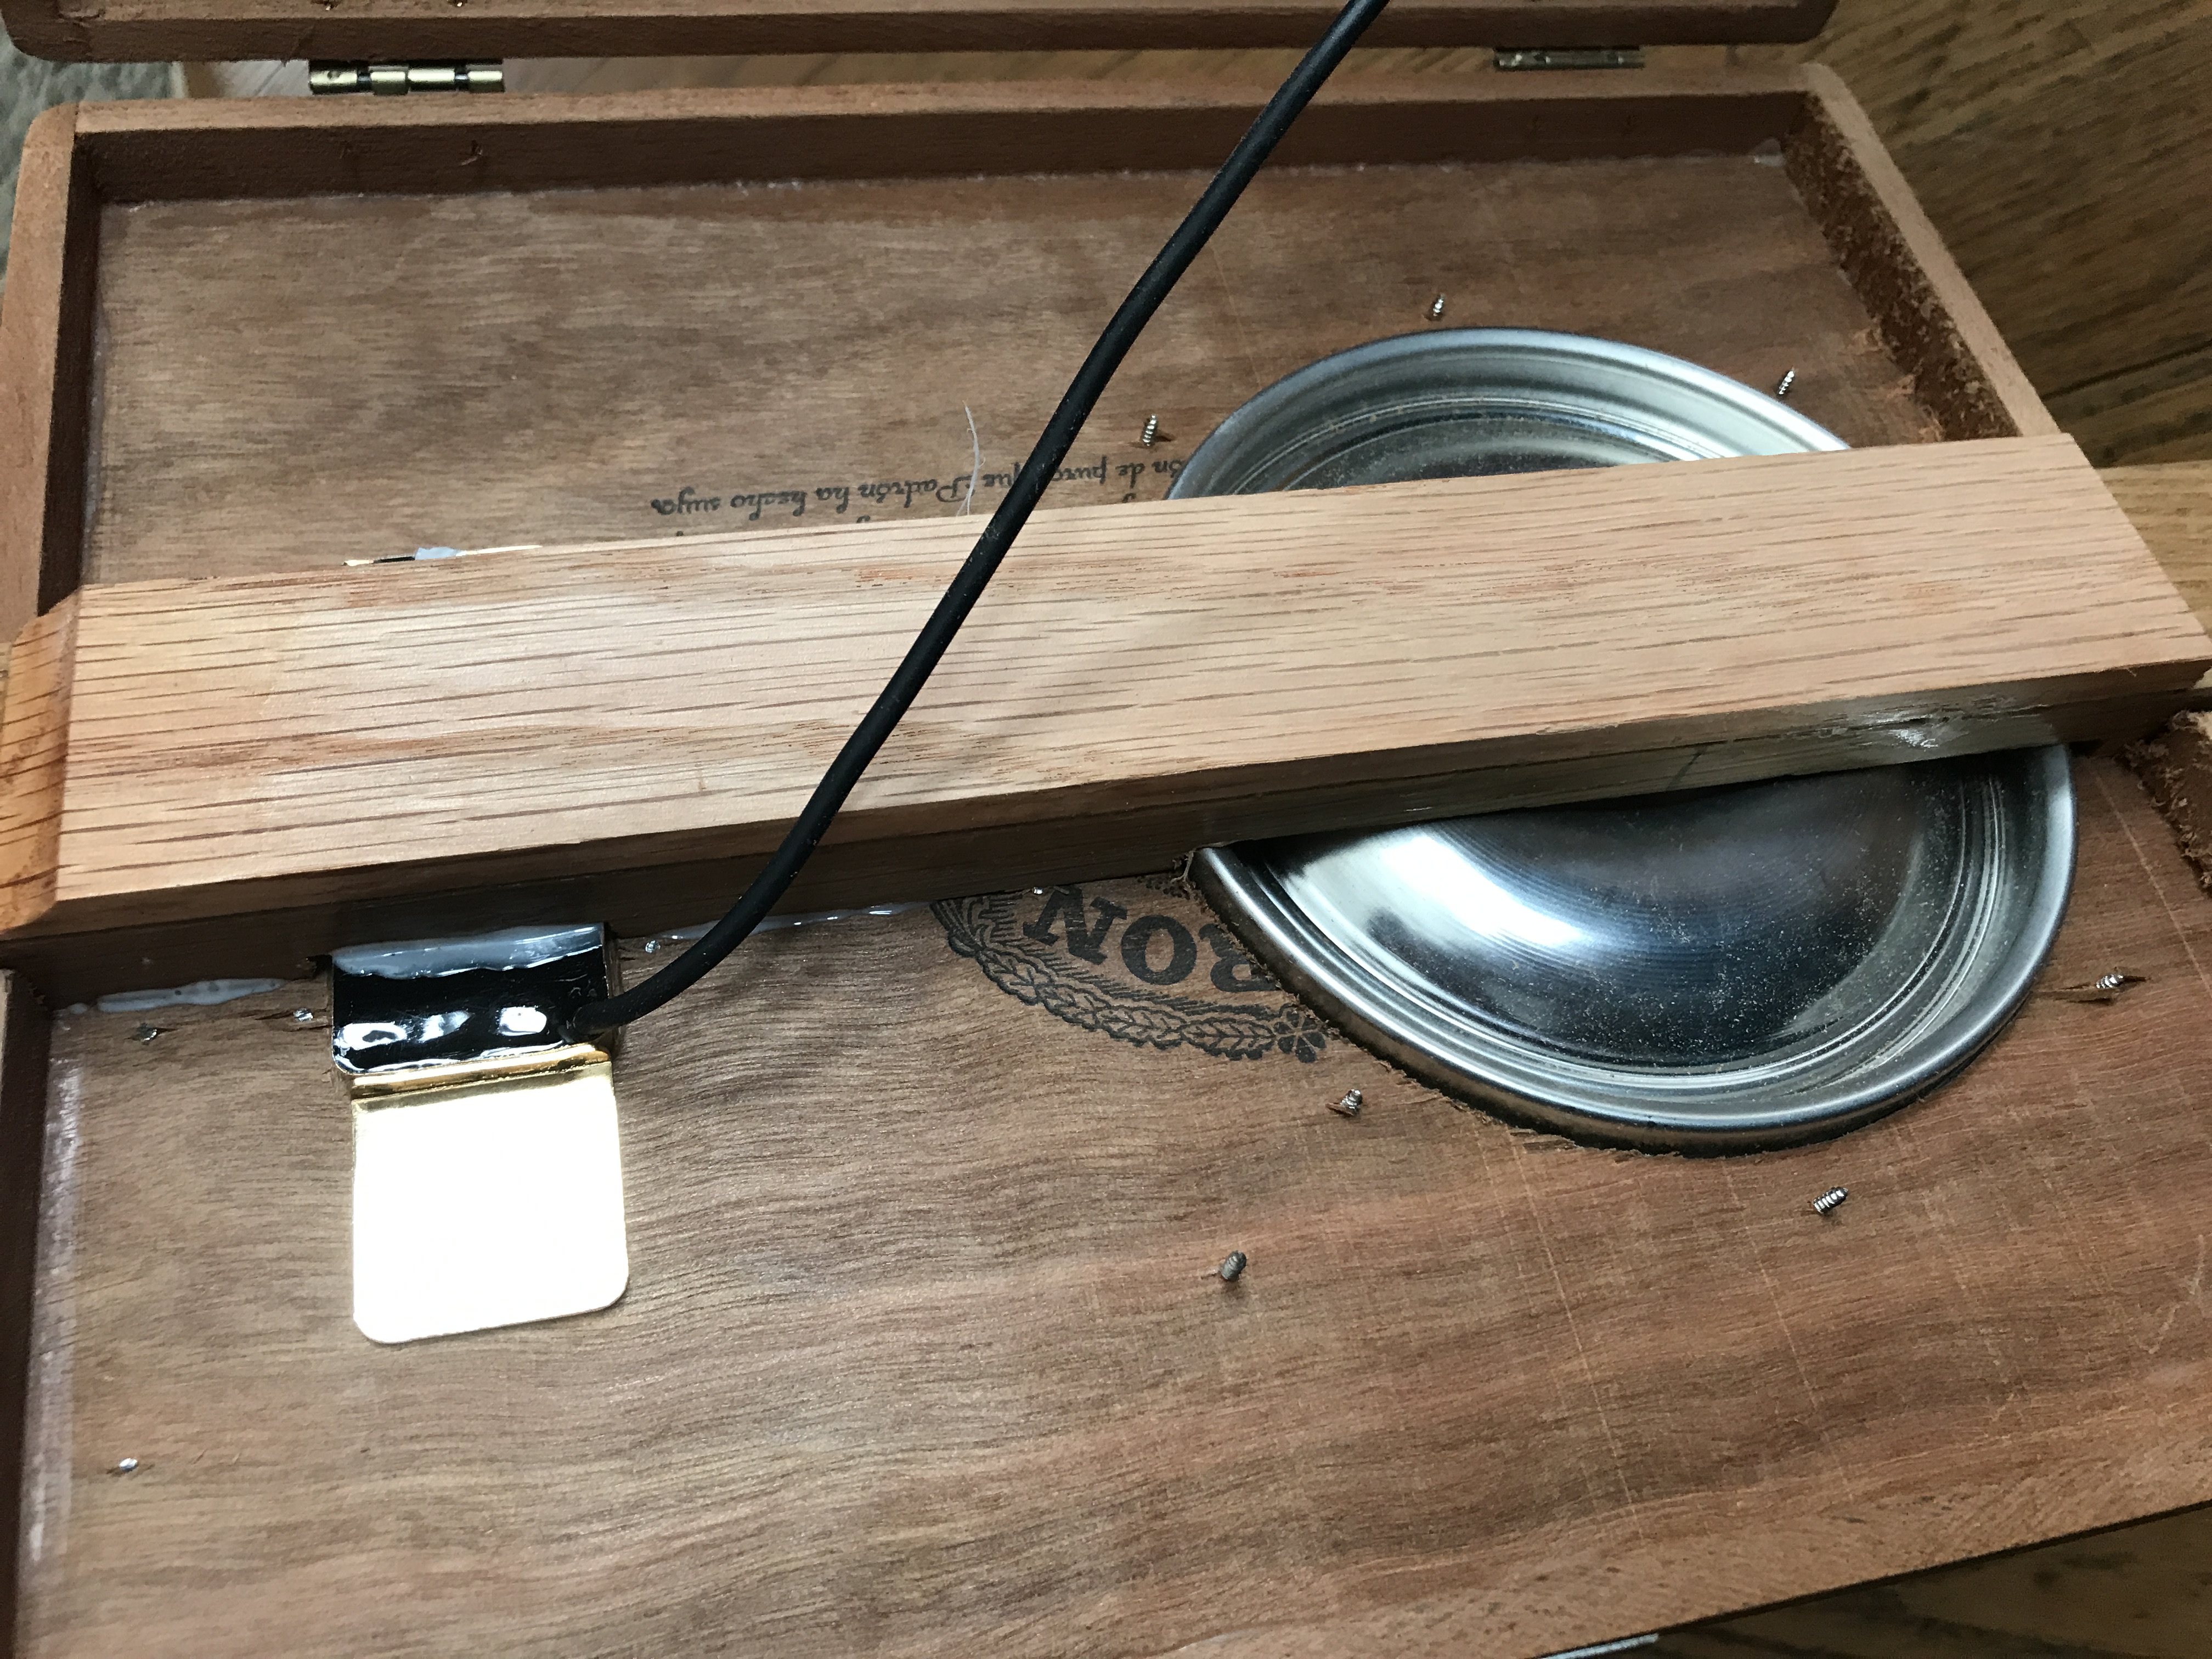
Above: Here is the extra strip of red oak that I glued to the back of the neck, making it stronger and less prone to warpage. The scrap wood only covers the part of the neck inside the box and does not extend past the box lid. (This photo was taken after the completion of the guitar and shows the pickup and Hubcap Resonator Cone mounted on the body. That's E6000 heavy duty glue joining the pickup and neck to the box. You can find it at any big box or craft store.)
One other note on the photo above: Notice how all the parts fit together like a puzzle. The more you measure and double check, the tighter parts will fit. Take your time and enjoy the process.
Now I have a great fit between the box, the parts and the neck. My next step will be to create an iconic headstock in Part 3.
Click here for Part 3: Create This Pearloid Headstock
Recent Posts
-
Steve Holladay's "Pocket Box Guitar"
If you're a member of the Friends of C. B. Gitty group on on Facebook, you've probably seen some of …14th Jan 2026 -

2024 World's Wildest Electric Cigar Box Guitar Build-Off Winners!!!
C. B. Gitty Crafter Supply is proud to announce the winners of the 2024 "World's Wildest Electric Ci …31st Oct 2024 -
")
Improved C. B. Gitty: Easier Than Ever! (Work in Progress)
Ben “Gitty” has been cleaning house, making our website even easier find your favorite parts, kits a …7th Oct 2024