

The Illuminated Fretboard - A Builder's Diary
Recently, Gitty customer Vince Wesley sent us a couple of pictures of recent builds, and one of them really "shone" - a homemade ukulele with light-up fret position markers! In the builder's diary below we'll share Vince's photos and step-by-step journal of how he created this strikingly unique instrument. - Ben Gitty
Vince writes:
Following are 16 pics that show the main steps in my build of a CB Ukulele with illuminated fret markers. The technique could be used for any instrument with an applied fingerboard. Please excuse the old desk calendar pages under the work: I use them to stop small parts from falling through the dog holes in my workbench! You asked, “what inspired it?” I’ve had guitars and basses with fret markers that are hard to see, especially on a darkened stage. I wished I could light them up! I devised this technique, that will work for an instrument without a truss rod. It worked so well, I plan to make other ukes, and CBGs this way! And it just looks cool!
Here is how Vince managed the wiring and building of his light-up fretboard.. Each photo is below its description.
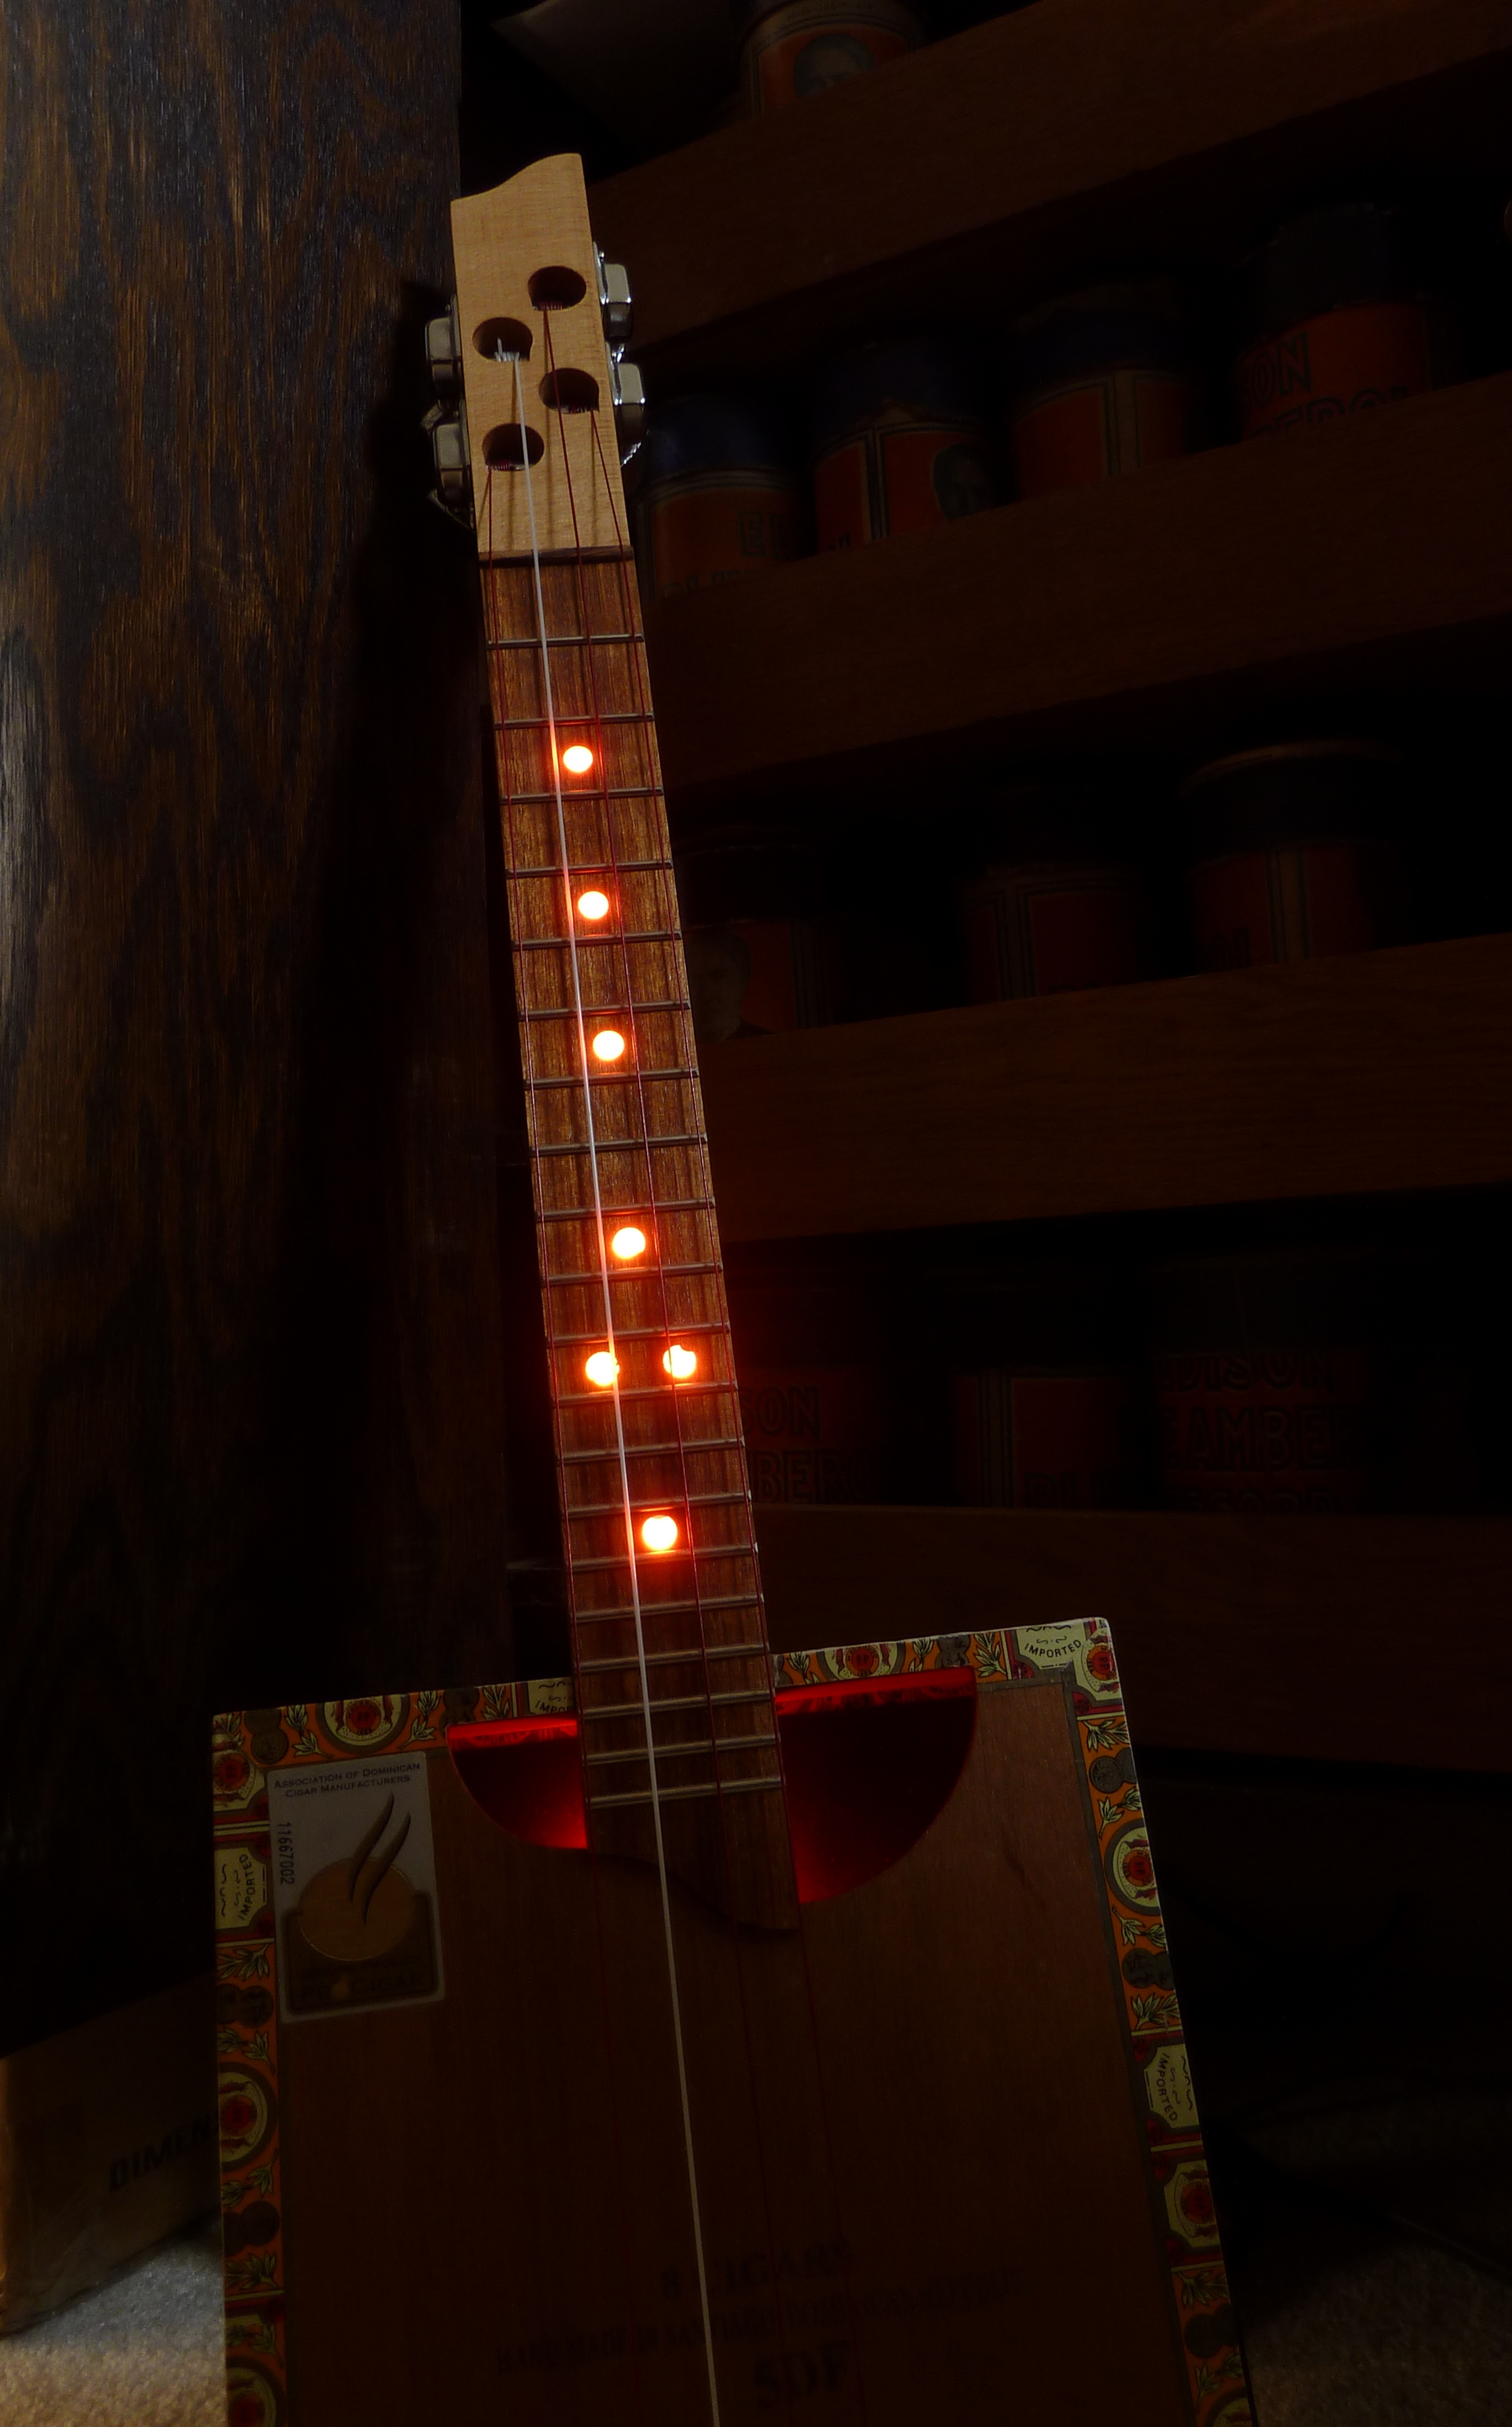
Photo 1: Here is the finished Tenor Ukulele (third from right) with illuminated fret markers, amongst some other of my builds.
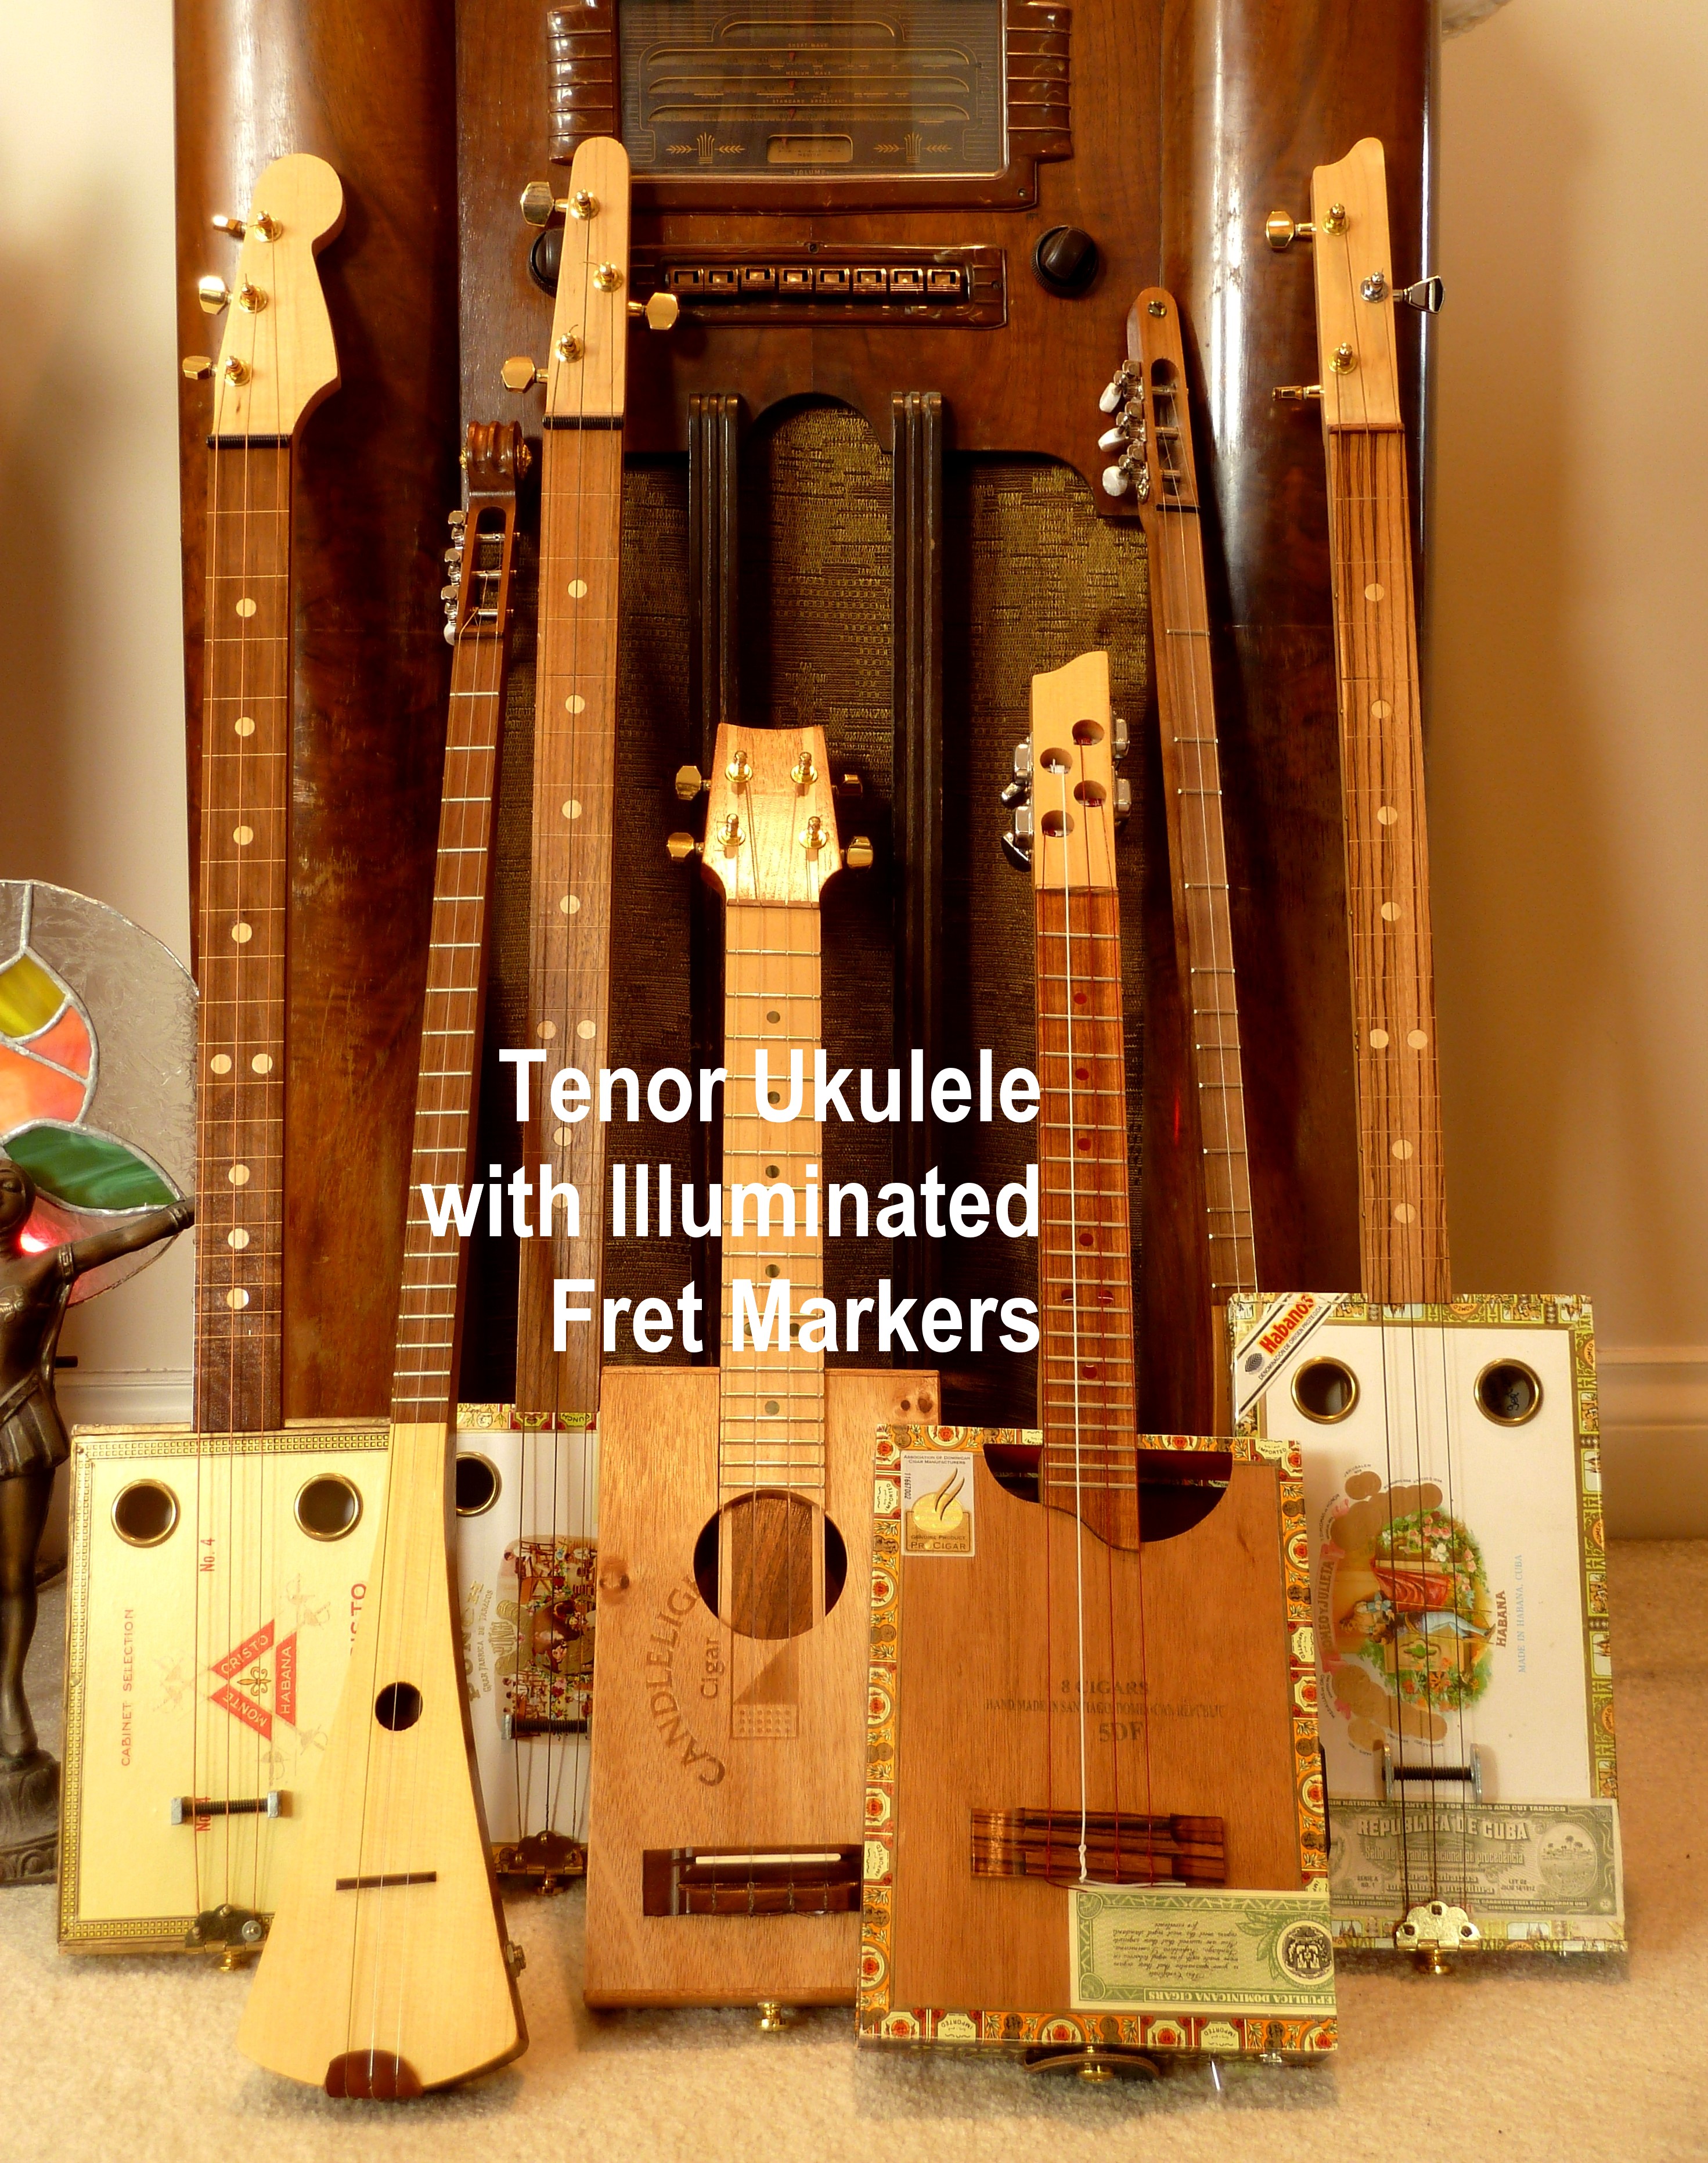
Photo 2: First, I needed to determine the exact location that the fretboard would sit on the neck. I wanted to fit the fretboard into the pocket on the cigar box, so first I roughly cut the sound hole, which would be on either side of the fretboard.
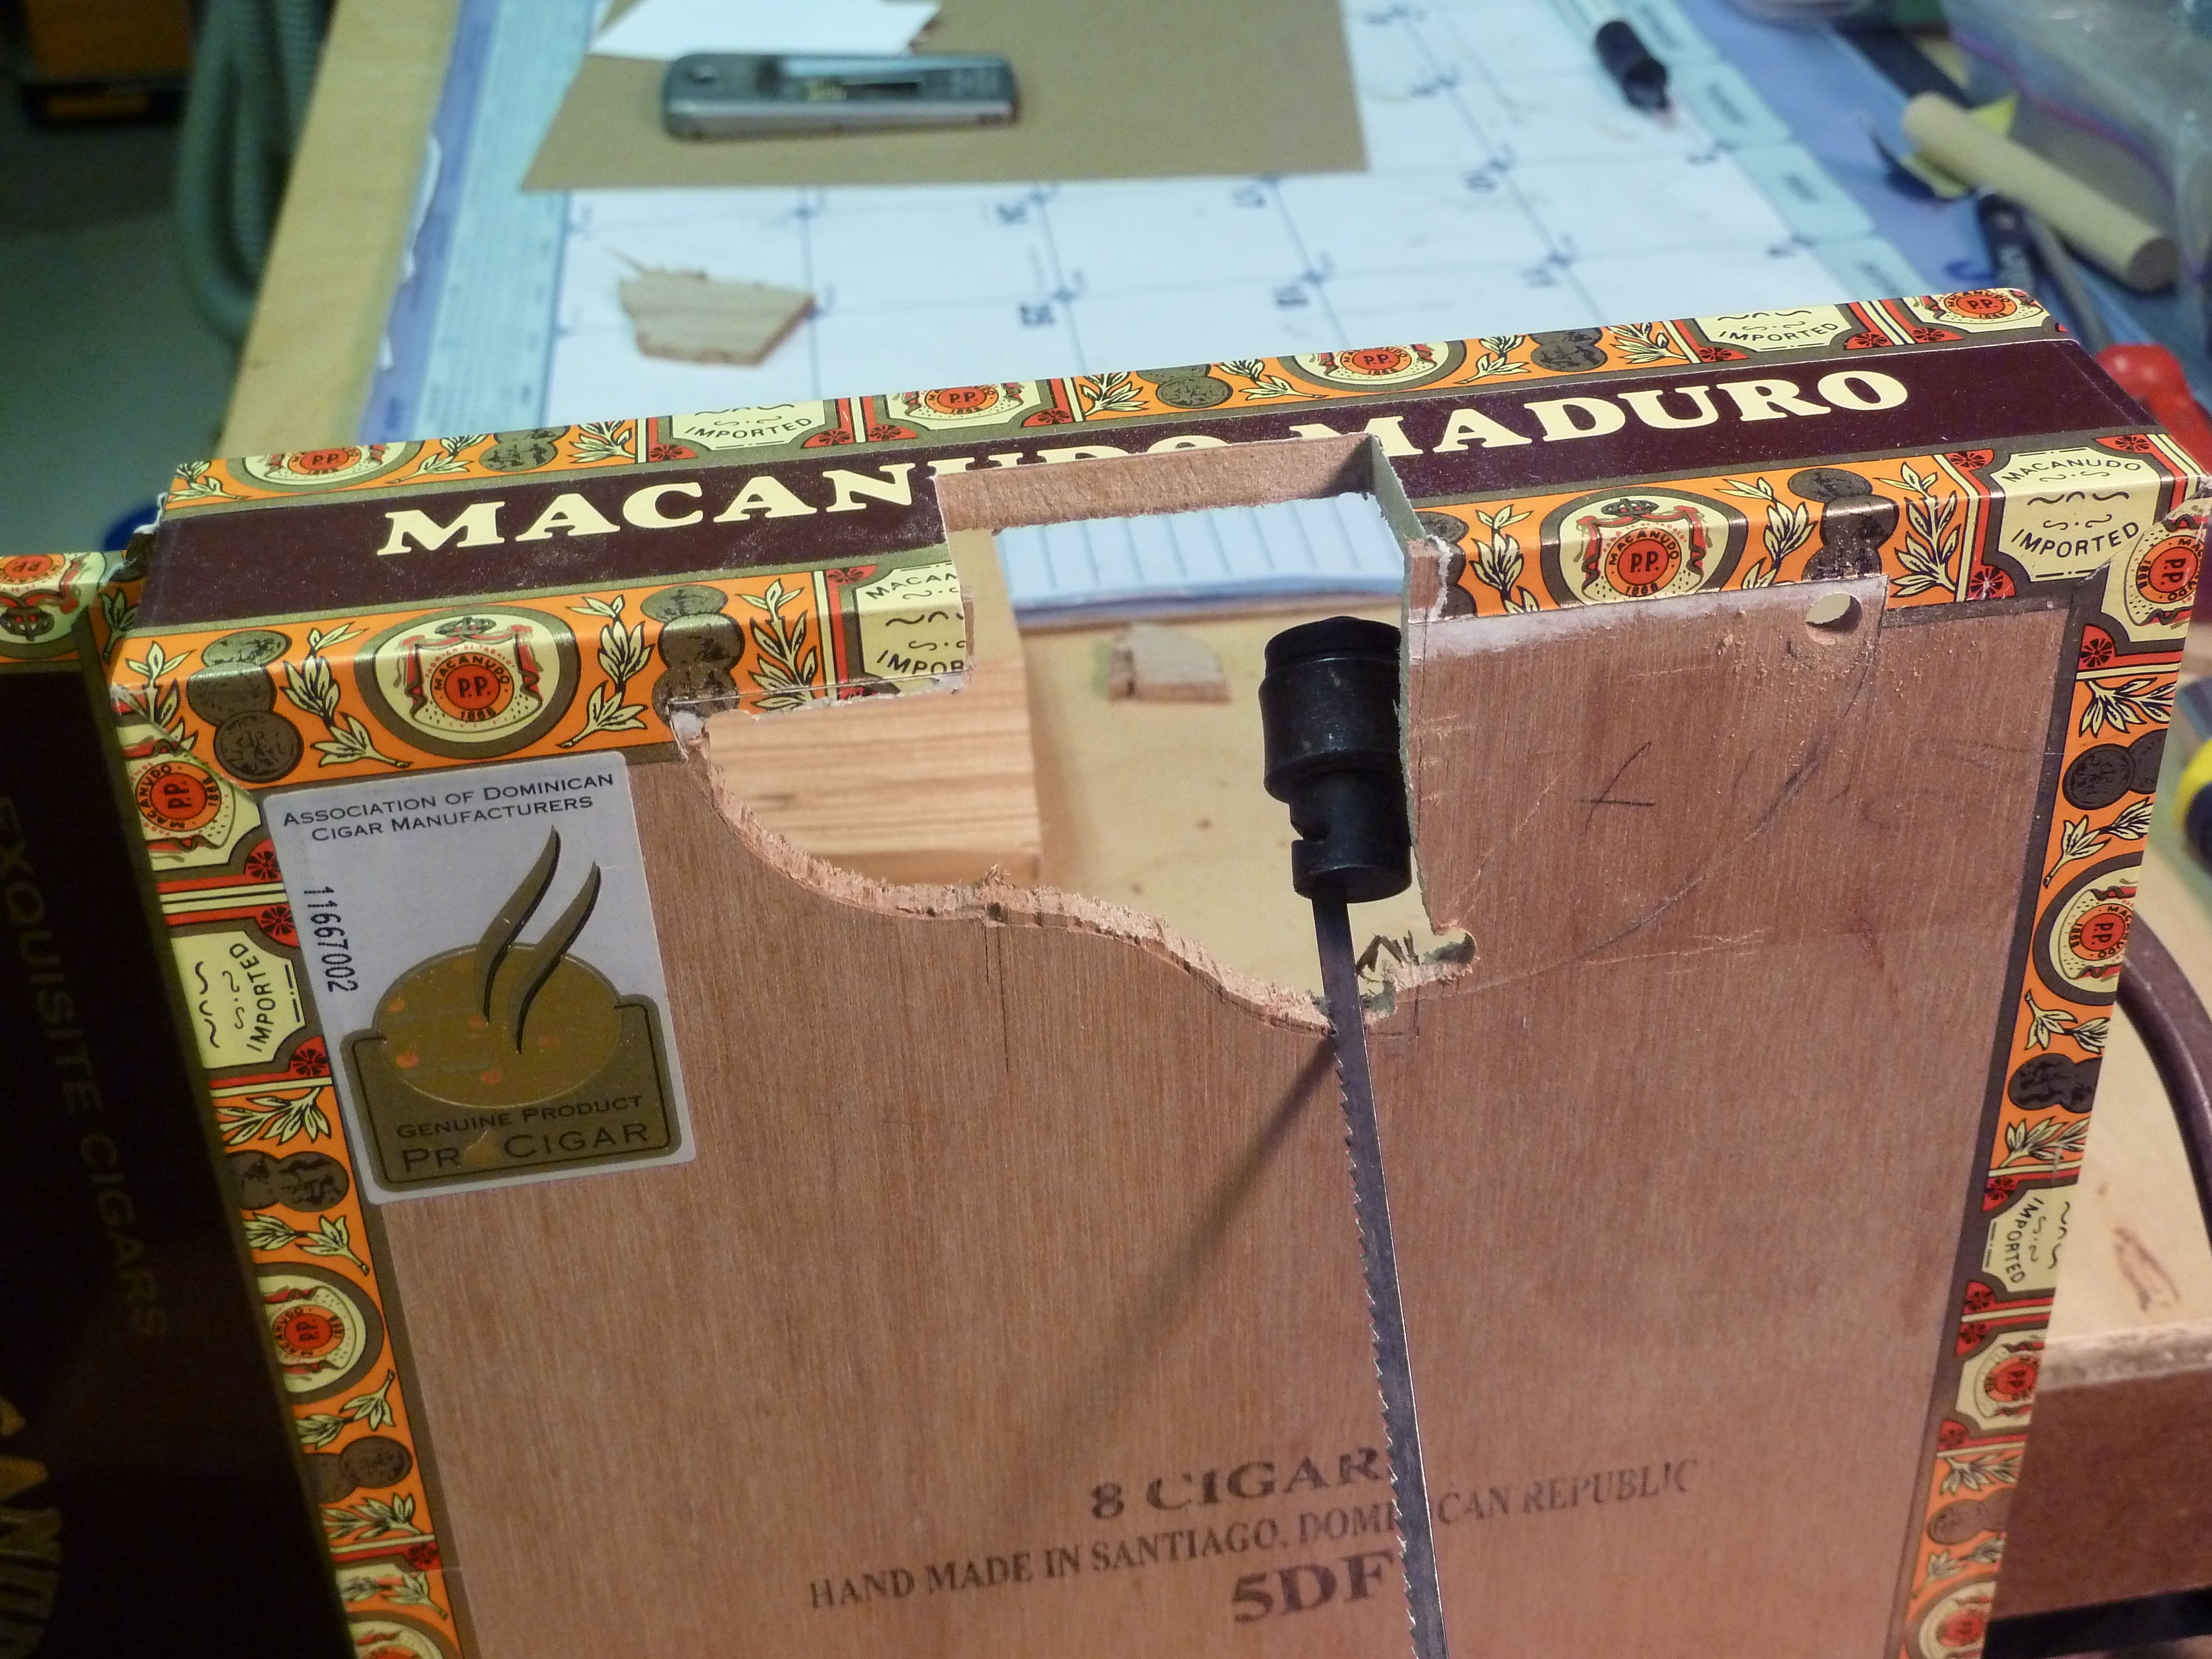
Photo 3: Here the rough-cut sound hole and neck pocket are finished.
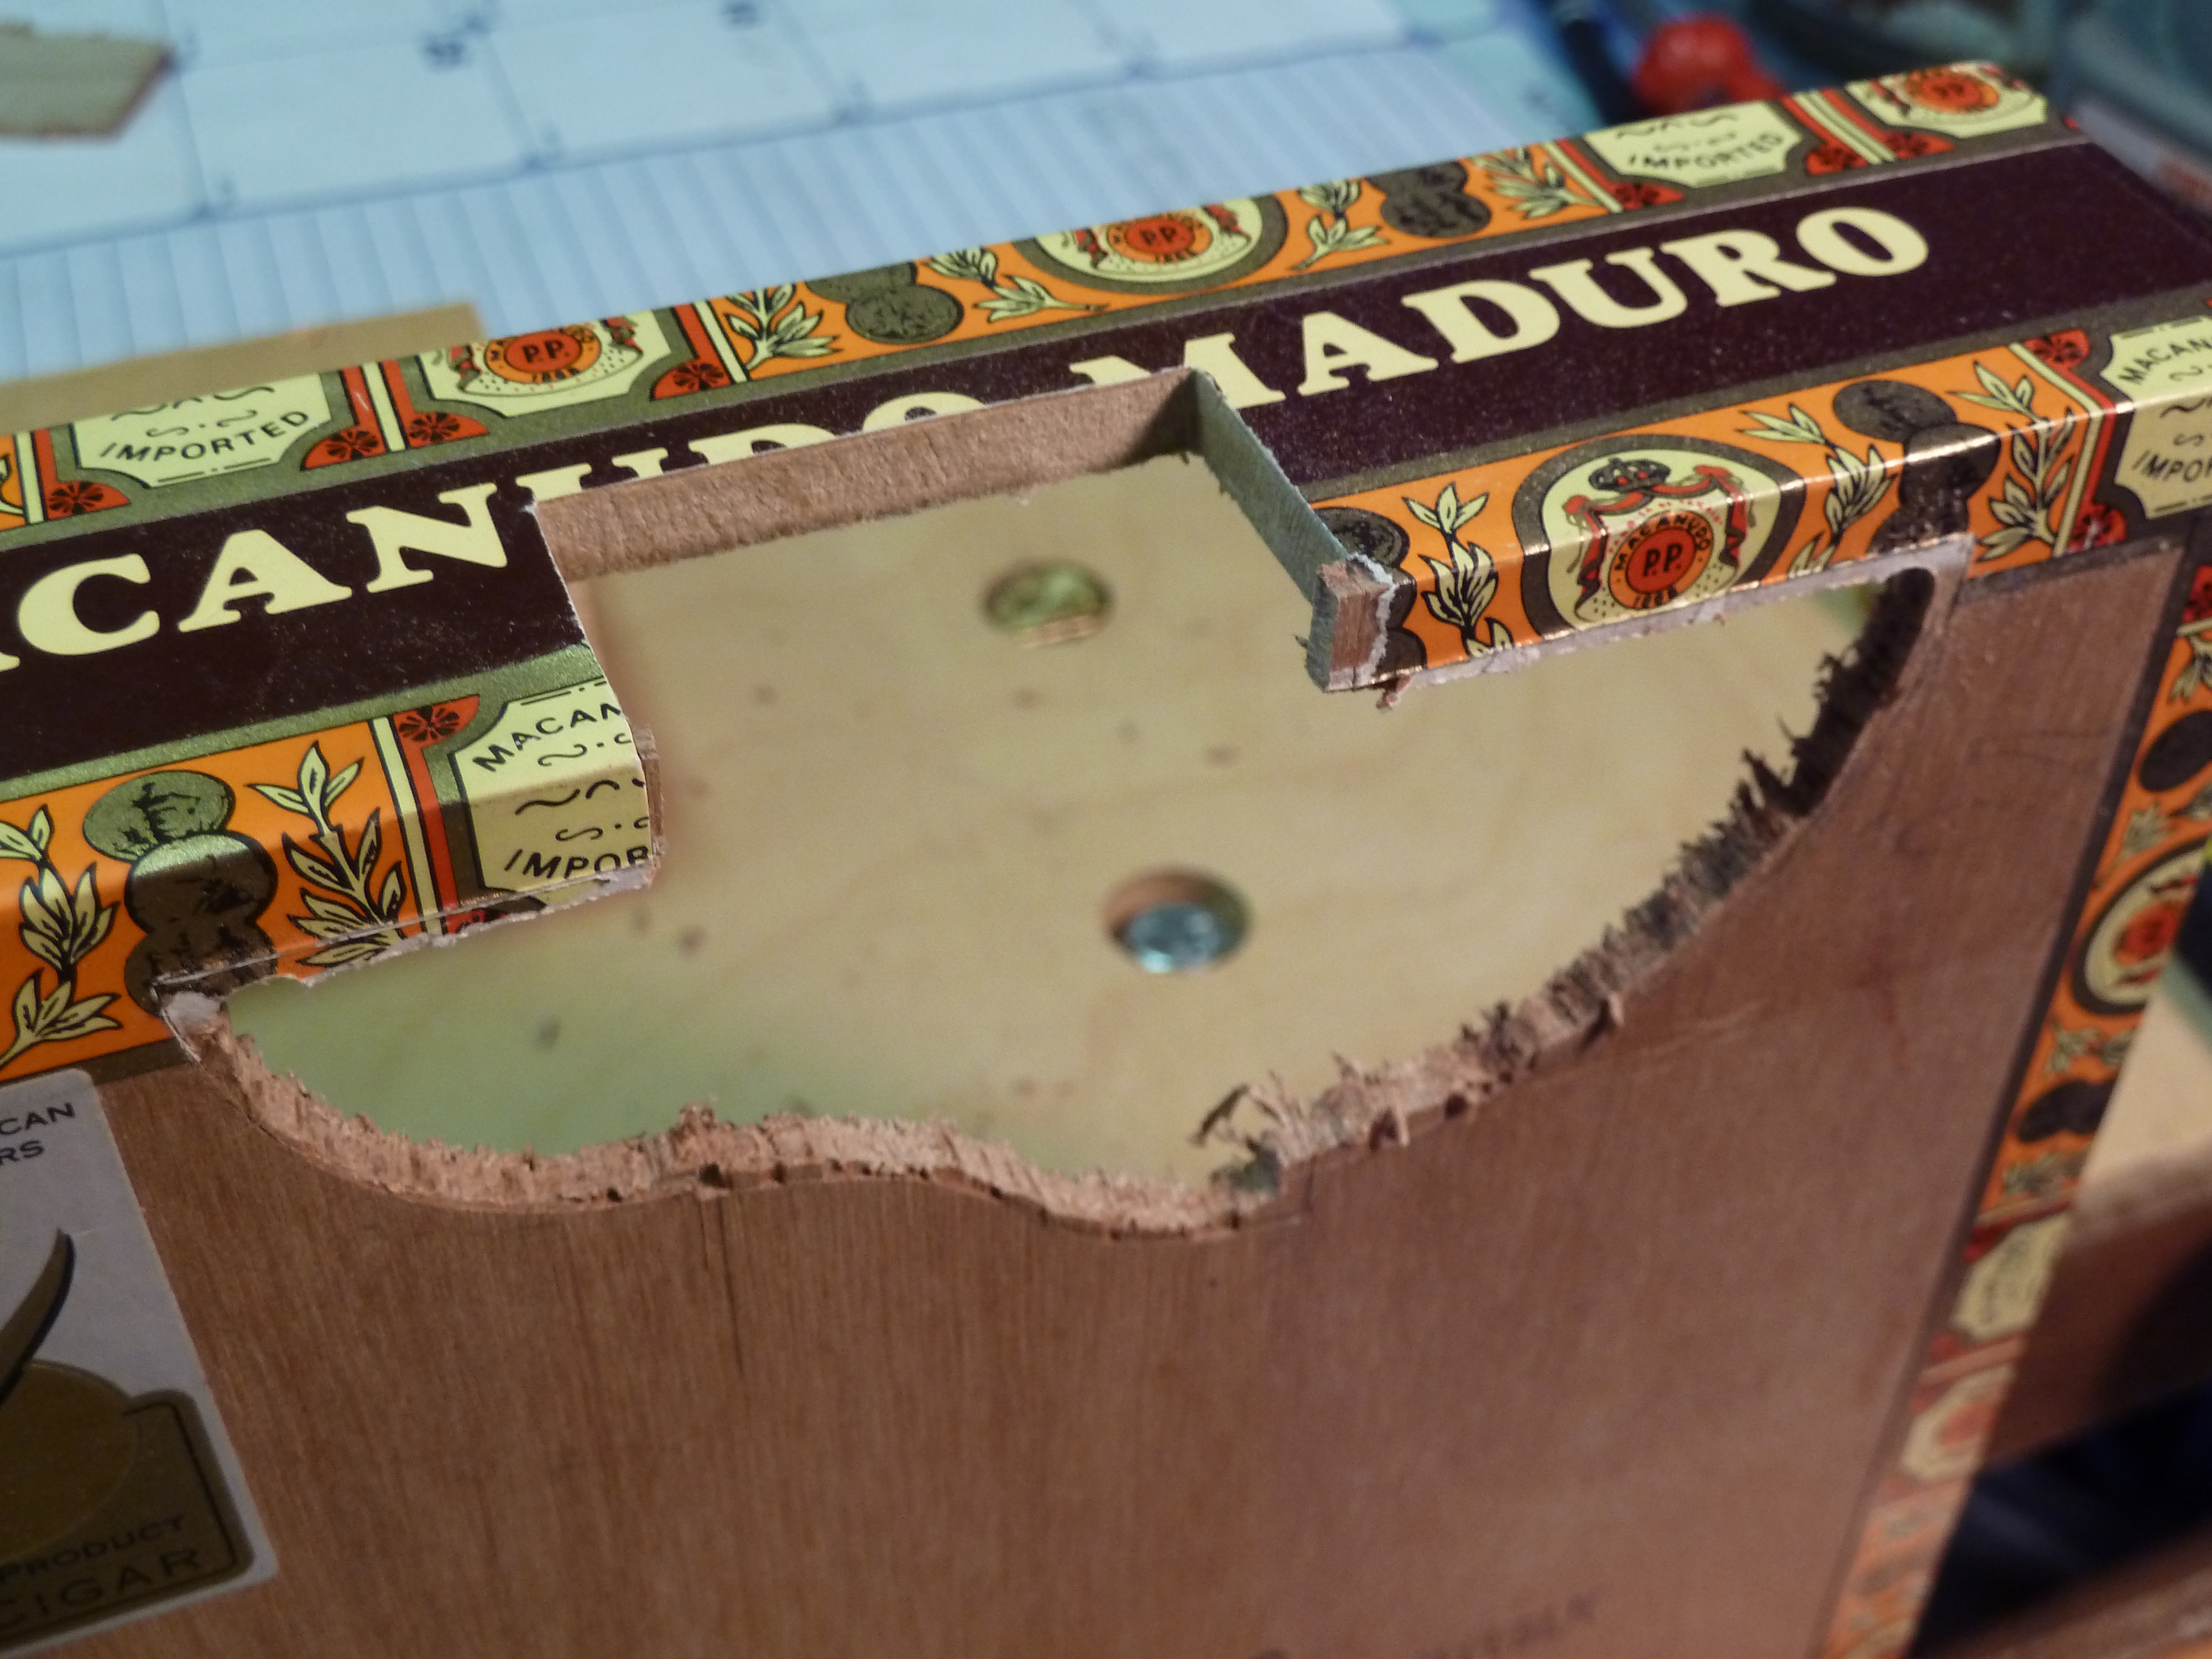
Photo 4: After filing the sound hole cleanly, I dry fitted the fretboard in its final position, with its end cut to fit nicely into the shape of my sound hole cutout.
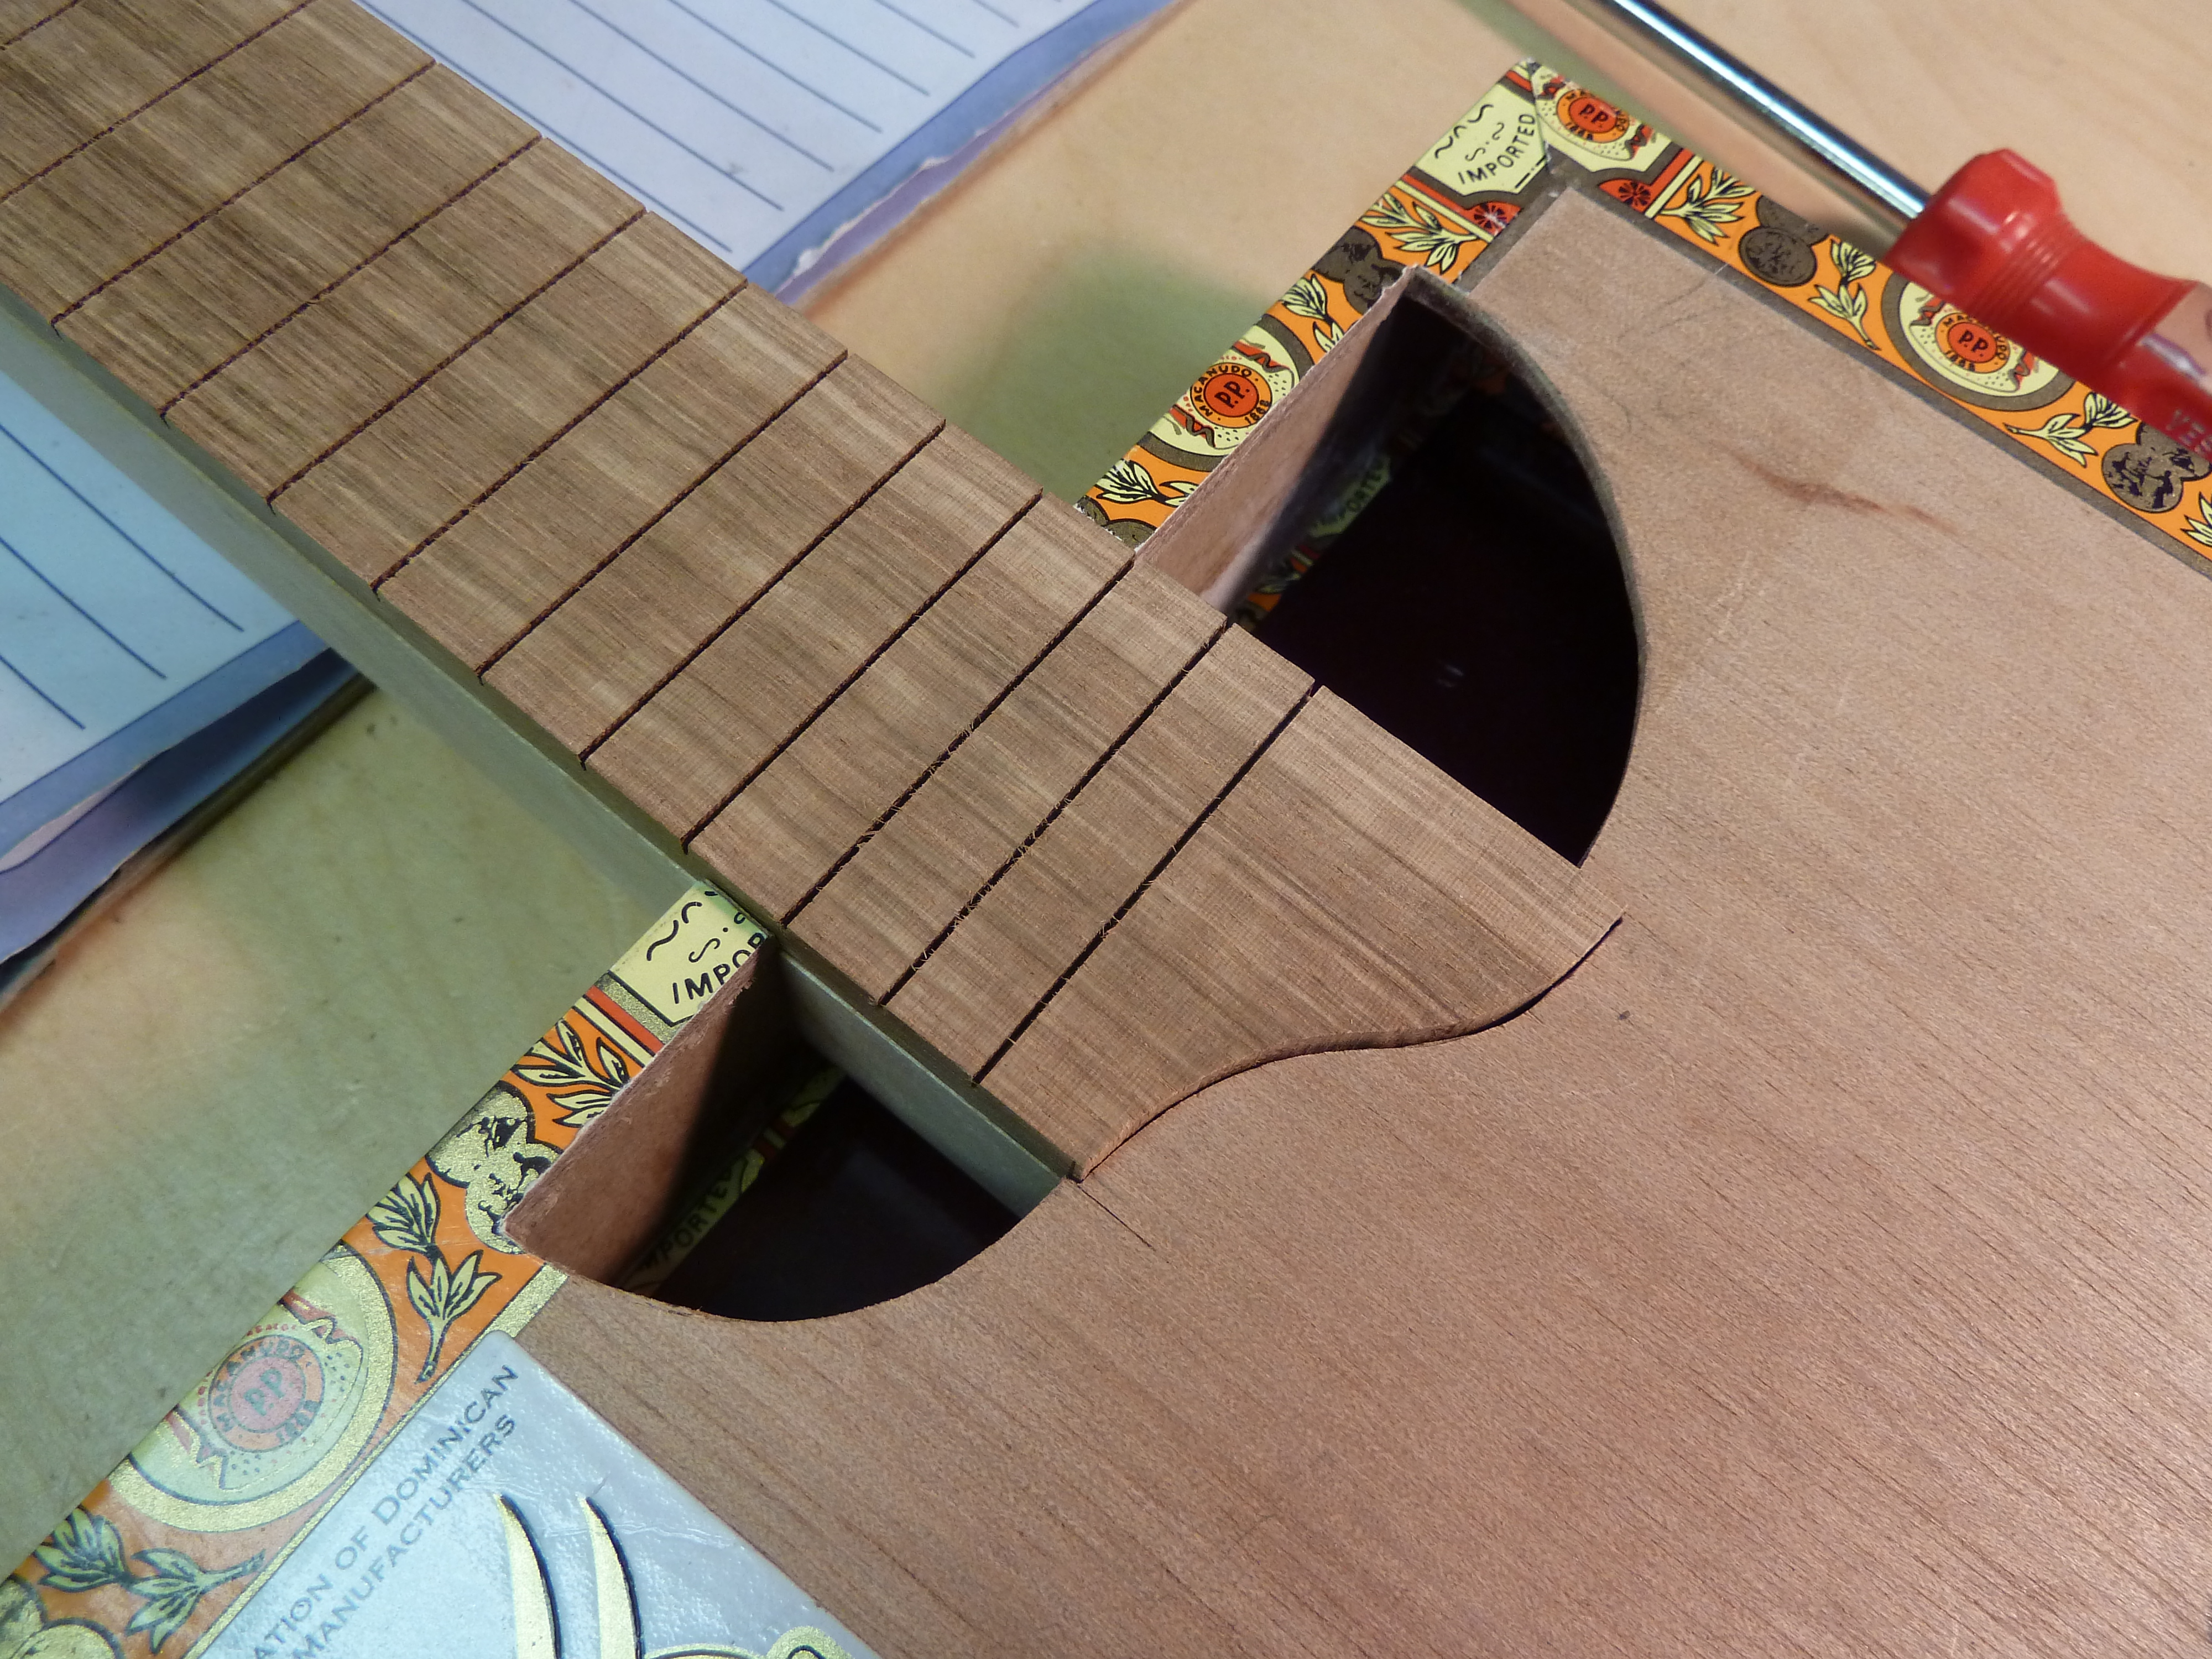
Photo 5: Next, I drilled the fret markers through the fretboard. (I was making another ukulele at the time, and the fretboard behind shows stopped pockets drilled for its markers.) I placed the drilled-through fretboard in place on the neck, and with a pencil in each hole, I marked each dot’s position.
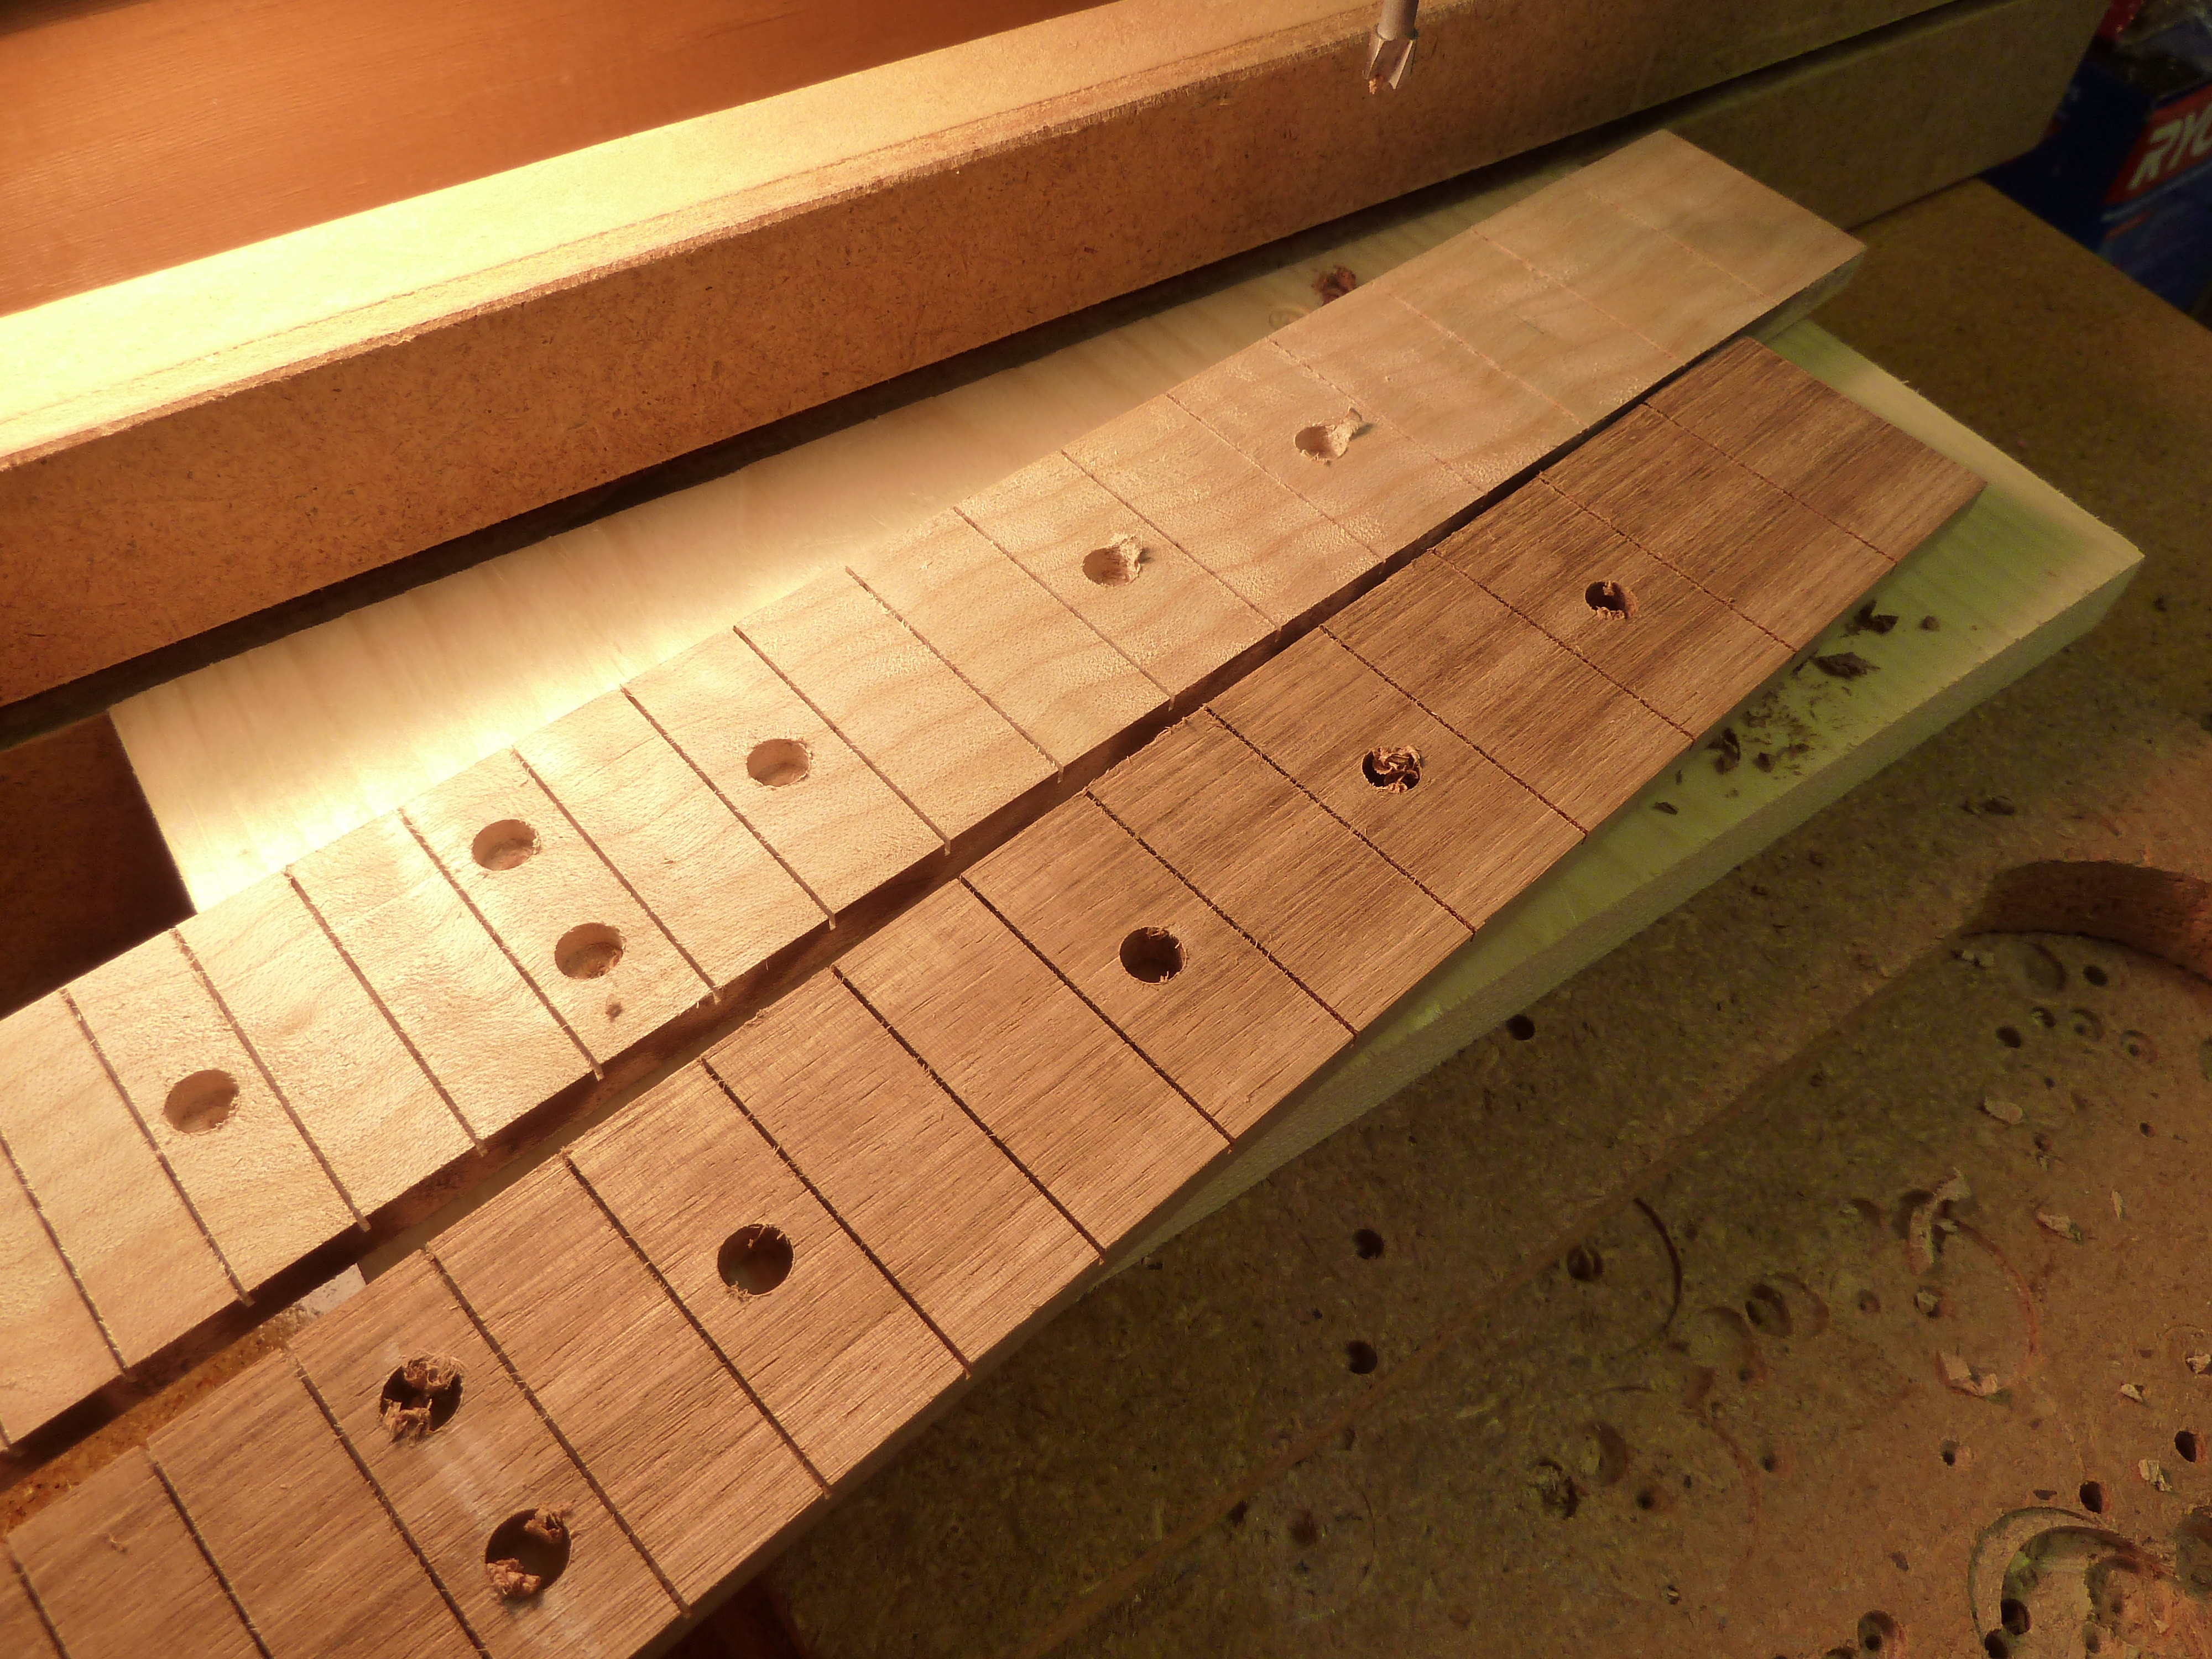
Photo 6: This back view of the fretboard shows the red plastic markers already inserted from the other side. I had drilled the fret markers using a plug cutter, and pressed them into the face of the fretboard. I like to cut the markers from semi-transparent plastic pen blank material; in this case, colored red. Many other colors are available.
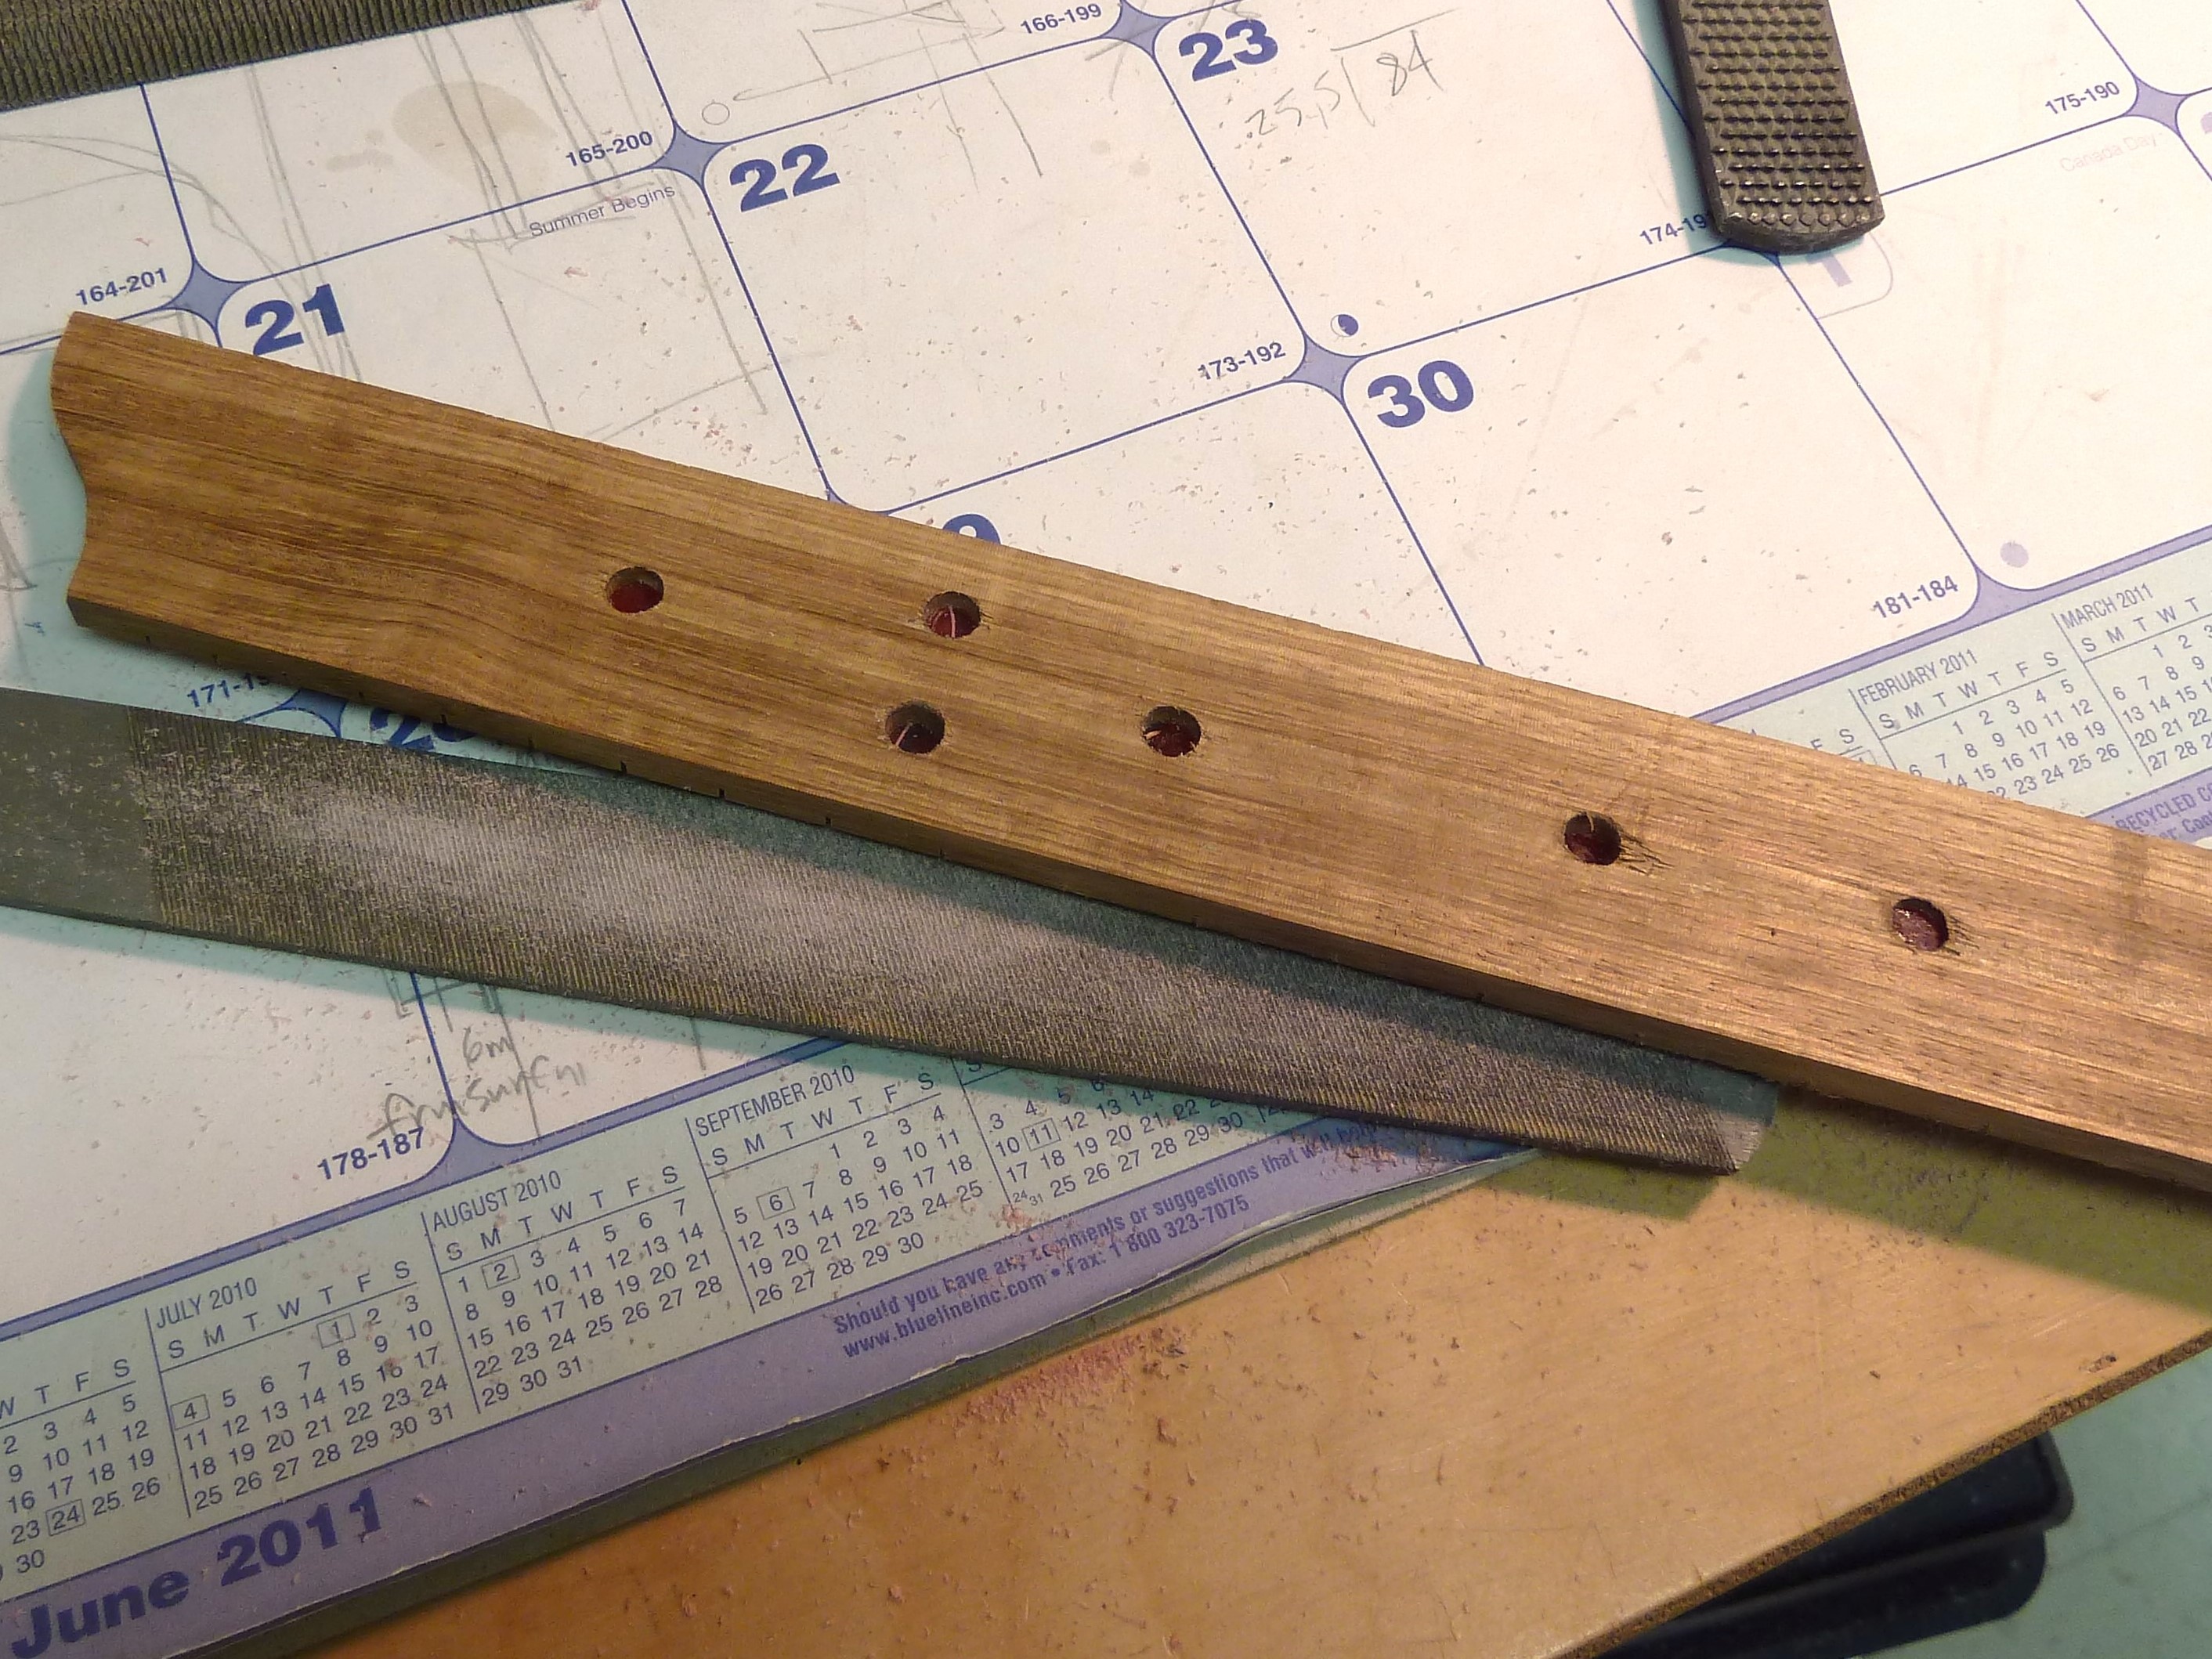
Photo 7: I set up the router table to cut the groove in the neck in which to bury the LED strip. I needed the tape as a reference to see where to start and stop routing the neck.
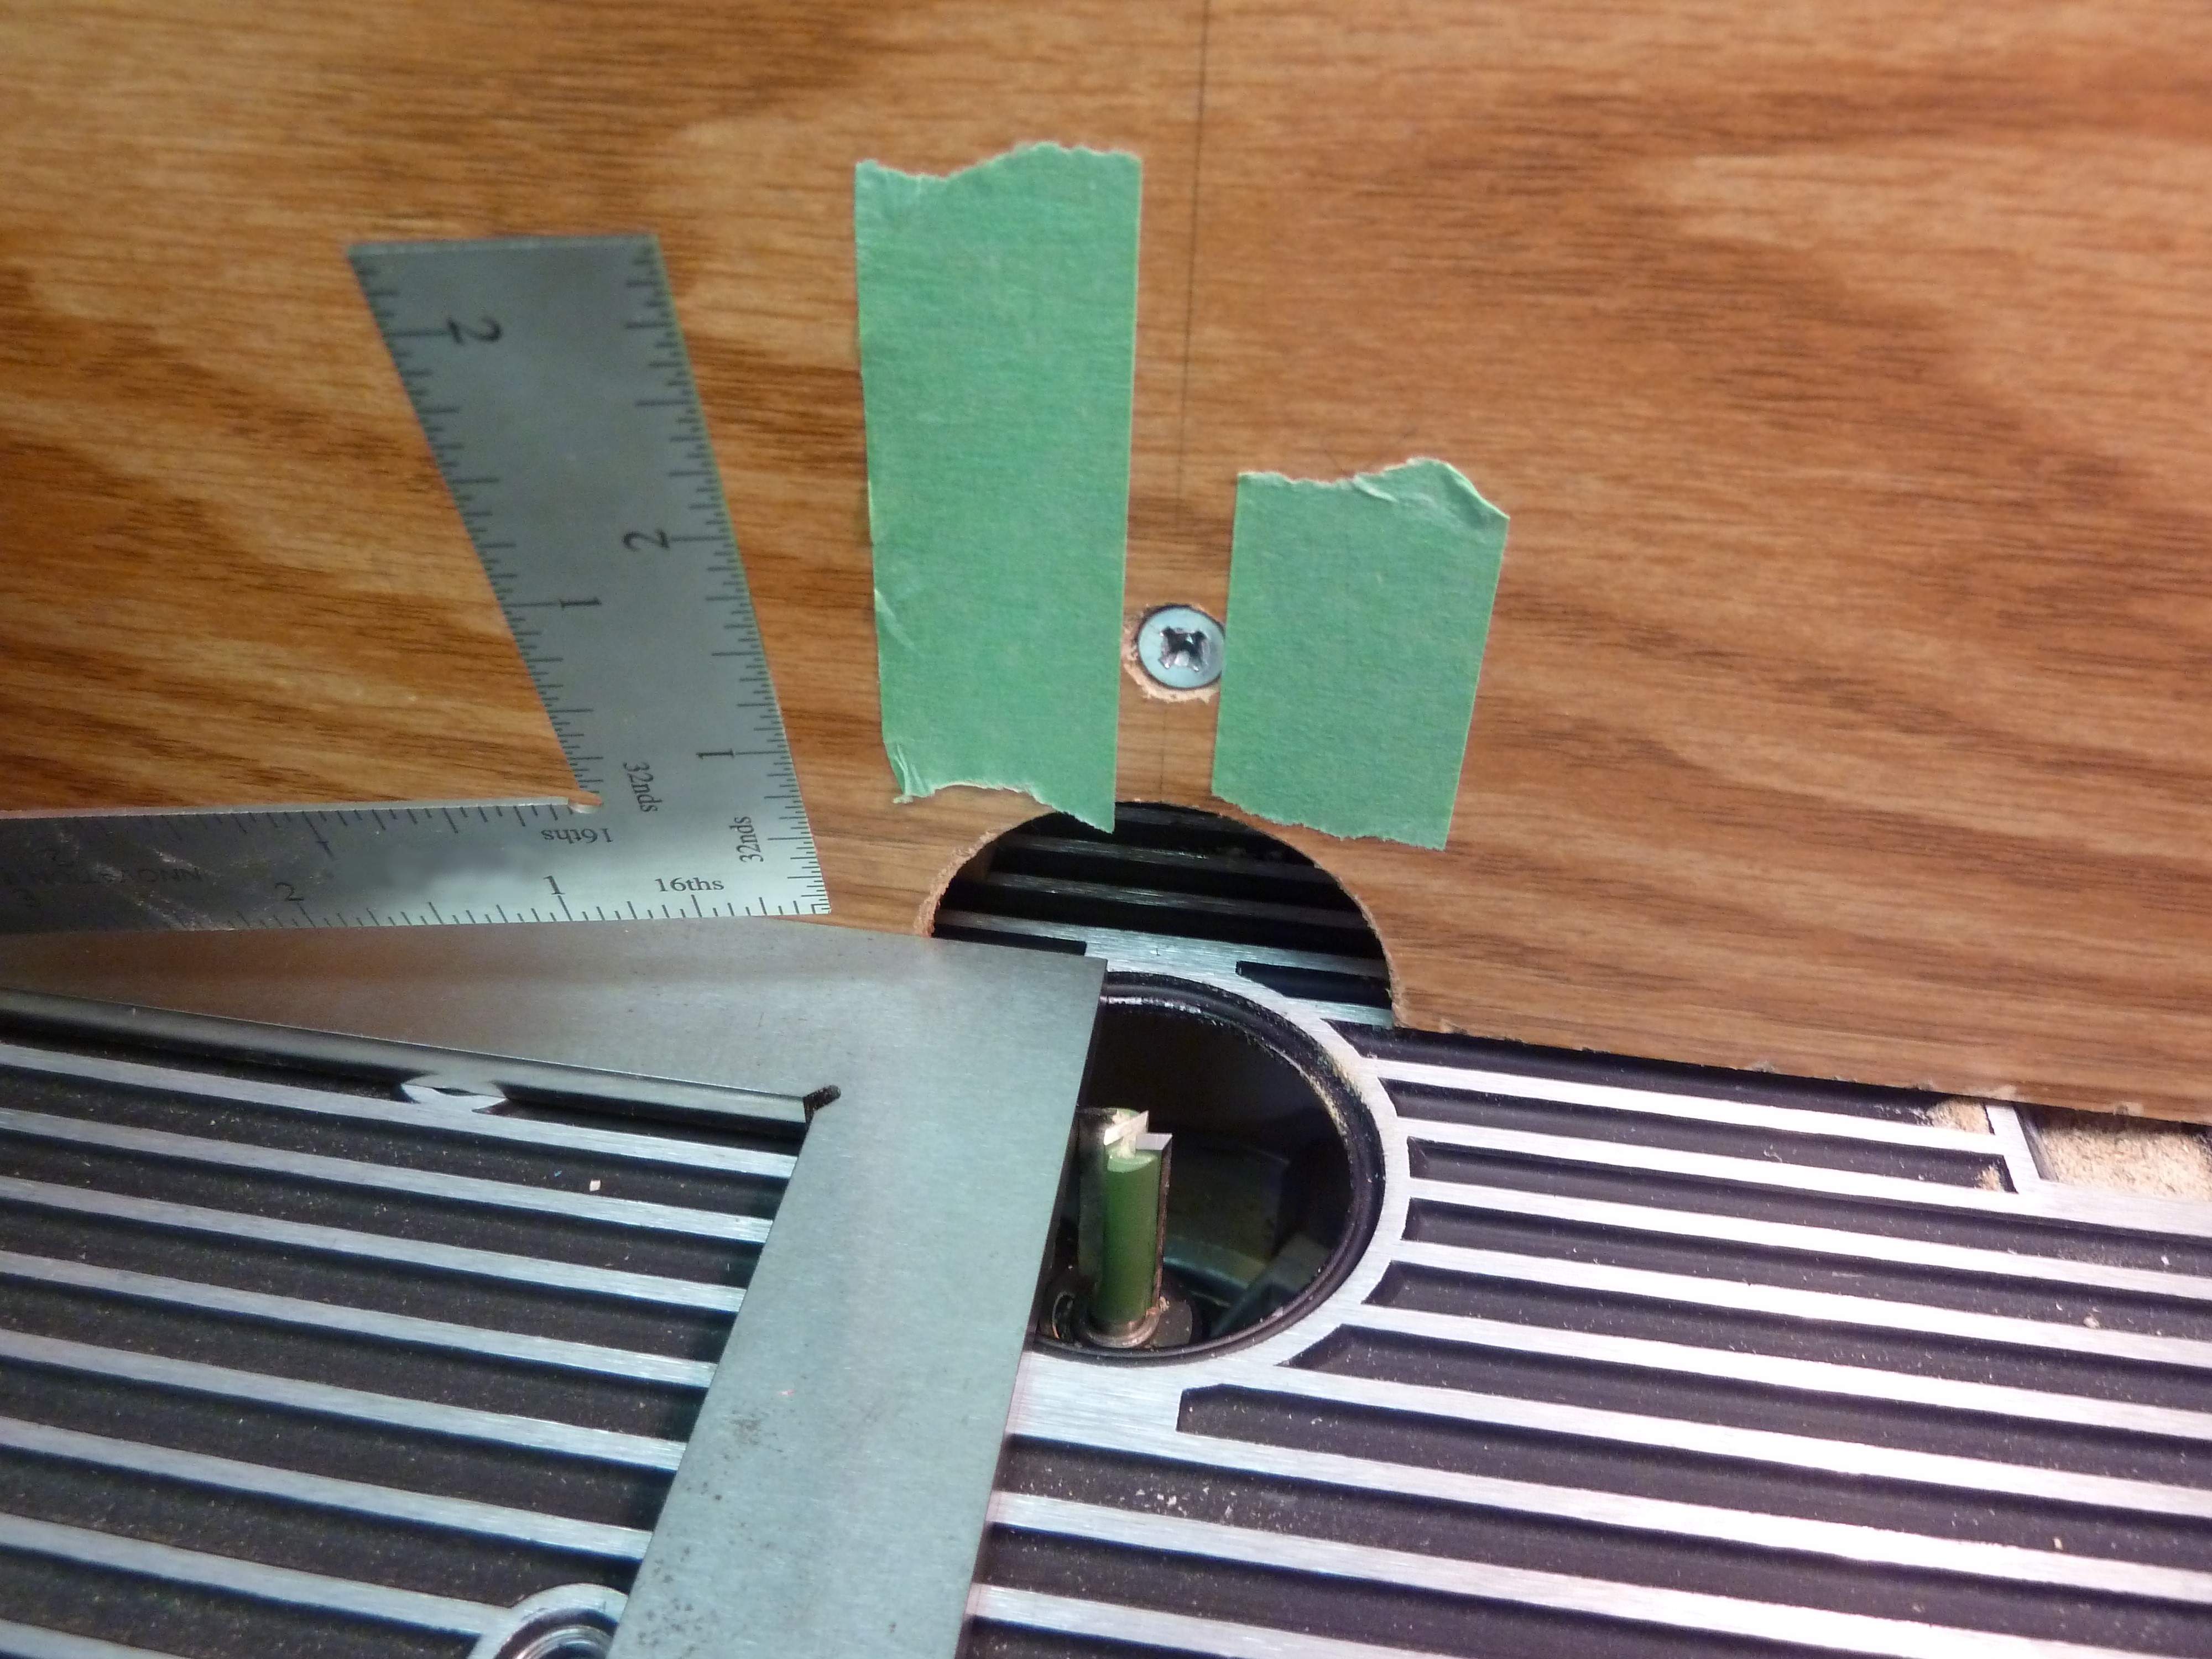
Photo 8: Once routed, I tested that the groove was the rigth depth to hold the LED strip.
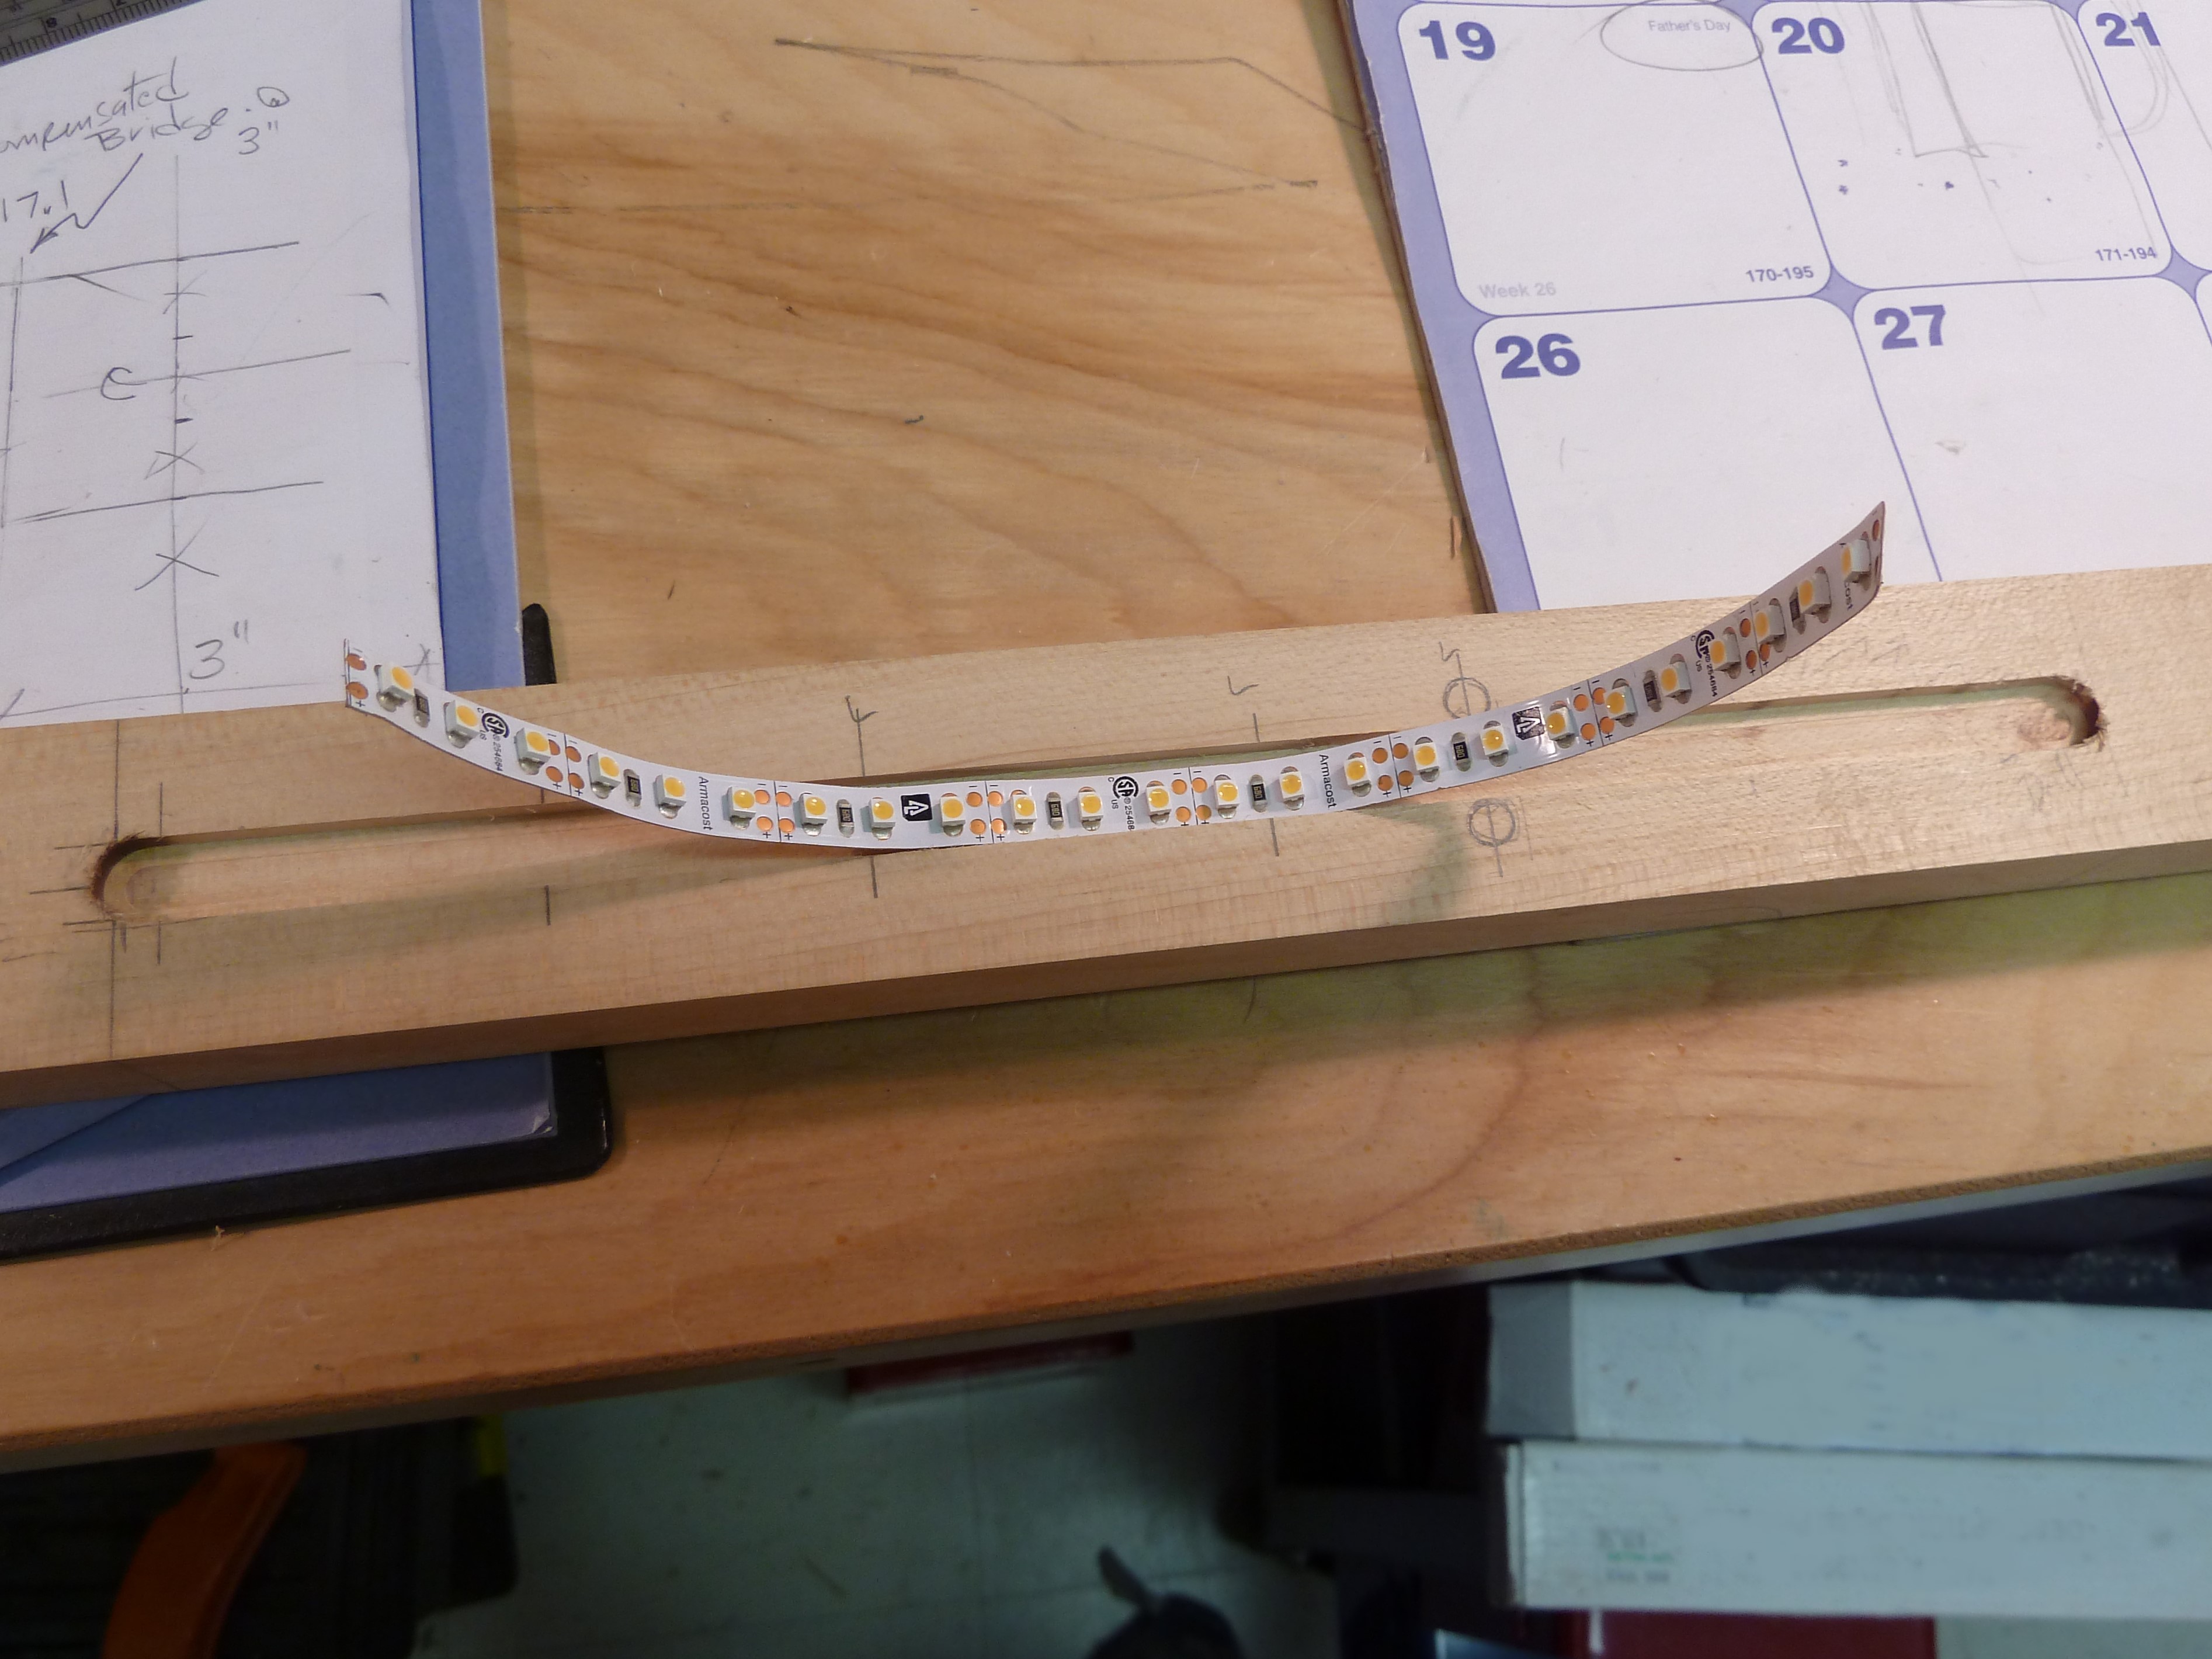
Photo 9: For the 12th fret, which would have double dots, I chiseled out a perpendicular recess to hold another LED strip to light up both dots.
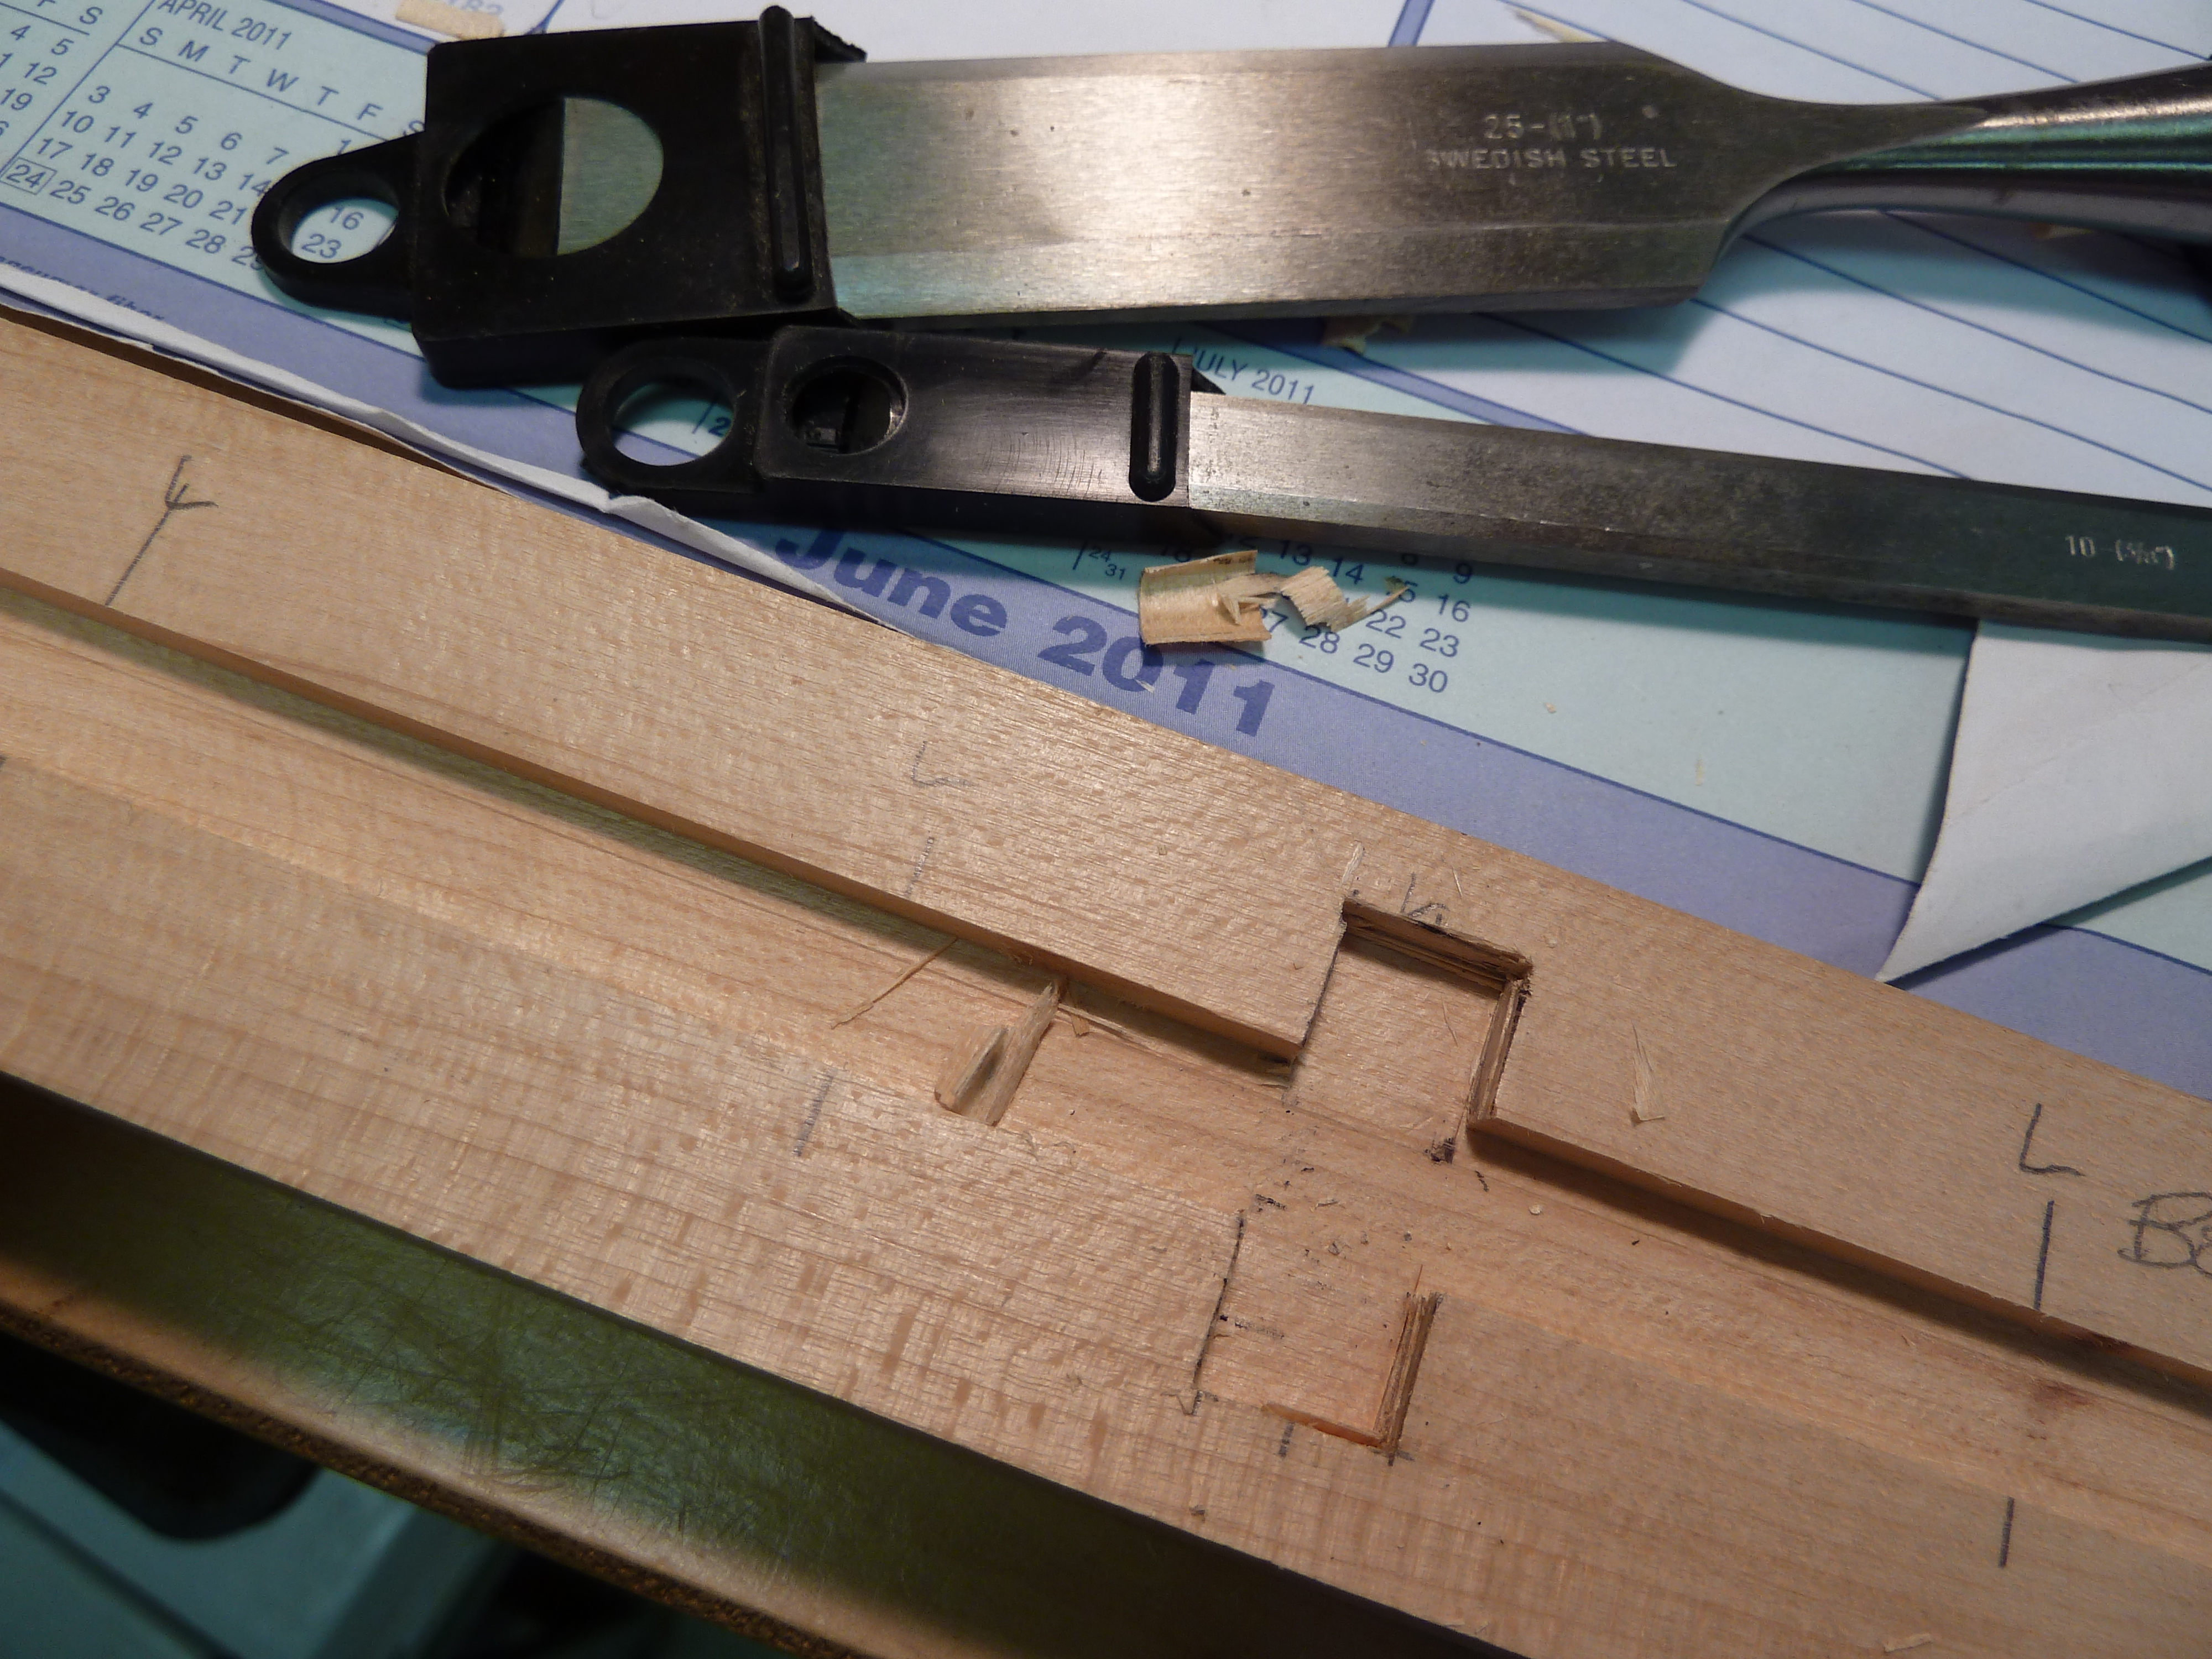
Photo 10: The LED strip I used allows you to cut it at every 3 LEDS. I cut it into useful segments, and ensured that one LED sat under each spot marked “L”. I then proceeded to solder on leads.
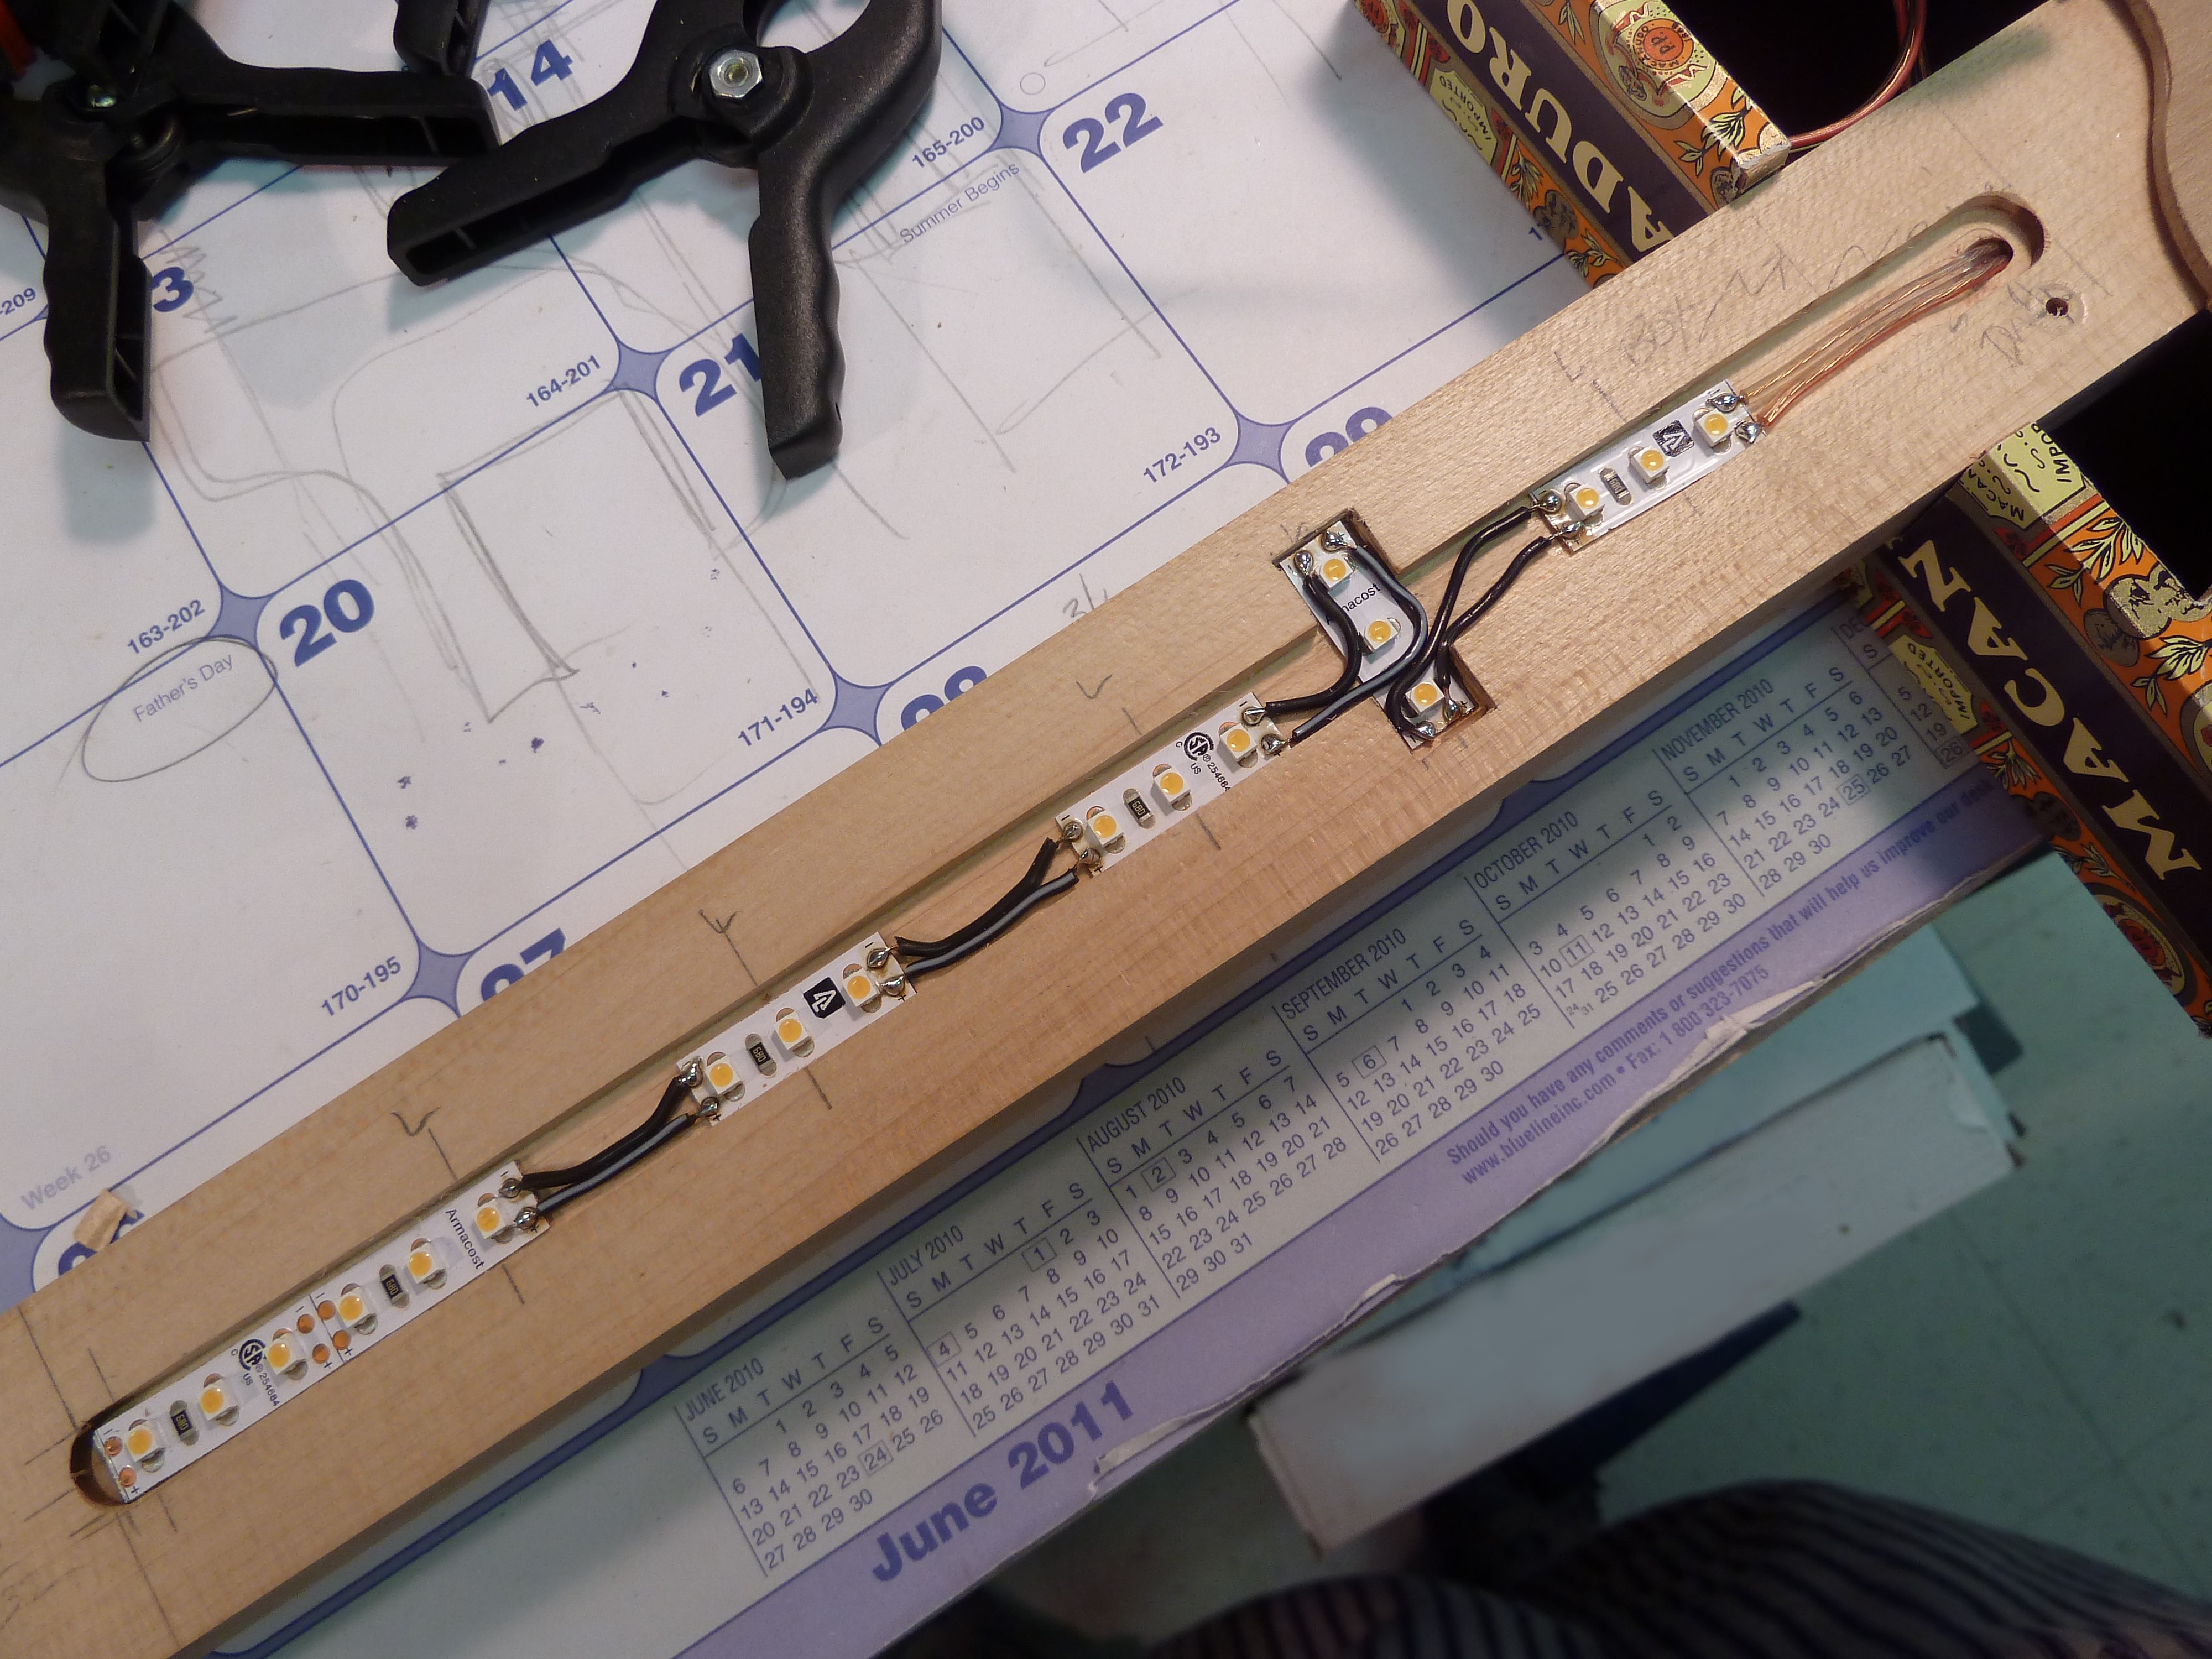
Photo 11: I tested that my soldering was good with a temporary connection to a 9-volt battery.
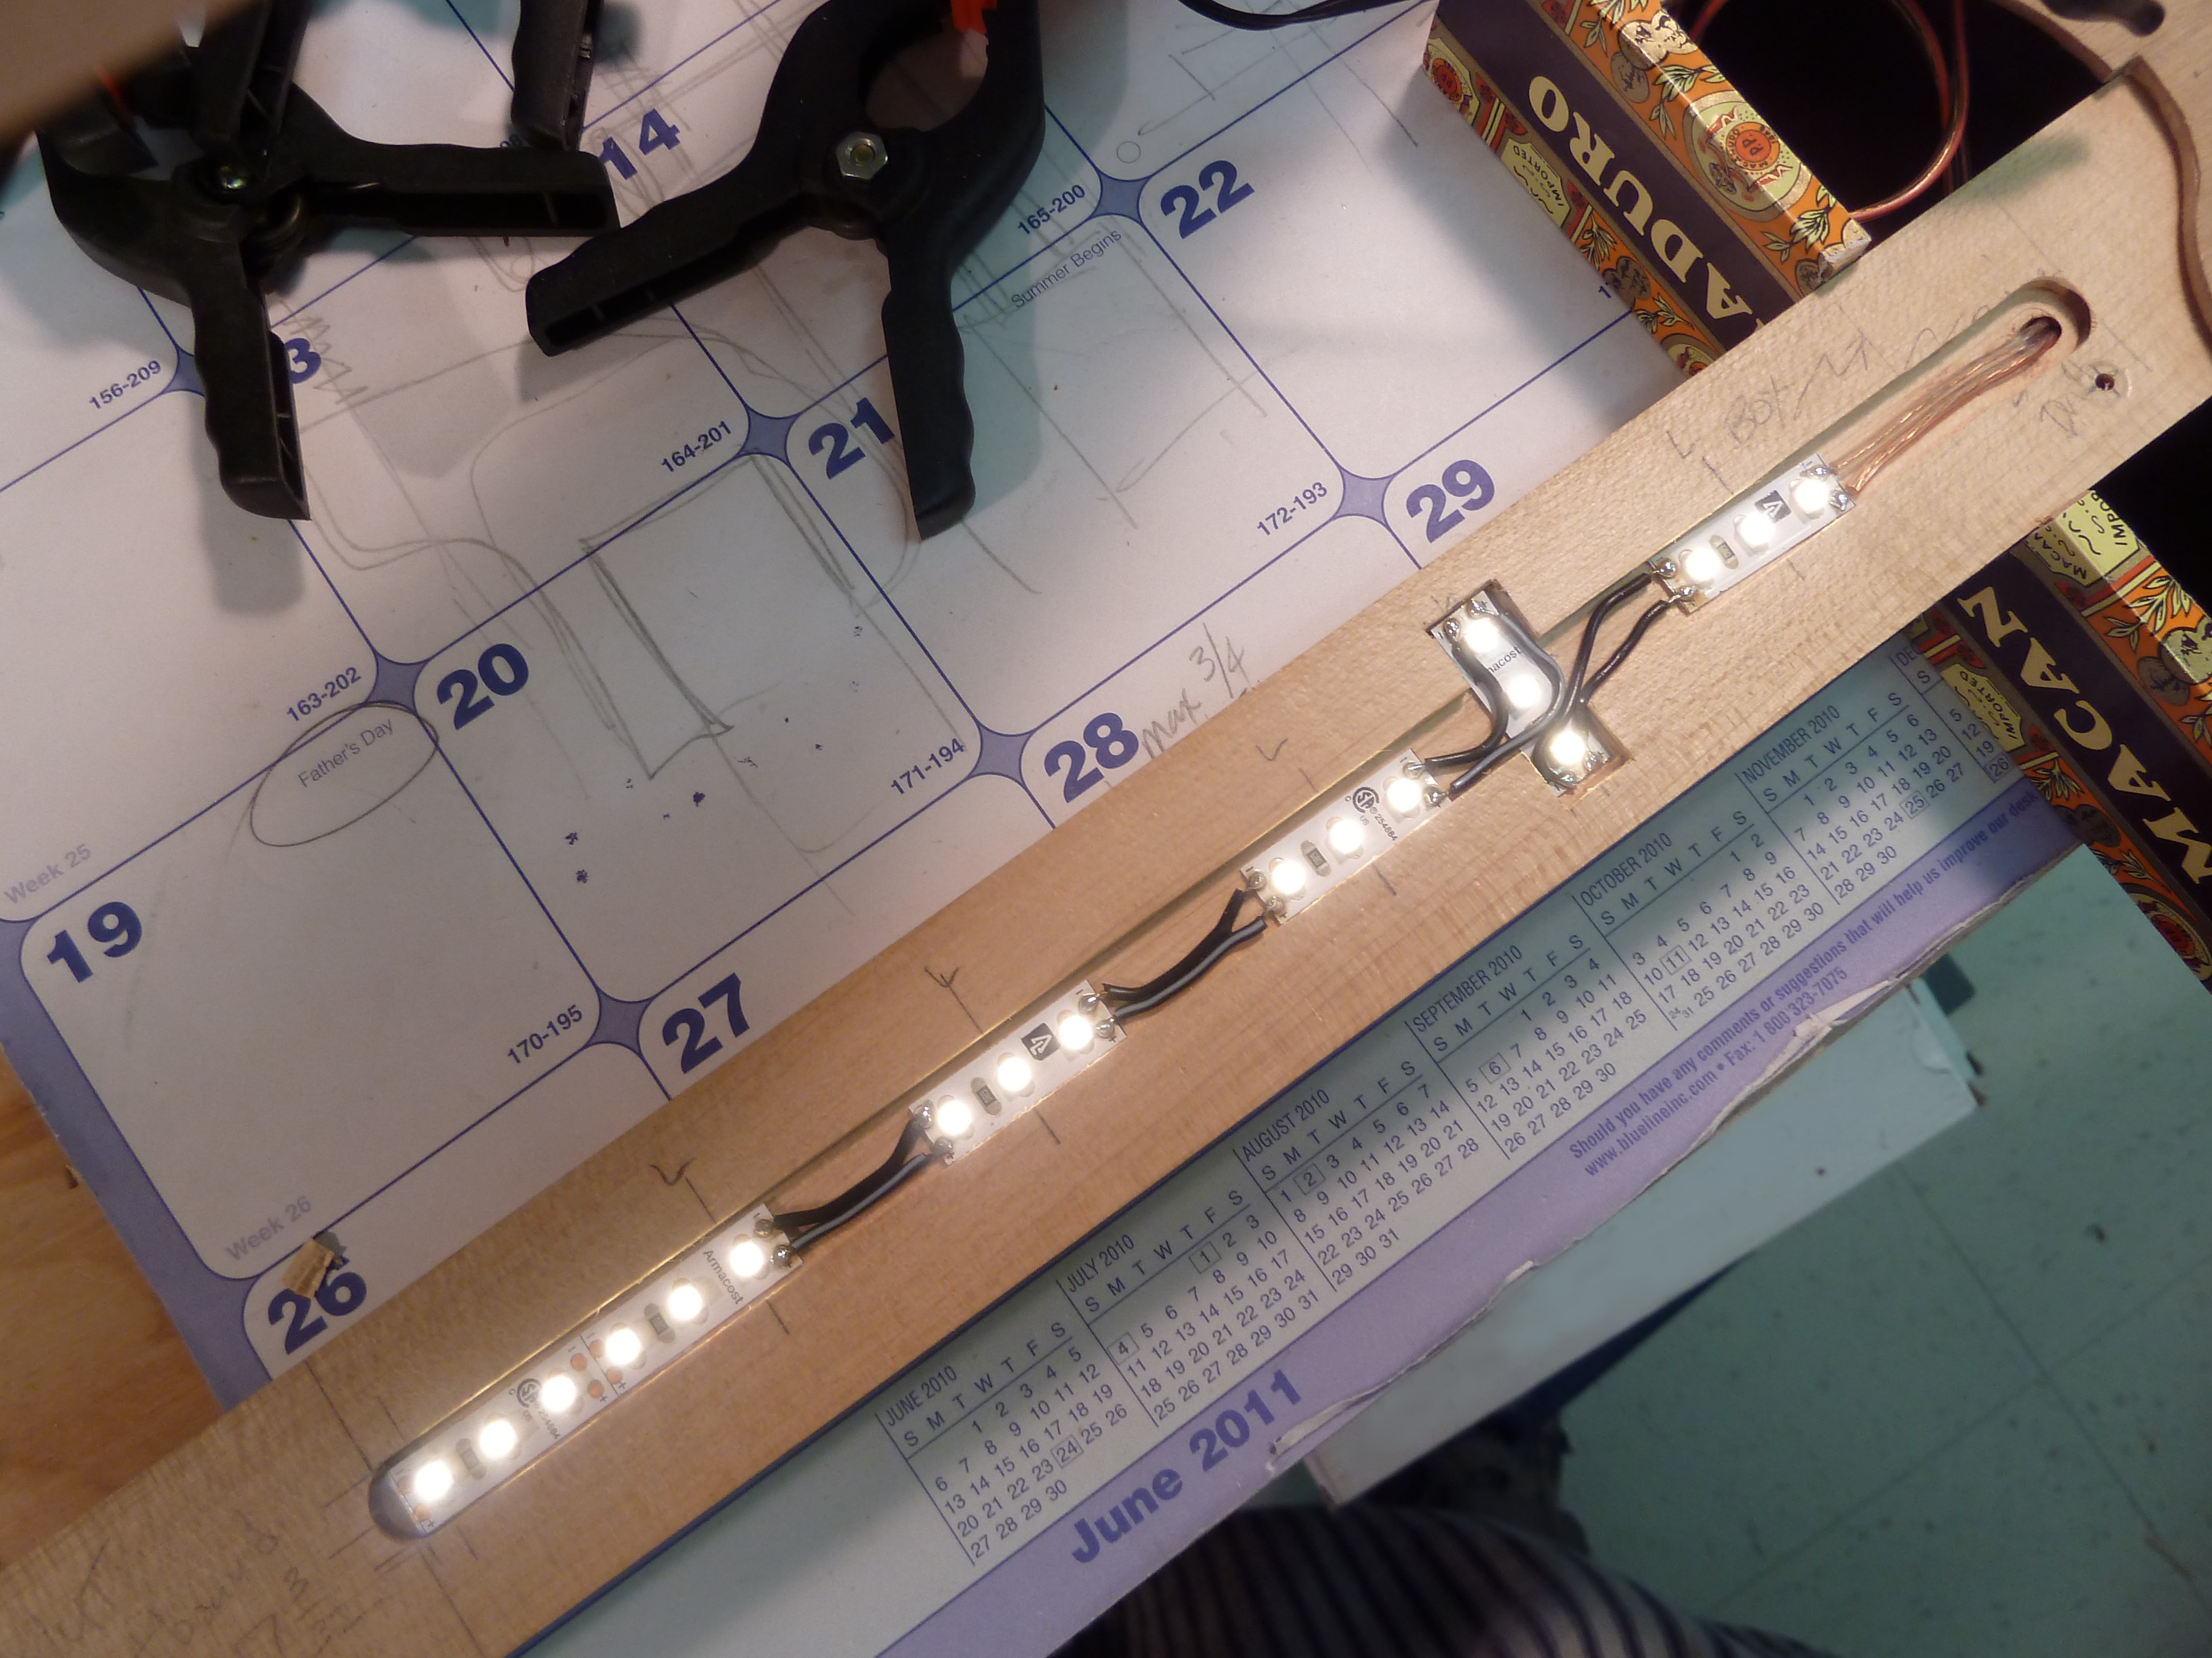
Photo 12: Here, I am dry fitting and testing the brightness. Looks good to me! I then glued the fretboard permanently to the neck.

Photo 13: All the fret markers are sanded flush, and oil finish is applied to it all.
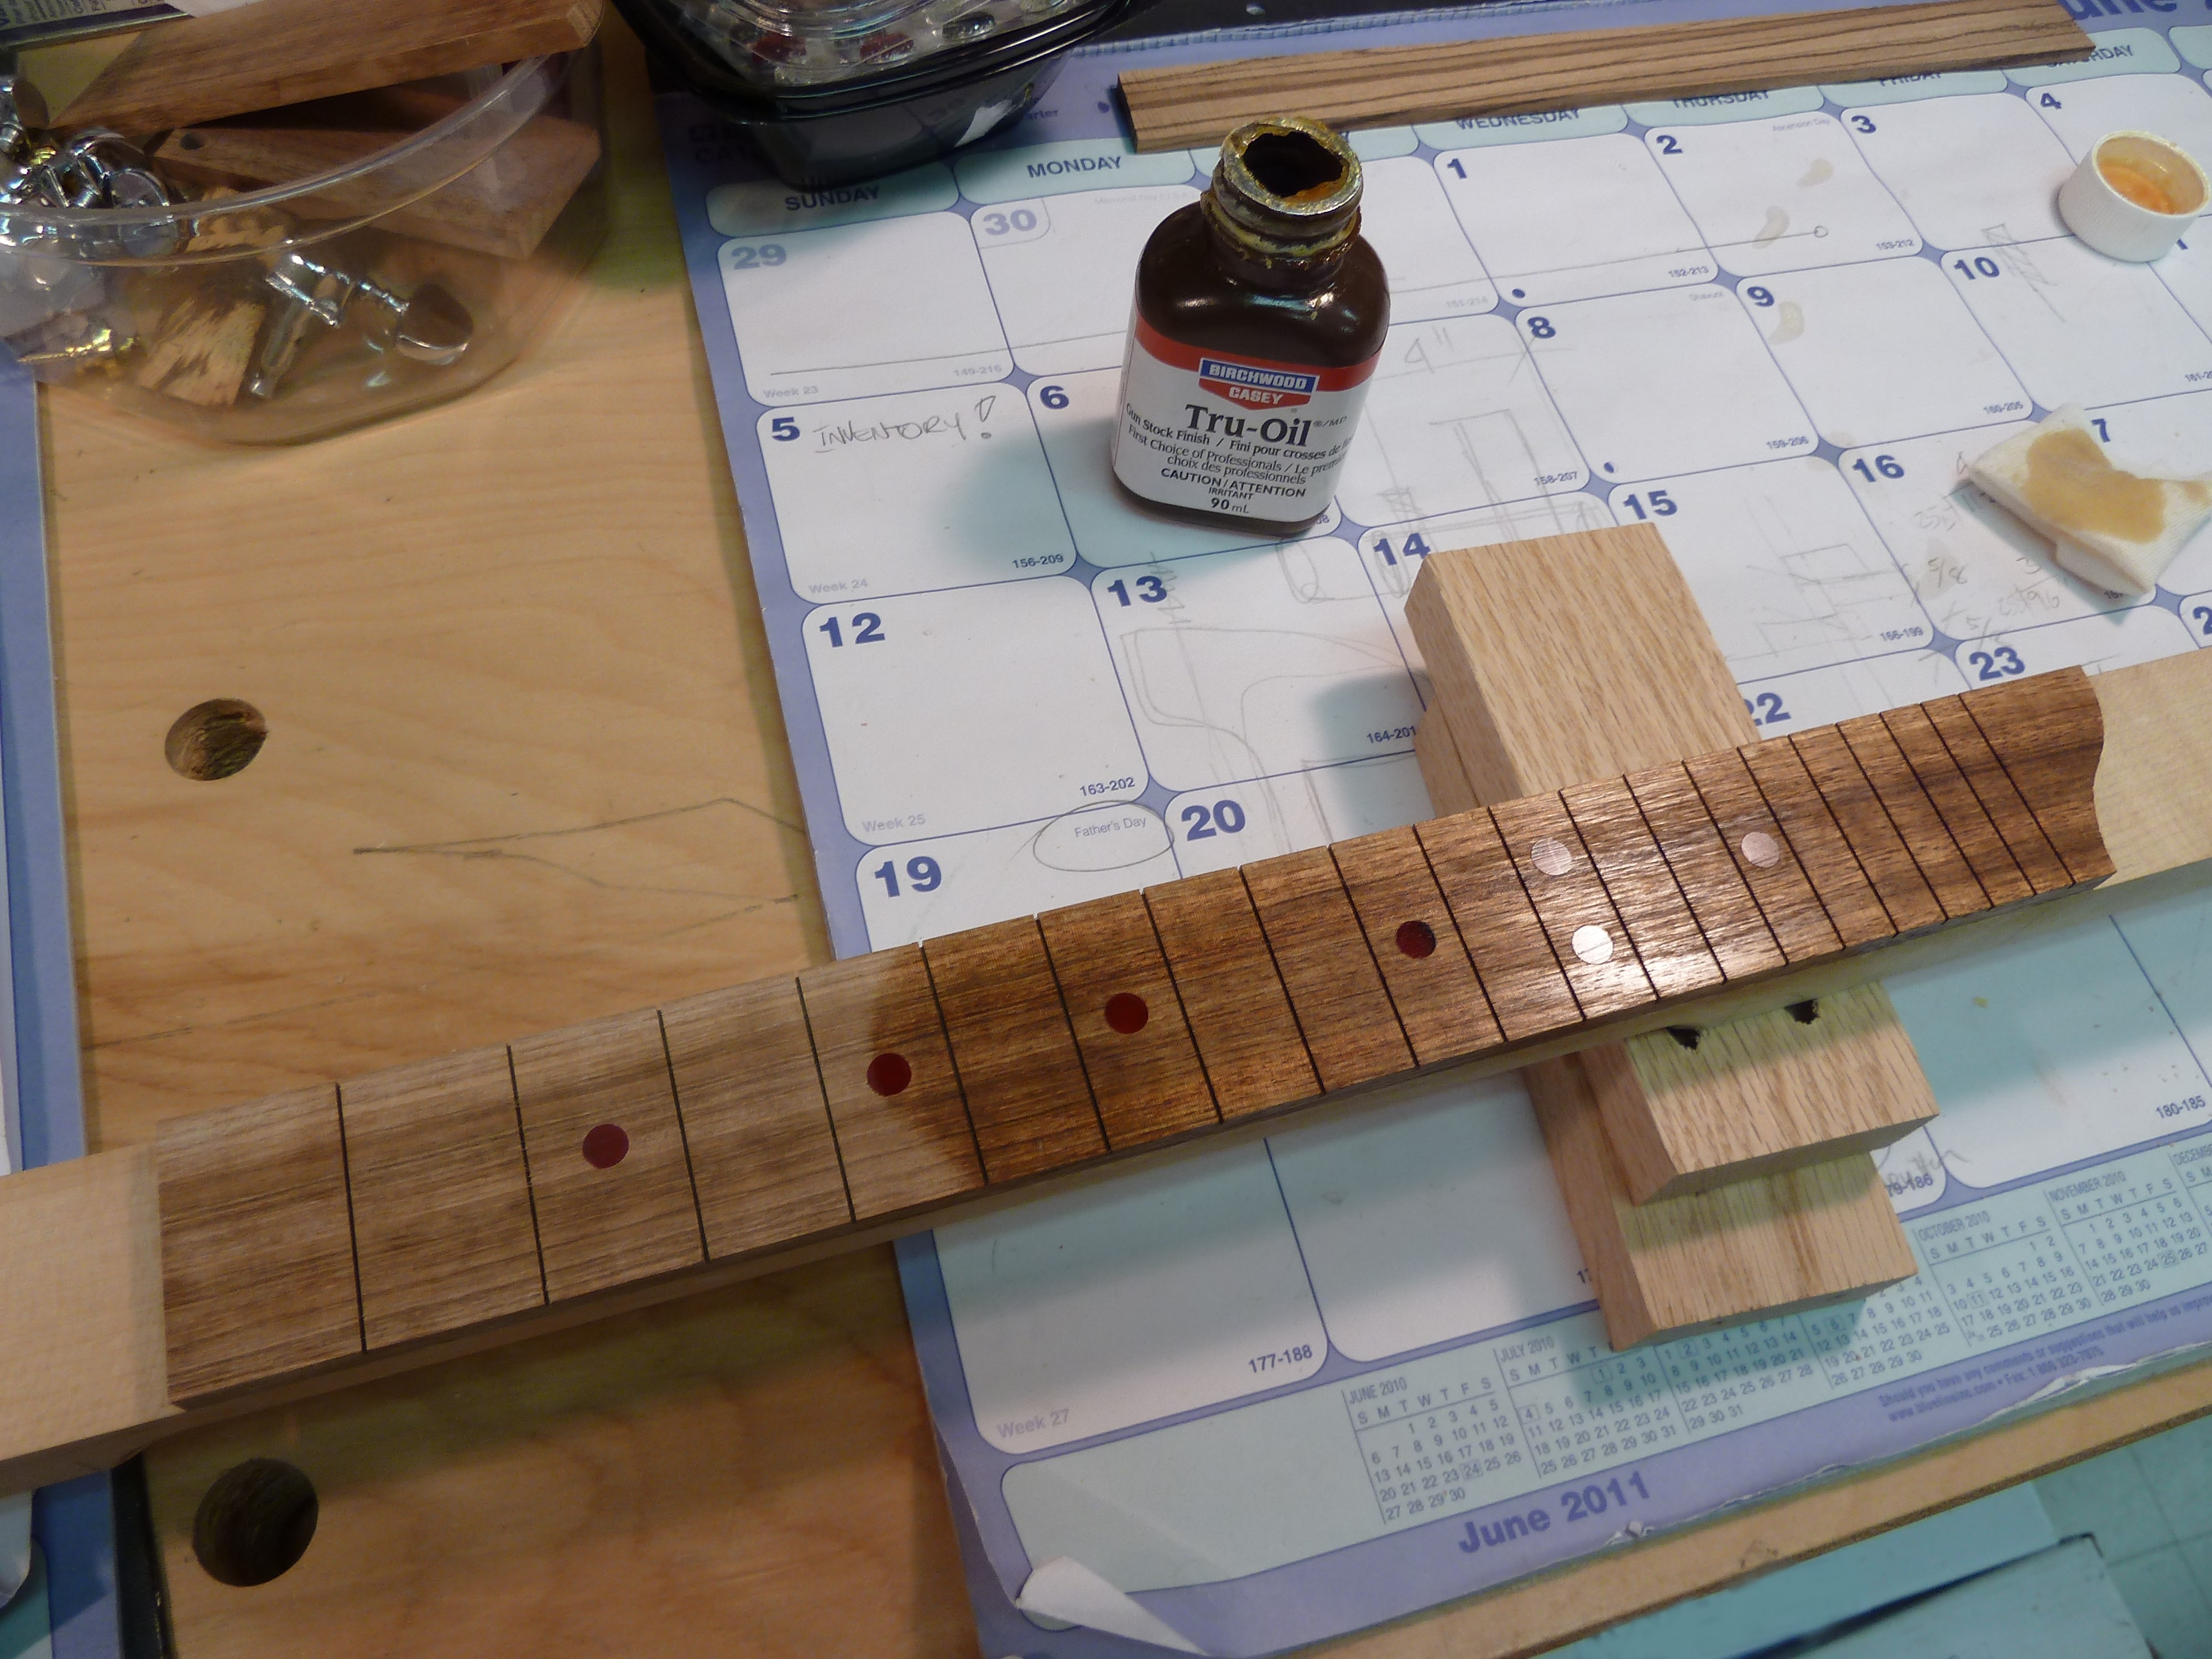
Photo 14: Here I’m setting the frets, being careful not to crush he wire coming out of the back of the neck.

Photo 15: The internal wiring is simple. A 9-volt battery powers the LEDs, through a tiny toggle on-off switch. Soon after the build, I changed the battery clip to an external mount 9V battery tray so that I wouldn’t have to open the back every time to change the battery. Note the additional piece of LED strip adhered to the back of the neck in the body. It lights up and glows red through the sound hole.
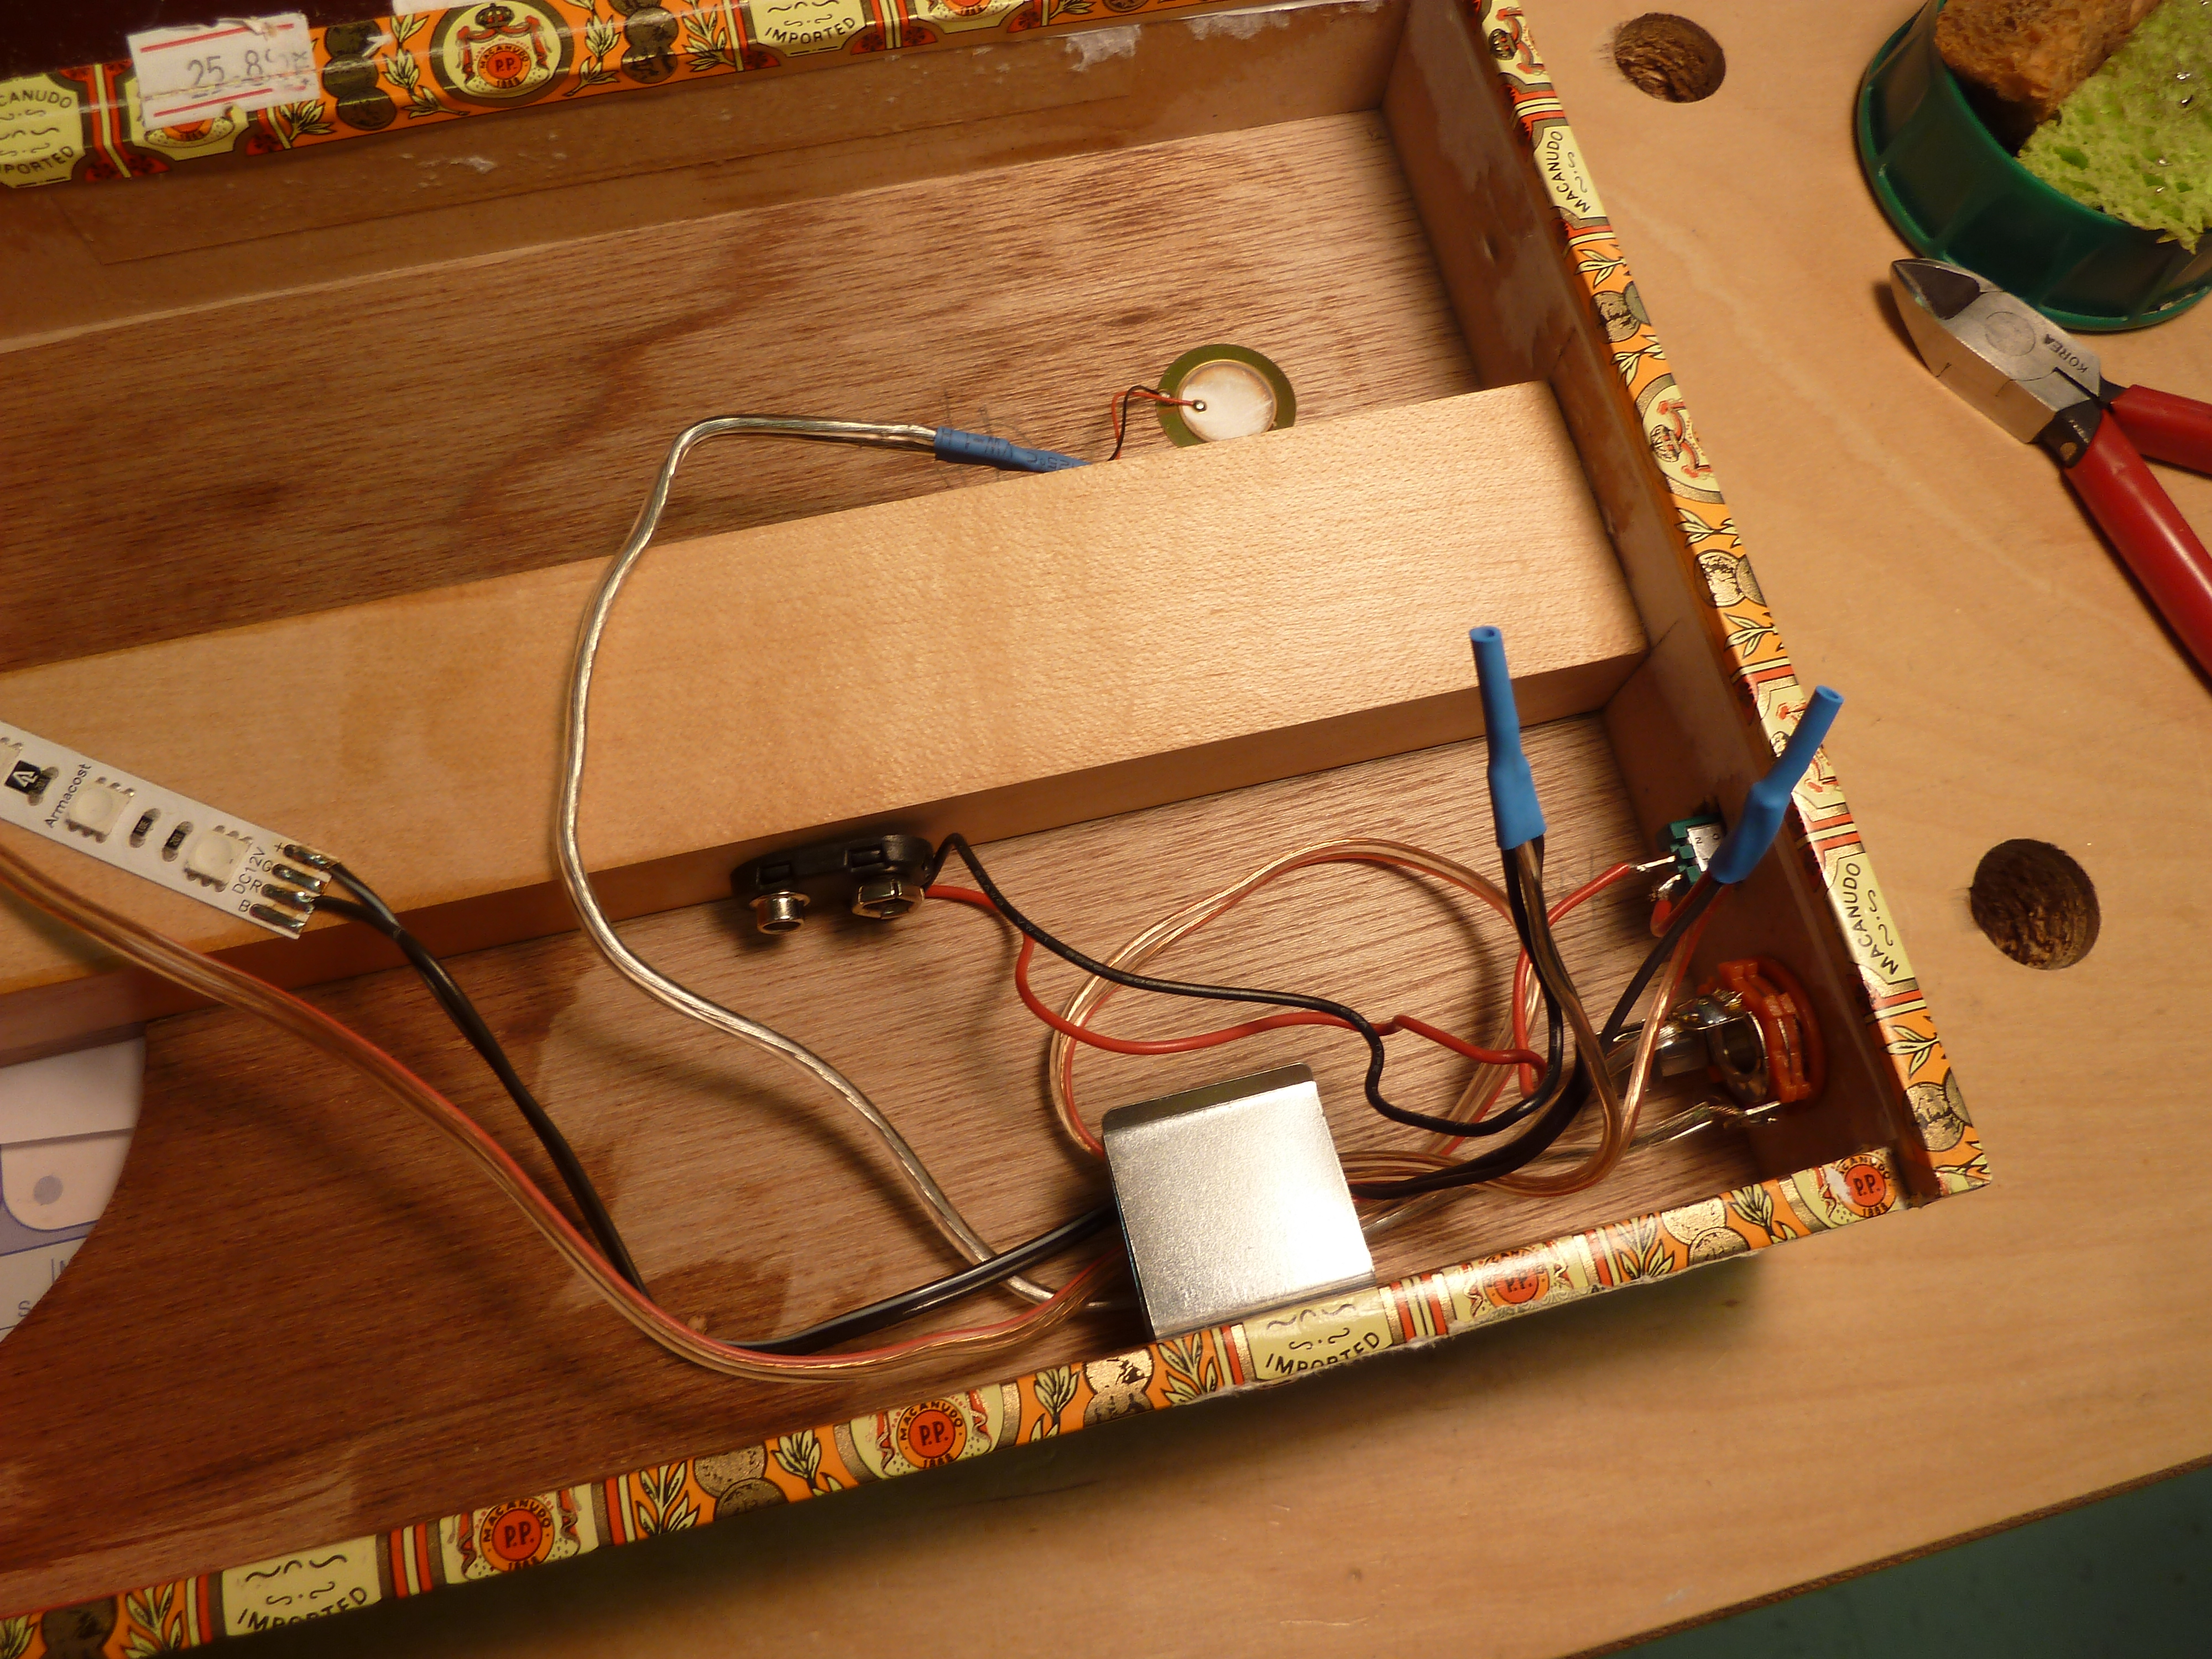
Photo 16: Unfortunately, a recent string change means the white string stands out from the other 3 red strings!
Our thanks to Vince to providing the photos and step-by-step process of his work on this build. Hopefully it will inspire others to brighten up their builds with built-in lighting elements!
Recent Posts
-
Steve Holladay's "Pocket Box Guitar"
If you're a member of the Friends of C. B. Gitty group on on Facebook, you've probably seen some of …14th Jan 2026 -

2024 World's Wildest Electric Cigar Box Guitar Build-Off Winners!!!
C. B. Gitty Crafter Supply is proud to announce the winners of the 2024 "World's Wildest Electric Ci …31st Oct 2024 -
")
Improved C. B. Gitty: Easier Than Ever! (Work in Progress)
Ben “Gitty” has been cleaning house, making our website even easier find your favorite parts, kits a …7th Oct 2024