

Building the "Wagon Wheel" Tenor Banjo - A Photo Diary
So rock me mama like a wagon wheel, rock me mama any way you feel...
Before I had even finished my last heirloom build (the One-Way Ticket Steamer Trunk Guitar), I started thinking about what my next project would be. I can't remember exactly when it came to me, but at some point the idea popped into my mind: what about building a guitar from an old wooden wagon wheel? I could call it the Wagon Wheel Guitar and play one of my favorite songs, Wagon Wheel on it... it seemed like a great idea.
It would certainly be a challenging build - there is nothing flat on a wagon wheel - it's all curved rim and round(ish) spokes. So how could that be turned into the sides and panels of a guitar?
The first challenge was finding the wheel. I ended up on Facebook Marketplace where I found a lady who had two old carriage wheels not too far away - up in York Beach, Maine. They weren't cheap - $199 for the pair, but they looked to be in pretty good shape, so I made arrangements and went up to get them.
Seeing them in person, they were a bit rough, with some rotted sections, but overall OK. One thing that troubled me was how narrow they were - the rims being only about one inch wide. These had been on a carriage for carrying people, so they weren't built as sturdy (and wide) as the big draft carts were. That narrow width would make the build even more challenging.
Still, in talking with the nice lady who owned them, it turned out there was some story behind them. The wheels had belonged to her grandfather, and had been on the family carriage in Boscawen, New Hampshire when he was a boy in the first decade of the 1900's. She'd been holding onto them most of her life (she's 72 now), and had struggled with the decision to sell them. When I told her what I intended to do with them, her face lit up with joy - the idea that they would be repurposed and live on, instead of just rotting away in someone's flower bed, touched her deeply.
And so, I had my wheels, and soon they were leaning against my workbench in the Gitty shop. The photo diary below walks through the steps I took to turn one of these wheels into a beautiful heirloom banjo... and I still have the second wheel for a future project!
Banjo Specs:
- Scale Length: 19 inches
- # strings: 3
- Tuning: G D A E (Irish Tenor)
- String Type: Nylon
- Tuners: Amber button short-shaft
- Pickup: None
The Wagon Wheel Builder's Photo Diary
|
|
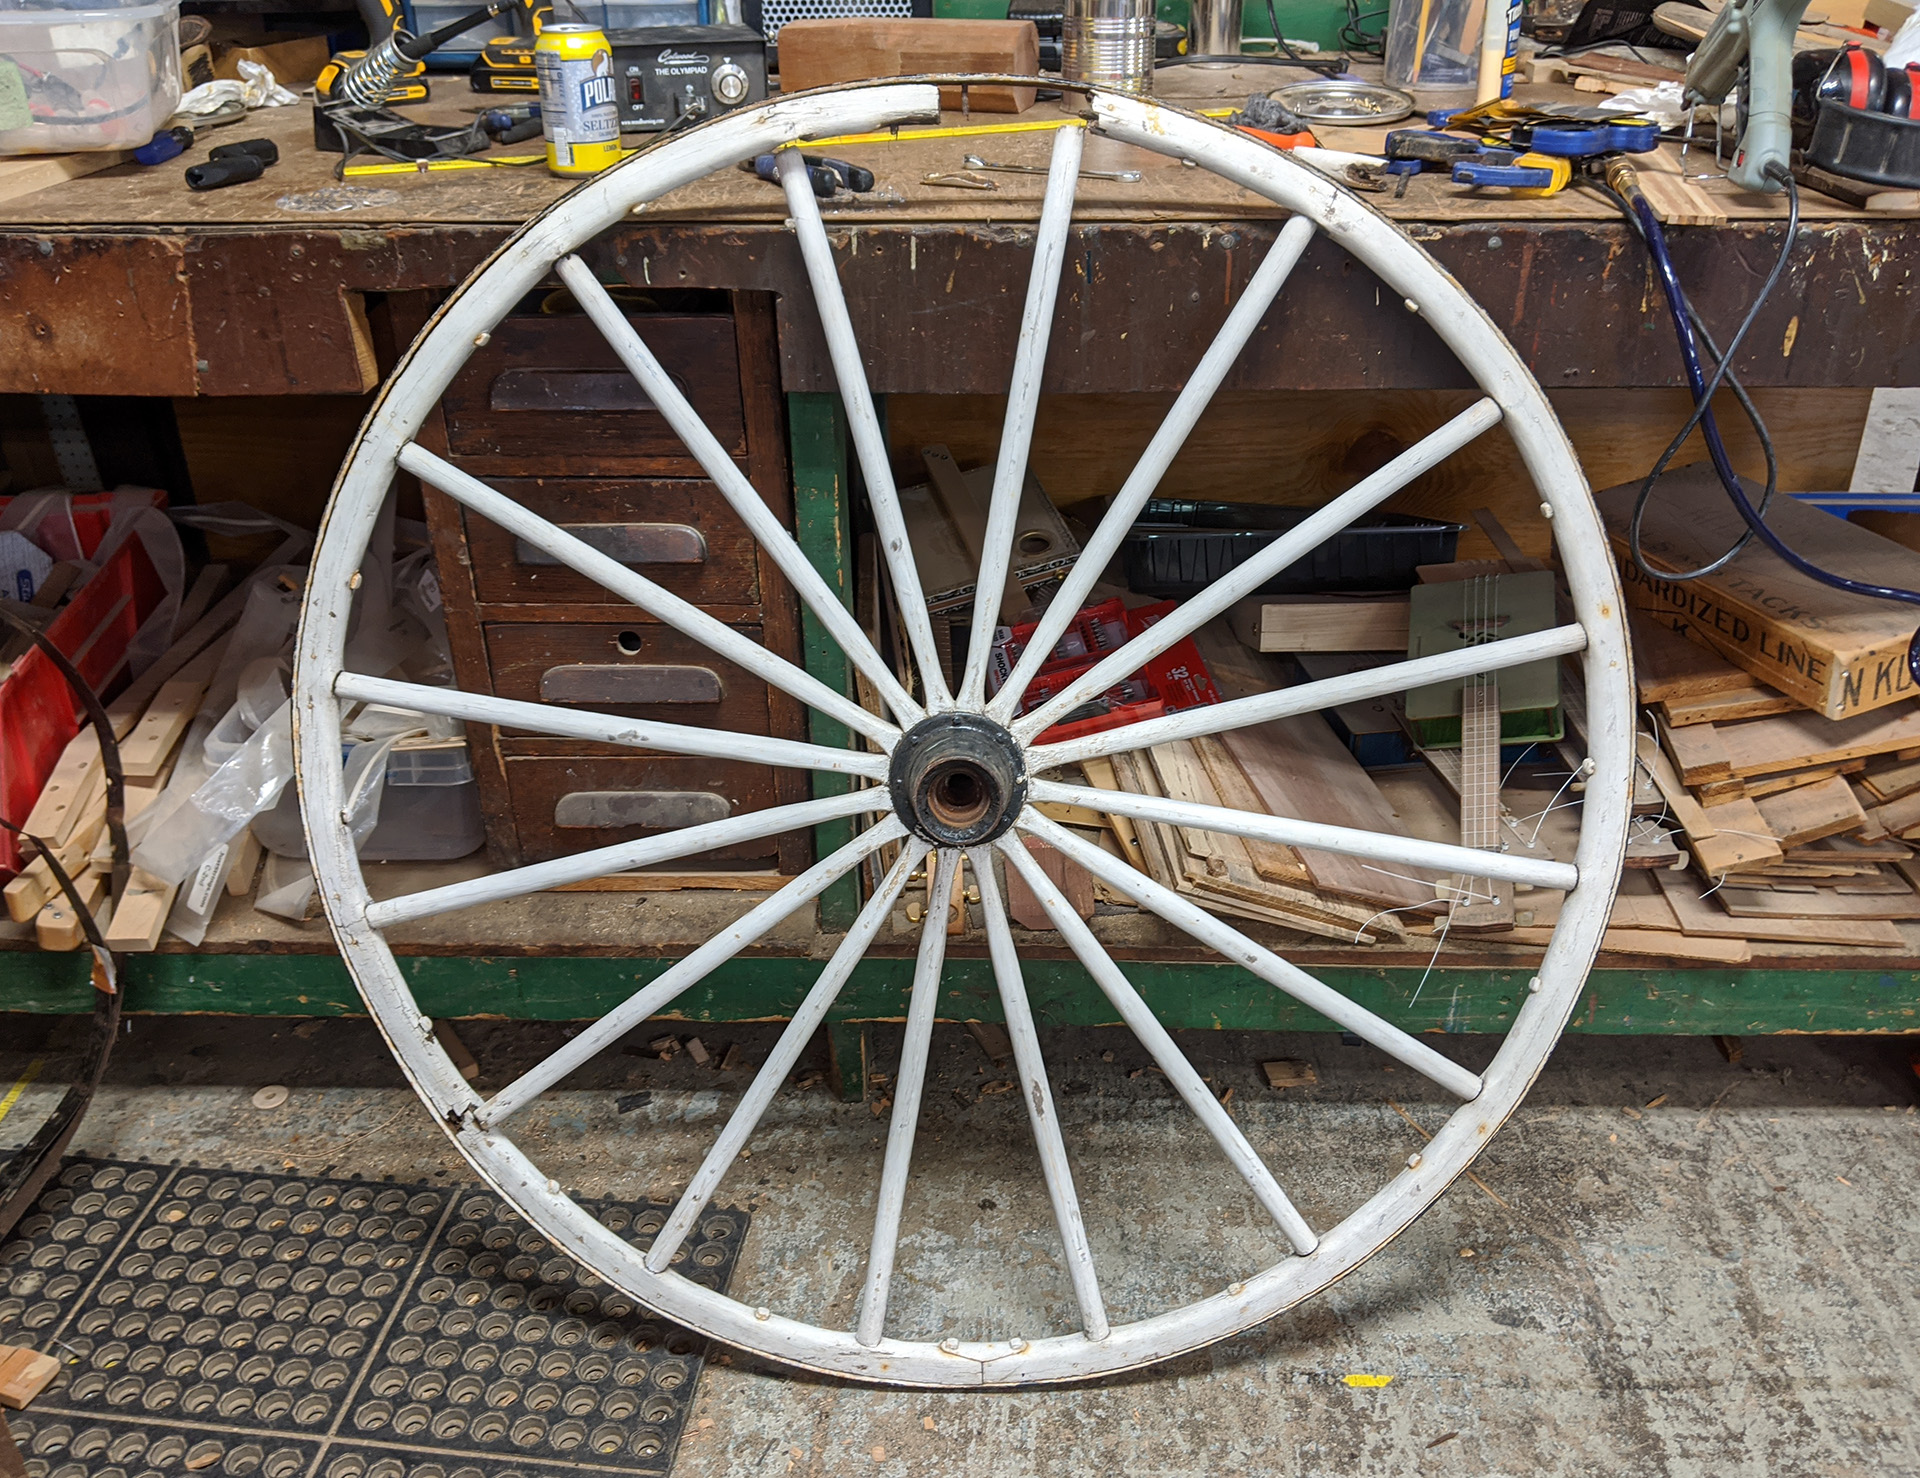
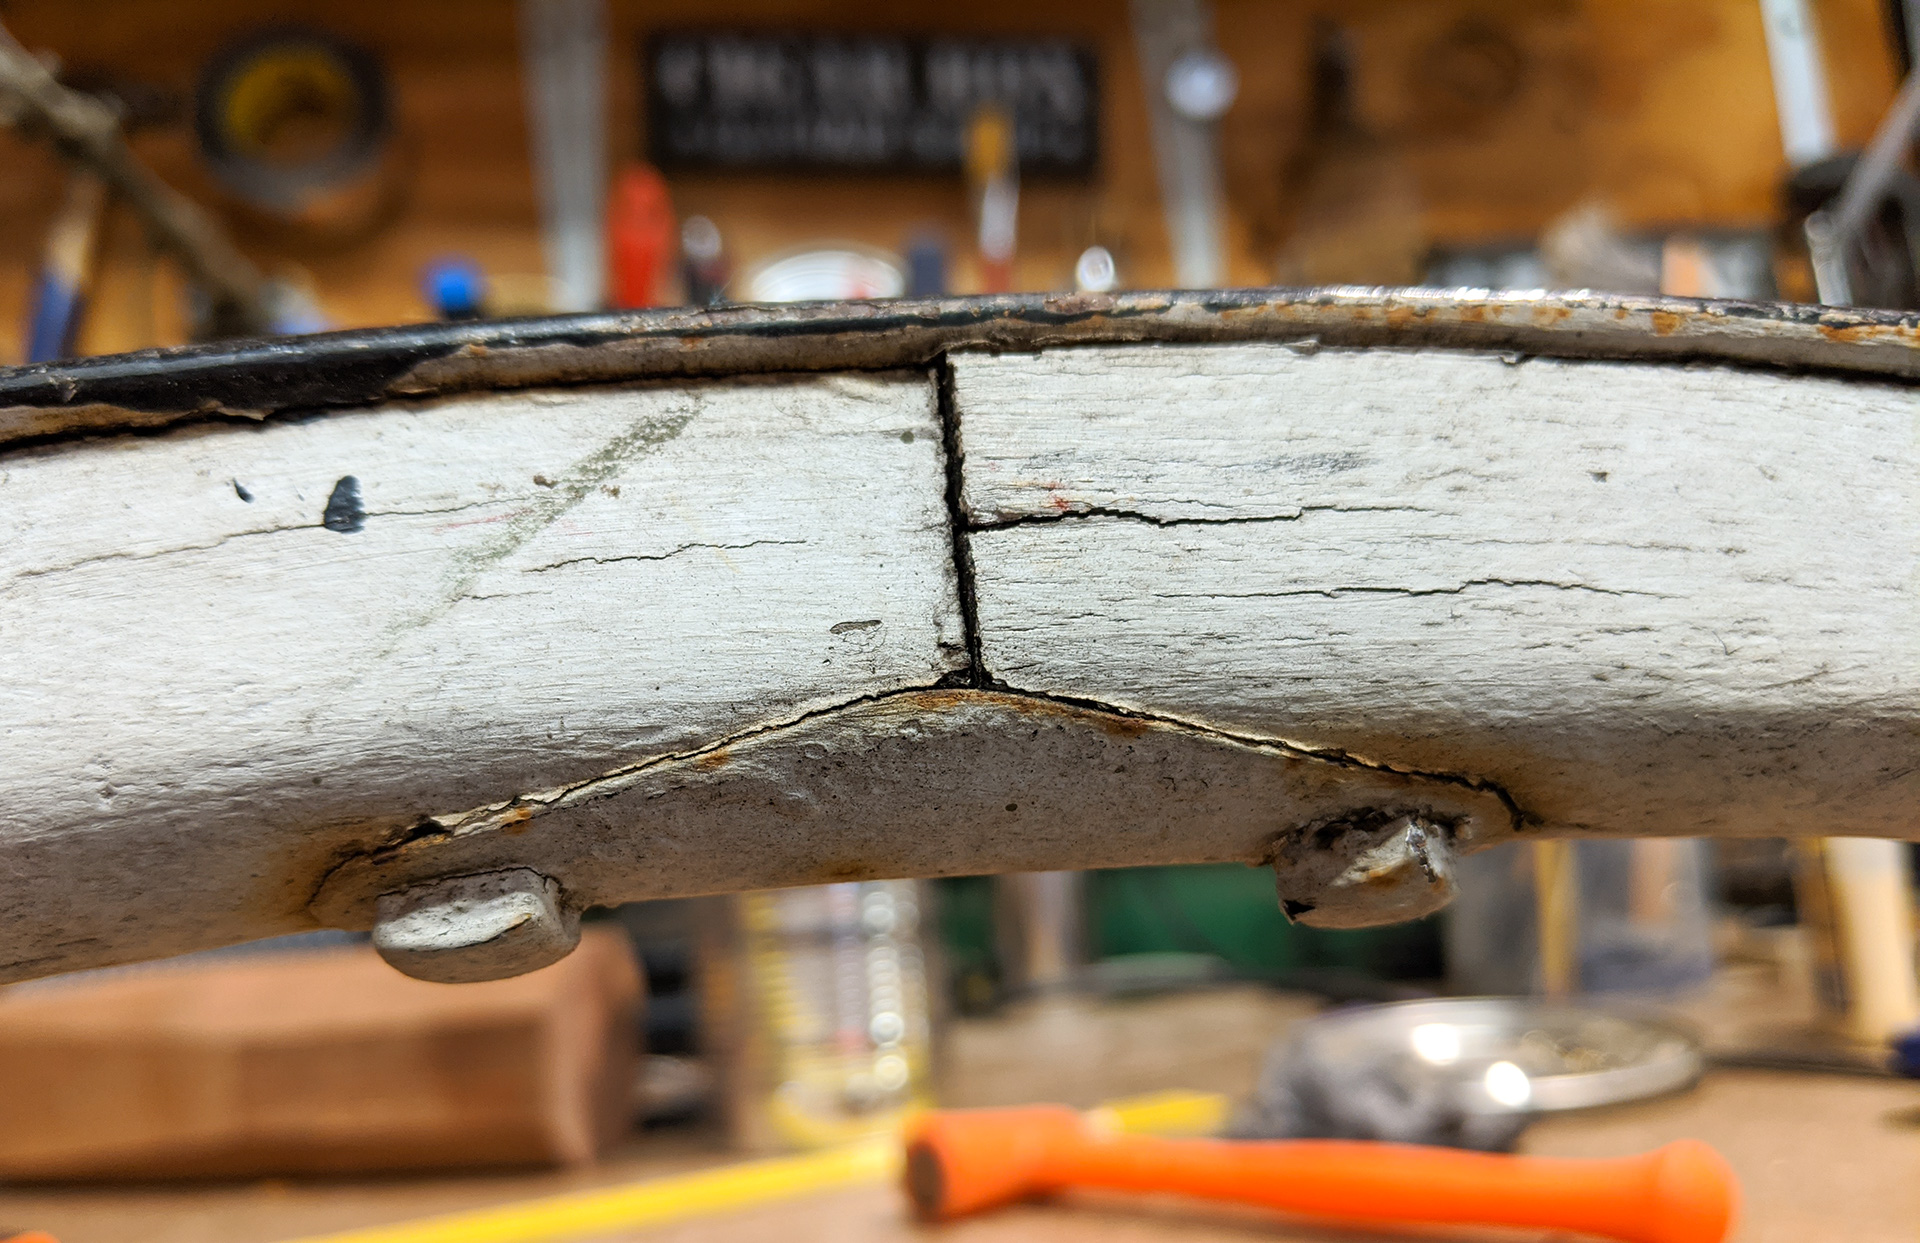
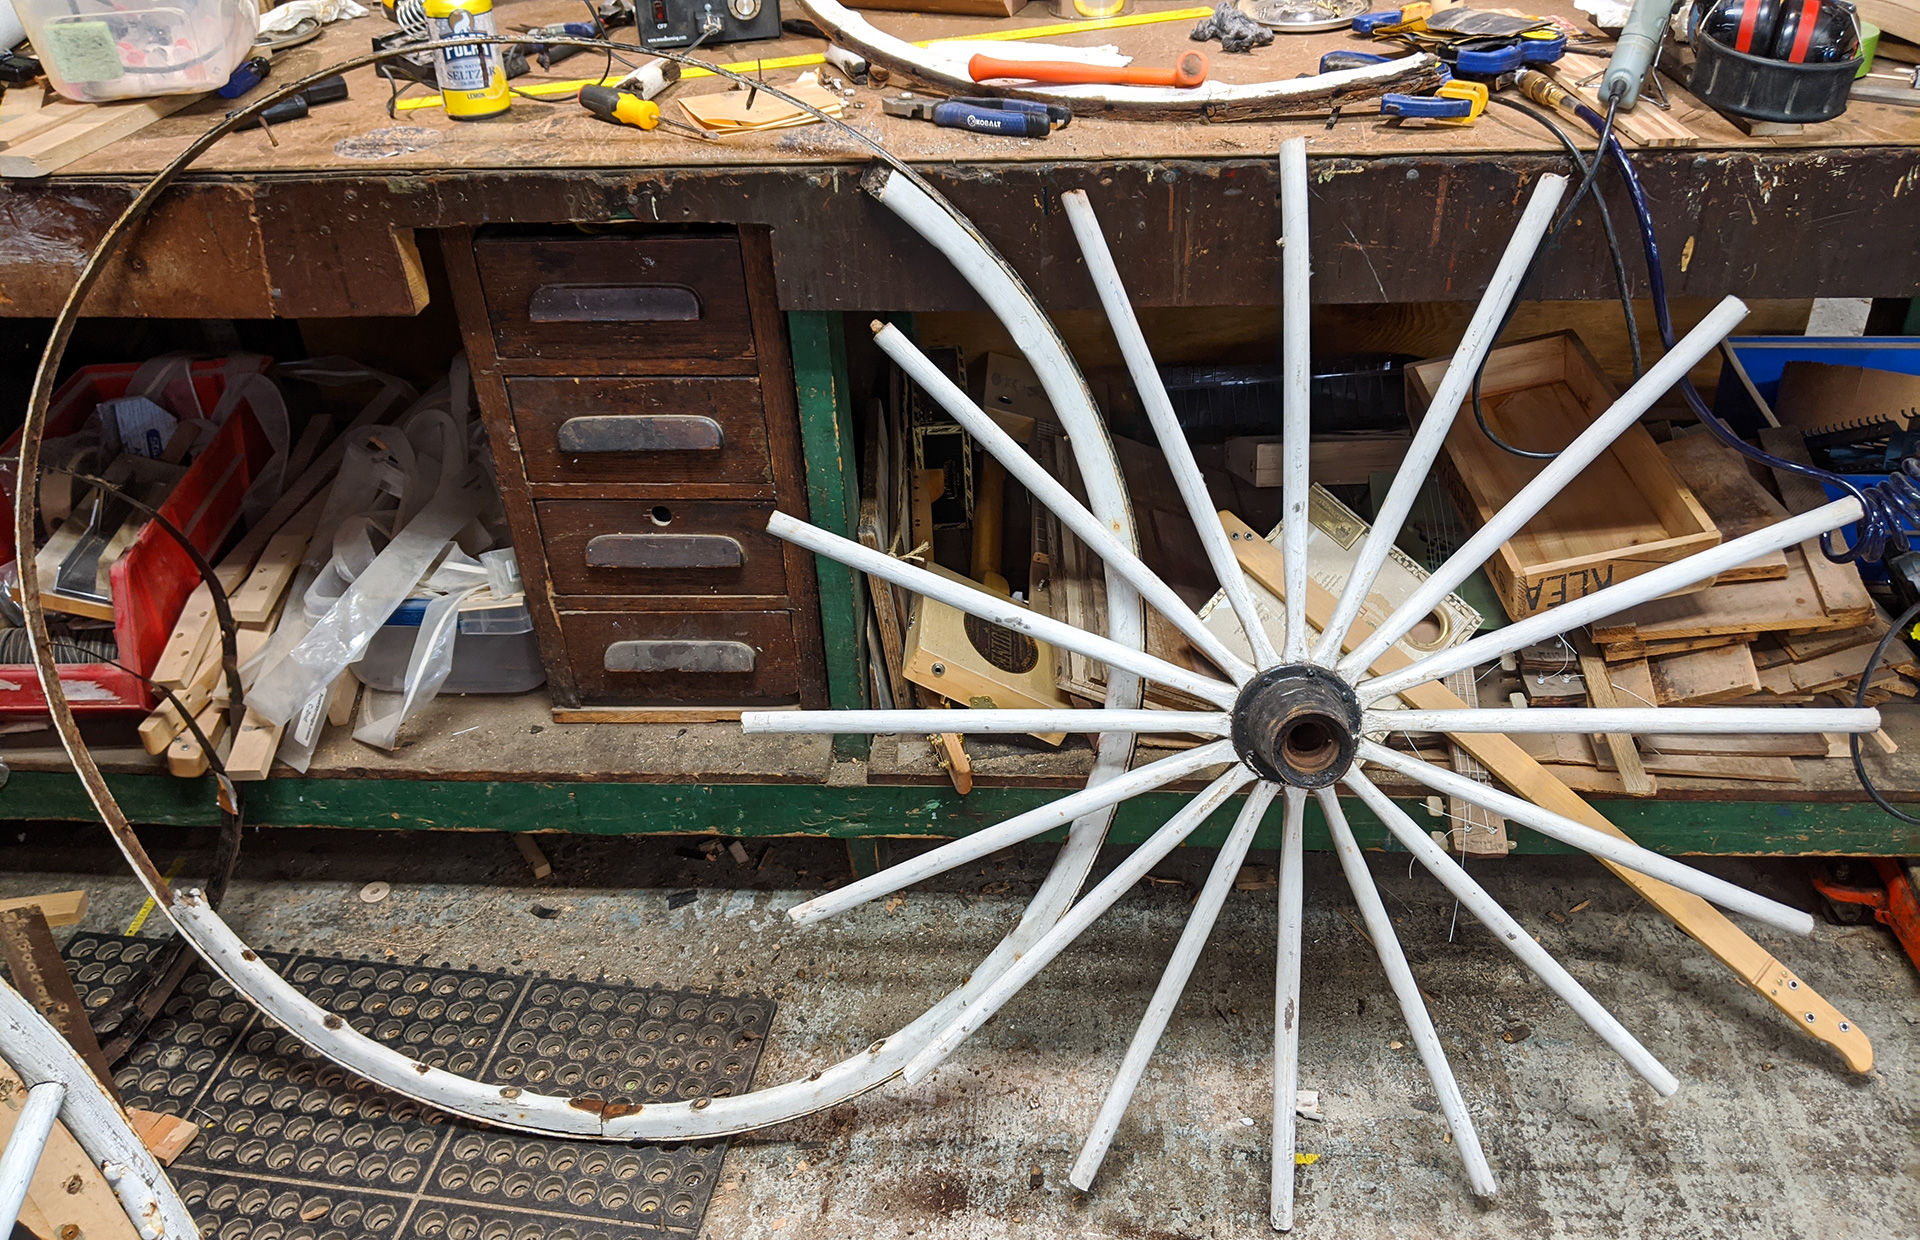
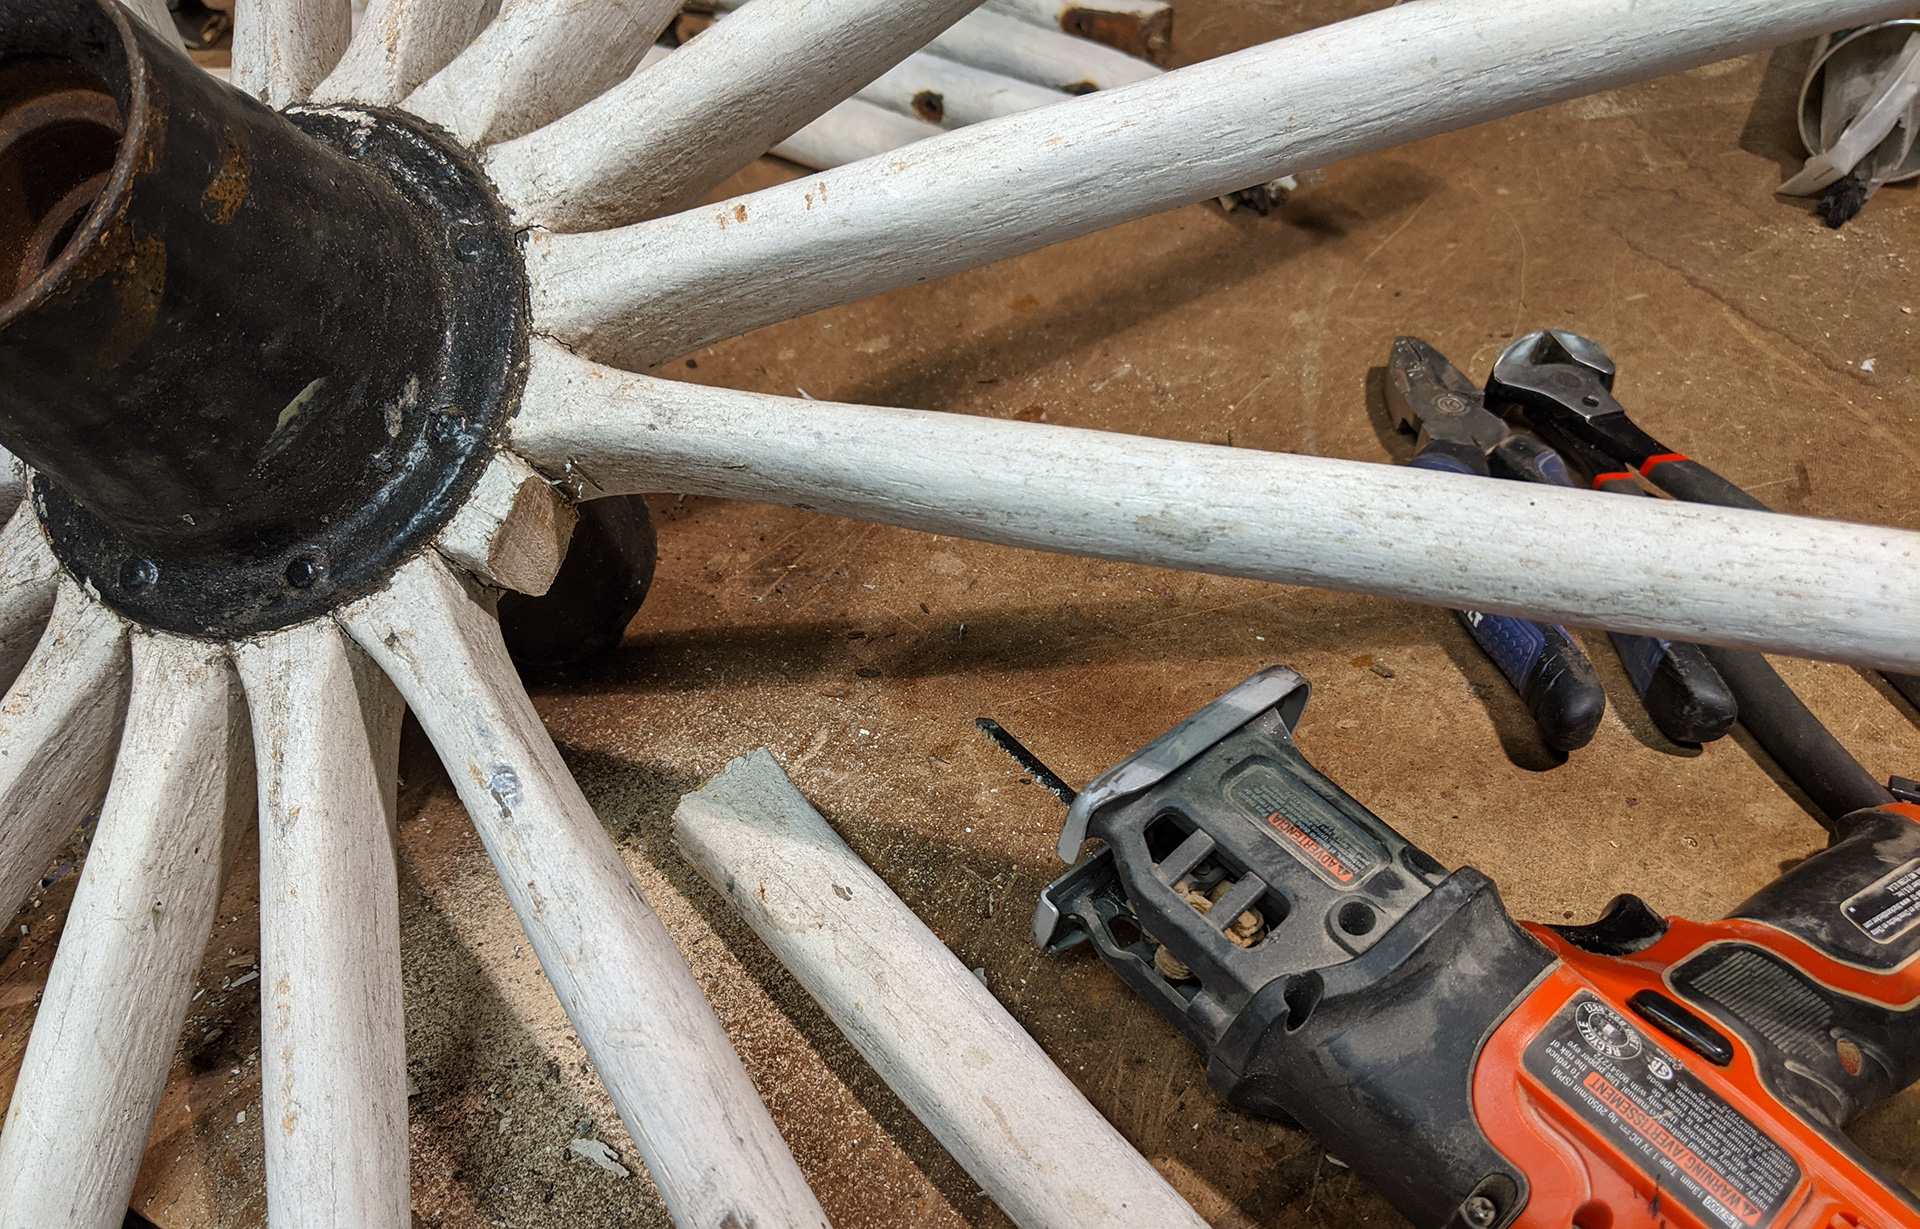
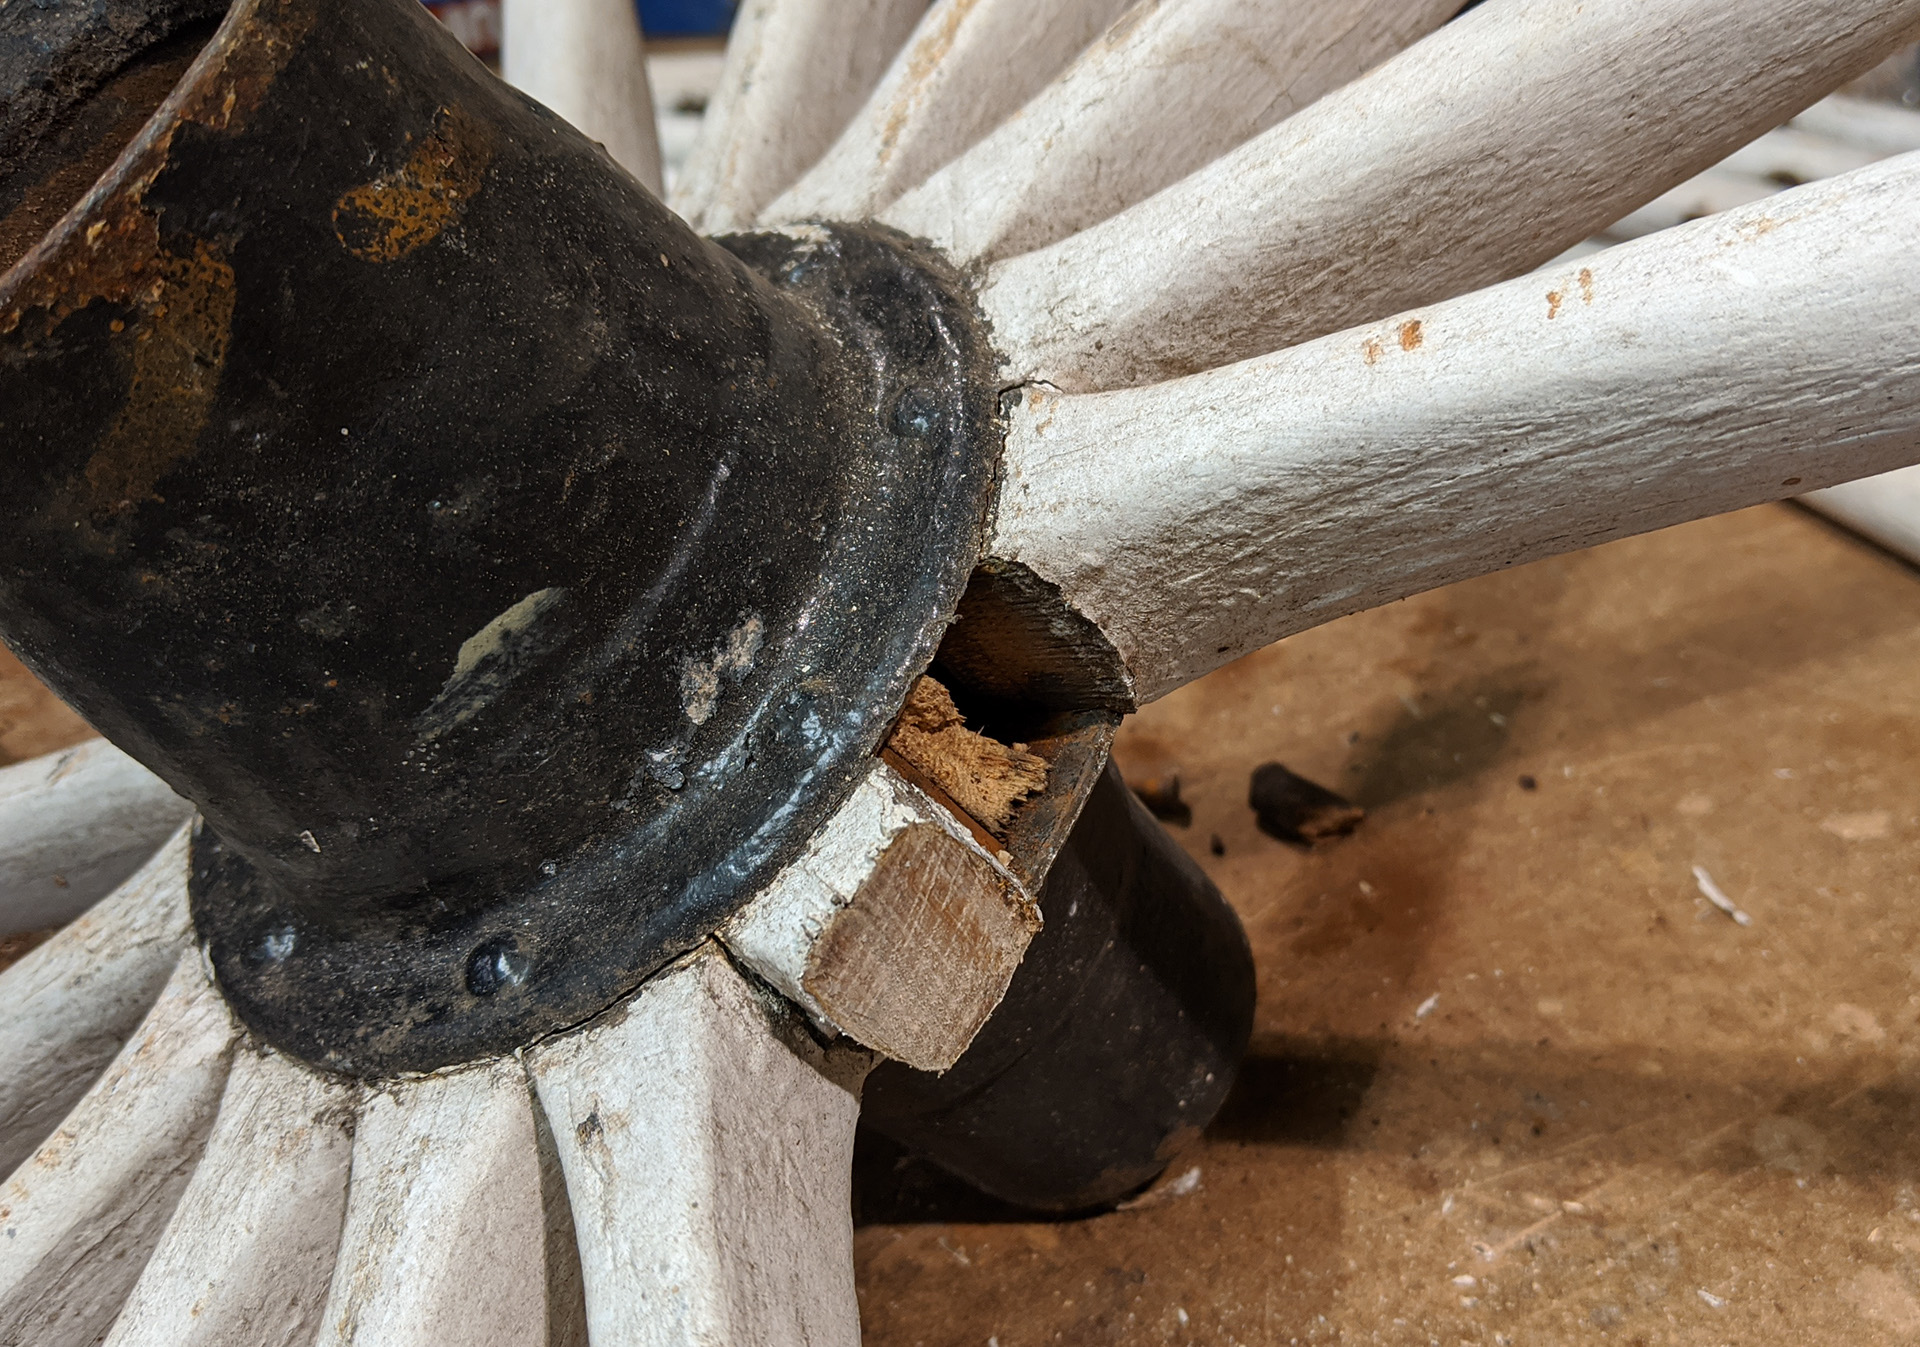
And so it begins. At this point, I'm starting from scratch... I don't know how these old wheels were put together, and there's a lot of old paint on there covering everything up. In addition, sections of the rim are in pretty bad shape - as you can see from the missing piece. I decided to start by just taking one of the wheels apart, to see how far I could get without touching the other one. |
|
|
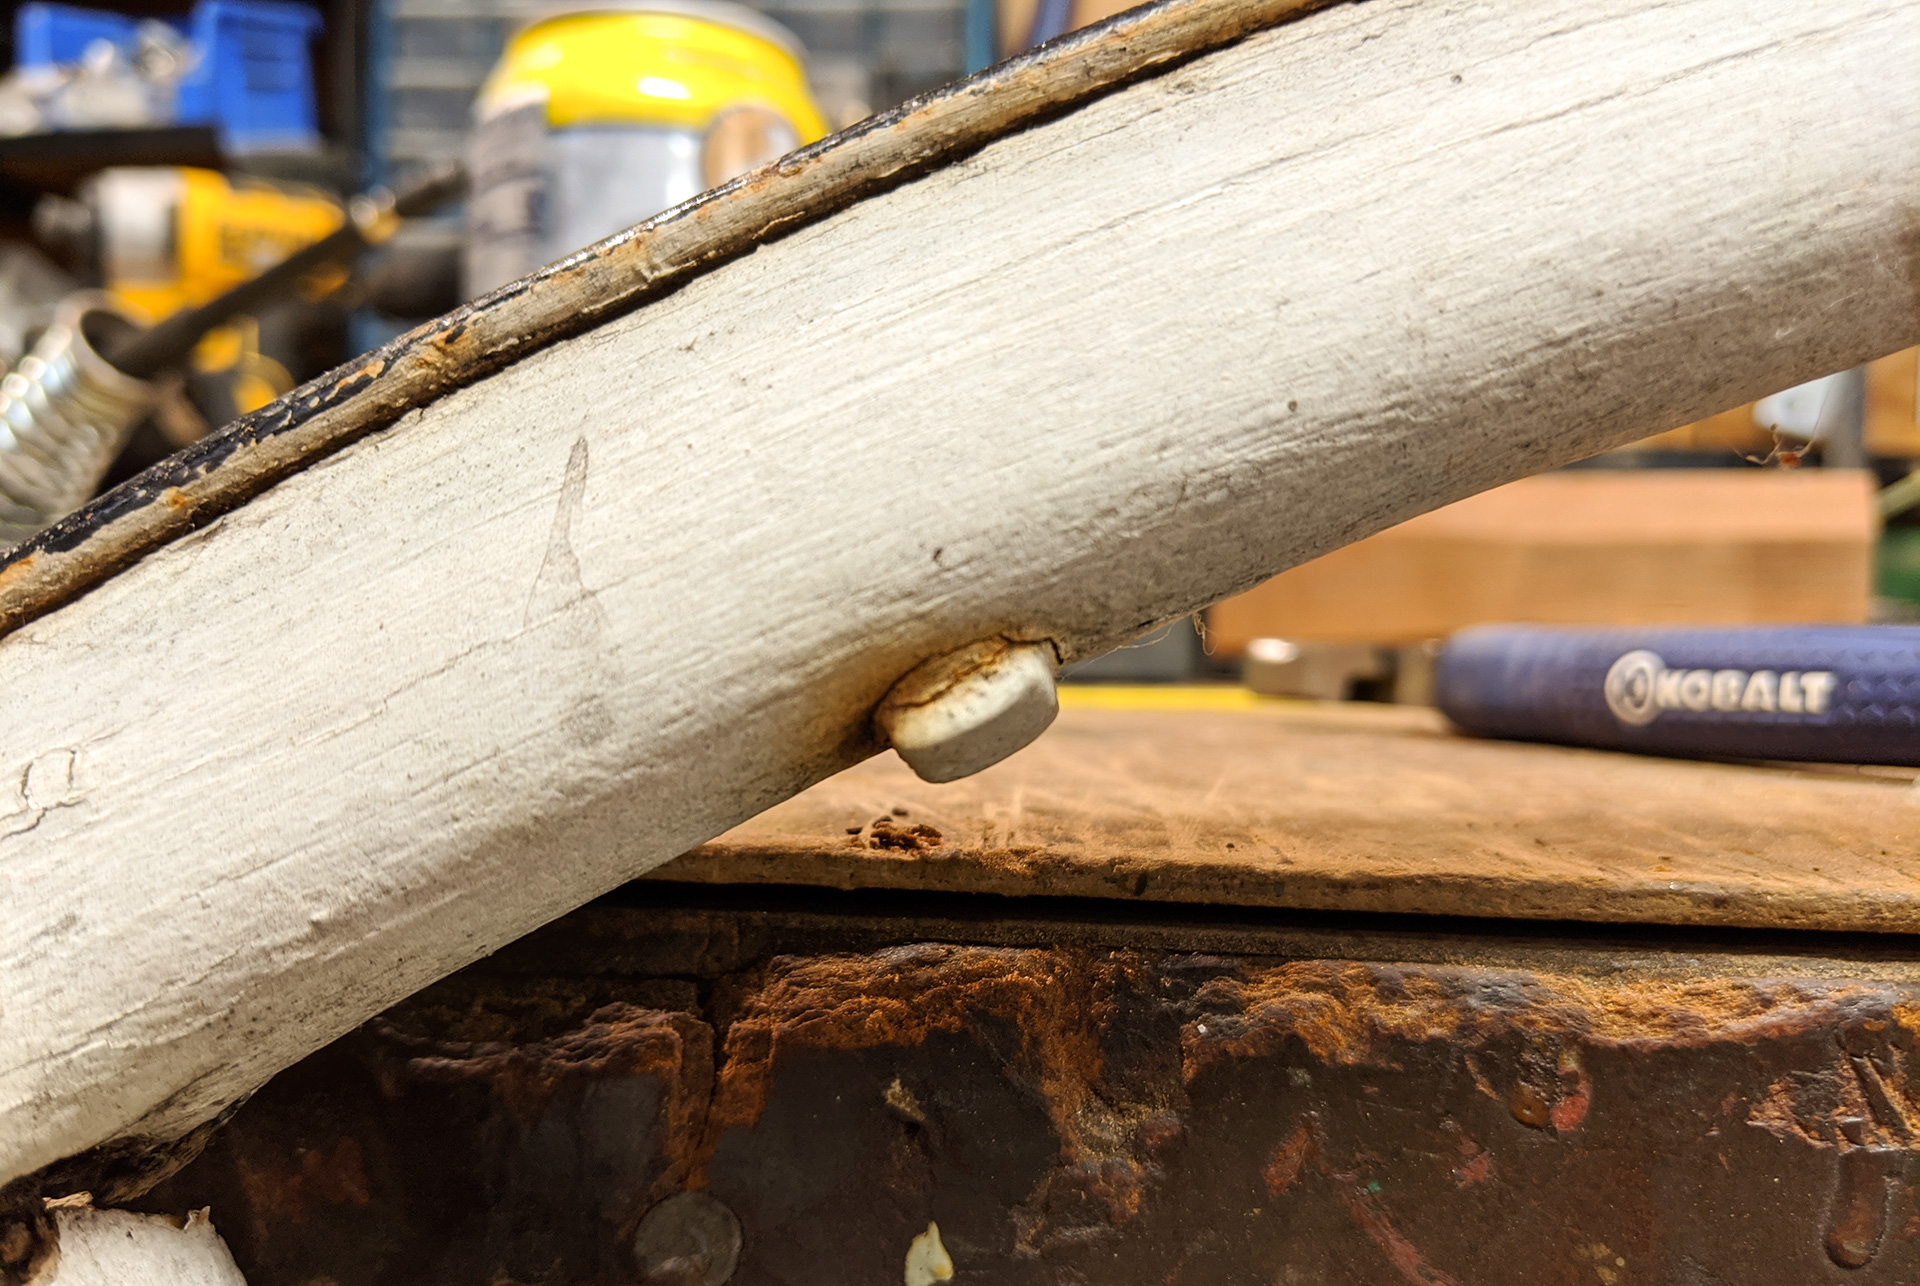
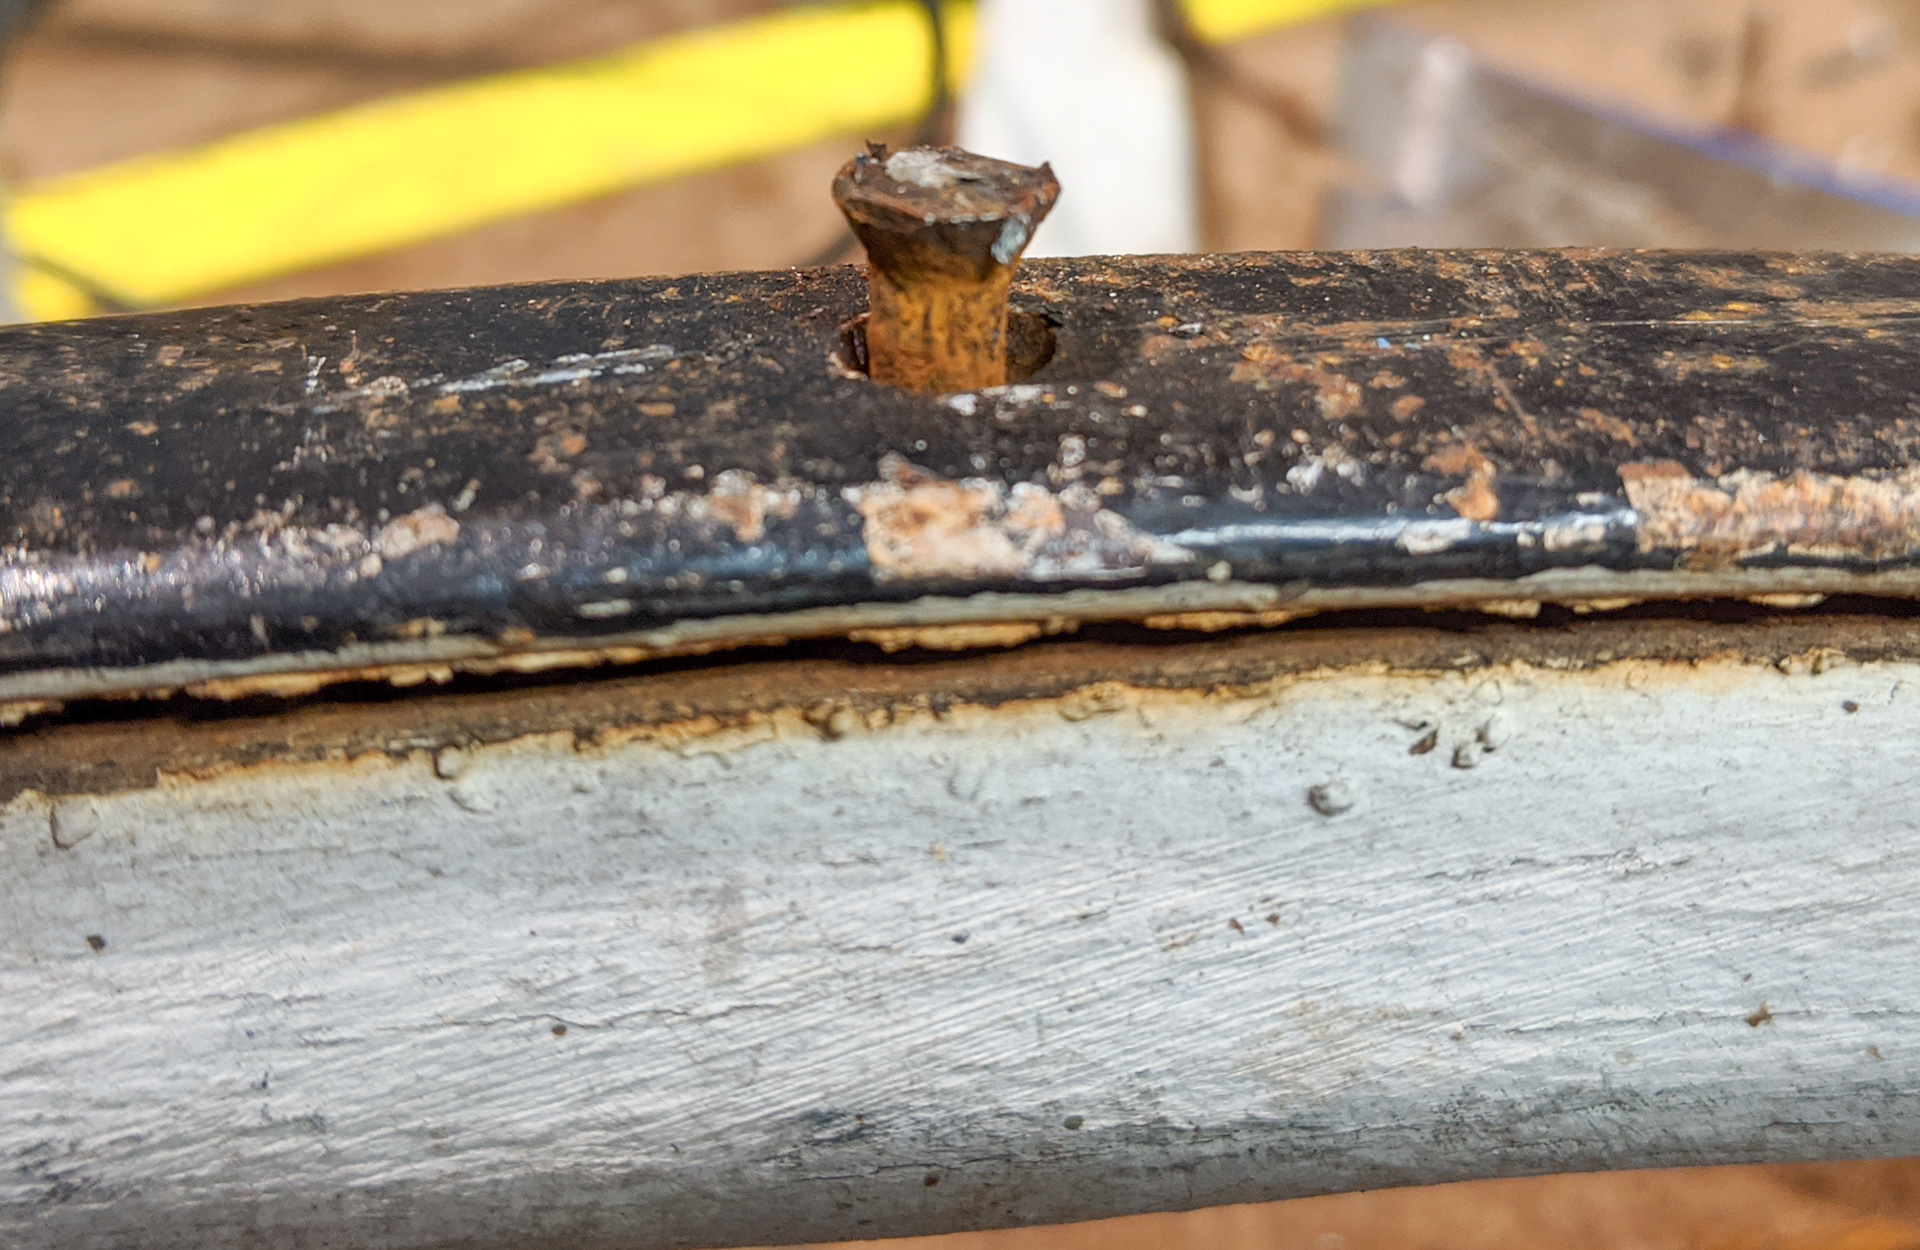
In between the spokes, these square-headed fasteners stuck out, but it was impossible to tell at first just what sort of fasteners they were. The other end was a flared-head sort of rivet that seated into the outer steel rim. My hope was that they were threaded bolts... |
|
|
|
|
|
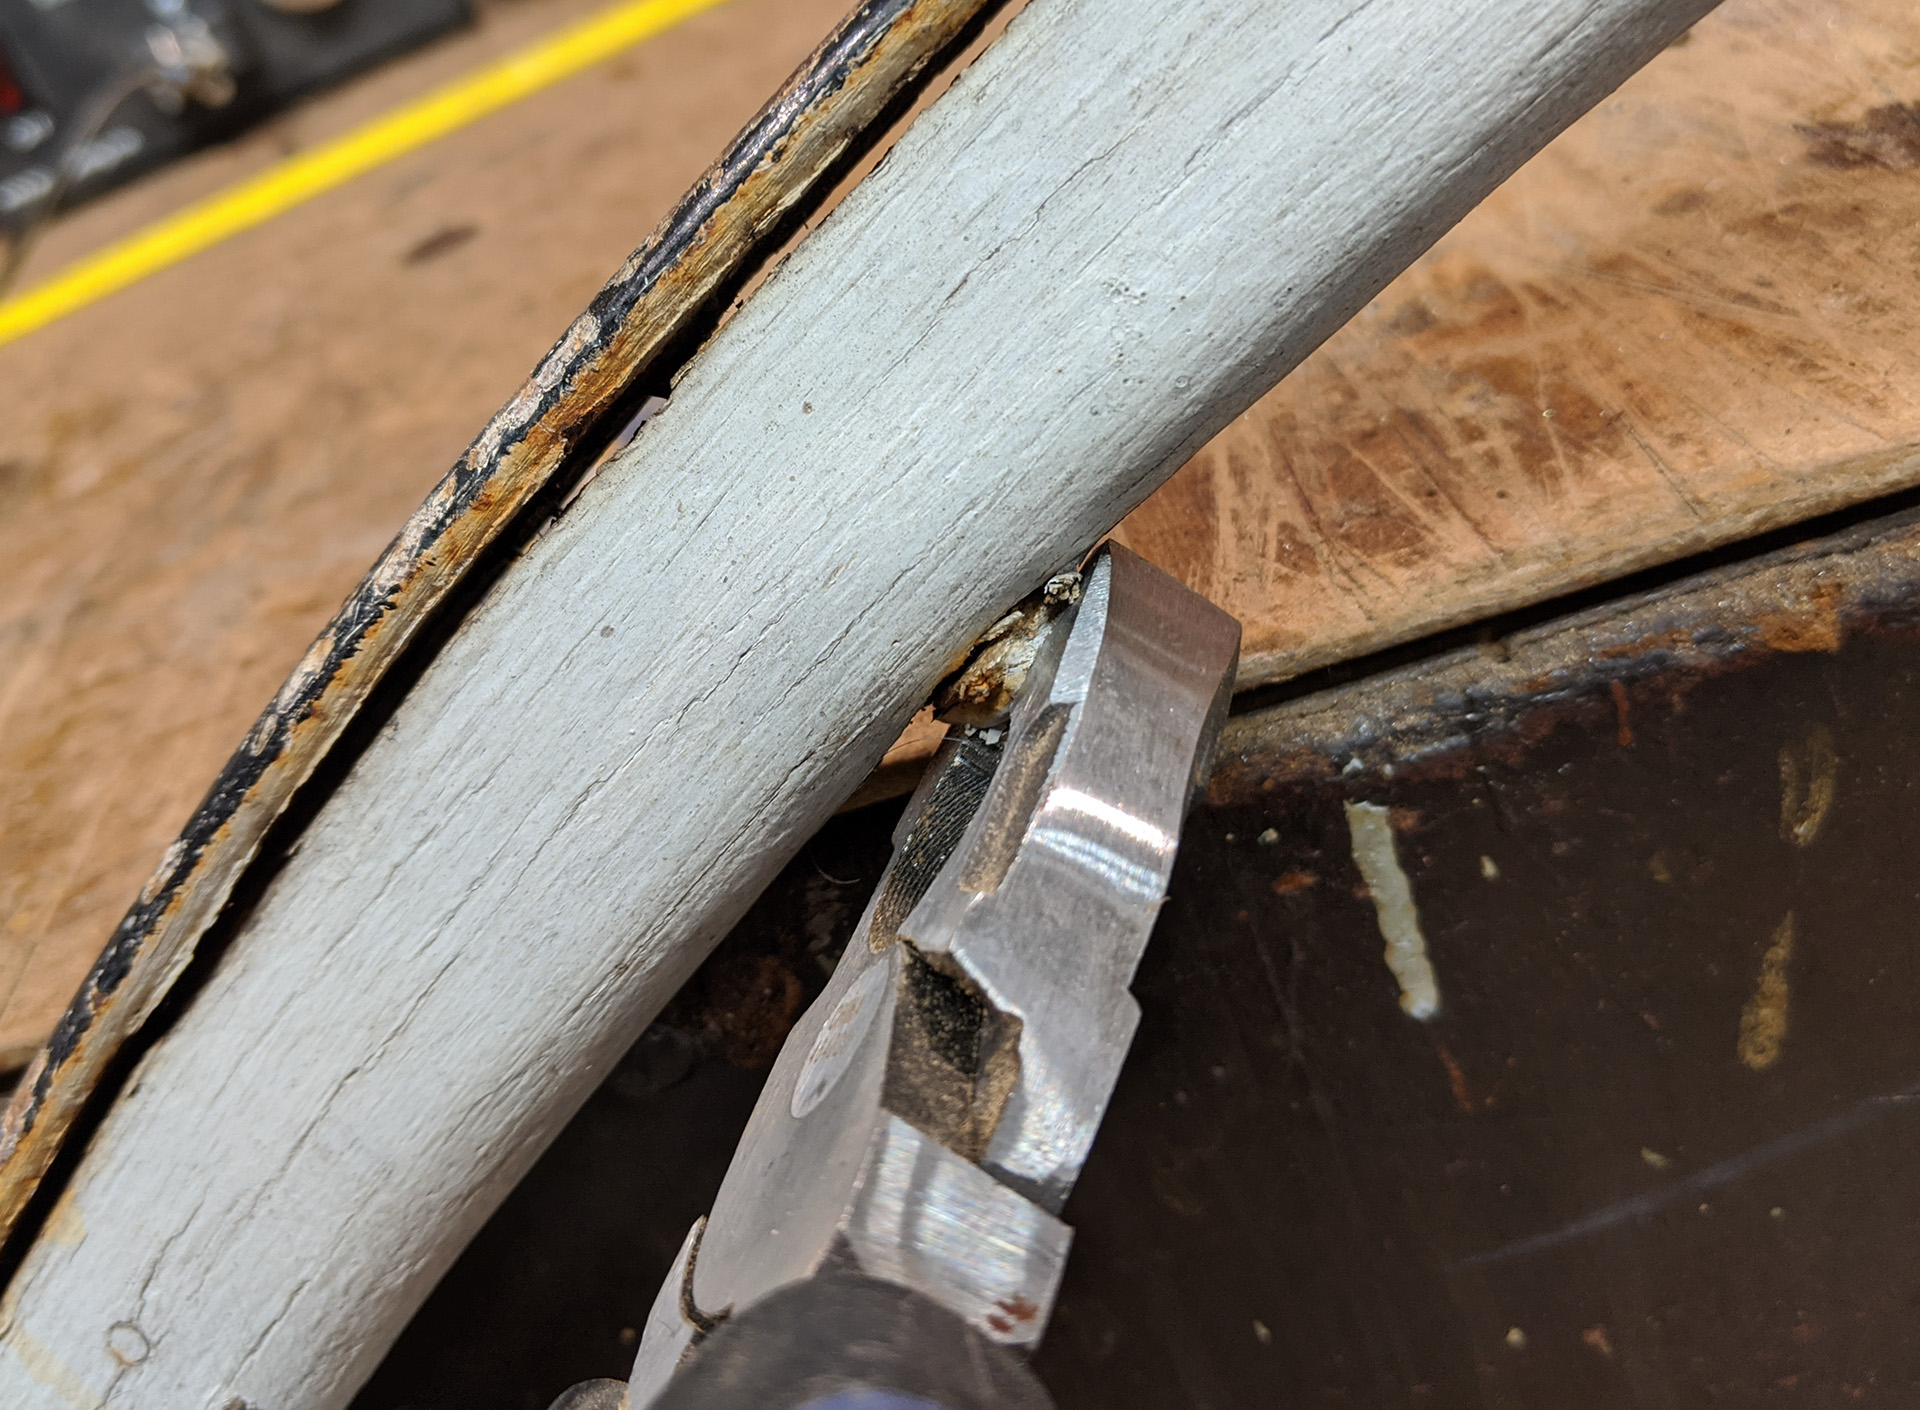
I moved closer towards an answer when I grabbed my pliers and gave one a good twist... |
|
|
|
|
|
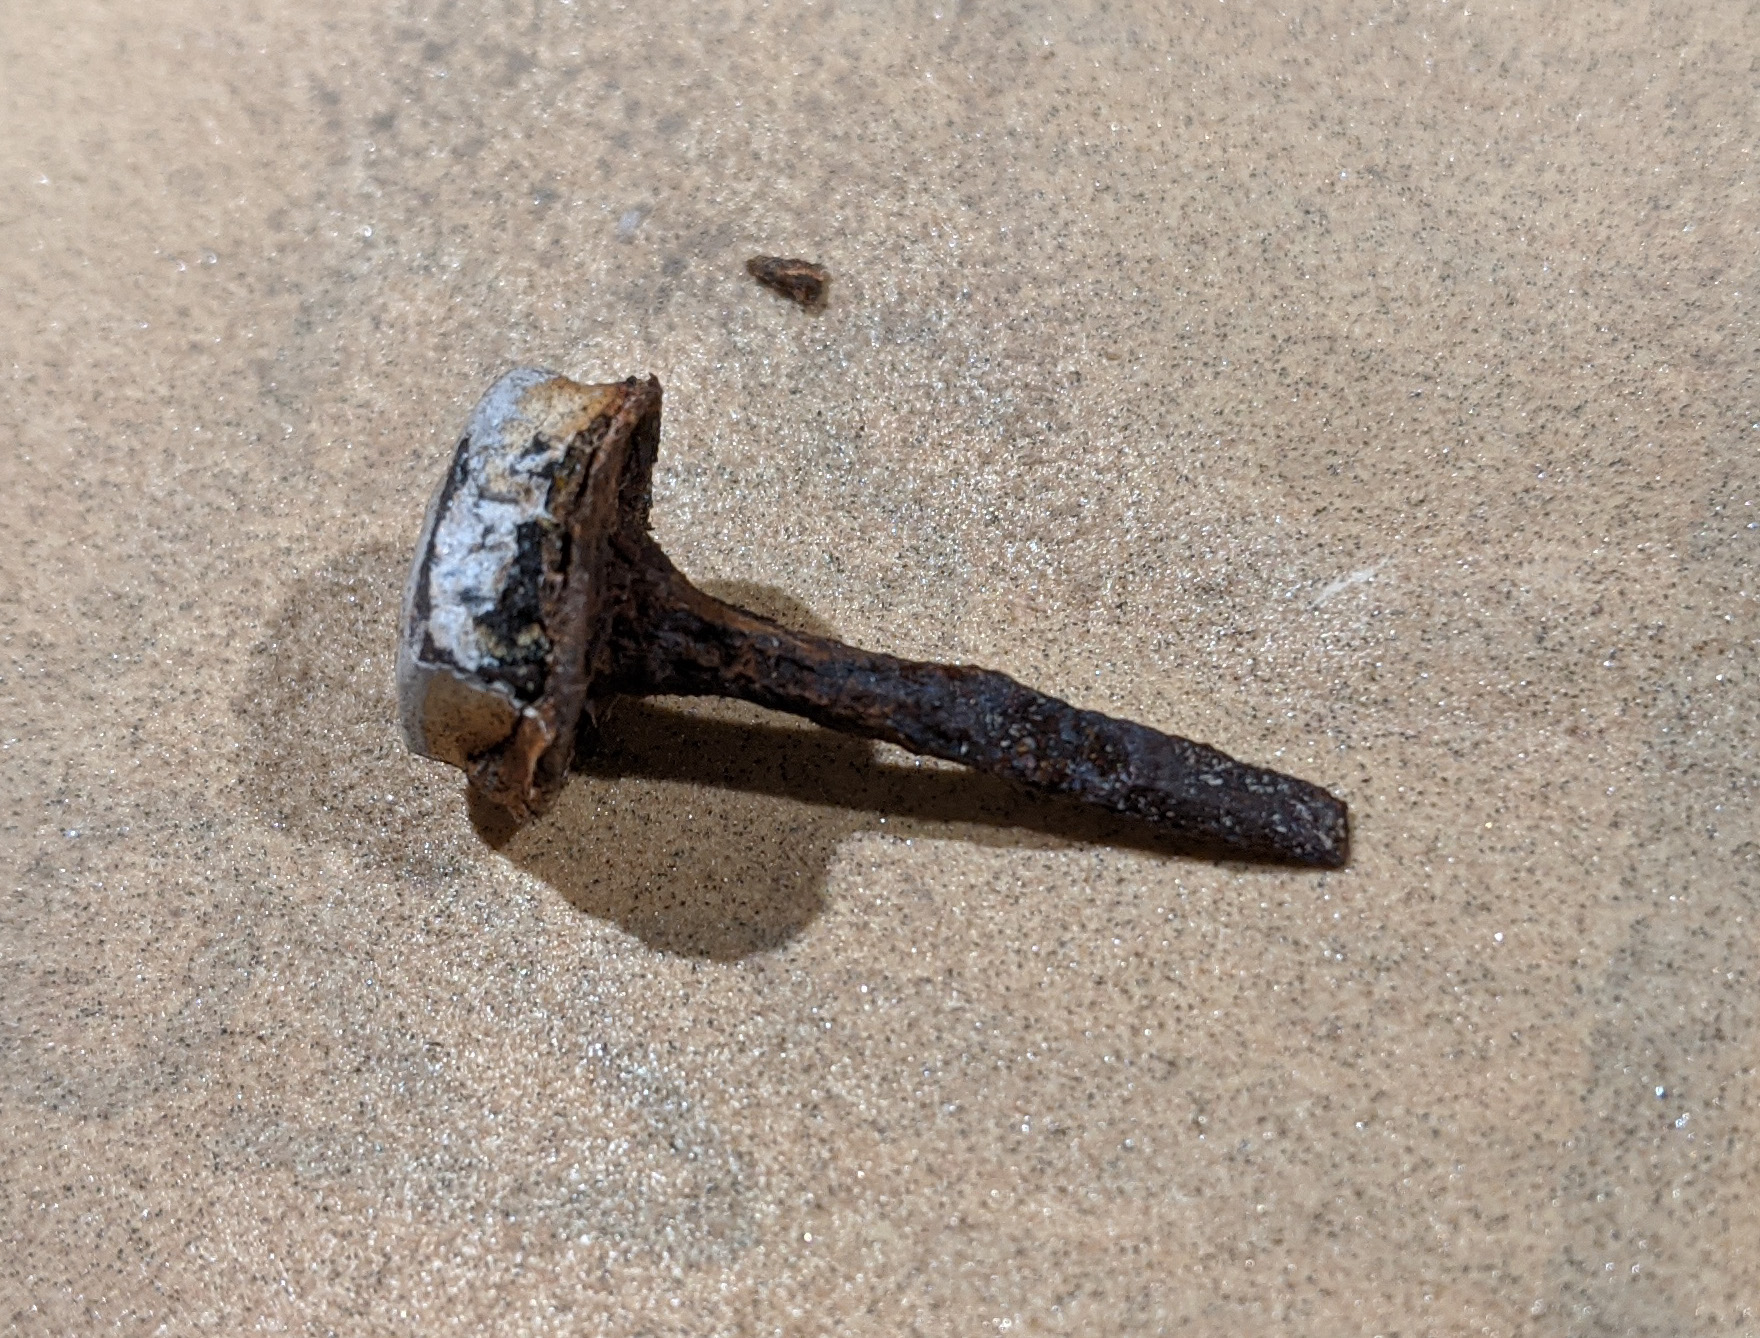
Of course, that one was pretty corroded and it broke, so I still wasn't sure. After trying a couple of more though, I was relieved to see that the square portion was a nut that unthreaded from the bolt shaft. A number of them twisted off, but at least half were sound. |
|
|
|
|
|
|
|
|
I discovered that the wheel was actually two halves, presumably steam-bent, joined together with these bolted plates. One was very badly rusted, but the one shown here was in decent shape. Later, this plate would be reworked into my banjo's tailpiece. |
|
|
|
|
|
It wasn't long before I had most of the bolts out and was able to break the spokes free of the rim. The spokes were set into the rim via a dowel-like extension on the end of each one, and many of them were dry rotted which made it easier to get the spoke assembly free of the rim. |
|
|
|
|
|
I then discovered that the bolts through the rim could be tapped free as well, which made it easier to get the rest of the rim off. |
|
|
|
|
|
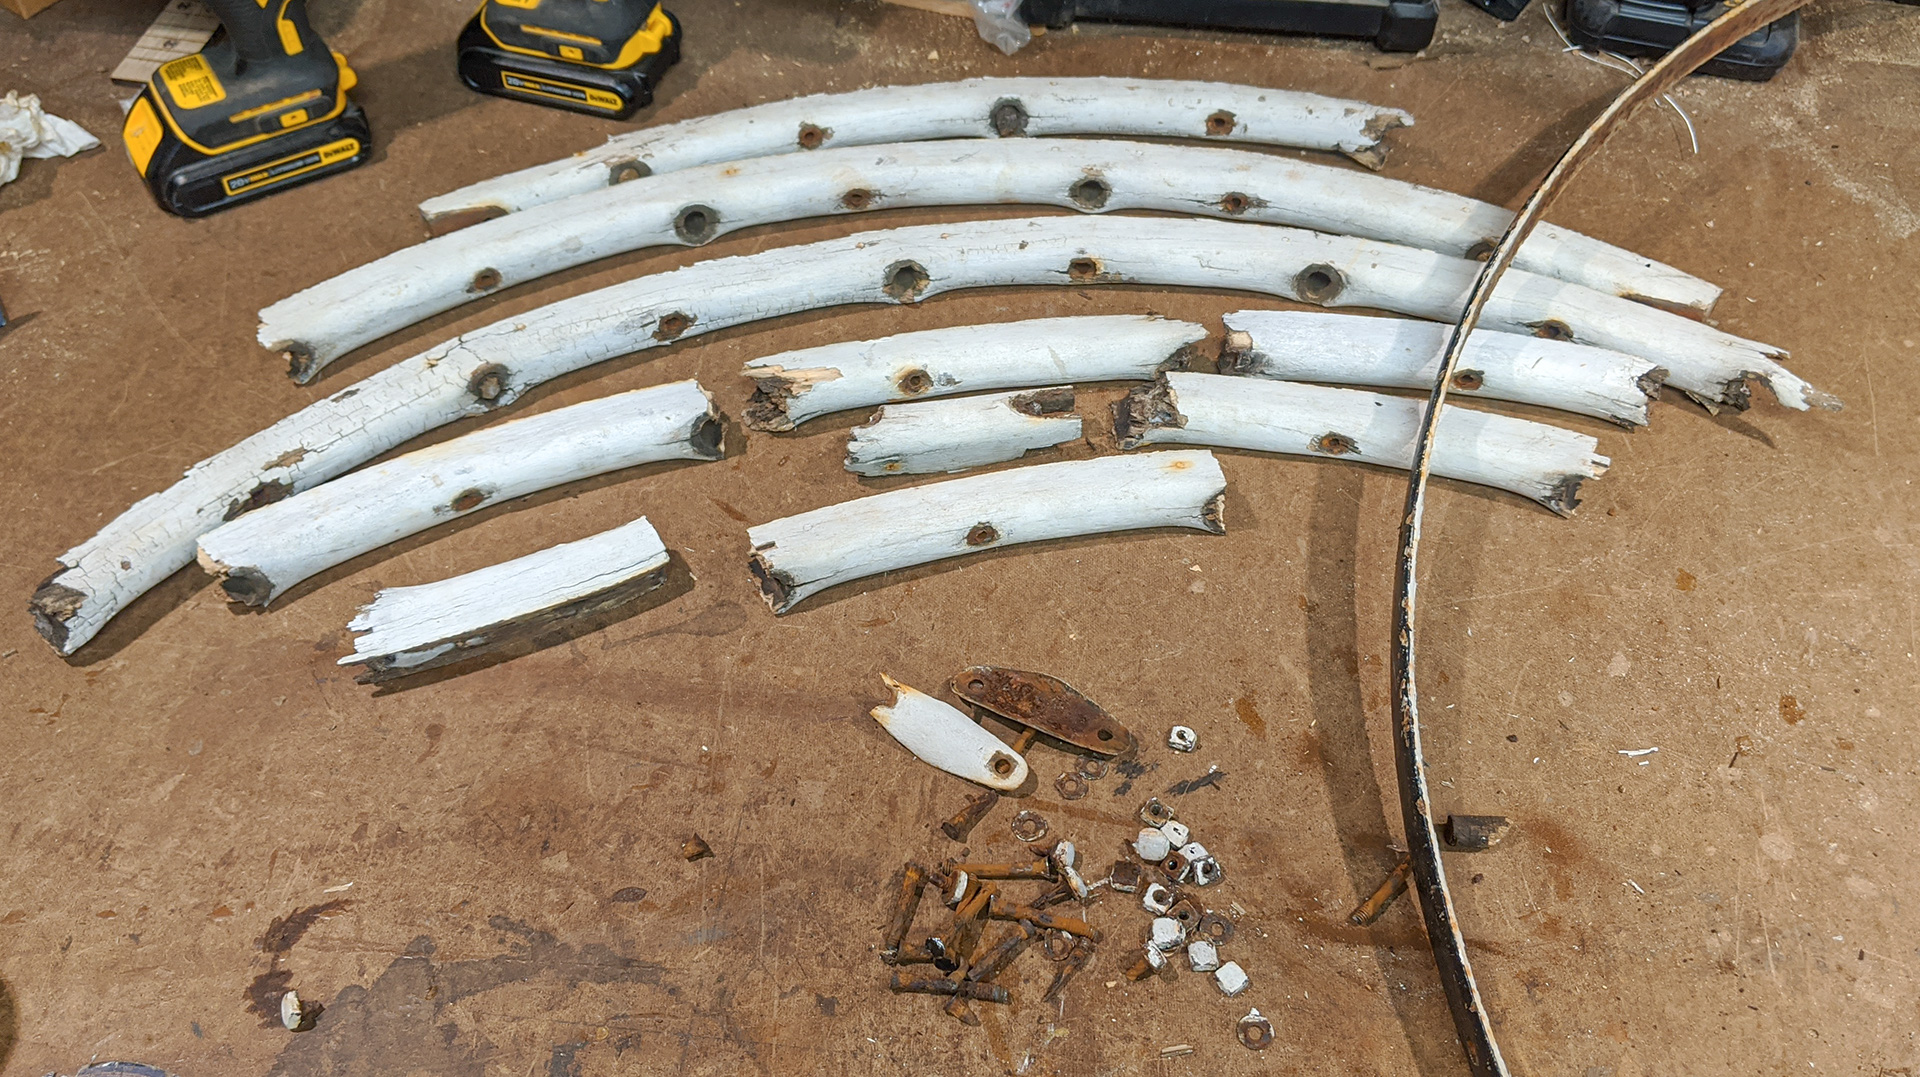
And there I had it - all of the rim wood was free.. unfortunately in a number of pieces. I wasn't sure at this point whether I would even try to use the rim at all in this build. on either side of each hole where the spokes had entered, there was a headless screw in the wood for stability, and I knew there'd be no good way to get them out - so if I decided to use the rim wood, I'd have to work around them. |
|
|
|
|
|
The pins holding the spokes to the central hub of the wheel didn't seem to be threaded bolts, and I couldn't come up with a good way to get them out. I didn't want to go to the effort of drilling, so I cut one of the spokes out to see how that went. |
|
|
|
|
|
Once one spoke was gone, I had enough wiggle room to pull the next one out - the wood around the pin gave way fairly easily. Here, I've broken the second spoke free. |
|
|
|
|
|
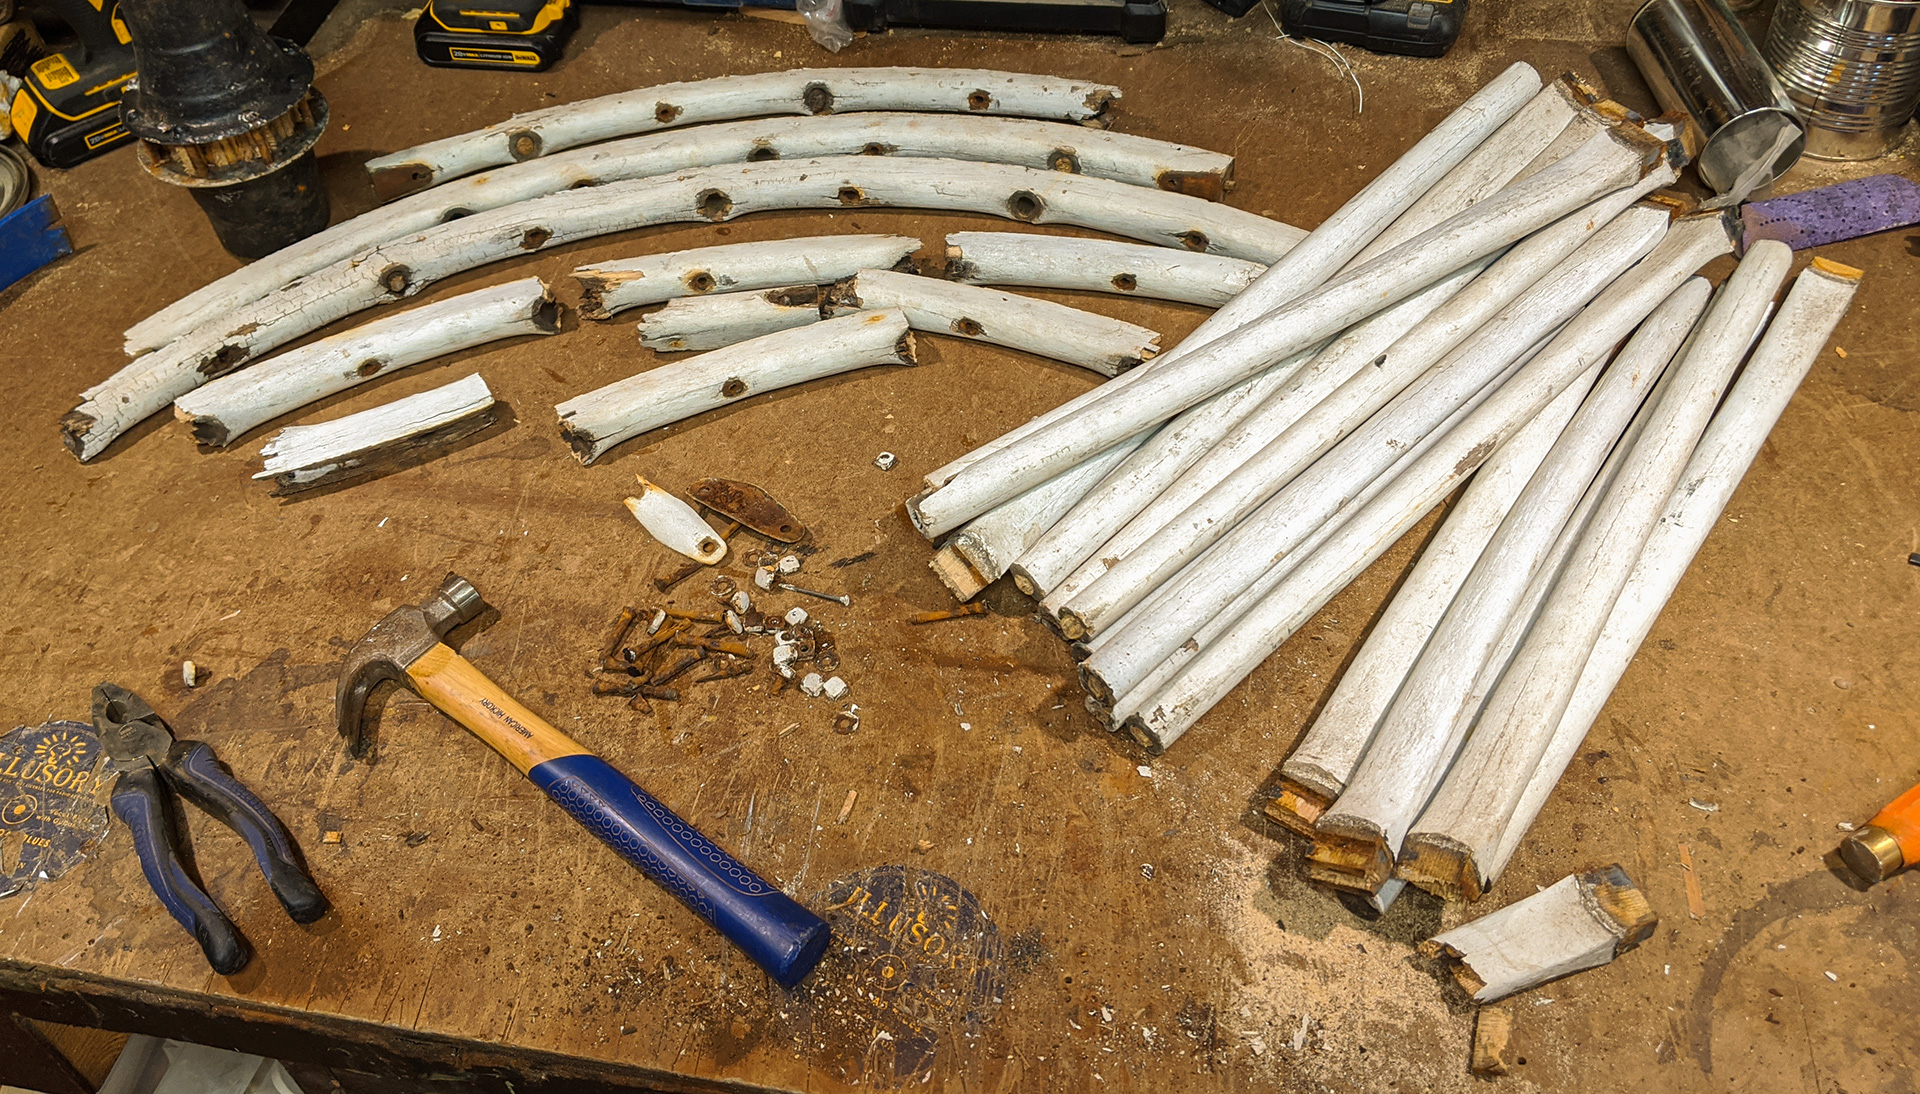
Before long, all of the spokes were out and my wheel was fully disassembled. Laying on the bench like this, it really didn't seem like all that much material. I knew I had to see how much usable wood I could get from the spokes... |
|
|
|
|
|
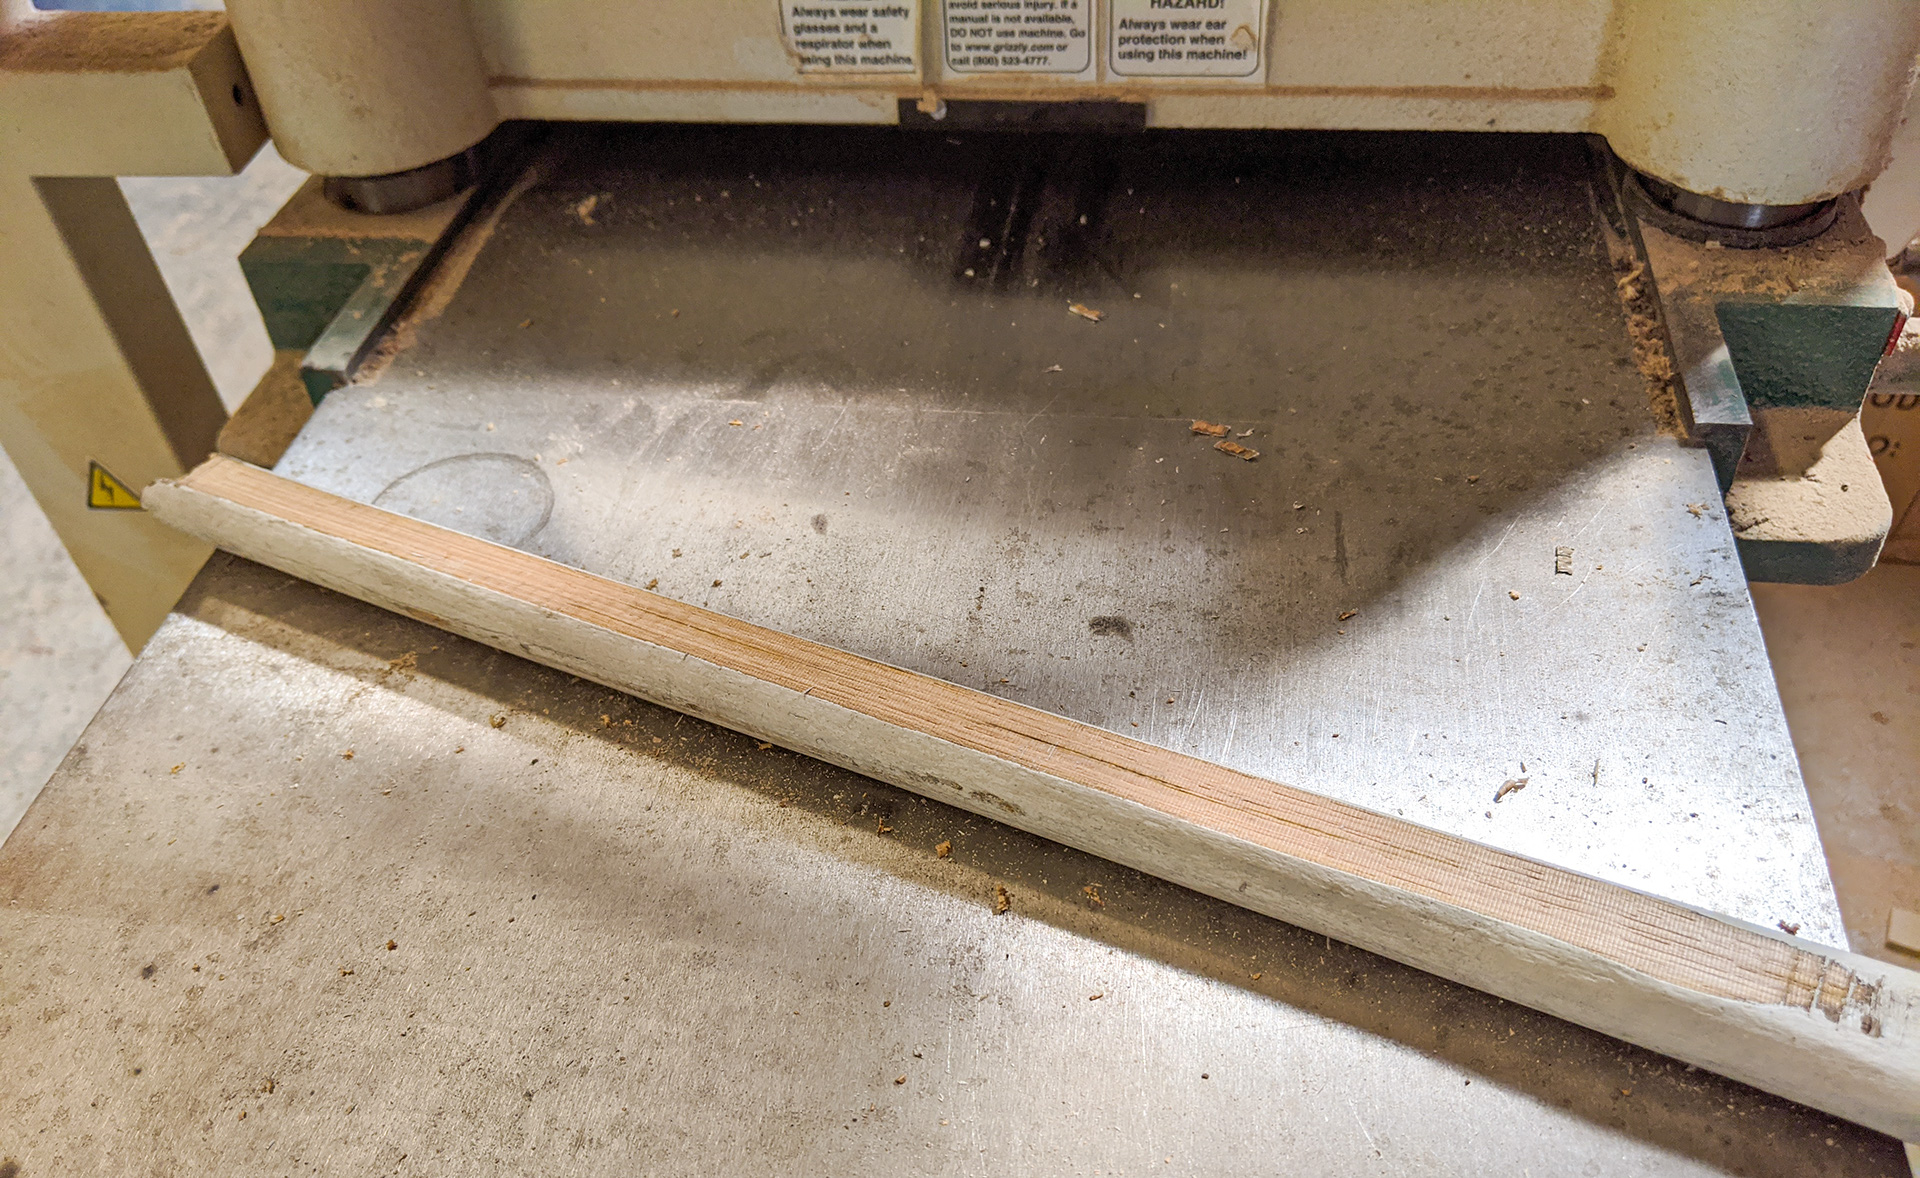
So first it was to the planer to plan a flat edge onto one of them... |
|
|
|
|
|
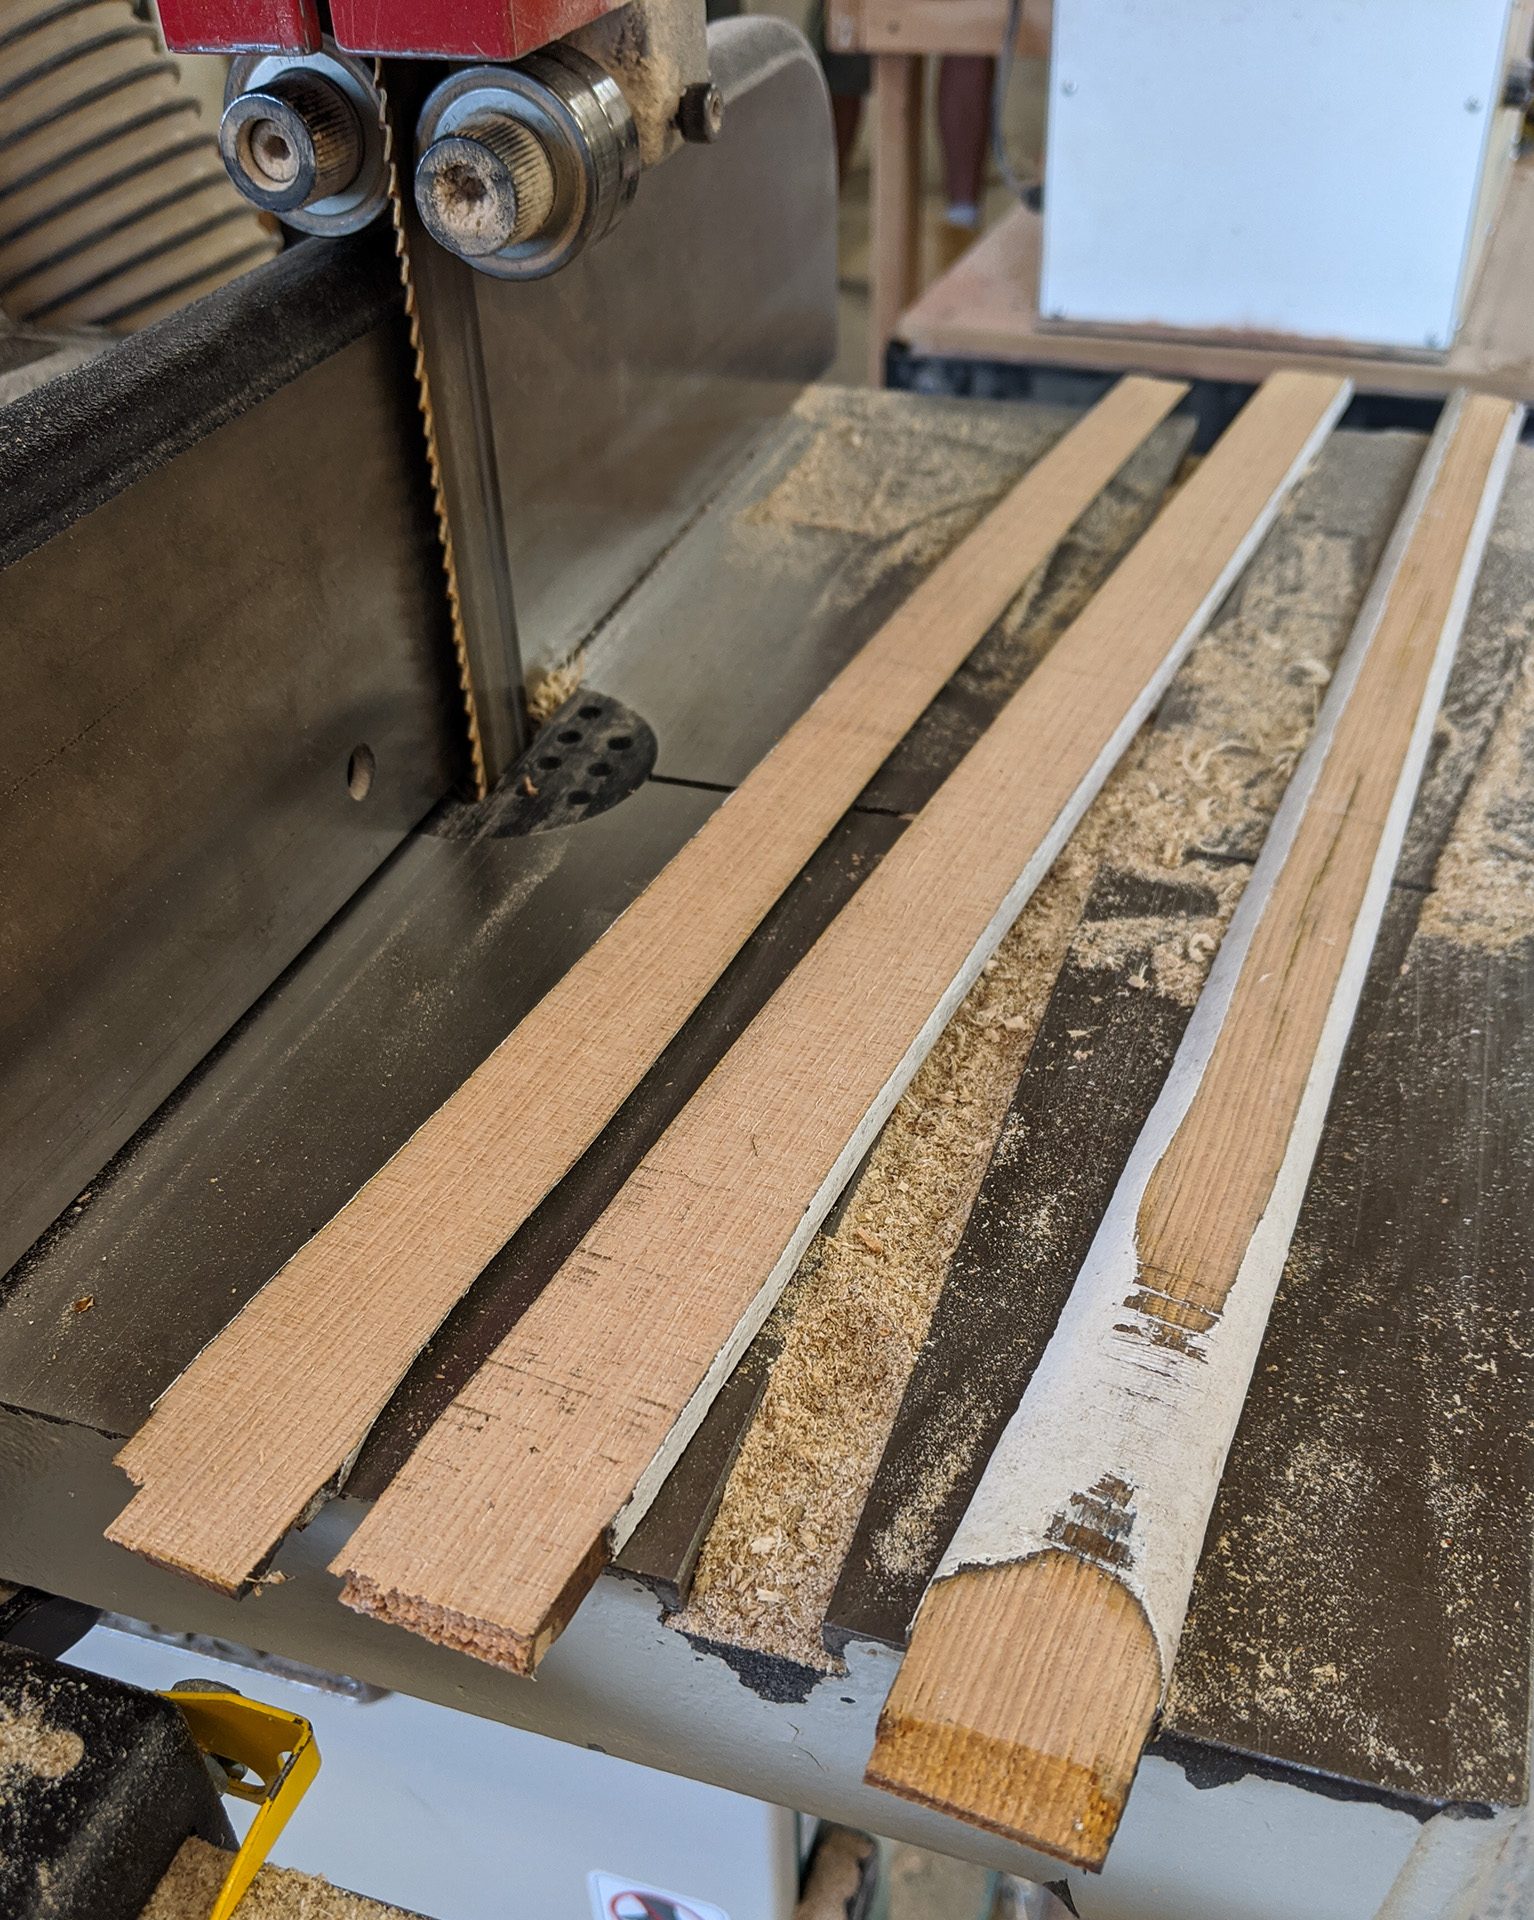
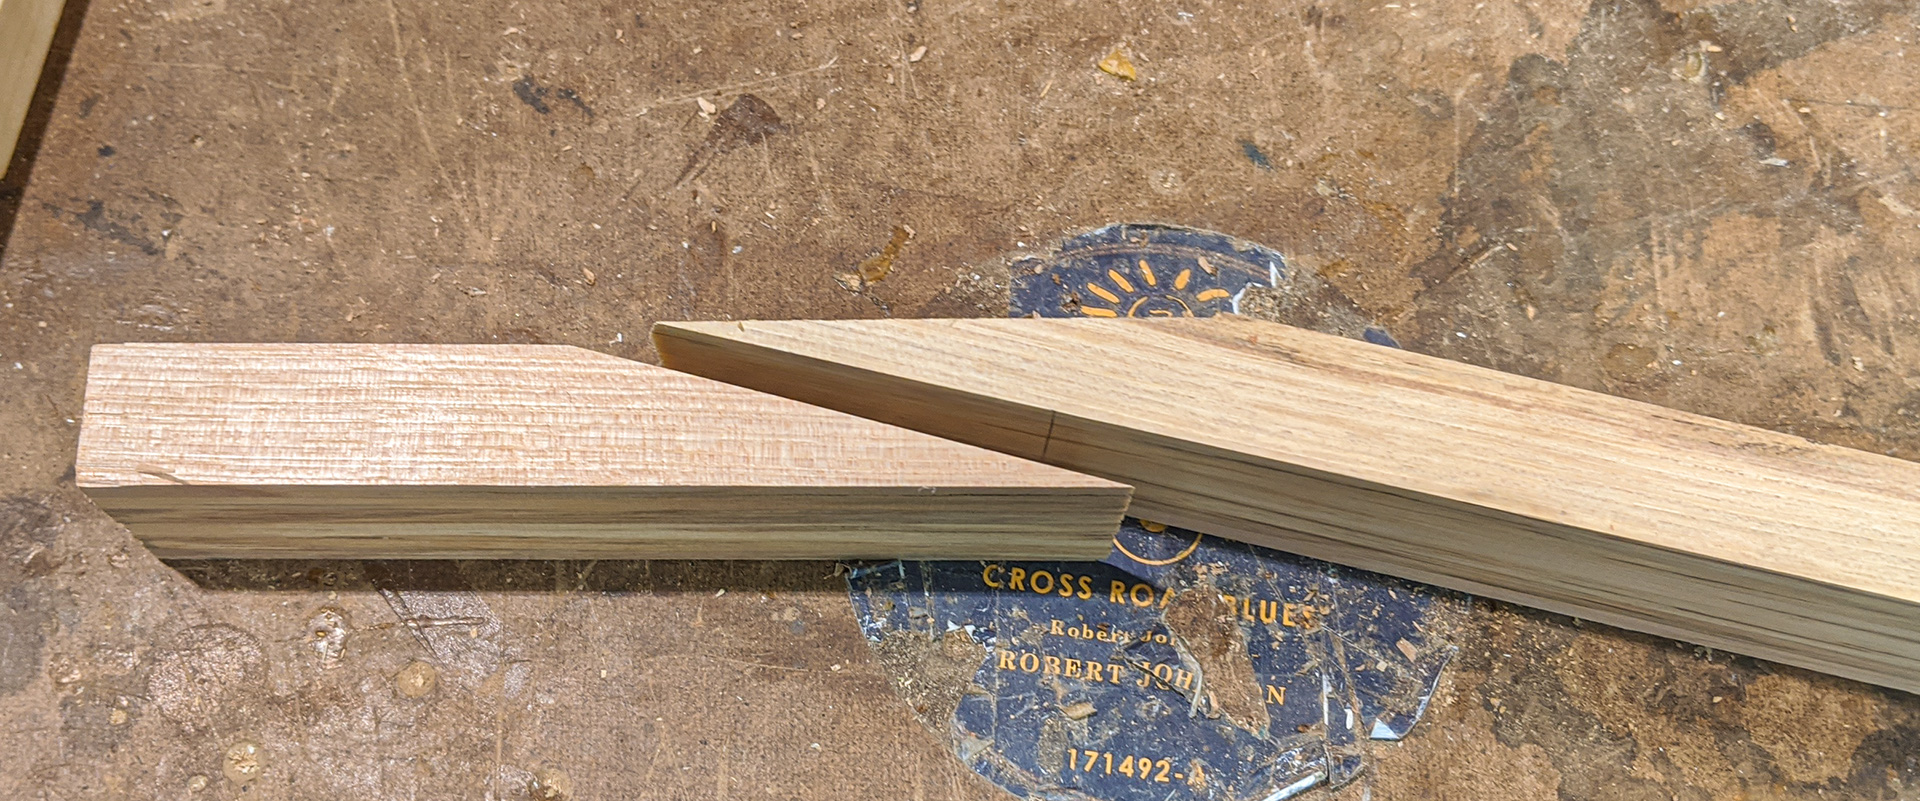
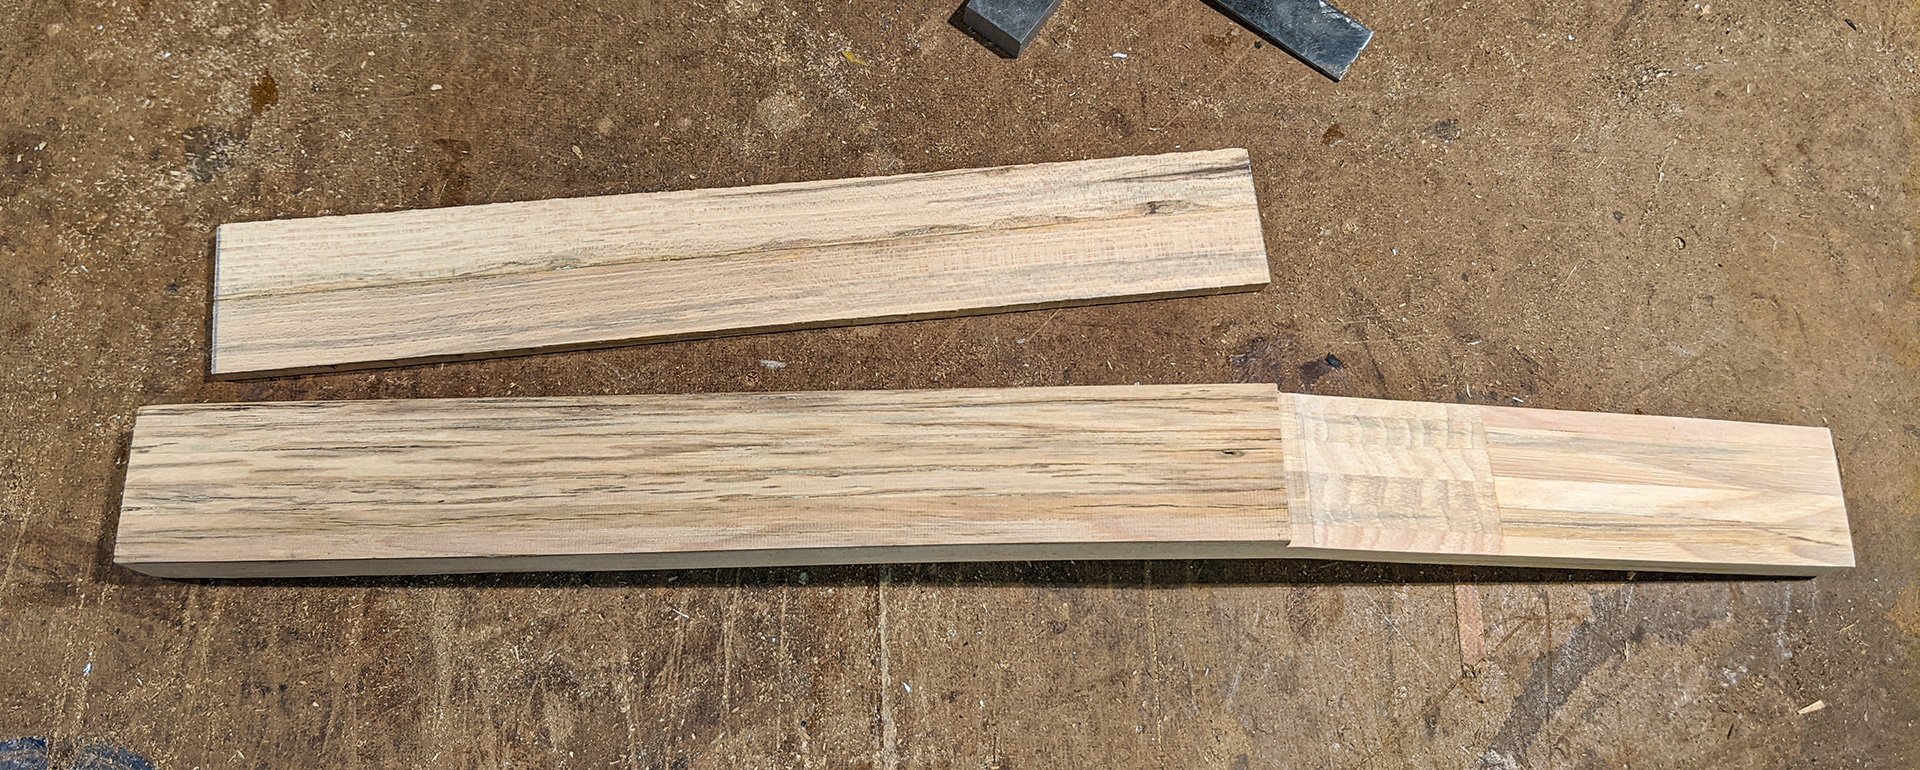
Then to the bandsaw to saw some slats. Here I've gotten one decent slat about 3/16" thick from the widest part of the spoke, and two thinner pieces that had one semi-rounded side. Not really all that much material, and there were only 17 spokes from this first wheel to work with, and several of them were rather warped. |
|
|
|
|
|
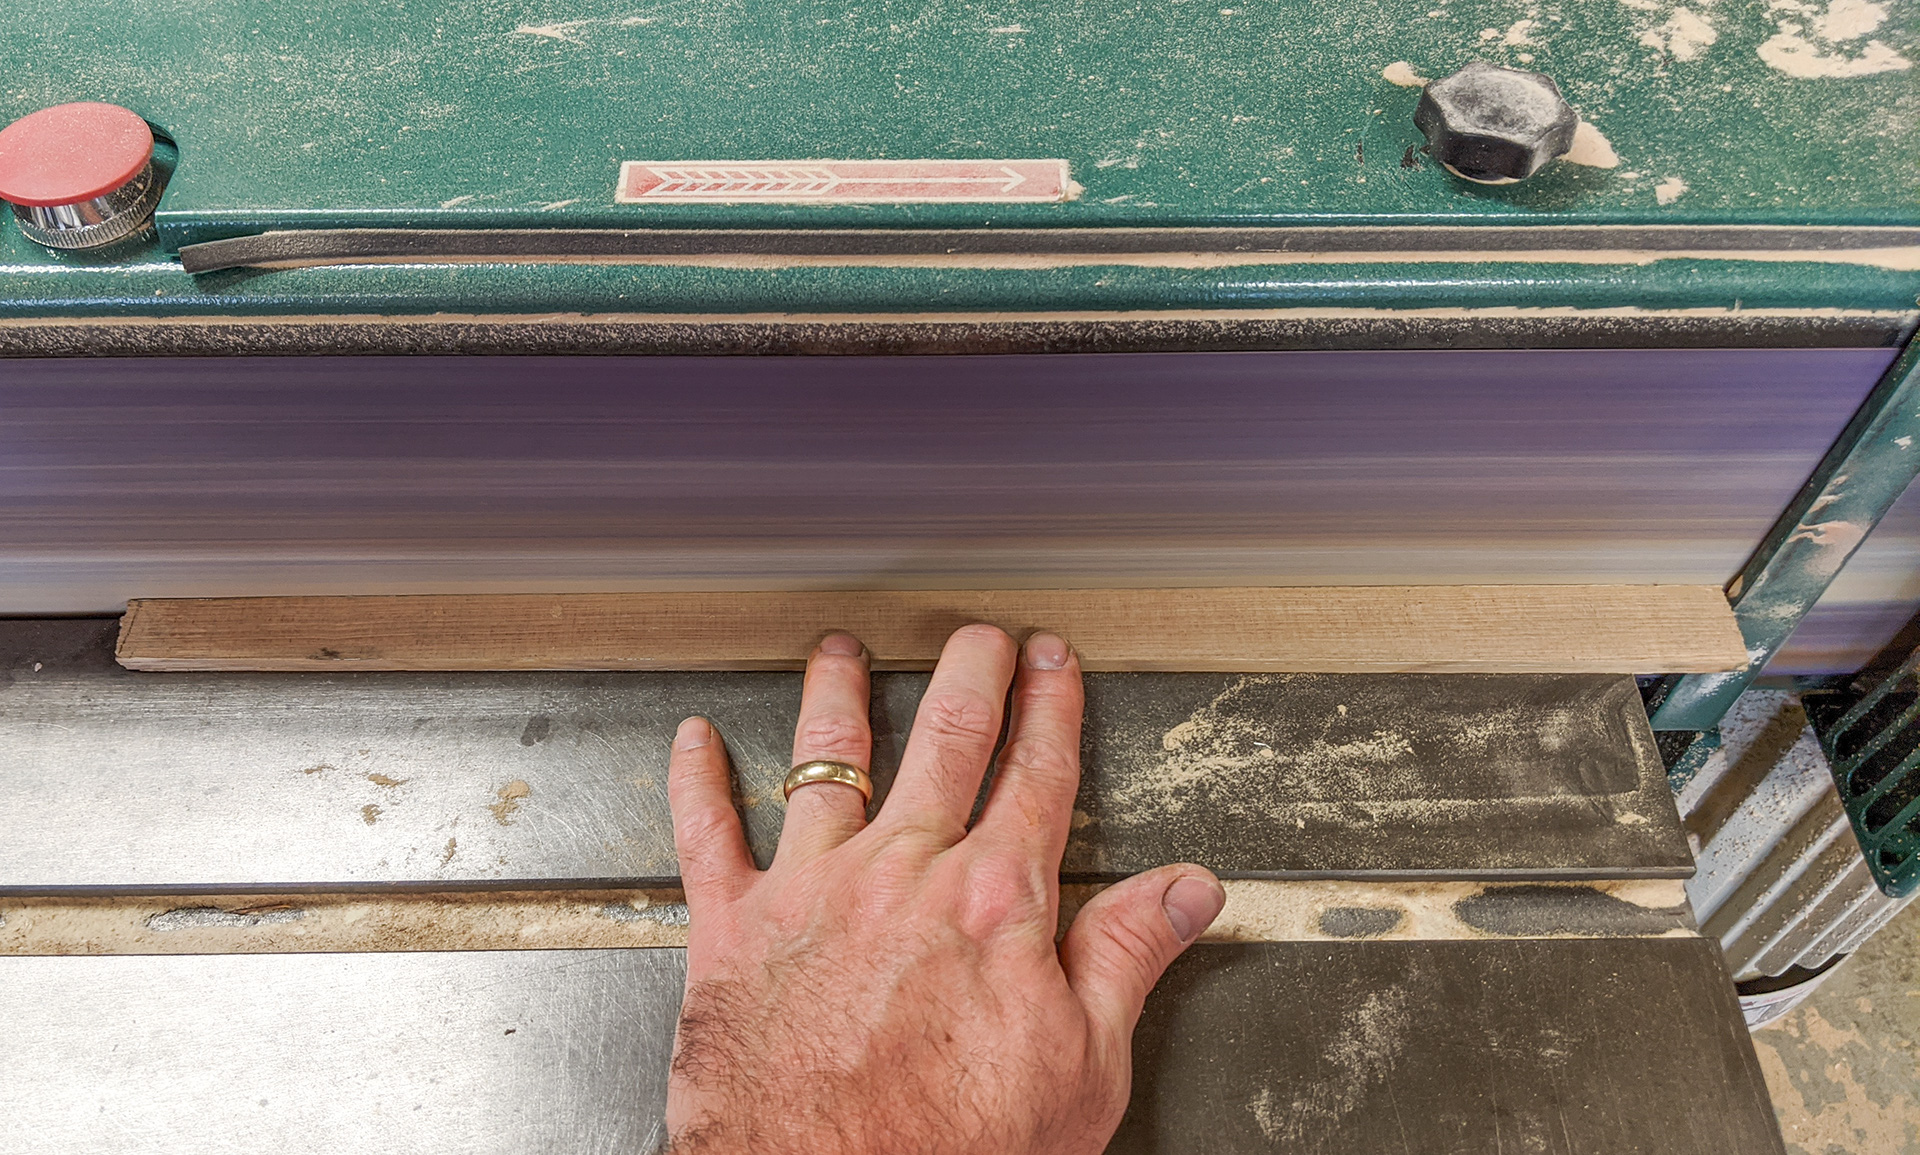
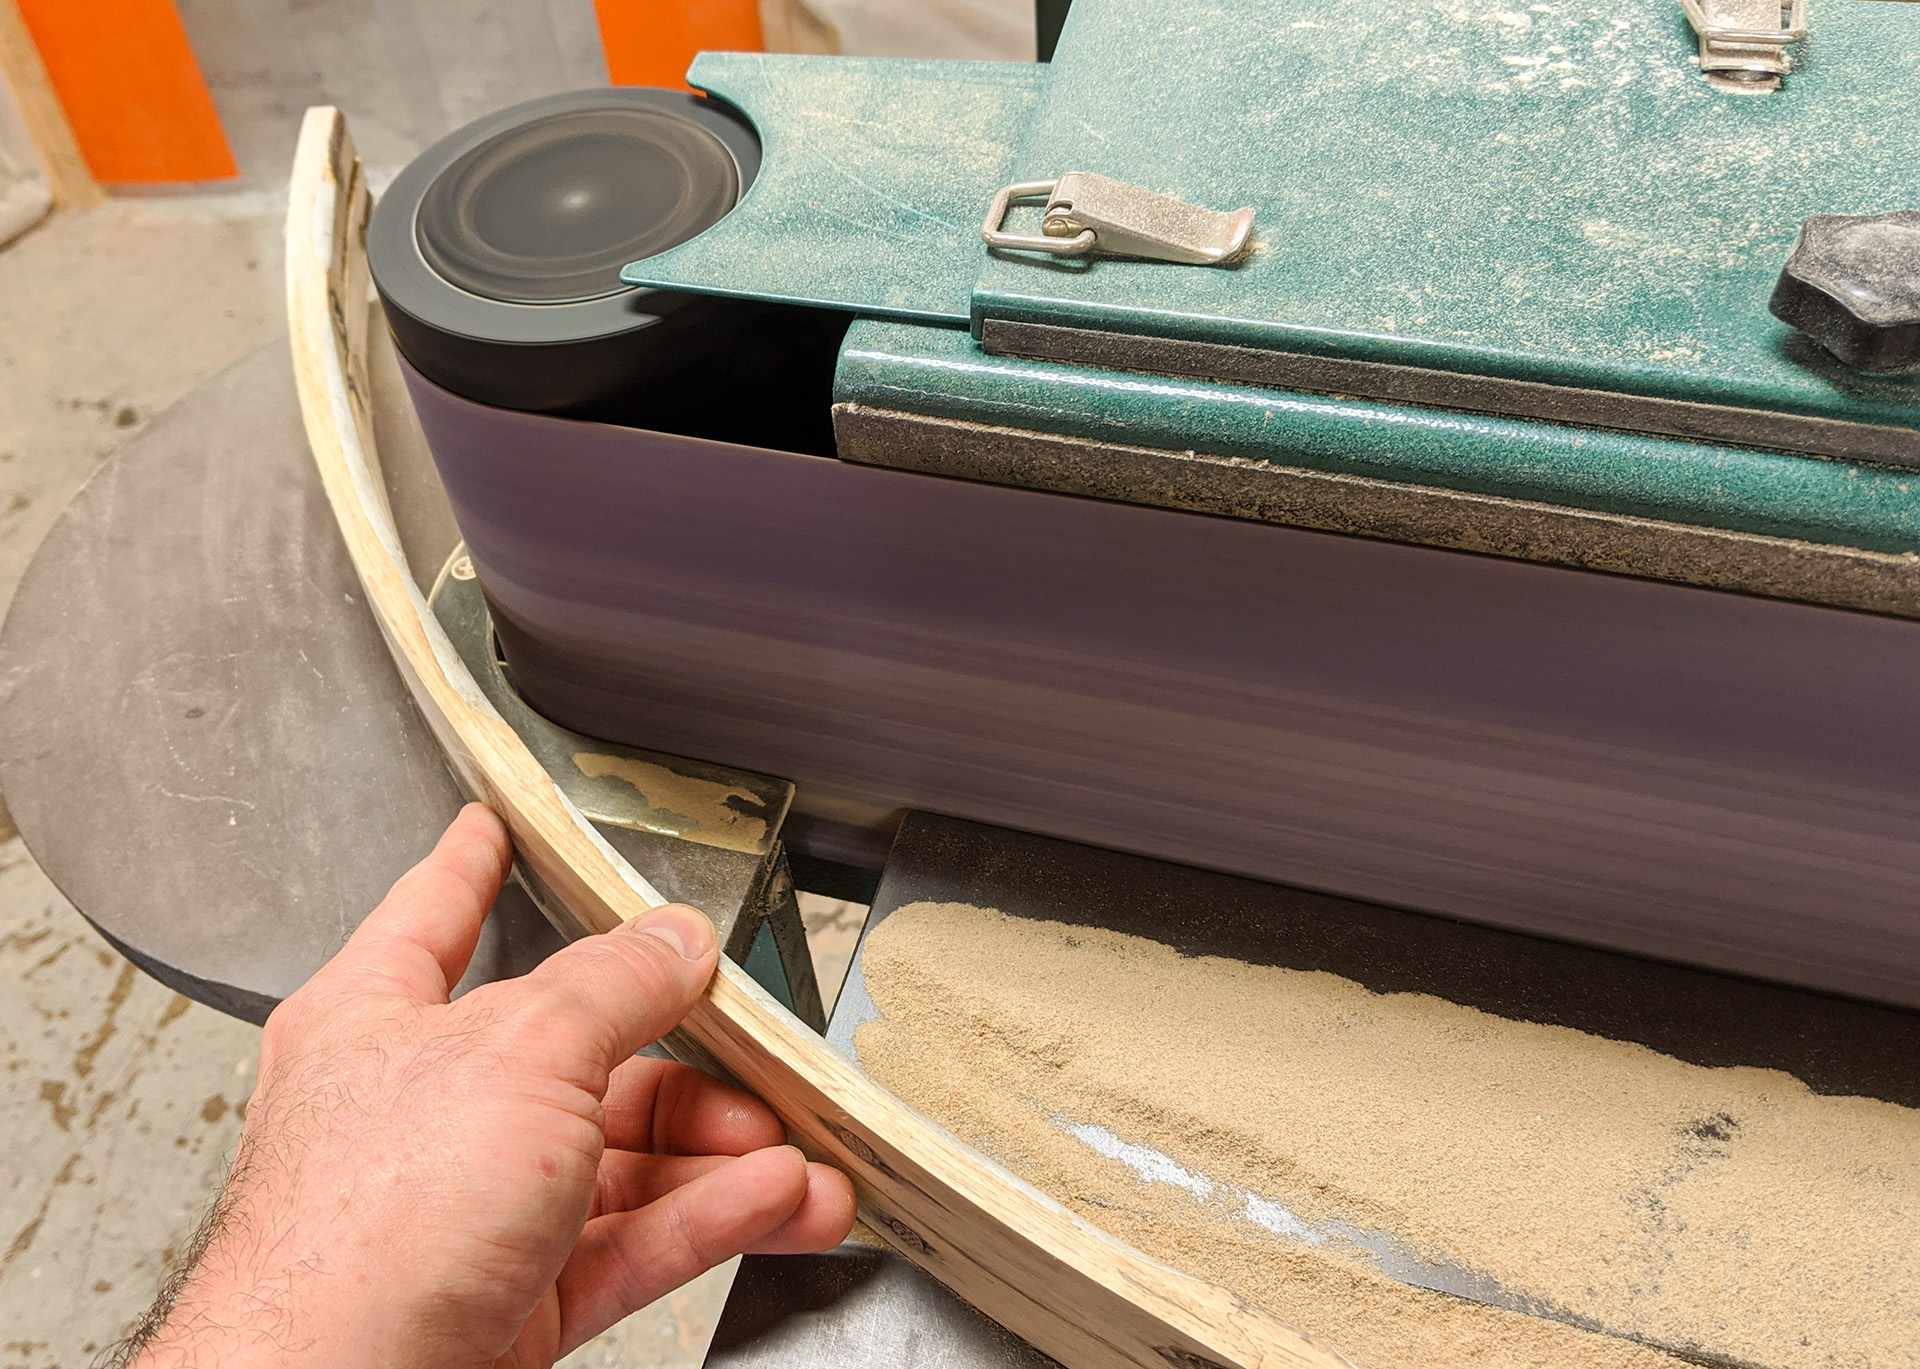
Next it was over to the edge sander to take off the radiused edges from my newly sawn slat, to see how wide of a piece I ended up with. It had a bit of a taper as well, matching the taper on the original spoke. |
|
|
|
|
|
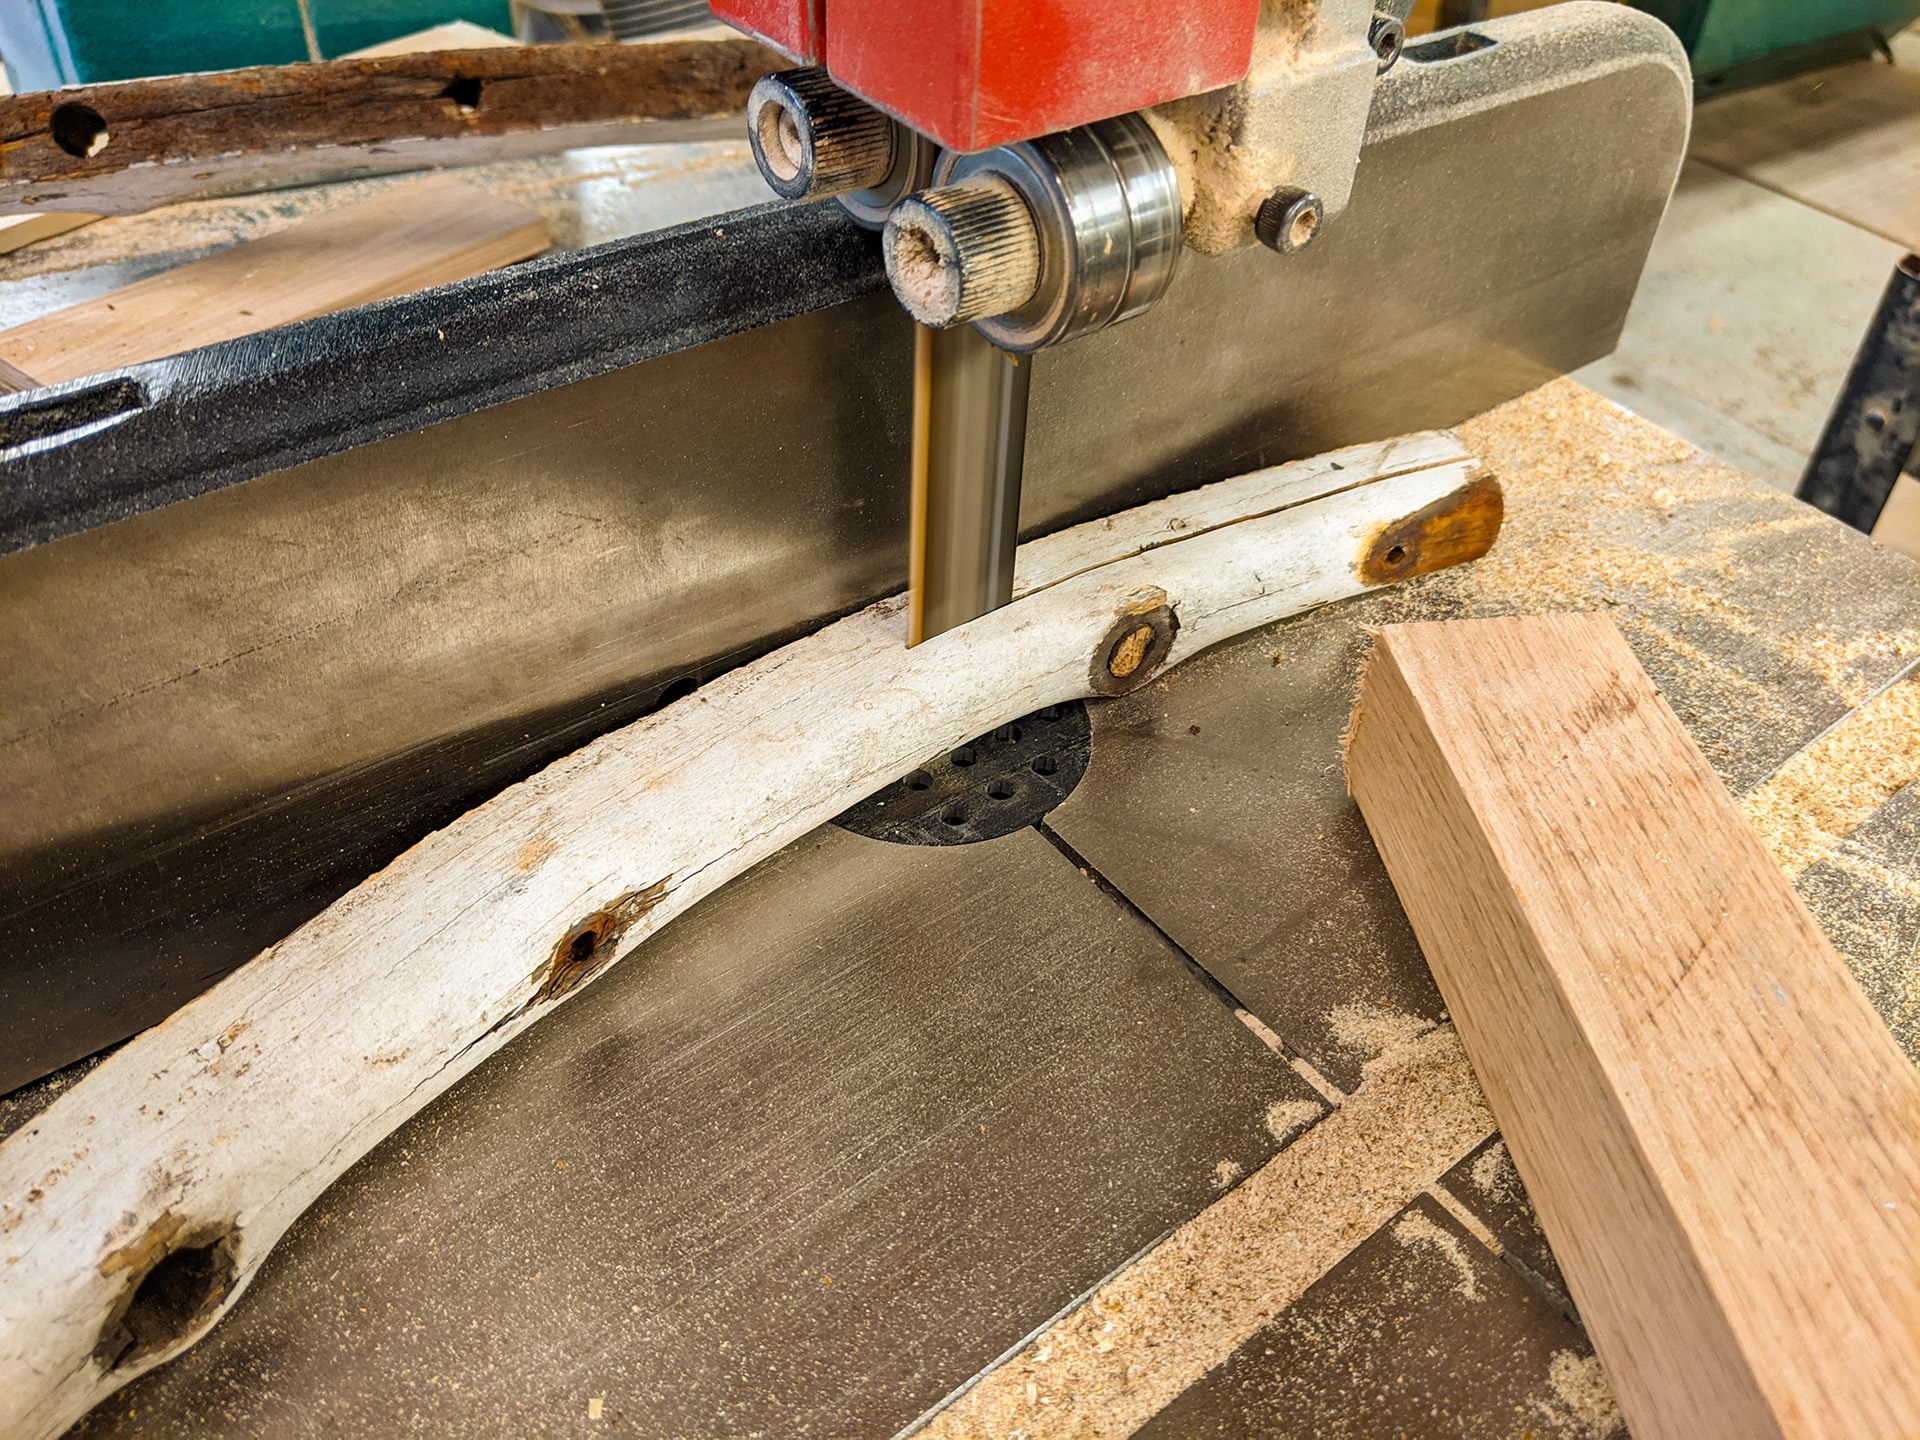
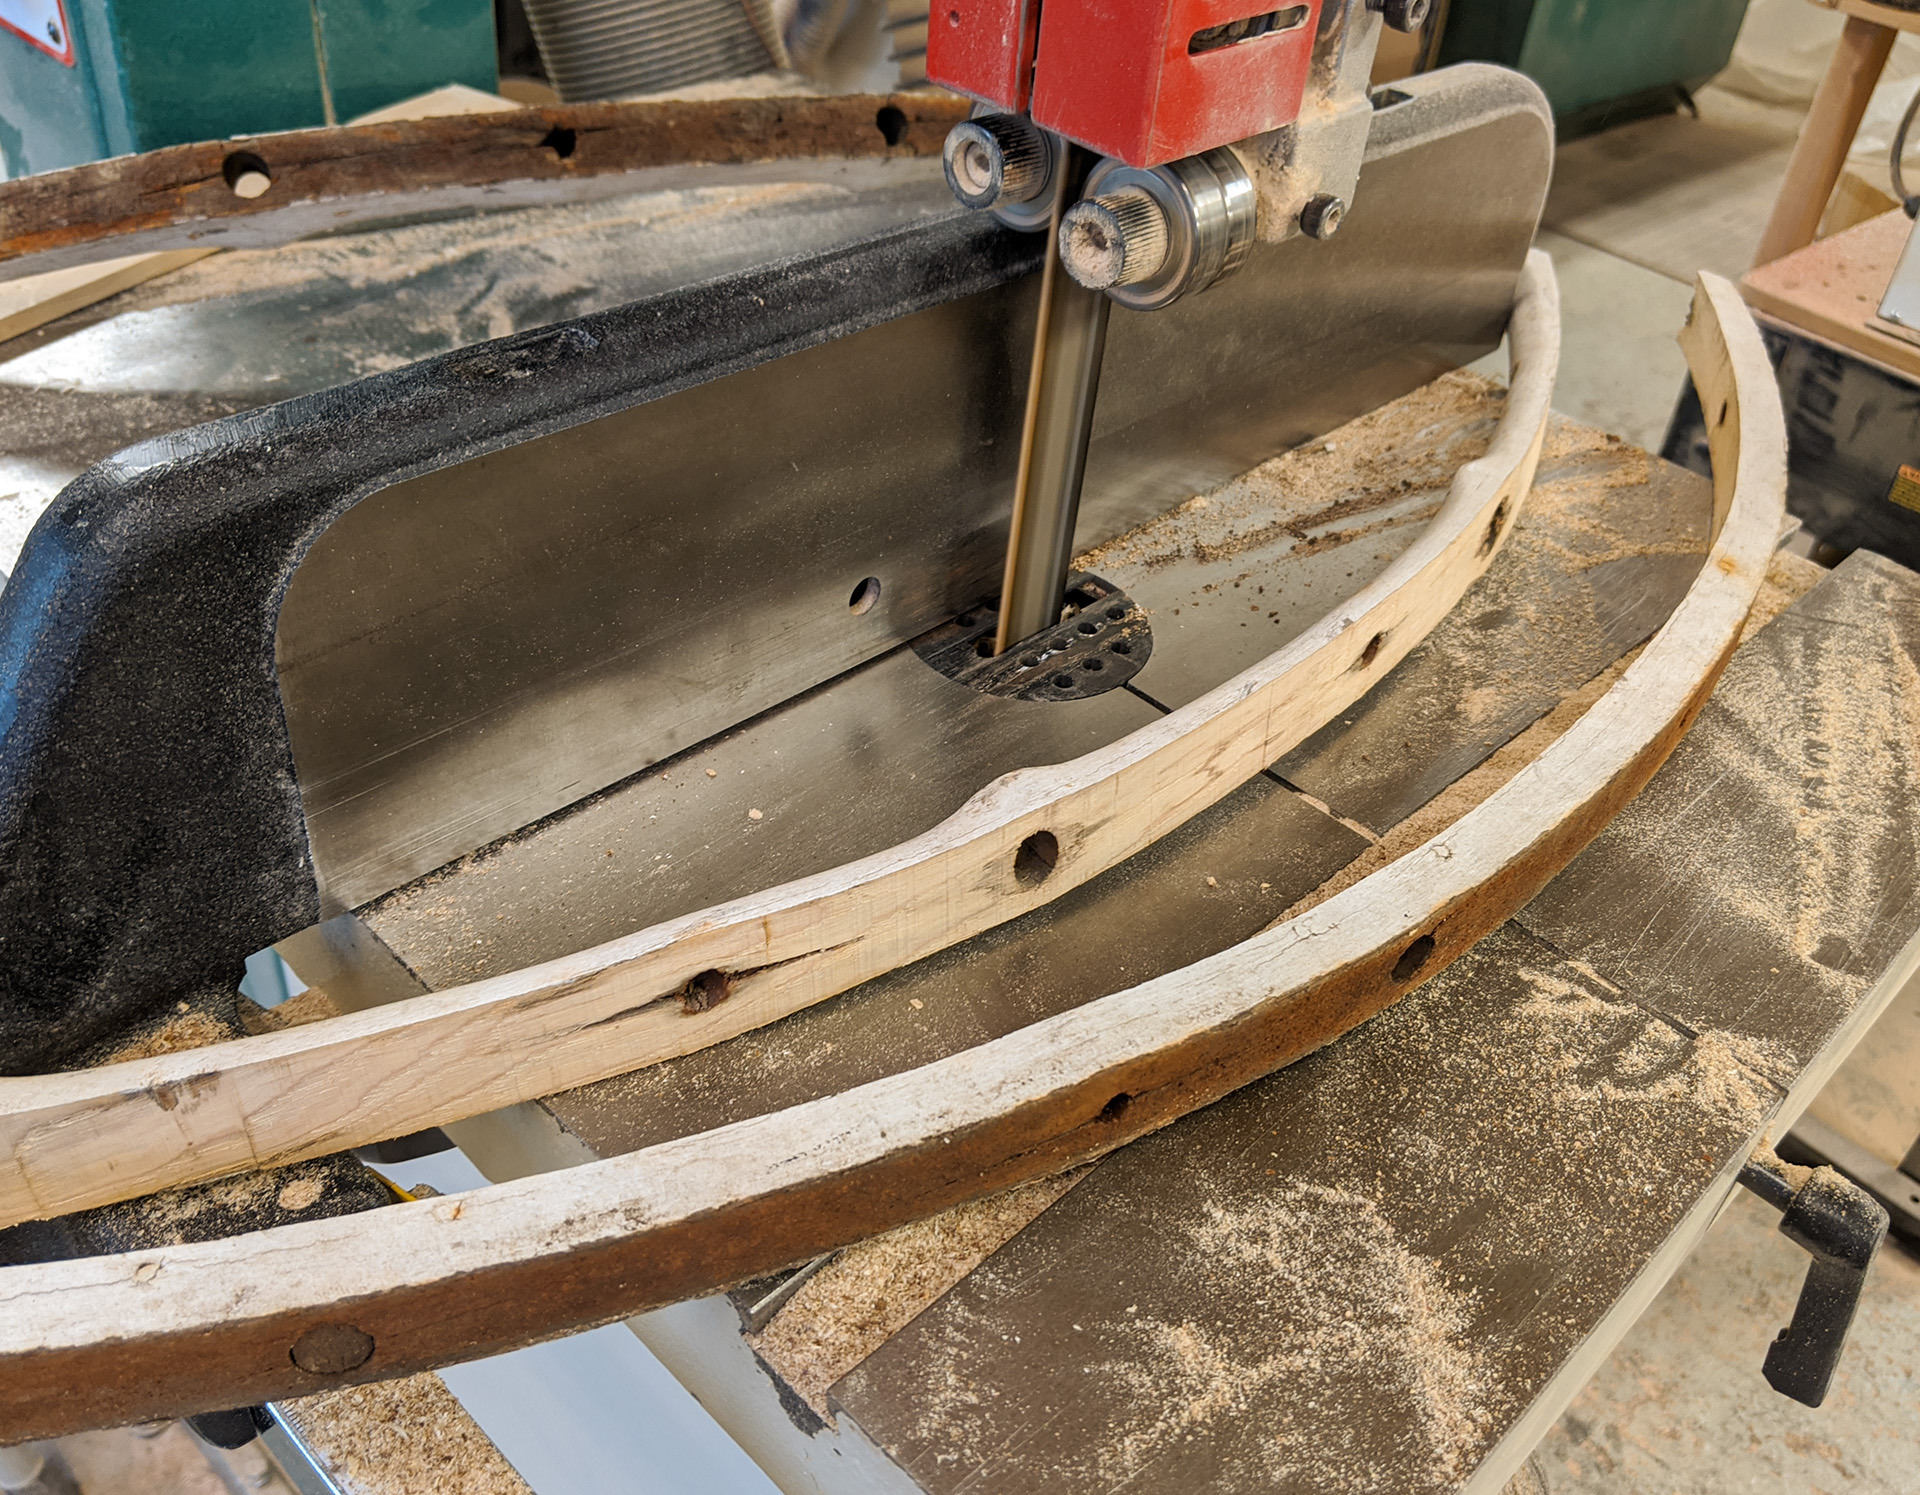
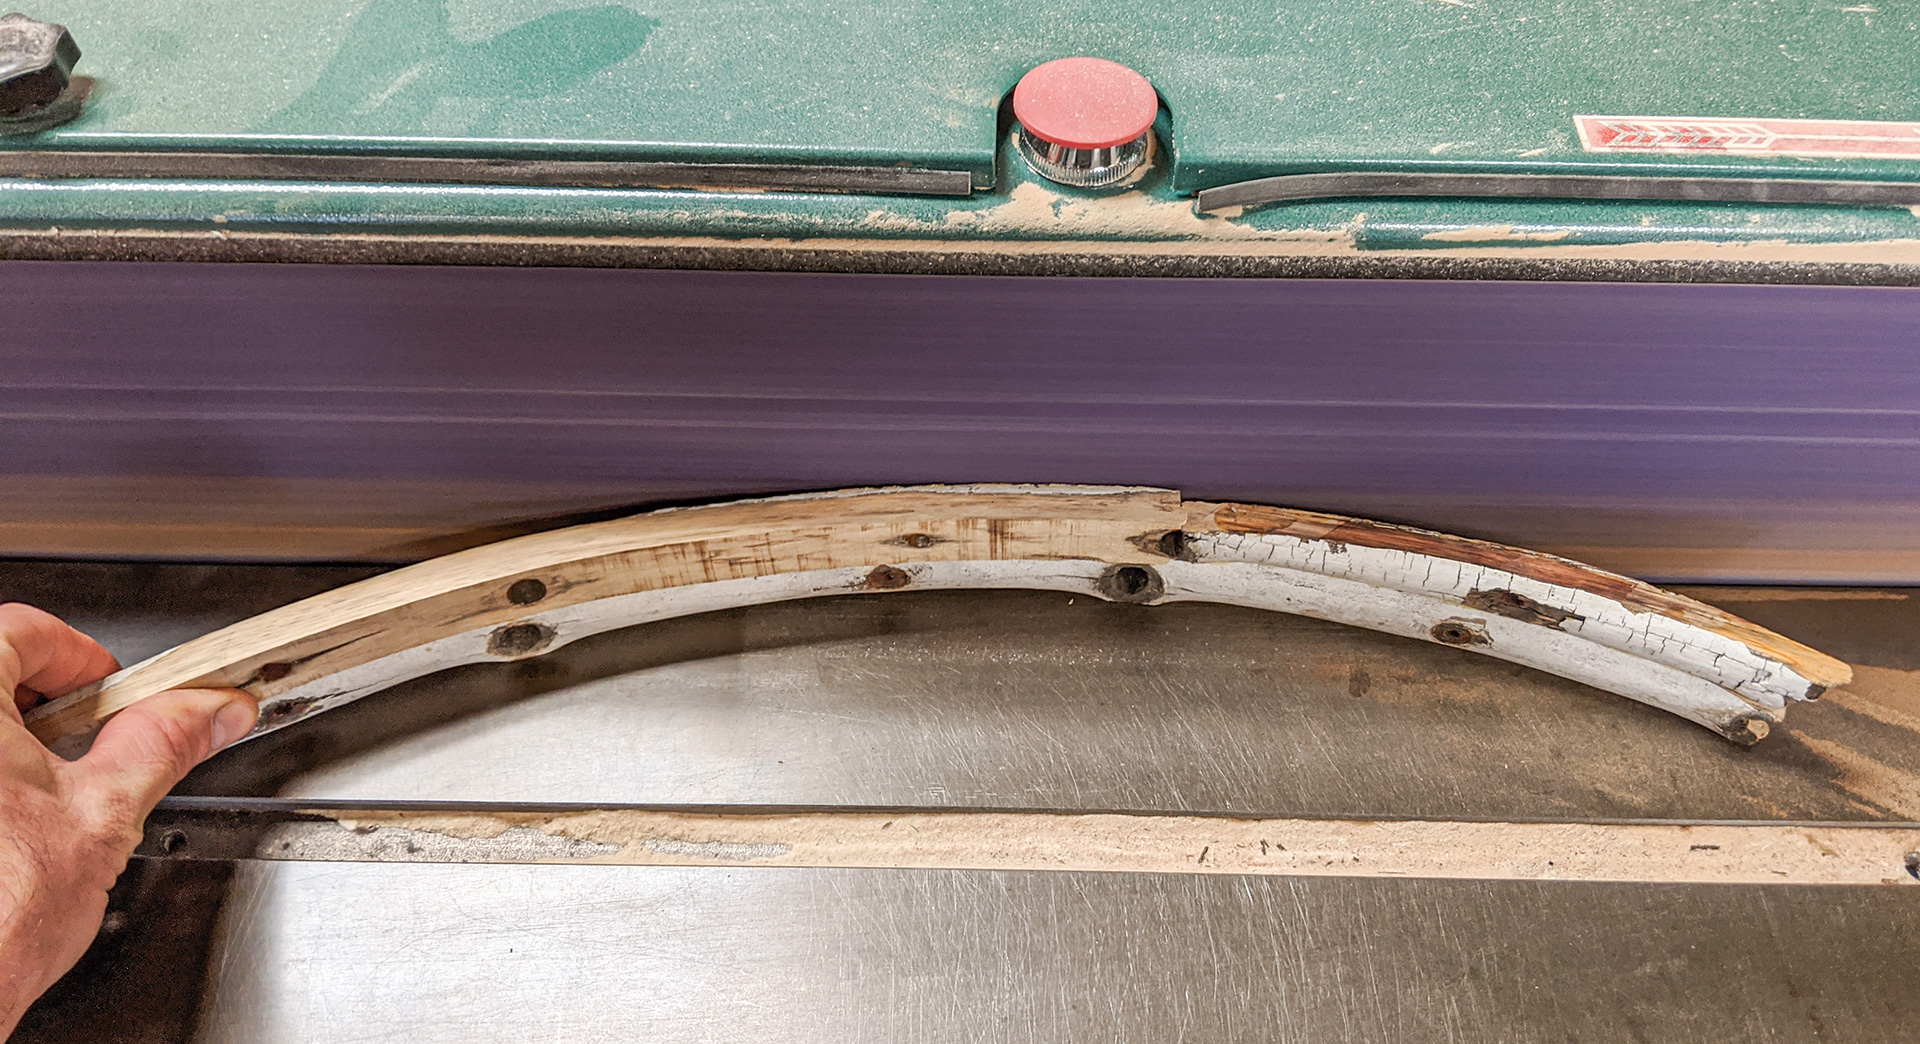
Feeling a little discouraged by how little material I'd be likely to get from the spokes, I decide to use the (mostly) un-rotted portions of the rim. Because of how narrow the rim was (about one inch), I decided to saw it in half and then join the pieces together to make a thicker curved slat to form the sides of my instrument. I had to be careful where I cut because of those headless screws running through the wood. I just shaved by a couple of them. |
|
|
|
|
|
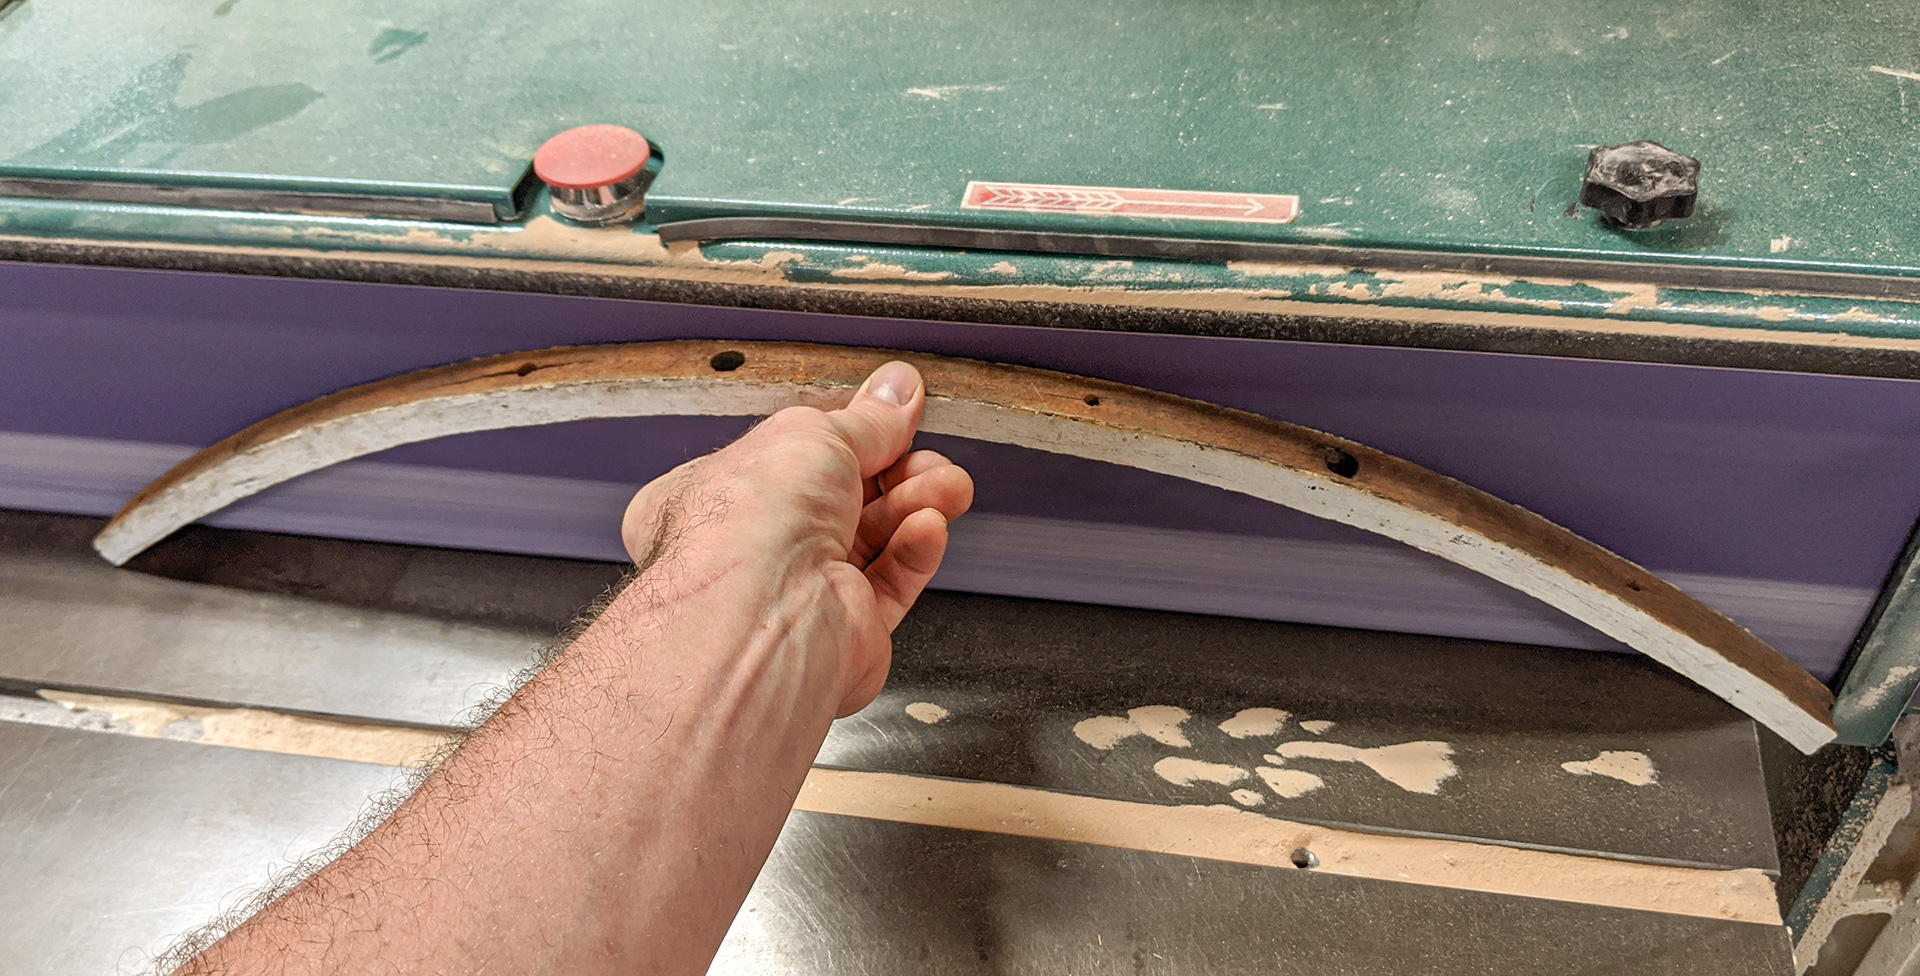
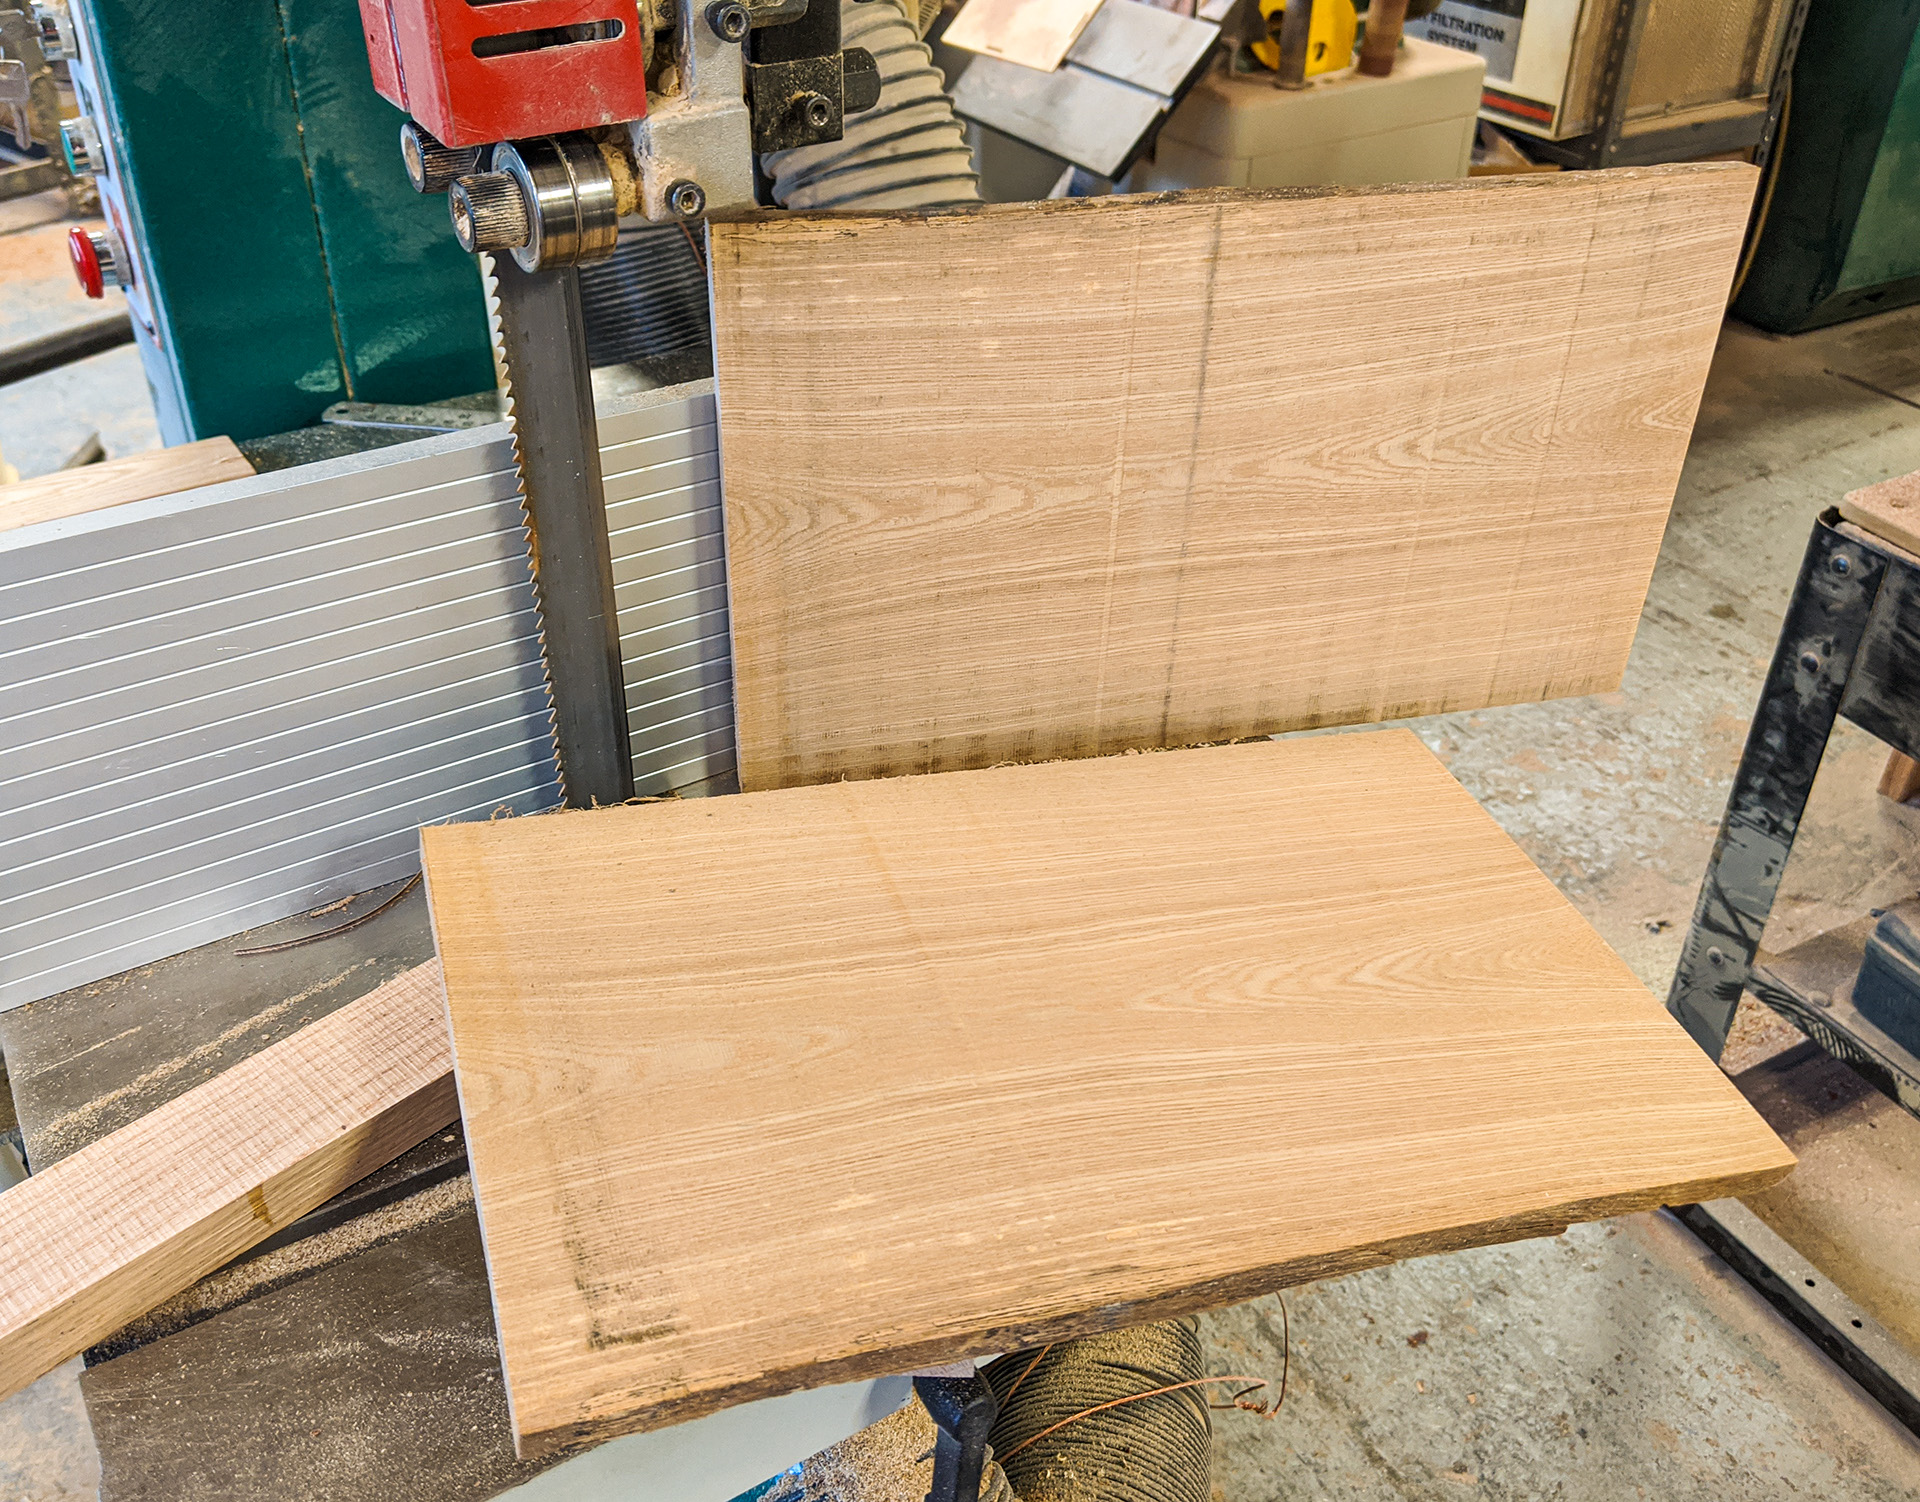
So here I have a decent amount of usable material from the nicest, longest length of rim wood. |
|
|
|
|
|
Next it was over to the edge sander to clean up the edges in preparation for gluing. |
|
|
|
|
|
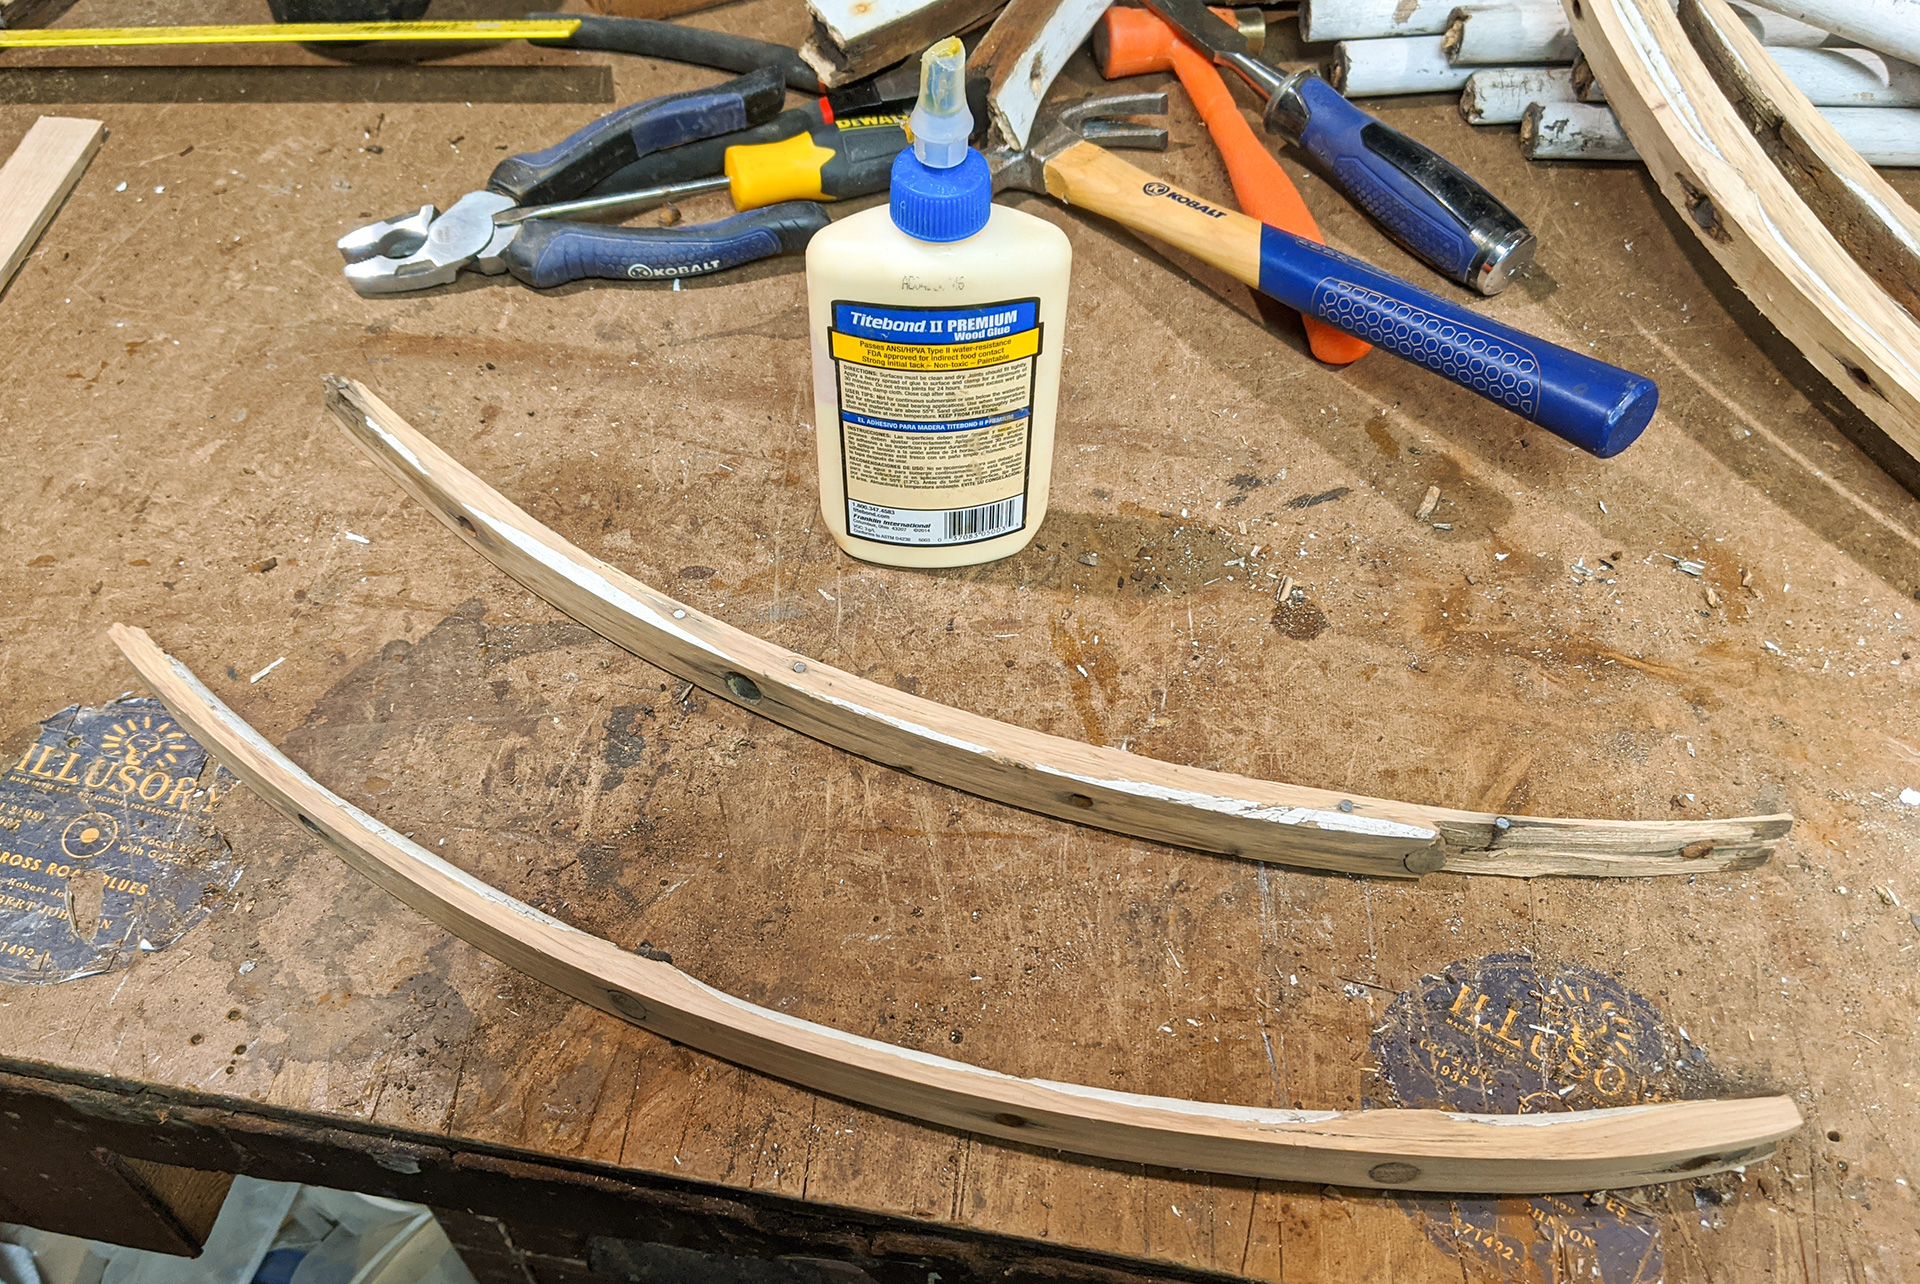
Here I have a couple of lengths ready for gluing on the bench. |
|
|
|
|
|
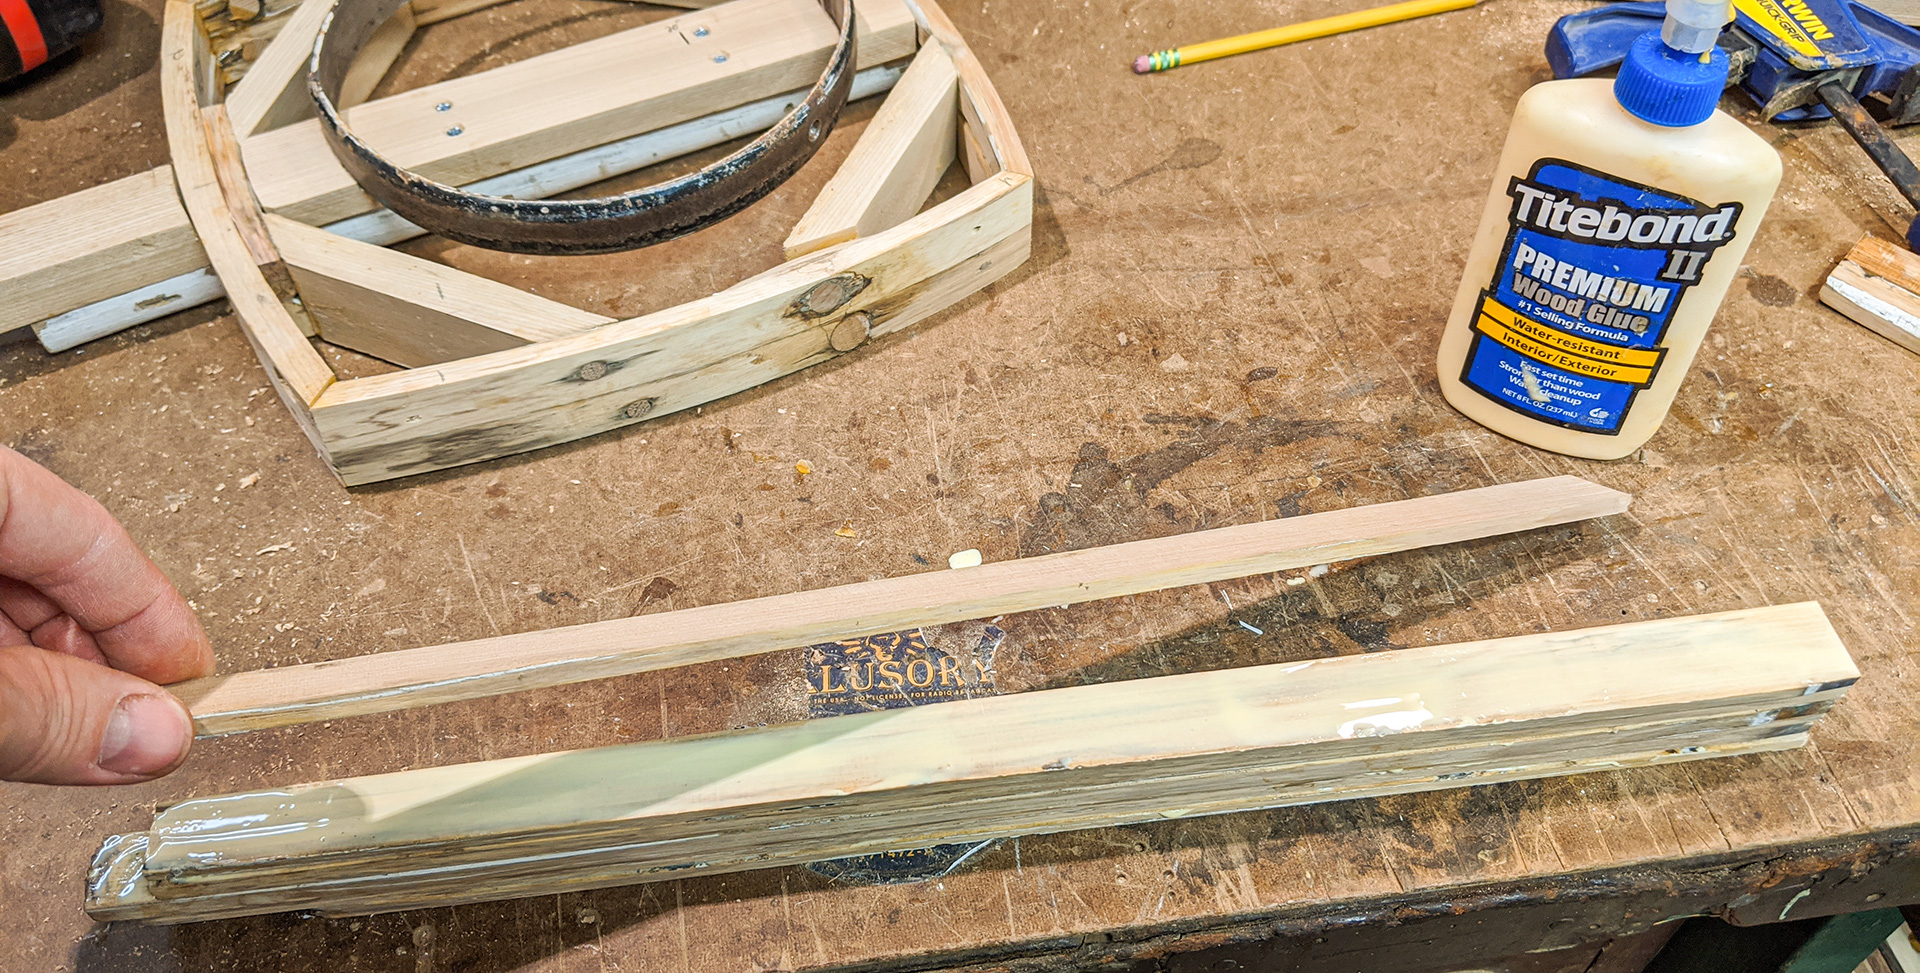
This build, like several of my recent ones, is a testament to the power of Titebond II wood glue. |
|
|
|
|
|
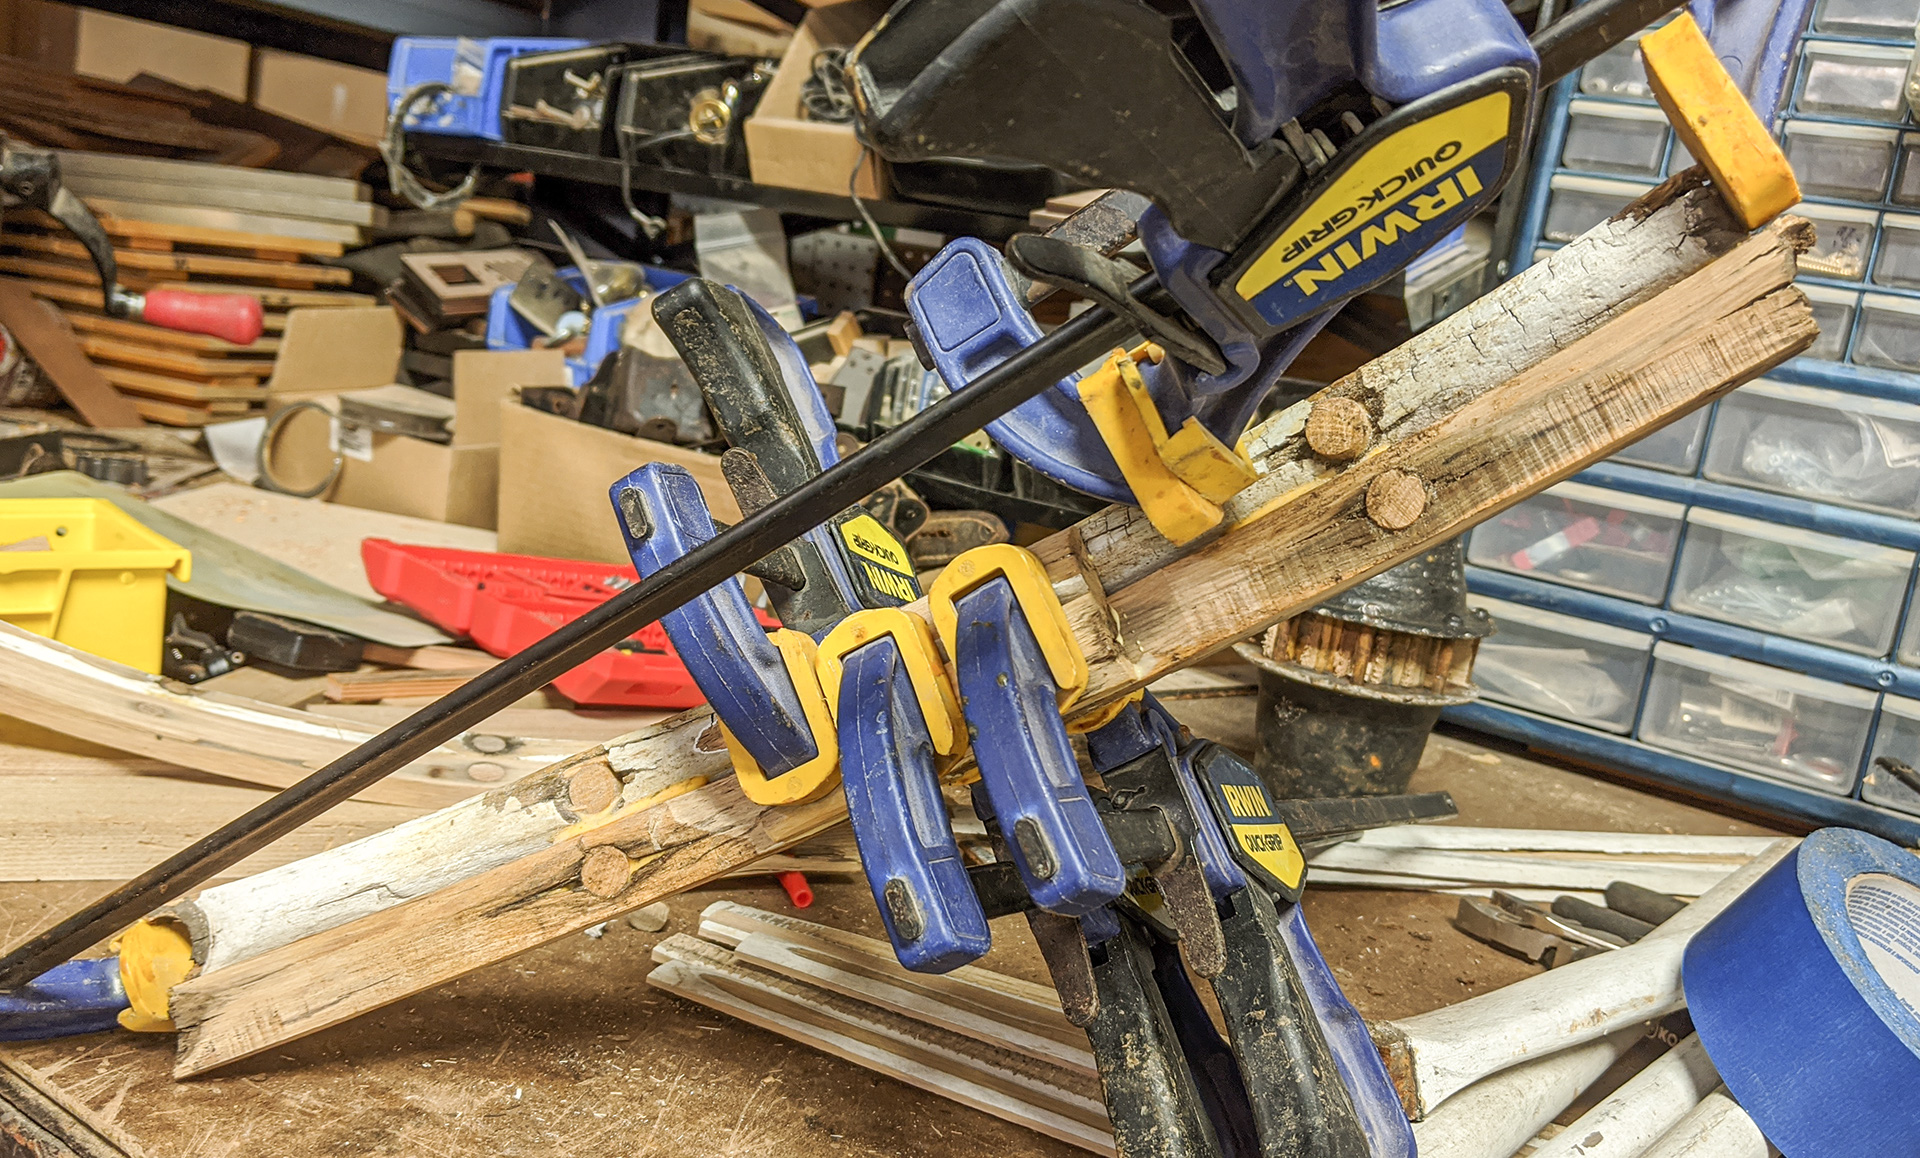
In a spectacular display of bad planning, I decided it would look nice to line up the holes in the curved slats when gluing them up. I did not consider that the holes were weak points, and that lining them up would compound the weak point. I would pay for this mistake several times as the build proceeded. |
|
|
|
|
|
Once the glue set, it was back to the edge sander to clean up what would be the outward-facing edge. |
|
|
|
|
|
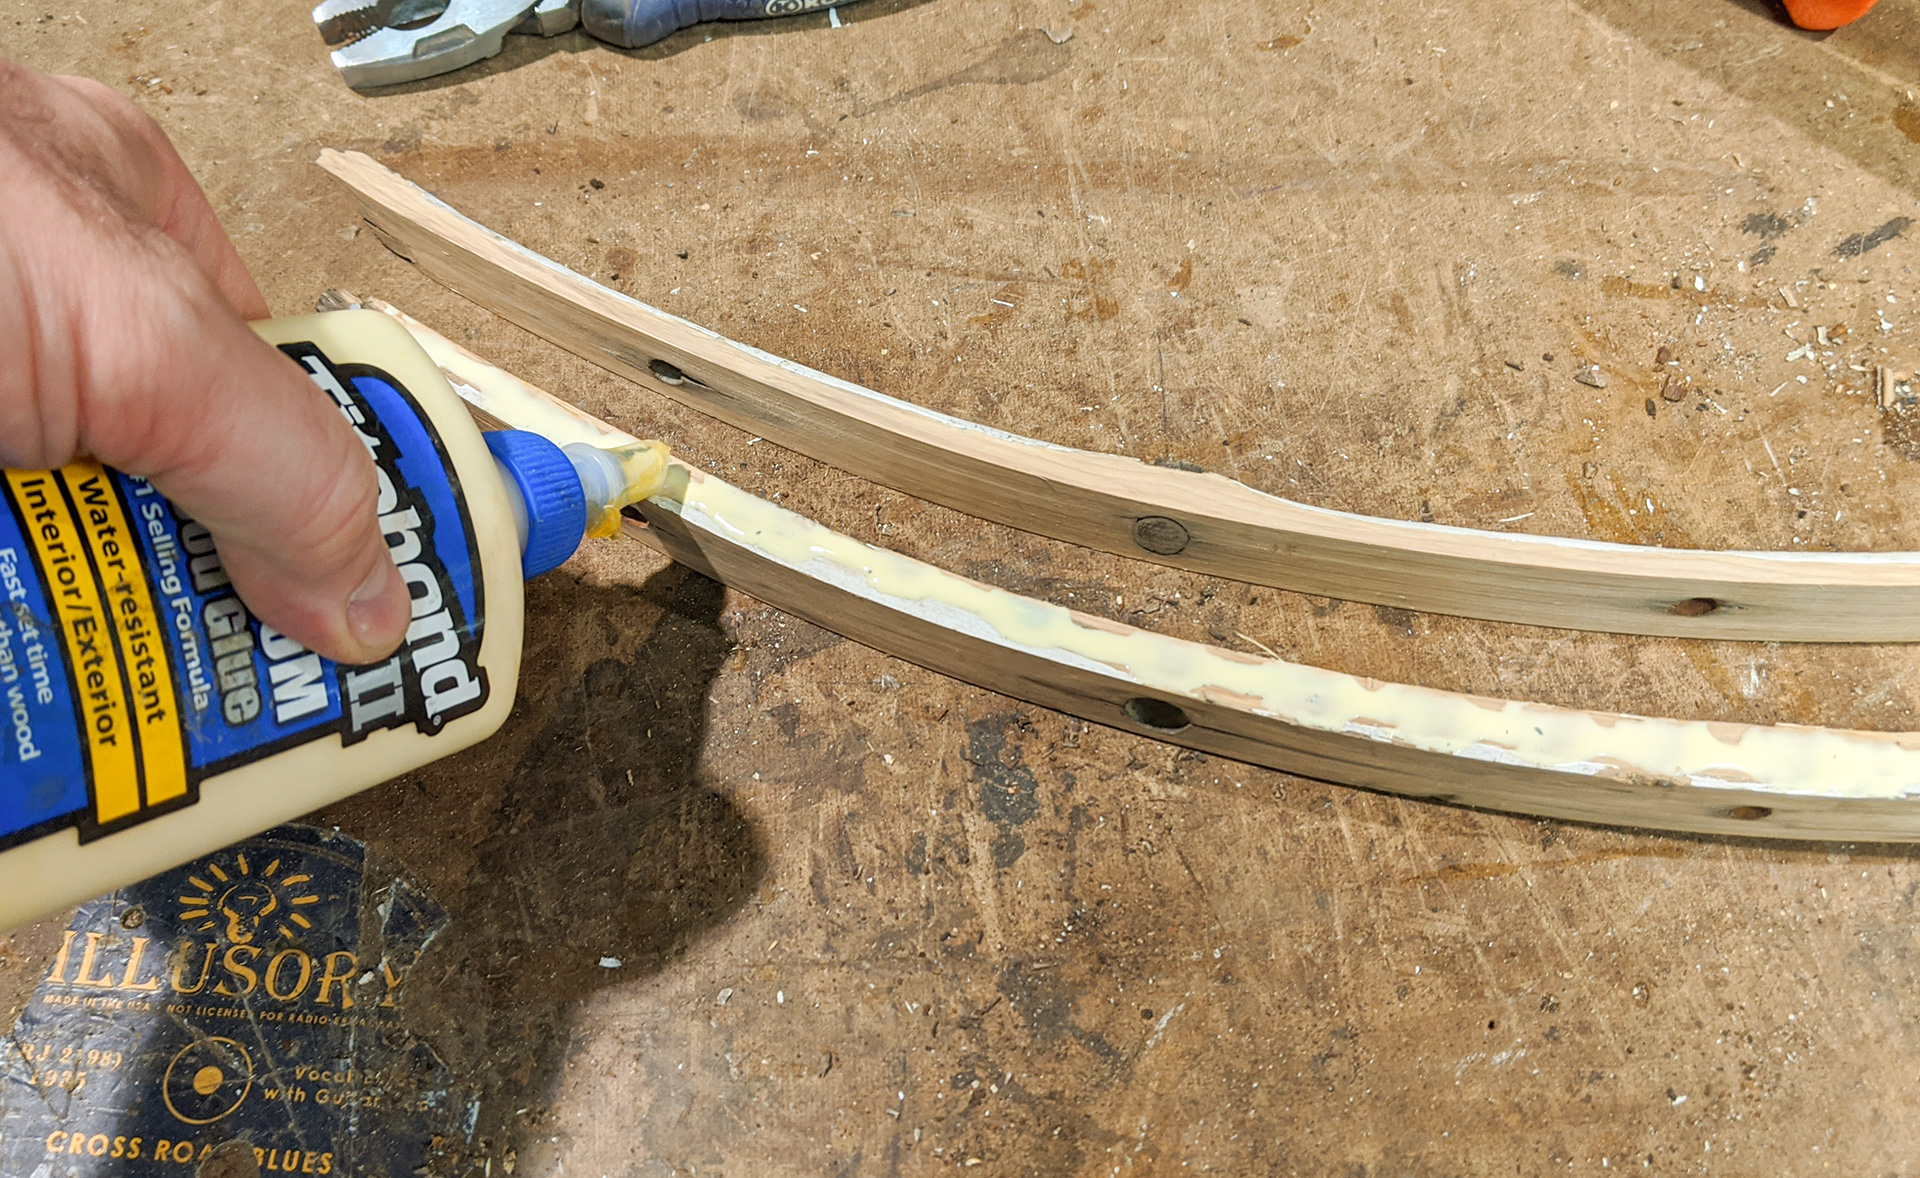
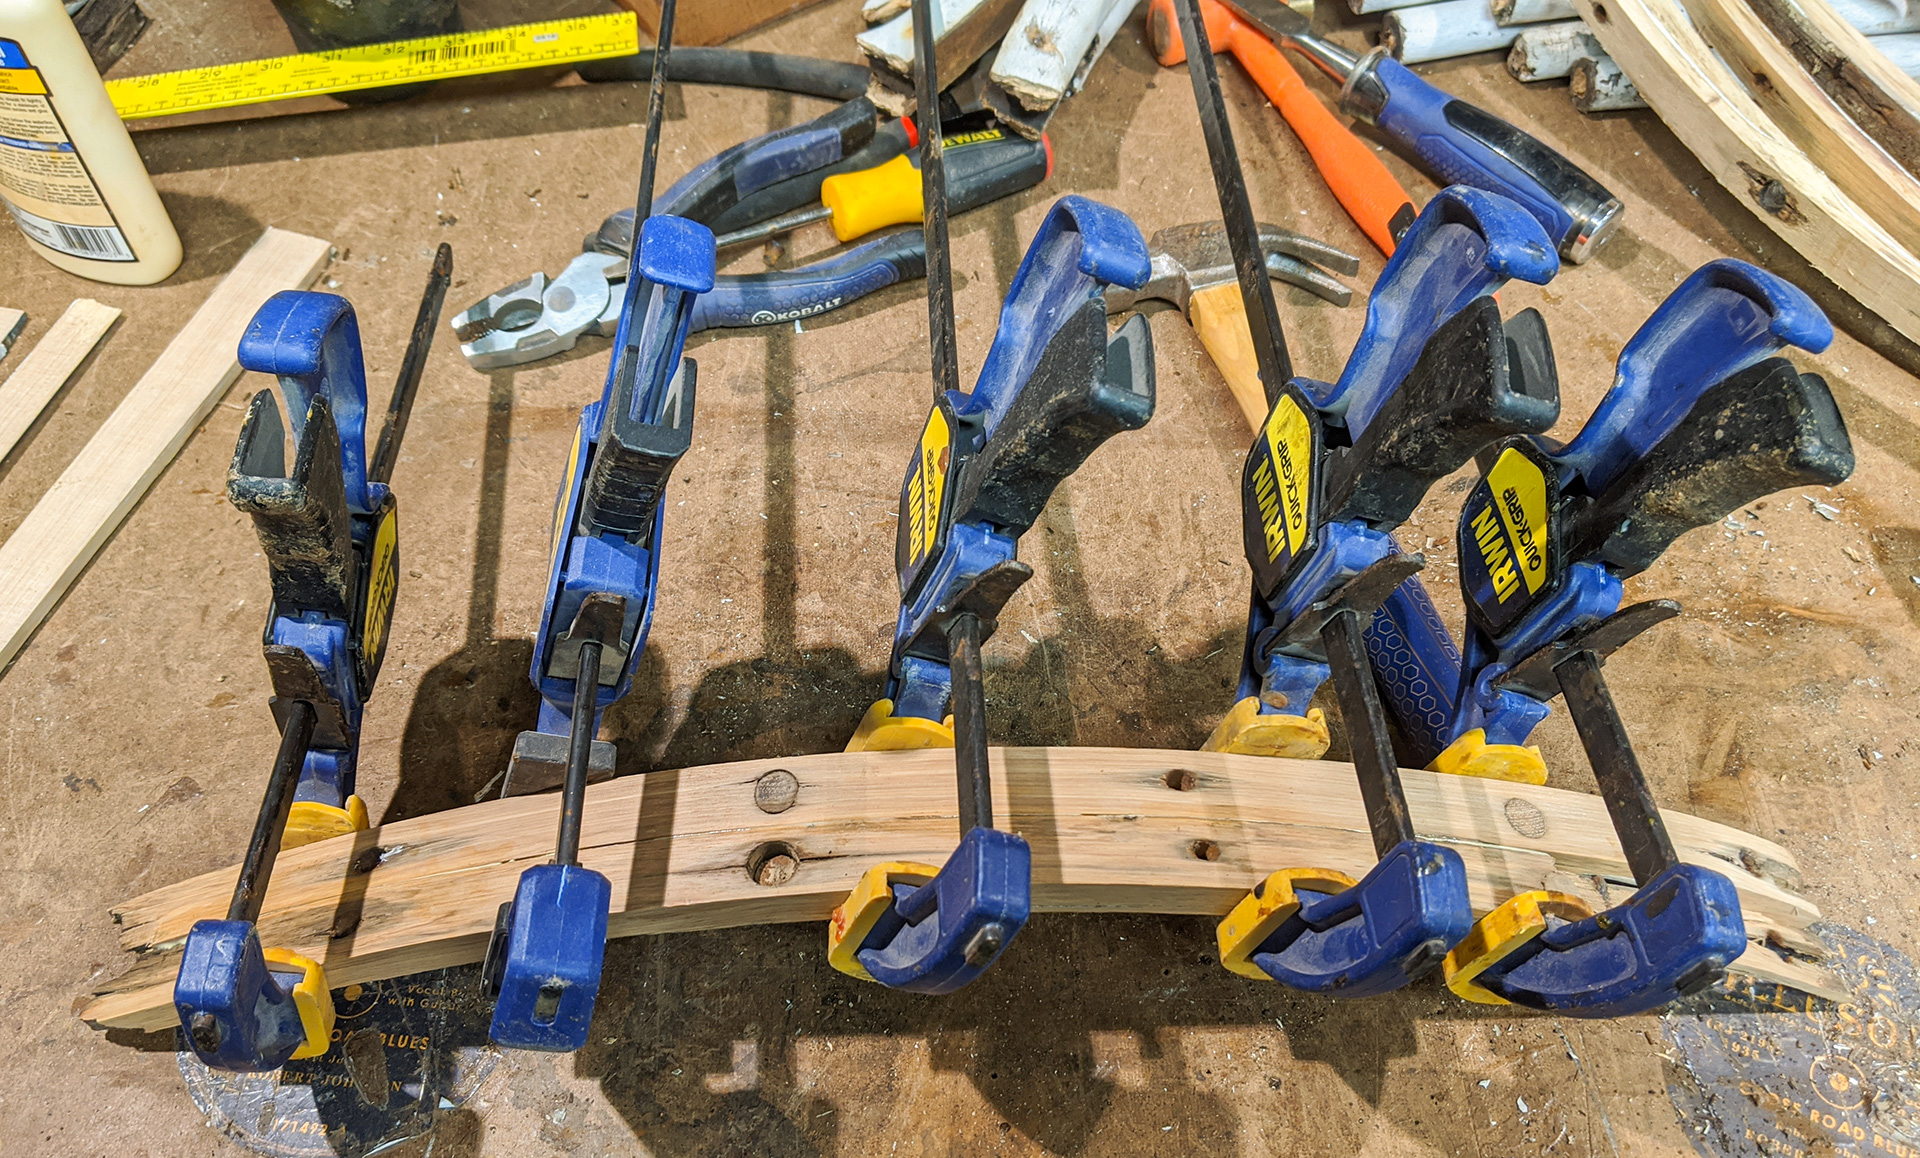
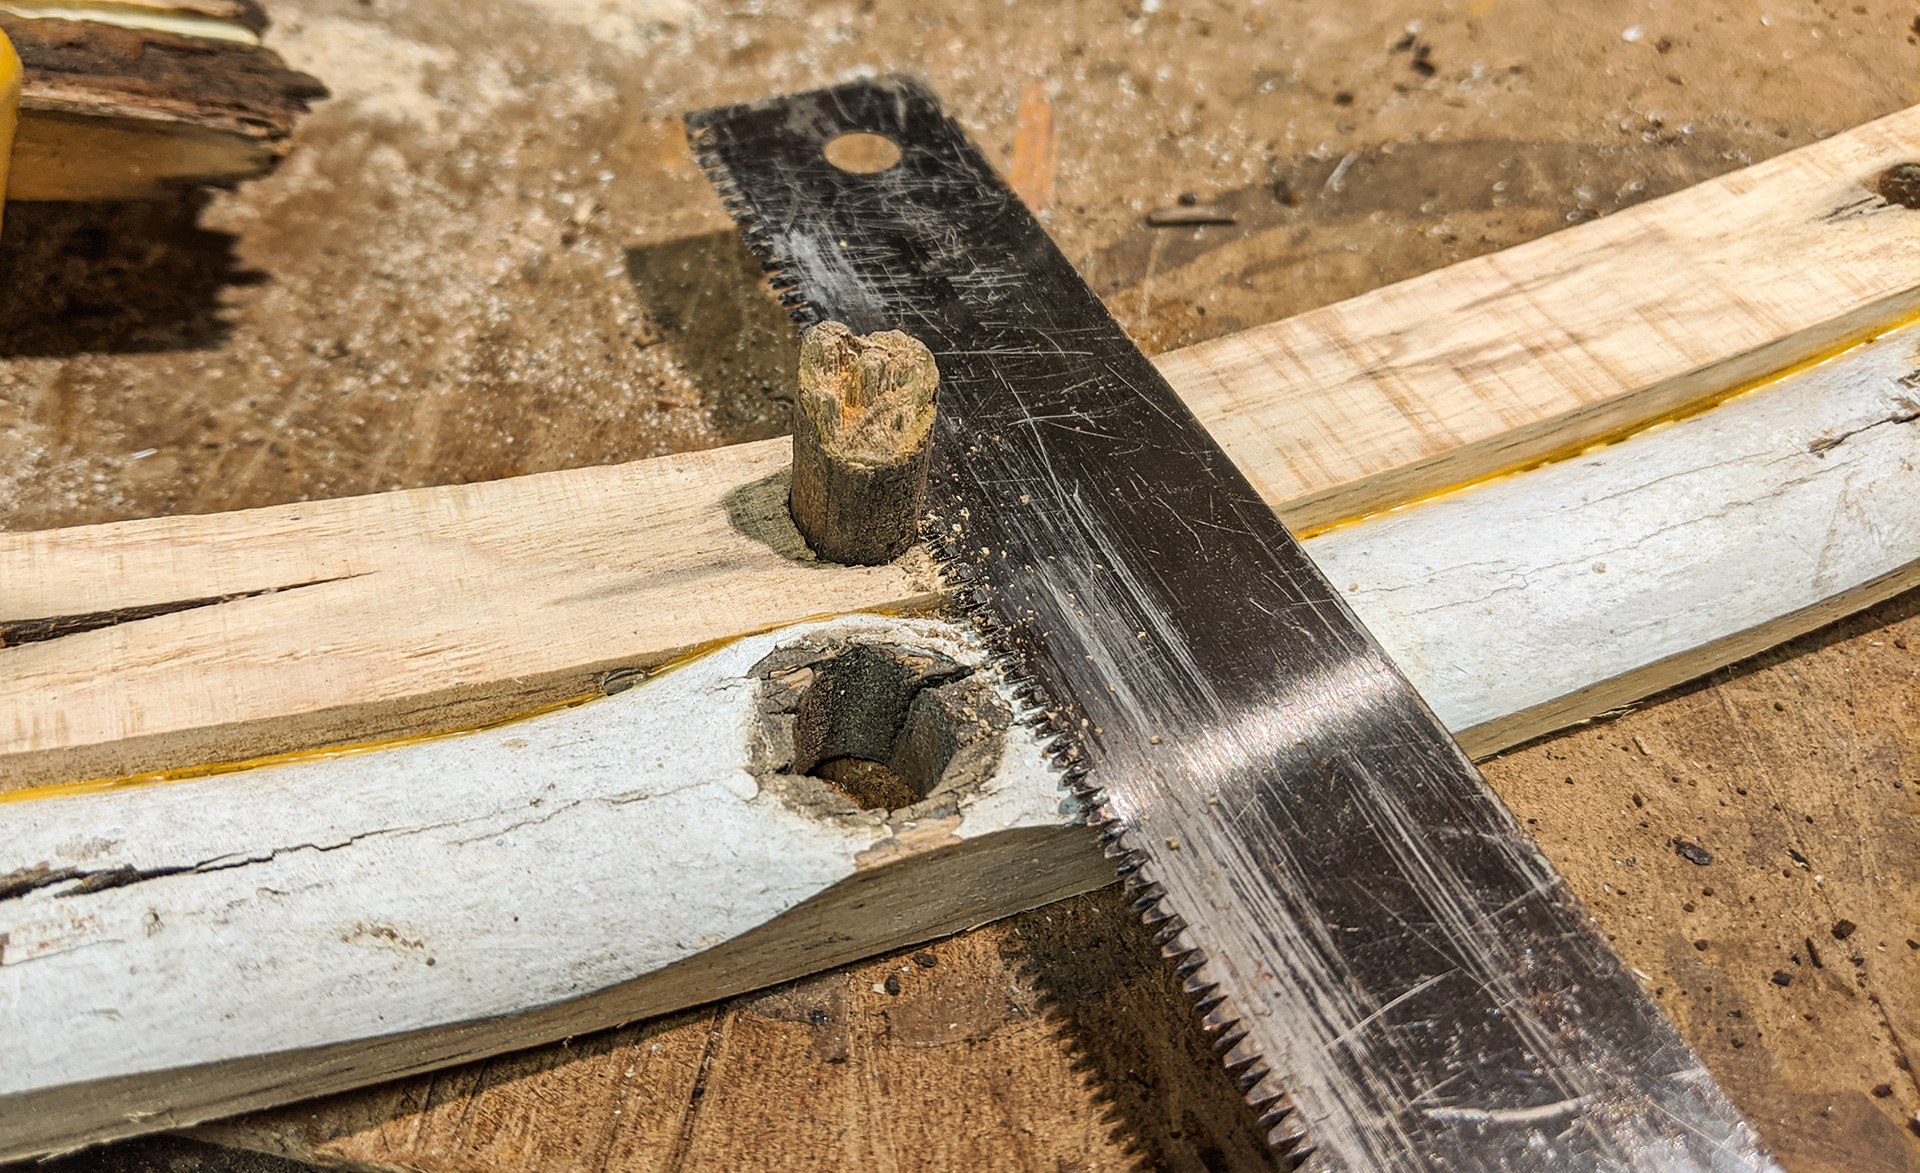
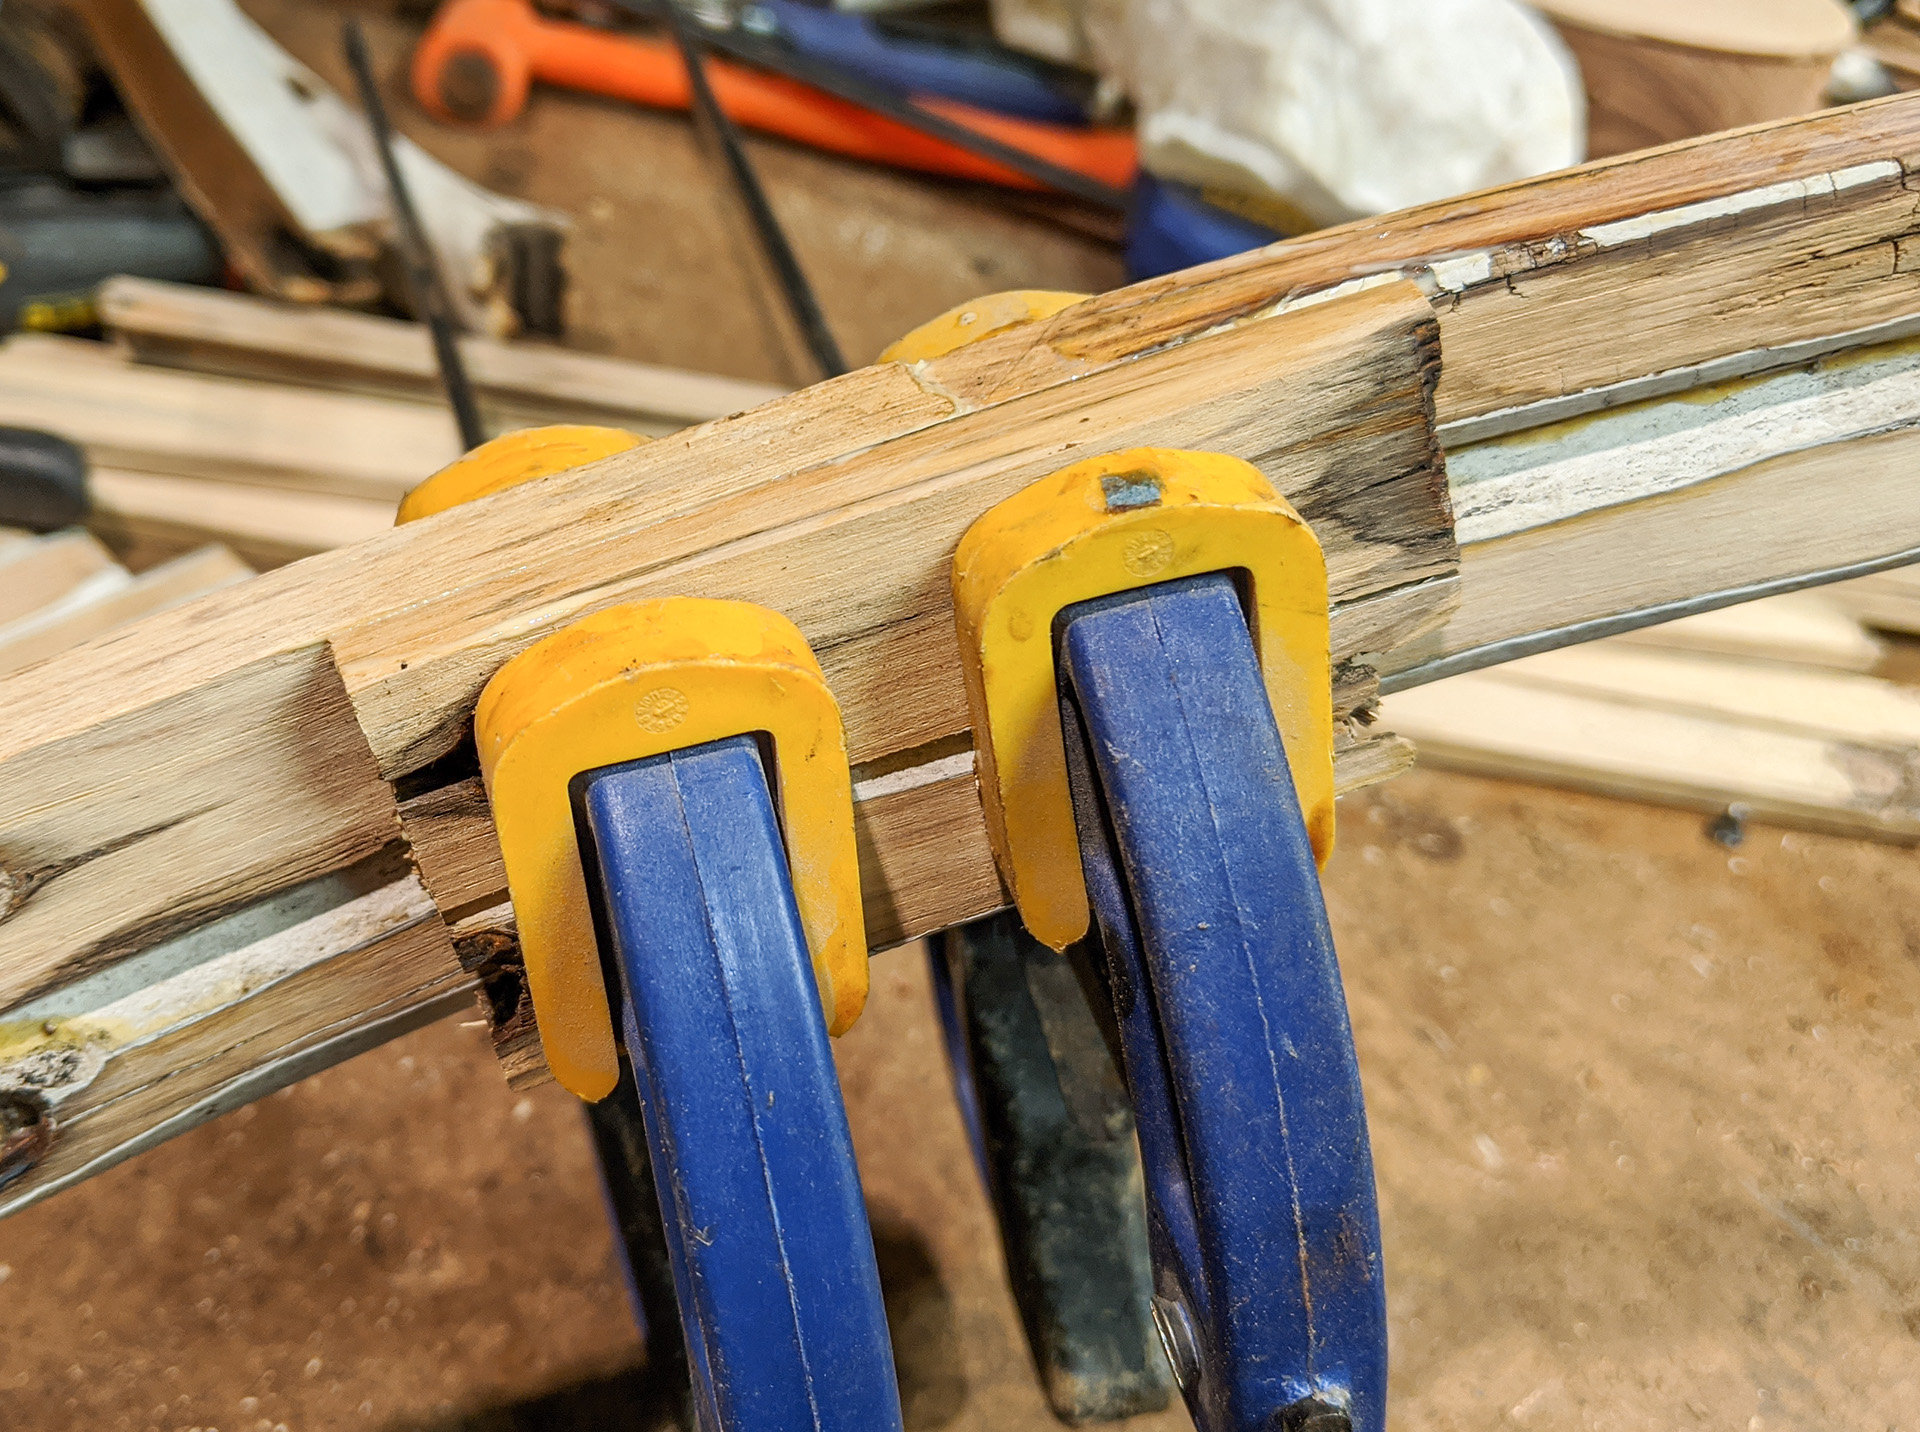
After having broken at least one piece and having to re-glue it, I decided to fill all of the holes with dowels. I re-used a couple of end-pieces from the spokes, and when those ran-out used regular store-bought hardwood dowels to make plugs. |
|
|
|
|
|
A lot of Titebond did the trick. |
|
|
|
|
|
Once the plug glue set, it was back to the edge sander, using the end idler roller as a sort of abrasive shaper wheel to clean up the inside edges of the slats. |
|
|
|
|
|
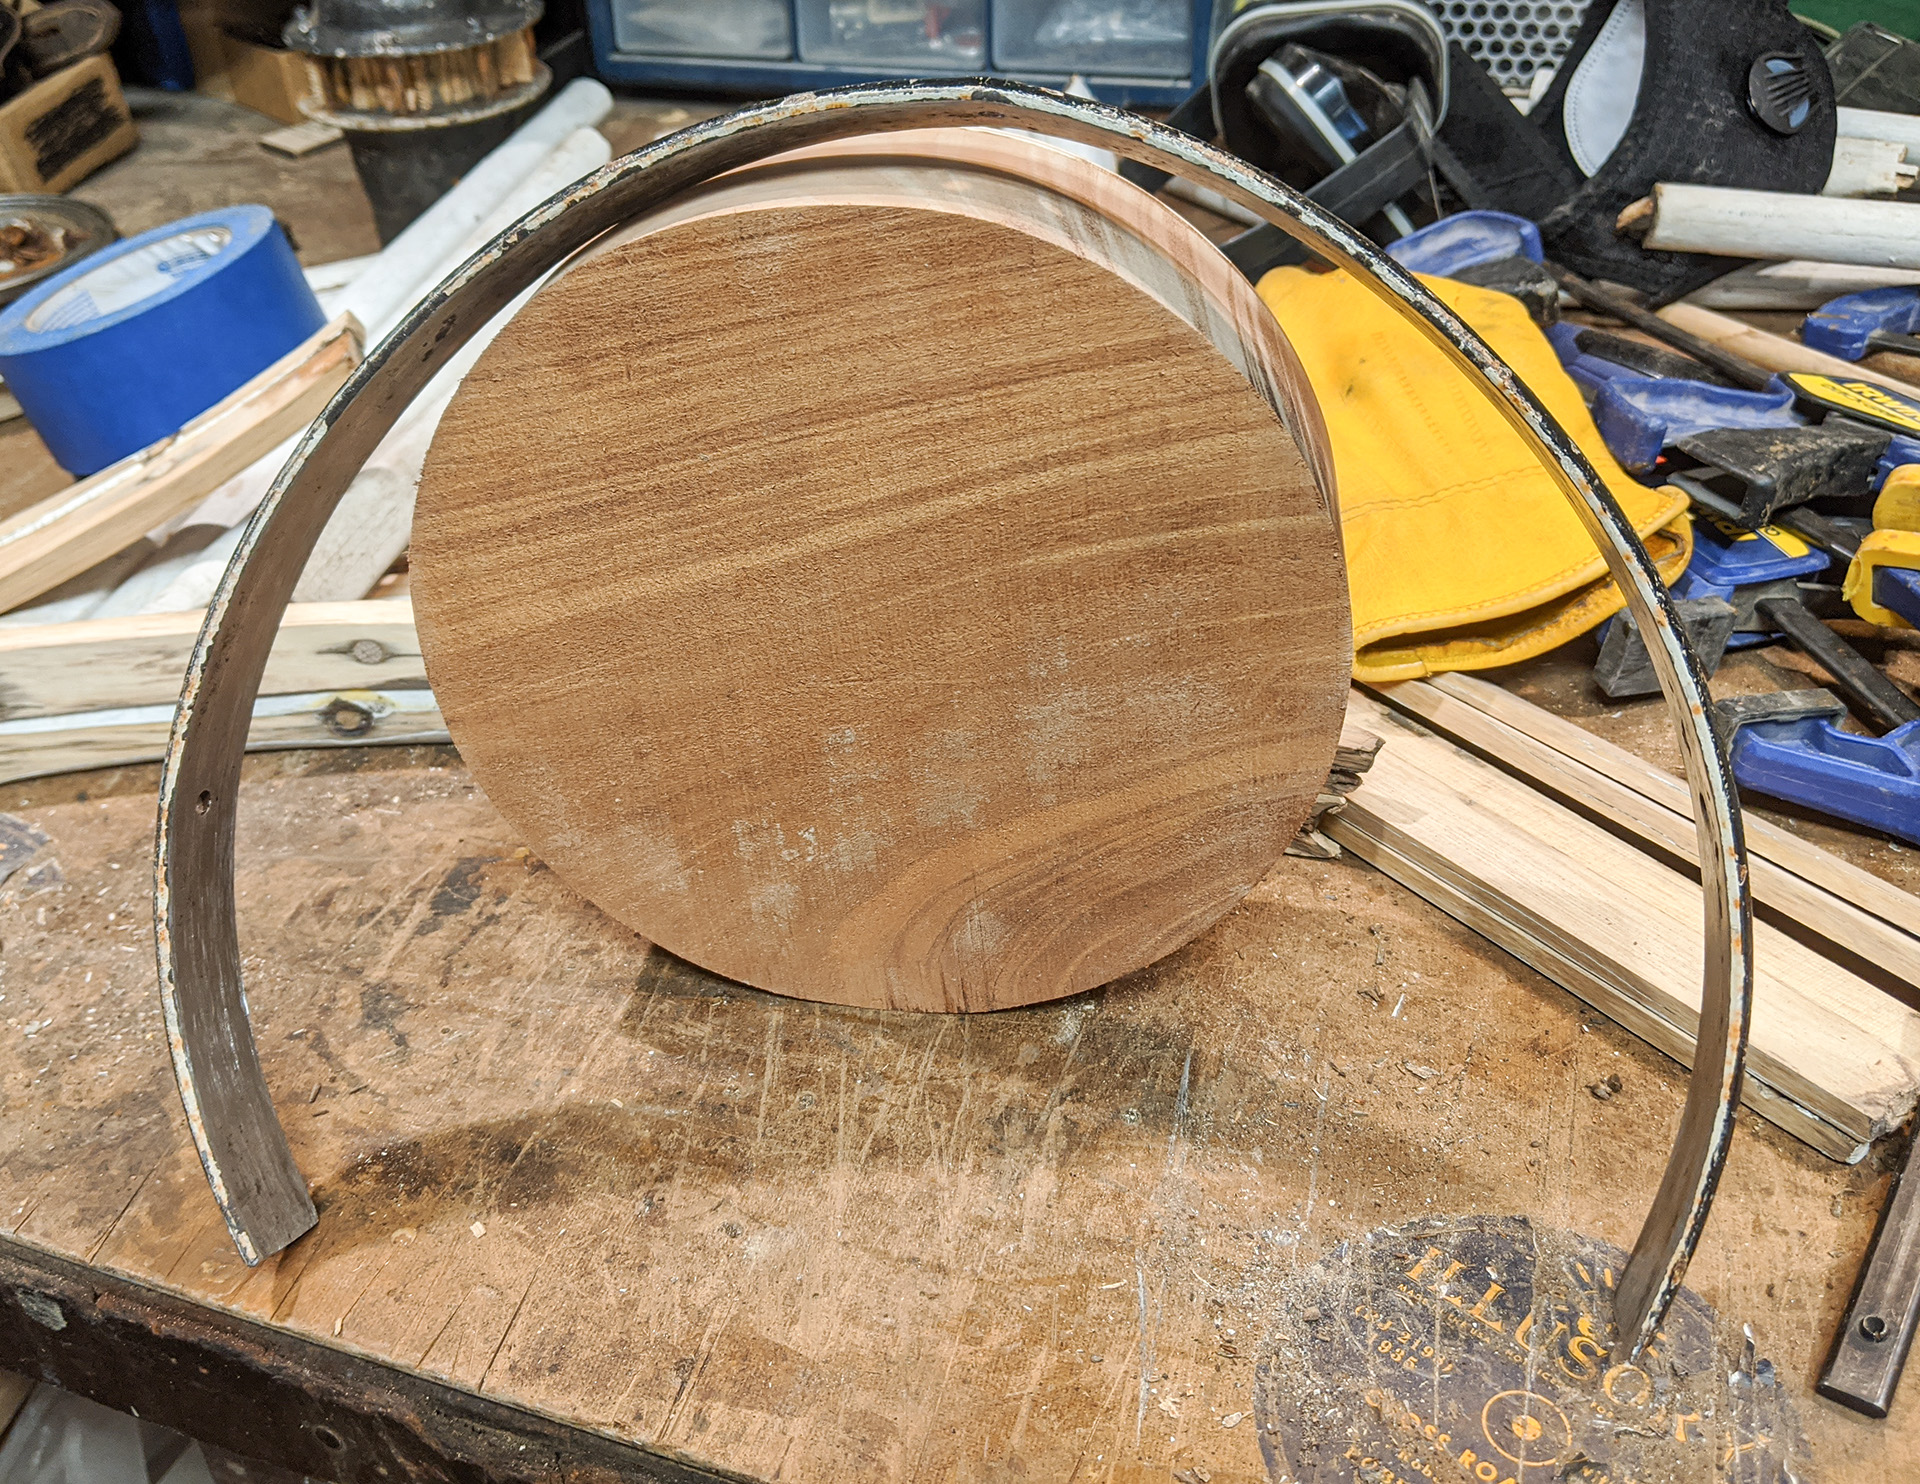
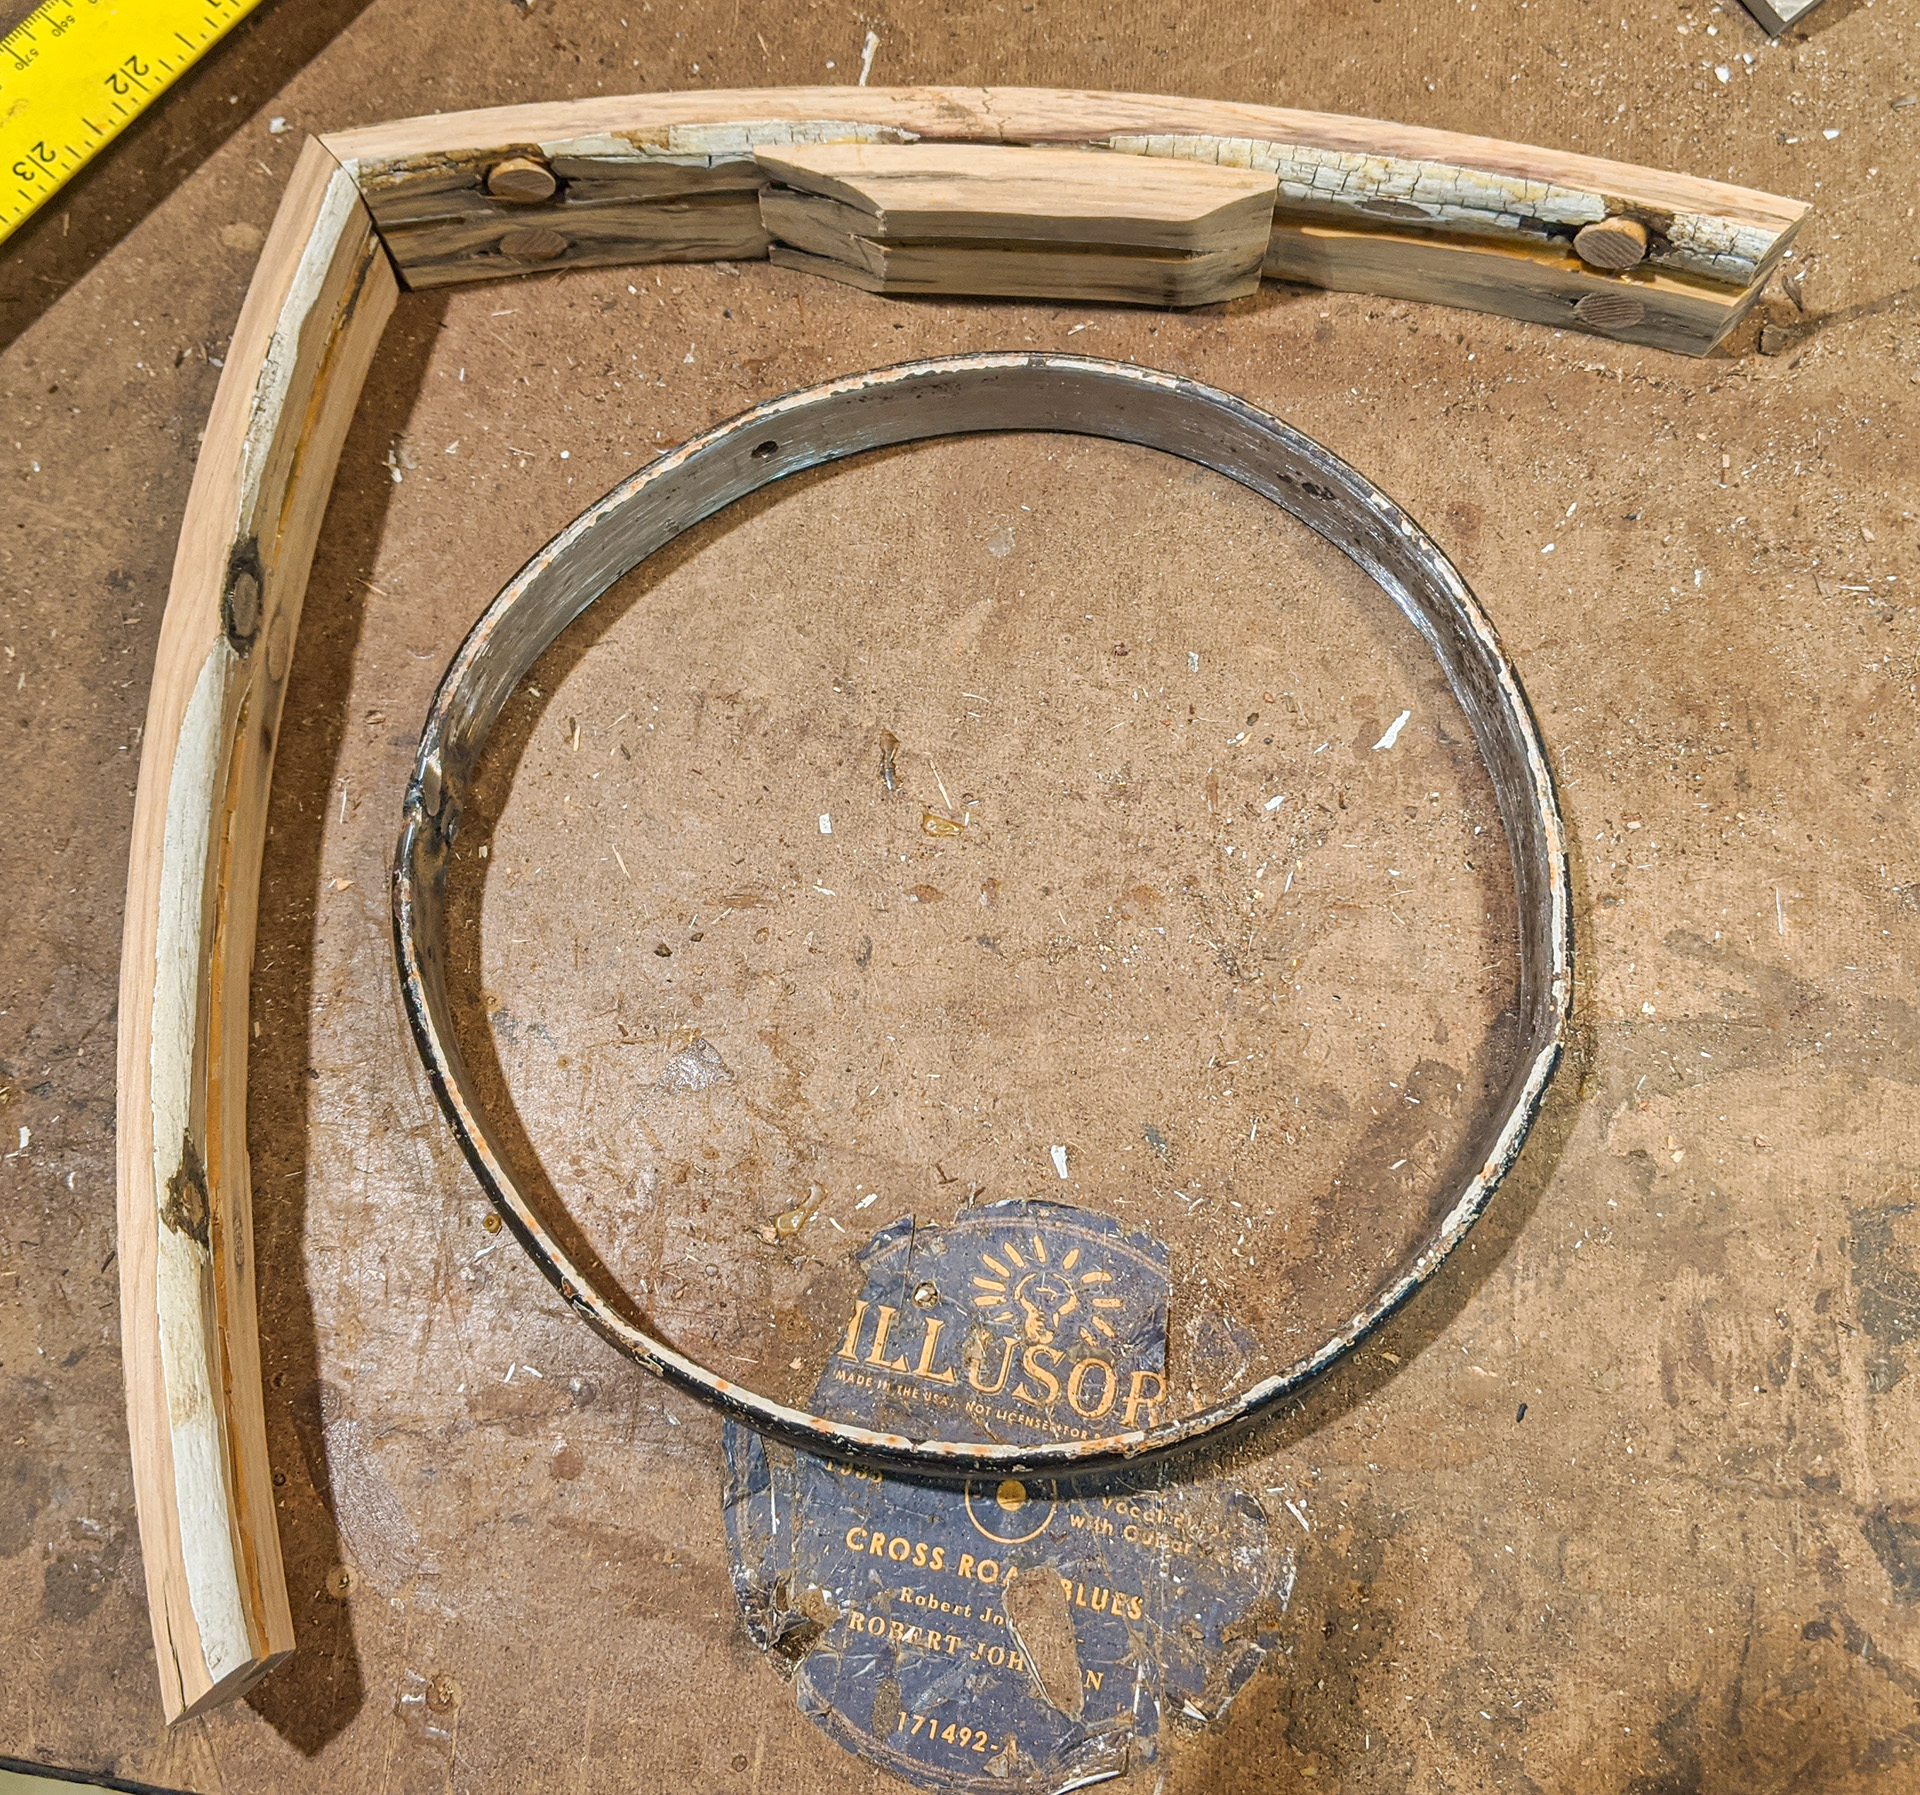
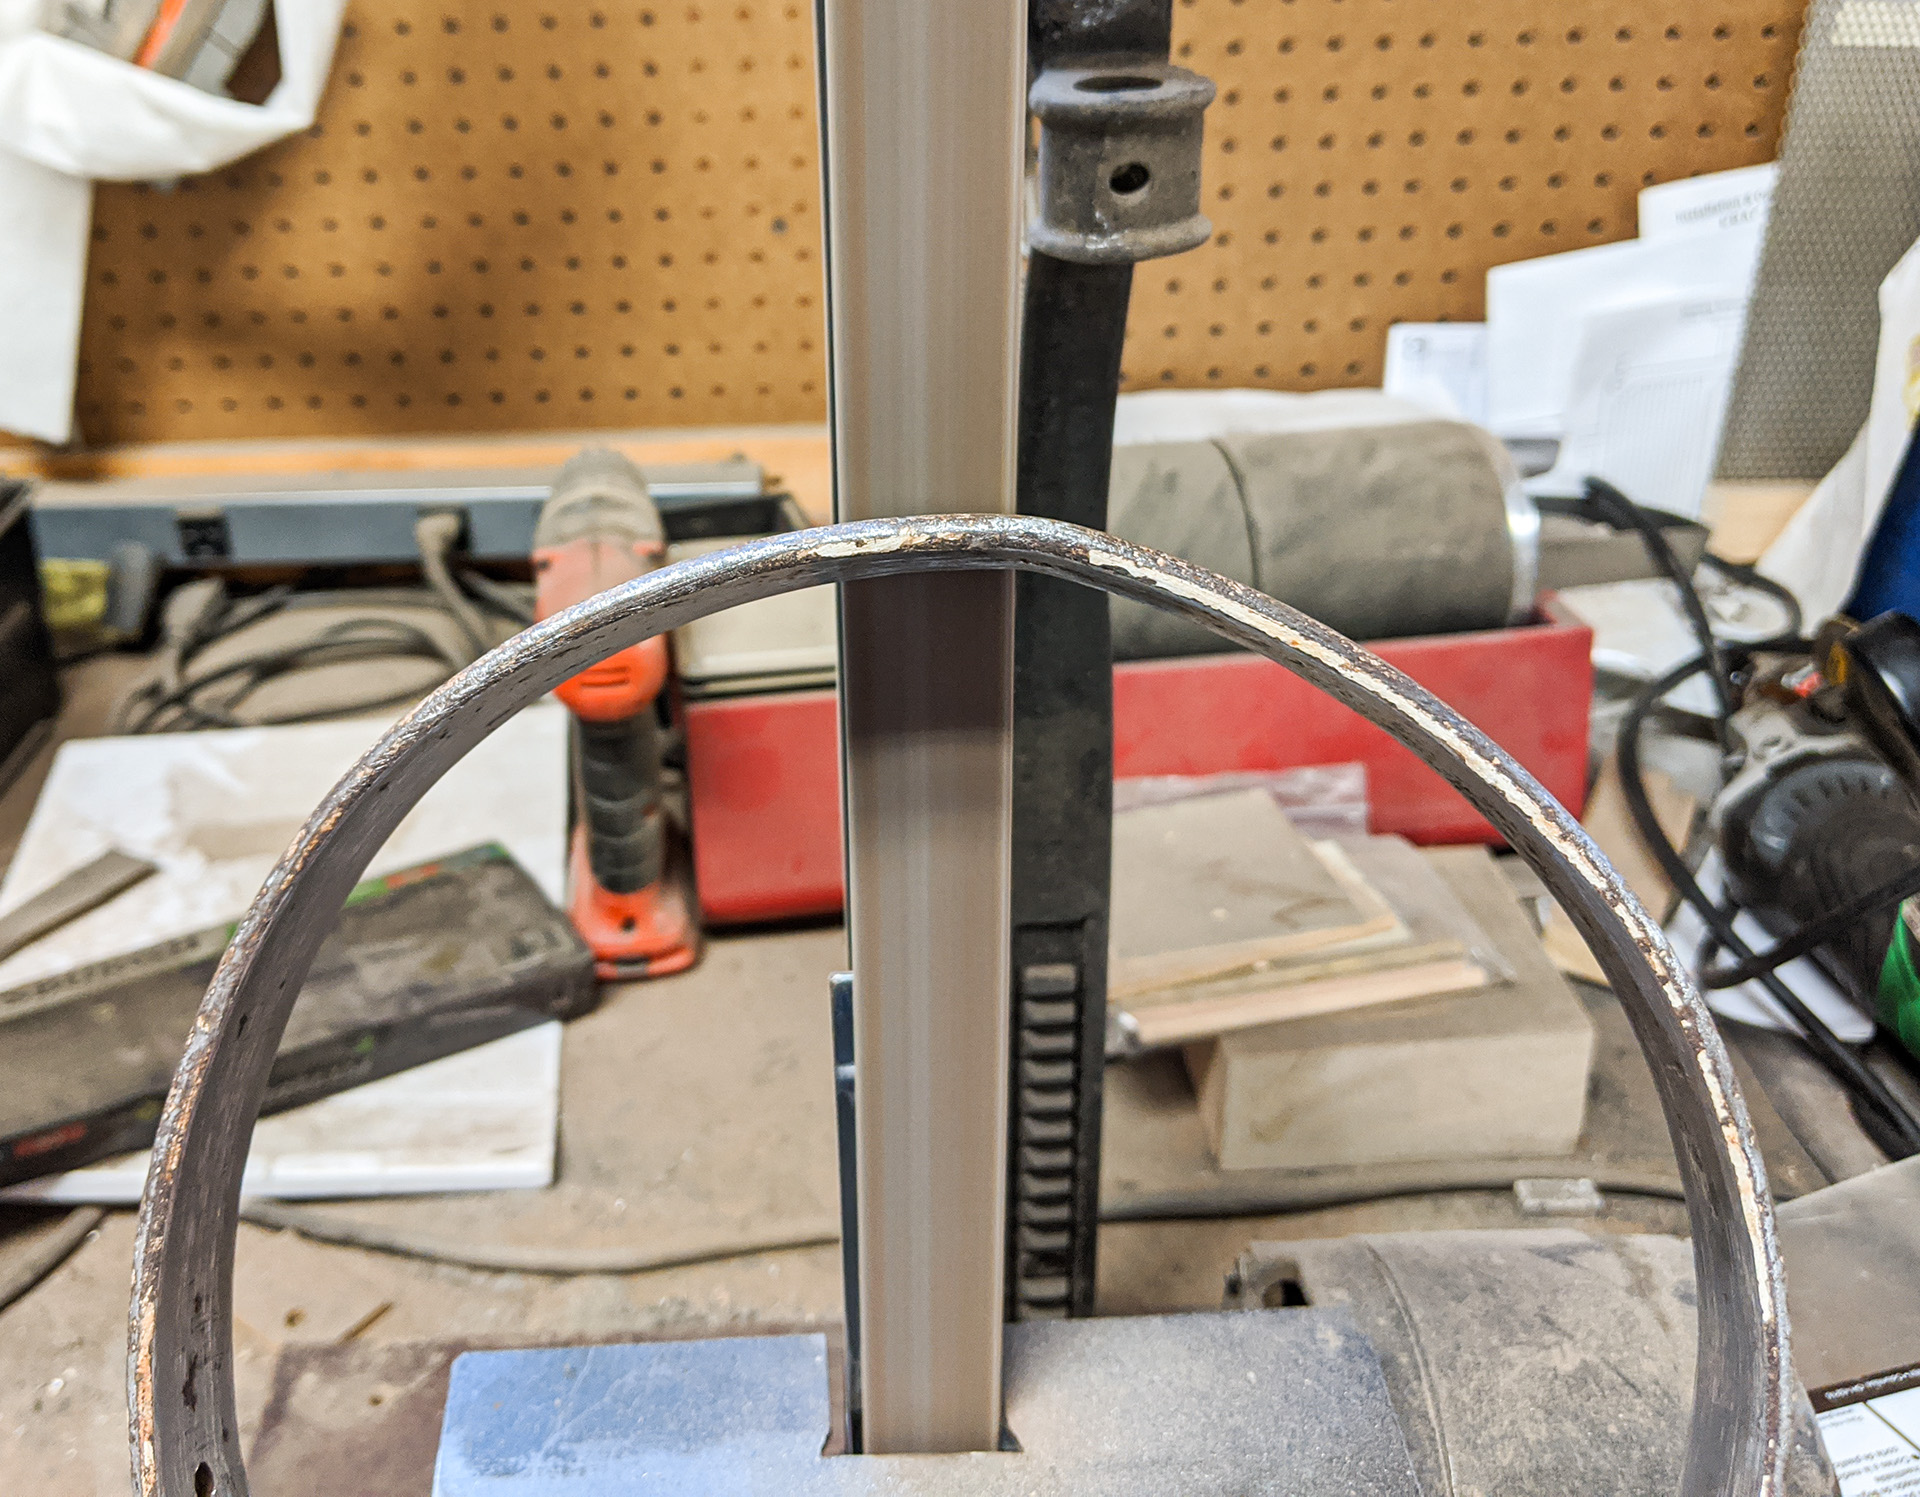
In between the last photo and this one, I made a major decision. To help promote a banjo-building contest we had recently announced through Cigar Box Nation, I decided to build a banjo instead of a guitar. This presented some interesting challenges... the first one being that I didn't really know how to build a banjo. But I've never let that stop me right? I realized that for my banjo's tone ring, I could use a portion of the outer steel rim of the wheel, rolled into a tighter 8-inch diameter circle (down from its original 42-inch diameter). How hard could it be? So, I do some quick math to figure out how long of a length I'd need to make an 8-inch circle... |
|
|
|
|
|
Then cut the piece to length with my angle grinder... |
|
|
|
|
|
|
|
|
Yielding a nice clean cut. That's some fairly thick steel there, as you can see. About 3/16-inch thick, in fact. |
|
|
|
|
|
So, I take the steel over to my little 12-inch vise-mount slip roll wheel, thinking I can roll it down into an 8-inch hoop no problem. Well, it was a problem. A good bit of sweat and a couple of blisters later, I got it to just about a 12-inch diameter, shown here. I just couldn't get it any tighter... couldn't pull it off with the equipment I had. And I had even used the belt grinder to thin it down a bit. So, I decided to use a bit of brute force to finish the job. I made an 8-inch diameter, 3-inch thick disc out of a slab of African mahogany I happened to have... |
|
|
|
|
|
Screwed my 12-inch diameter unfinished hoop to it... |
|
|
|
|
|
And proceeded to apply force in any way I could to bend the metal around my form. Squeeze clamps worked pretty well, applying enough pressure a little bit at a time... |
|
|
|
|
|
Slowly pulling it around far enough that I could put in more screws to cinch it down tight. |
|
|
|
|
|
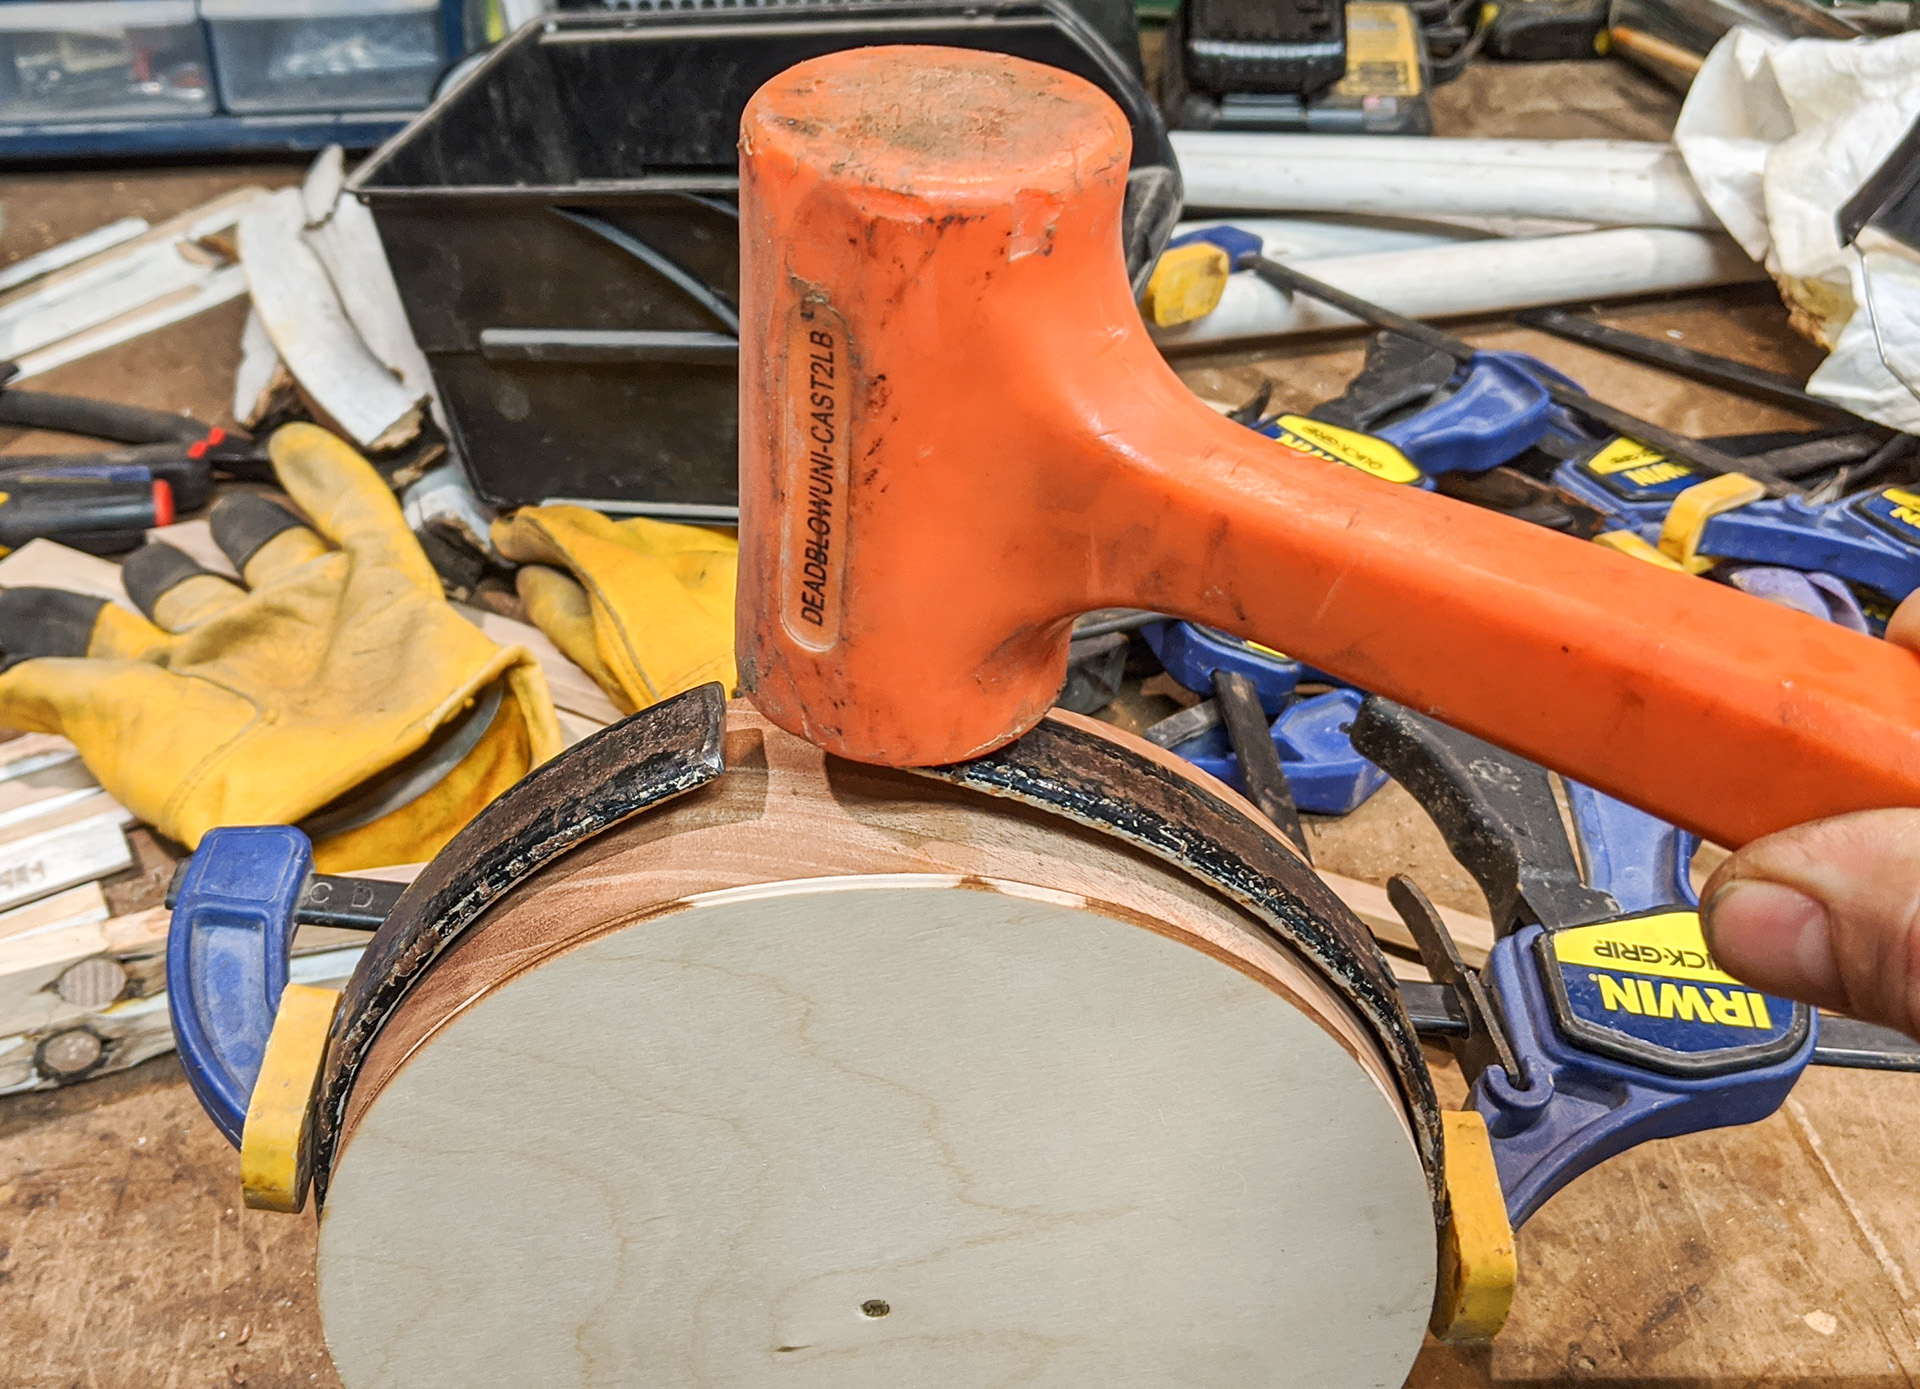
Finally, I had to grab the mallet and force those stubborn ends down into shape. |
|
|
|
|
|
In the end though, the ends joined up, and I had mostly circular steel hoop. |
|
|
|
|
|
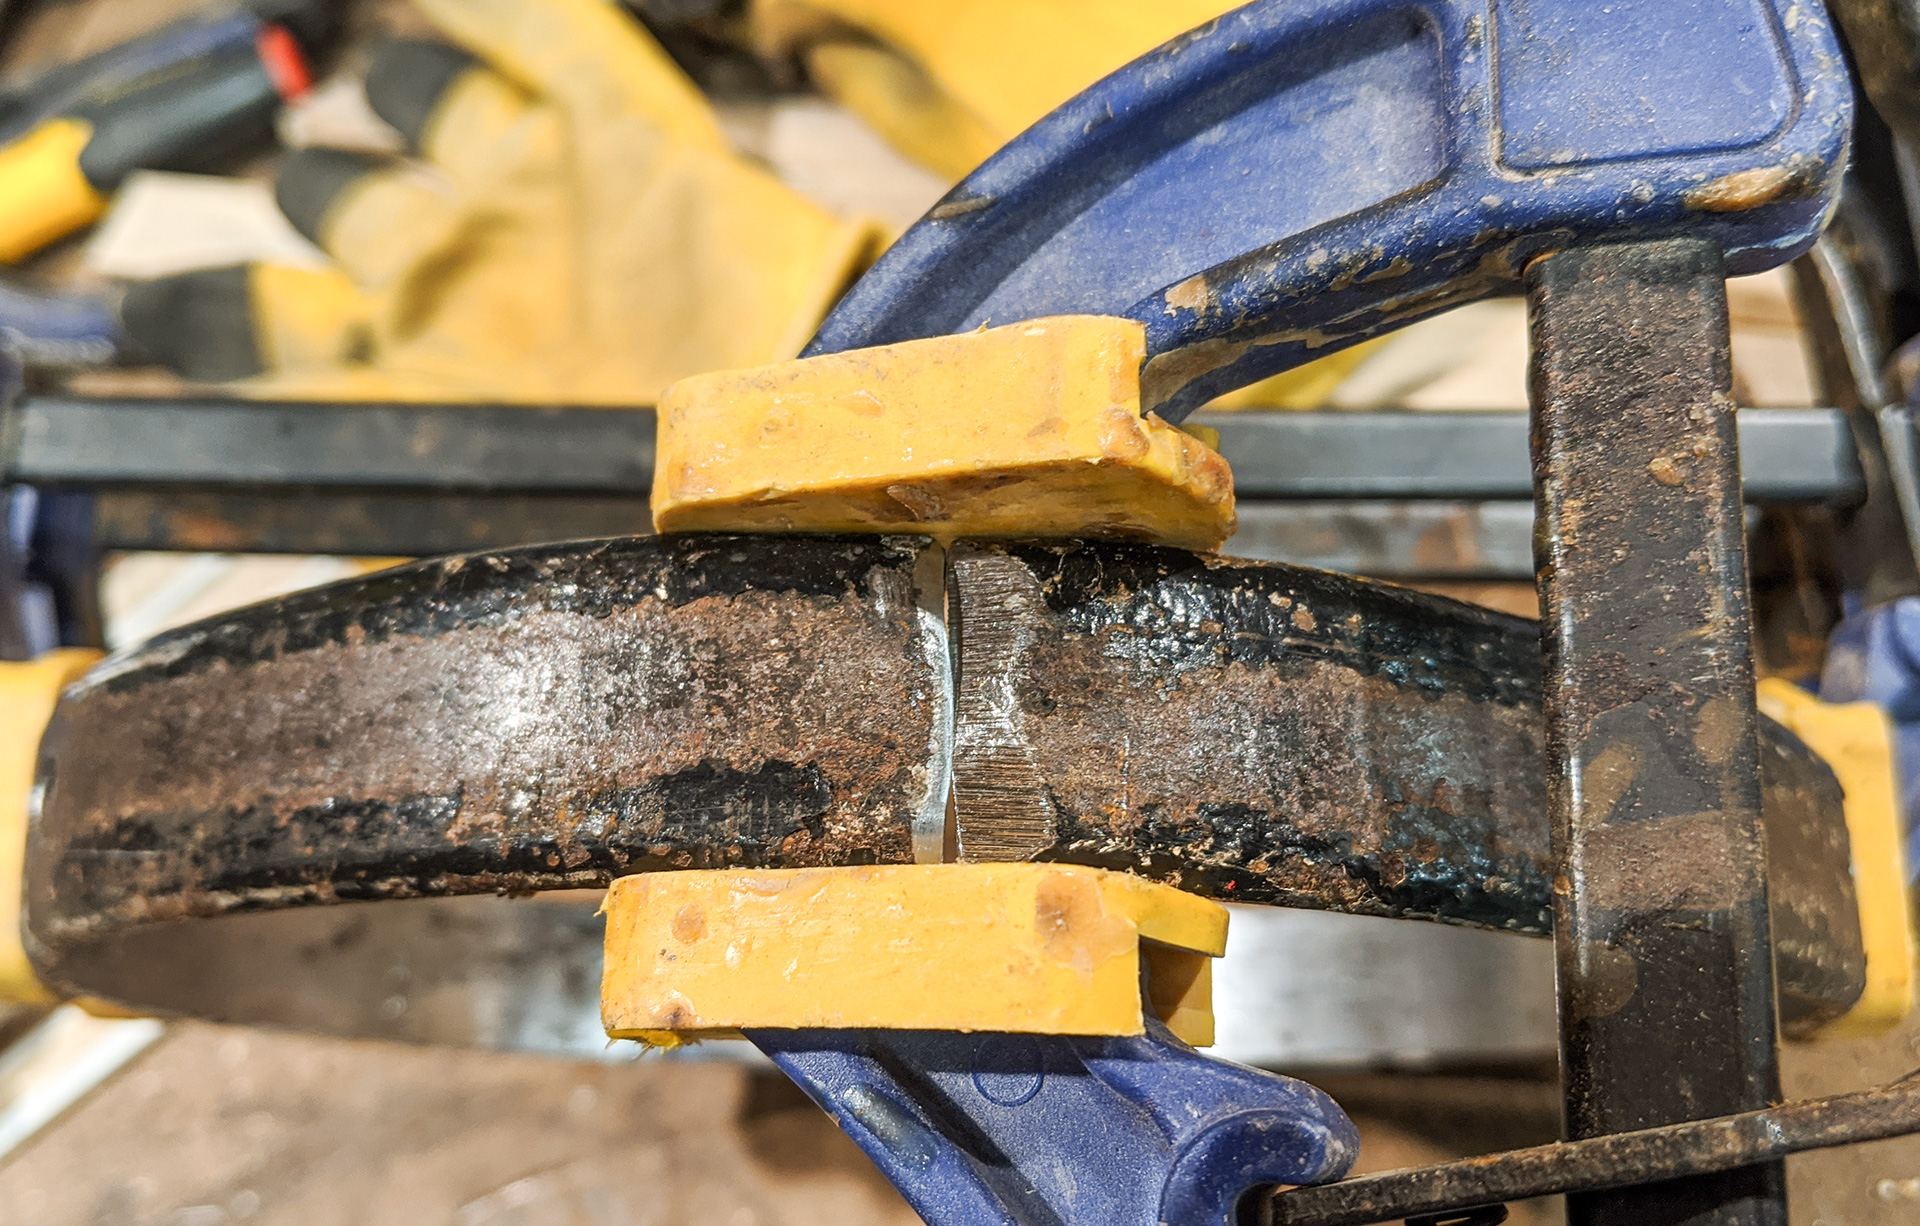
Then it was over to the metalworking area to try my hand at some arc welding. It took quite a few tries, and it wasn't the cleanest weld in the world, but it was enough to hold the hoop into shape. |
|
|
|
|
|
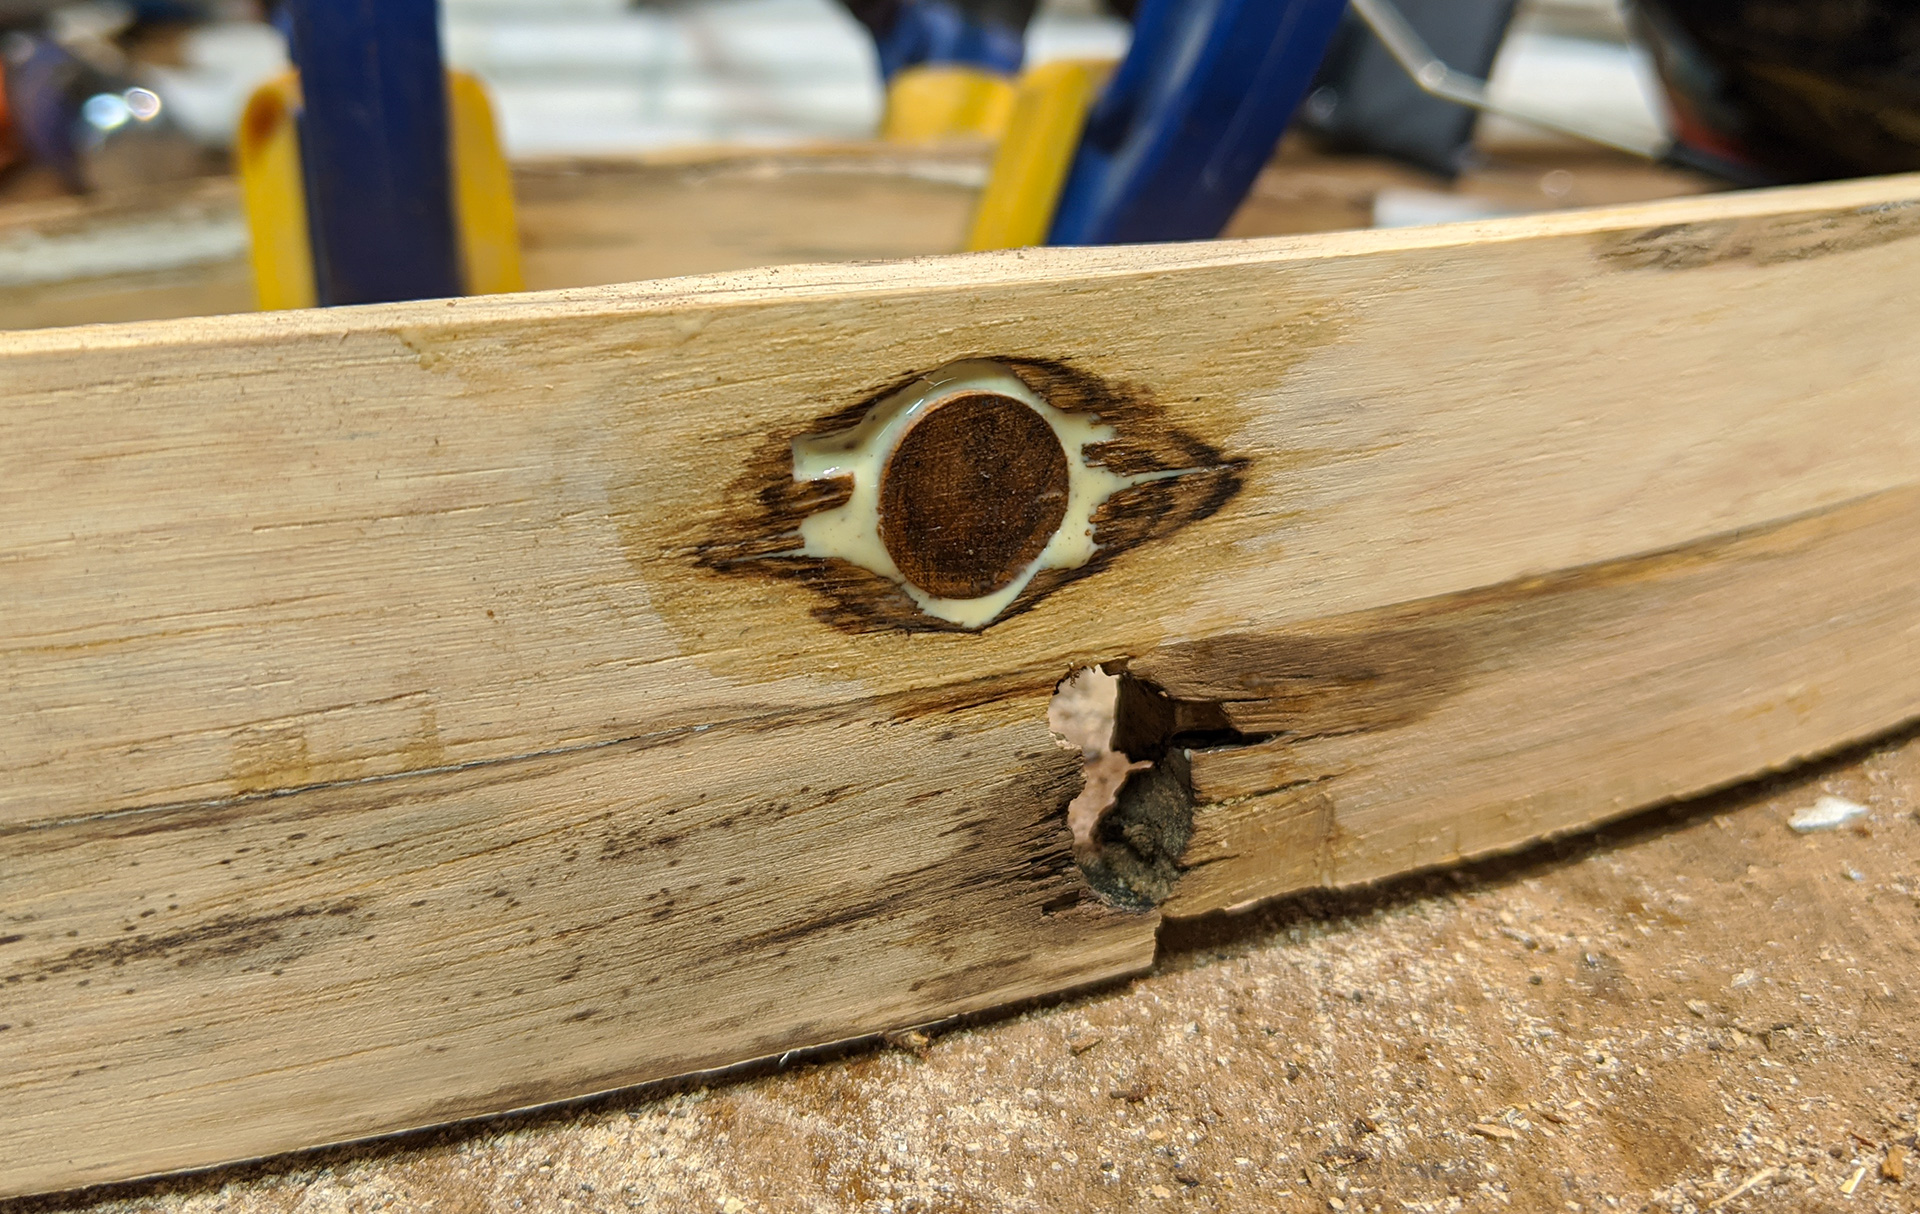
It wasn't long after I got back to my bench that I broke another one of my curved side panels -- right at a couple of those recently plugged holes, of course. |
|
|
|
|
|
So this time, after gluing the crack, I add a brace piece on the inside to keep it from breaking again. I end up doing this in several of the weakest points. |
|
|
|
|
|
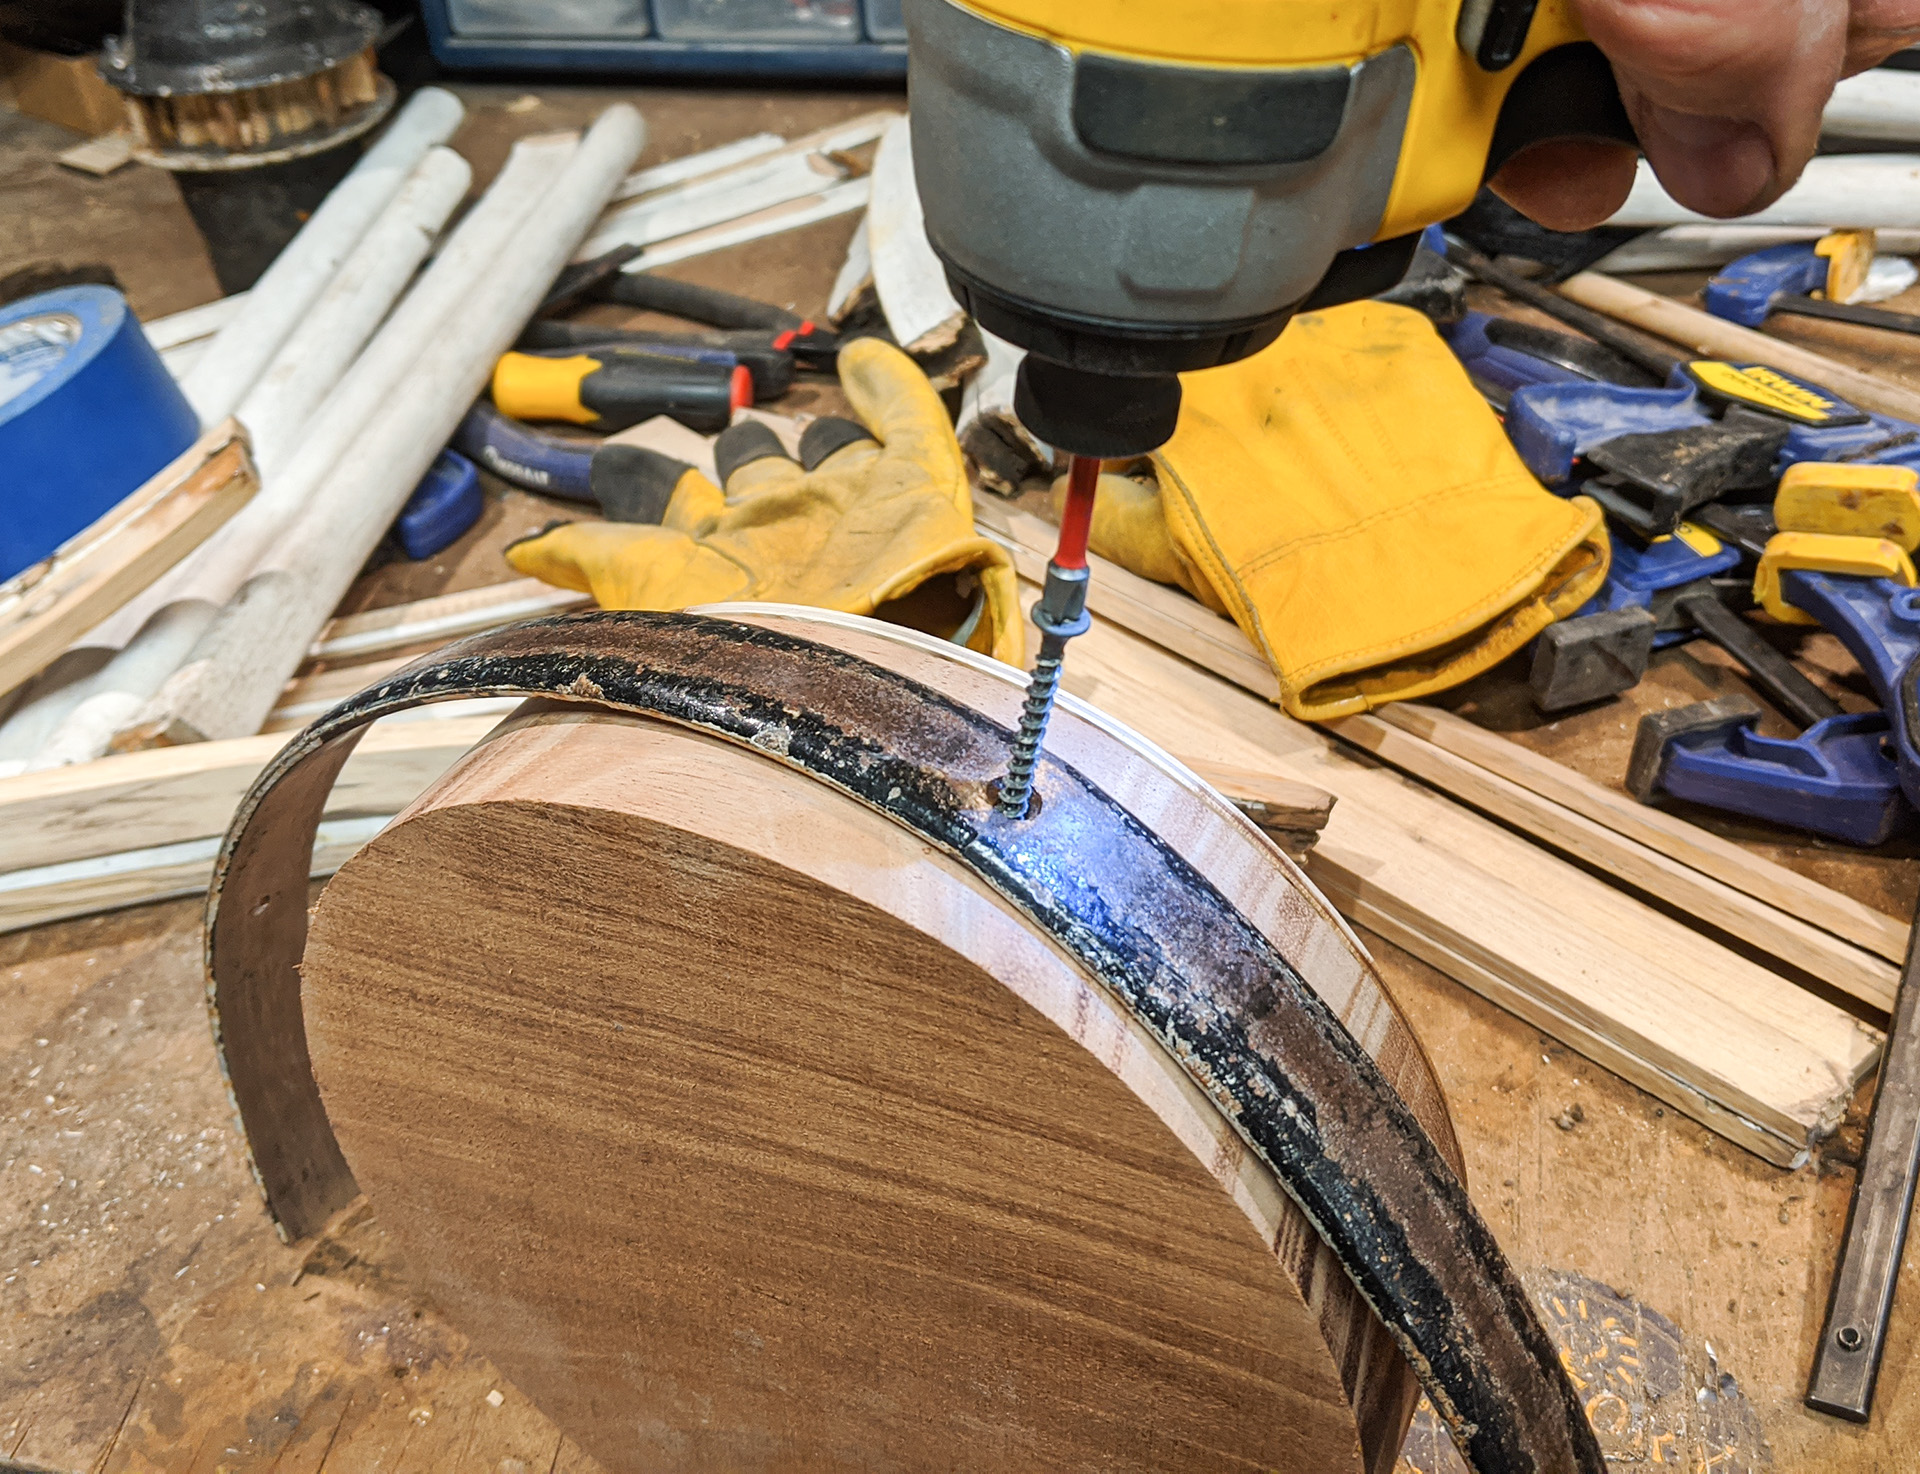
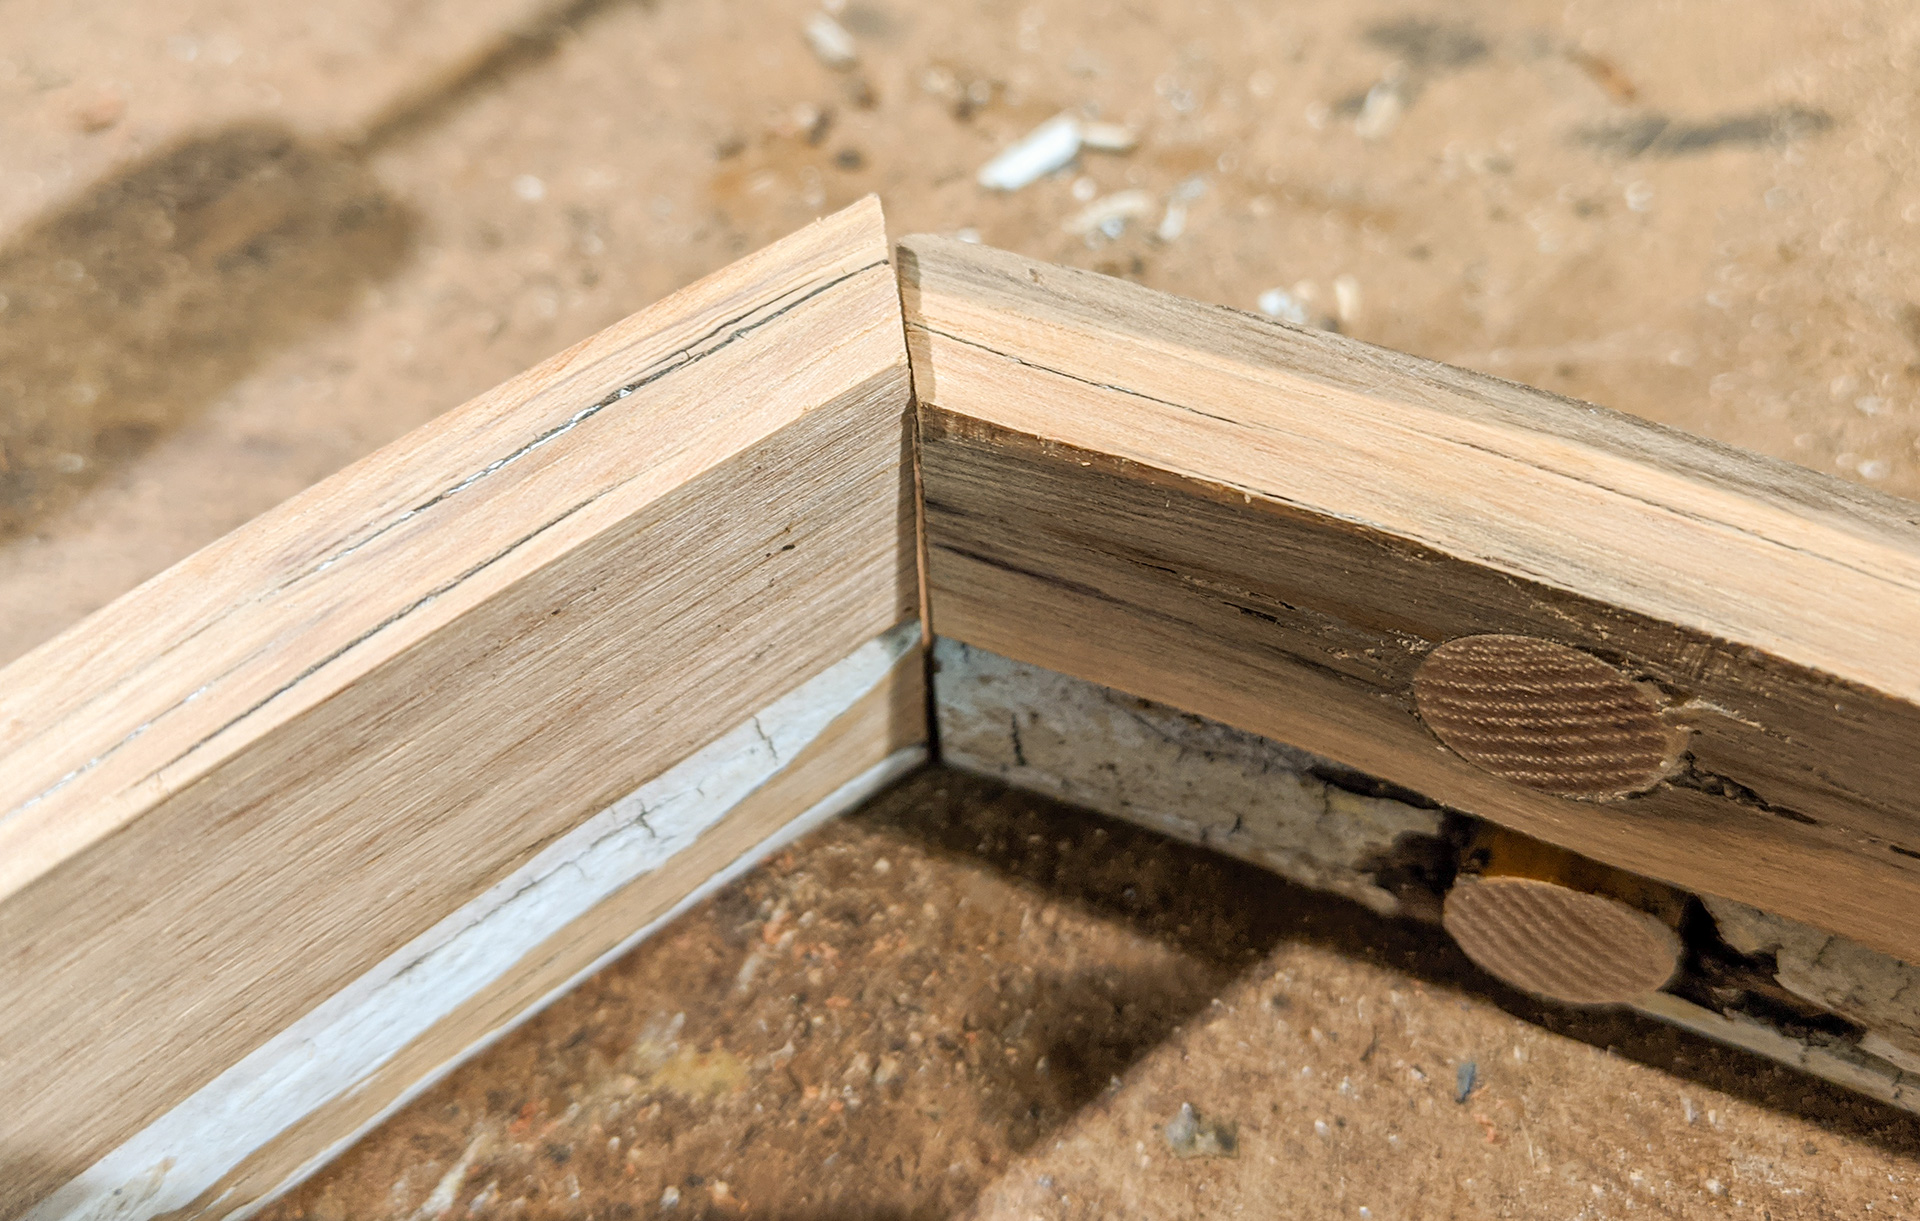
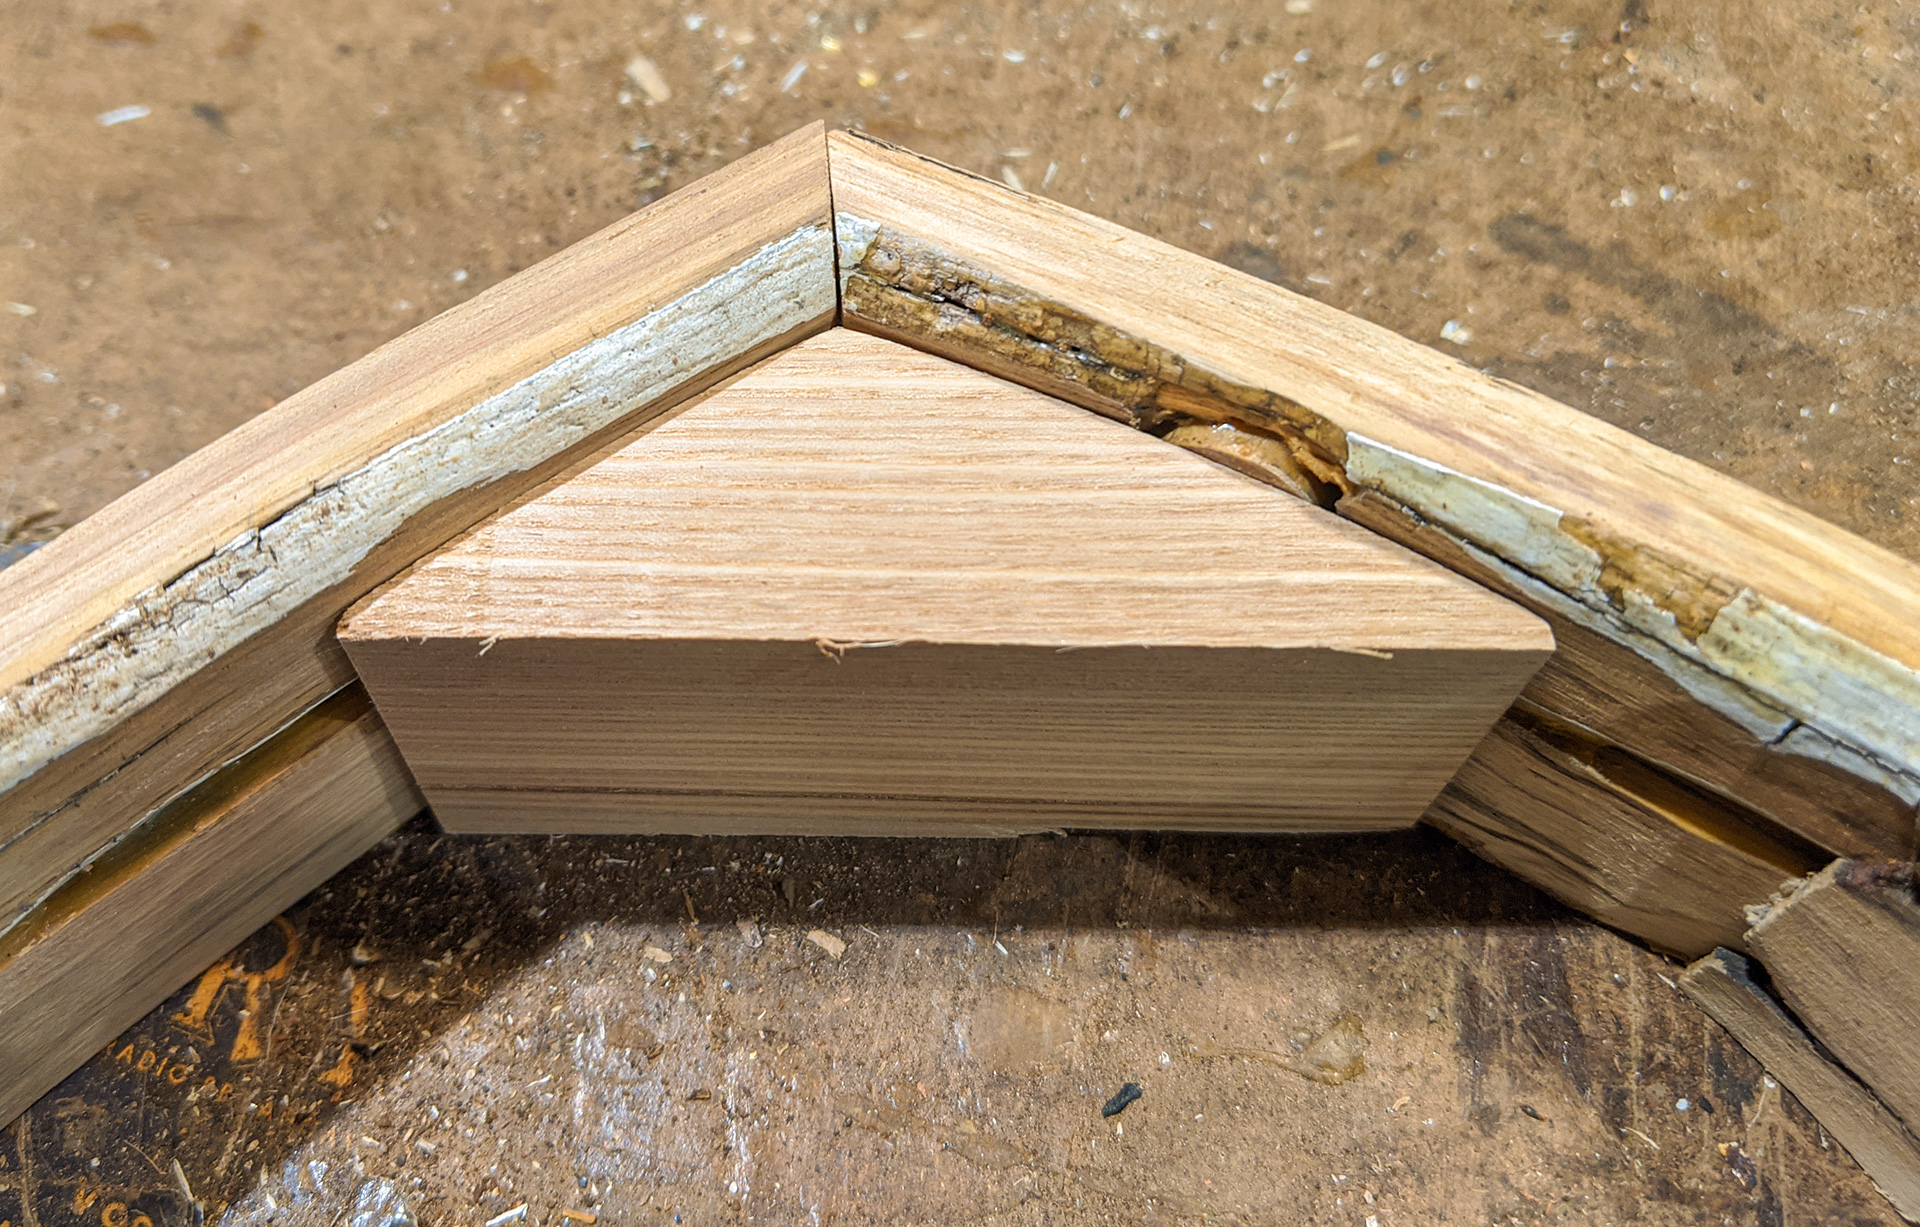
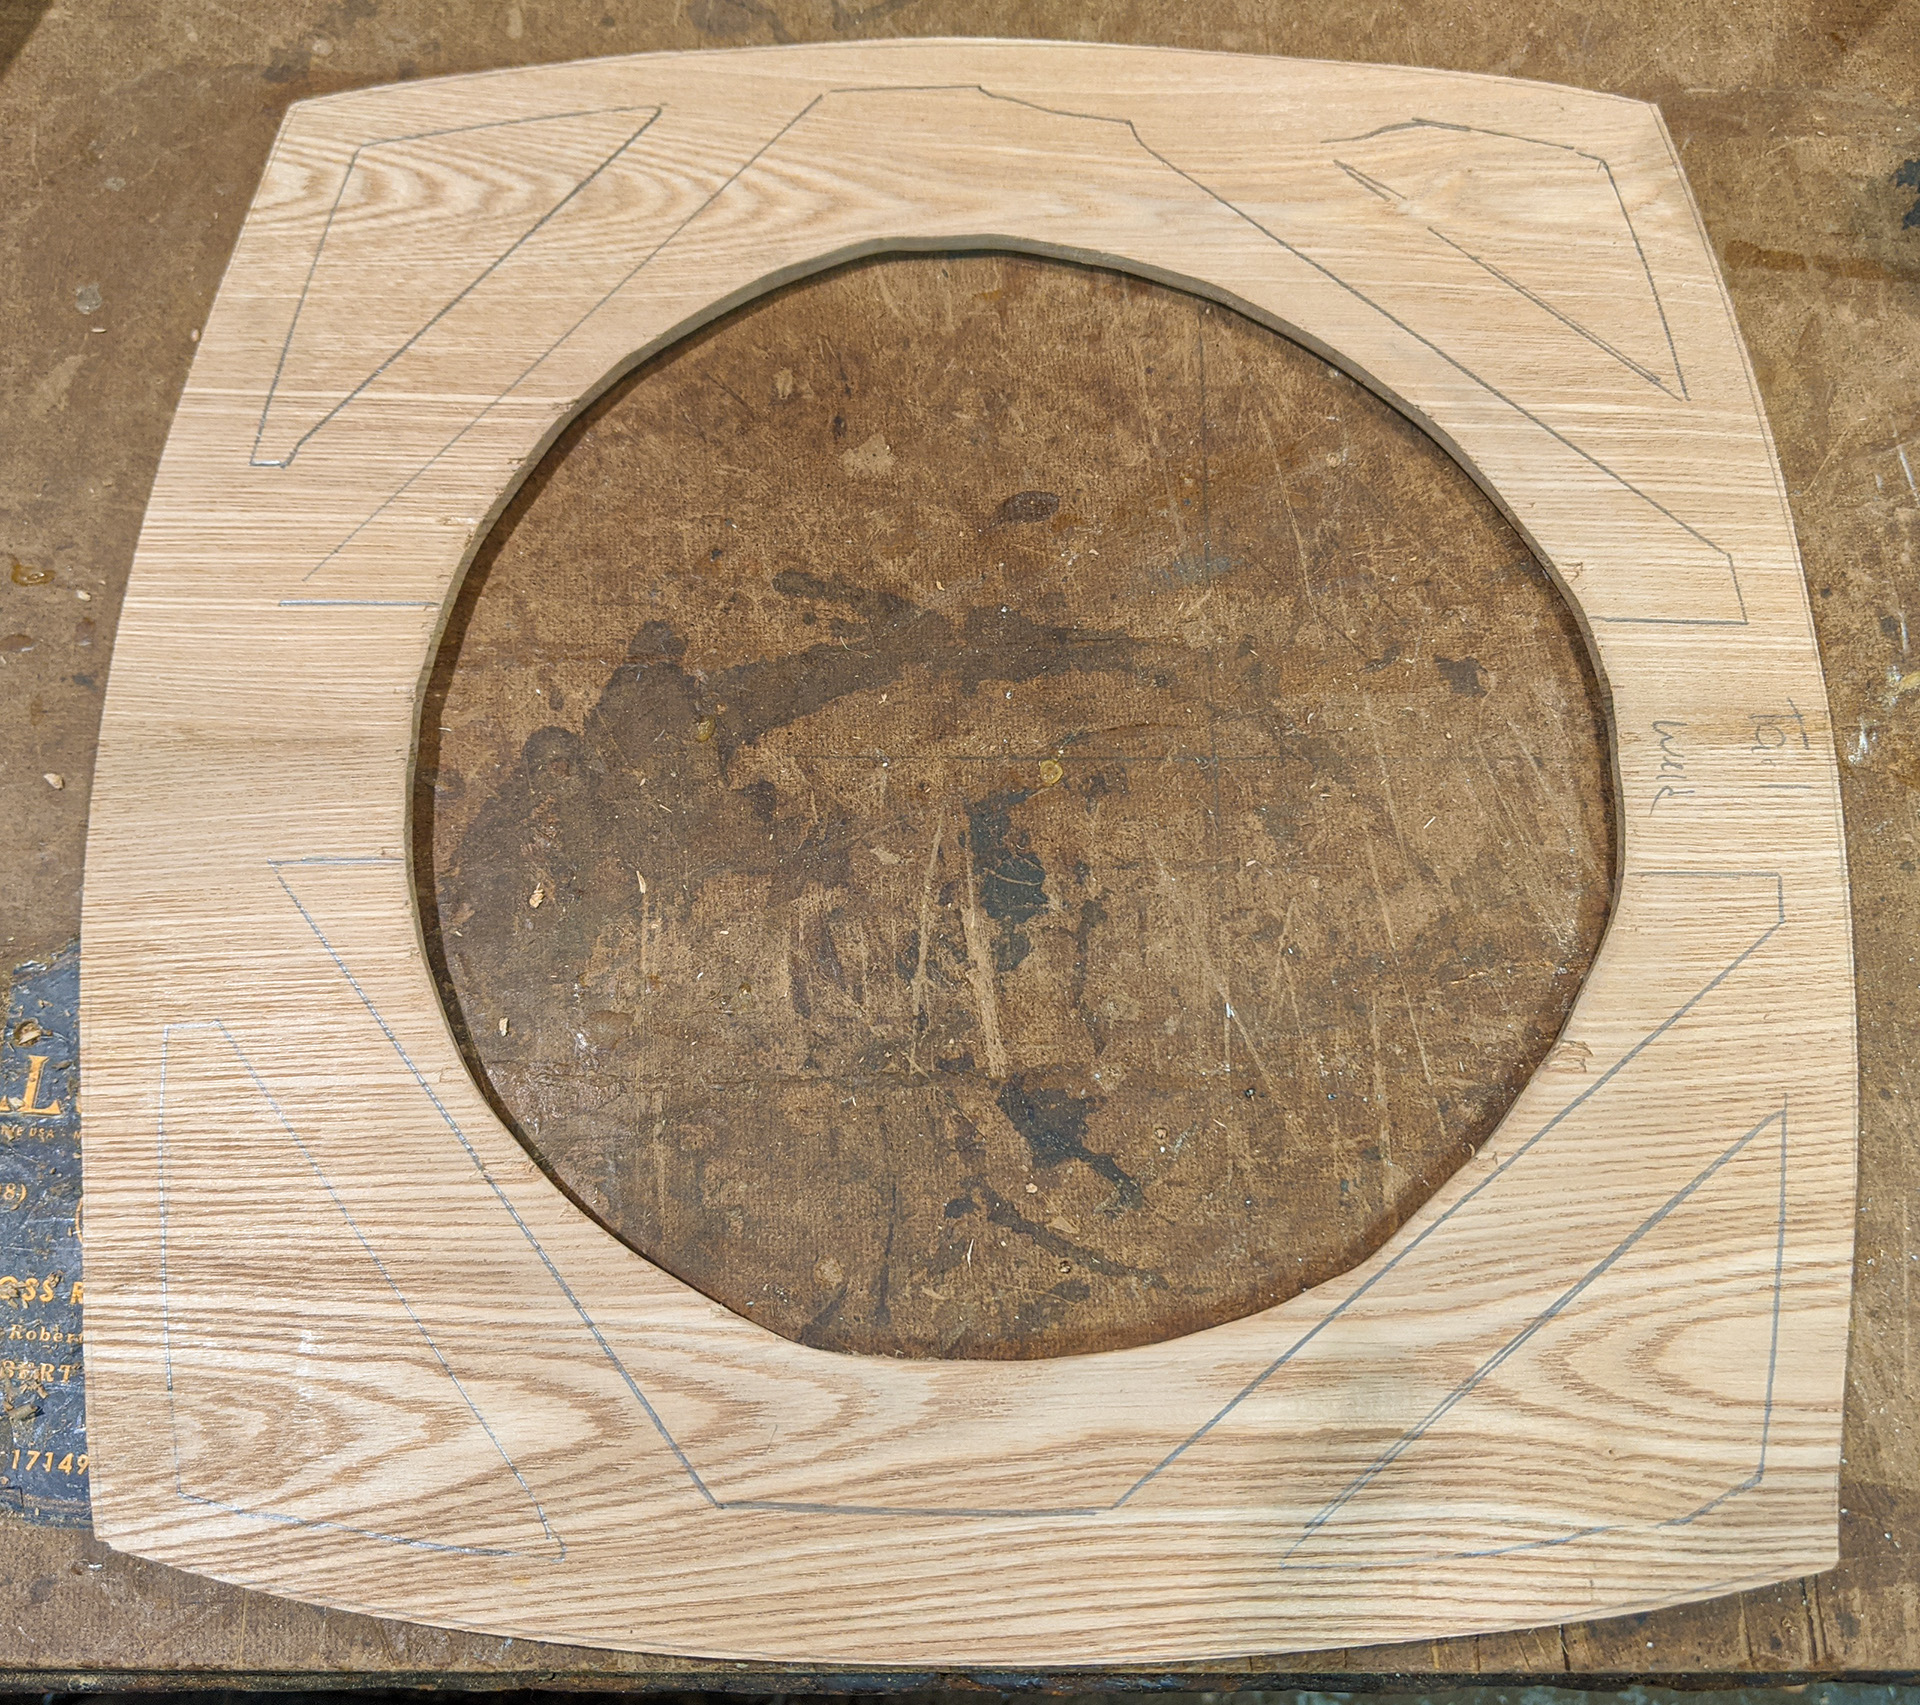
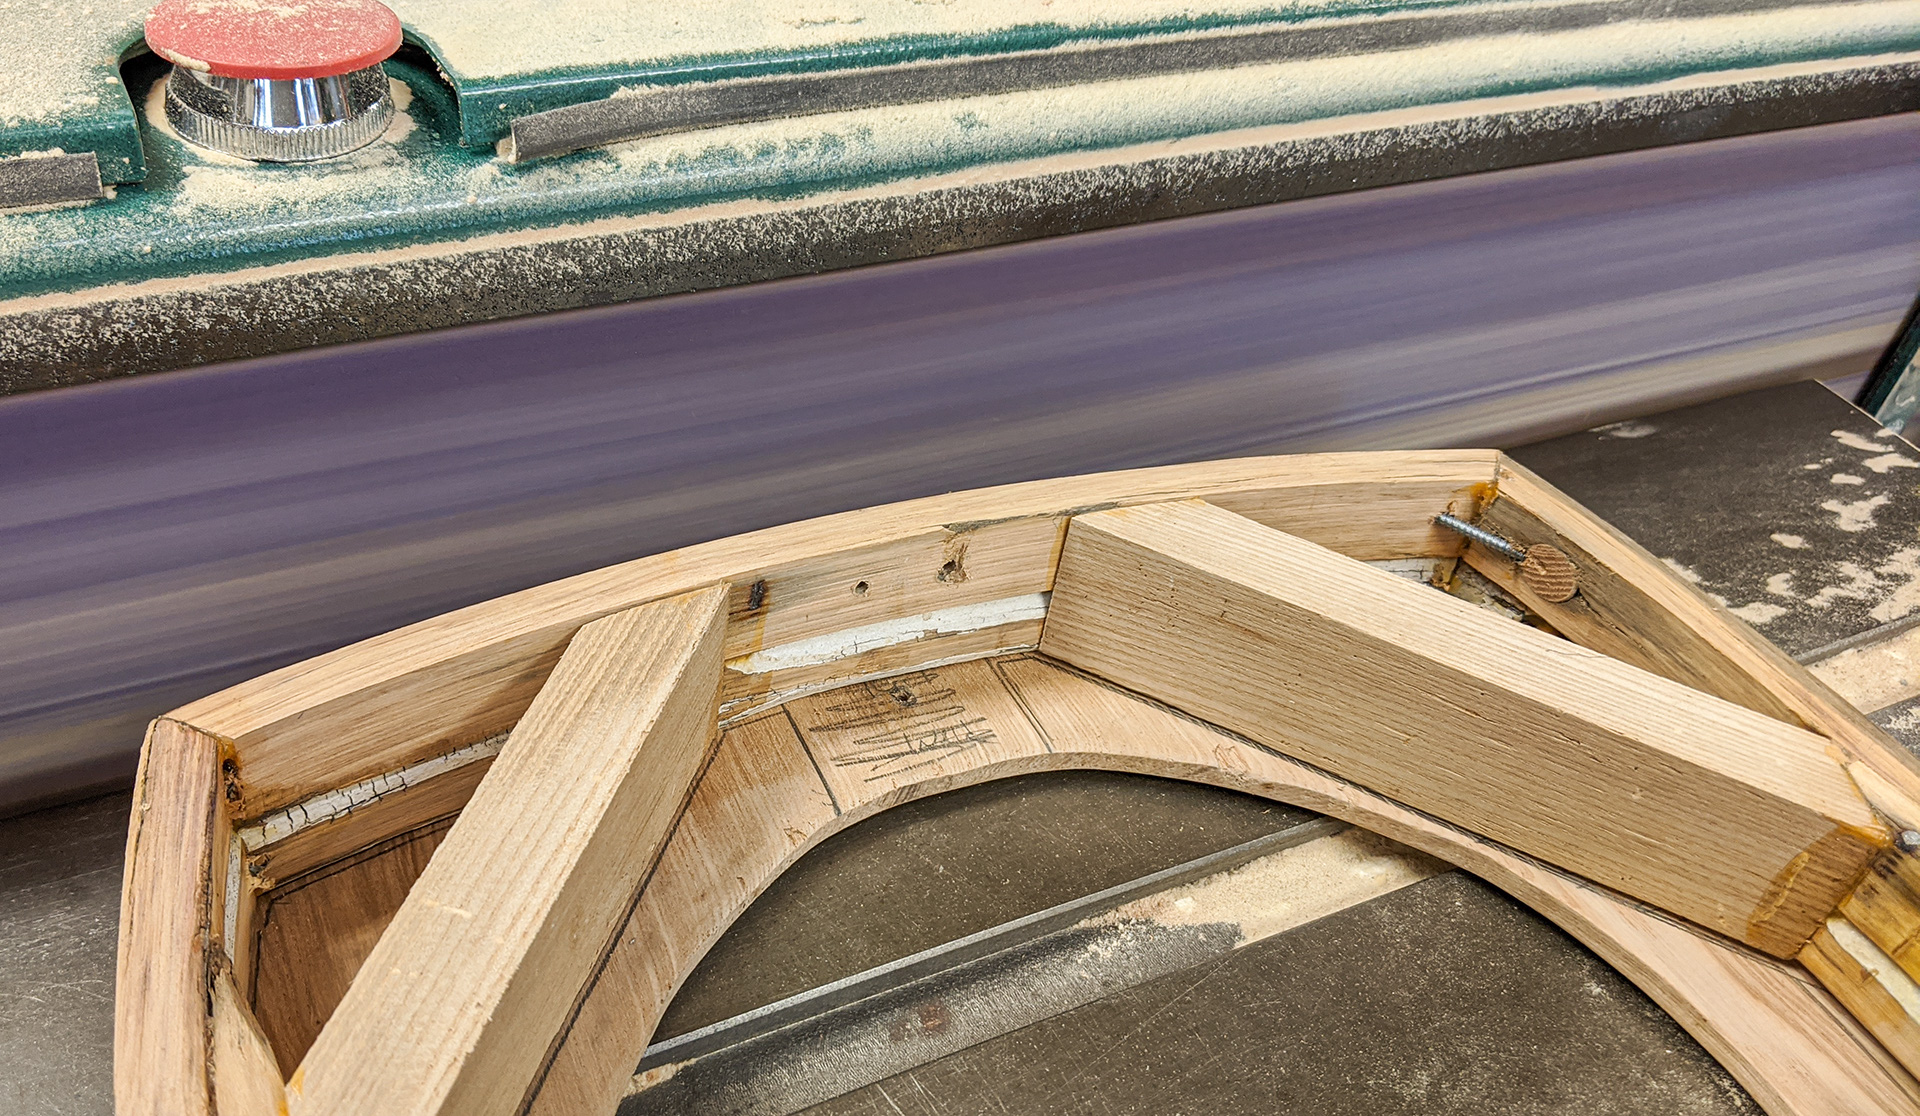
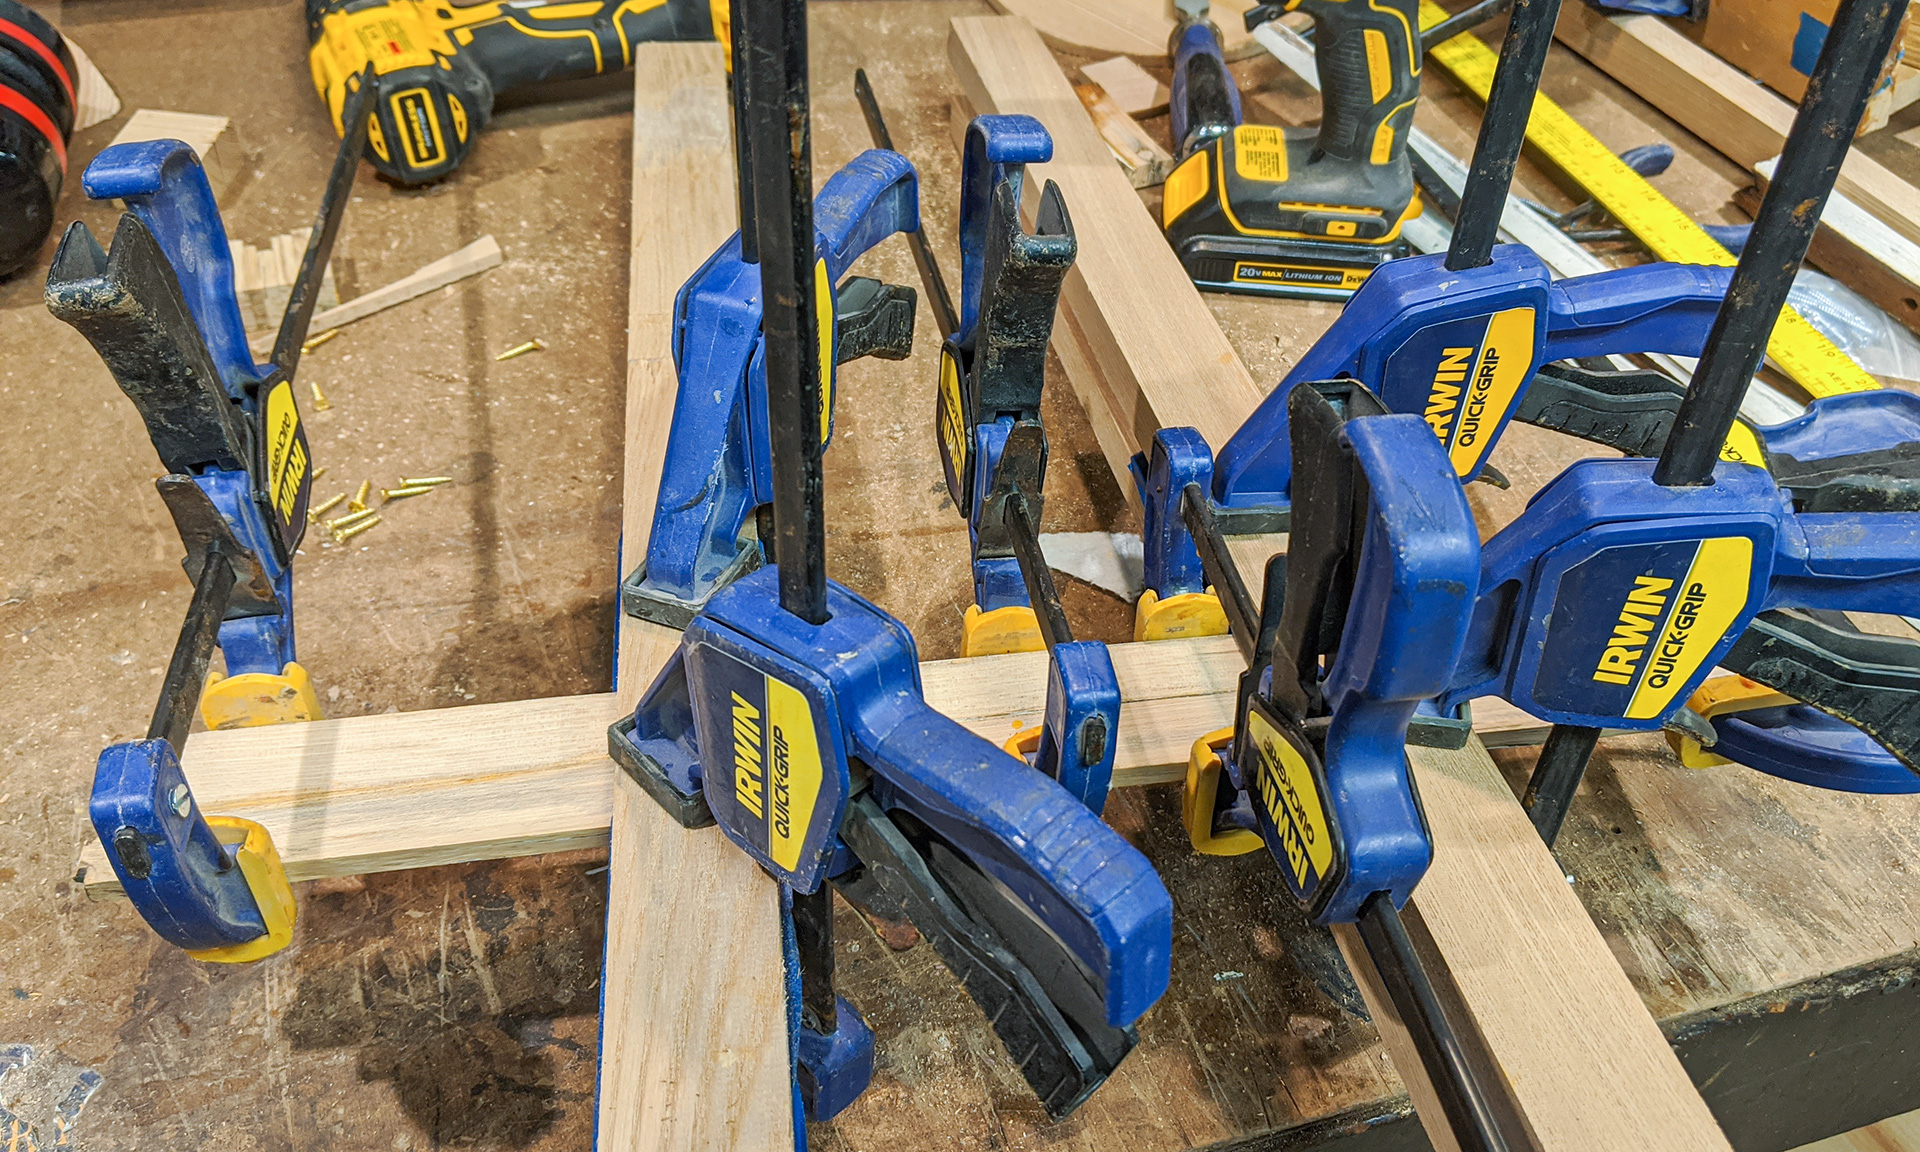
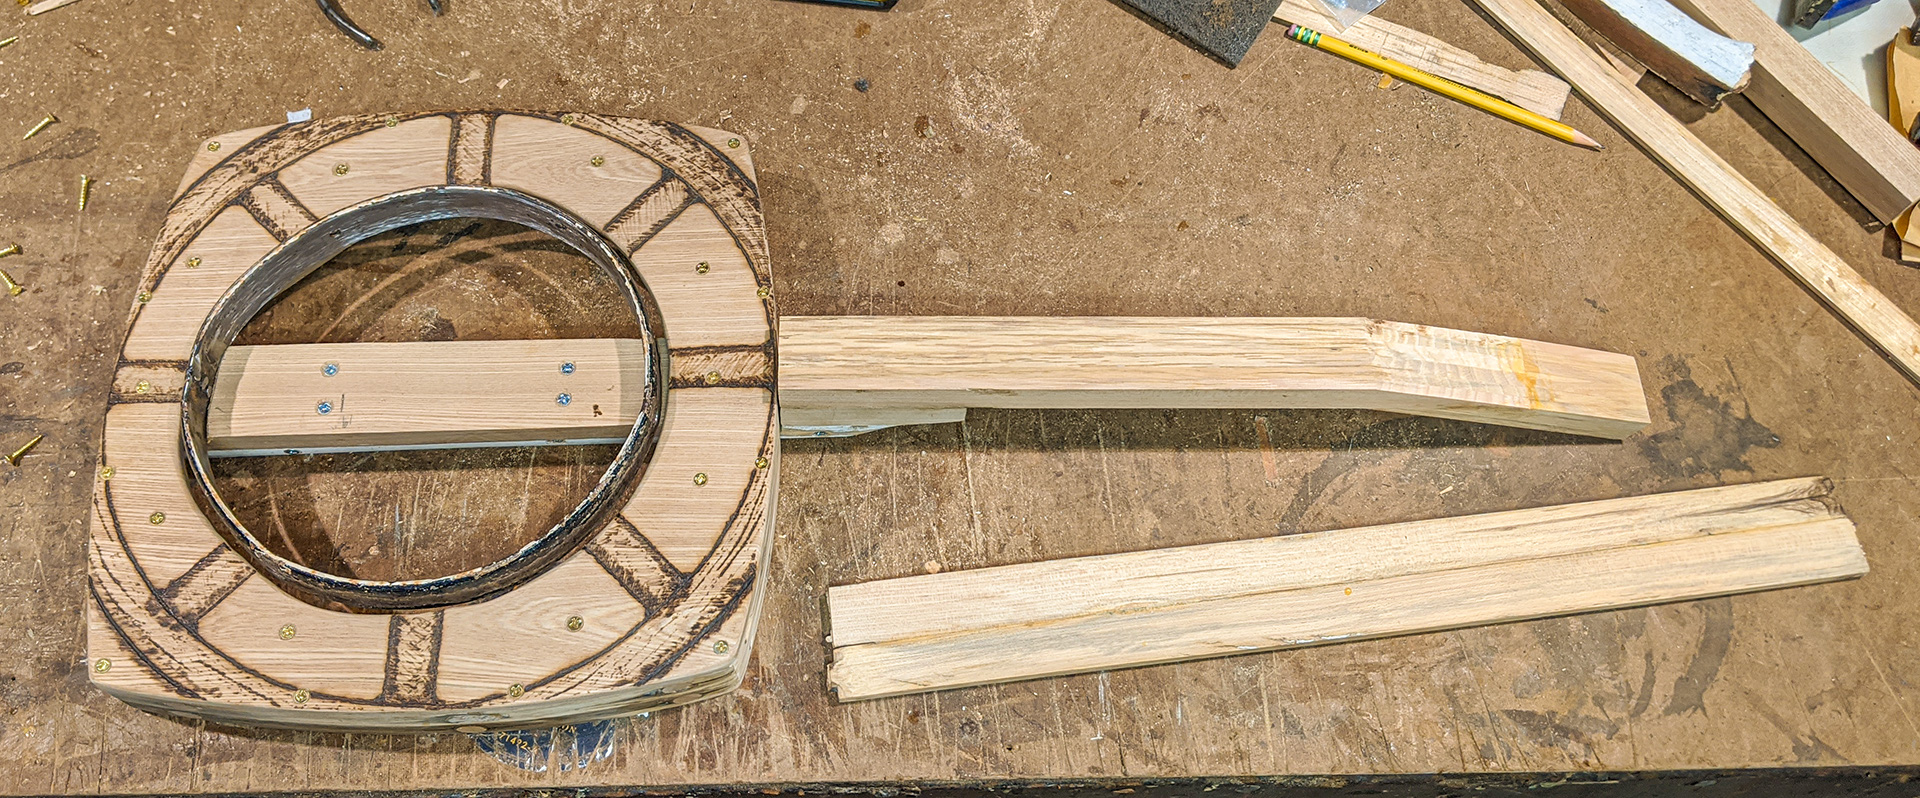
Now it was time to start creating the walls of my instrument body. It took some experimenting to get the angle just right, with those curved sides. |
|
|
|
|
|
The instrument body starts to take shape... |
|
|
|
|
|
I thought about gluing in this style of corner brace, but later abandoned that idea. |
|
|
|
|
|
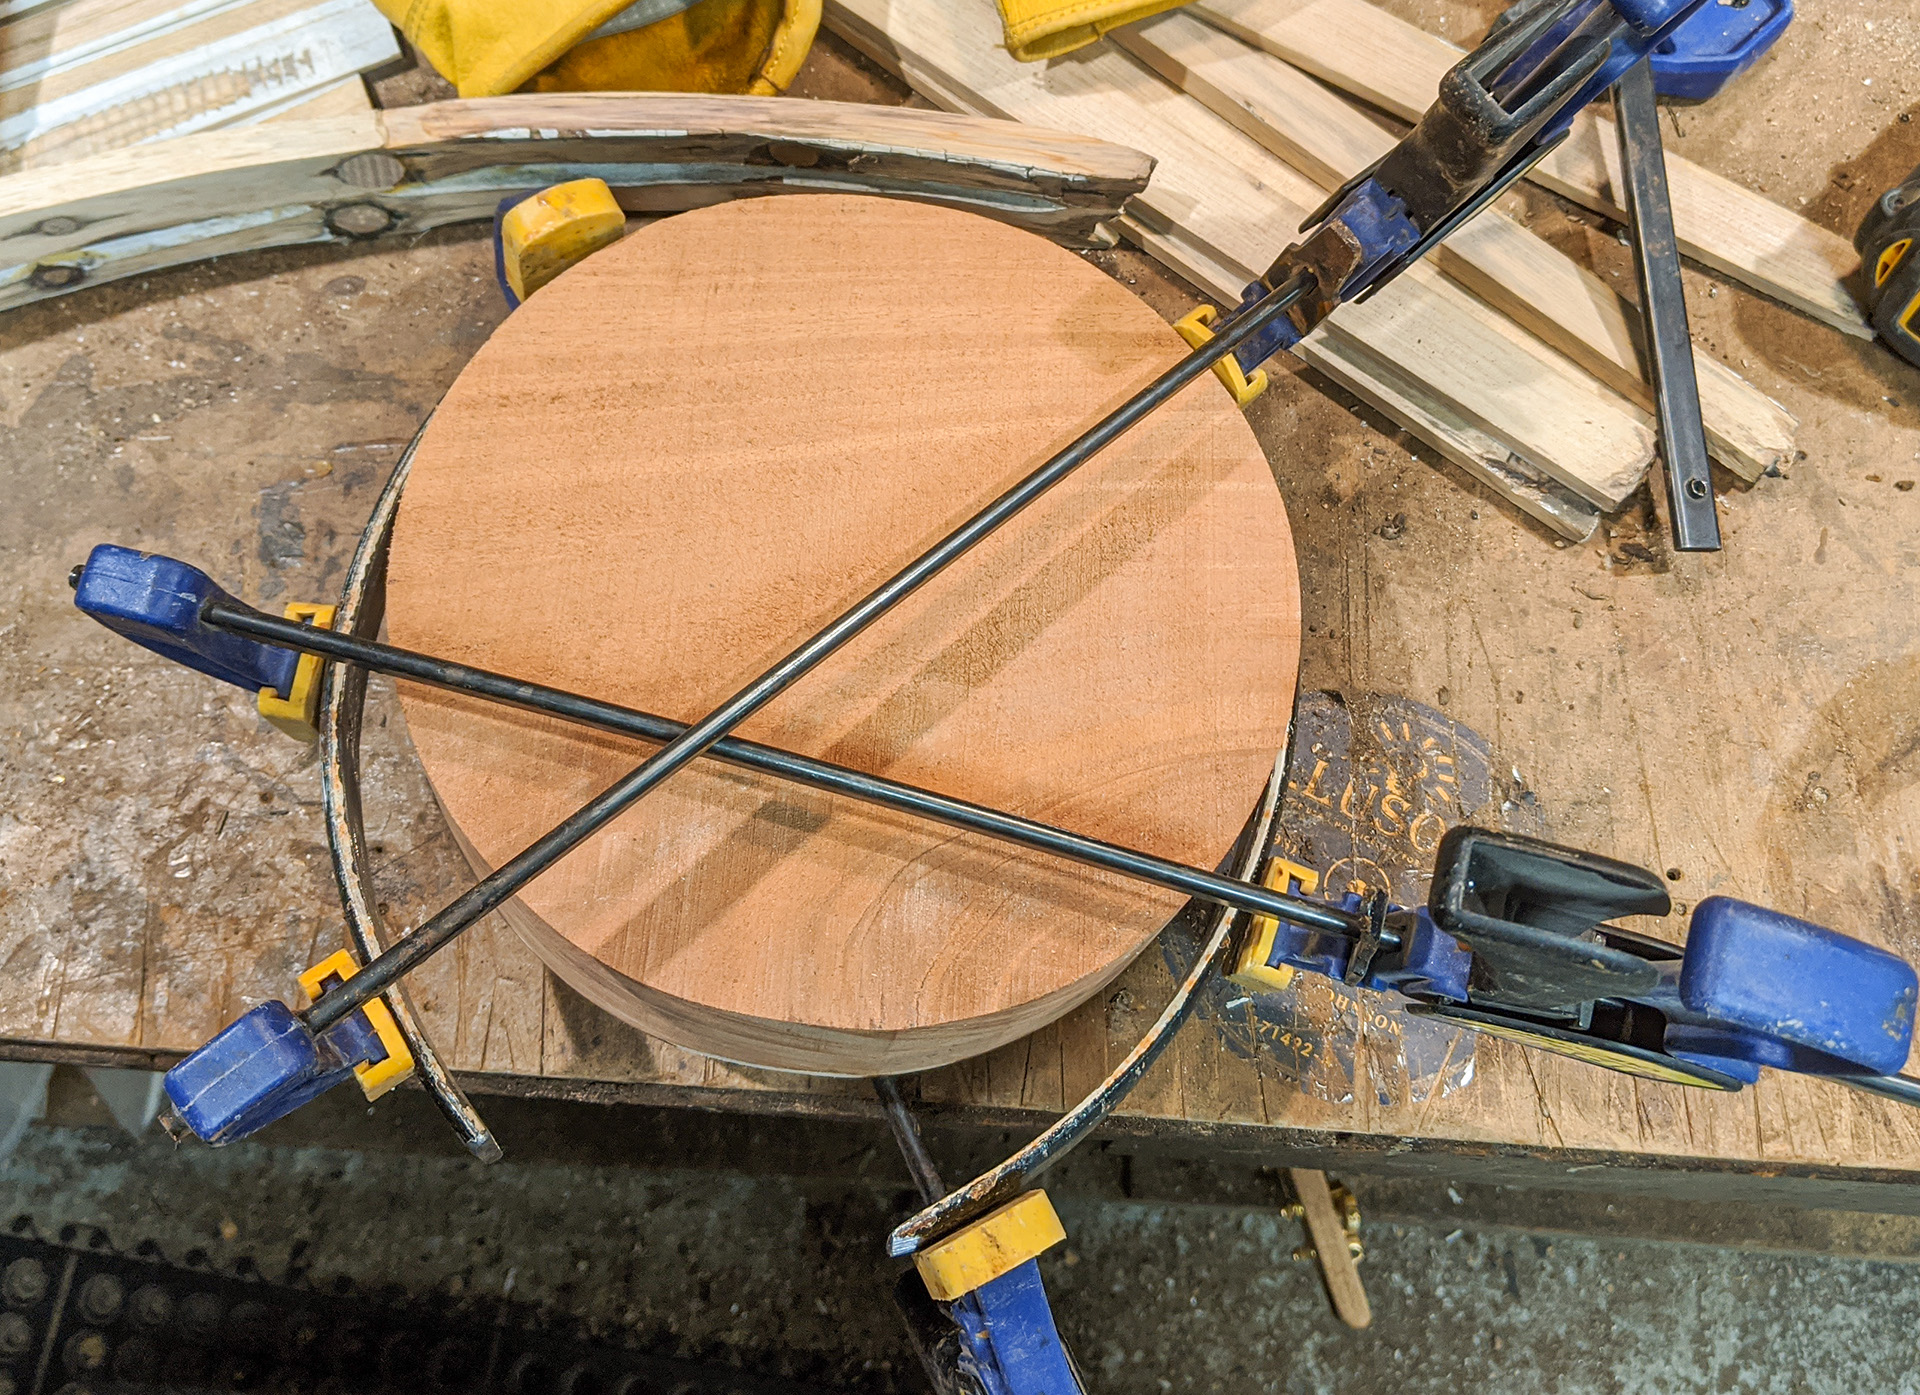
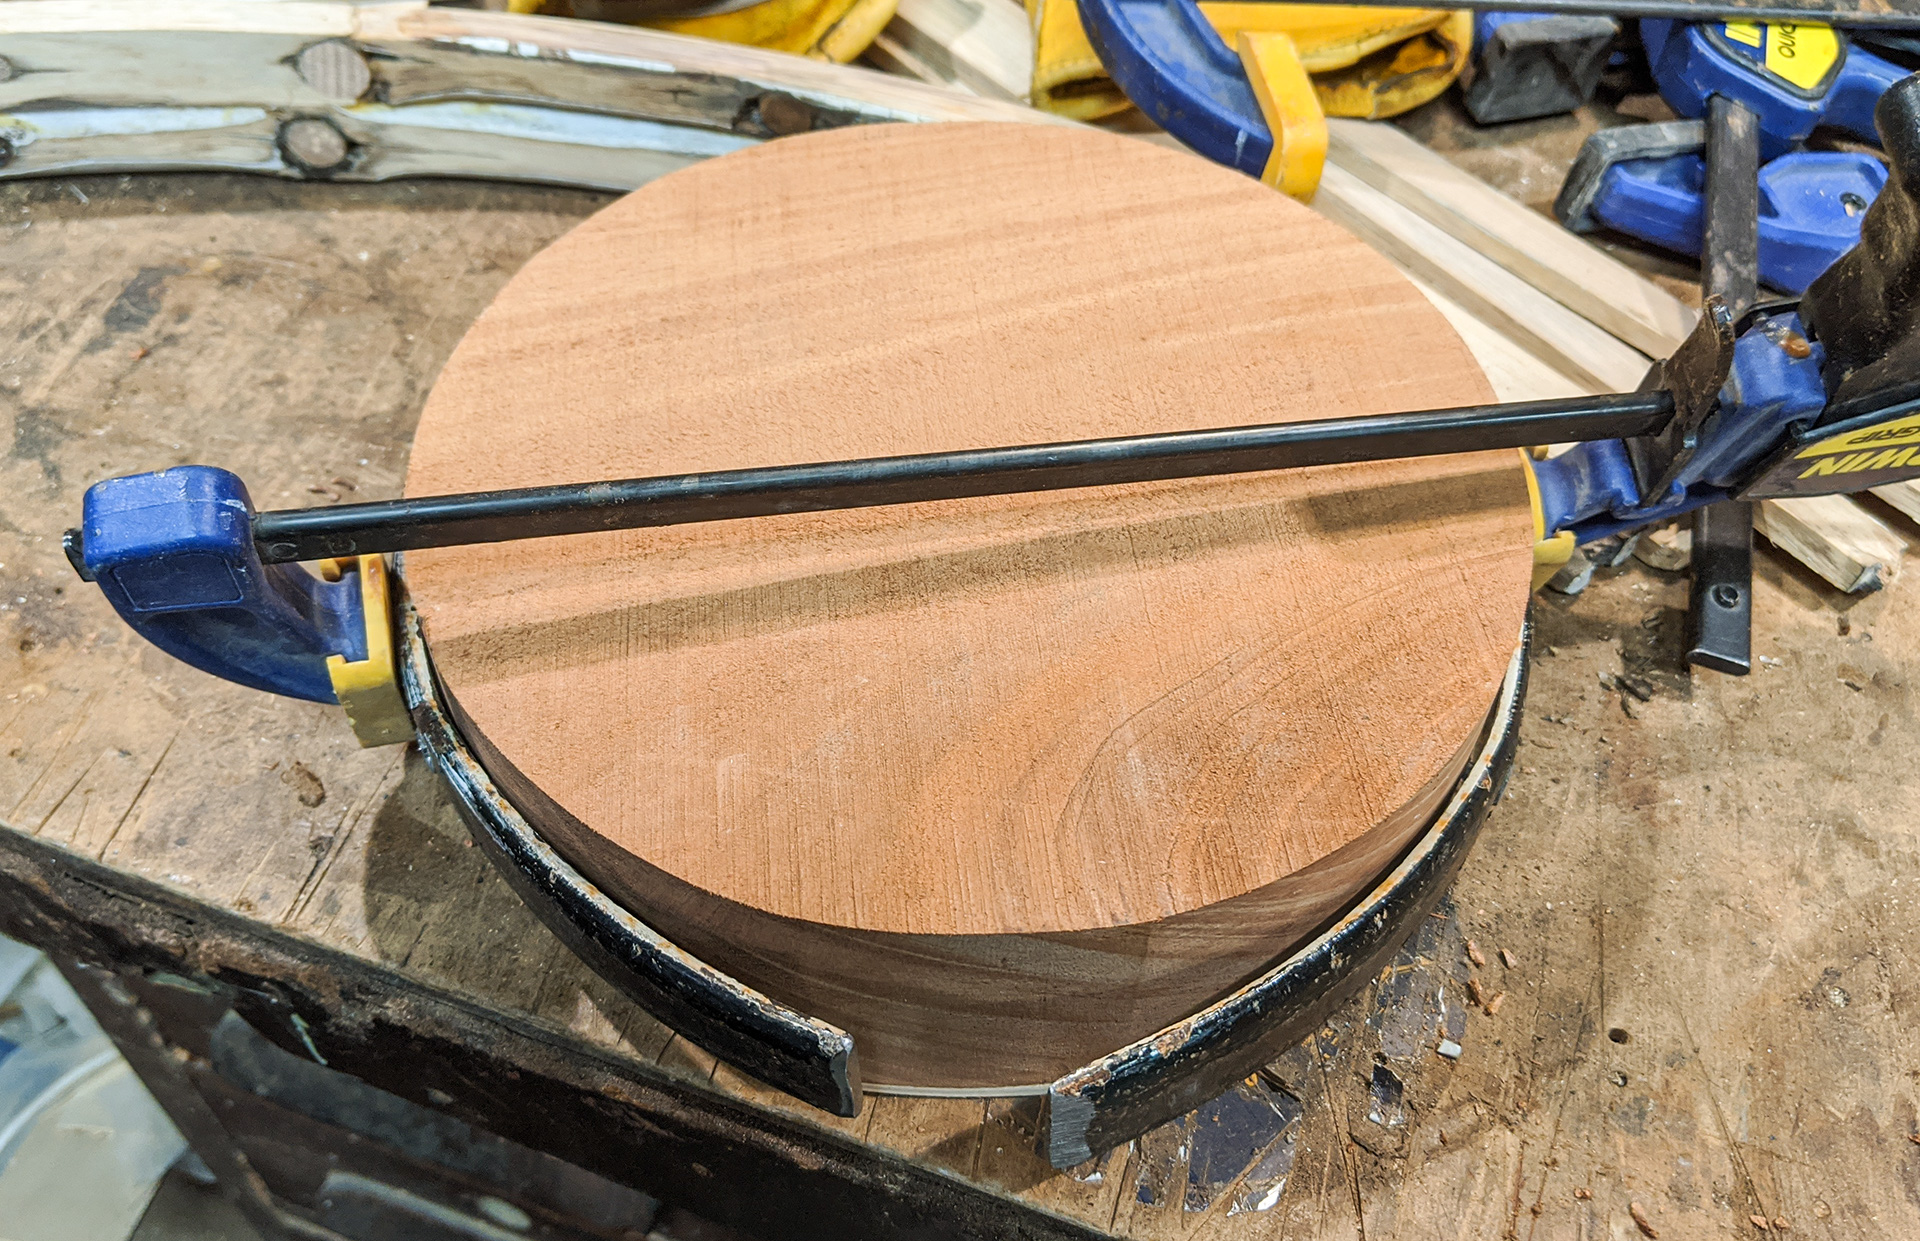
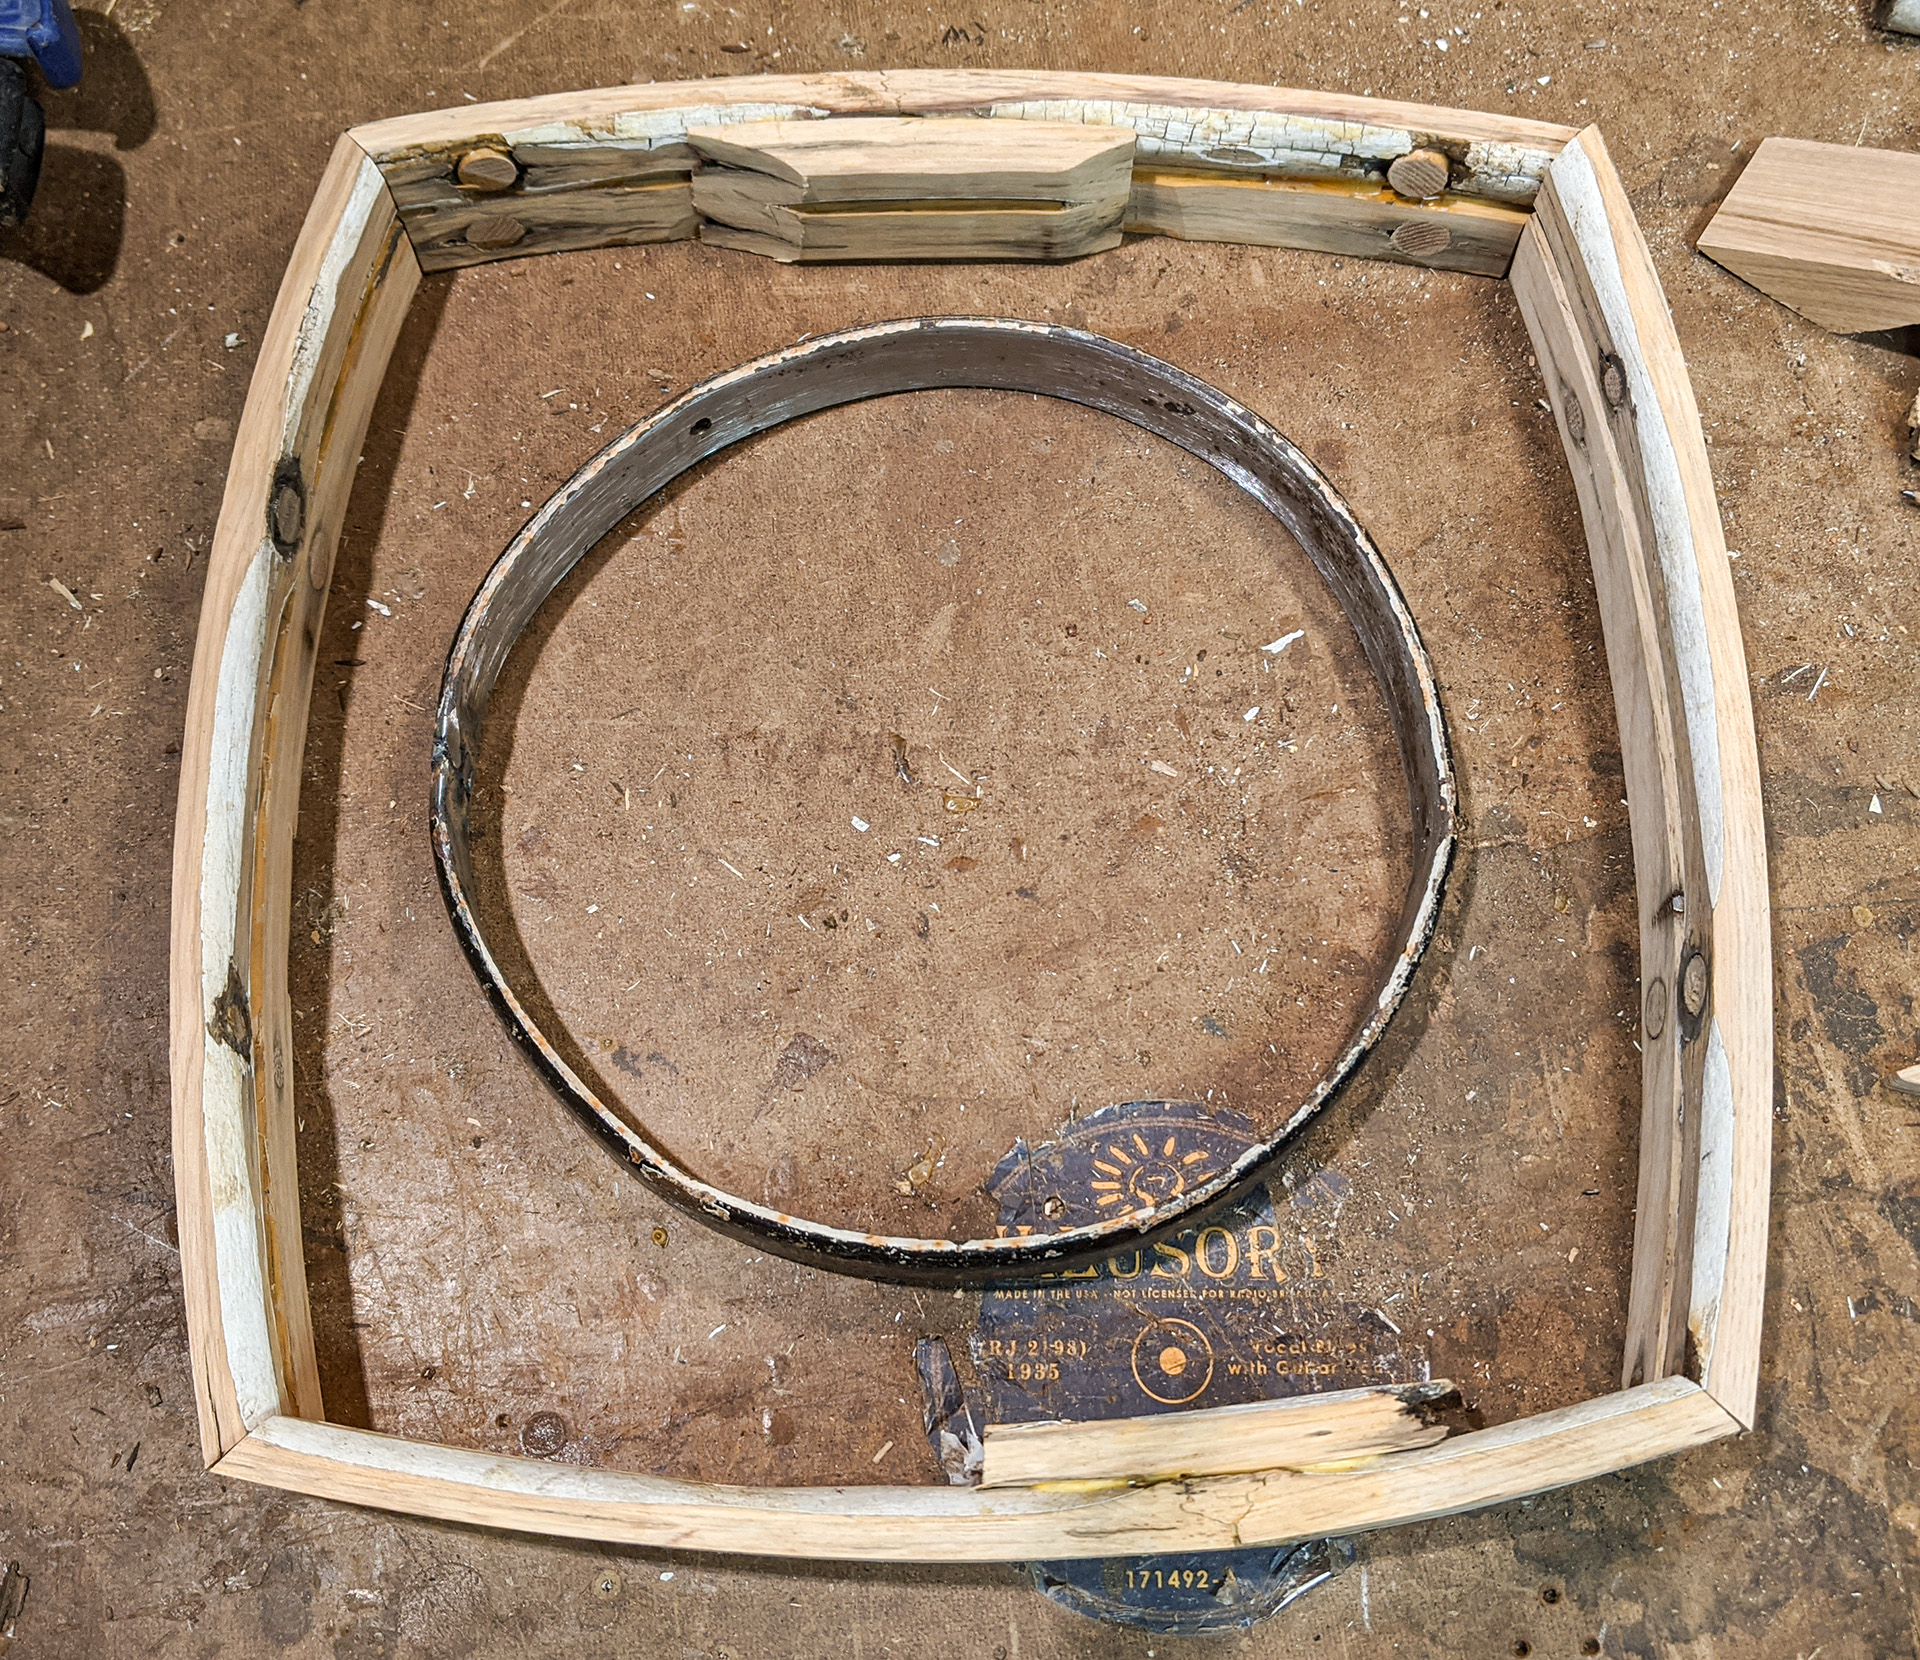
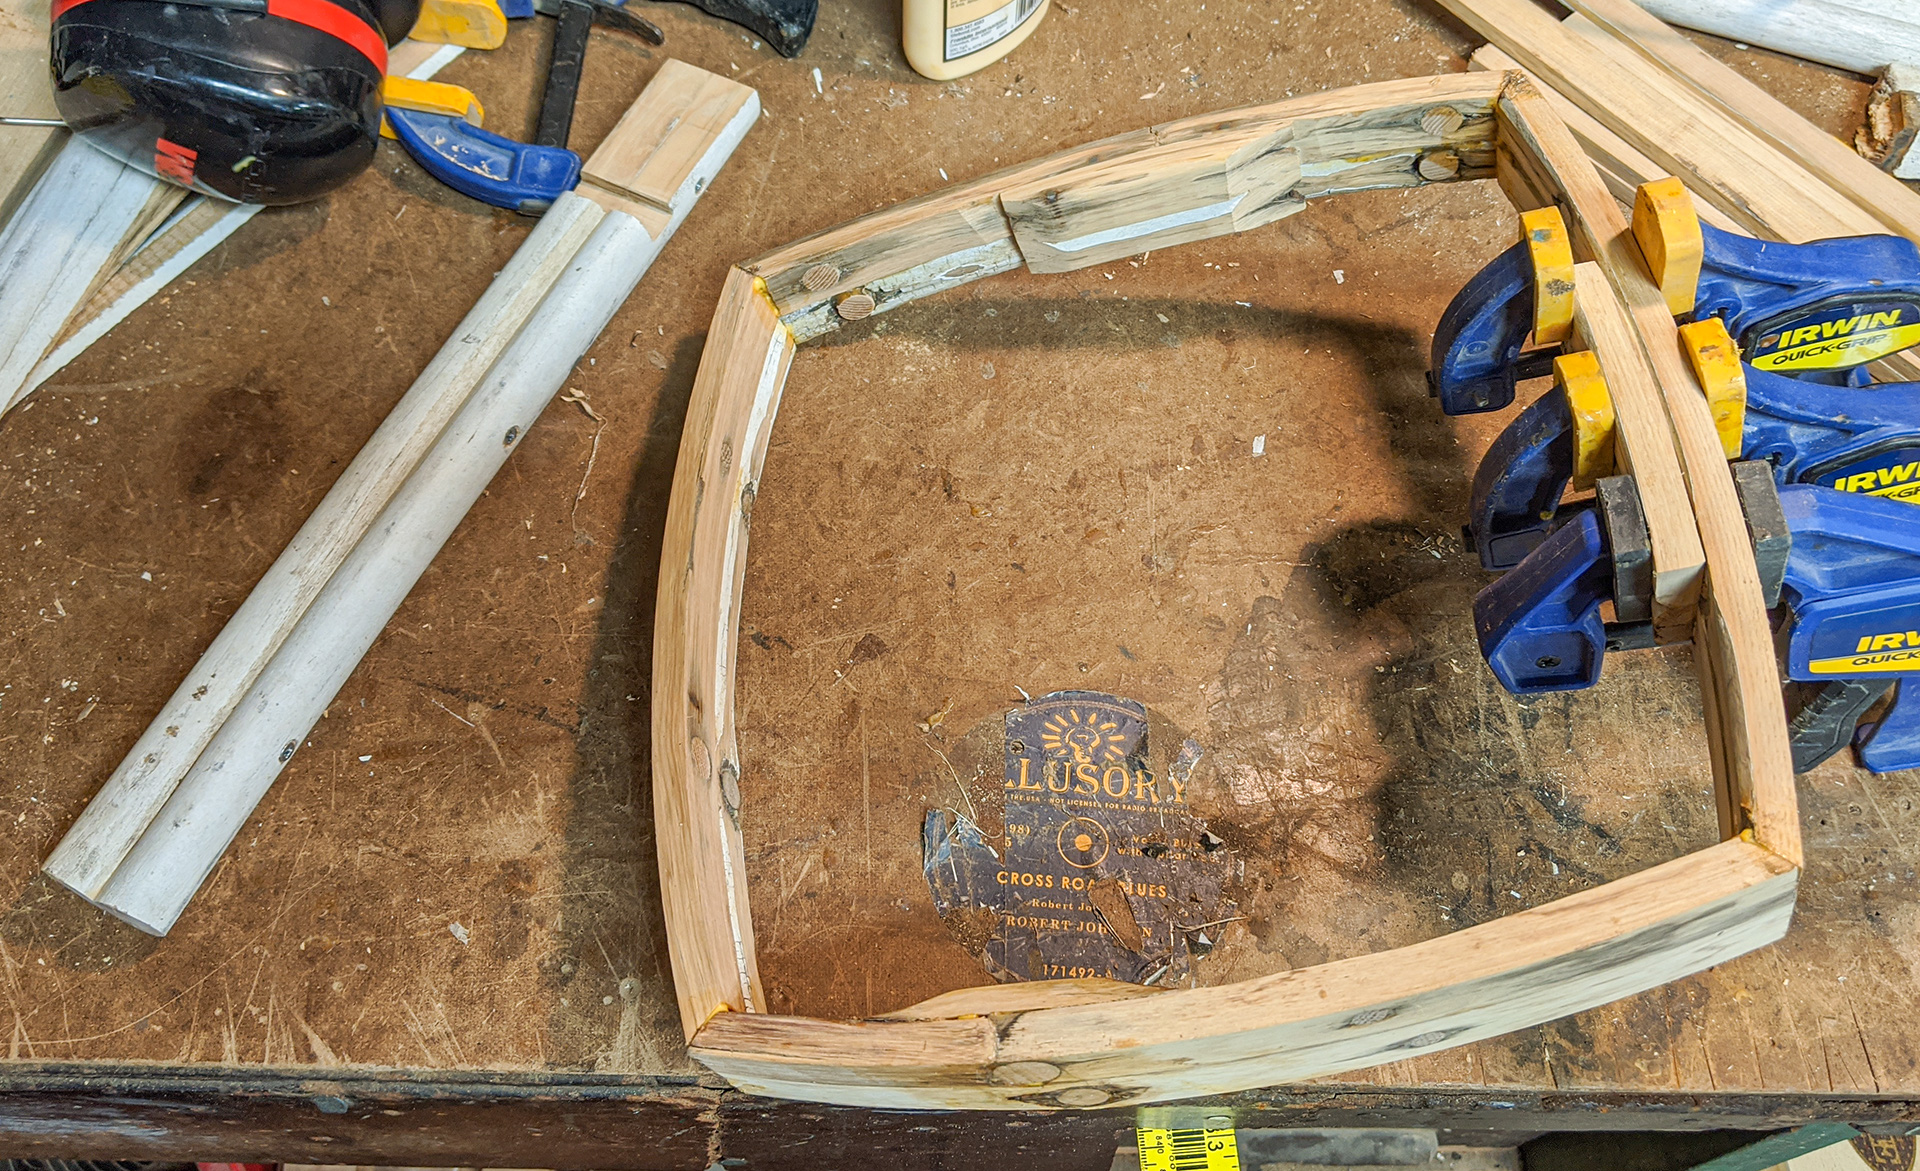
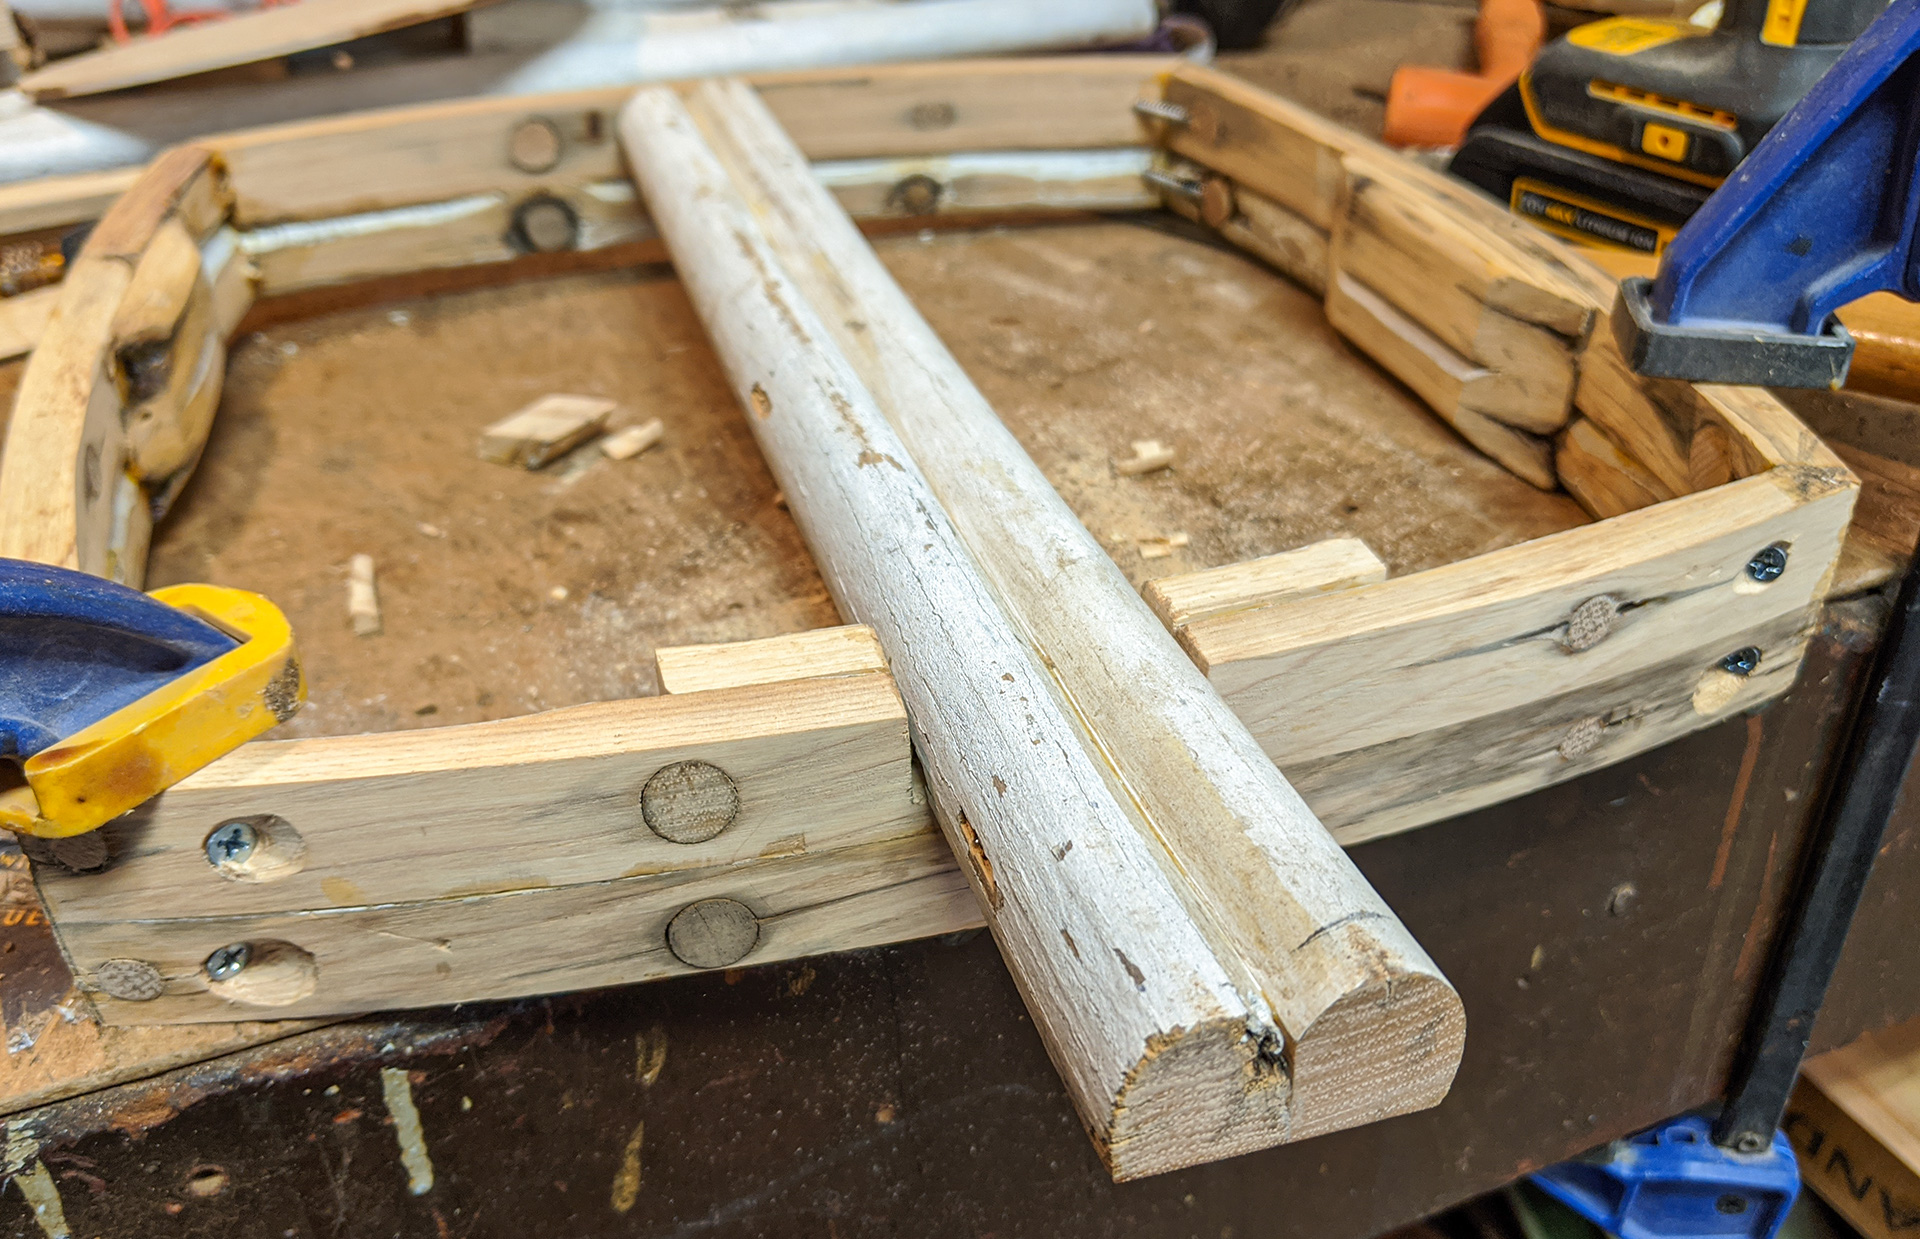
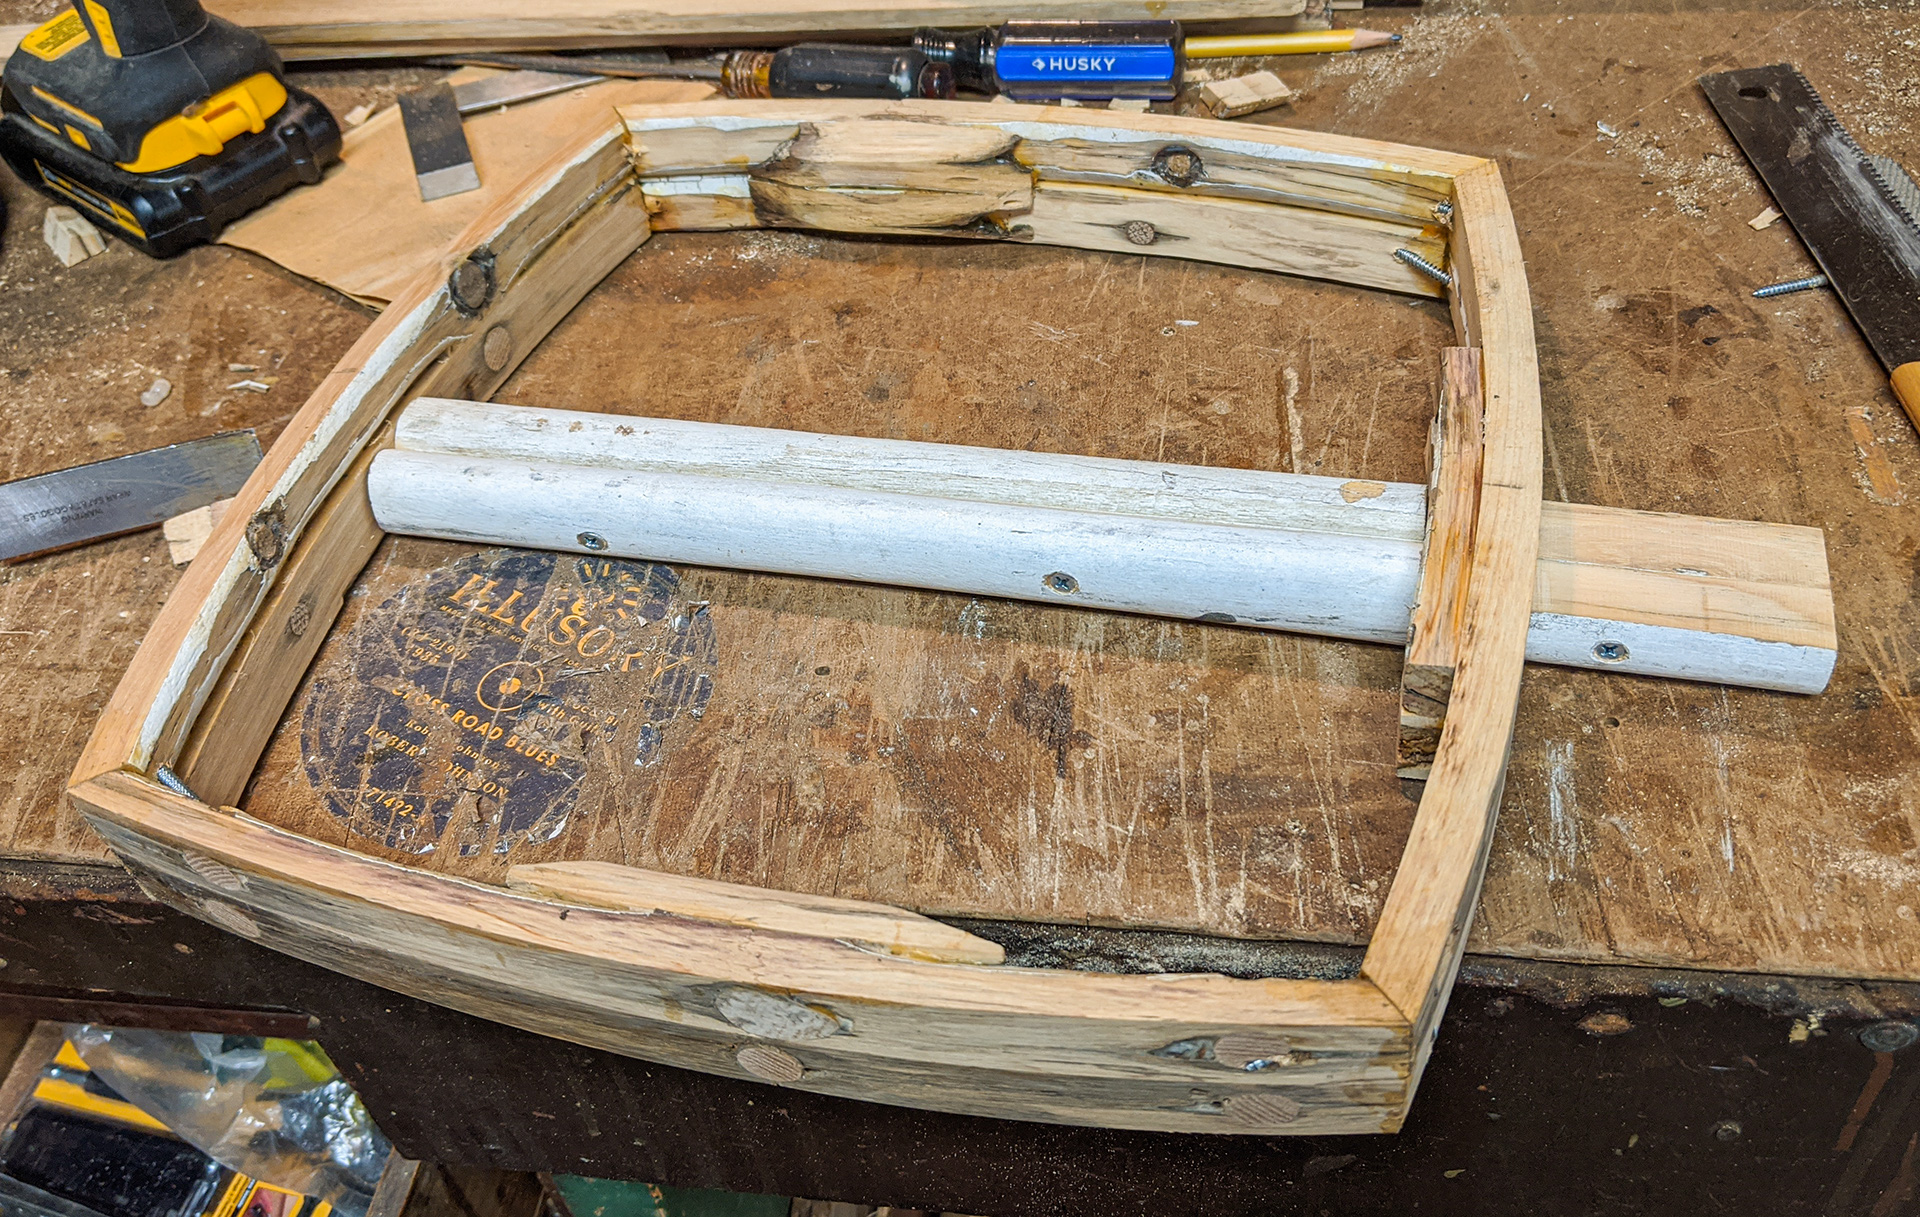
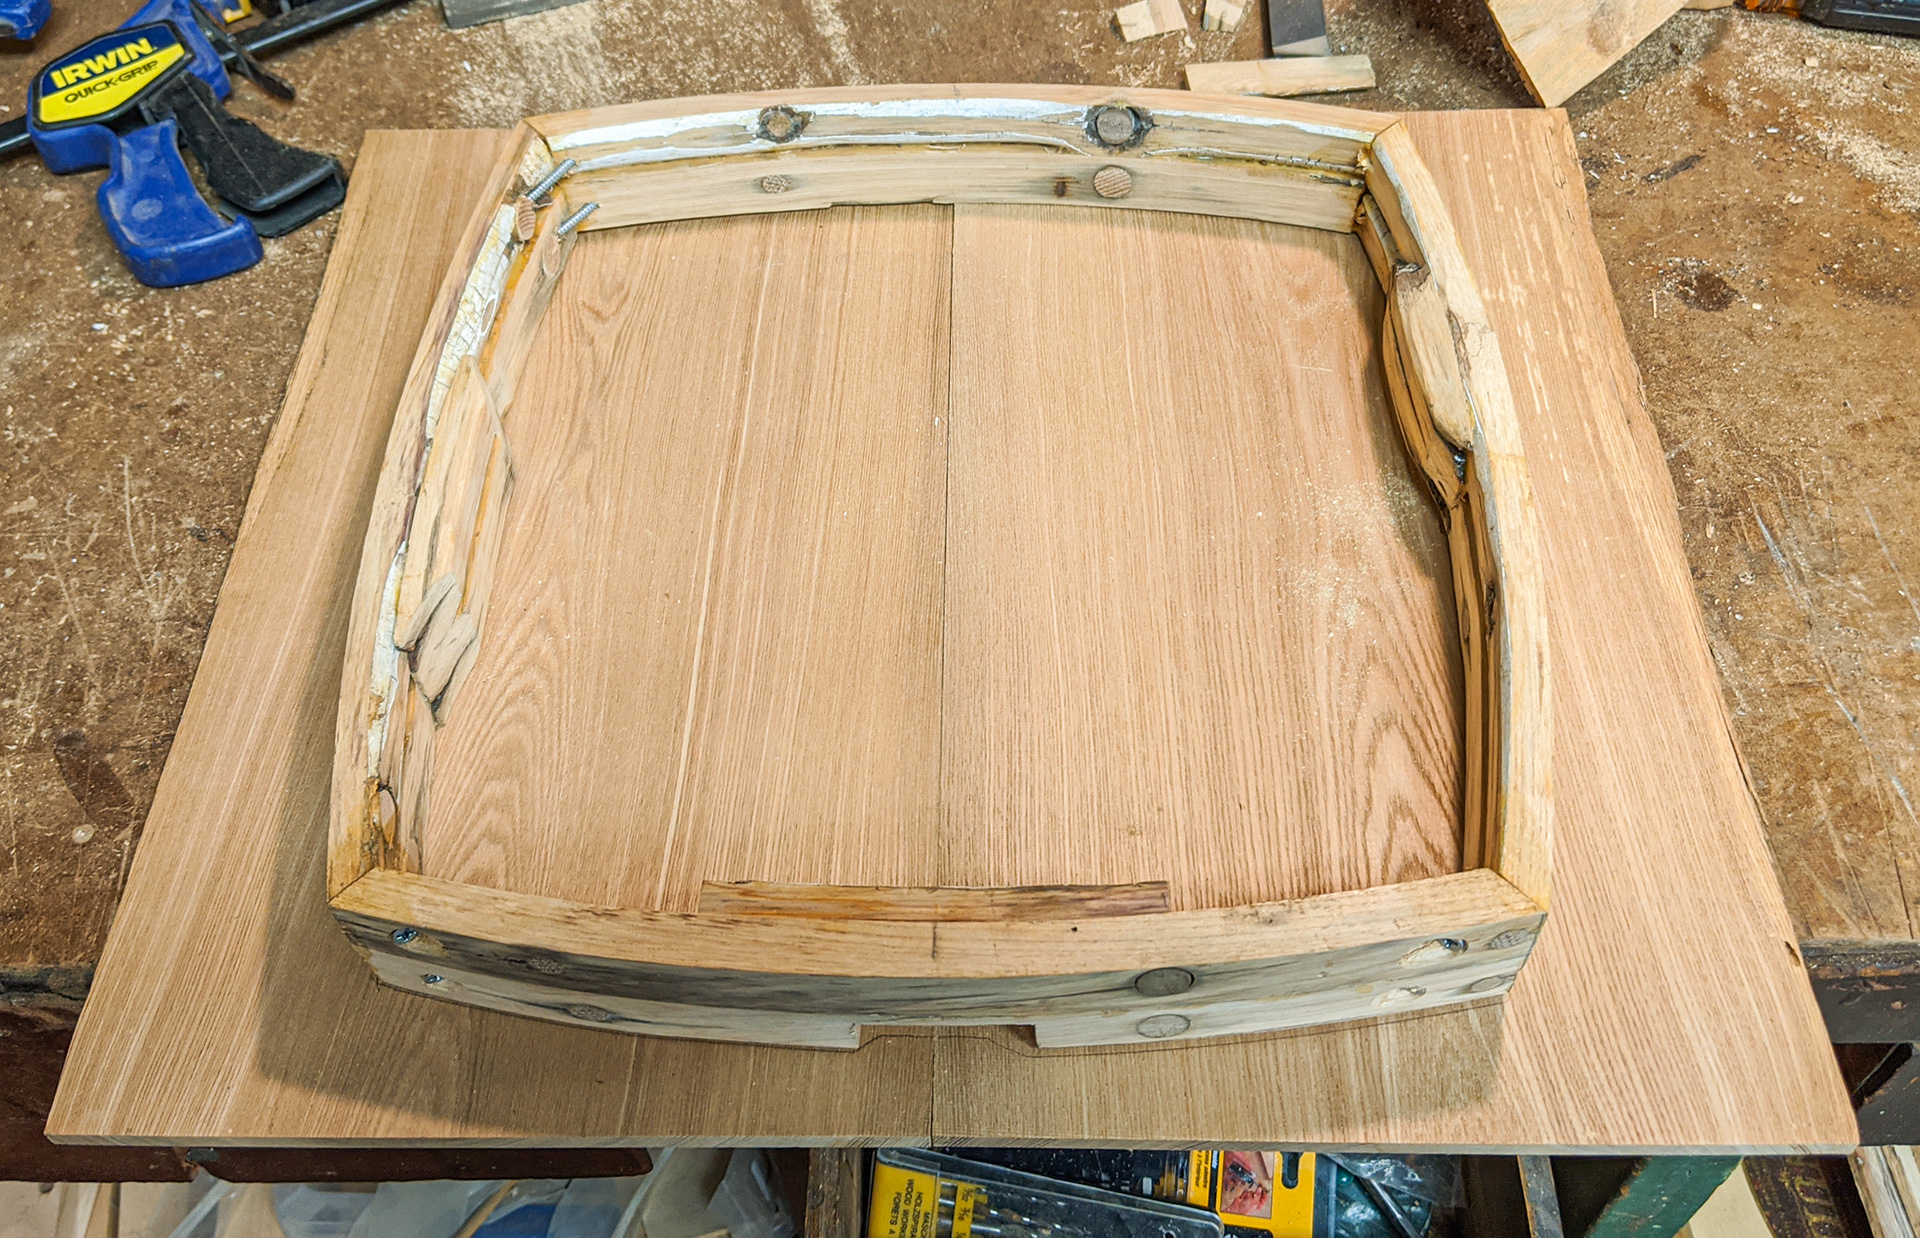
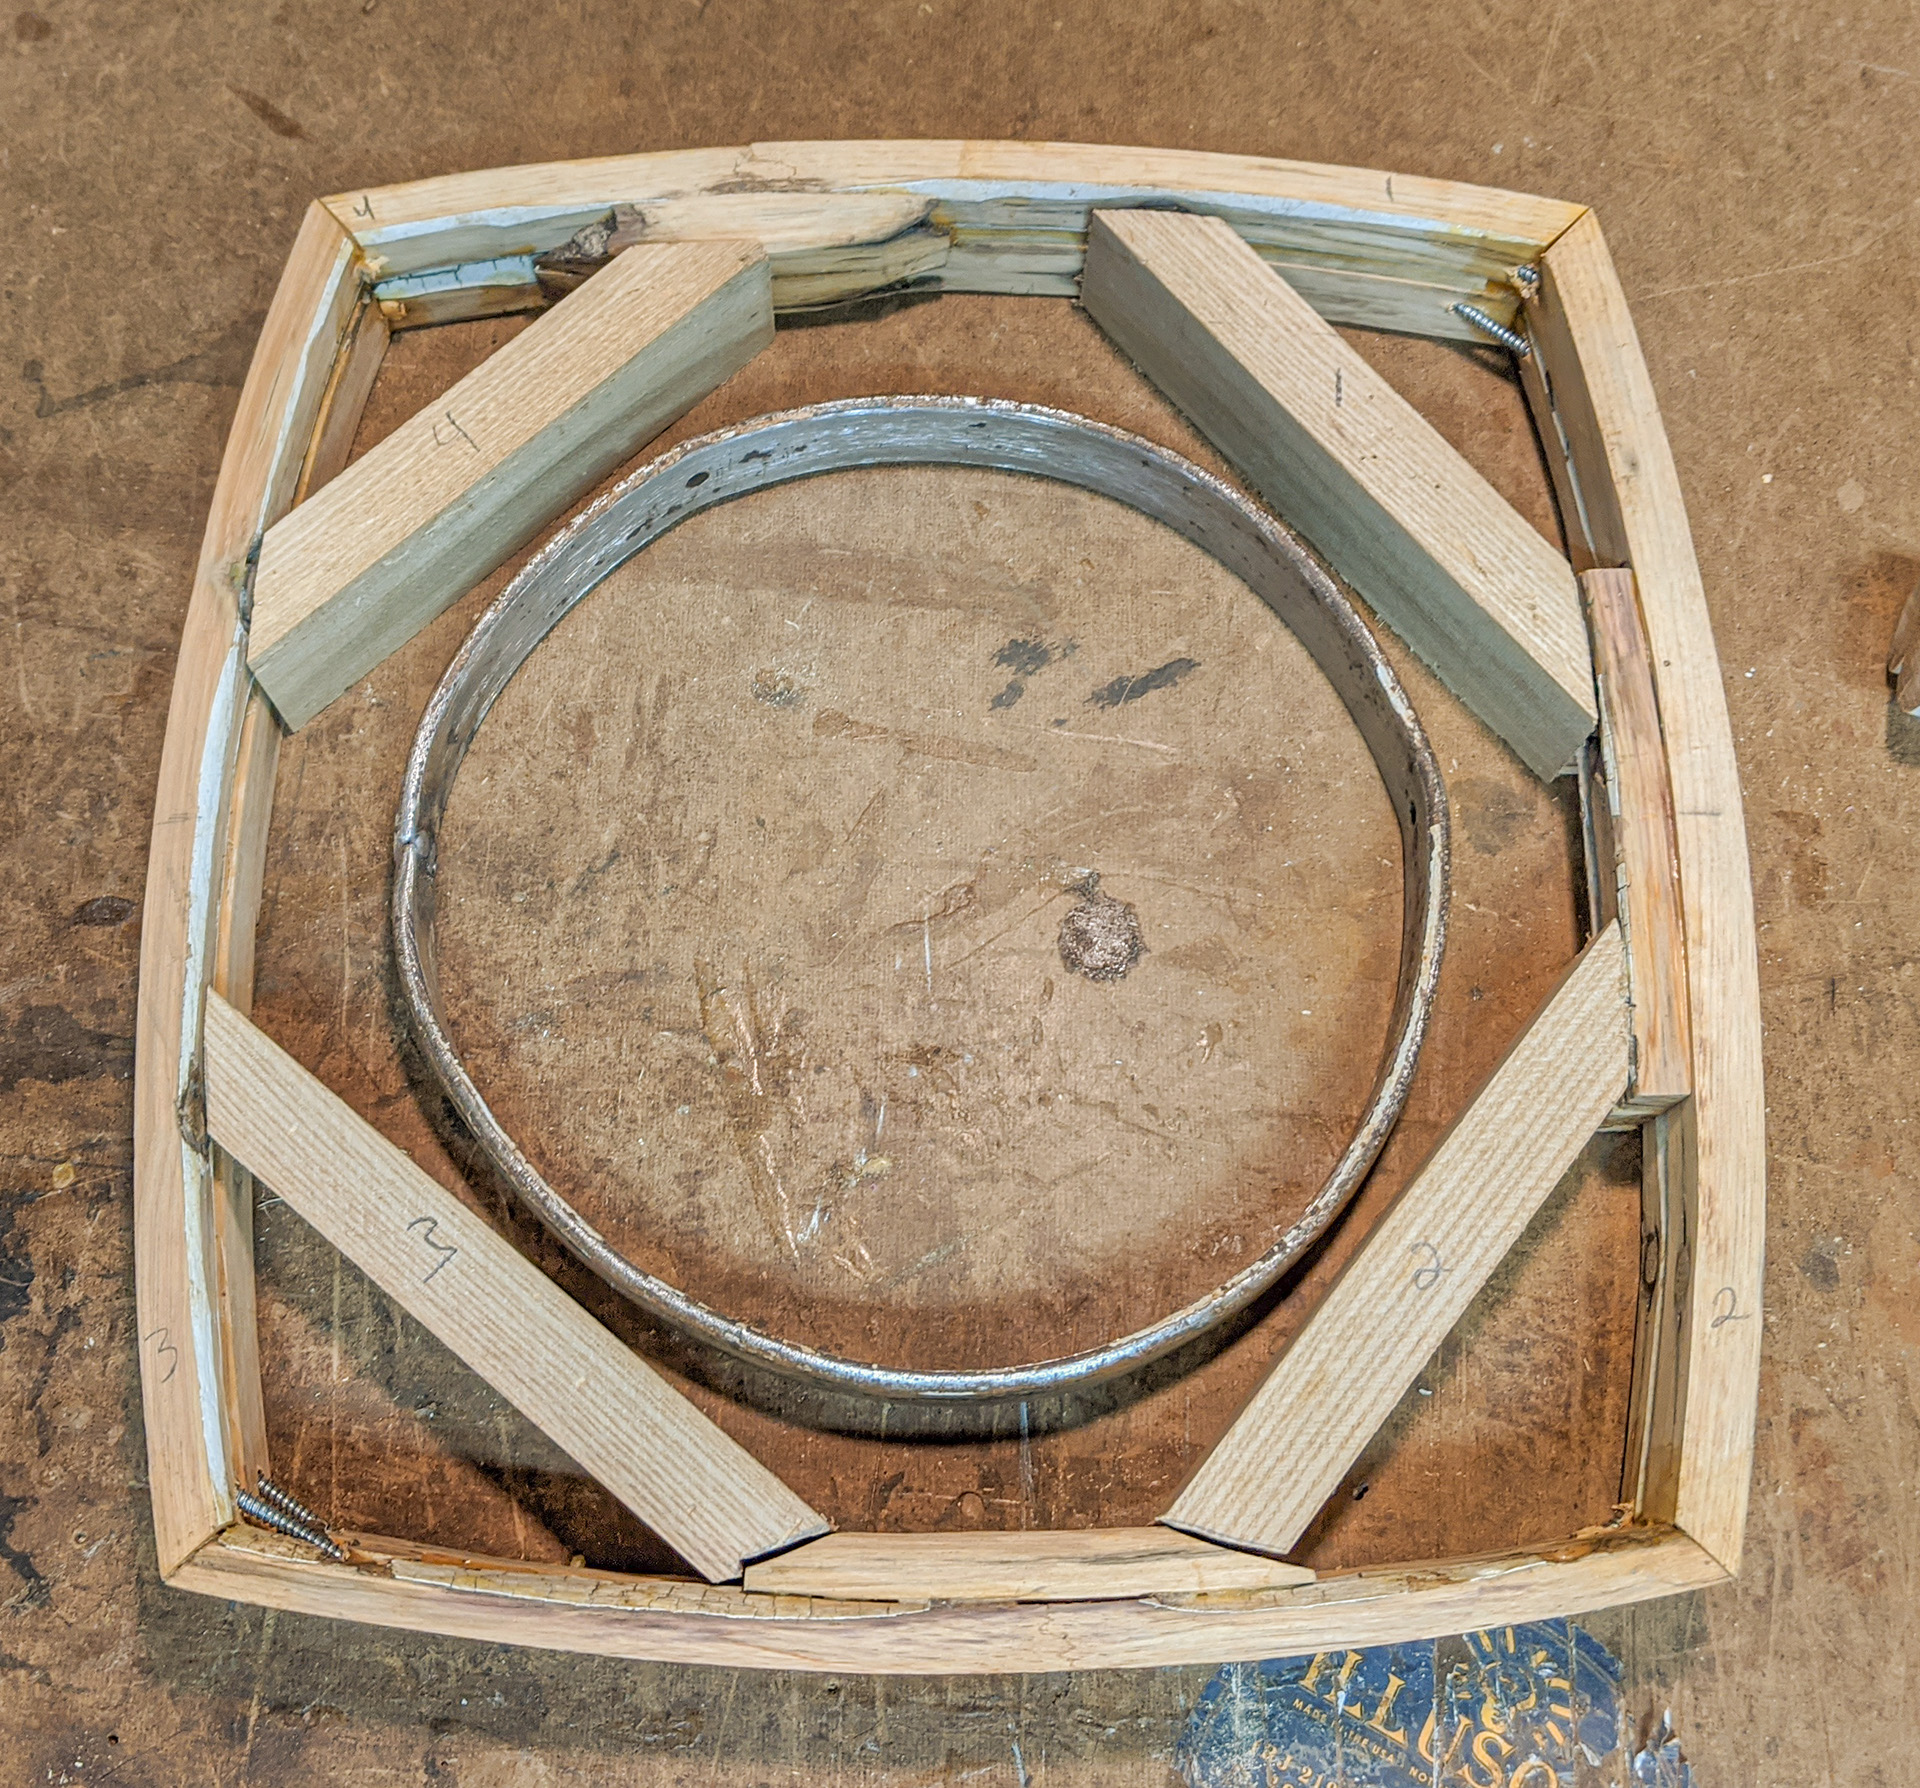
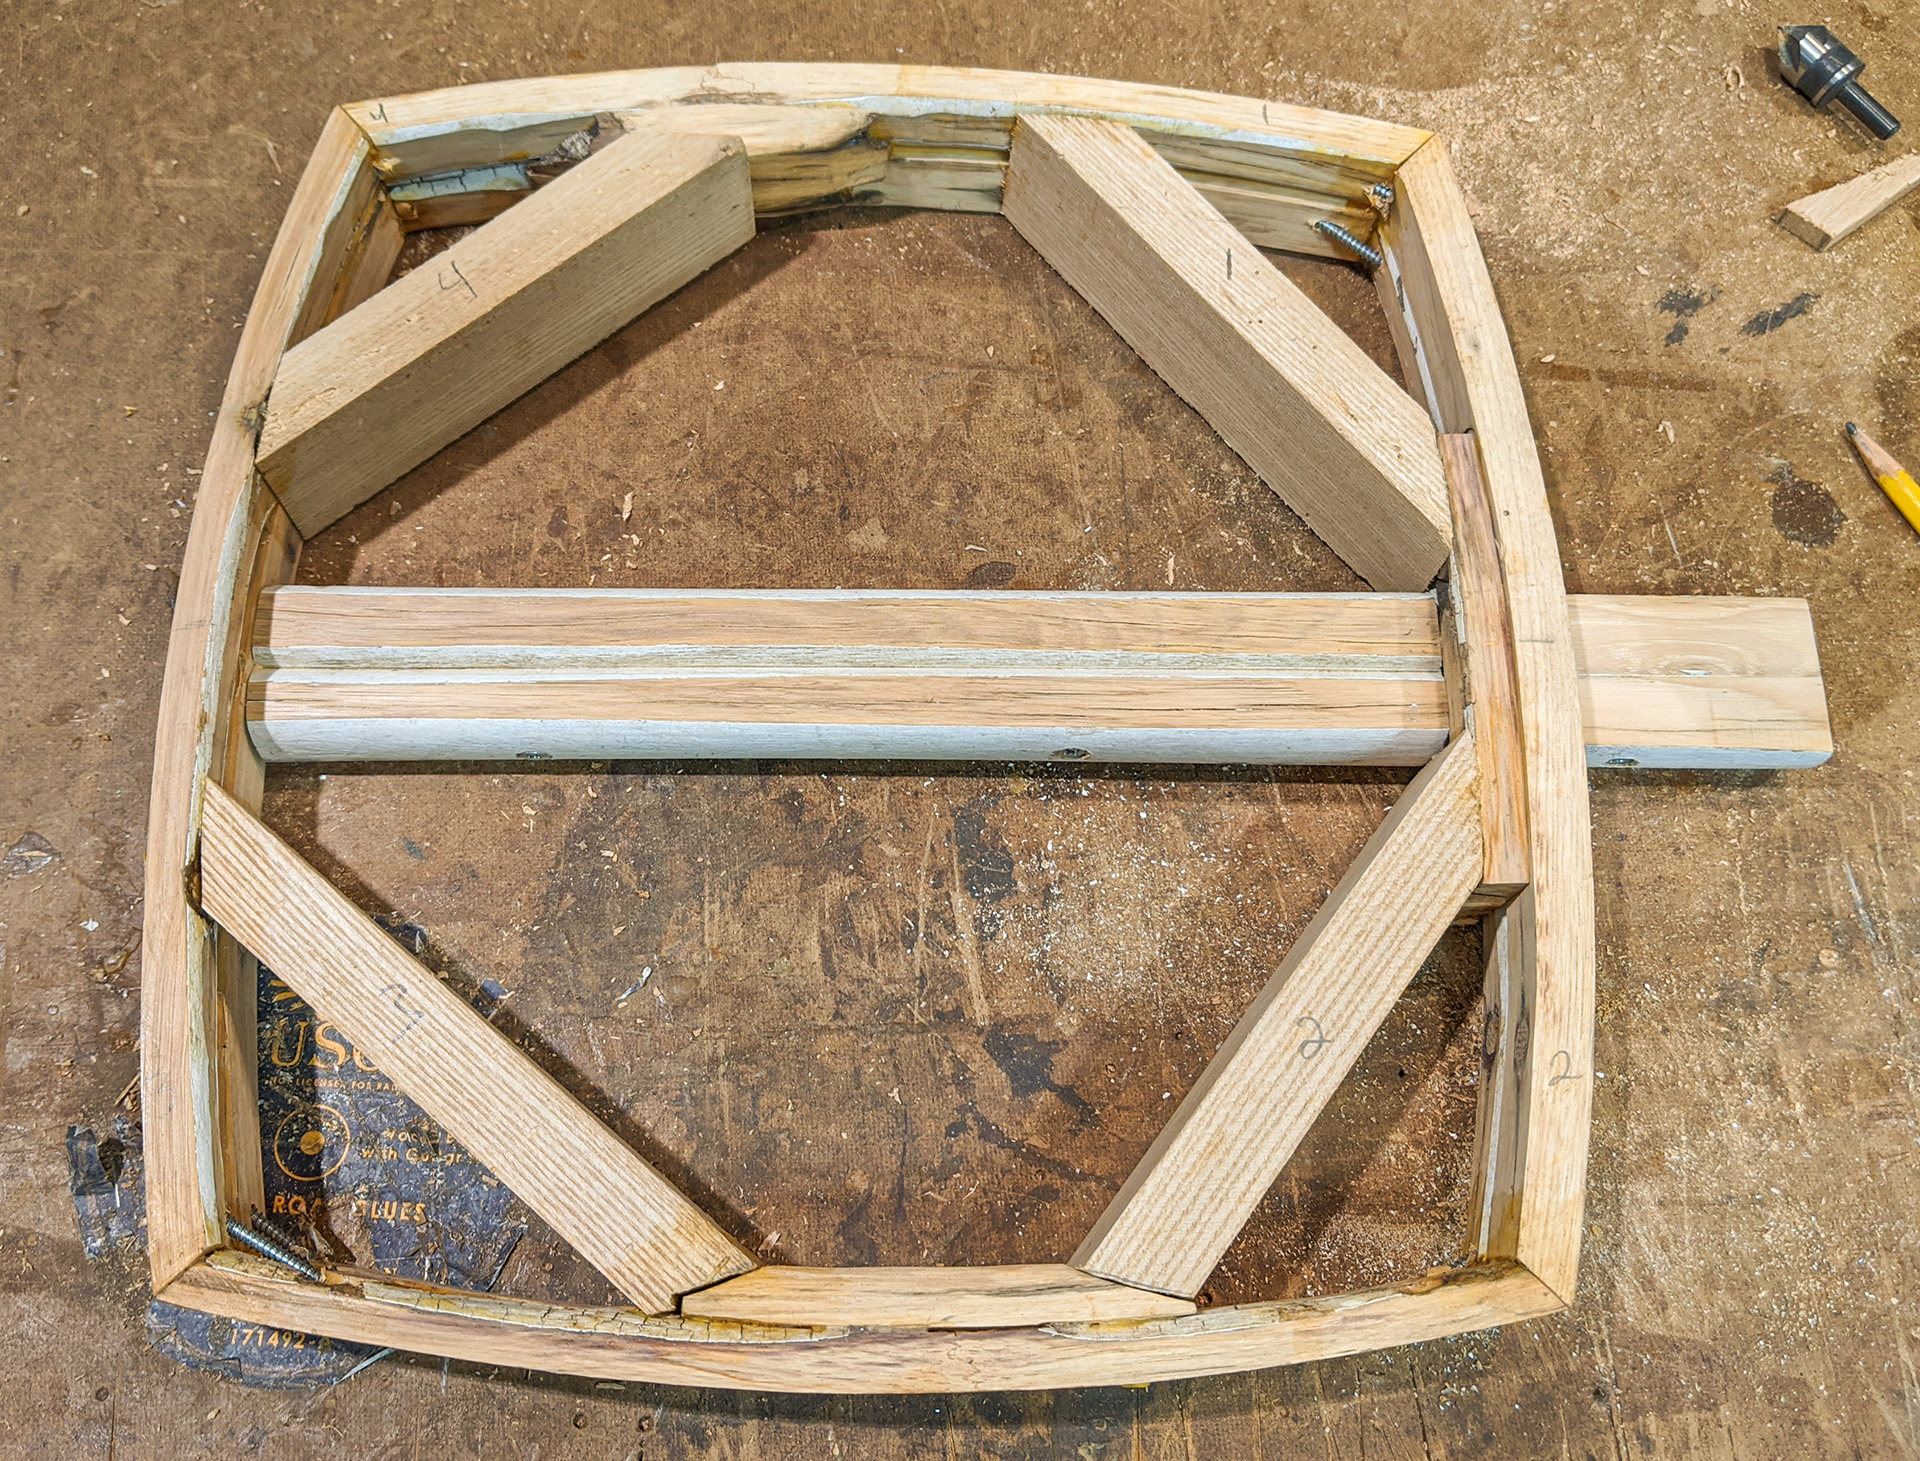
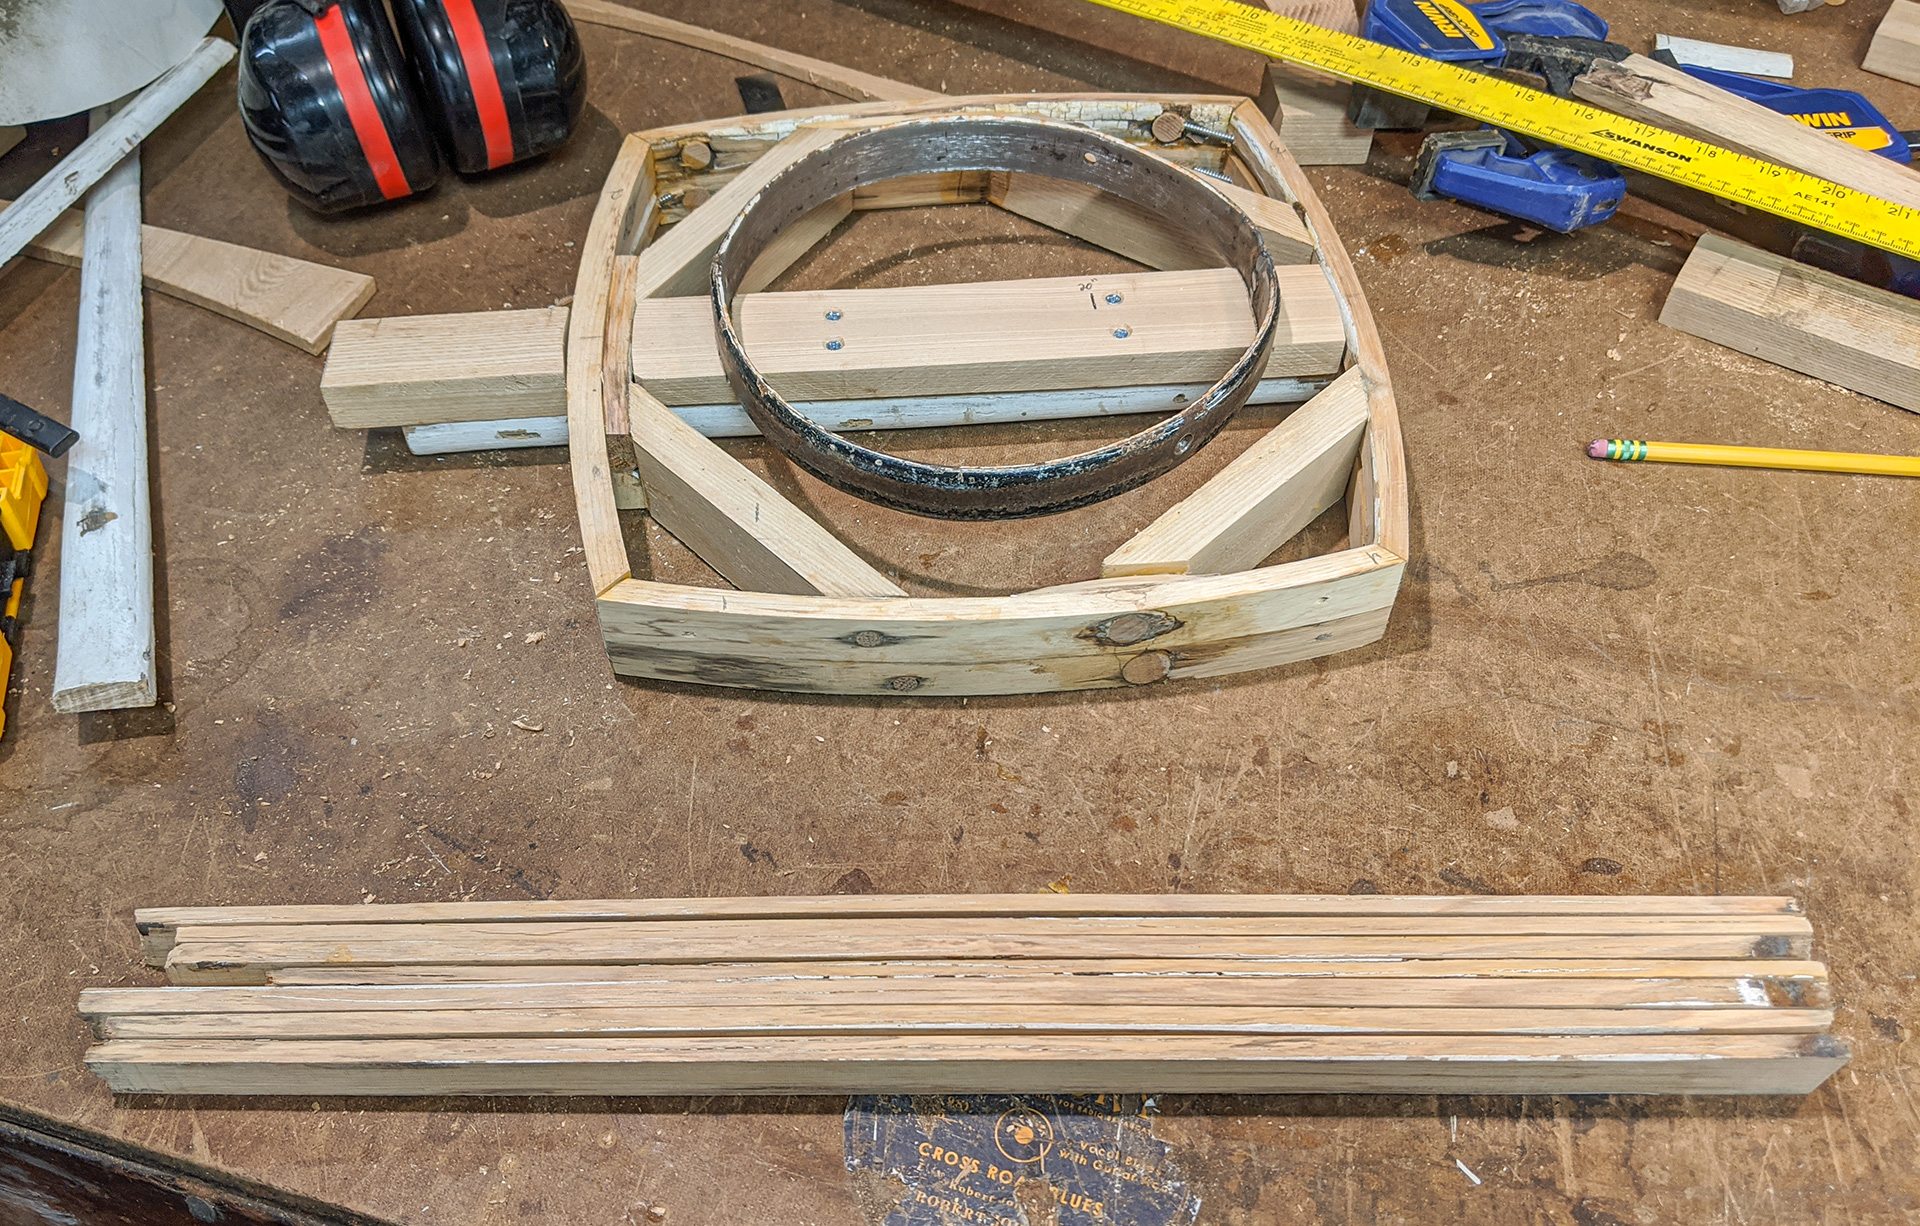
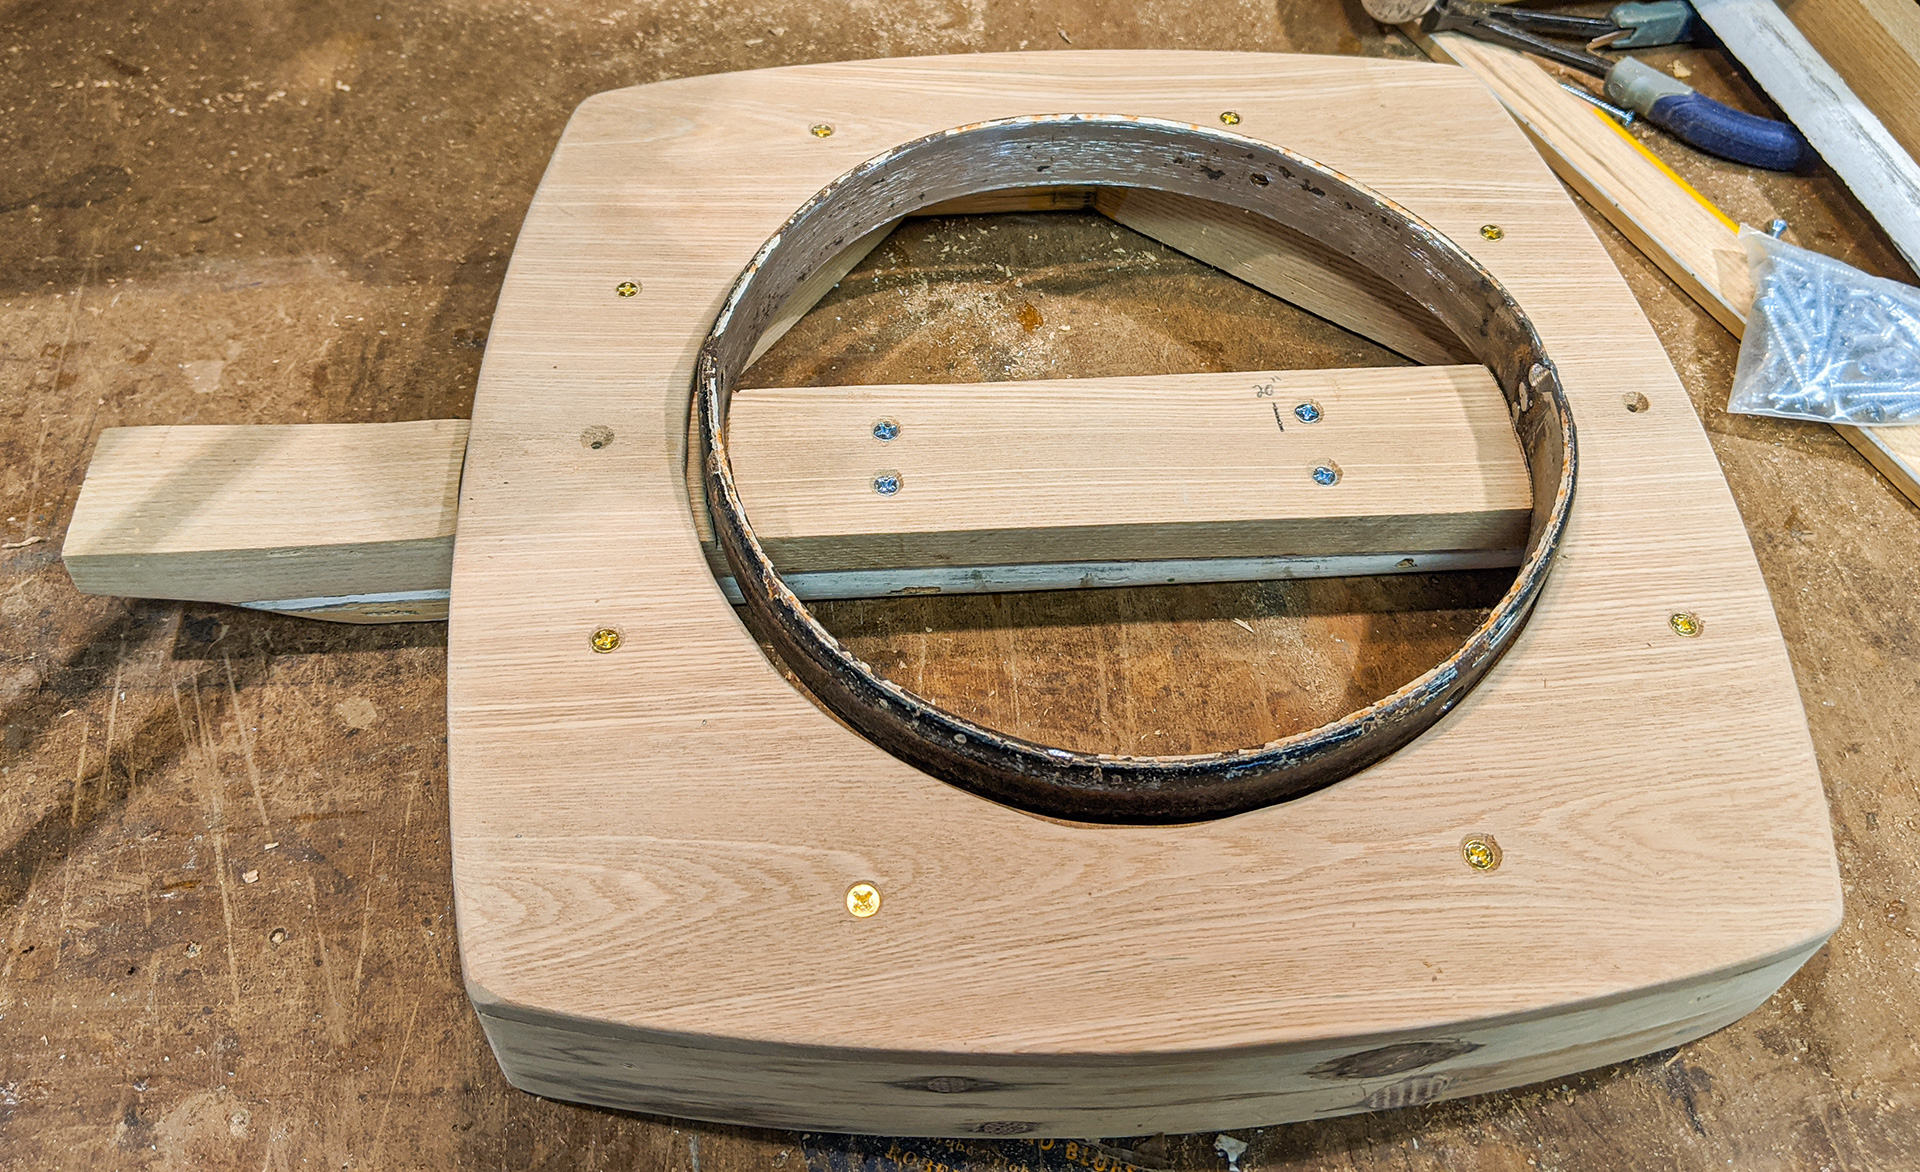
This is a dry fit of my frame ready to be glued, with my tone ring inside to check spacing and location. |
|
|
|
|
|
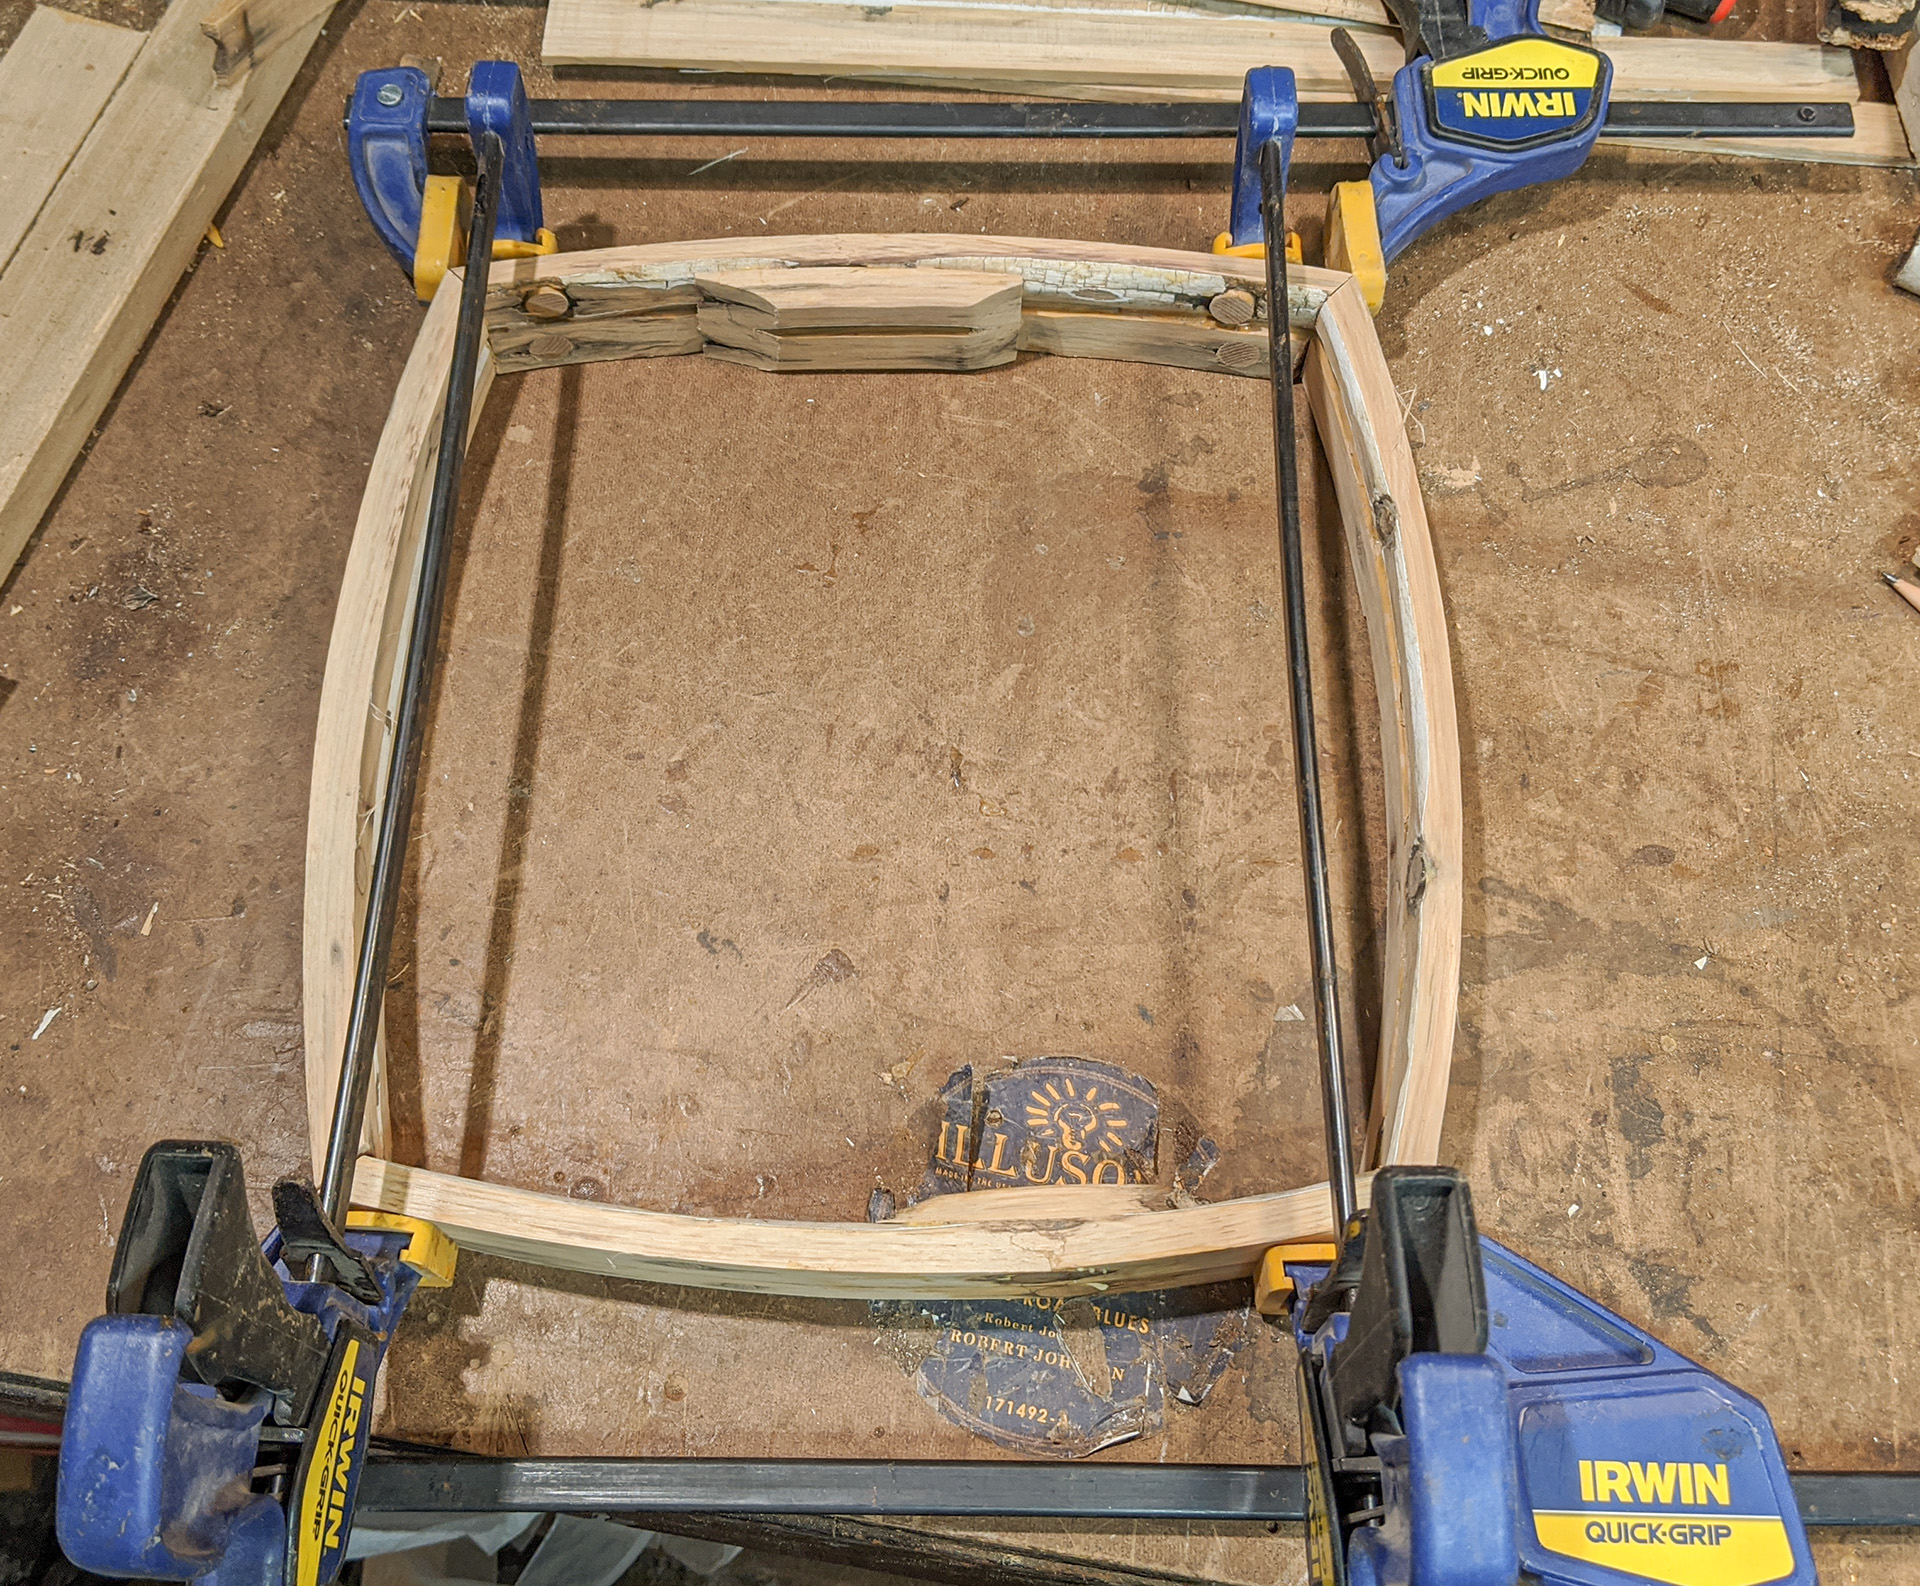
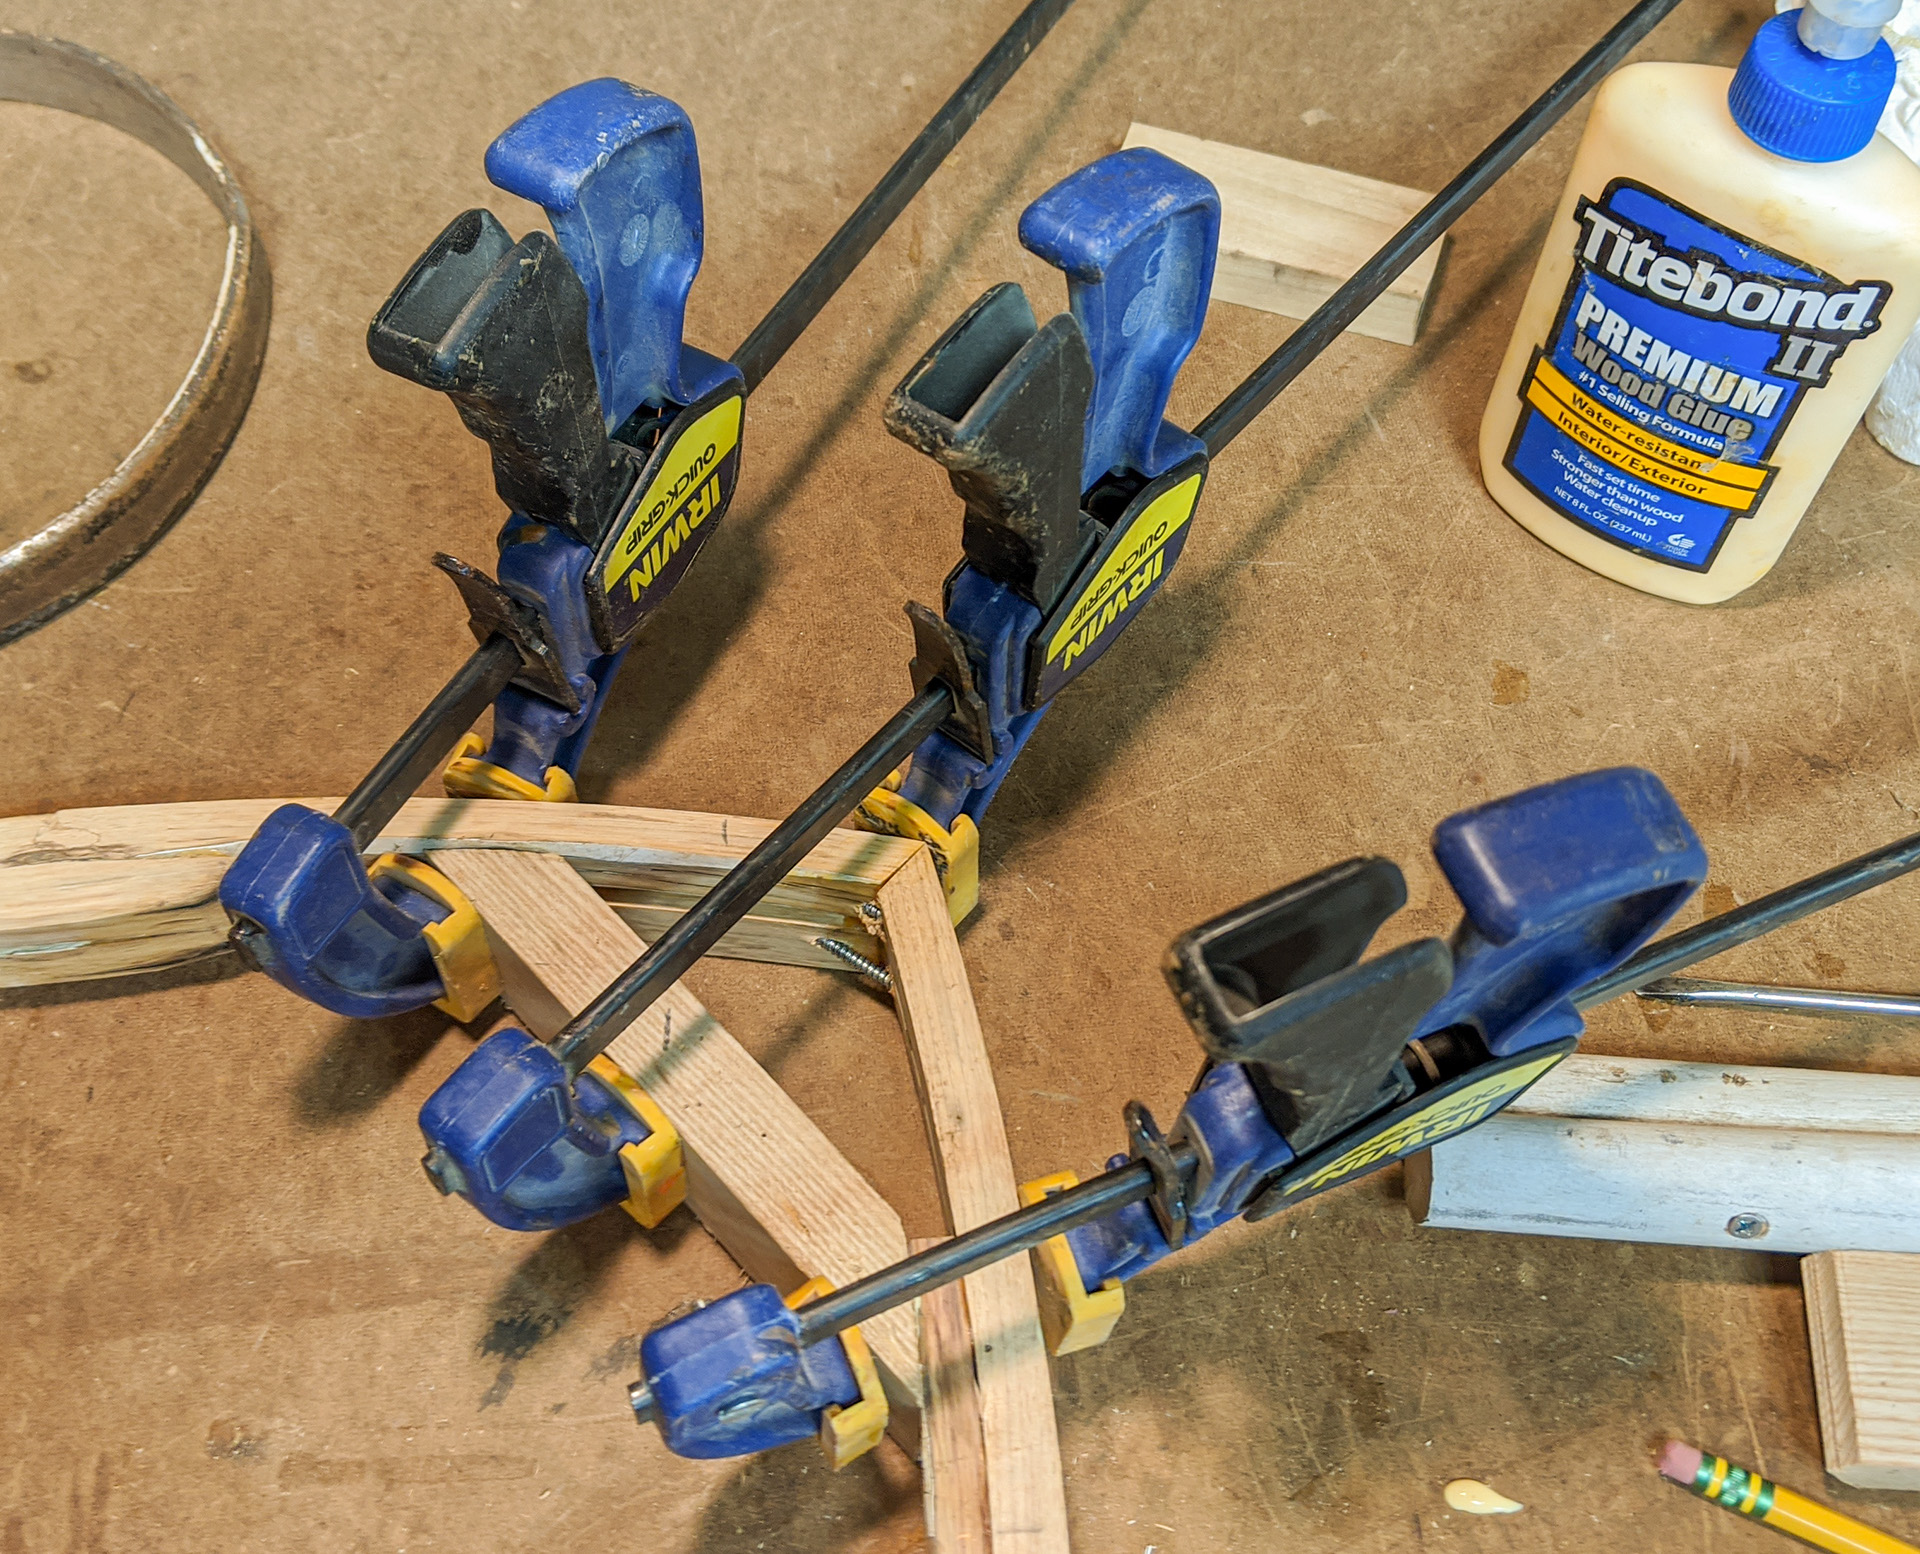
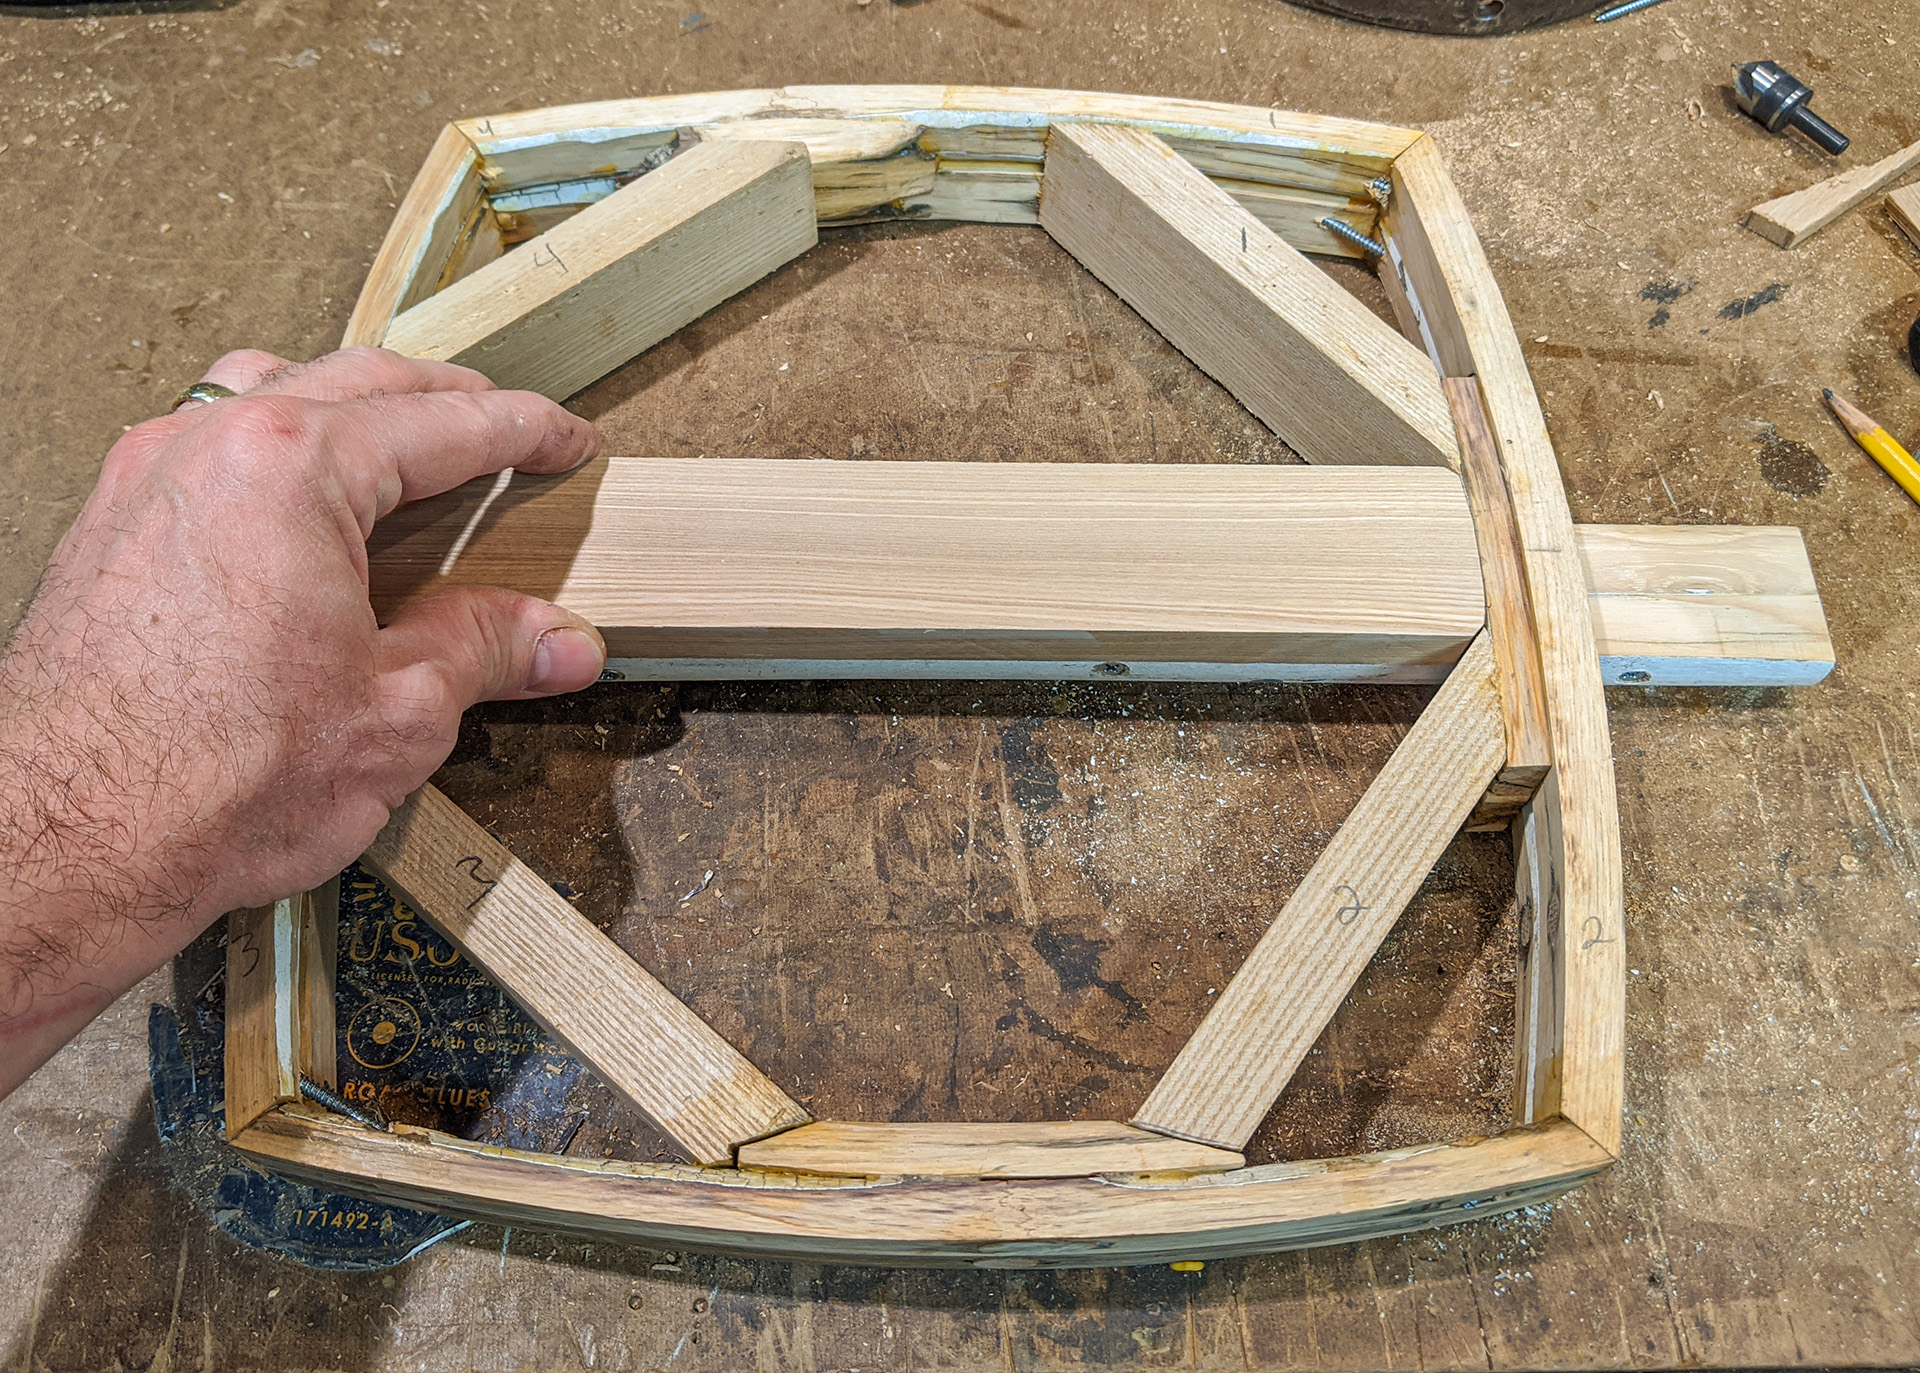
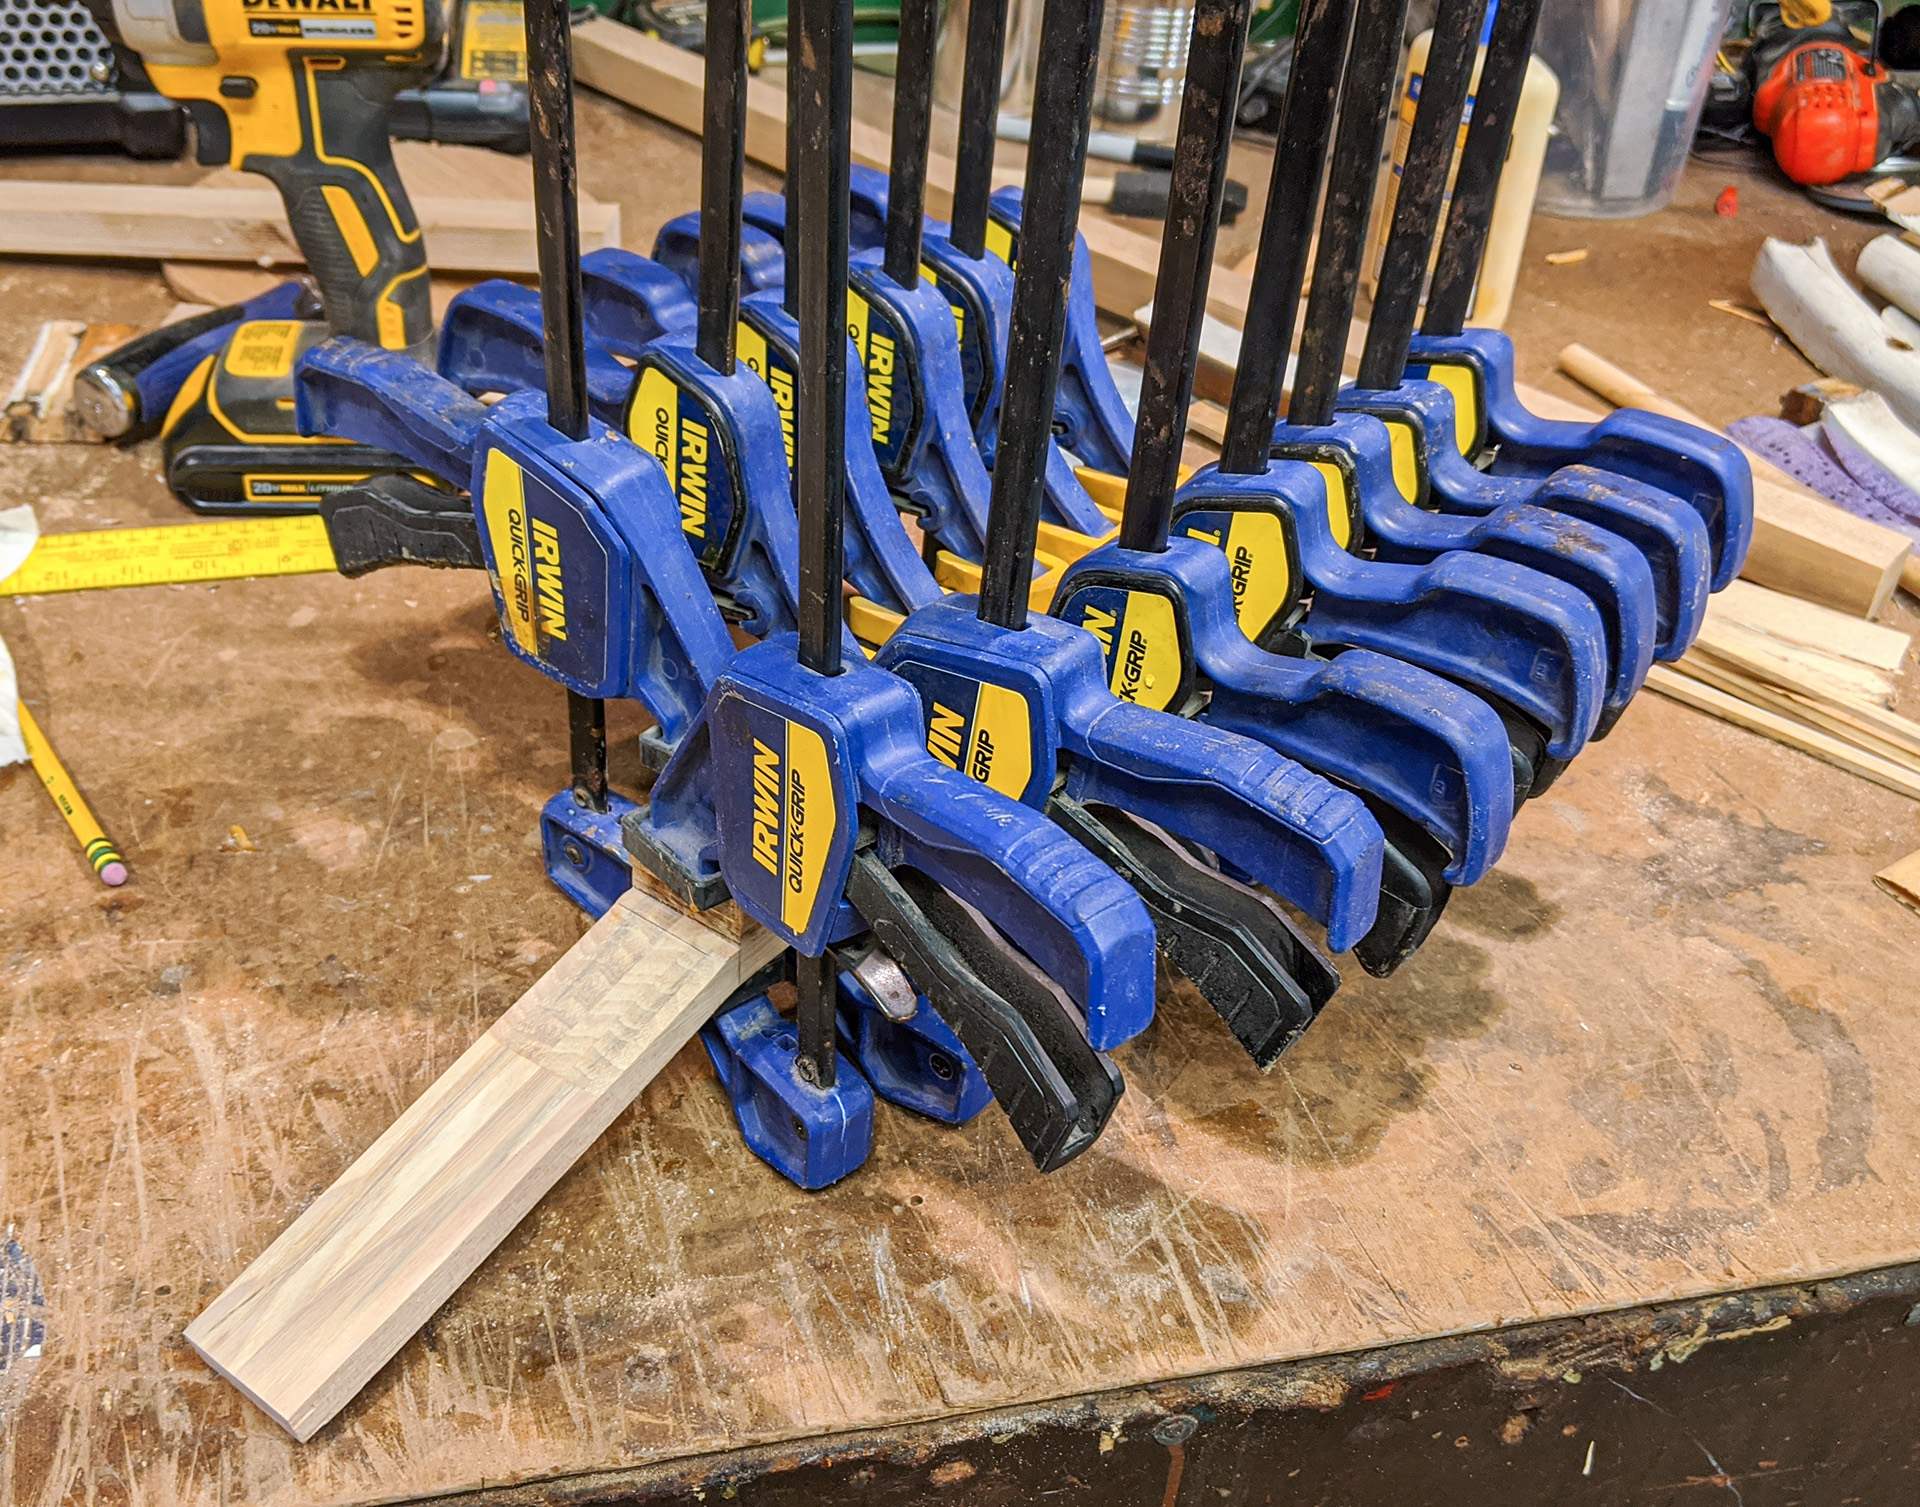
First I tried using clamps to glue up my frame... but those darn curved sides made it impossible, especially once I added the glue and made everything slippery... |
|
|
|
|
|
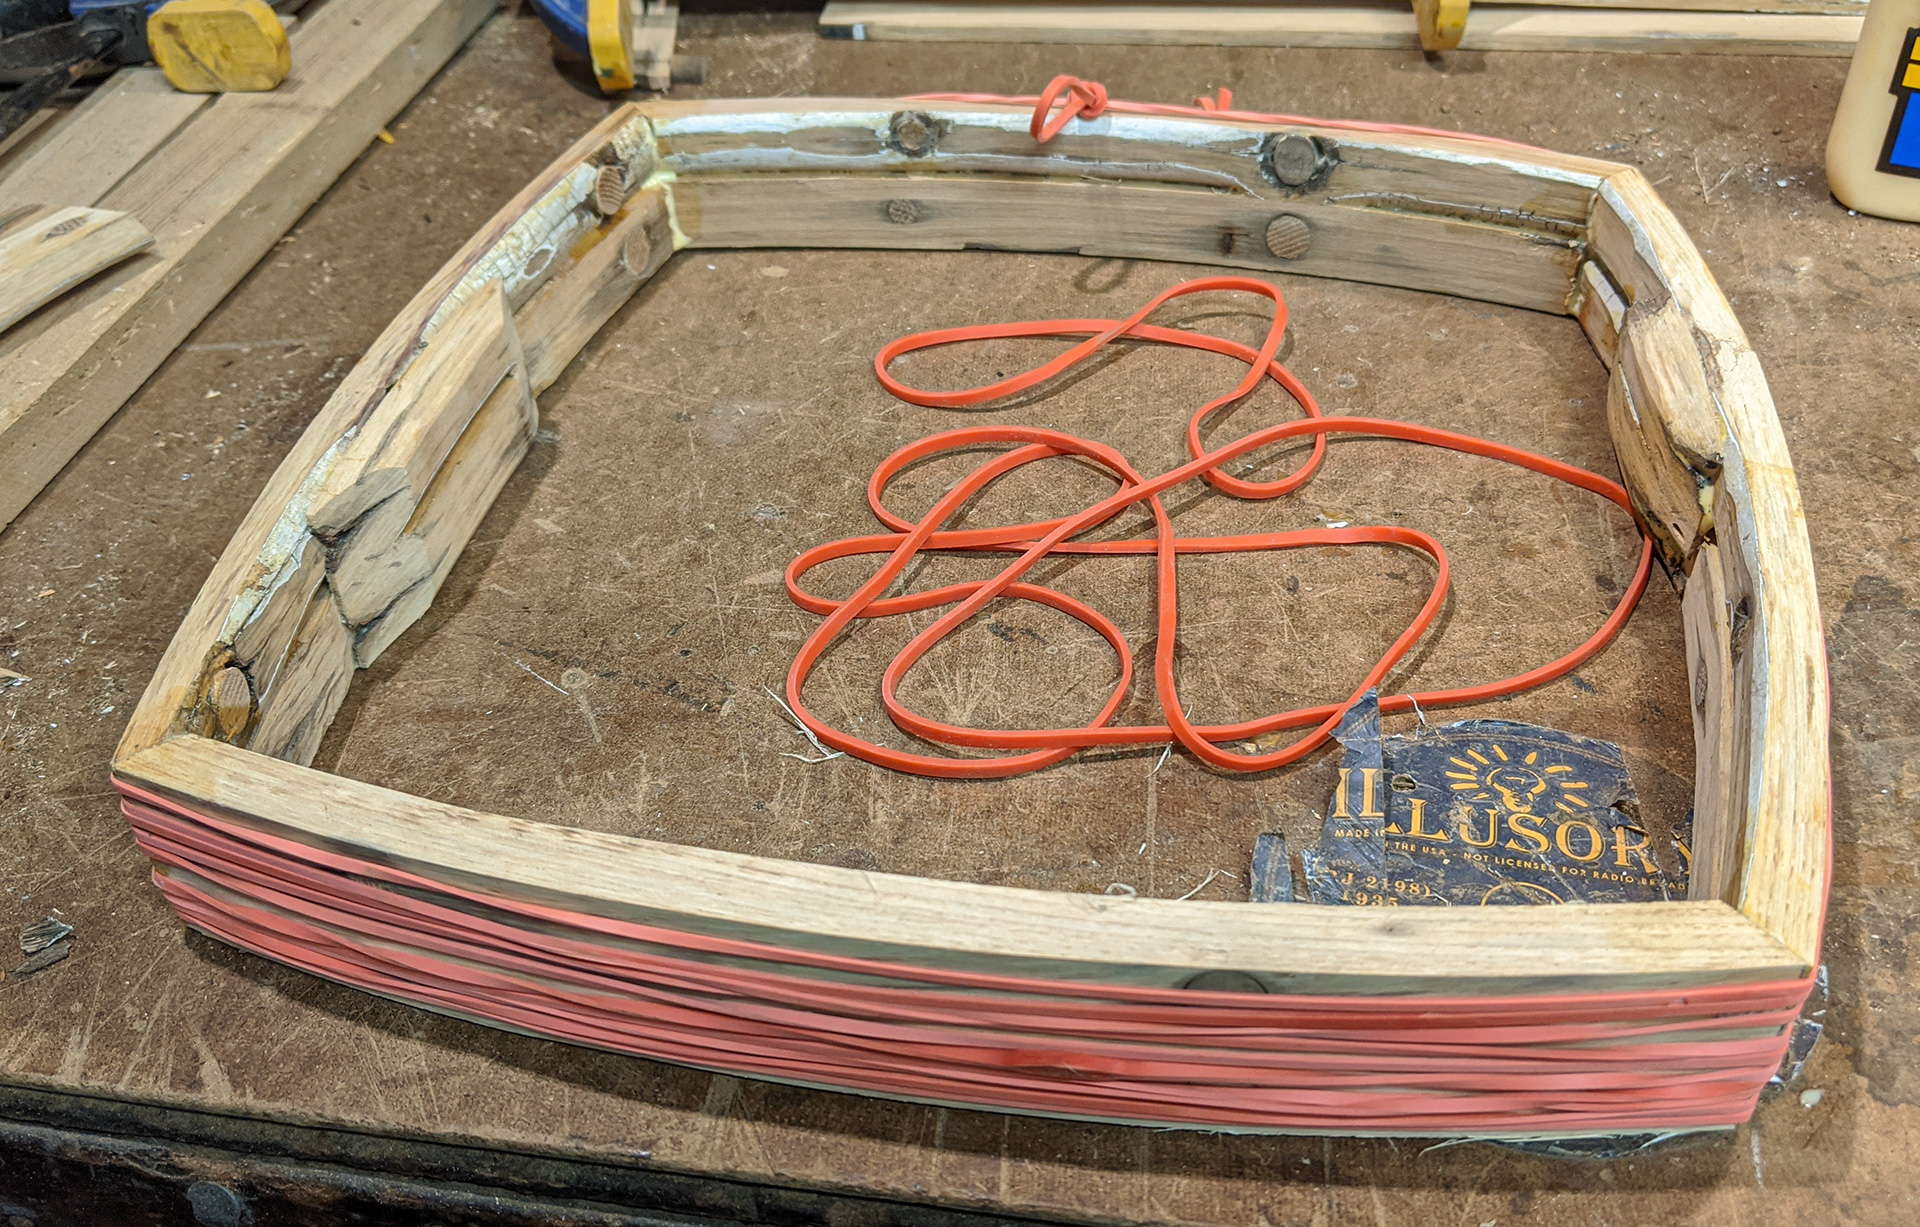
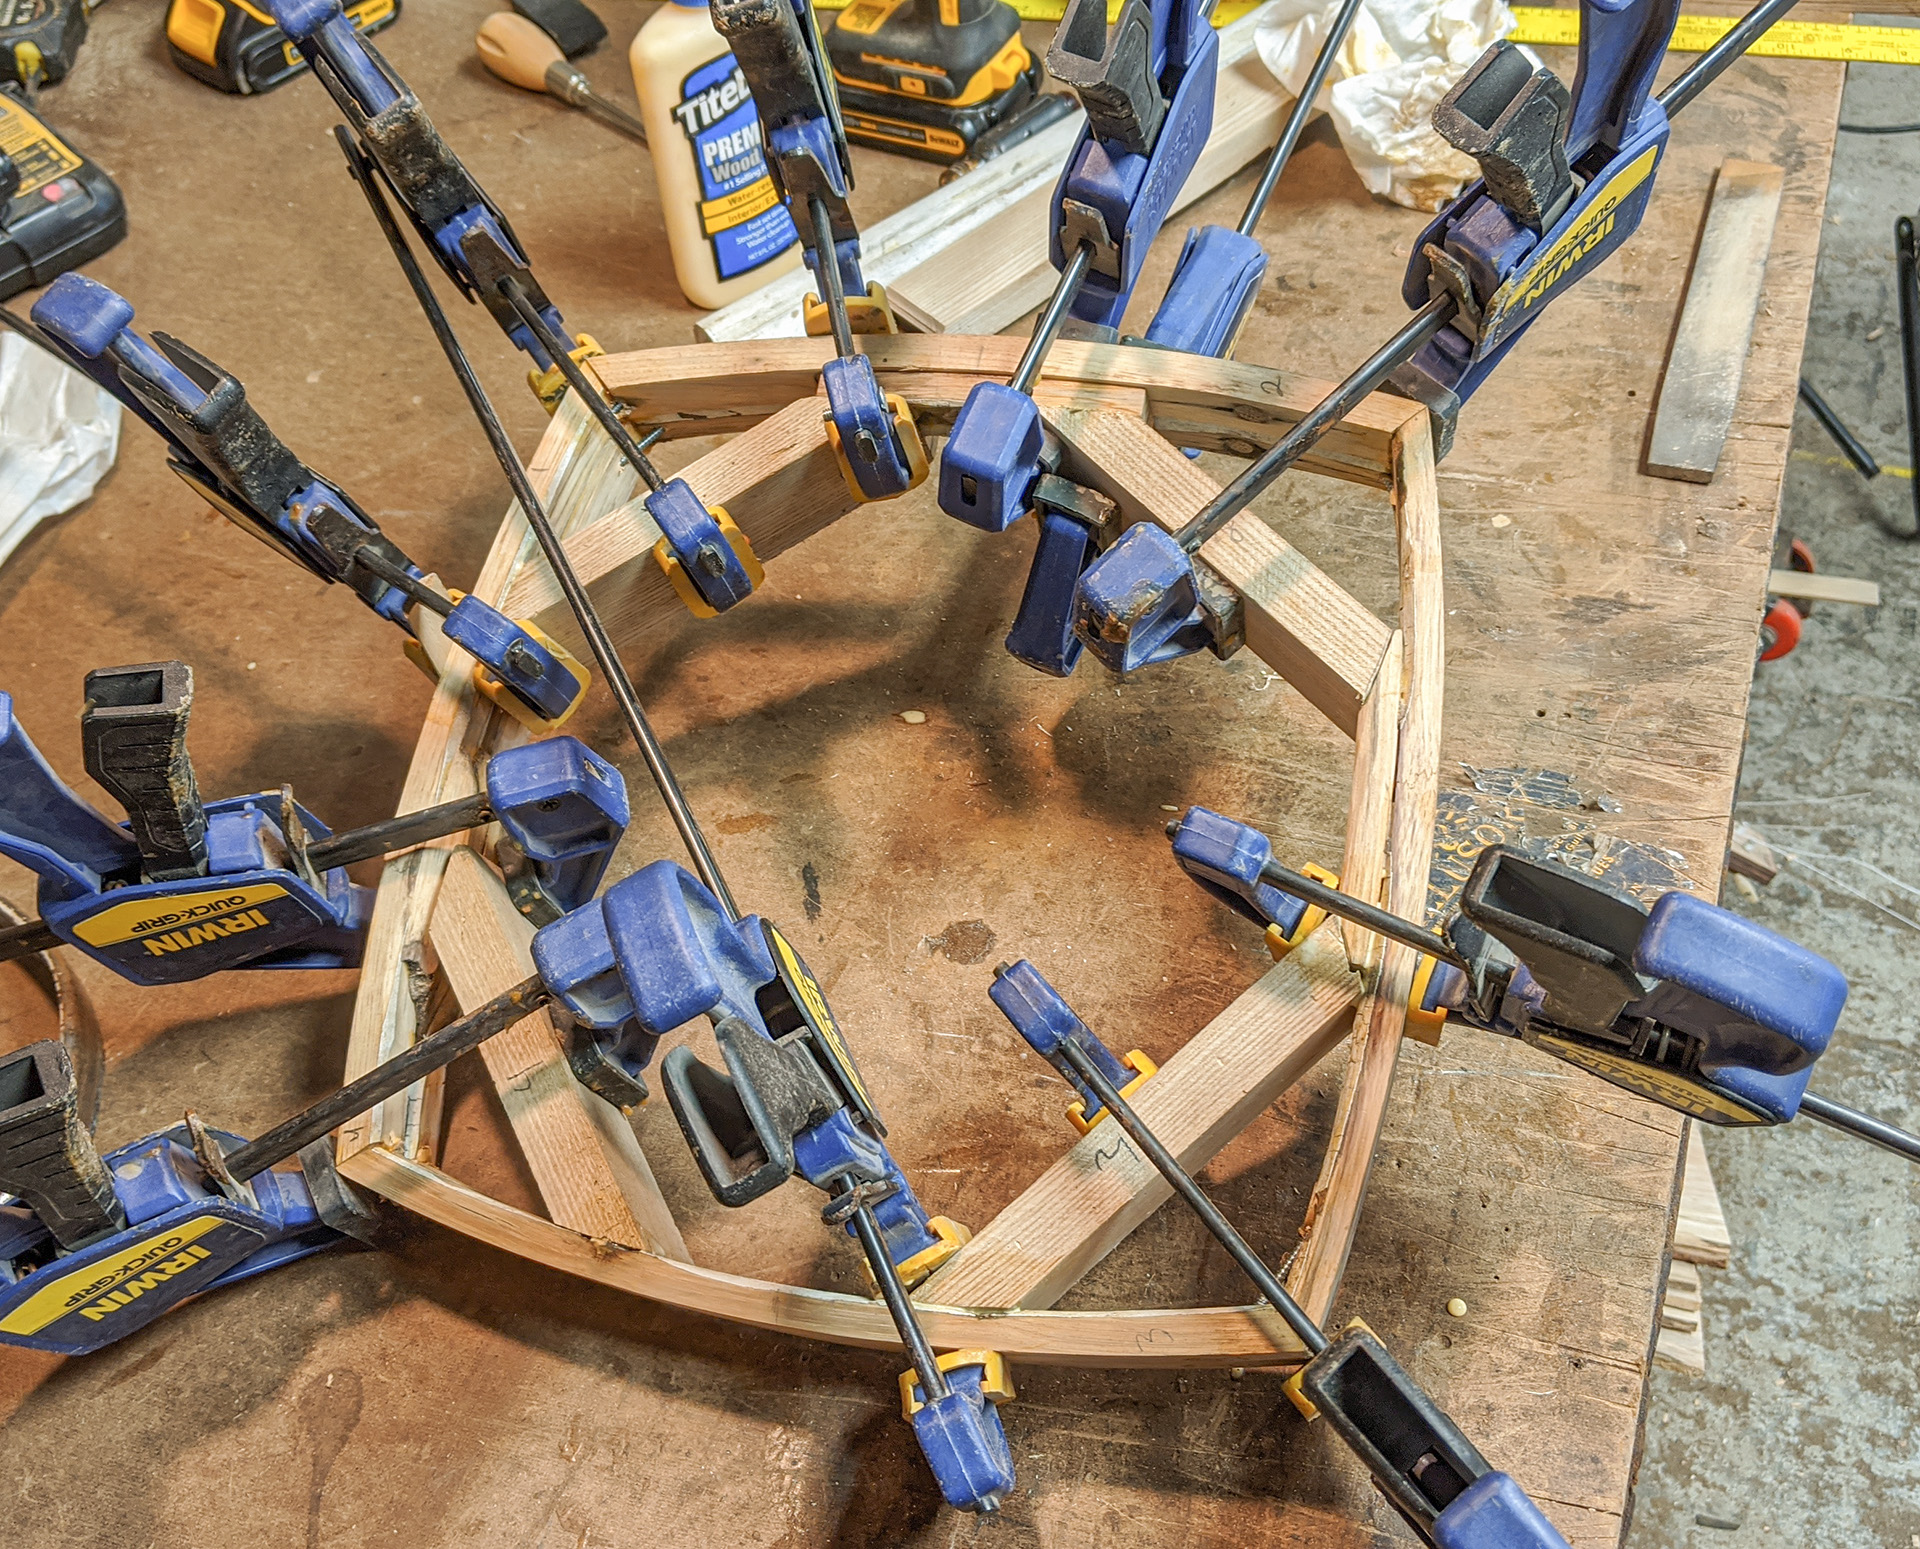
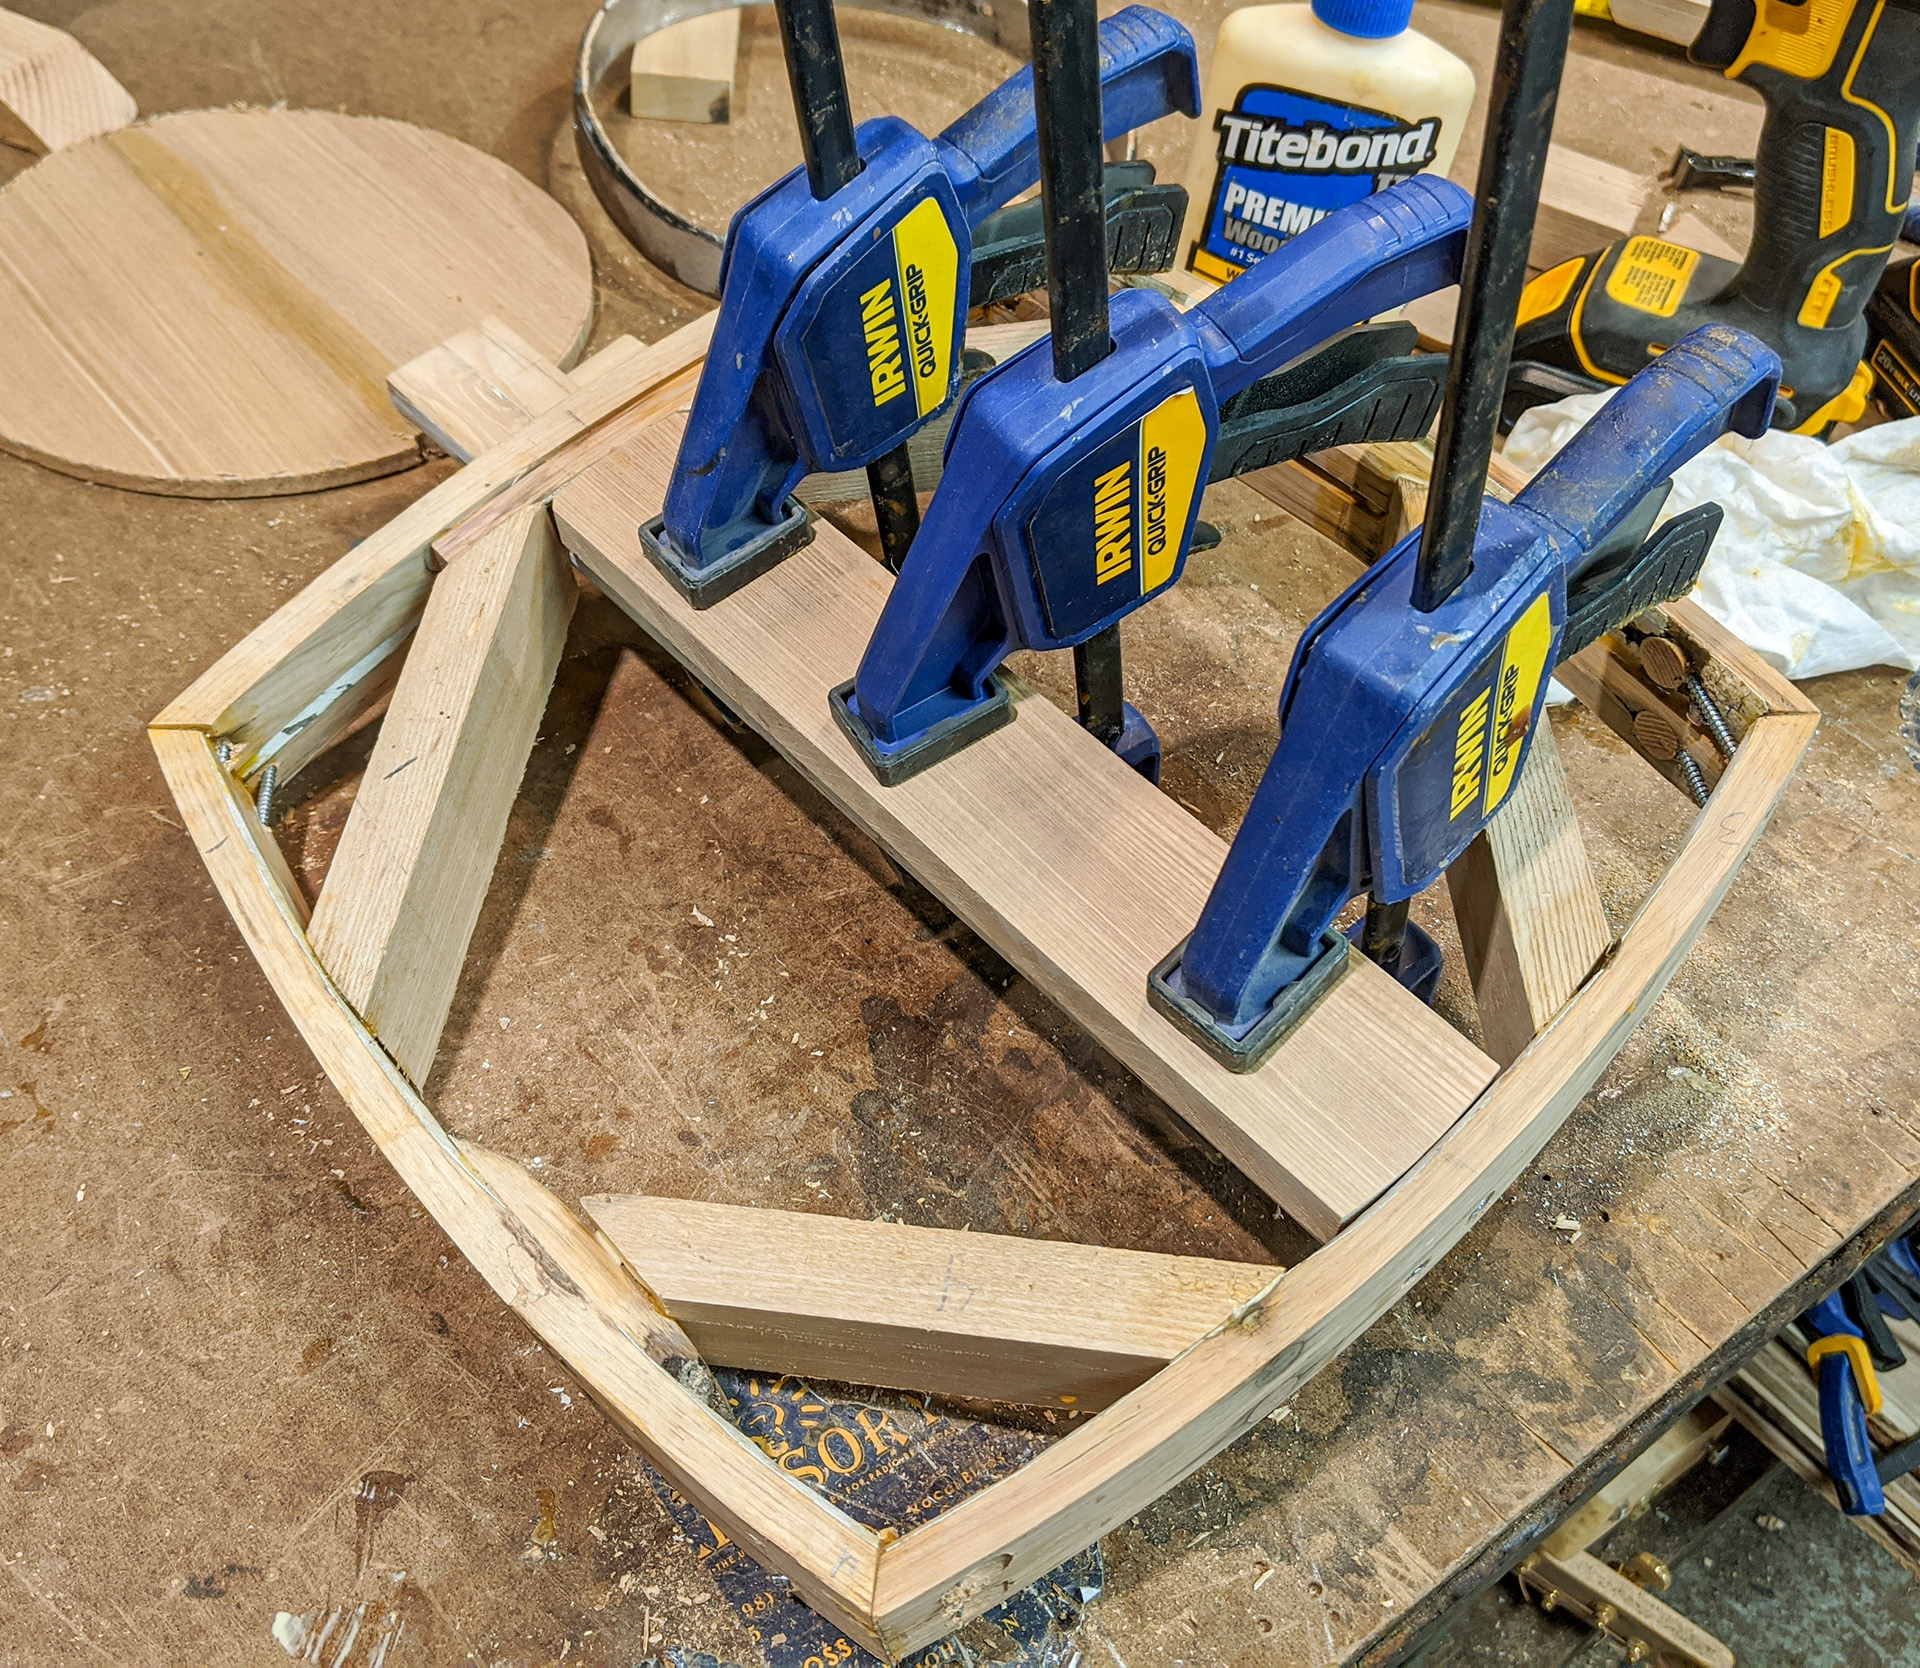
So I turned instead to the trusty old rubber band clamping method, and it worked great. I tied loop knots in the rubber bands to increase their tension. |
|
|
|
|
|
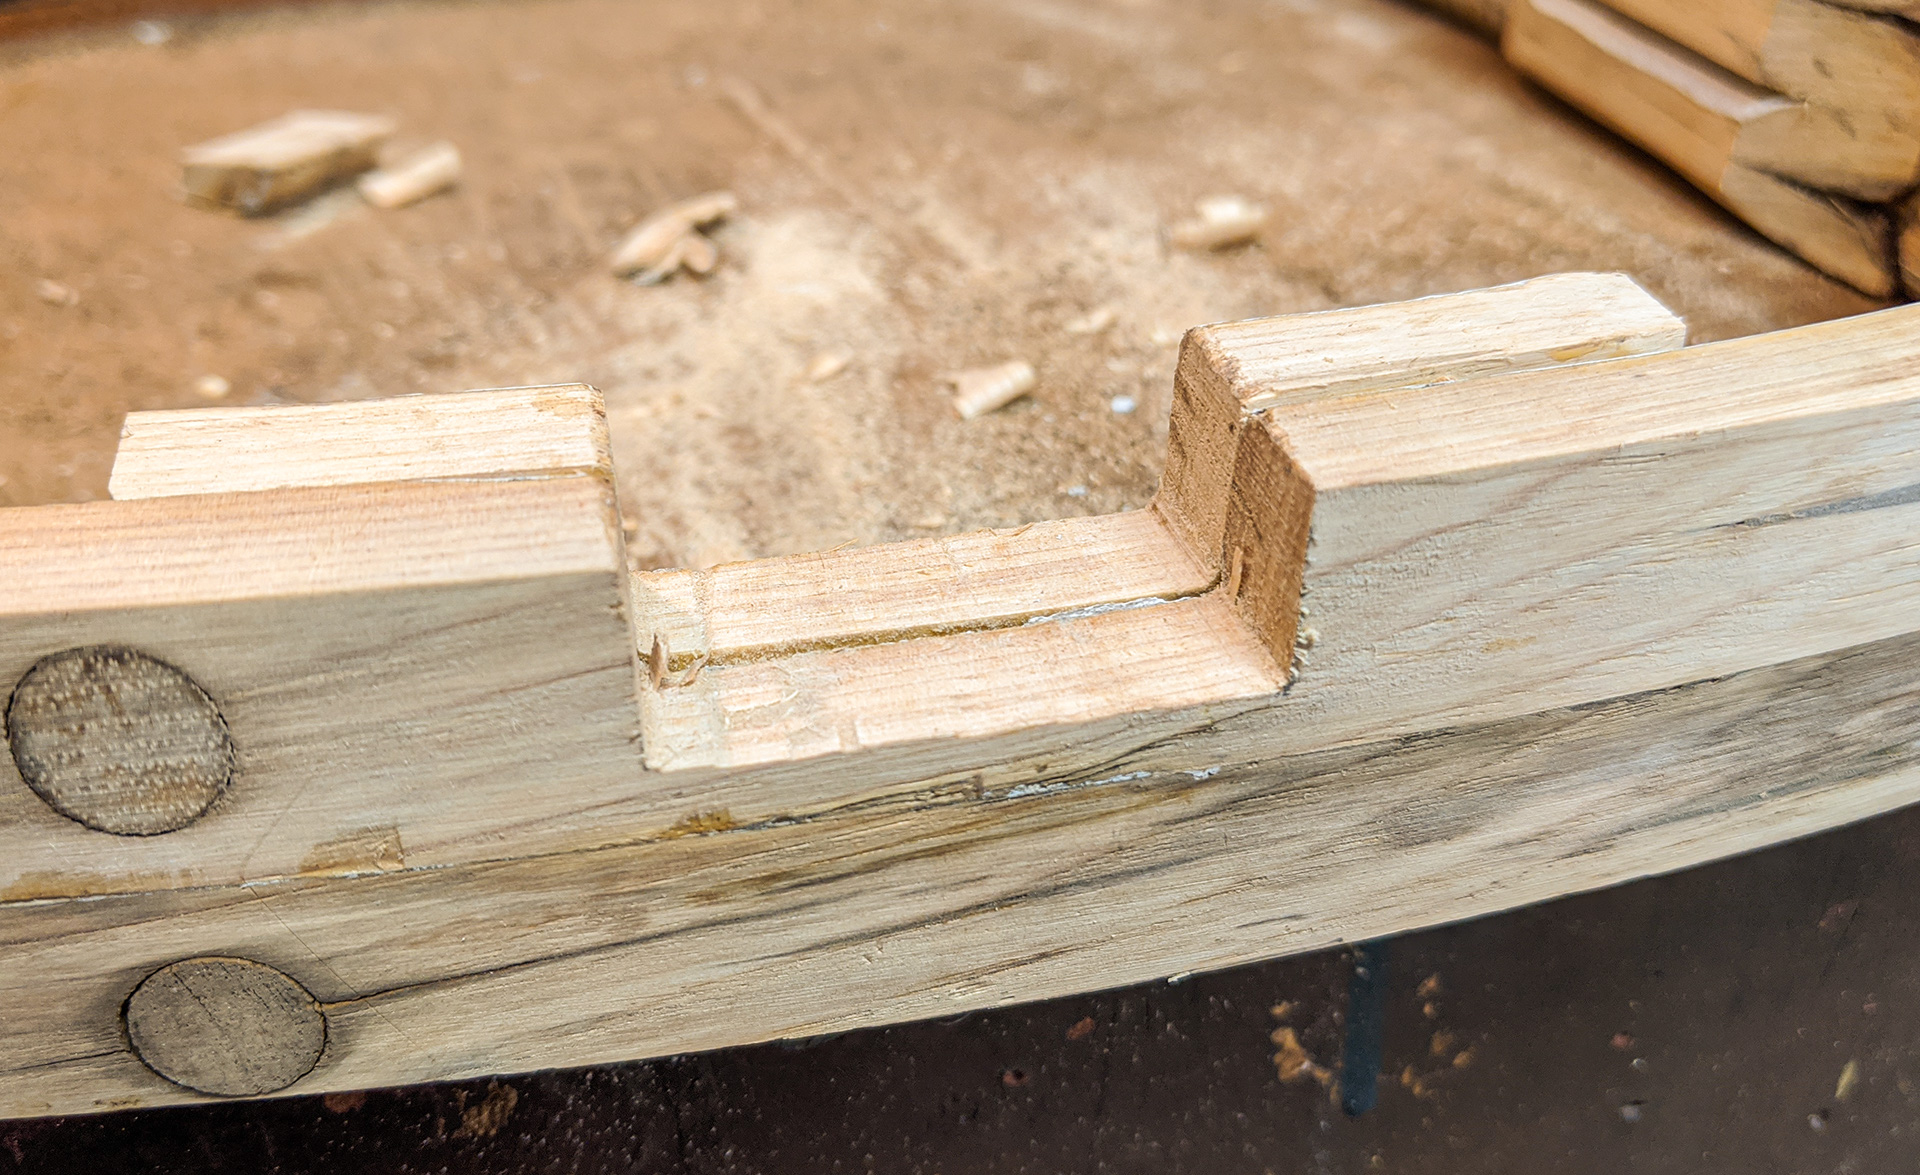
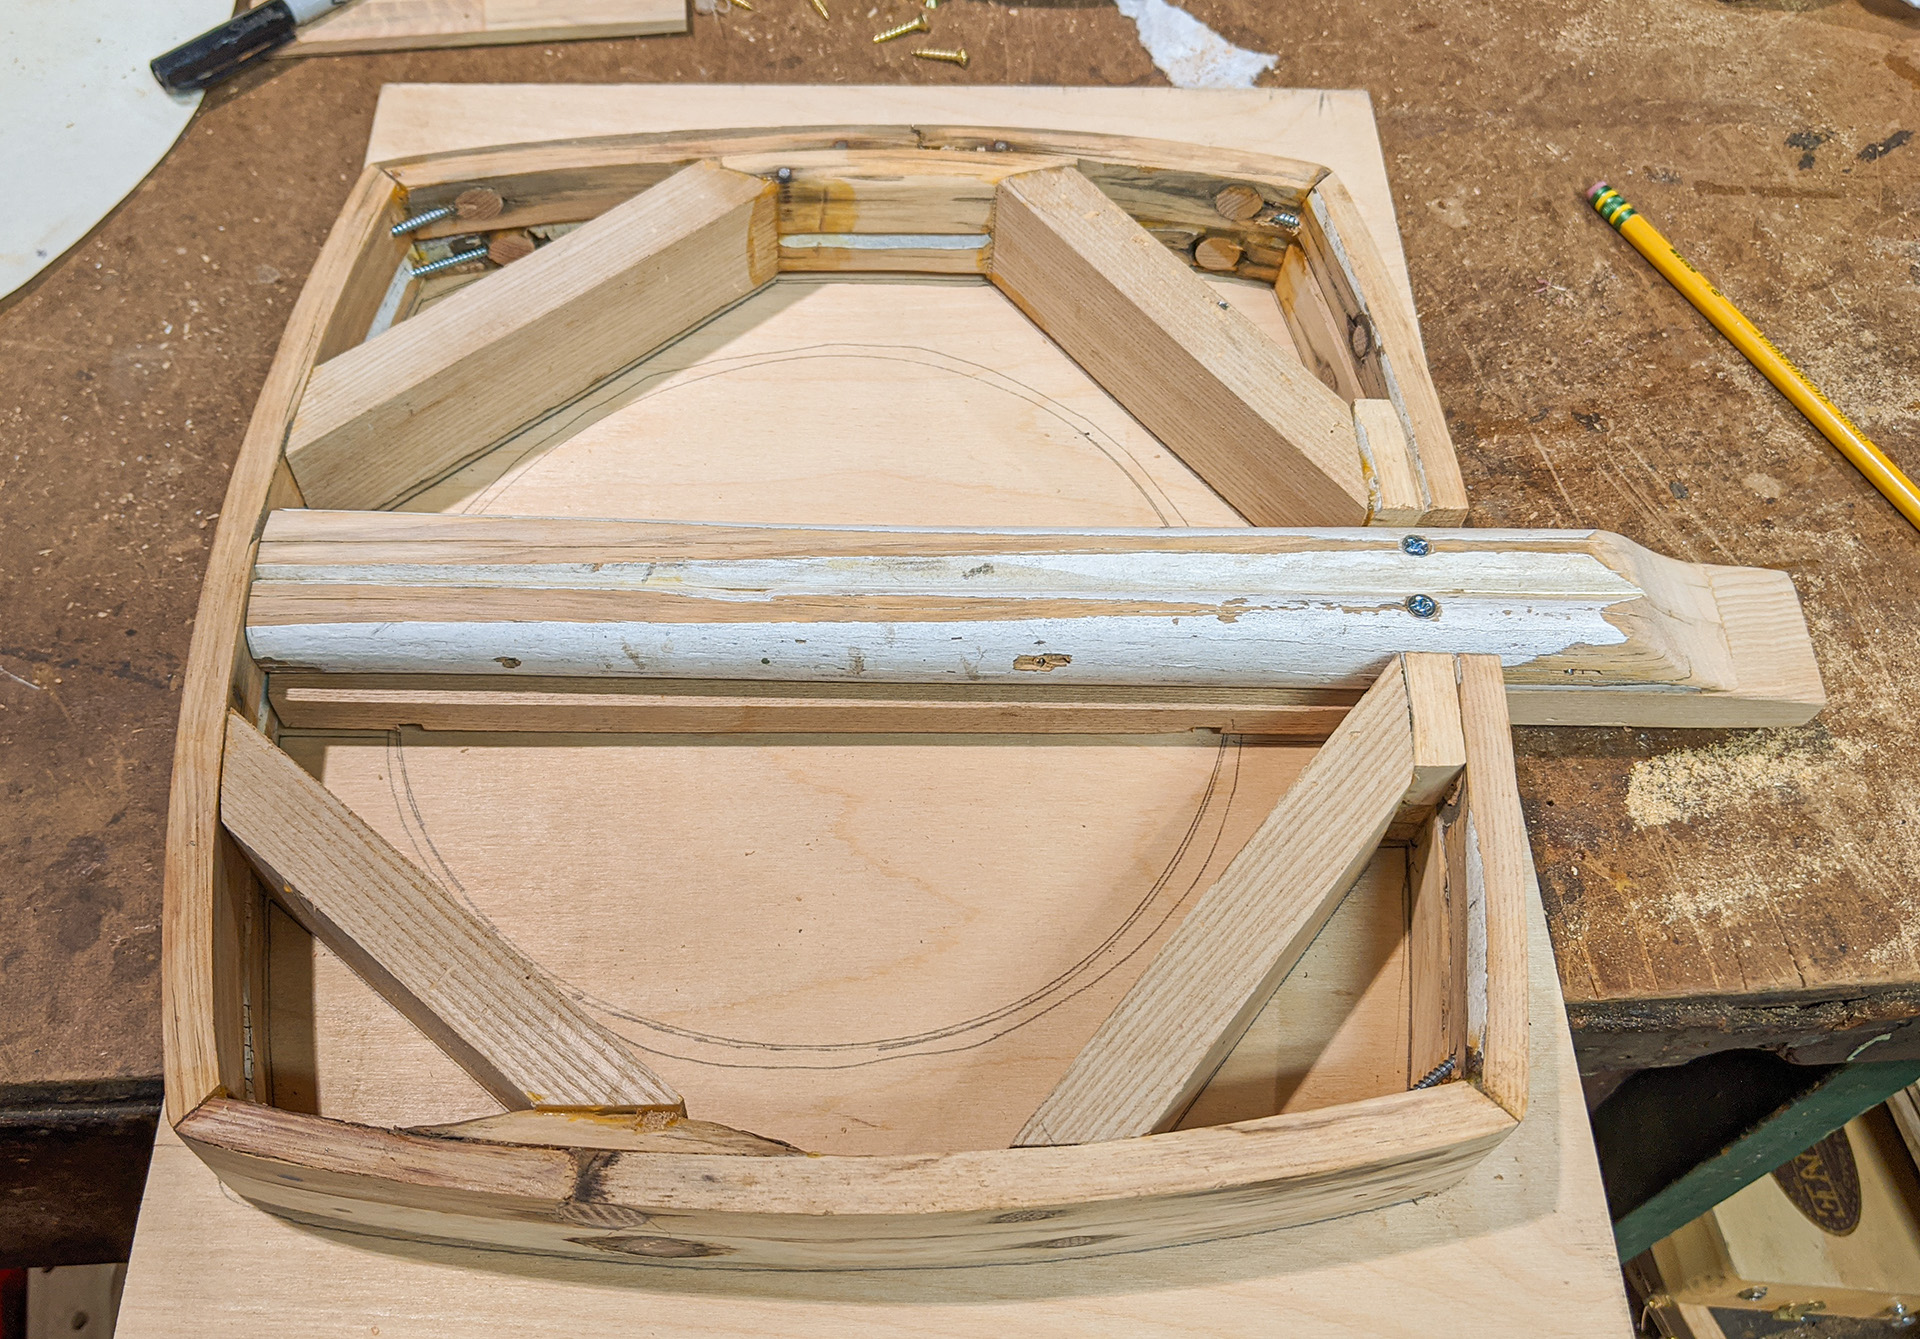
Here I'm gluing on a brace for where the neck will pass through the frame, to give it a bit more strength (and some additional thickness for mounting screws). For this build, because that frame wasn't very tall overall, I chose to notch up into the side wall of the frame and also down into the neck brace (seen to the left in the photo), and mount the neck up in from the bottom. The goal with this was to not remove too much wood from either the neck brace or the frame. |
|
|
|
|
|
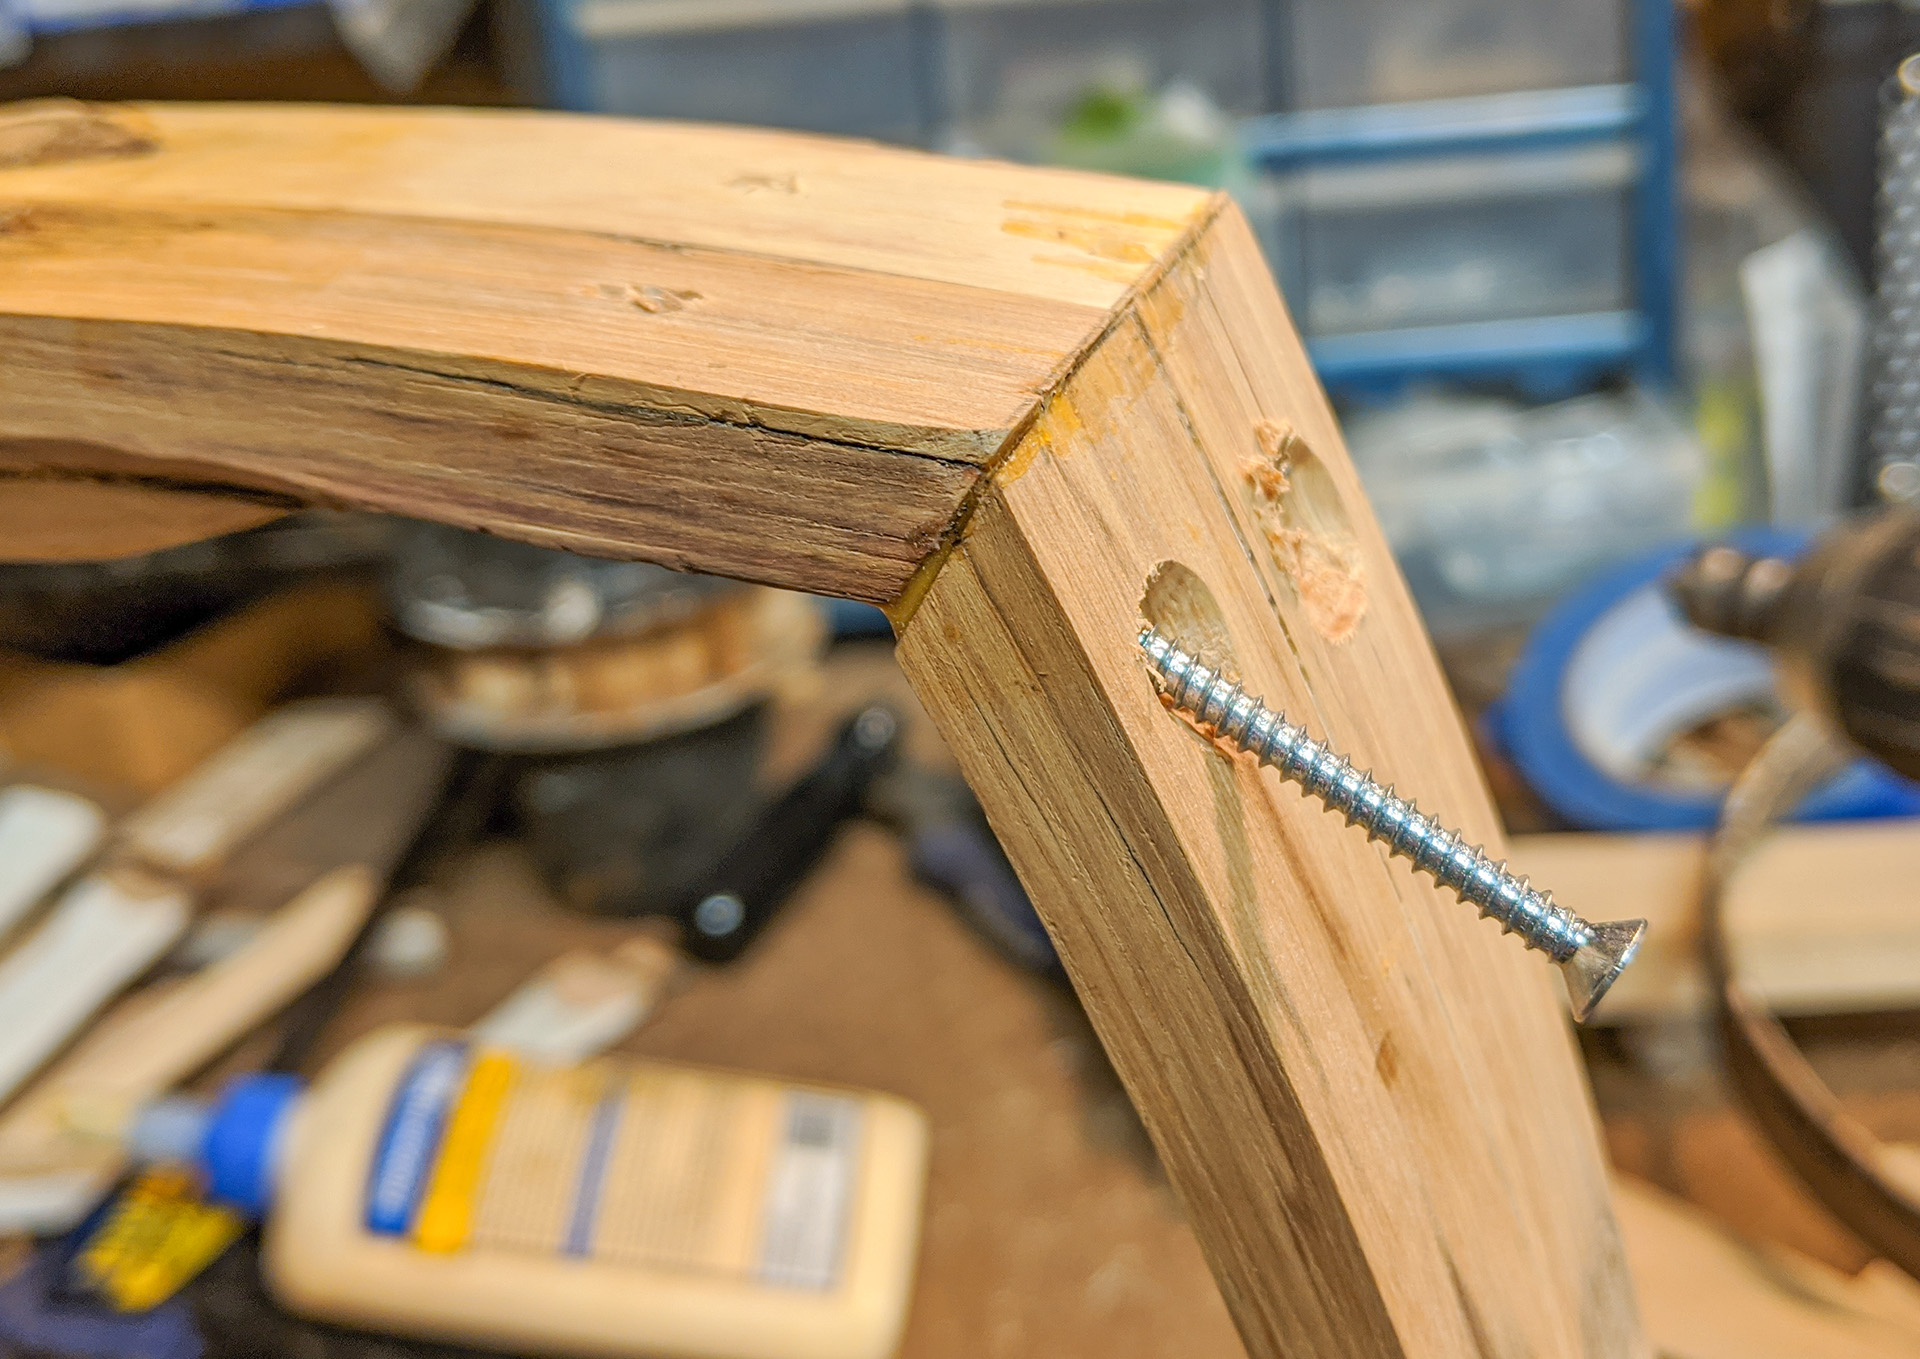
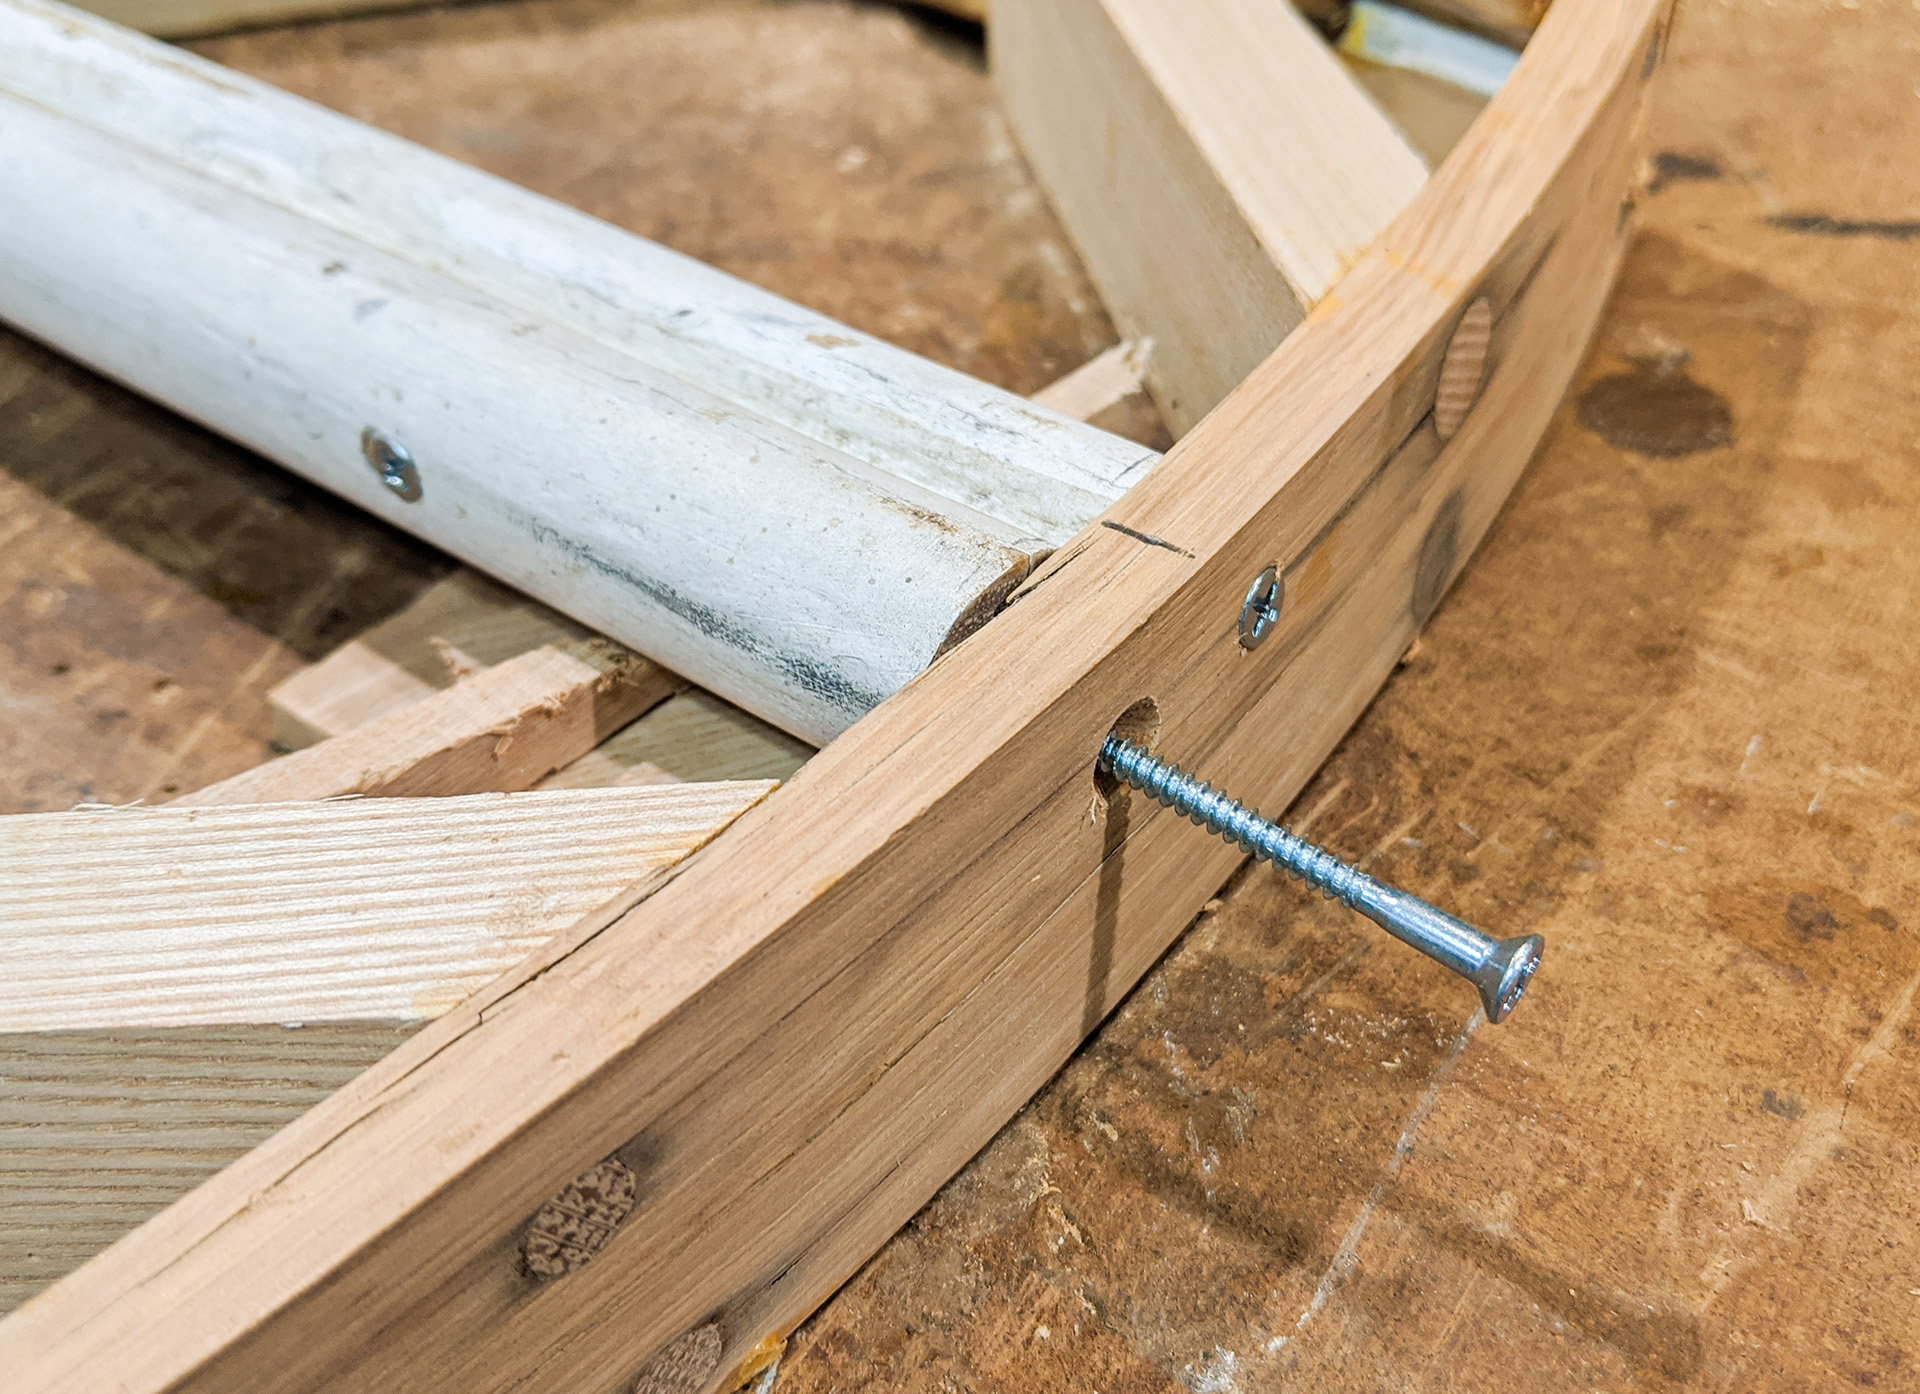
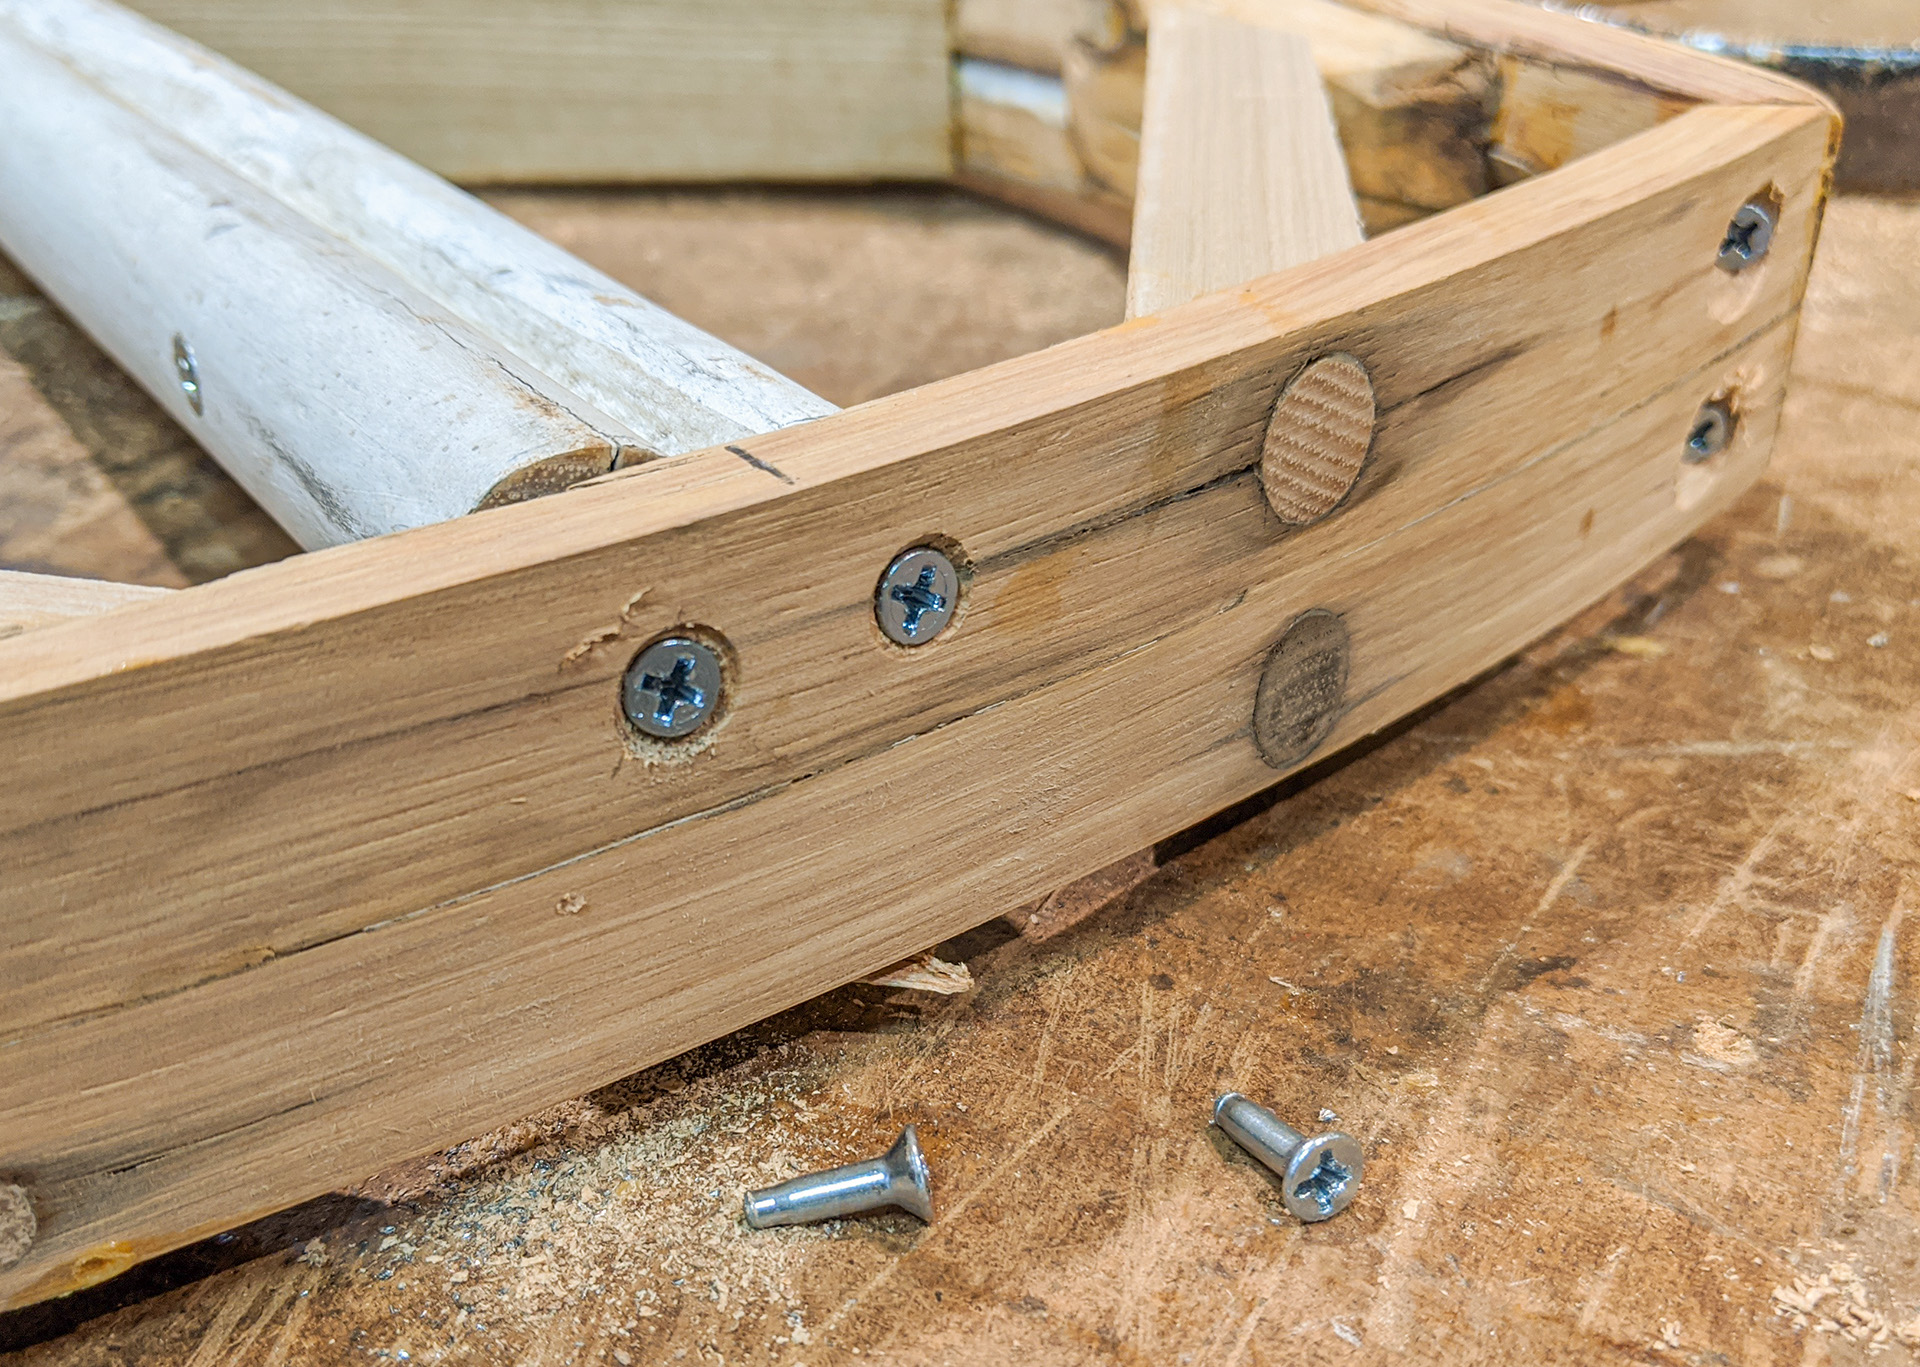
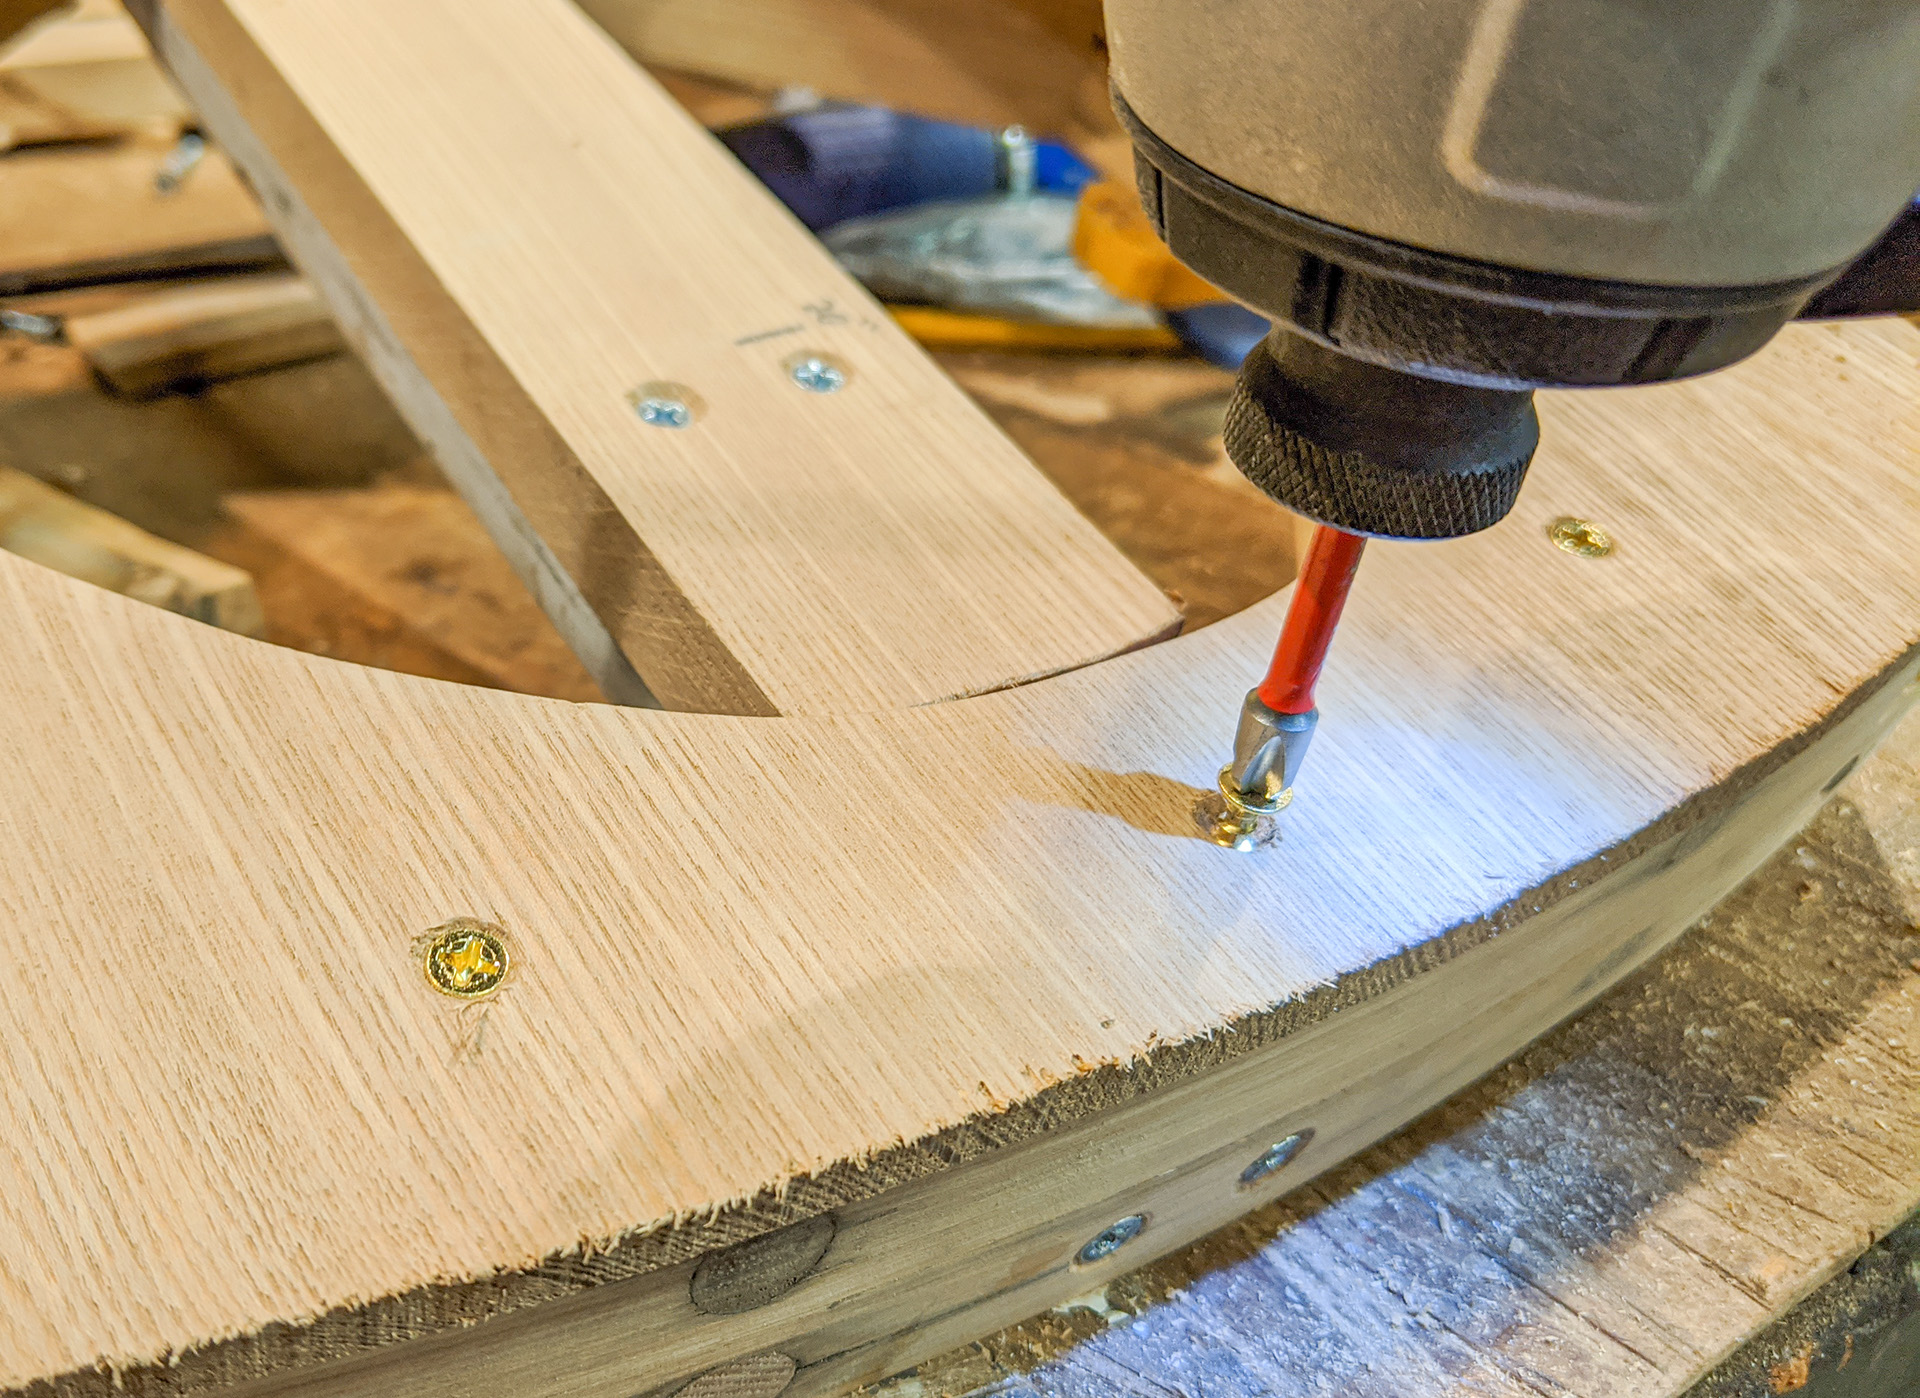
To help strengthen the corner joints of my frame, I drill and insert screws diagonally. I just free-handed this, and it would have been better to make some sort of jig for more consistent results. In the end though, it worked. |
|
|
|
|
|
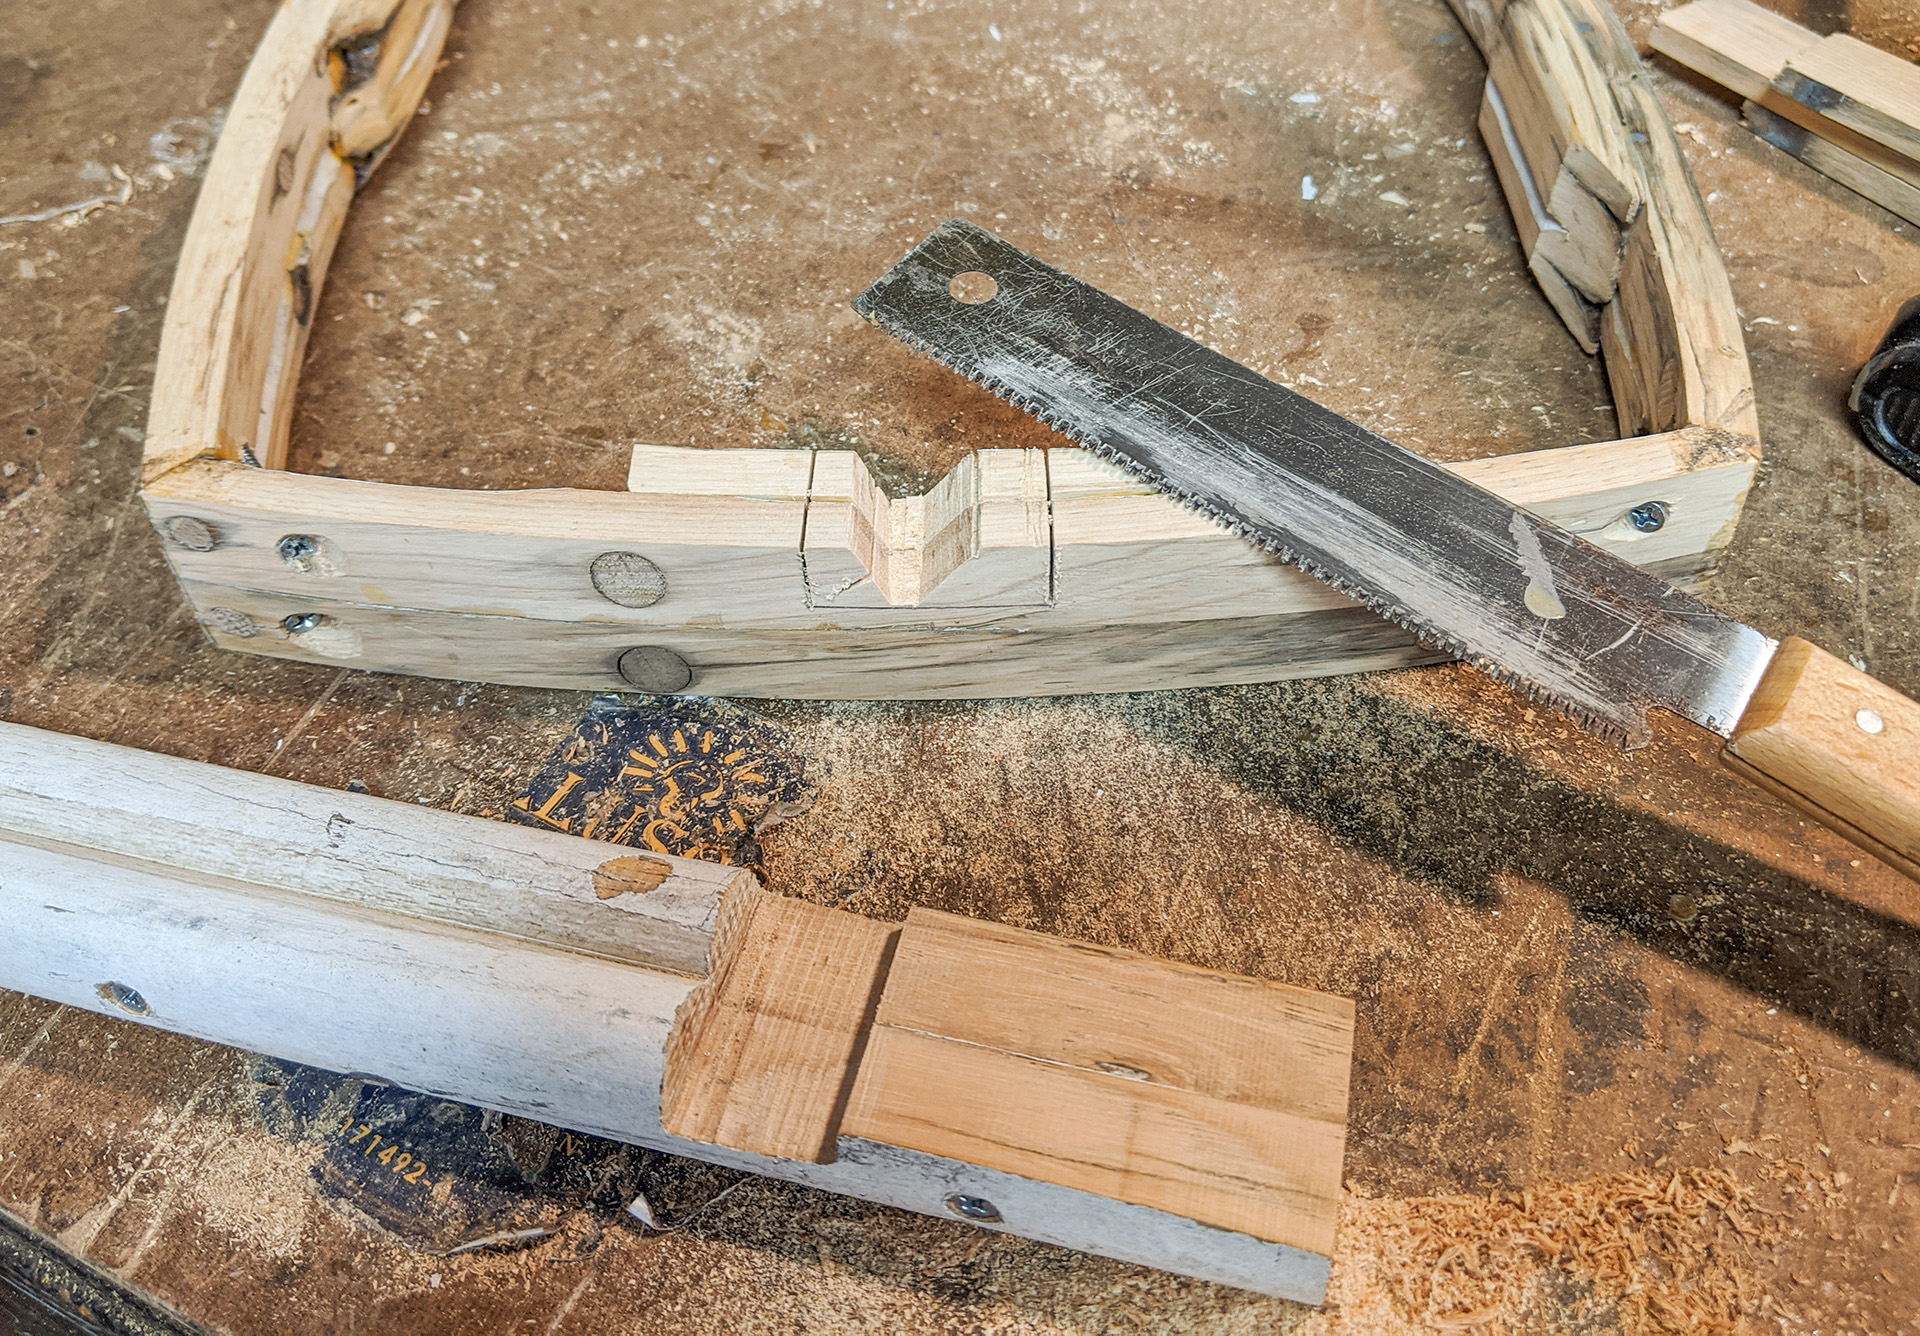
Here I'm taking out my neck notch from the bottom edge of my body frame. You can also see where I've notched down into the neck brace. I make multiple cuts with my pull saw, both vertical and diagonal, to remove as much of the wood as I can... |
|
|
|
|
|
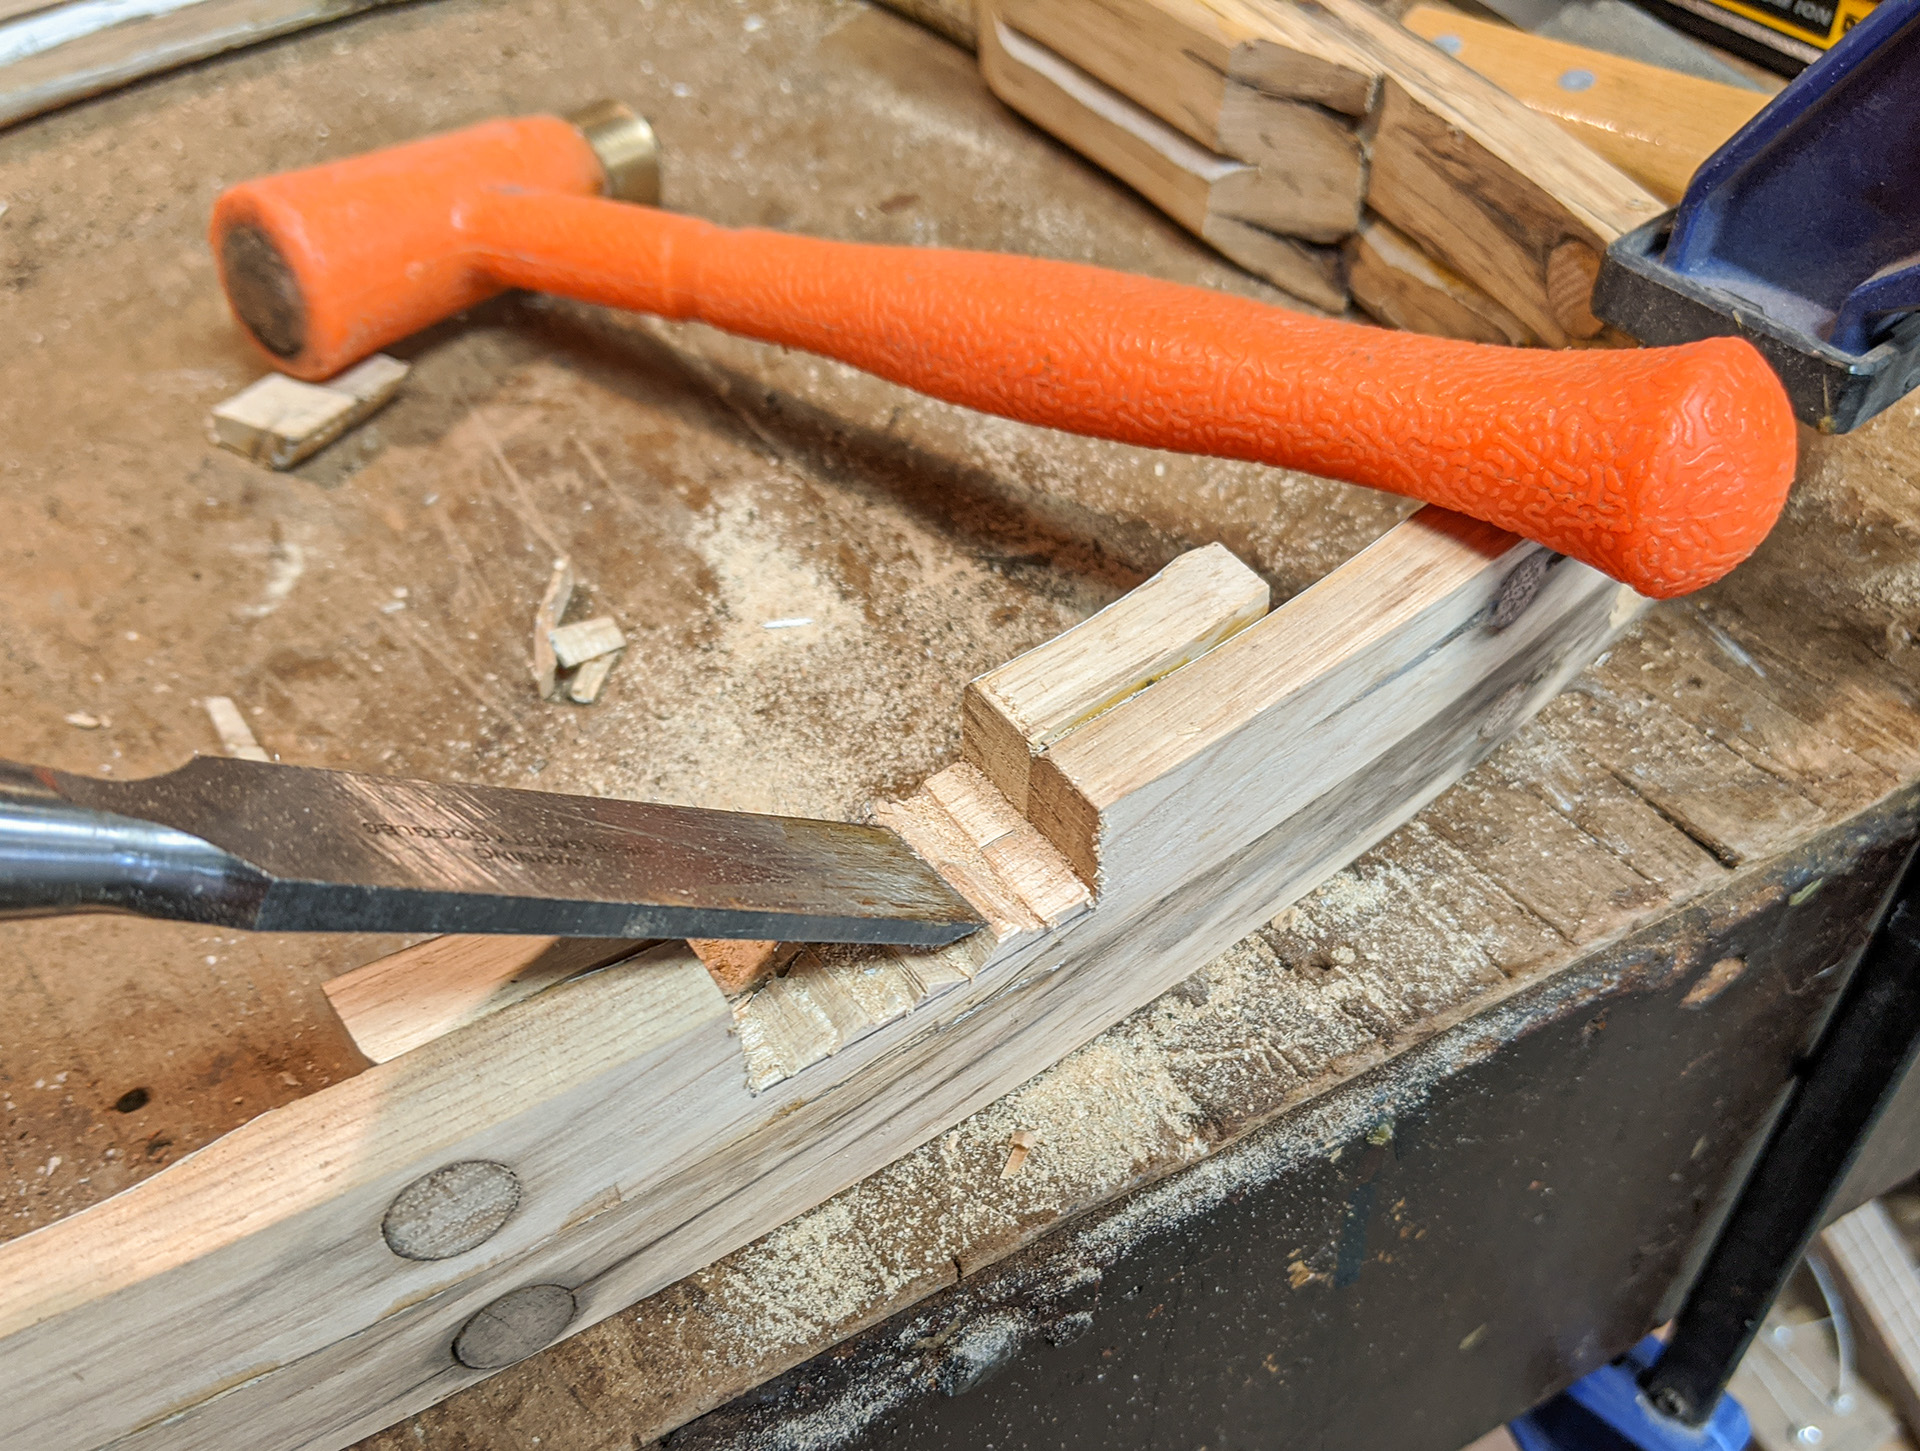
And then a wood chisel helps remove the rest. |
|
|
|
|
|
After some filing, my notch is looking pretty good. No power tools involved in this one! |
|
|
|
|
|
Remember that we are looking at the bottom side of the frame and brace. Here the brace is nicely seated down into its notch. The slight amount of protrusion will later be sanded off. |
|
|
|
|
|
Here the frame has been flipped over so that it is "face up", with the neck brace mounted through the bottom edge. |
|
|
|
|
|
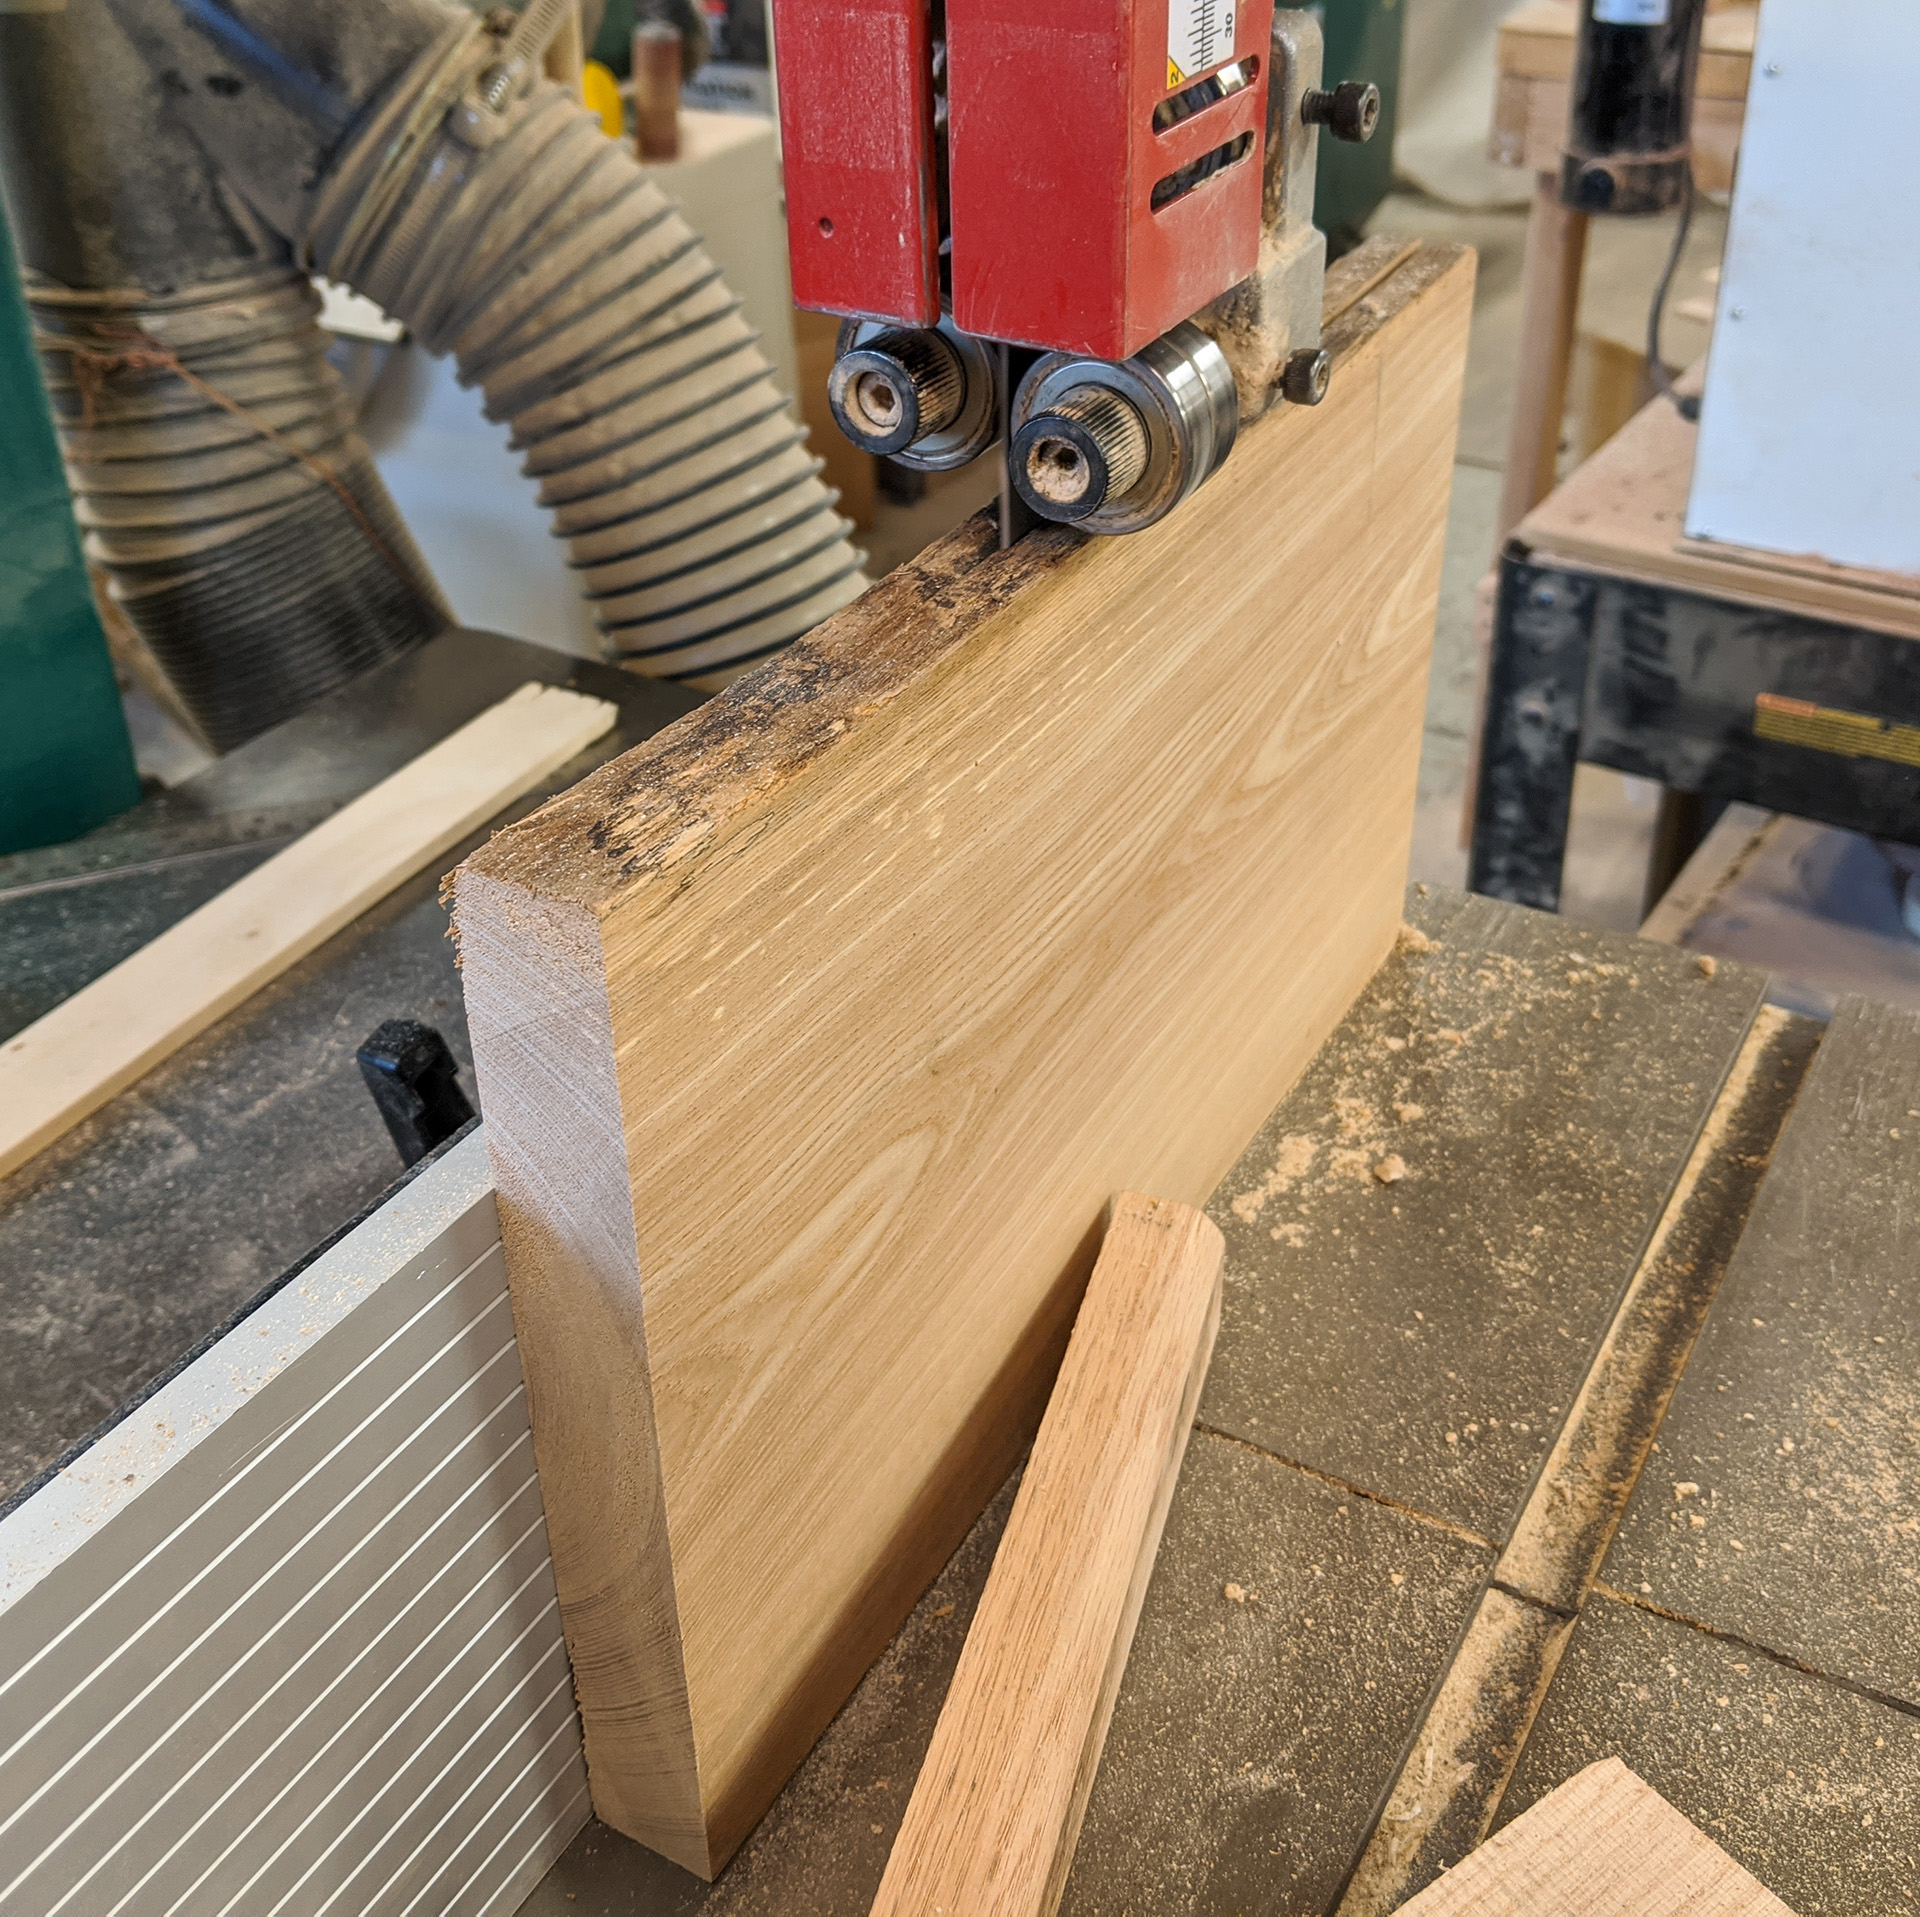
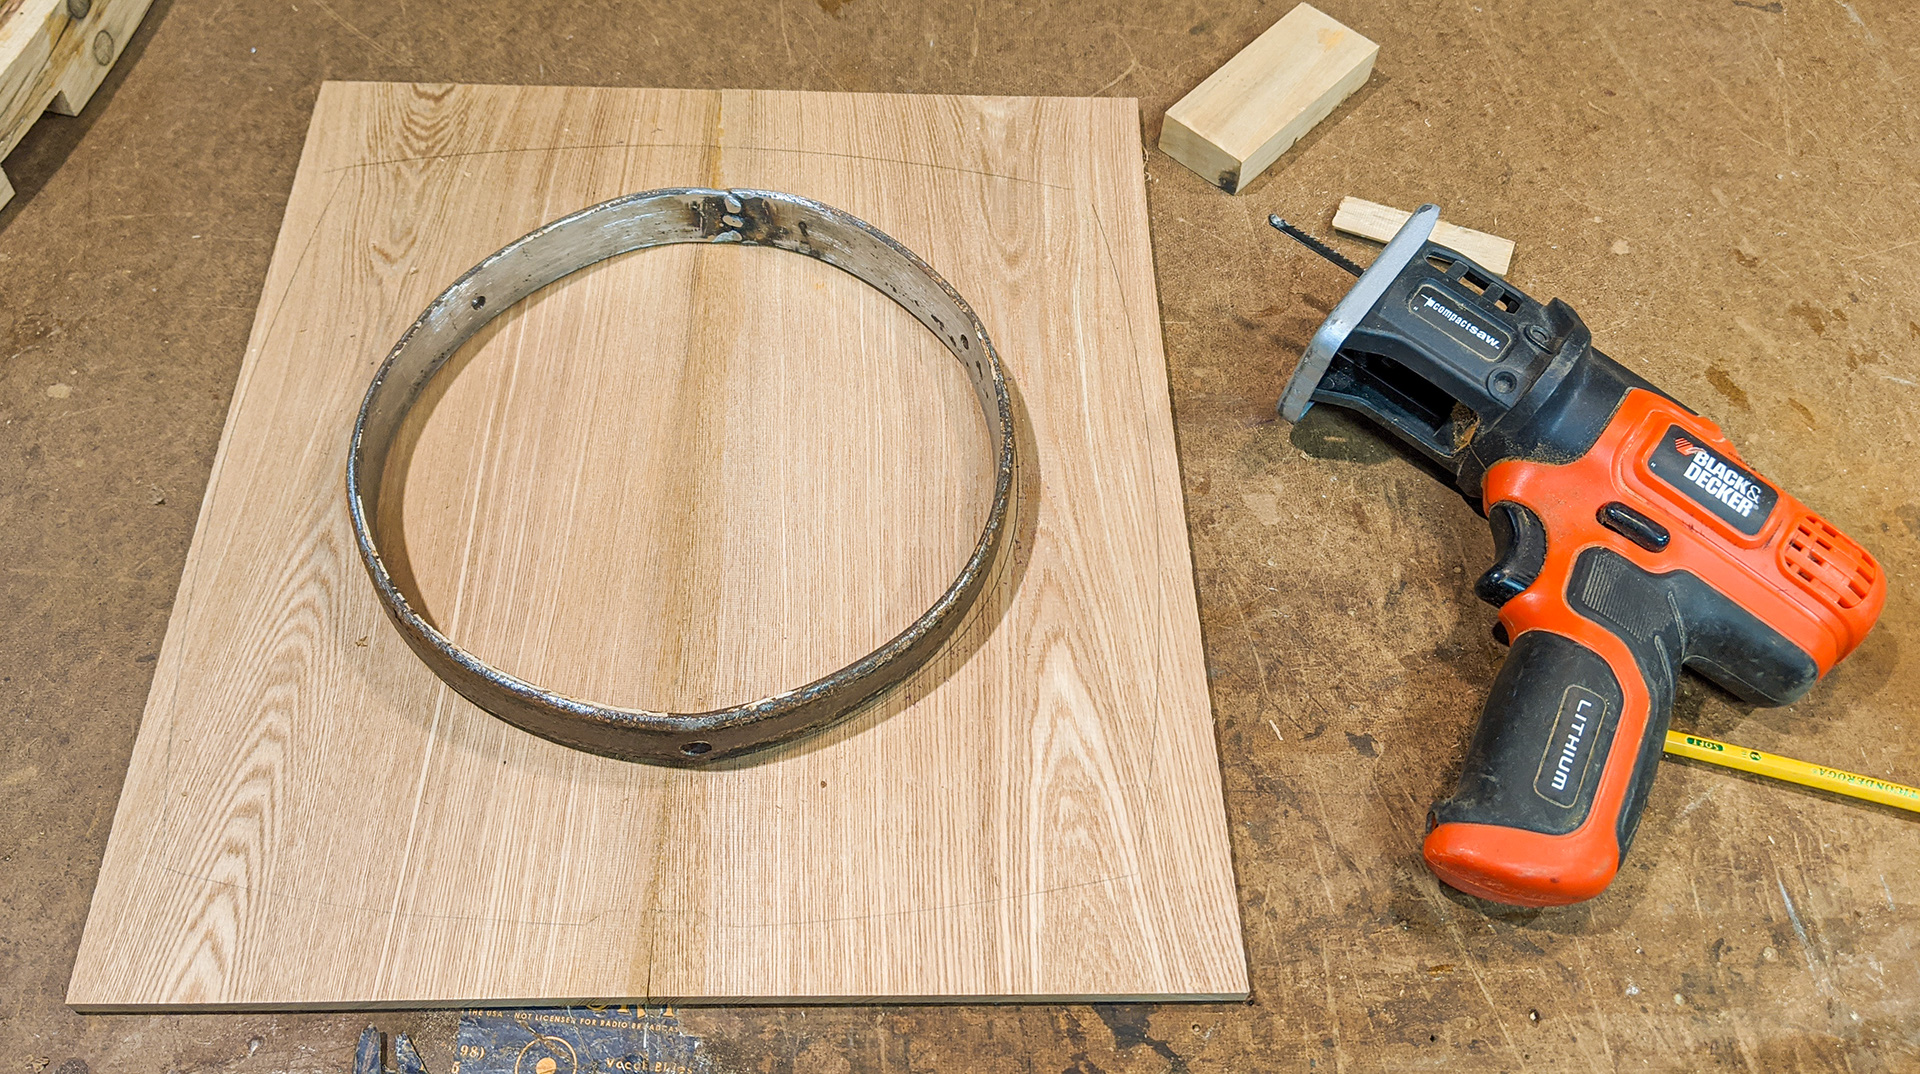
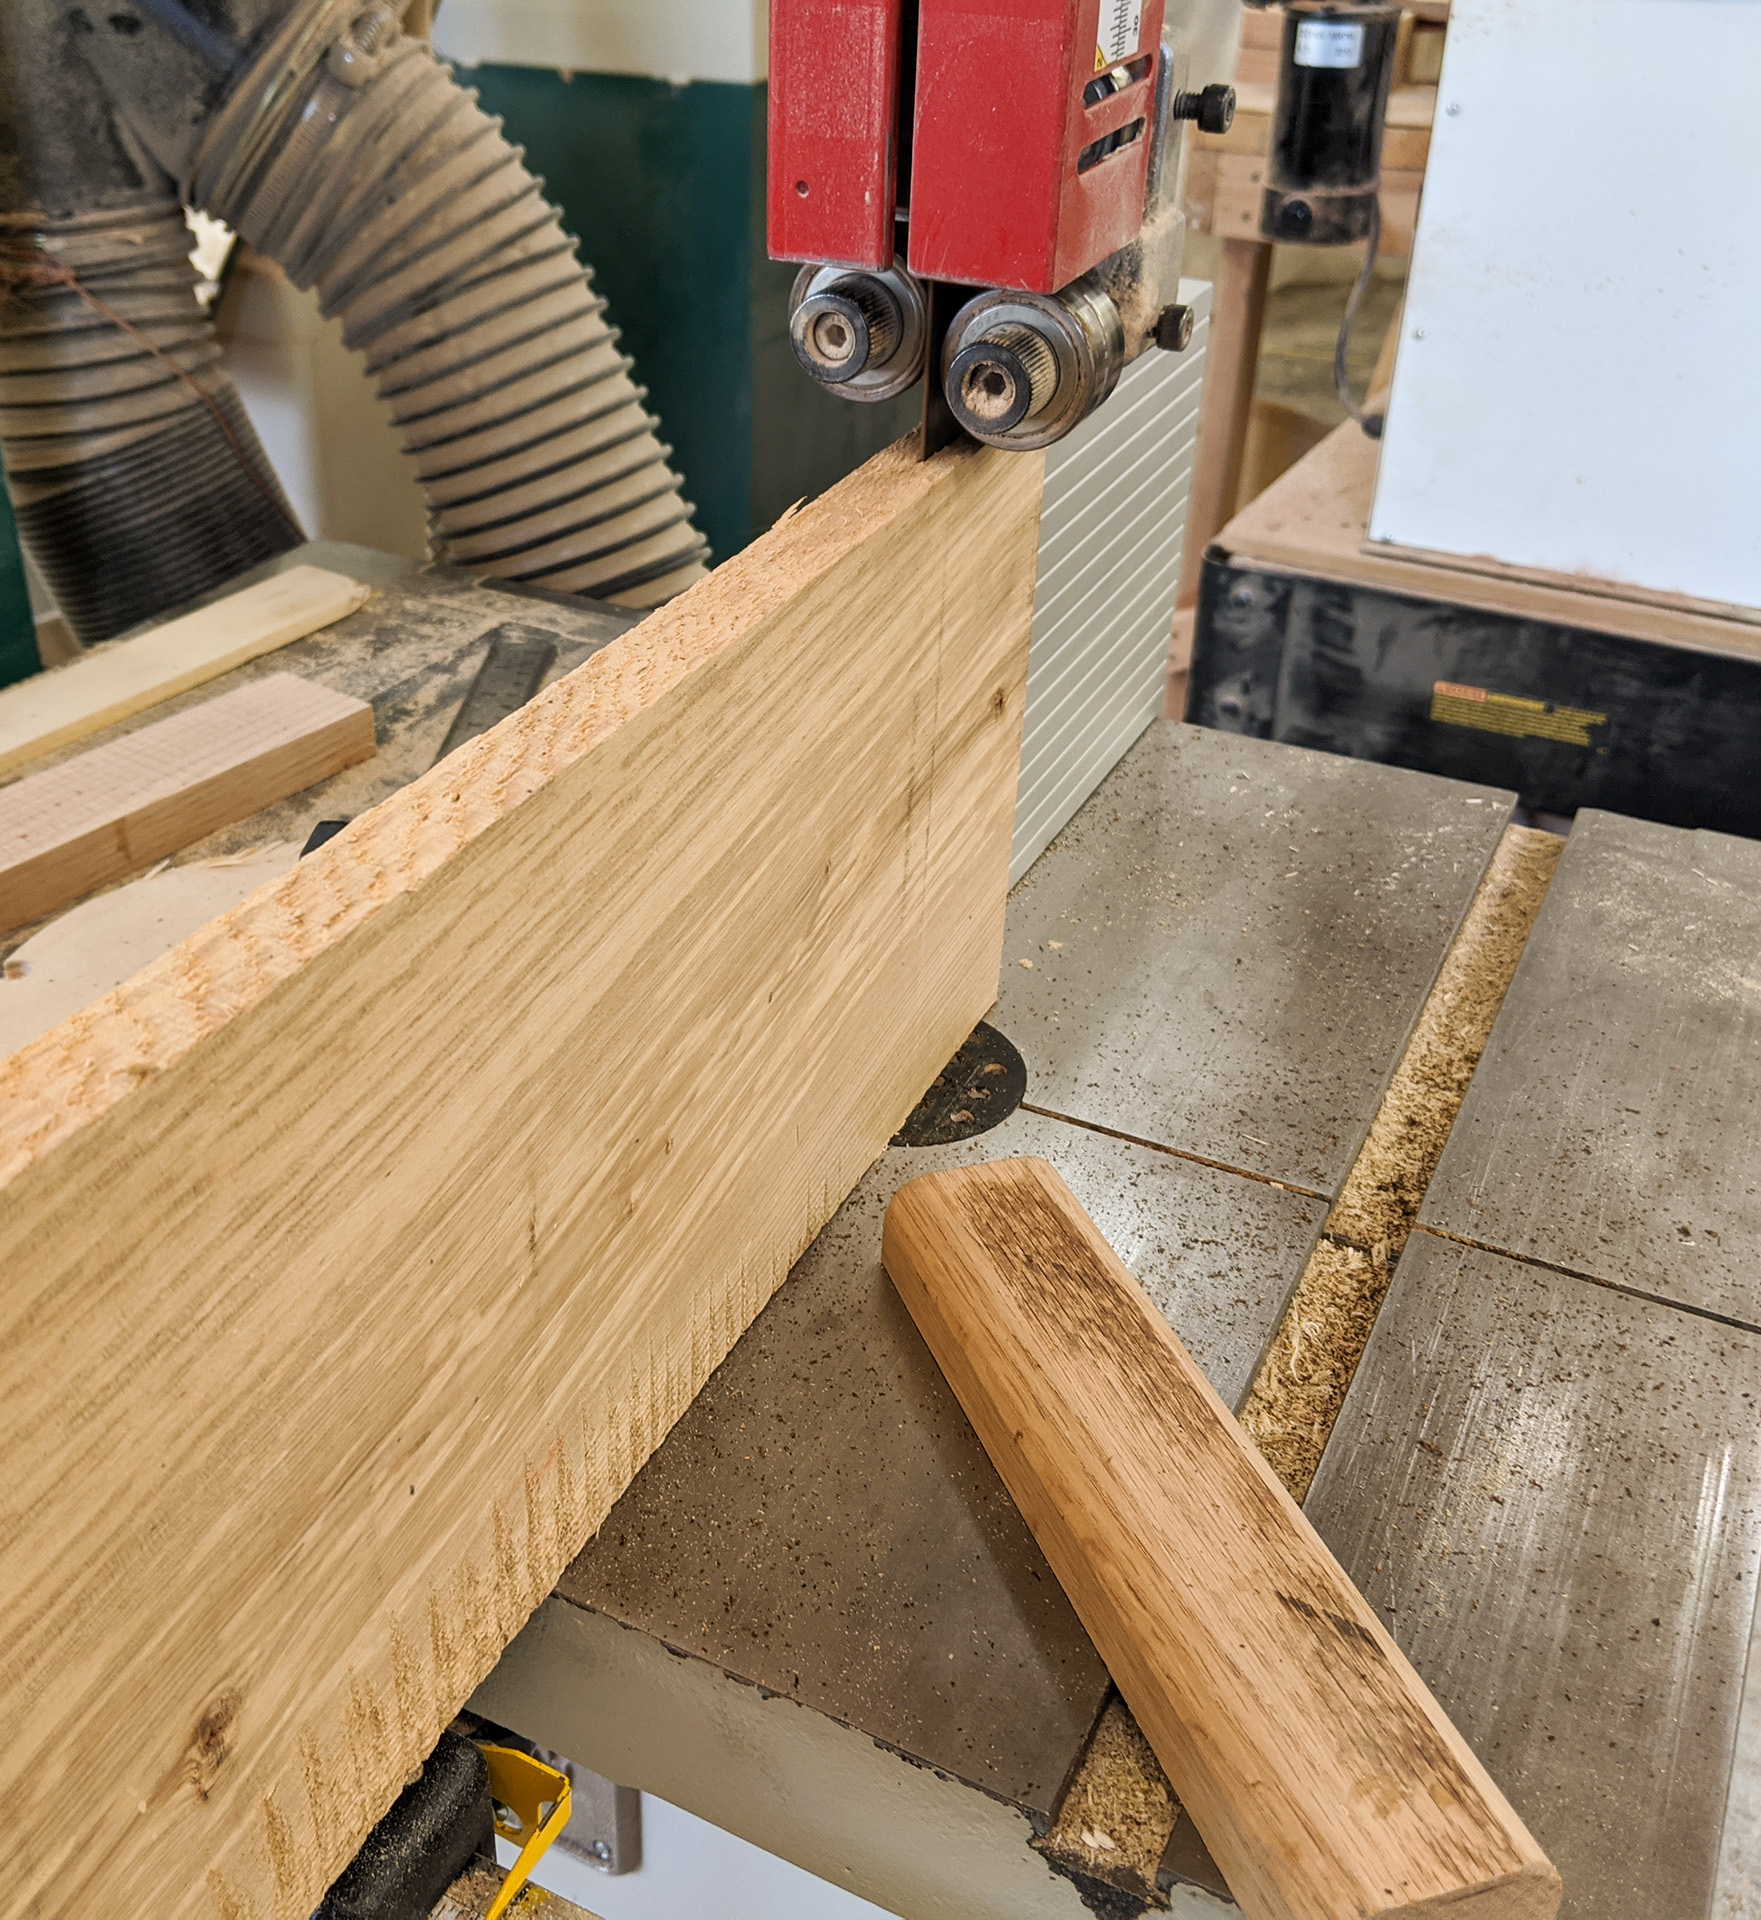
Now I turn my attention to crafting the top panel for my banjo. For this, I choose to use some of my stash of reclaimed American Chestnut wood, which was salvaged from a 200-year-old barn up in Shapleigh, Maine. At first I wasn't sure about introducing wood into this build that did not come from the carriage wheel itself, but in the end I decided that using some of this chestnut, which came from an old New England farm, would be a perfect addition to a rural-themed build like this. In this photo, a cutoff piece of the chestnut is being resawn on our big bandsaw. |
|
|
|
|
|
After the trip through the bandsaw, it's time to head over to the planer and get these panels down to the right thickness. |
|
|
|
|
|
Then, after a short stop at the edge sander to true up the gluing edges, it's back to the bench to prepare for edge gluing them together into a single wide panel. |
|
|
|
|
|
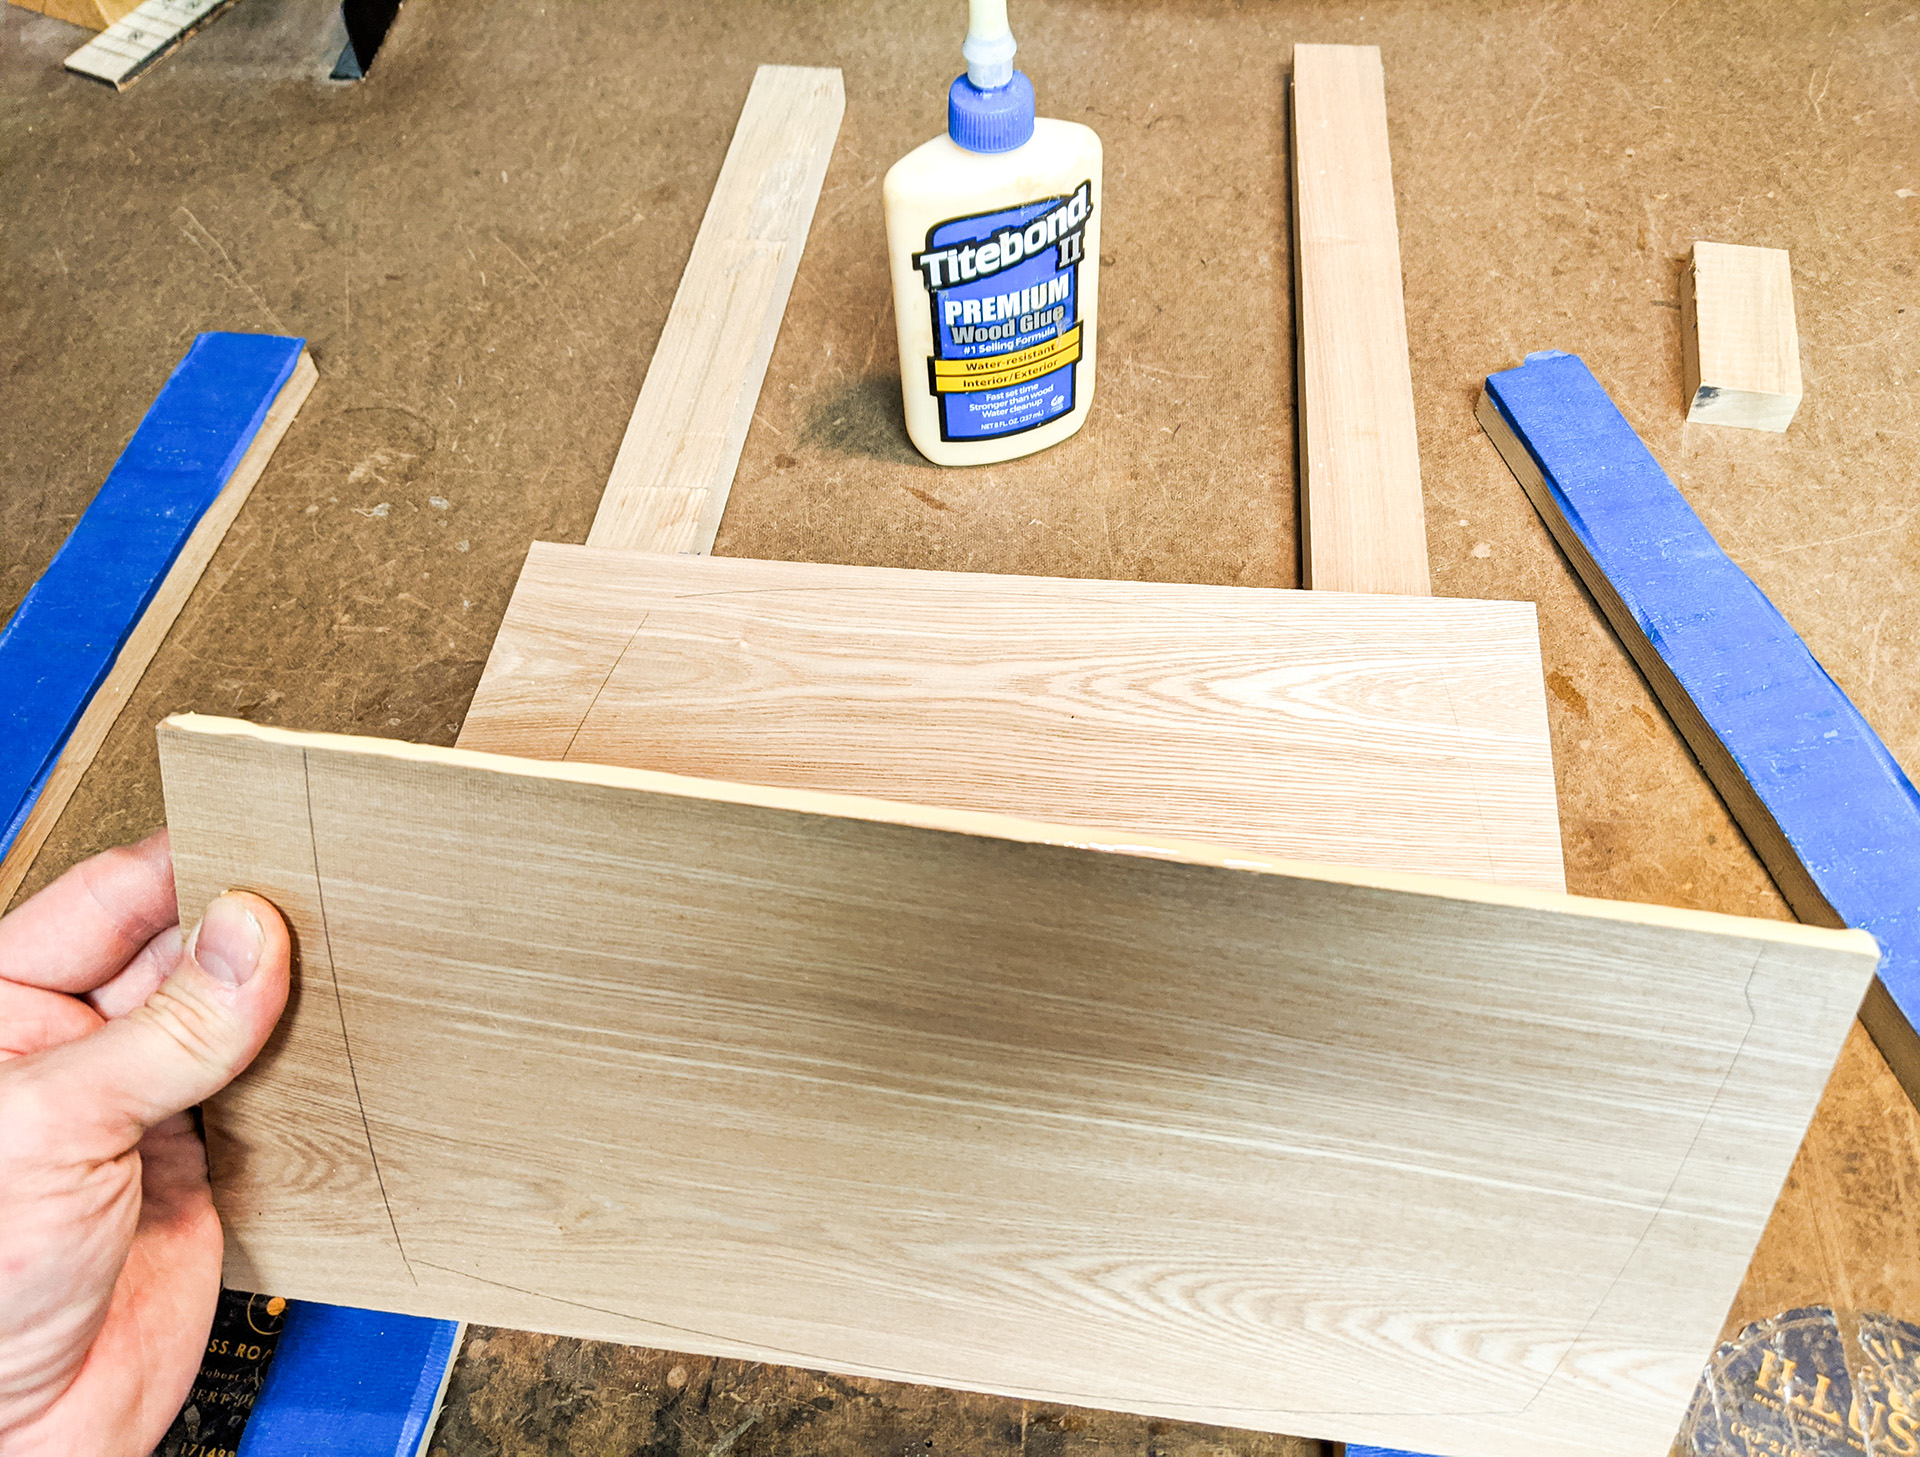
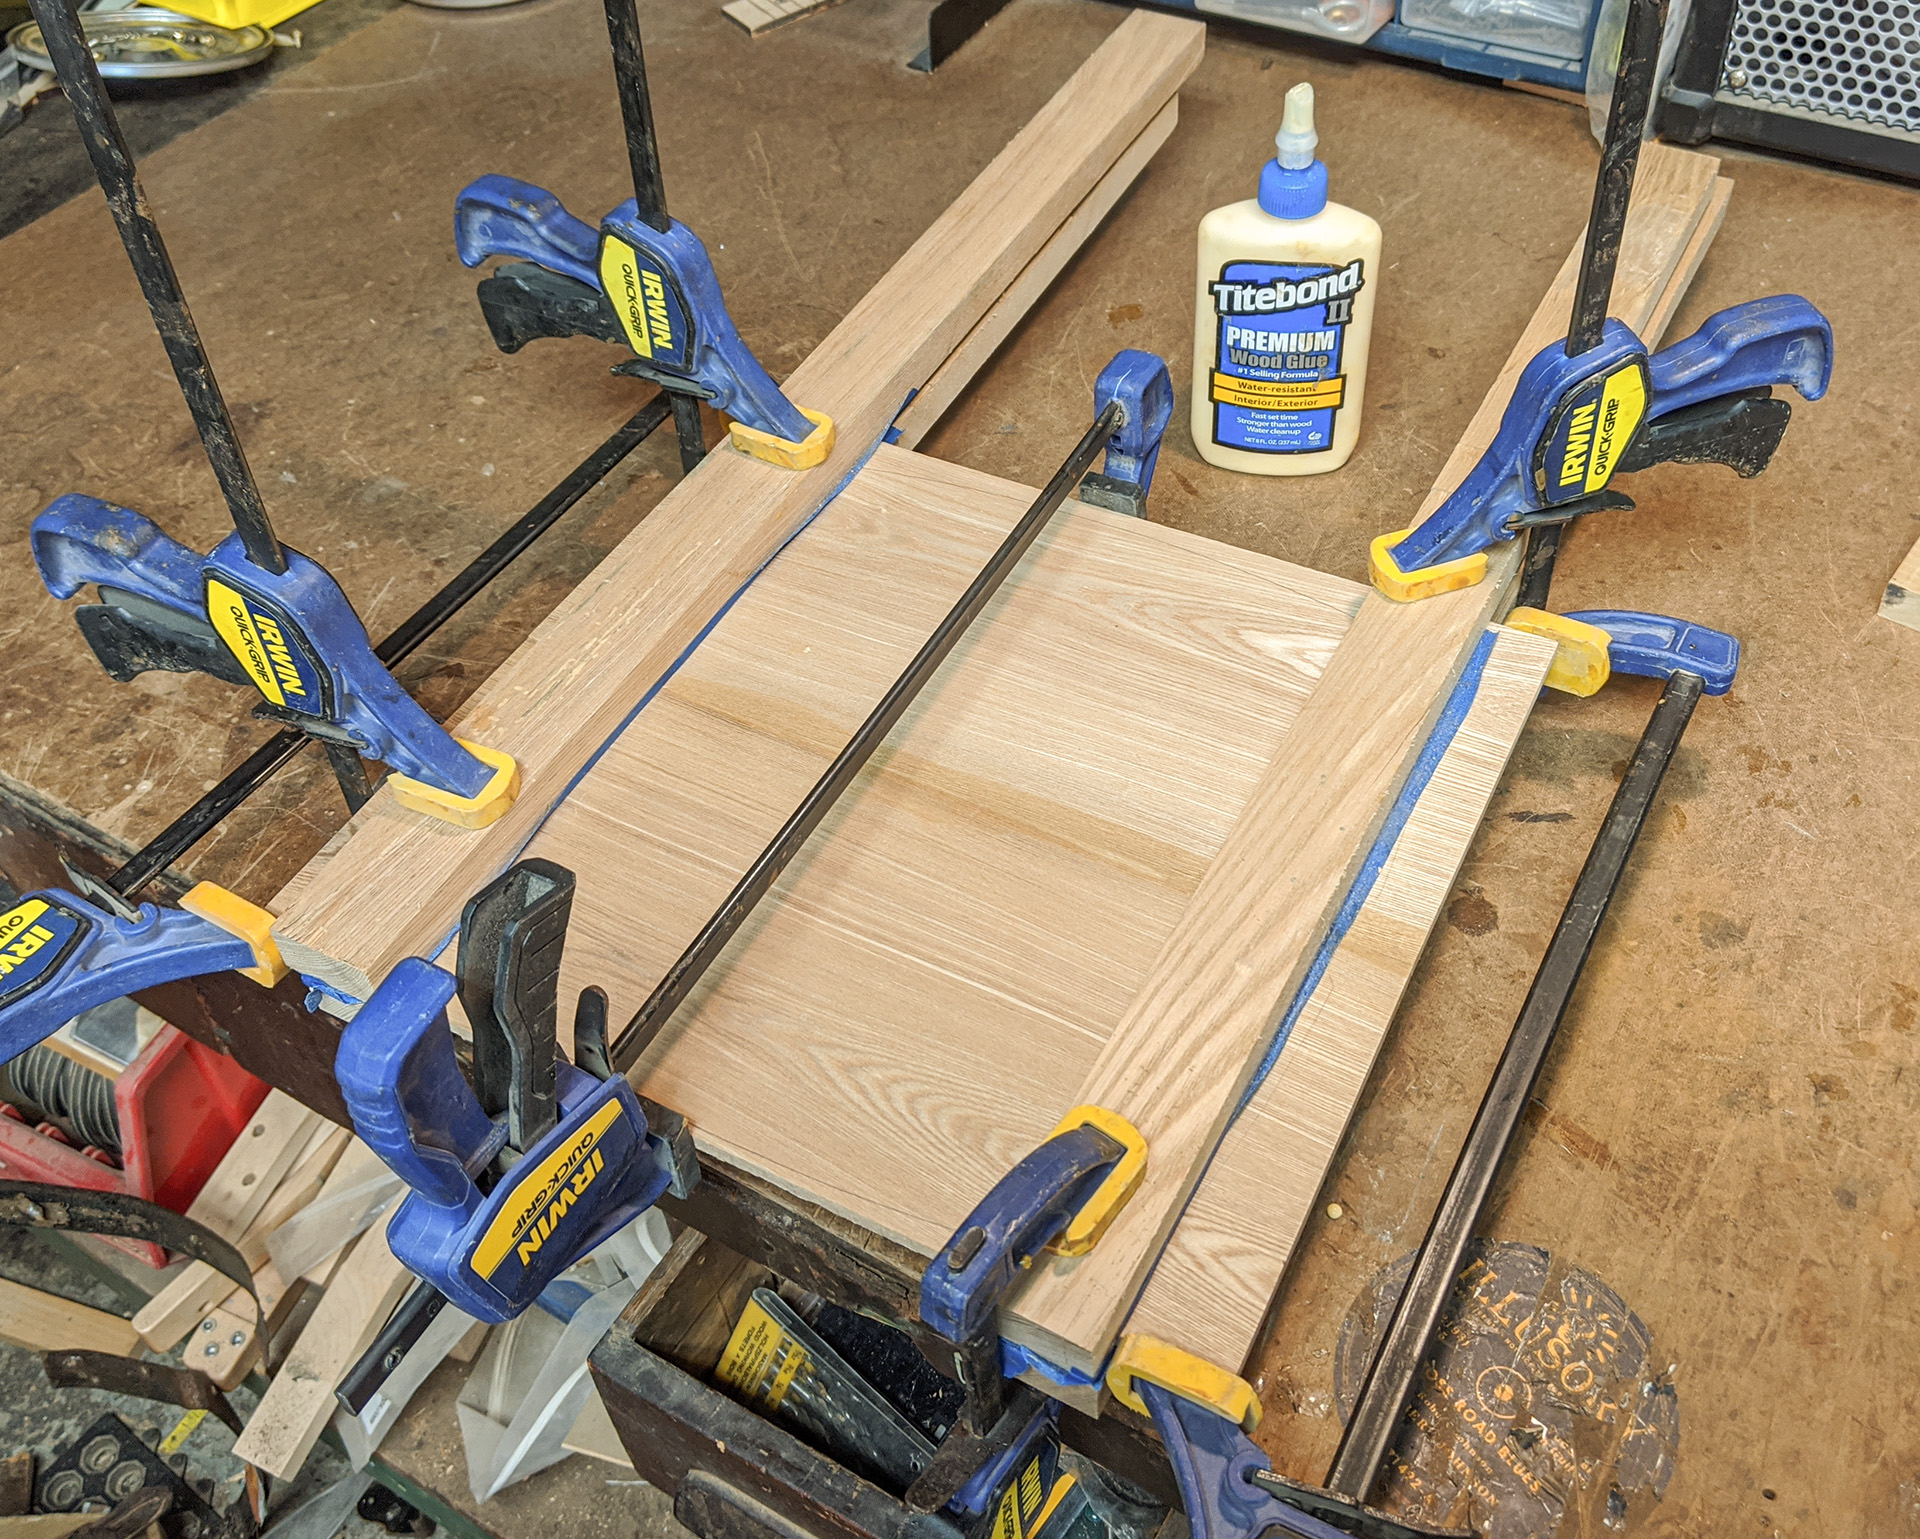
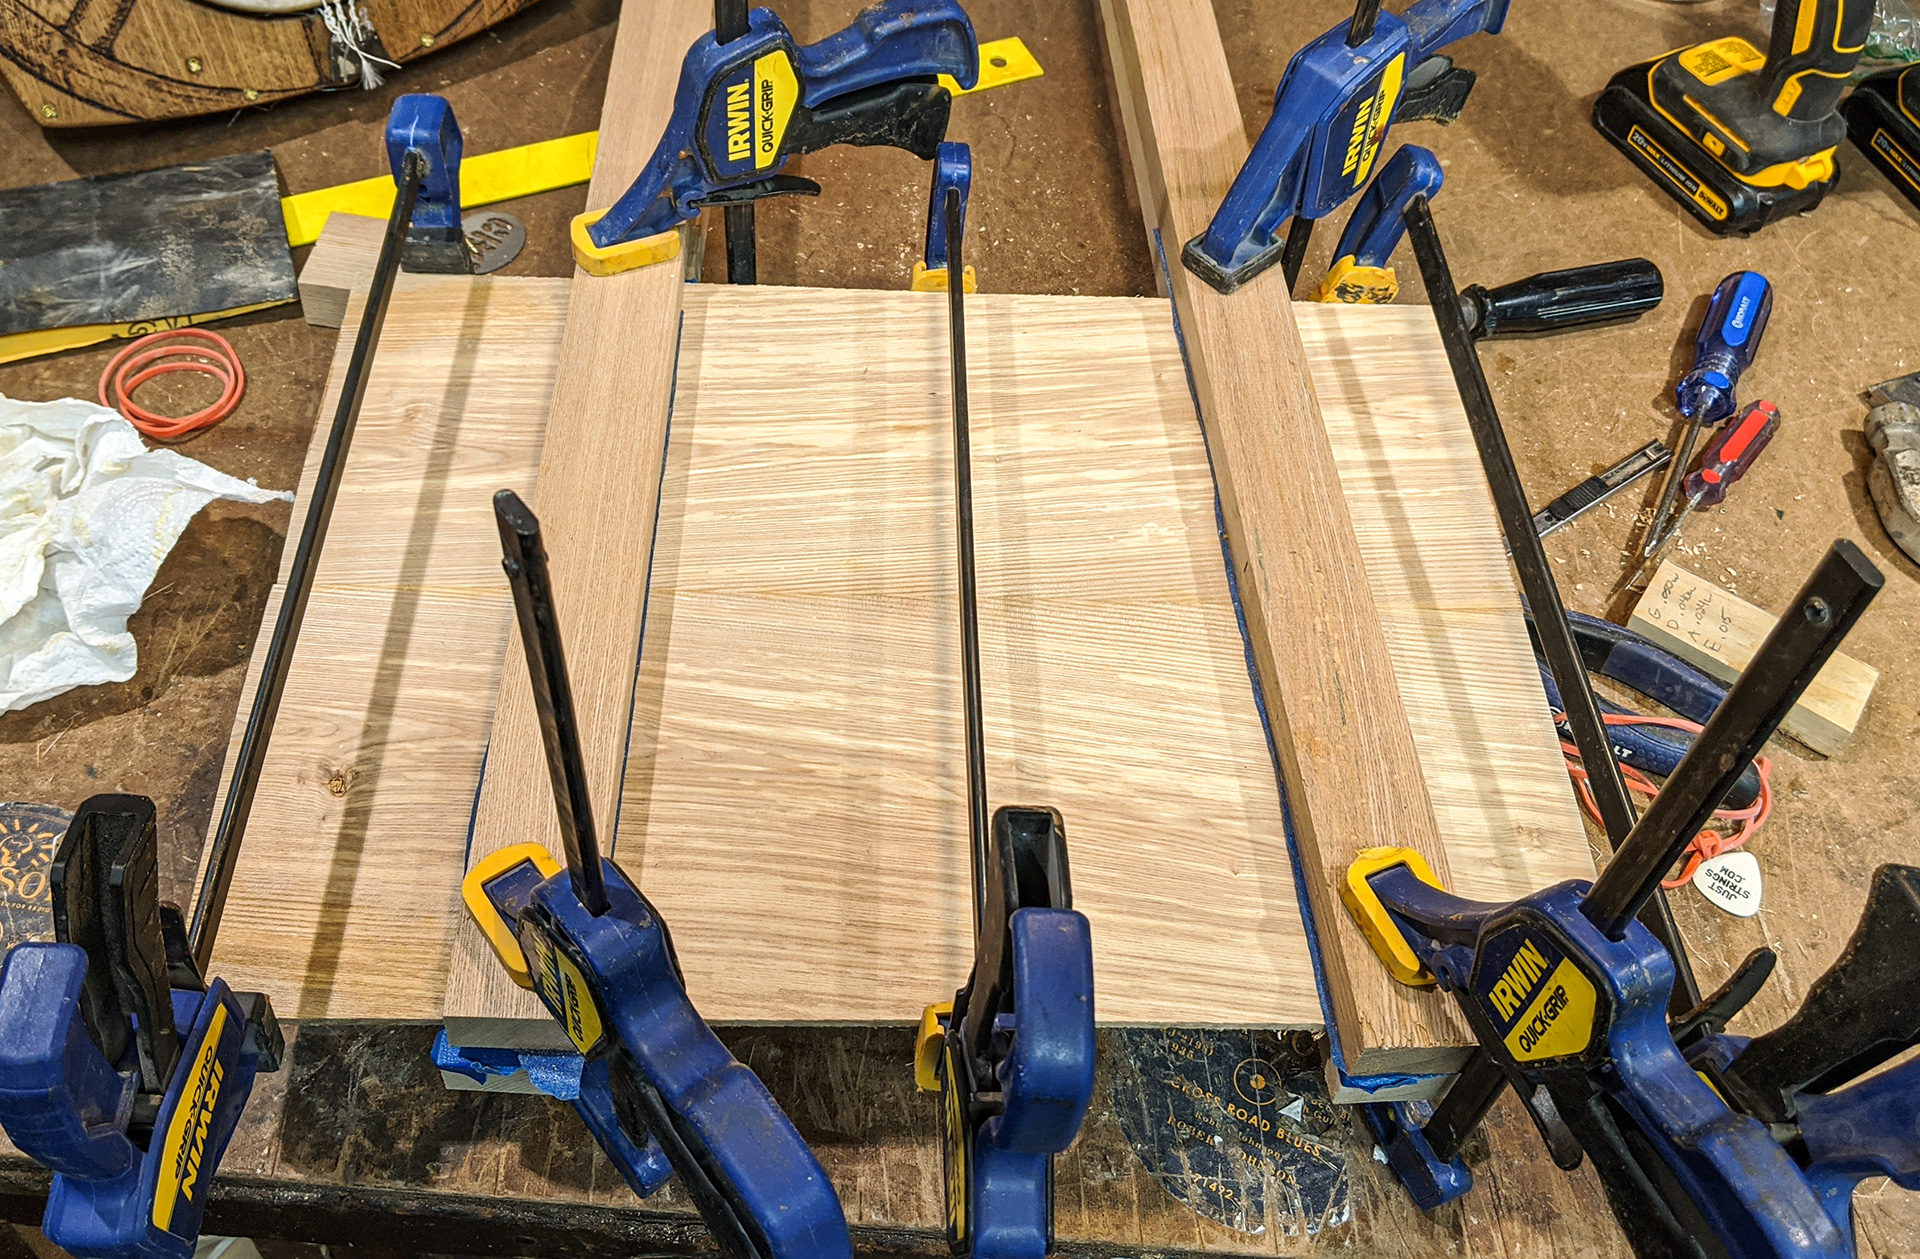
With my painter's tape-protected gluing rails in place, a little Titebond glue along the edge and we're ready to roll. |
|
|
|
|
|
The gluing rails hold the panels securely in place so that the horizontal pressure doesn't make them buckle. Once that glue sets, the instrument's top panel will be ready for sanding and shaping. Later in the build I'll be repeating this process for the back panel. |
|
|
|
|
|
I now decide to add some additional bracing inside the body. I'm not yet sure at this point exactly how I am going to mount the banjo head, but I know it will exert a lot of tension on the frame and I want to make sure it is properly supported. I use some more of the American chestnut for these braces. Getting the angles right so that they fit into place around my other bracing took a bit of doing. |
|
|
|
|
|
Three clamps per corner... |
|
|
|
|
|
Times four sides, and the braces are on their way. |
|
|
|
|
|
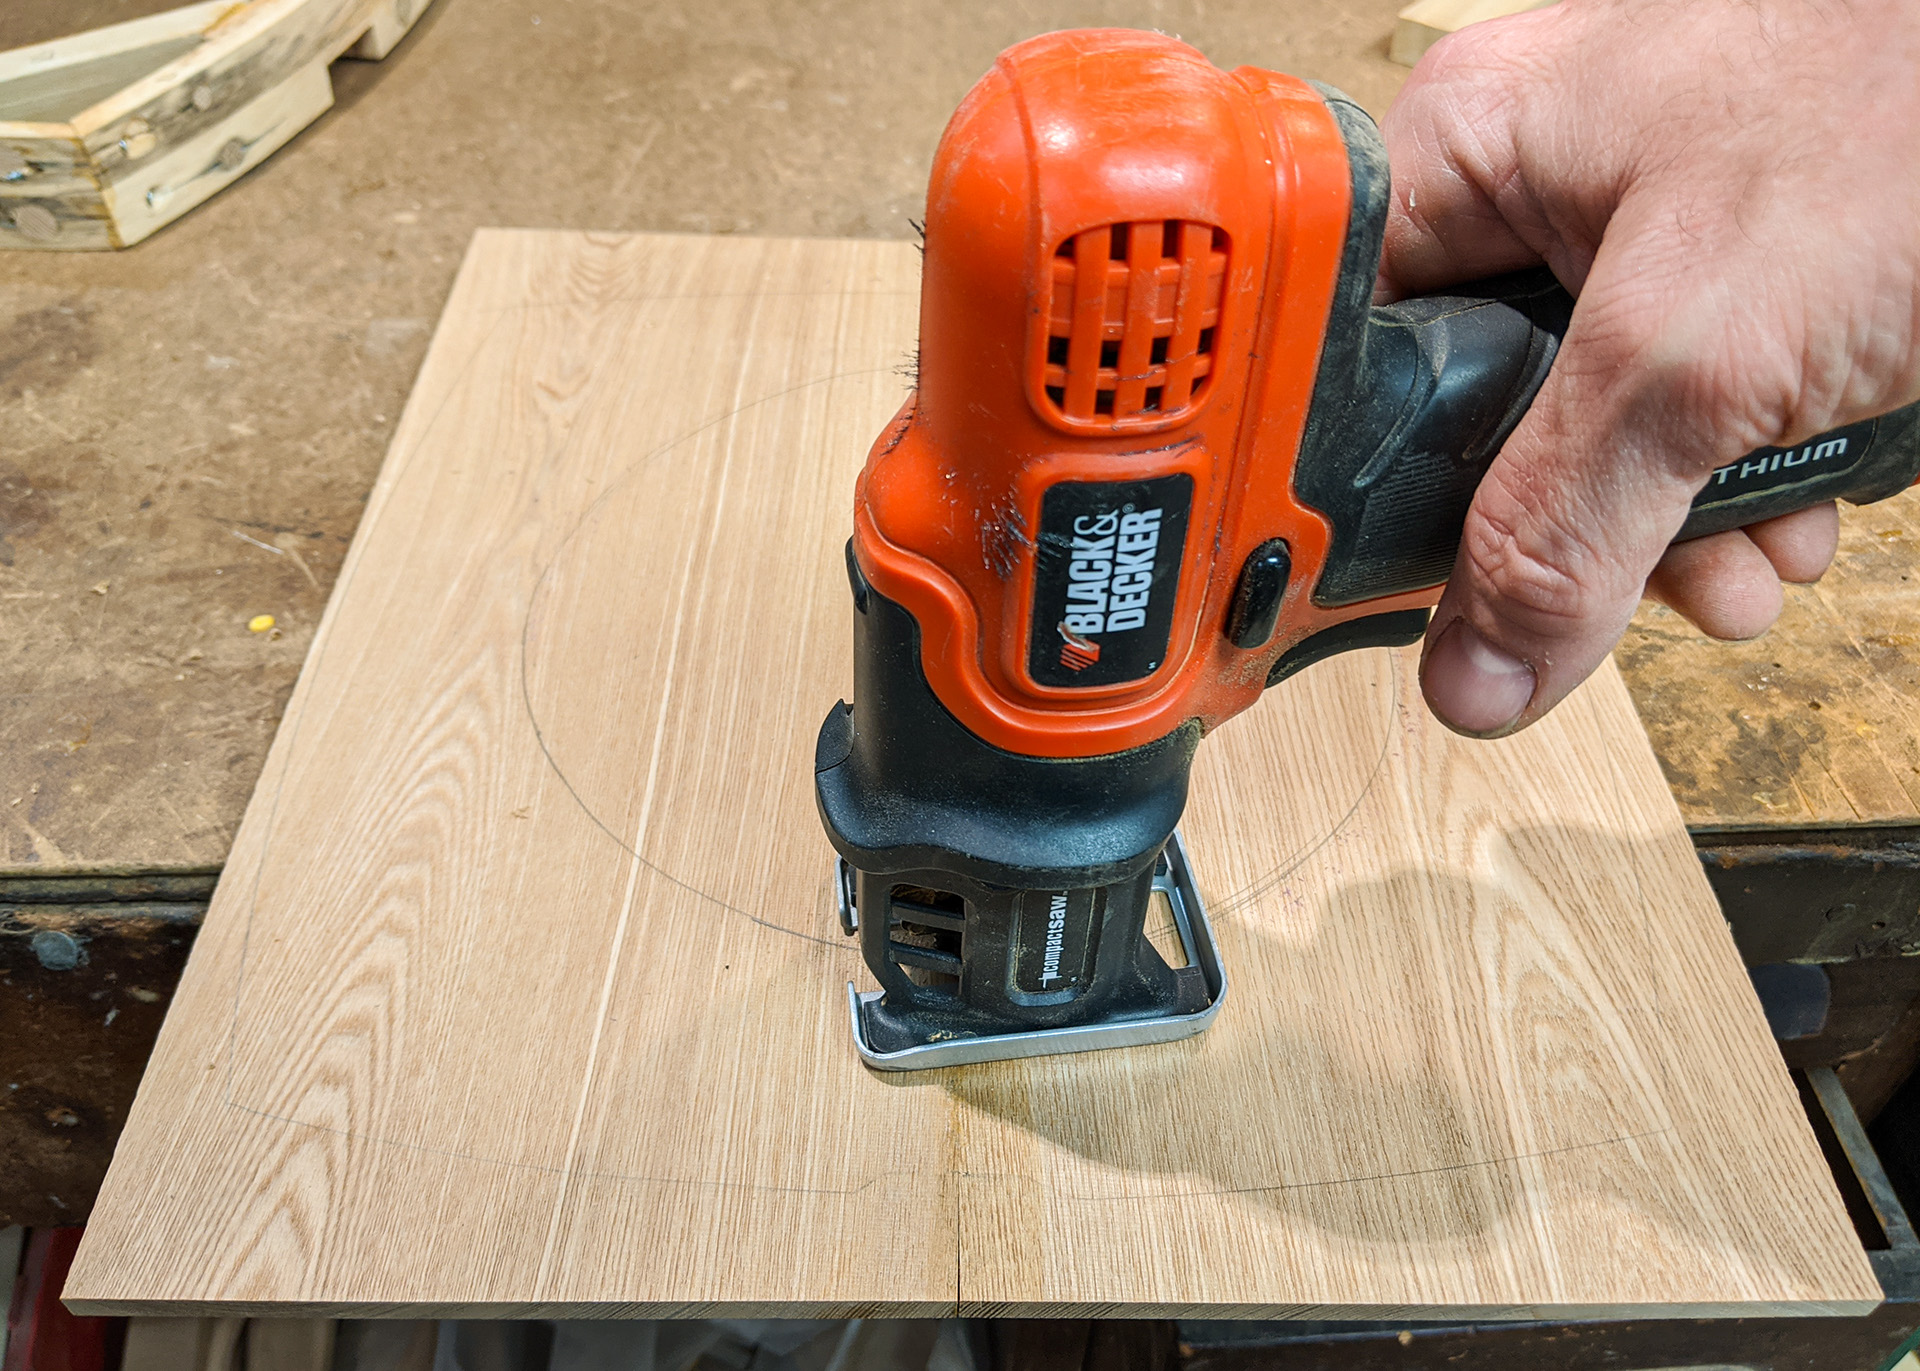
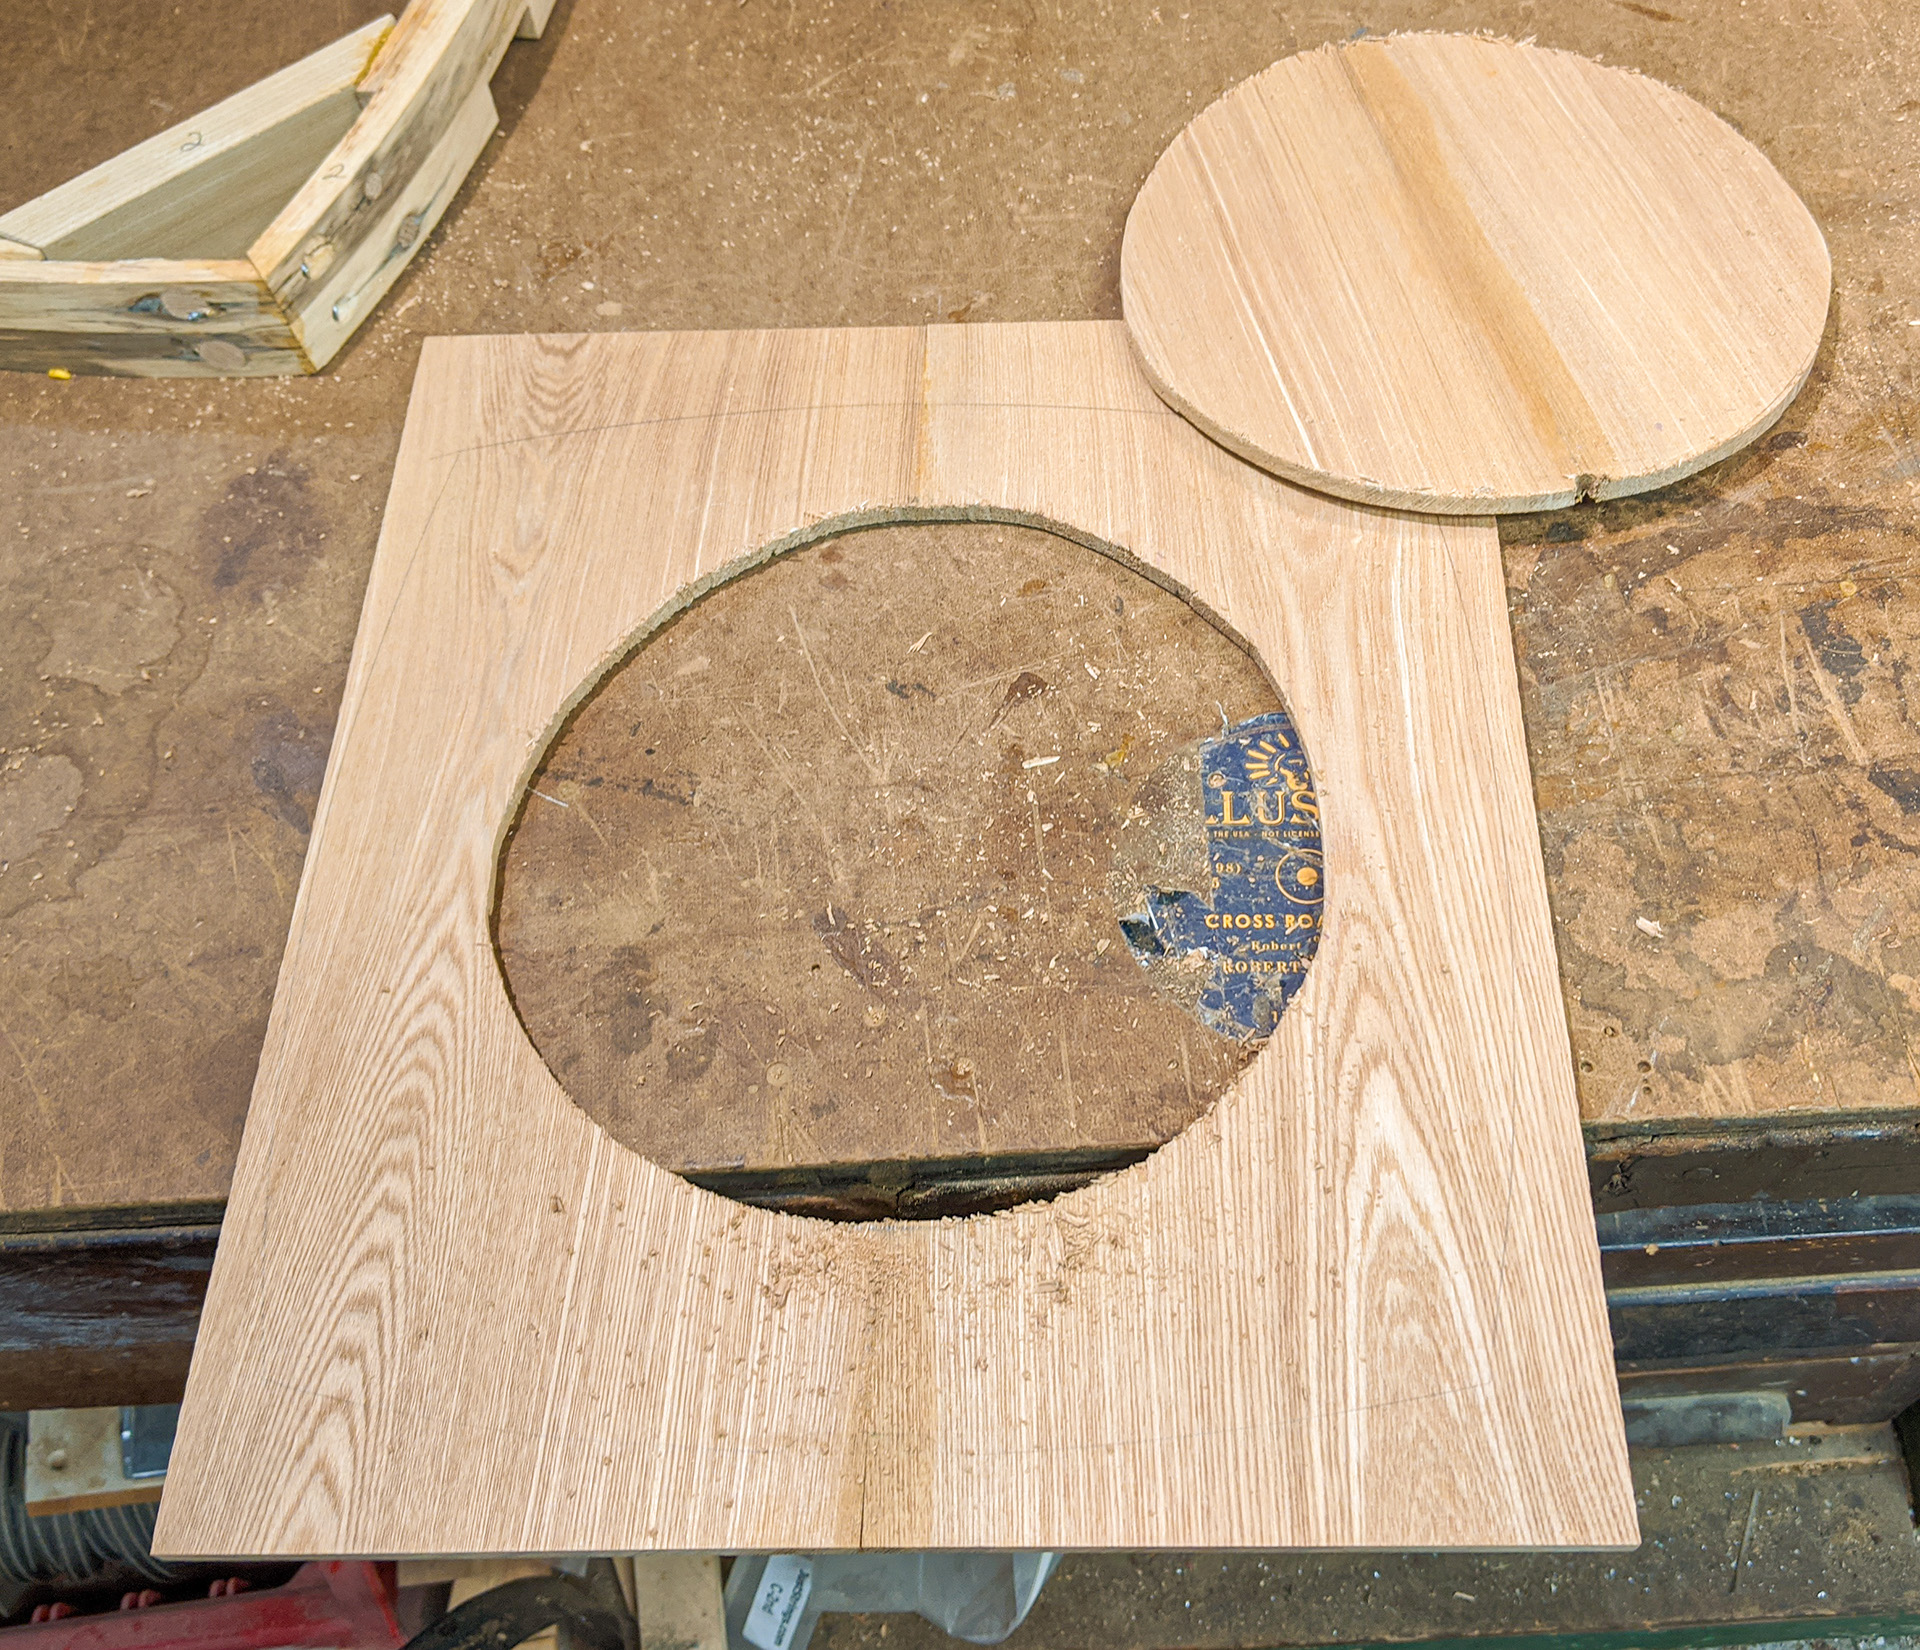
While the glue sets on those braces, I turn attention back to my sound board. If you look closely, you'll see I have traced the shape of the frame onto it, and now I am positioning my tone ring. For making the ring cutout, I used a little handheld jig saw. |
|
|
|
|
|
I launch into the cut and quickly discover my blade is very dull. One quick blade change later (and a burned thumb from where I grabbed the very hot blade while removing it)... |
|
|
|
|
|
And the job is done. A little time at the spindle sander cleans up the hole, and some additional sanding to smooth up the edges has it looking nice. |
|
|
|
|
|
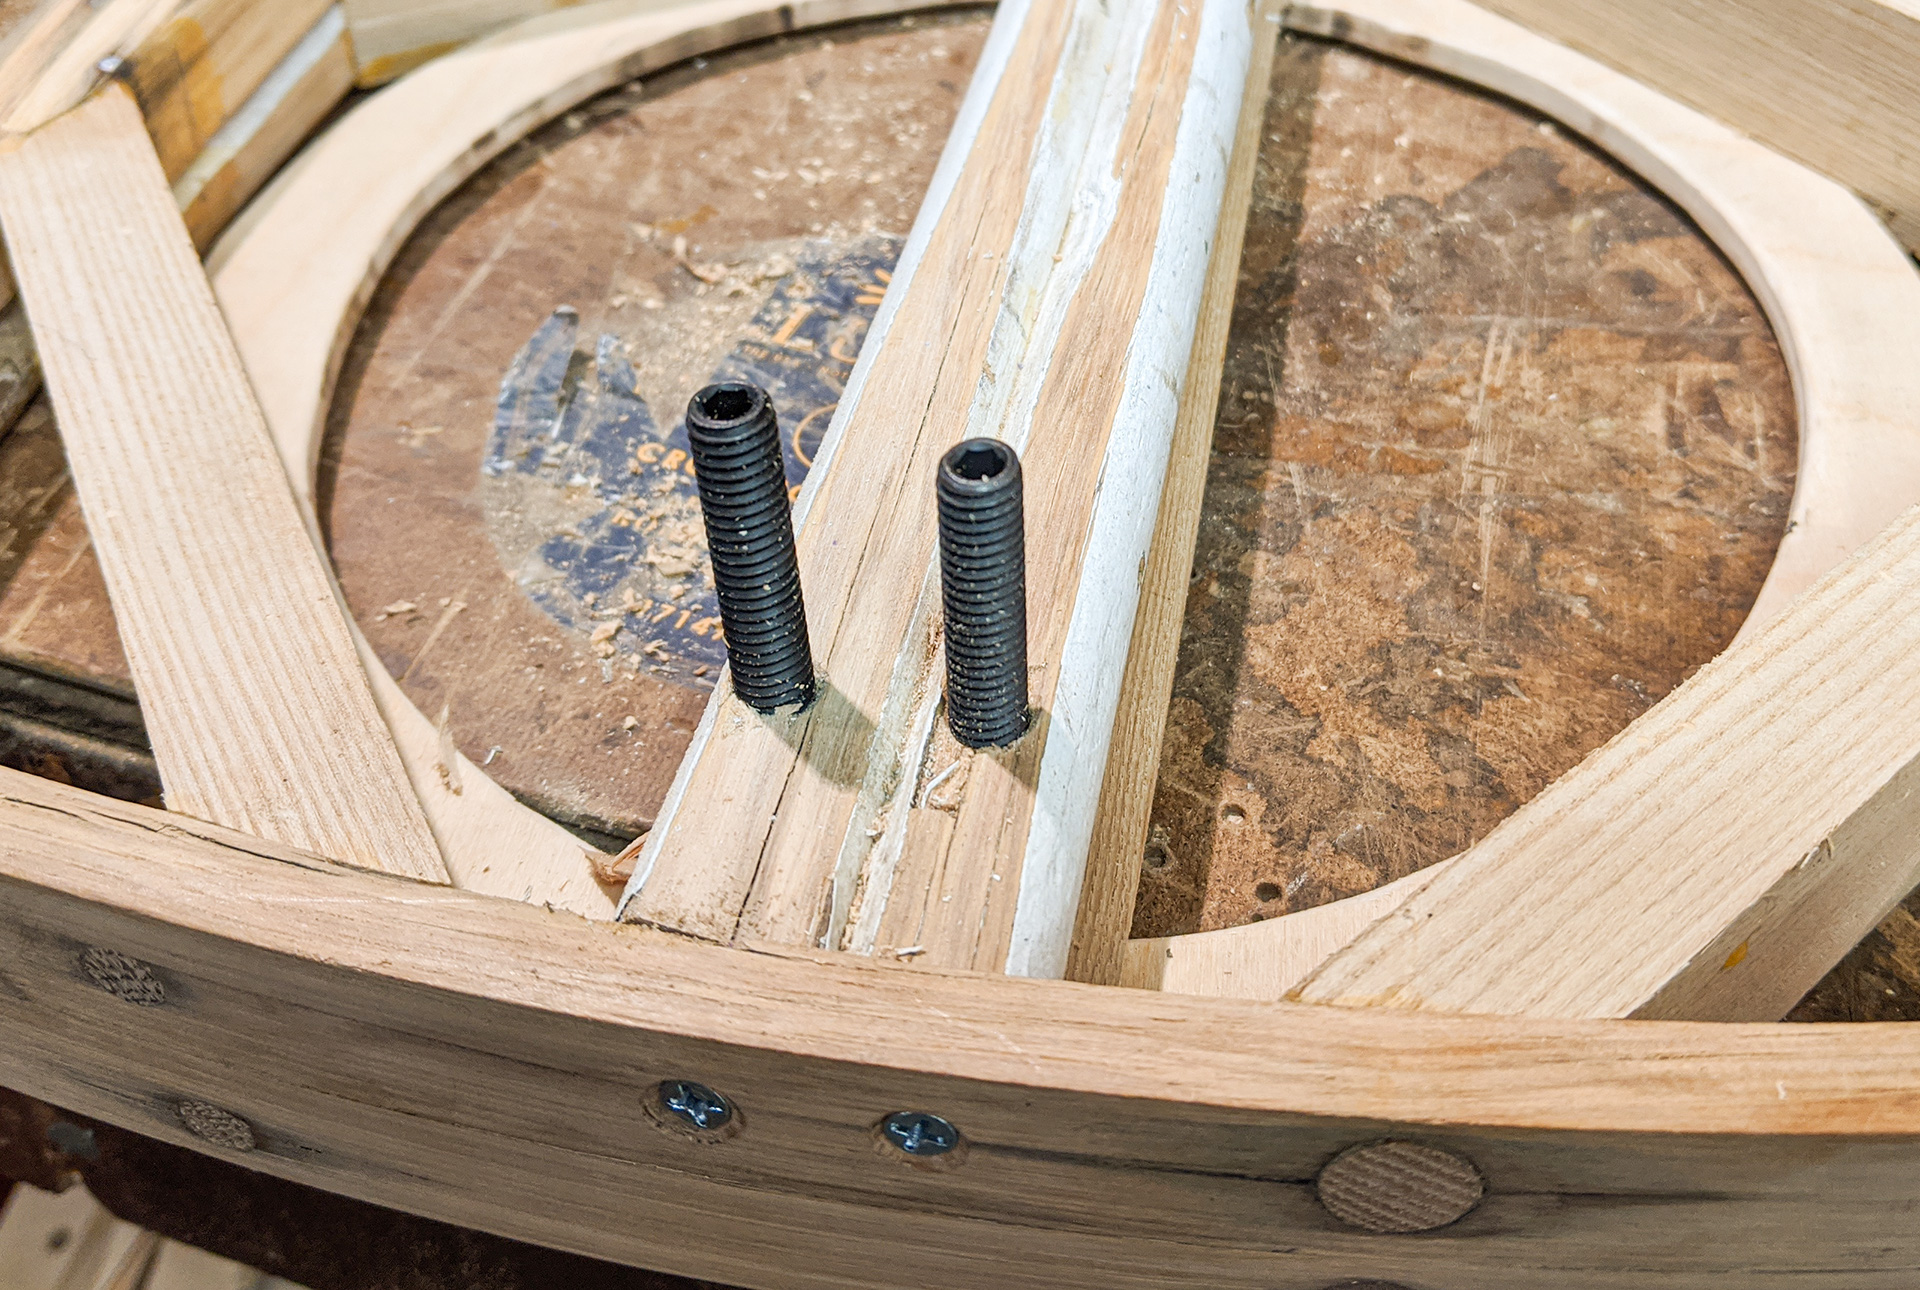
With the corner brace glue set up, now I begin working on mounting the neck brace into the frame. I am still not sure exactly what sort of wood those spokes were made from, but I strongly suspect it was hickory. At any rate, it was extremely hard. Of course I drilled pilot holes before putting in the screws. The first one went in just fine... |
|
|
|
|
|
But that second one took three tries. I twisted off two screw heads before smartening up, using a larger drill bit, and then an even larger one to pre-drill for the shank. Finally I got a screw in without it twisting off... but those other two are still in there as well. |
|
|
|
|
|
Though not shown, I also put two screws in up through the neck brace into the braced area where it passes through the front edge of the frame. here the neck brace is shown firmly mounted in place |
|
|
|
|
|
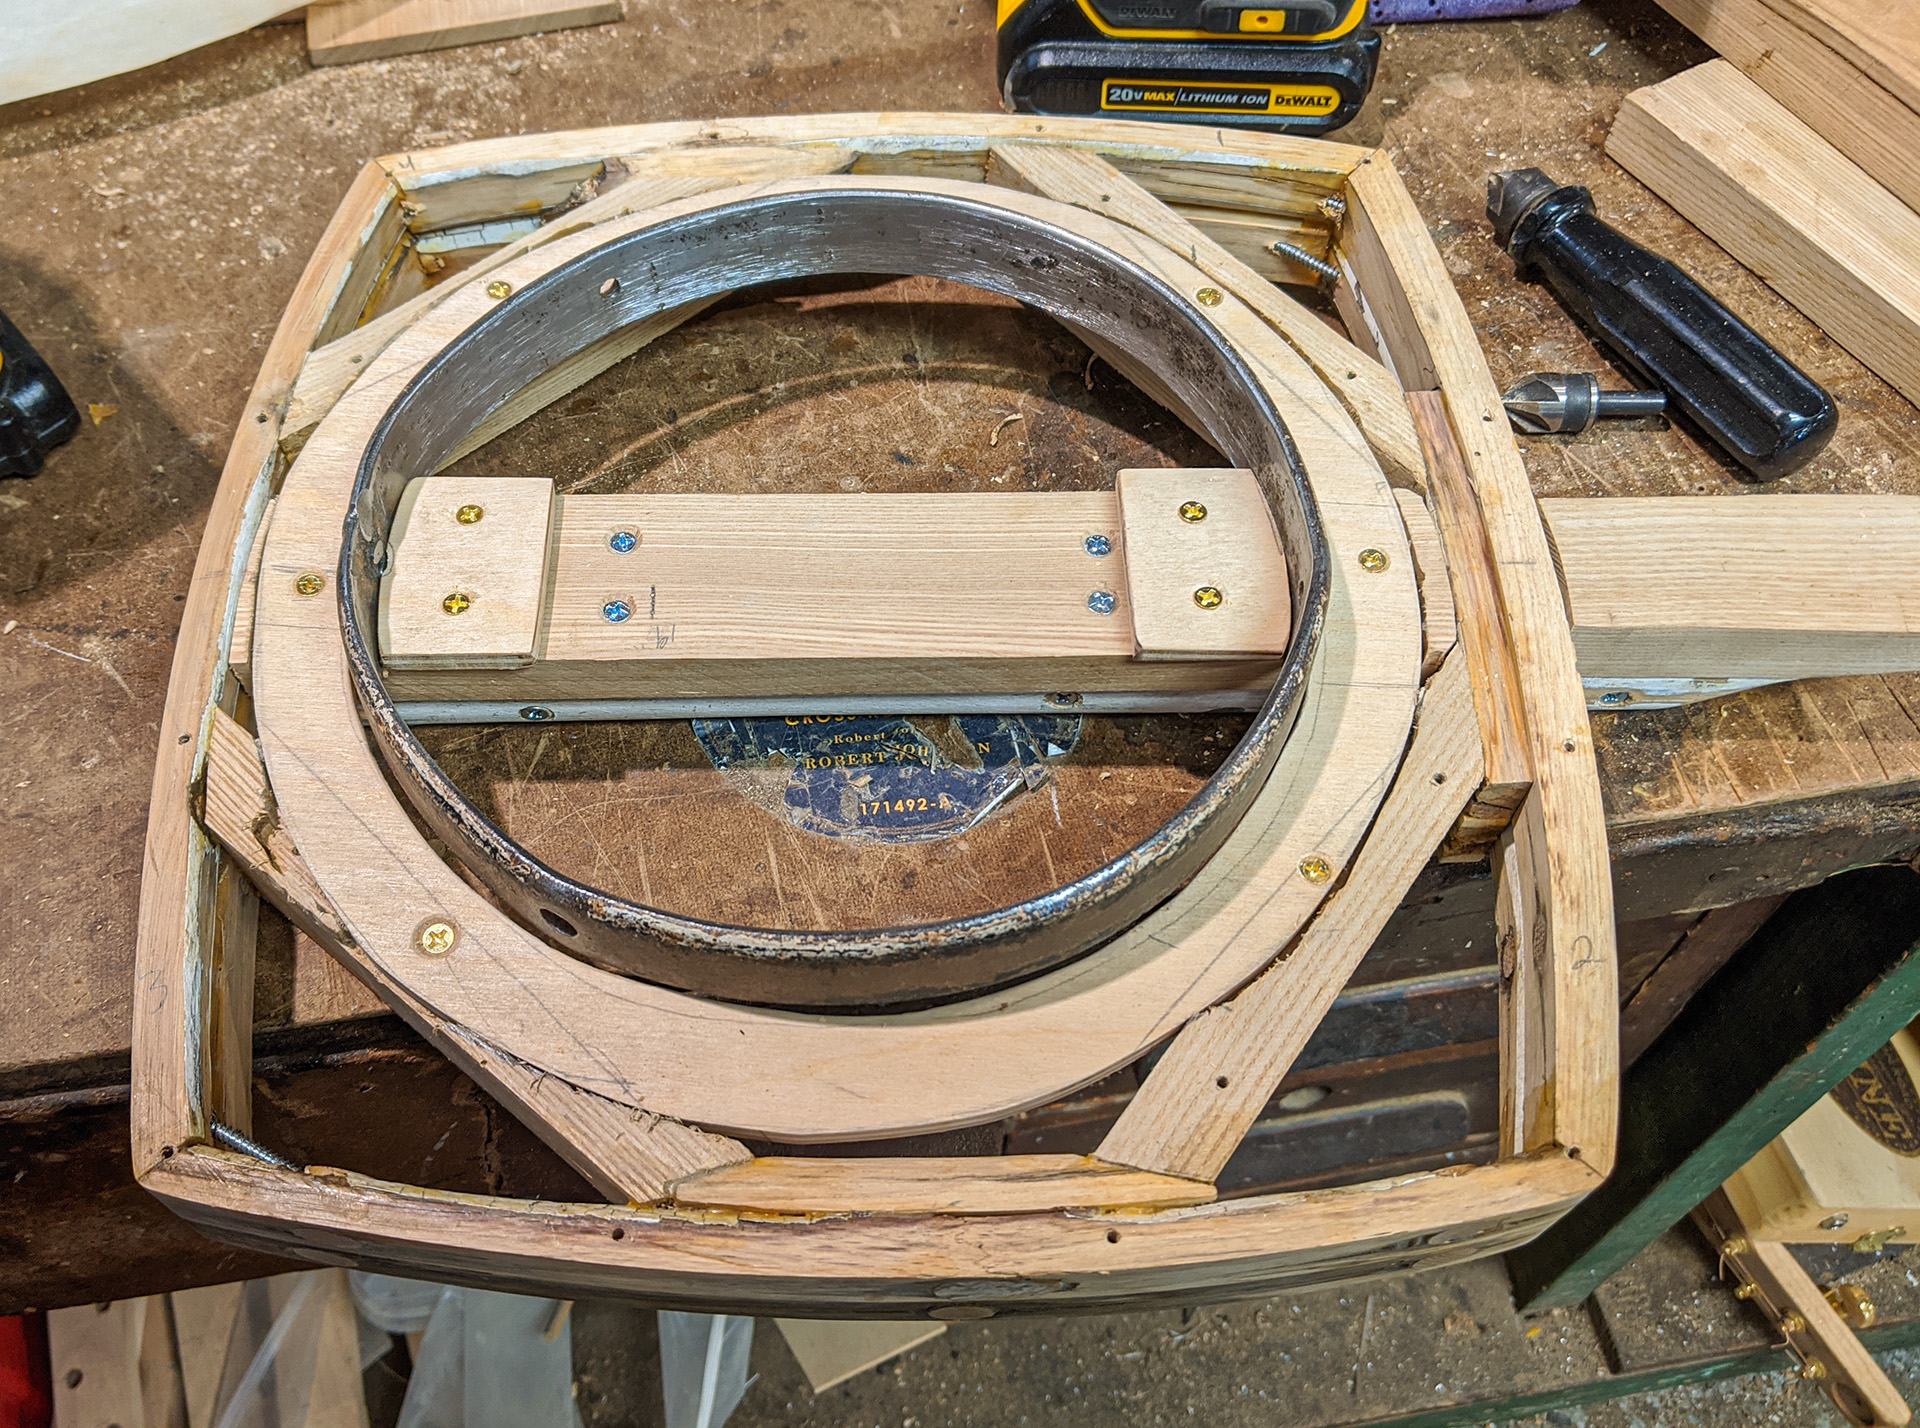
At this point, I am still not sure whether I'll be using steel or nylon strings on this banjo. Just to be sure the frame is strong enough, I chose to glue in another brace, also milled from the American chestnut wood. This brace will also hold the banjo's steel tone ring at the correct height. |
|
|
|
|
|
The brace is glued into place, and then screws inserted down into the original brace made from the spokes. |
|
|
|
|
|
I now route in a channel for the tone ring to rest in. I wasn't sure if this was absolutely necessary - remember I'd never built anything like this and was making all of this up as I went - but in the end it ended up working well. |
|
|
|
|
|
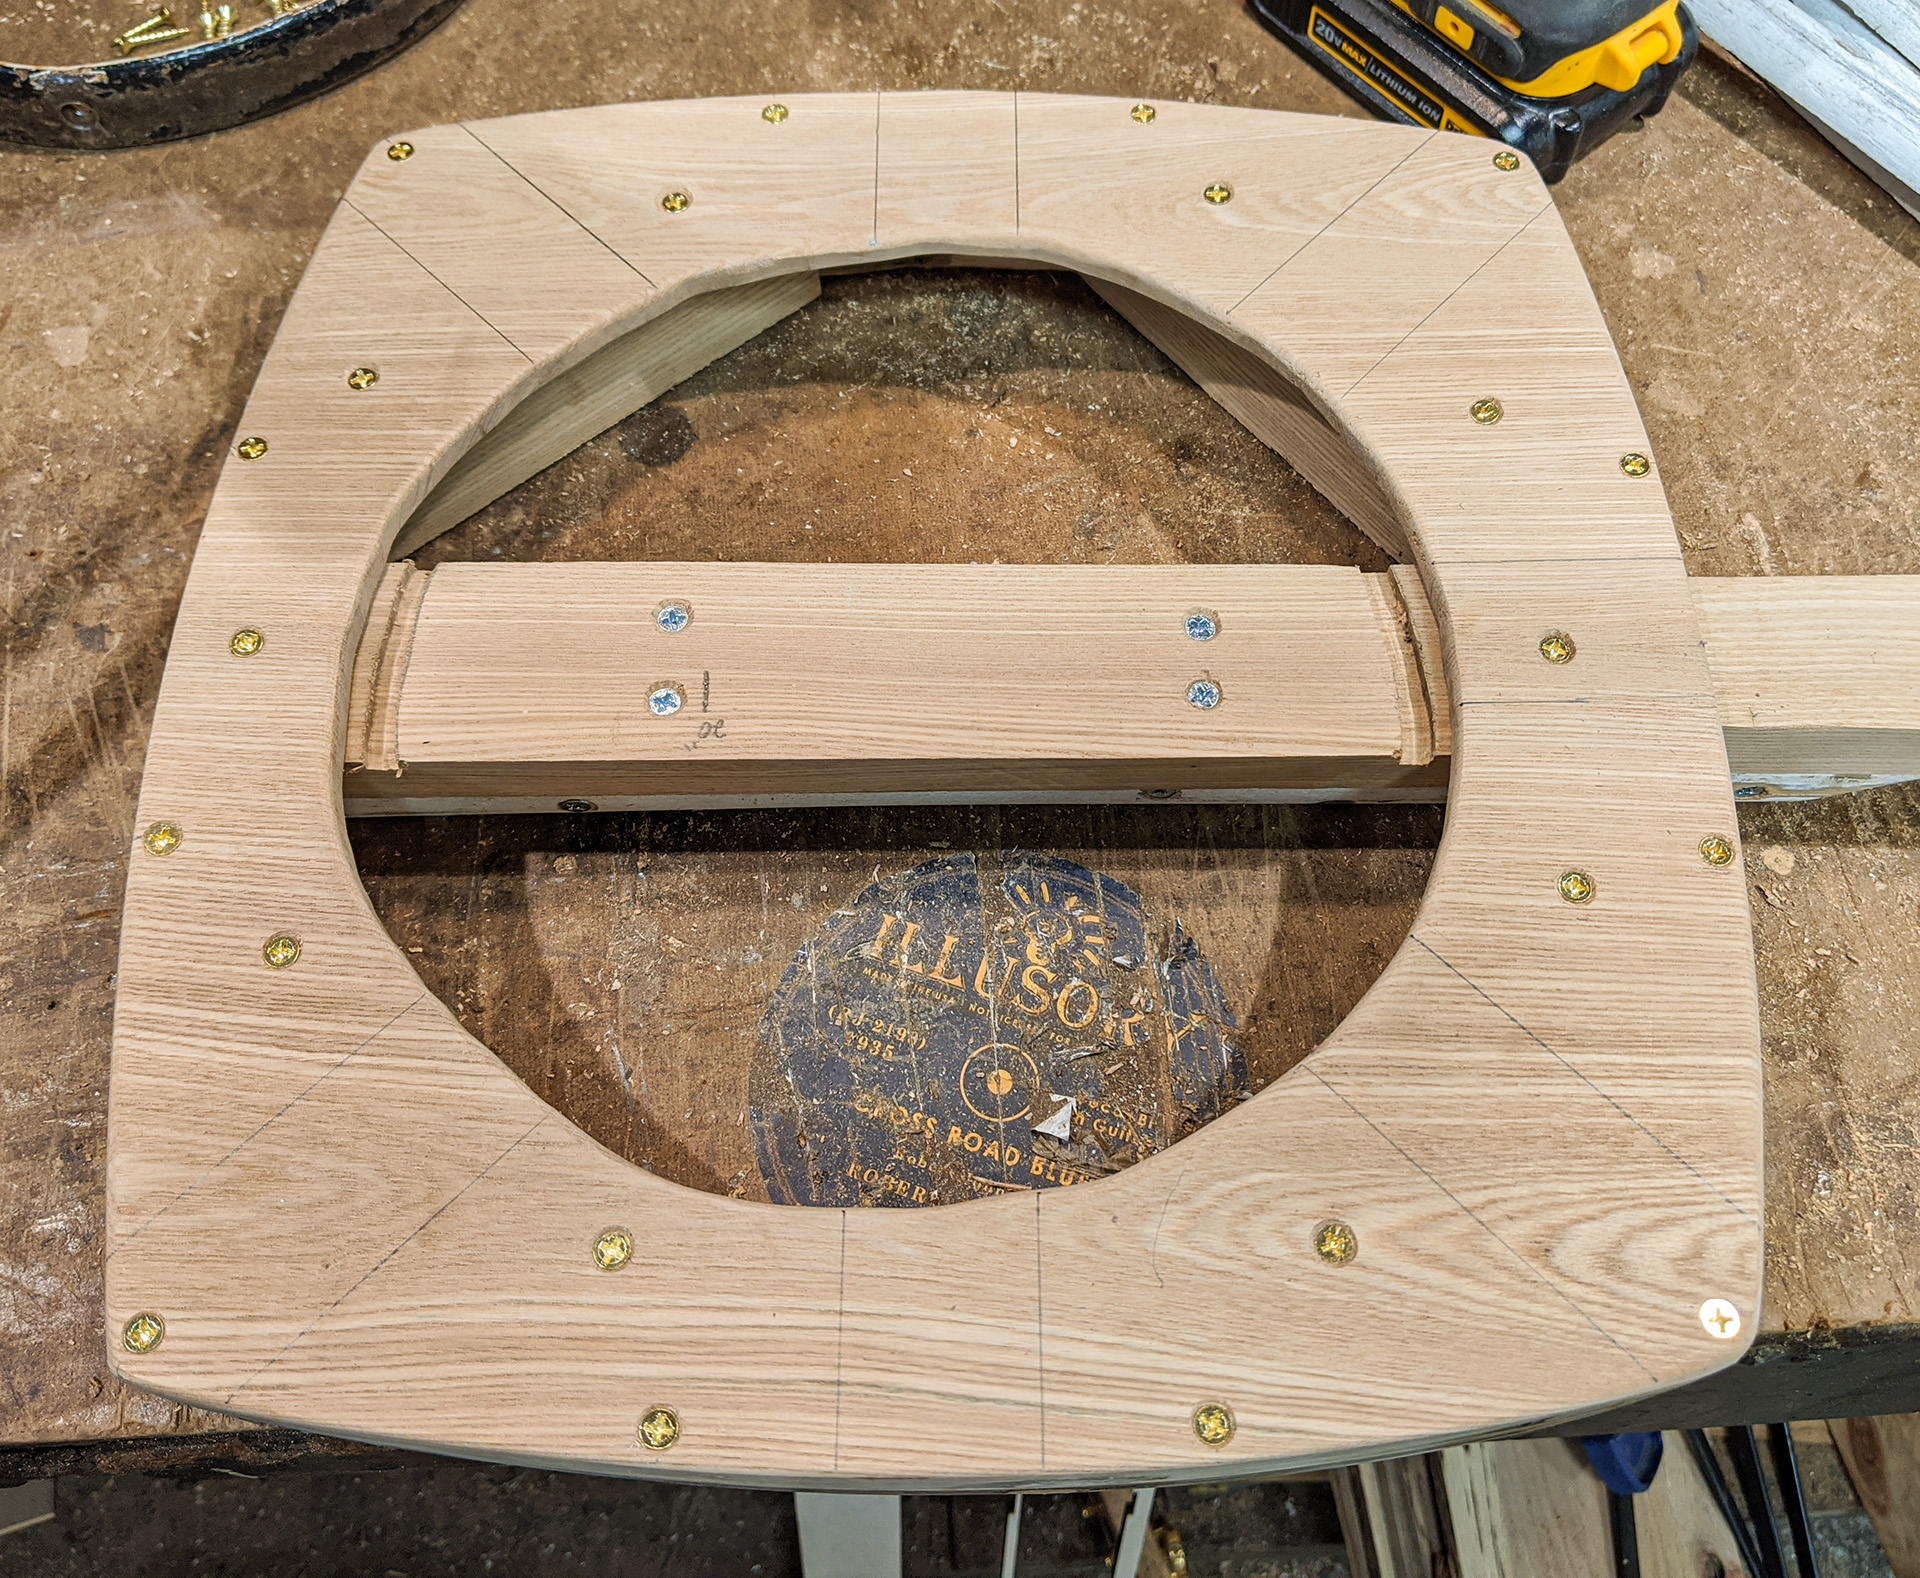
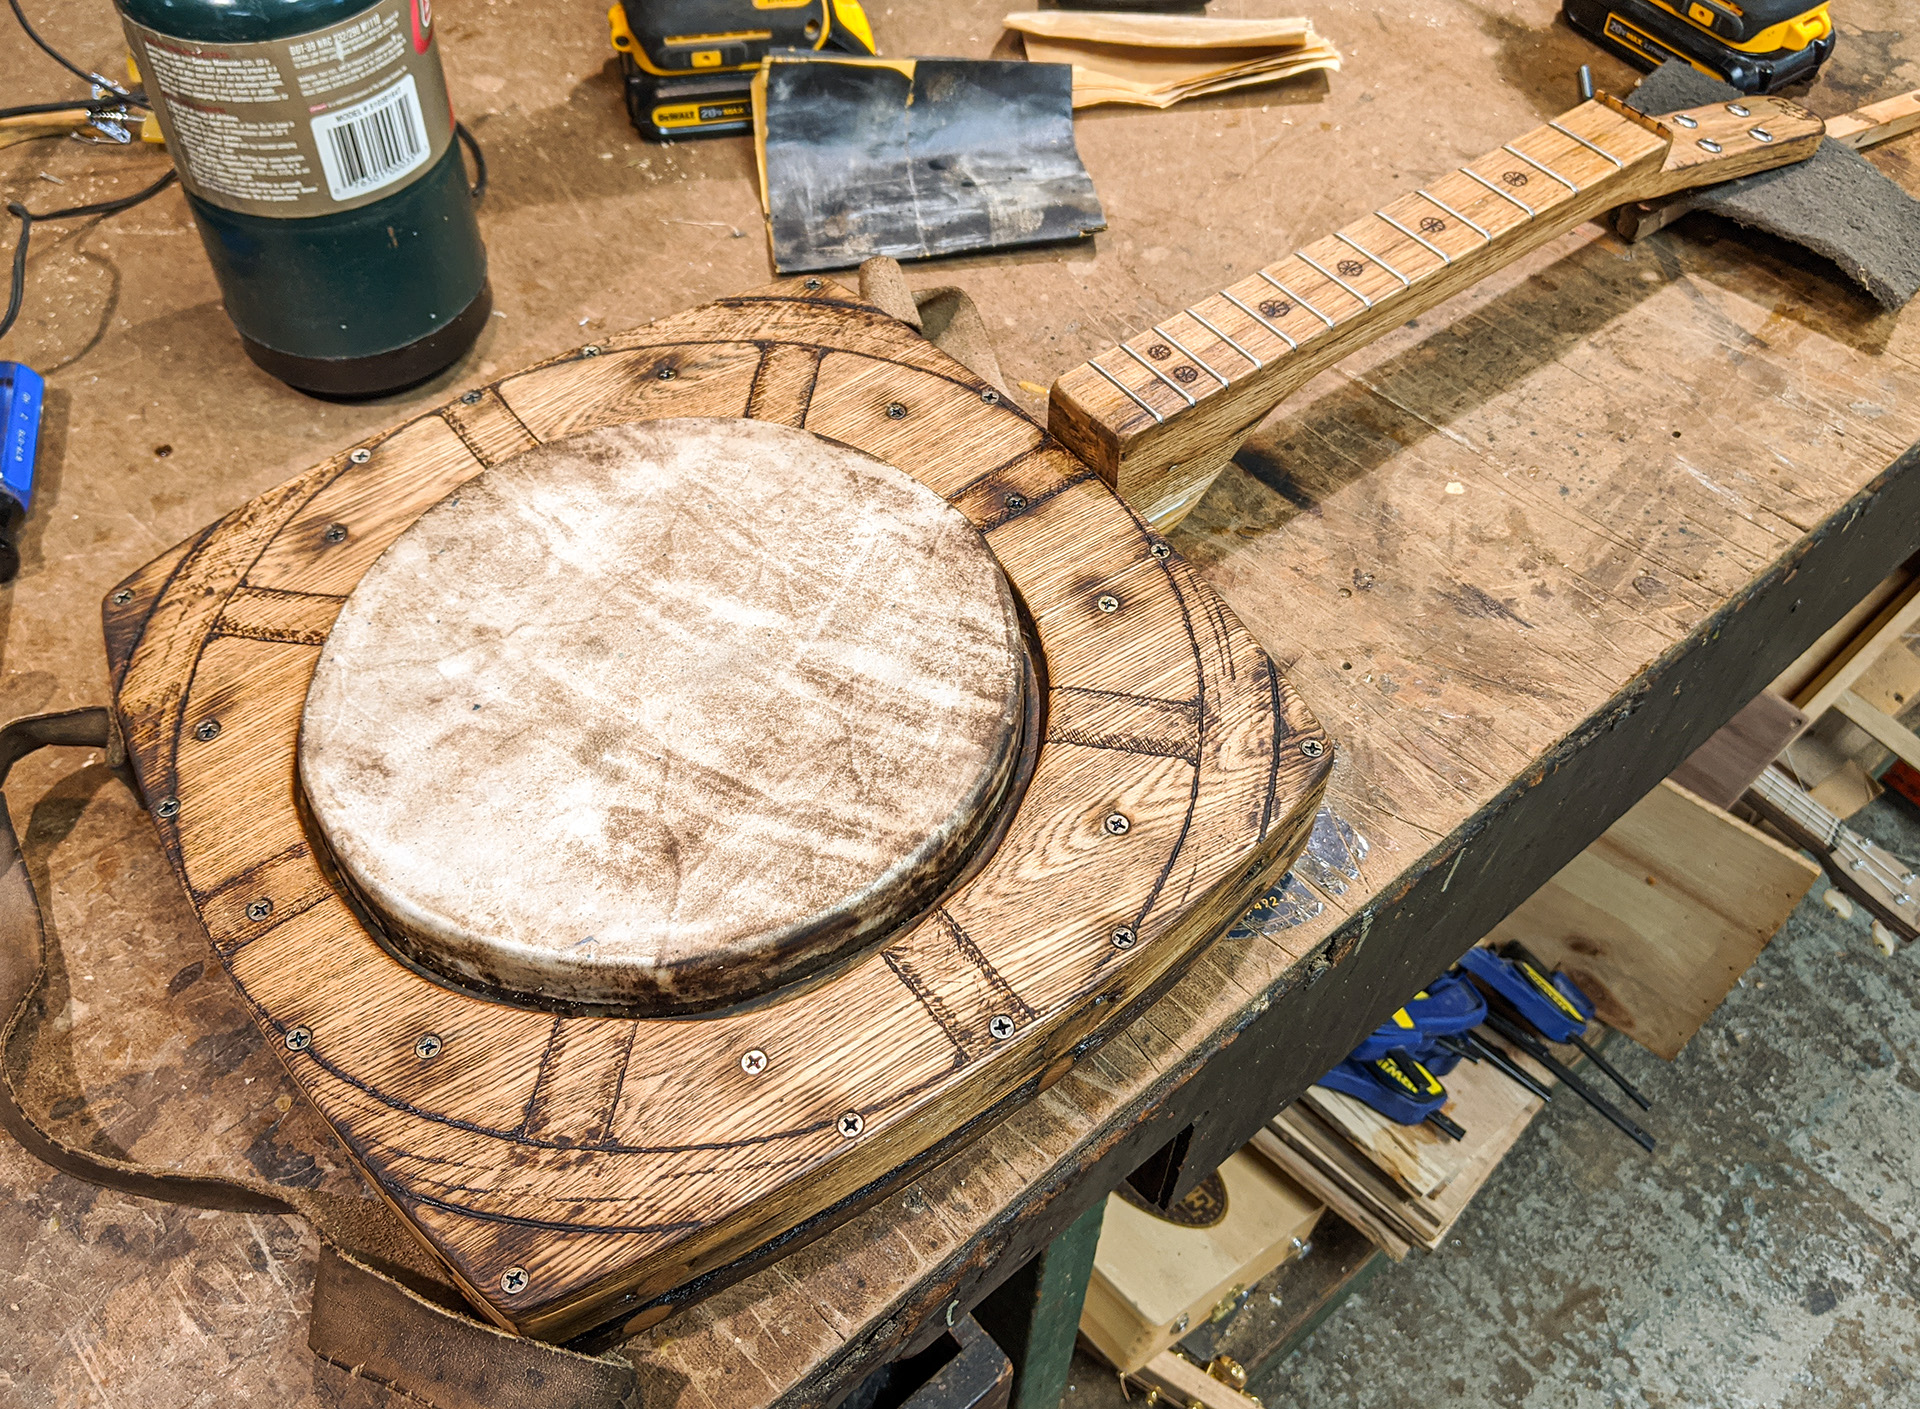
Here, my top panel has been shaped and sanded in preparation for mounting. I have used a pencil to mark all of the interior parts of my body frame onto the underside of my top panel, in preparation for placing the screws that will mount it to the frame. |
|
|
|
|
|
Here I am preparing to glue together the resawn spoke slats that will form the neck of my instrument. All of them have been planed and sanded in preparation for laminating. |
|
|
|
|
|
Once again, Titebond II takes center stage as I put a nice layer of glue in between all of the slats, |
|
|
|
|
|
And then I put the clams to it. The more pressure the better when doing this sort of laminating. |
|
|
|
|
|
While the neck glue sets, I proceed with fitting the top panel to the frame, measuring and placing the mounting screws as evenly as I can. You may wonder why I used so many screws. Well, by this point I have realized that my top panel isn't really going to serve as a true "sound board" for the instrument, as it won't be free to vibrate. The resonance of the banjo will come mostly from the hide head stretched over the tone ring. As such, these screws will serve a dual purpose, to fasten down the top panel AND to help provide clamping pressure on the hide head to keep it nice and taut. The inner ring of screws I am drilling for here go down into the corner braces and neck brace. |
|
|
|
|
|
I countersink each hole so the flat-headed screws will be slightly below the surface of the soundboard, and begin putting them in. Though I am using a power driver, I am very careful to not strip out any of the screw holes - for most of them I get them down mostly tight and then finish up with a hand screwdriver, just to make sure I don't over-tighten. |
|
|
|
|
|
|
|
|
Here, my inner ring of screws are all in place. The screws I put down through the neck brace are also visible, as are both of the tone ring notches I routed in. |
|
|
|
|
|
Then it's over to the edge sander to do the final fitting of the top panel to the frame. After the edge sander, I go over to the sanding table and finish up by hand with 220-grit sandpaper. |
|
|
|
|
|
When finished, the top panel fits very smoothly with the sides, with no overhangs or rough edges. With the tone ring dry-fitted into place, it's starting to look like a thing! |
|
|
|
|
|
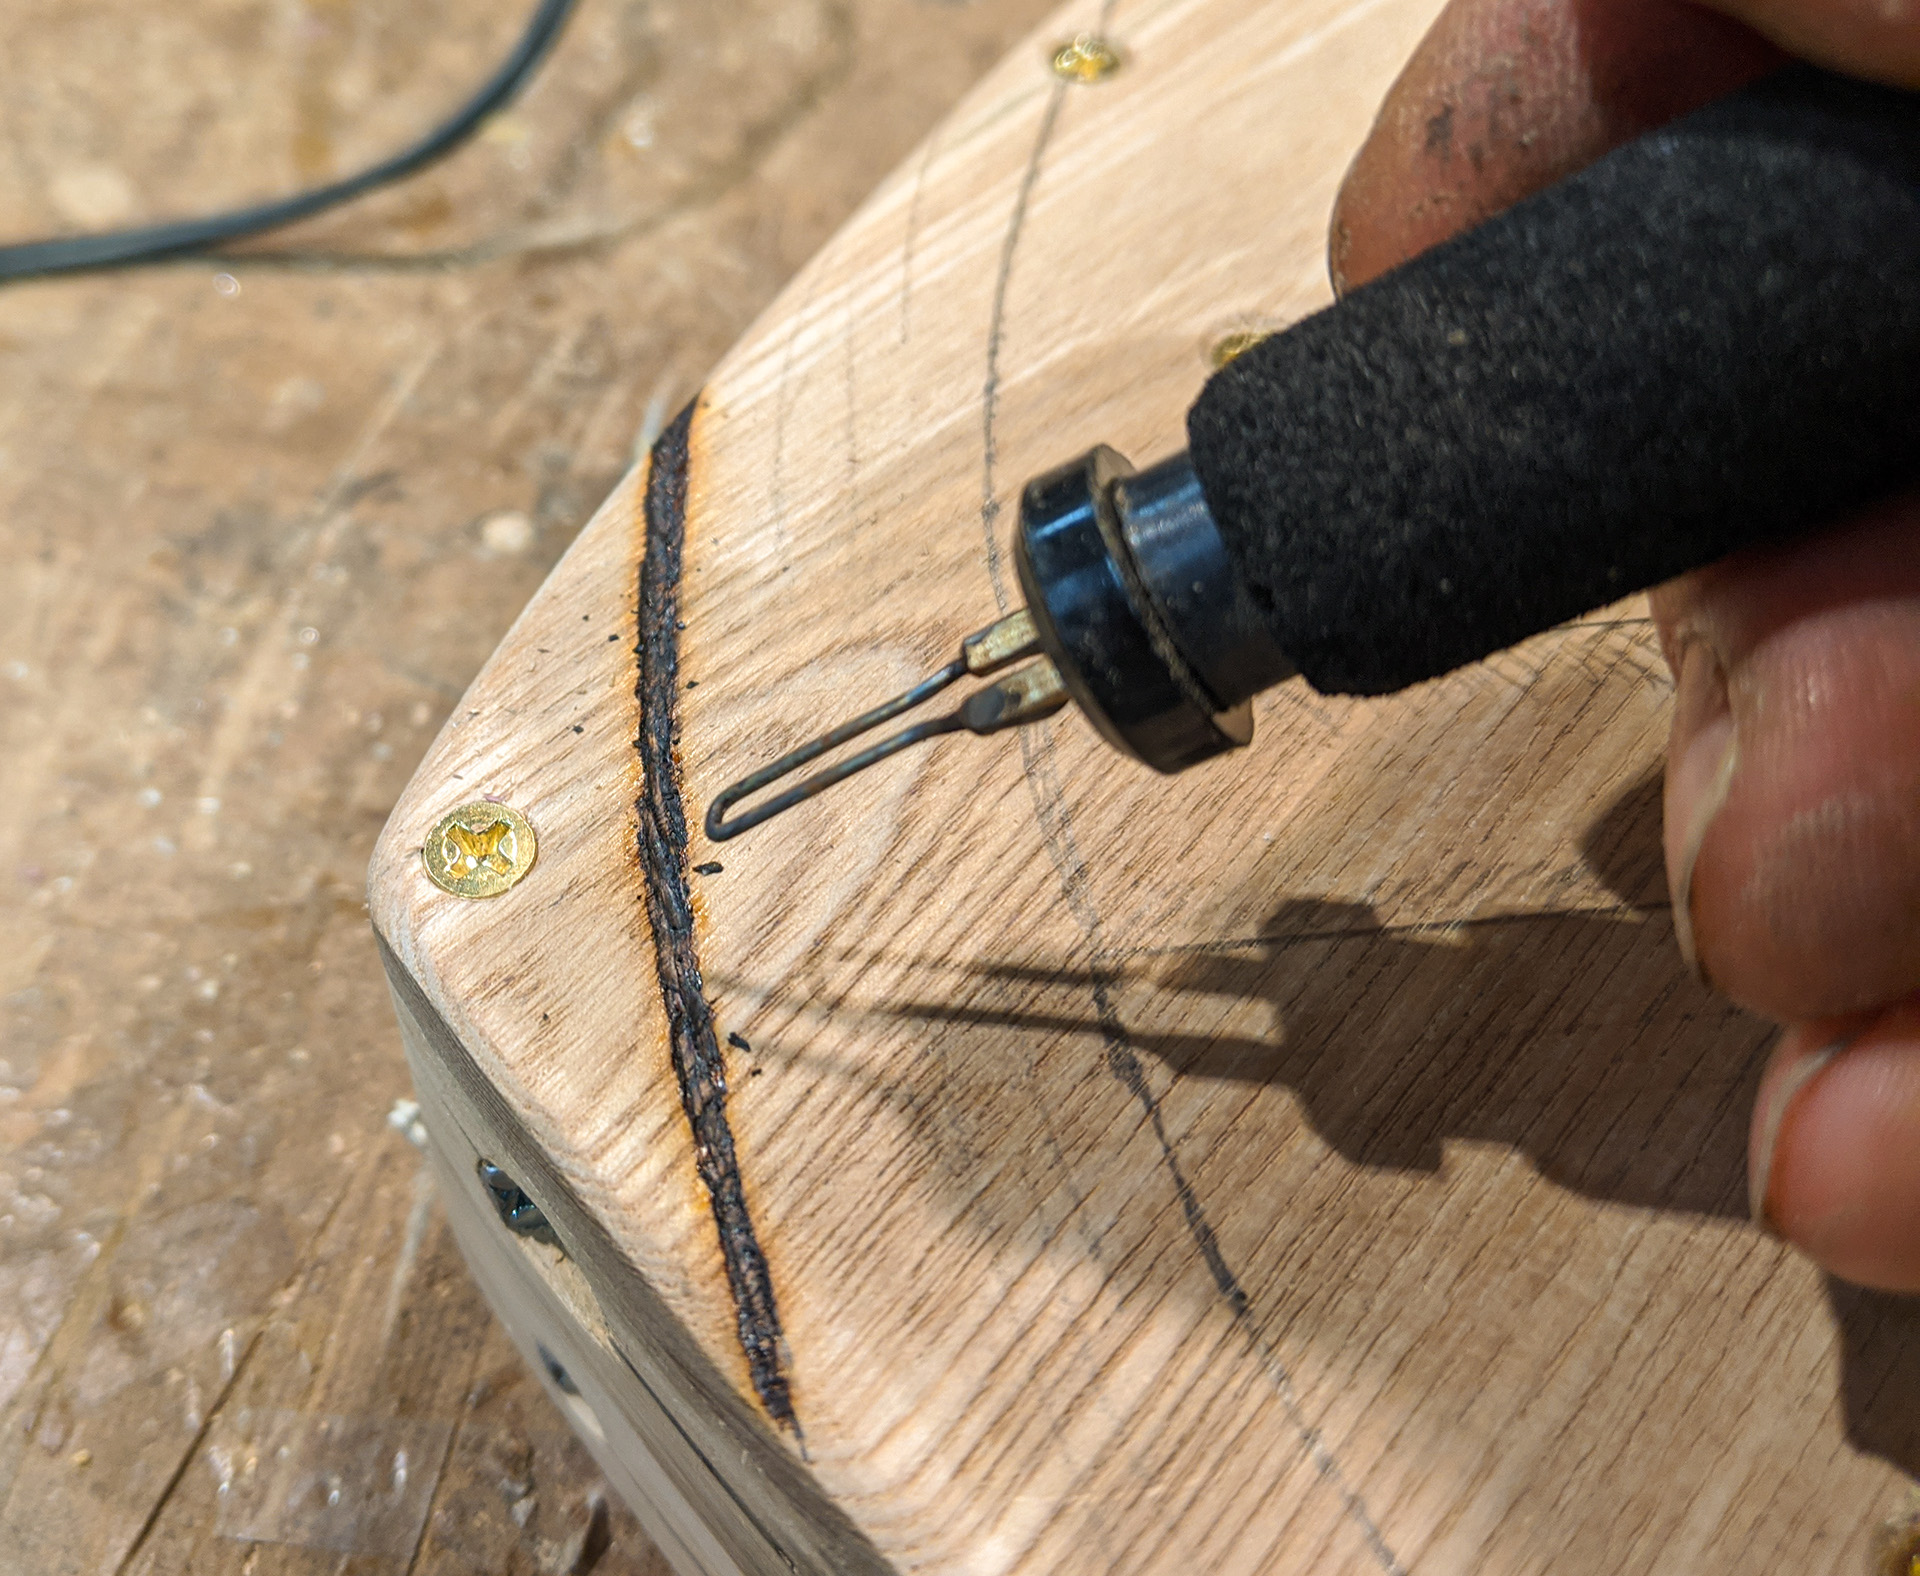
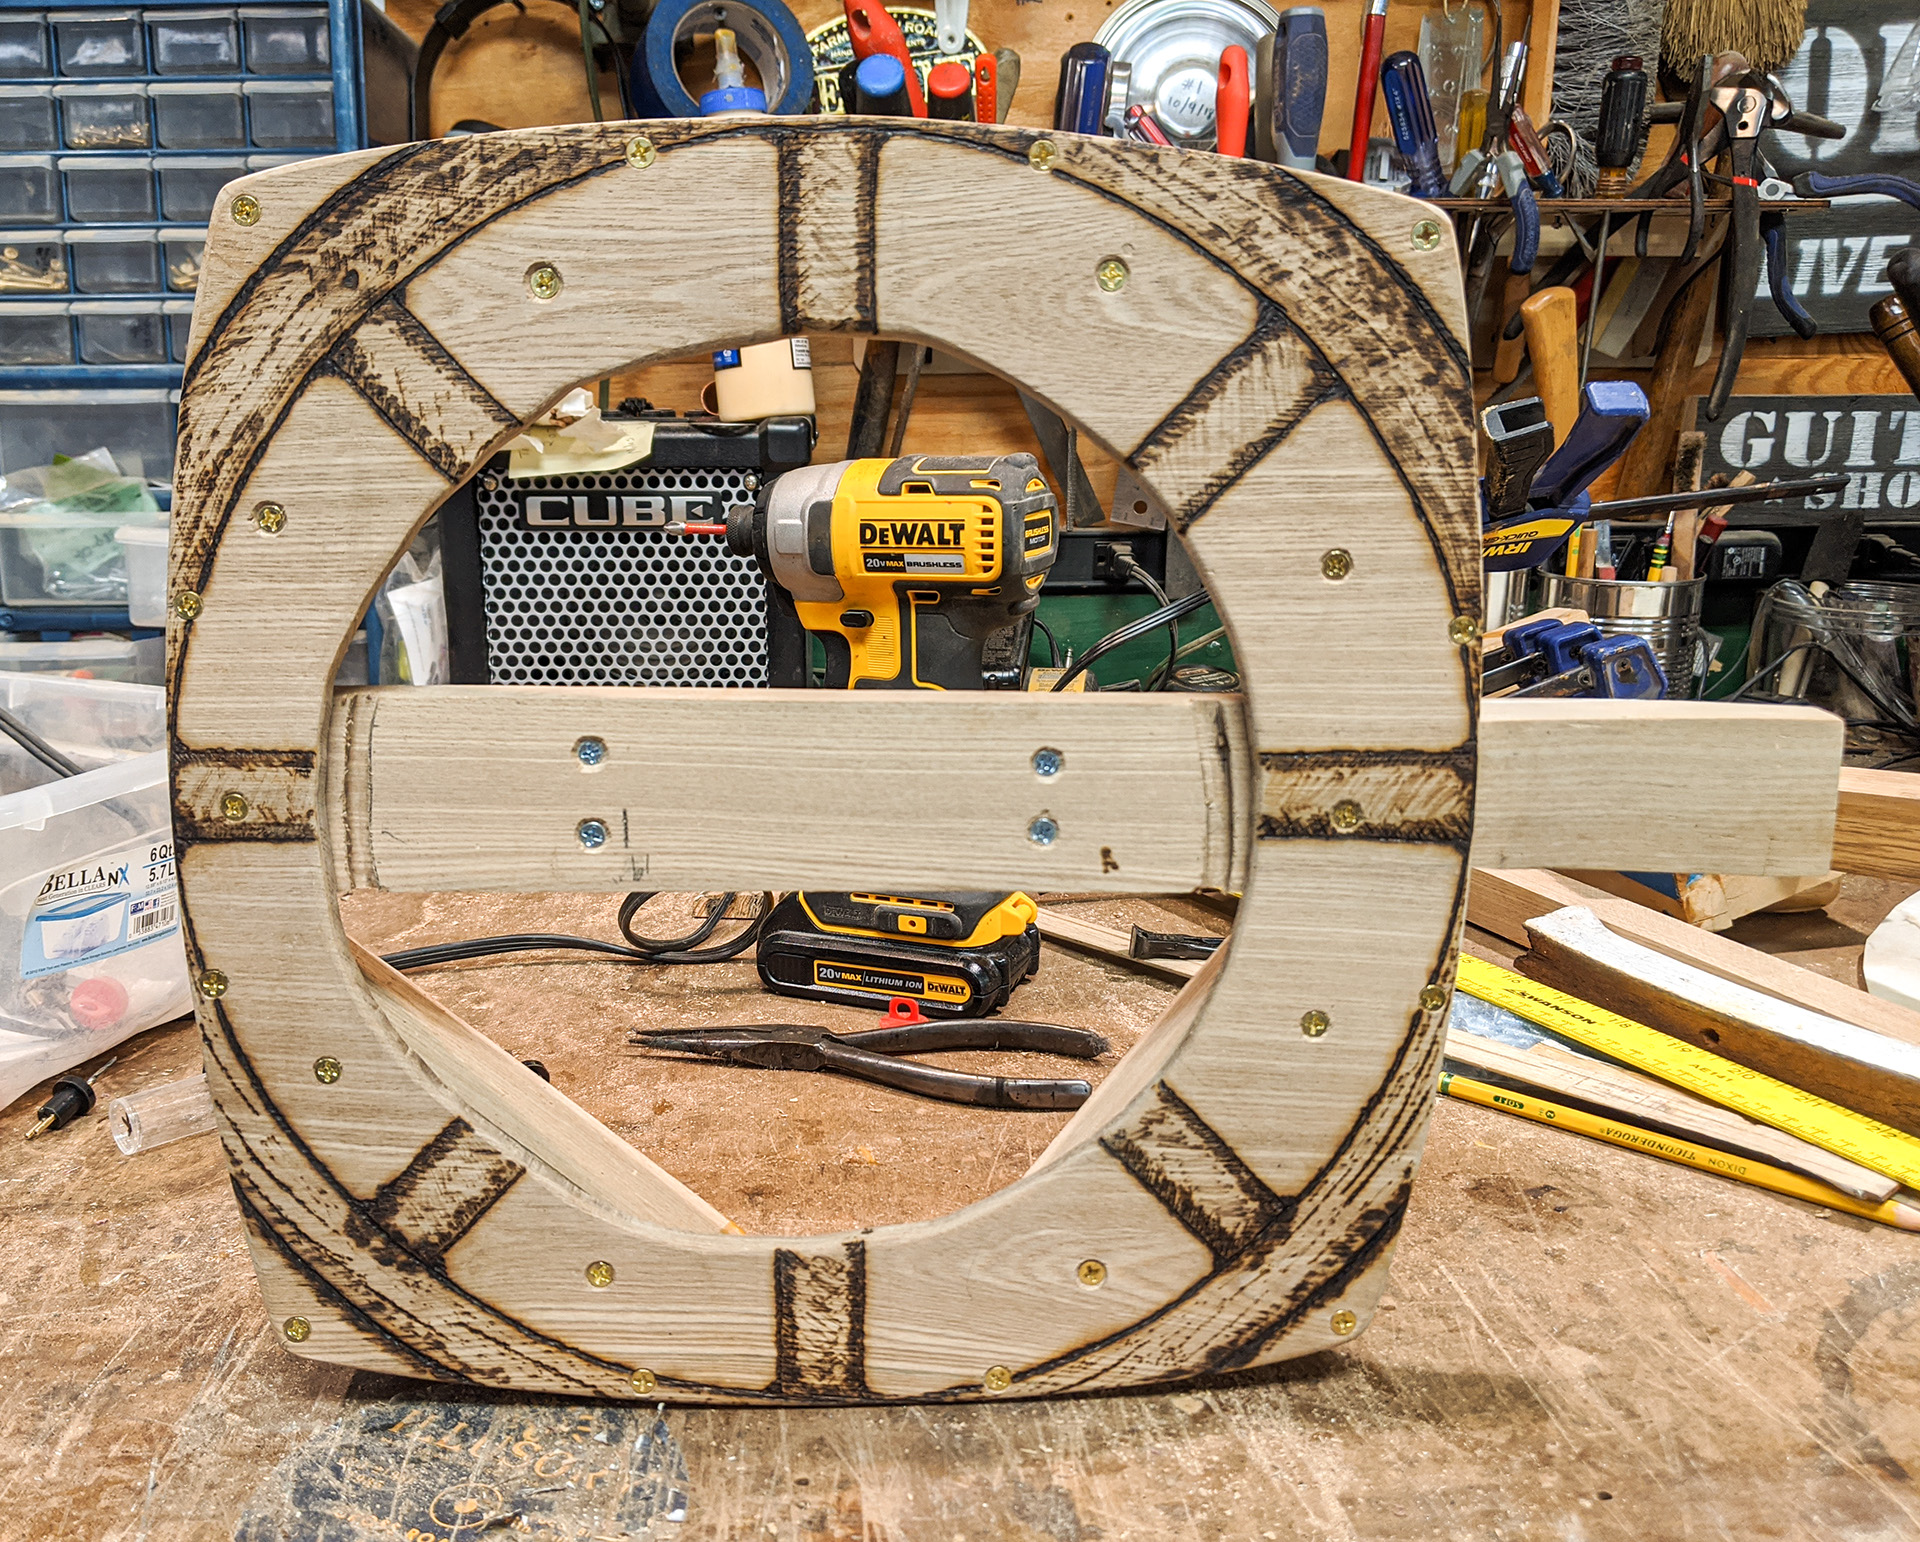
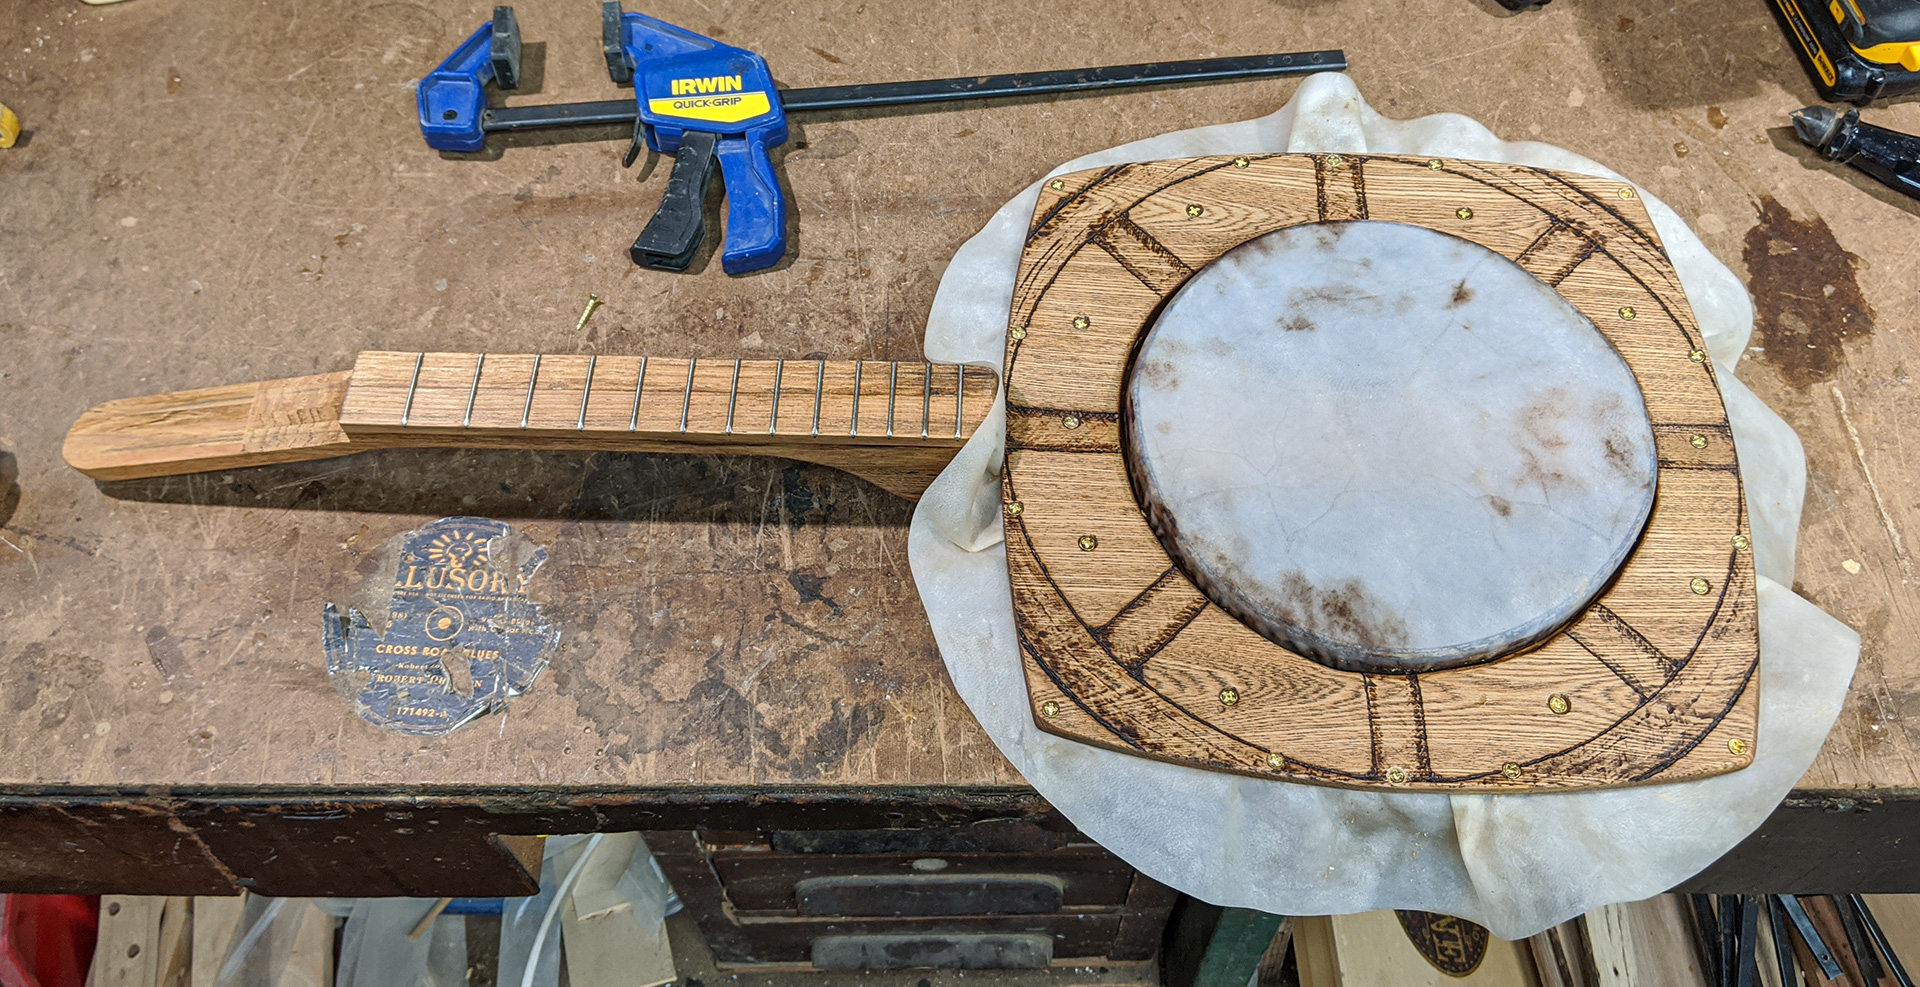
Is one round of screws enough? Oh heck no. Besides, the edge of the panel needs to be mounted to the frame, right? So, in go 12 more screws around the outer edge. These screws will also help clamp the banjo's hide head firmly in place. I do have to be very careful with them being so close to the edge, that I don't split the wood while tightening them, Also in this photo you can see I have penciled in some faint lines for the wagon wheel woodburning design I'll be adding later. |
|
|
|
|
|
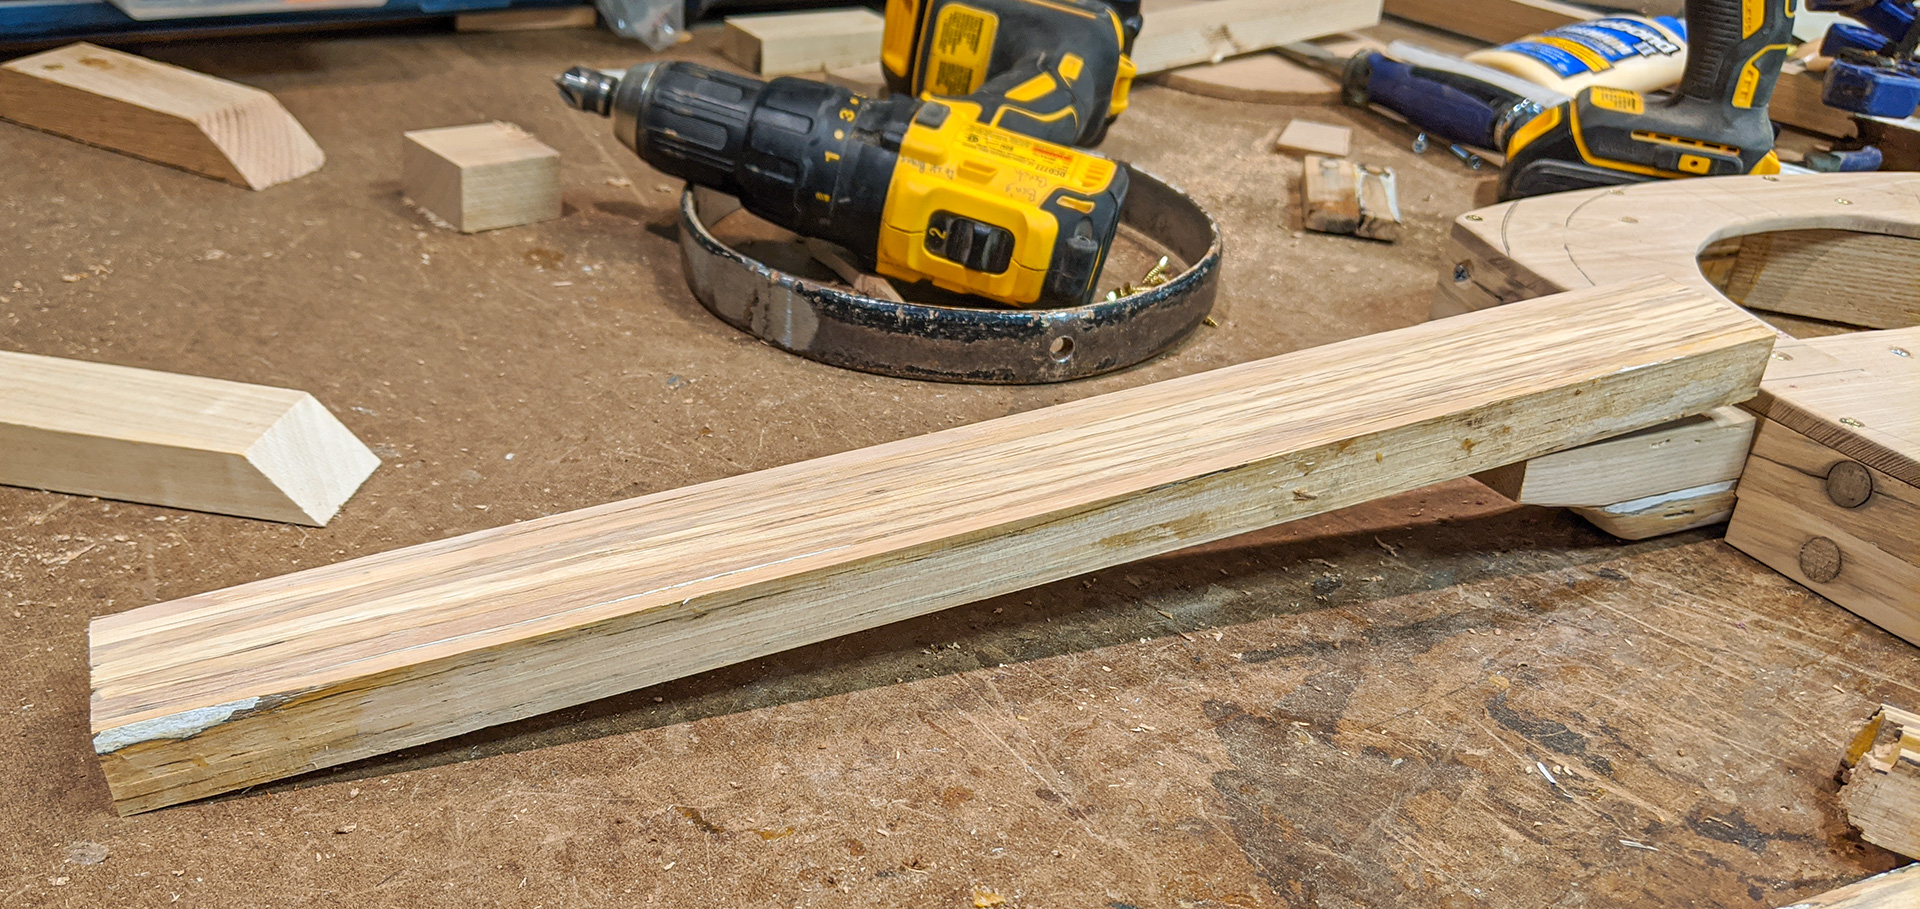
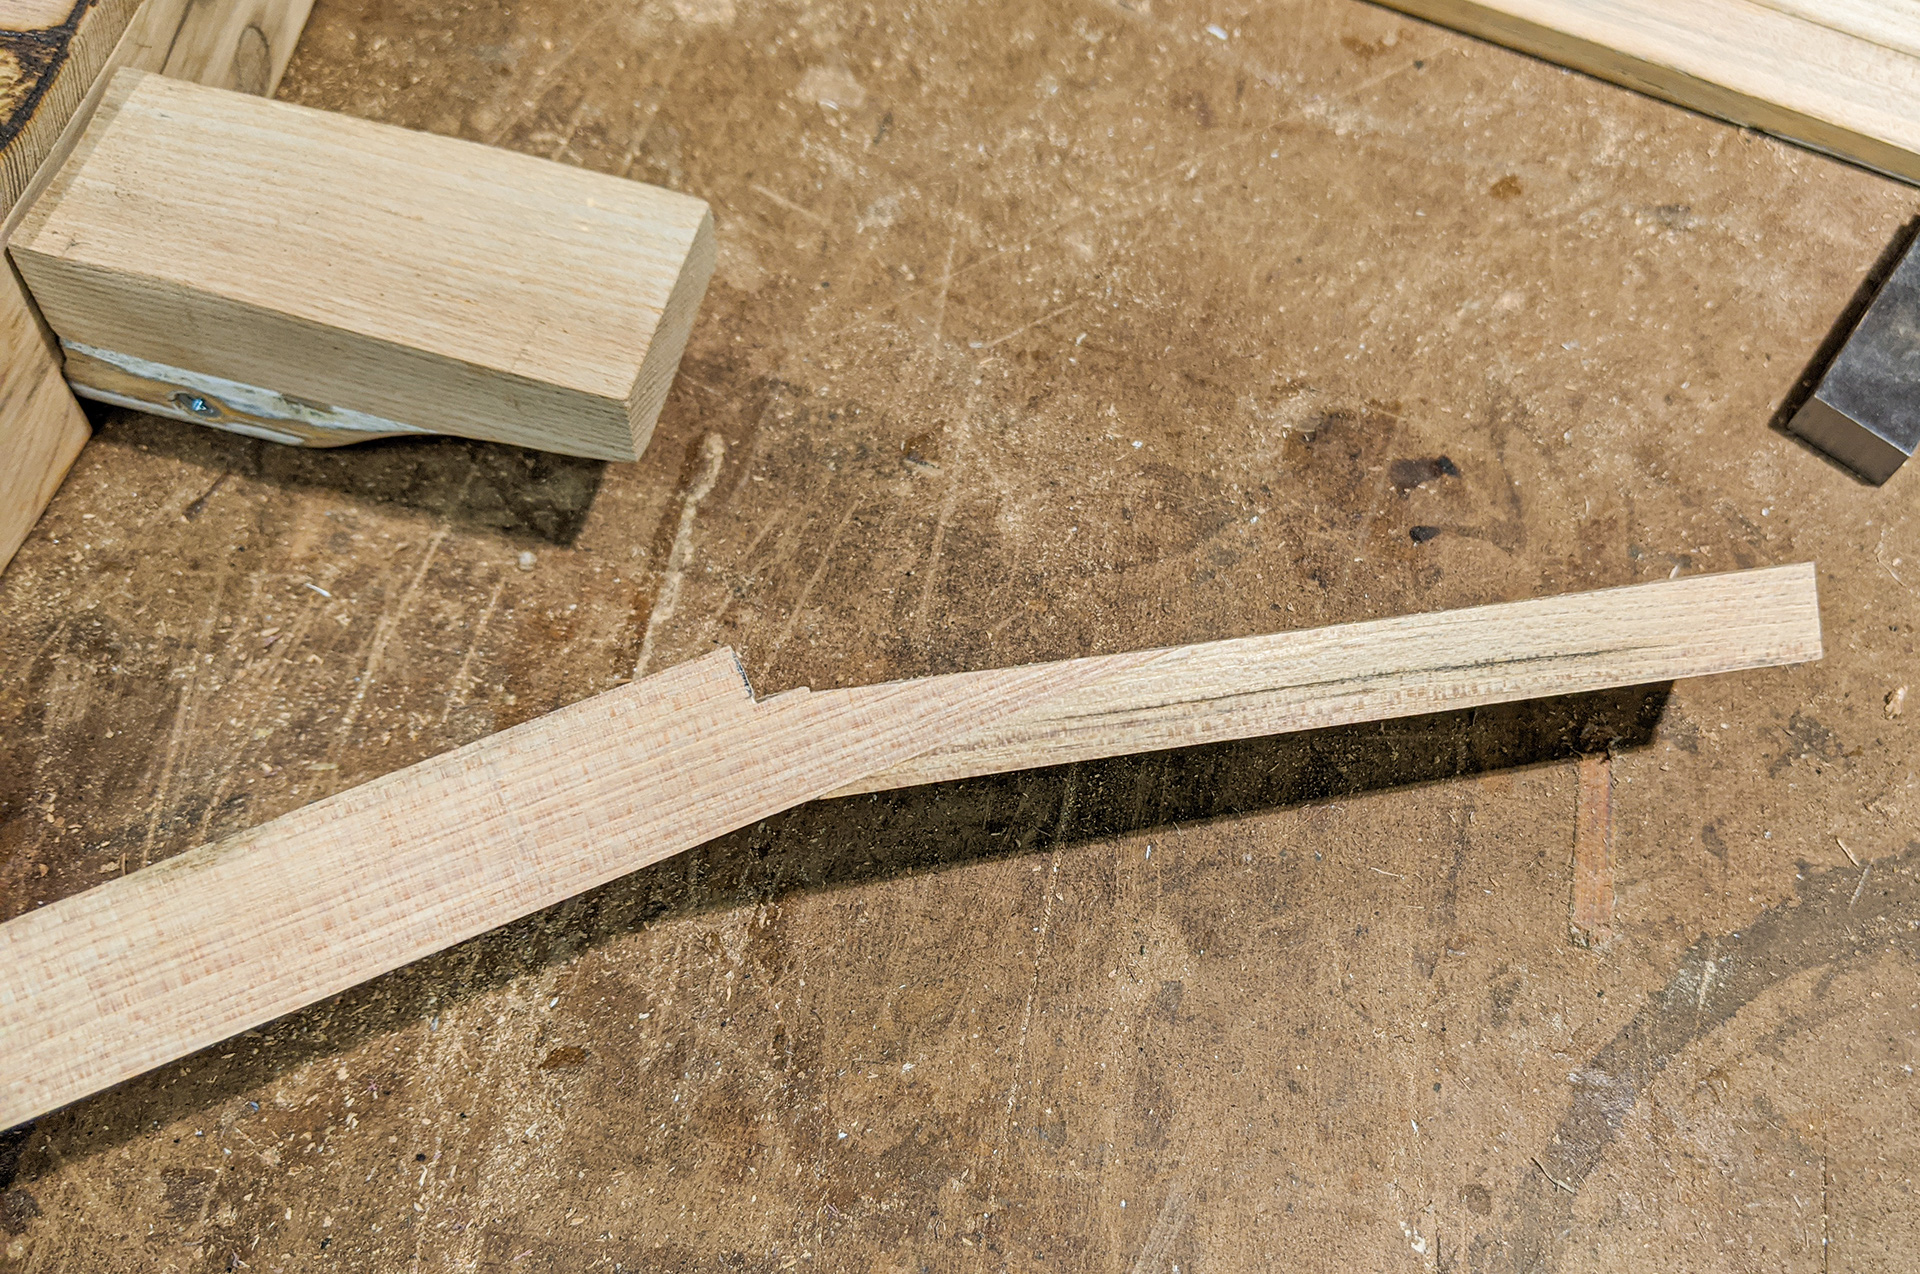
The neck glue has set, and I've done some planing and milling to get it into shape for mounting. You'll also notice that I glued on a heel extension to the original neck brace. Actually this has been visible in the last few photos. I added this heel extension to make sure my neck would be raised up to the right level once glued in place, to get my string action height correct once the tone ring and bridge were in place. |
|
|
|
|
|
I decided to do a scarf-jointed angled headstock for this build. Here the angled cut has been made and she's ready for gluing. |
|
|
|
|
|
While the headstock glue sets, I work on getting two more spoke slats glued together to form a fretboard. |
|
|
|
|
|
While waiting for glue to dry, I work on my top panel design. Gitty crew member Dan "Deke" Caldwell helped me with penciling in the design and adding some nice shading before I grabbed the woodburner. |
|
|
|
|
|
A little while later, the woodburning is complete and I am pretty happy with the result. My goal all along was to try to retain as much of the "wagon wheel" character as possible in the build, and I think this decorative design really helps with that. |
|
|
|
|
|
Here's a dry fit of the neck onto the body, with the newly glued fretboard blank nearby. Nothing is glued down at this point |
|
|
|
|
|
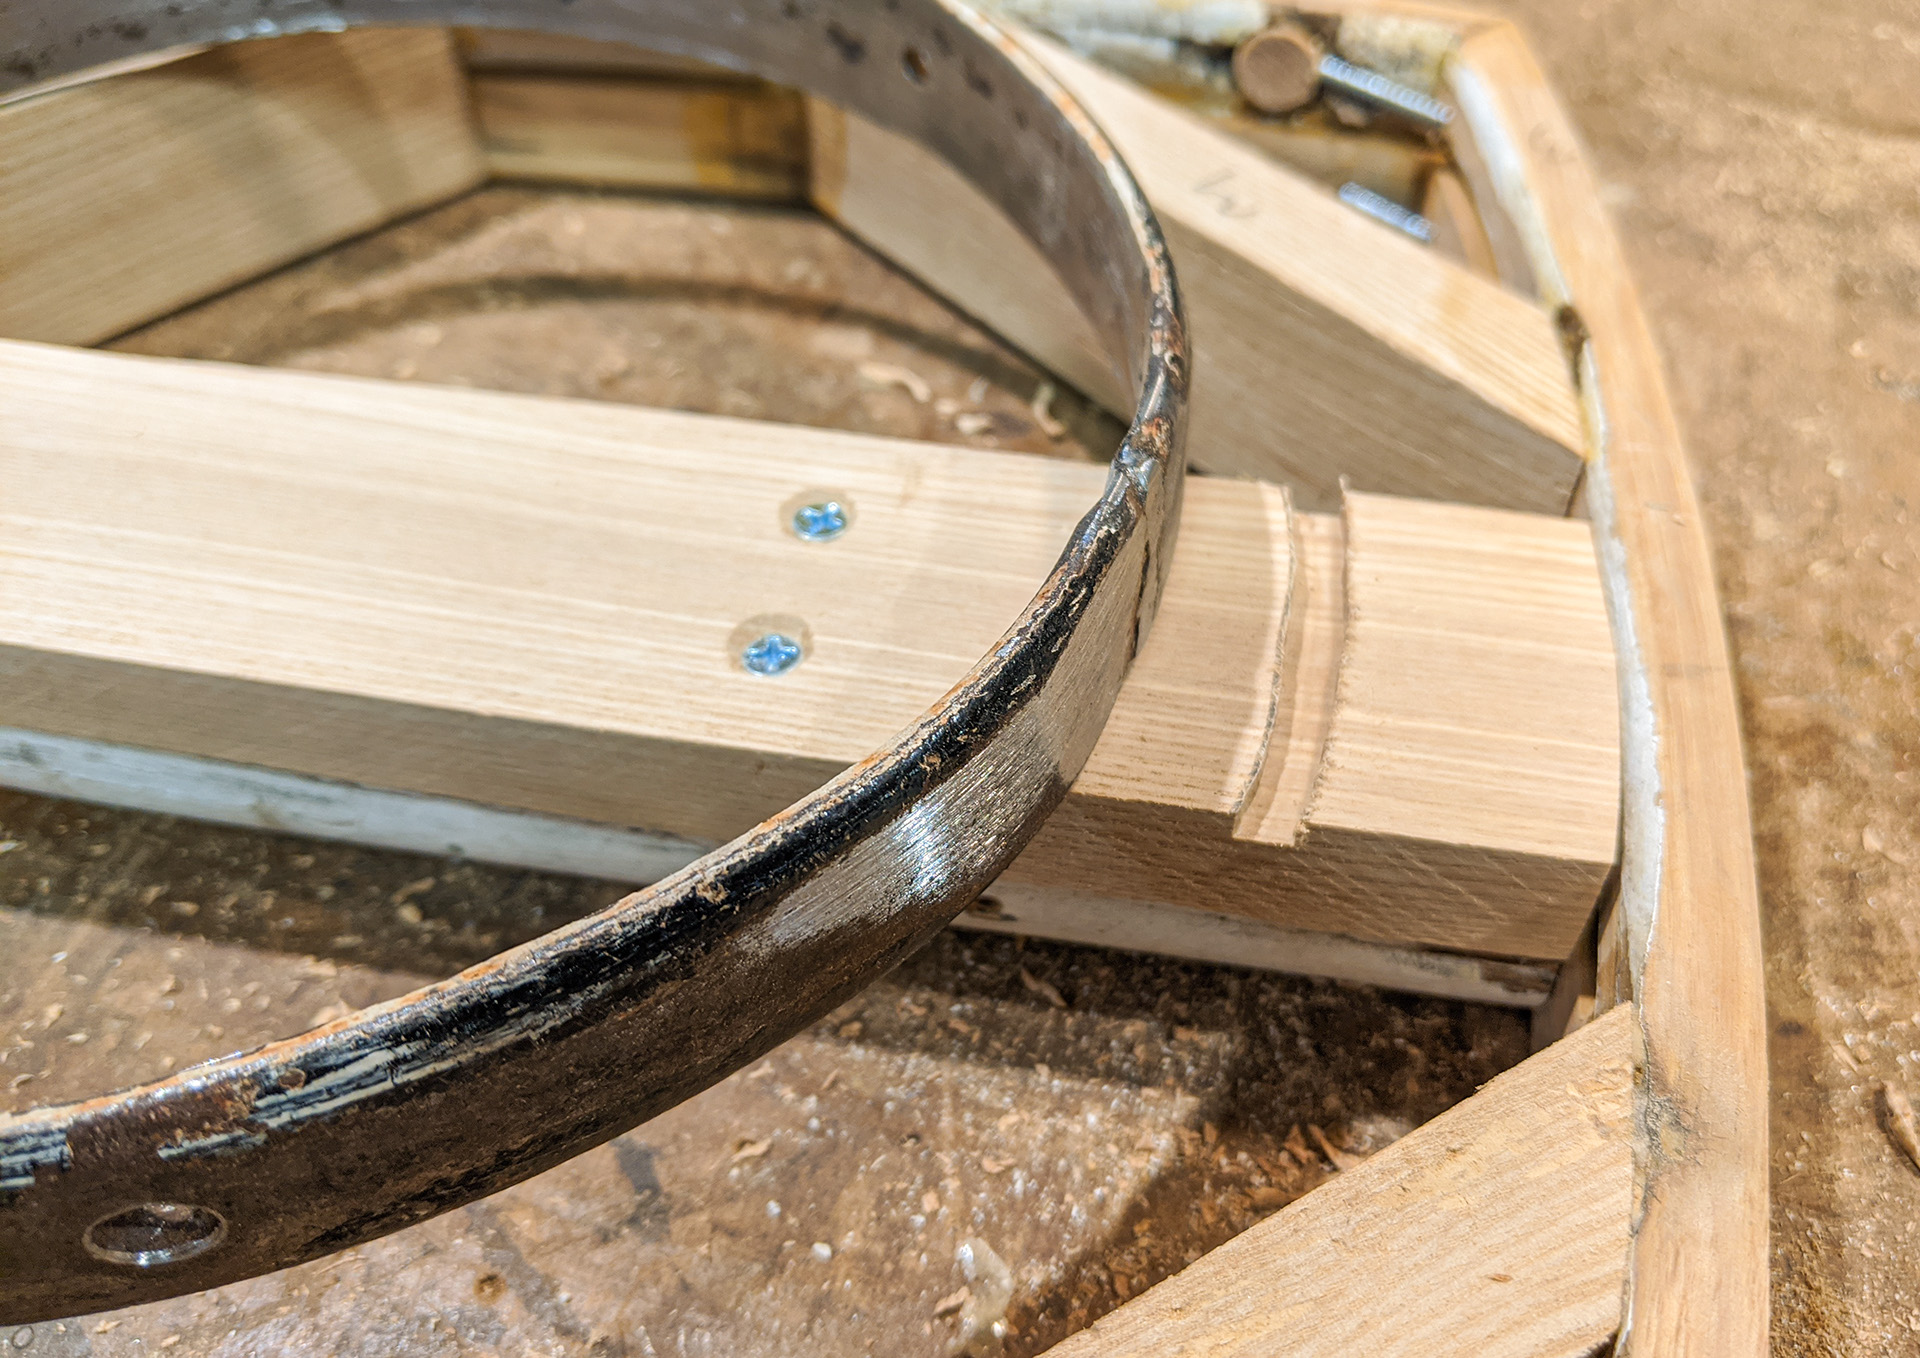
I take a short detour over to the knife belt sander on the metalworking bench to smooth over what will be the bearing edge of my tone ring. Remember that this ring was formed from a portion of the original steel rim that went around the carriage wheel. Who knows how many miles this steel traveled around the back roads around Boscawen, NH in the late 1800's and early 1900's. At any rate, it was pretty rough on the edges but some sanding and smoothing soon brought it into line. |
|
|
|
|
|
Here, I have thinned down my headstock by cutting out a layer on the bandsaw. I actually cut it a little thinner than I meant to, which is why I ended up using shorter-shaft ukulele tuners on the build instead of guitar tuners. If you look closely, you can see that I have also left a little portion for the nut, in parallel to the neck surface. |
|
|
|
|
|
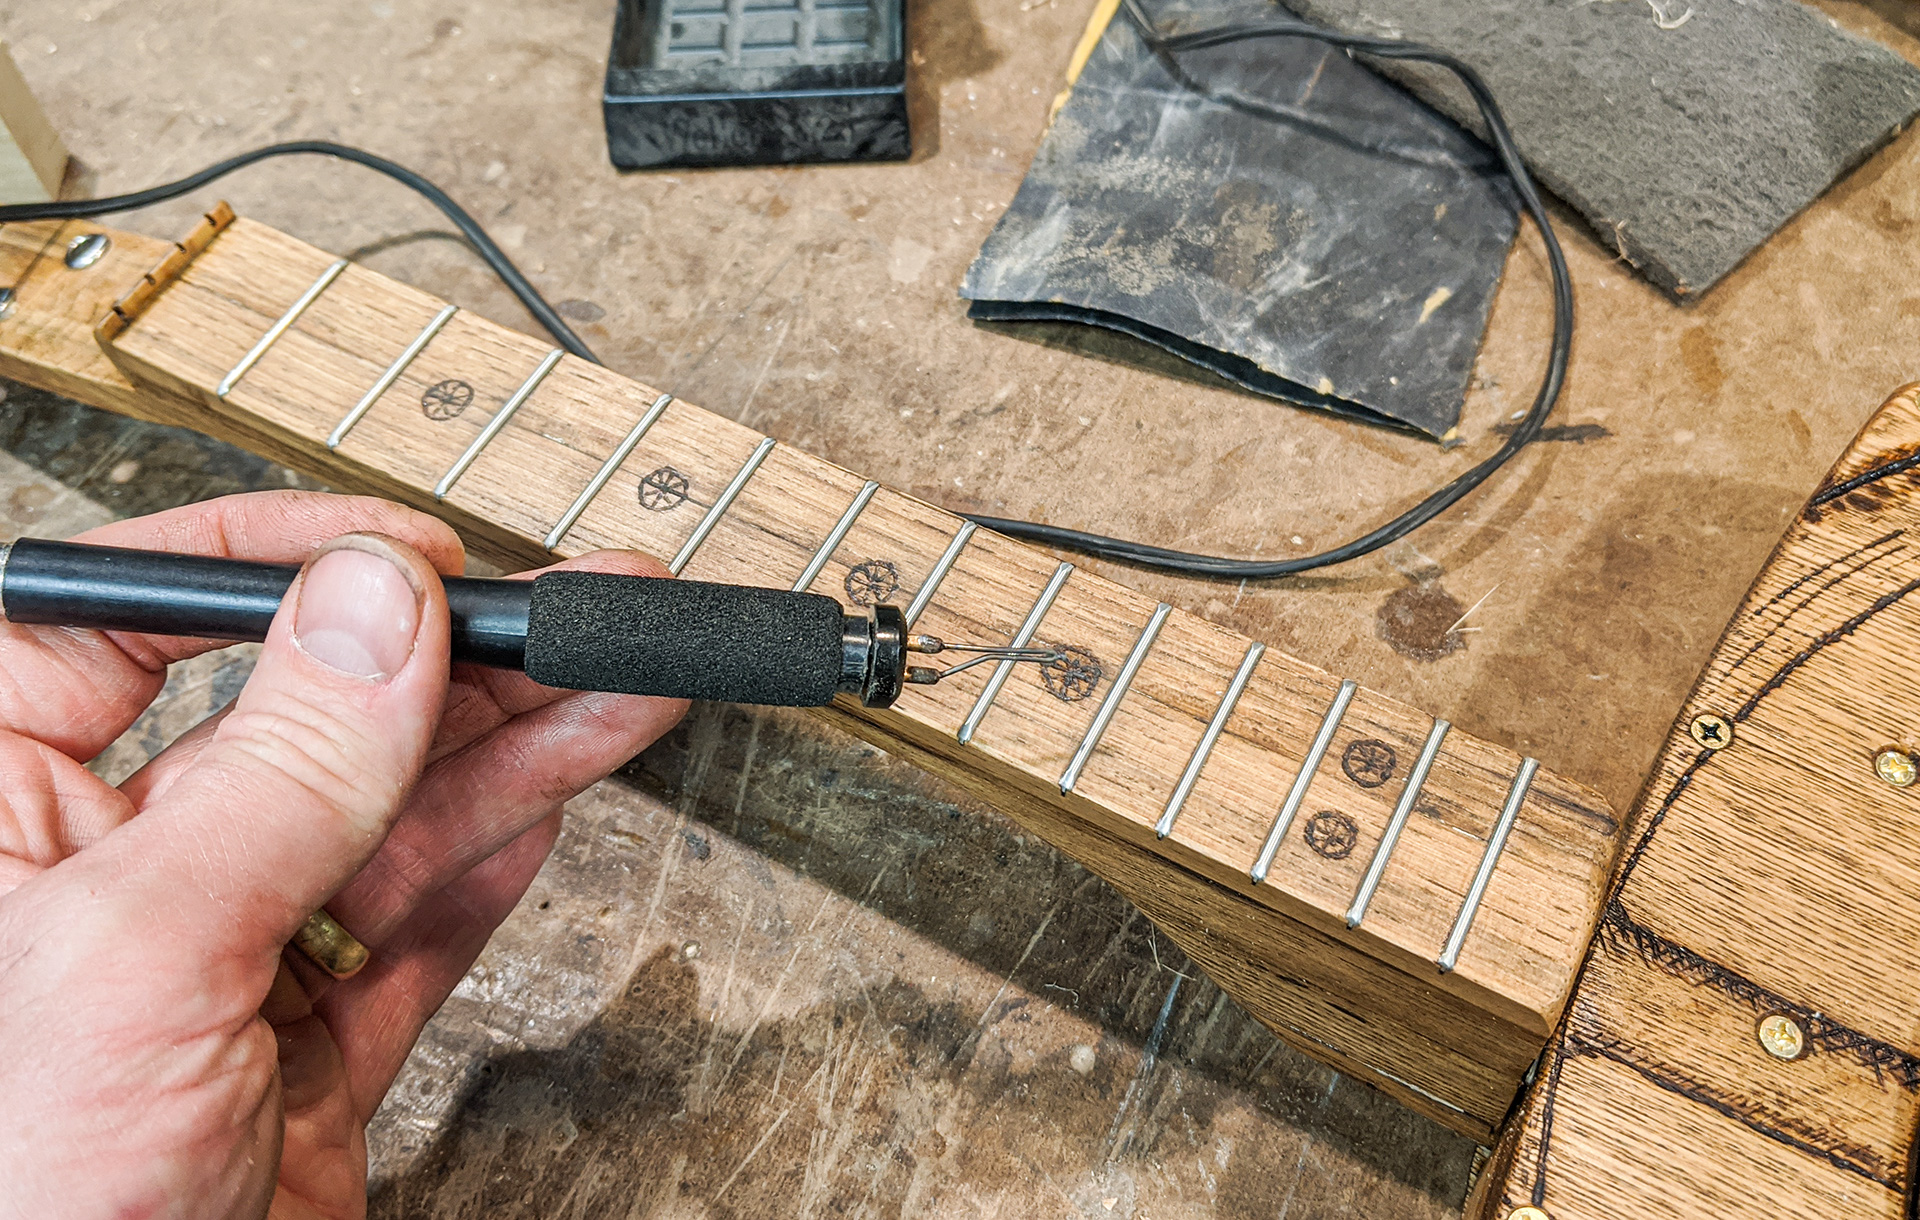
Here I have planed, sanded and milled my fretboard blank down to the right size, and I'm ready to get the frets in. |
|
|
|
|
|
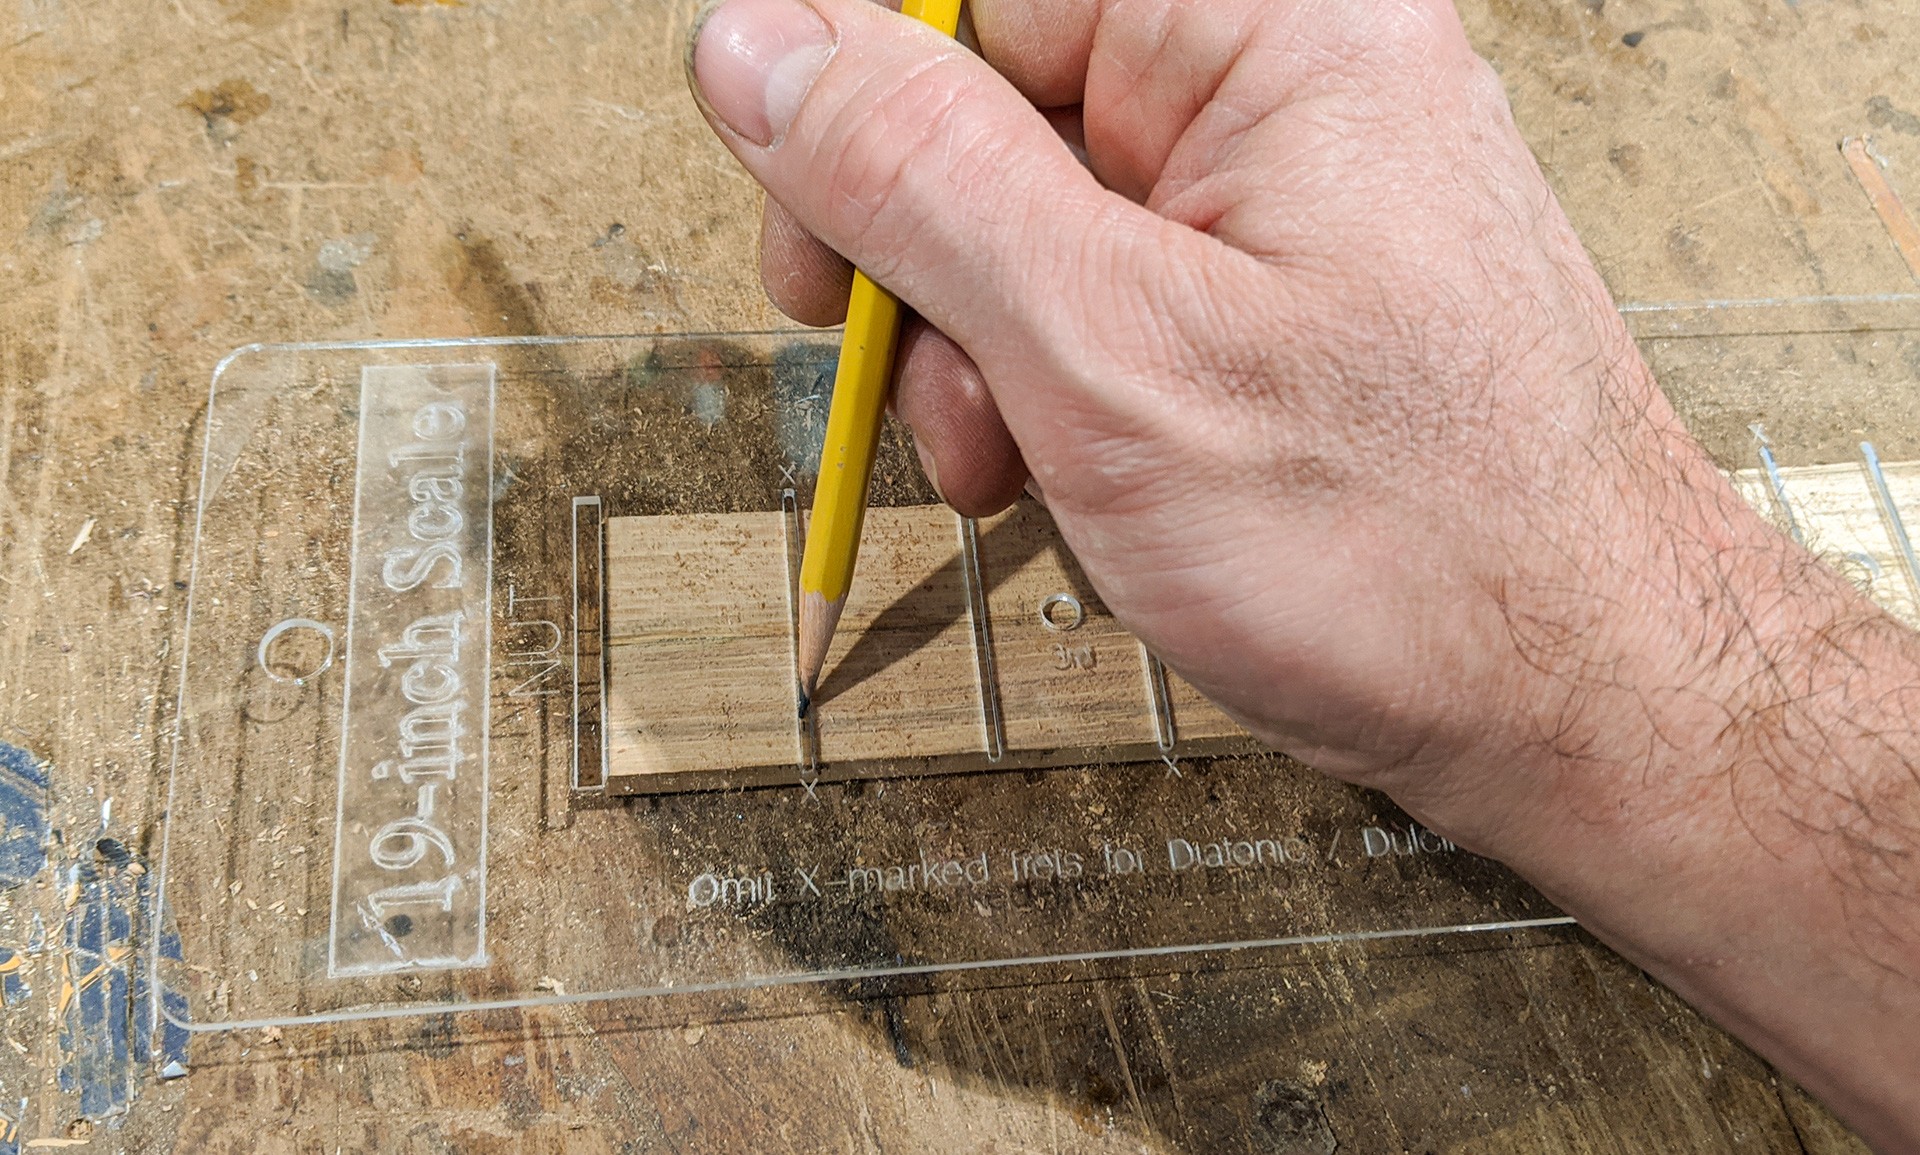
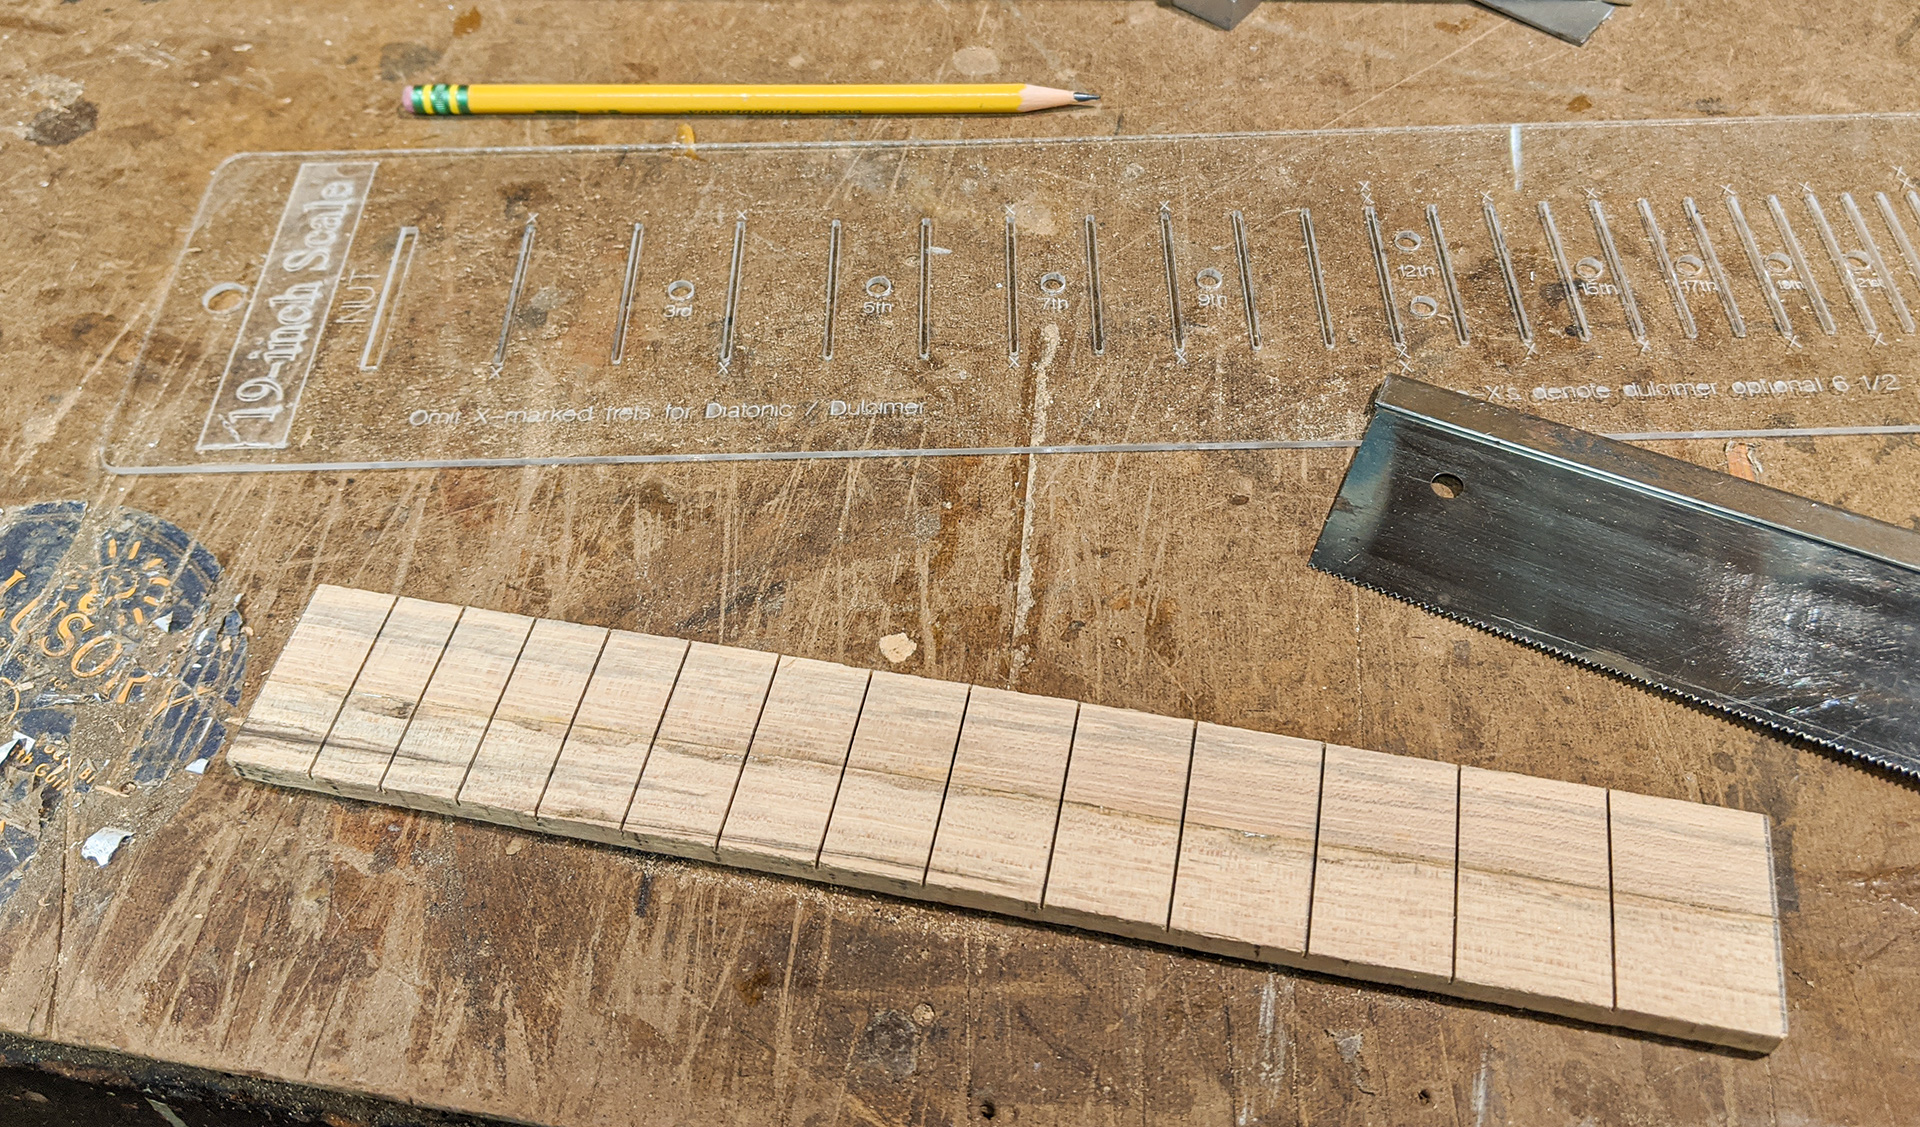
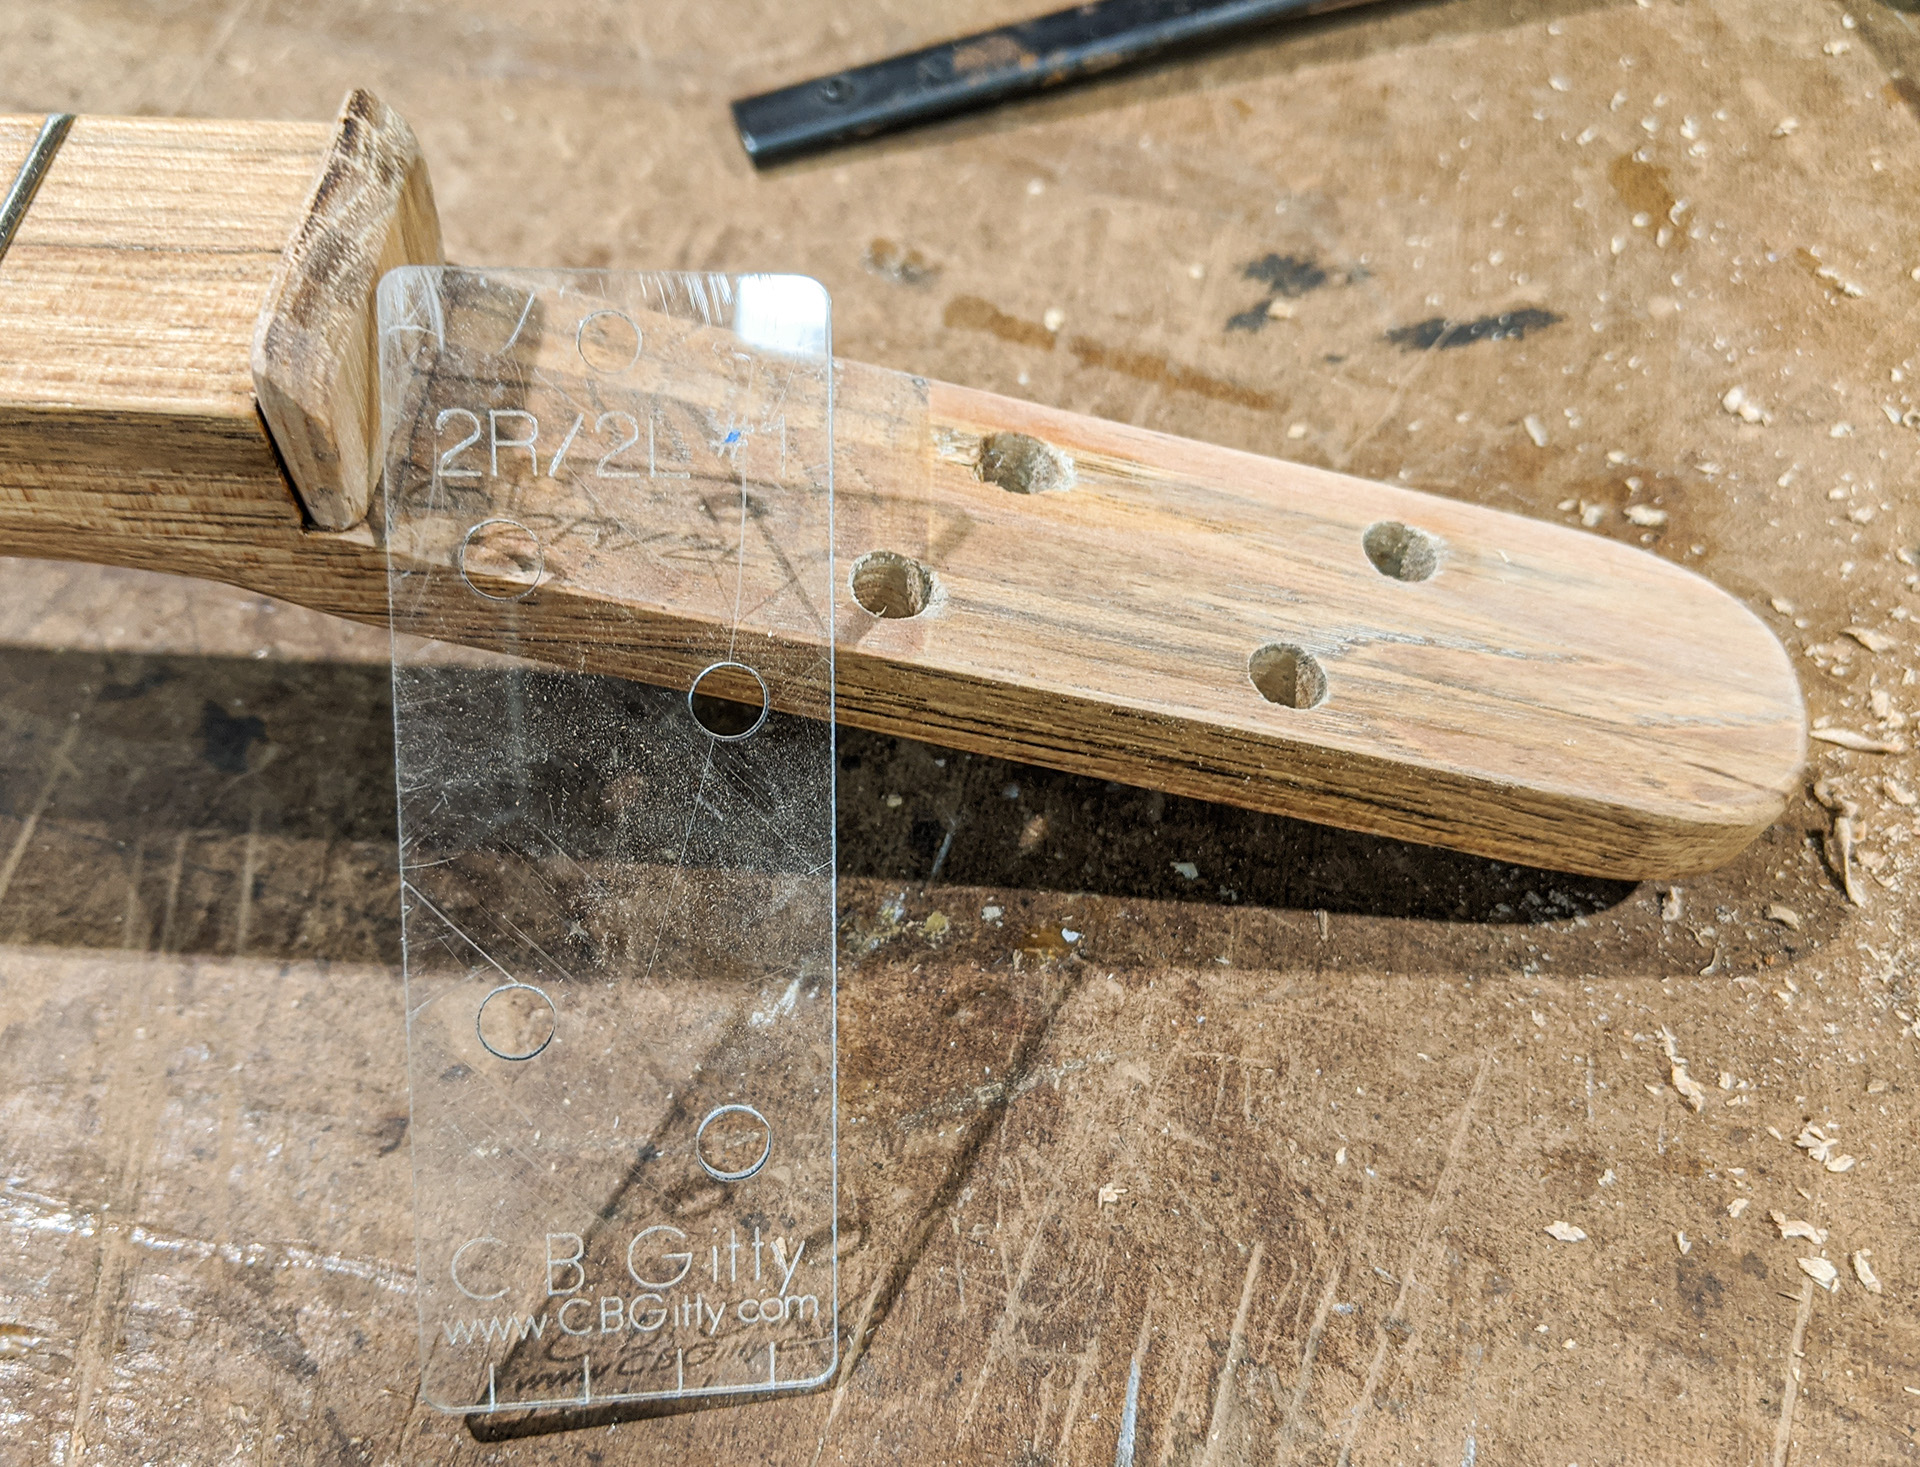
I grab a handy dandy C. B. Gitty acrylic fret scale template and proceed to mark the lines. Originally I had intended this instrument to have a 20-inch scale, but that ended up being just a bit too long, so I went with 19-inch instead. |
|
|
|
|
|
Here I've sawn my fret slots using a C. B. Gitty Fretting Saw. |
|
|
|
|
|
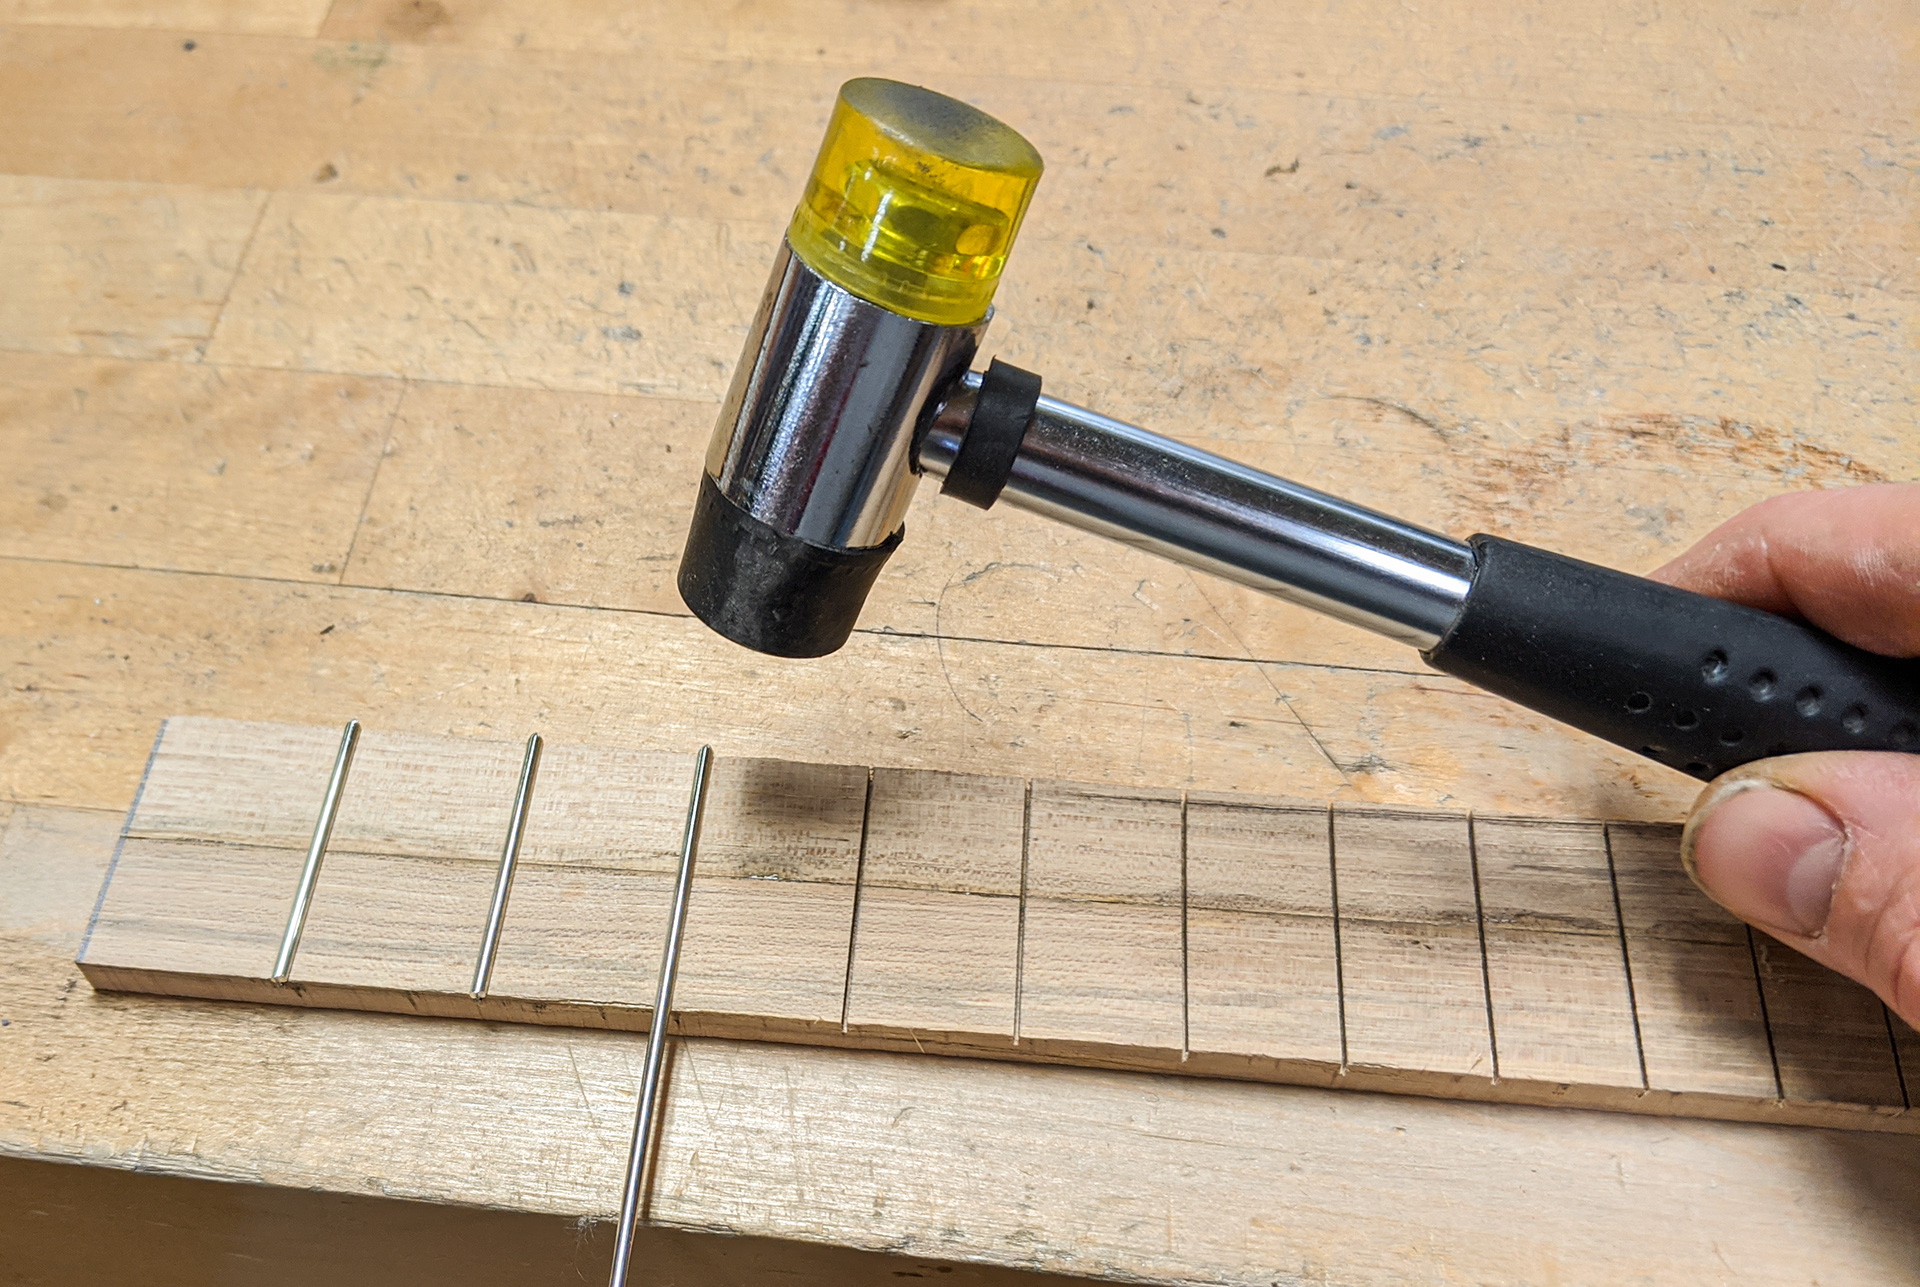
Then it's over to the fretting bench to get the frets into place (using a C. B. Gitty two-headed fretting hammer!). |
|
|
|
|
|
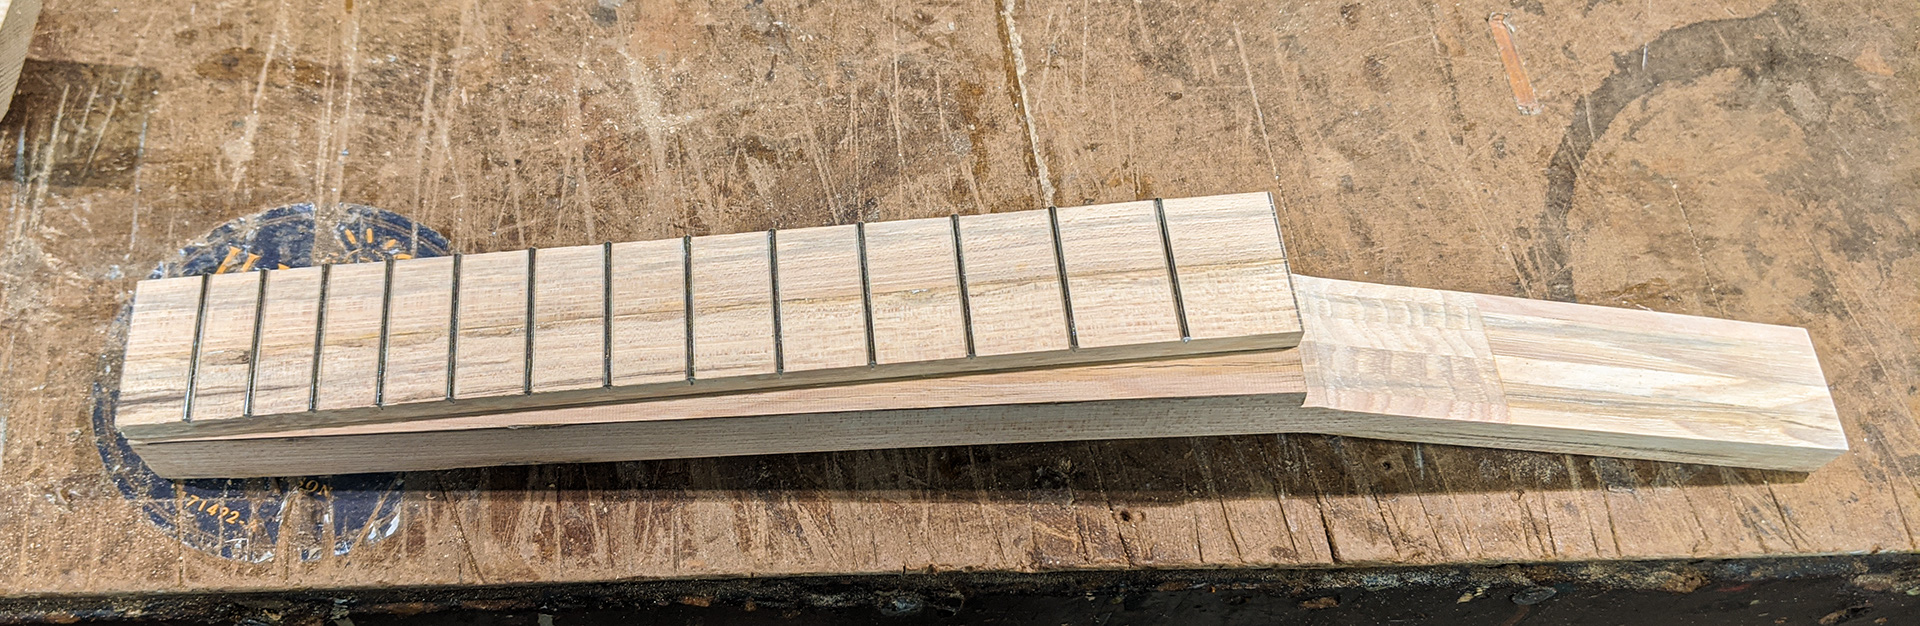
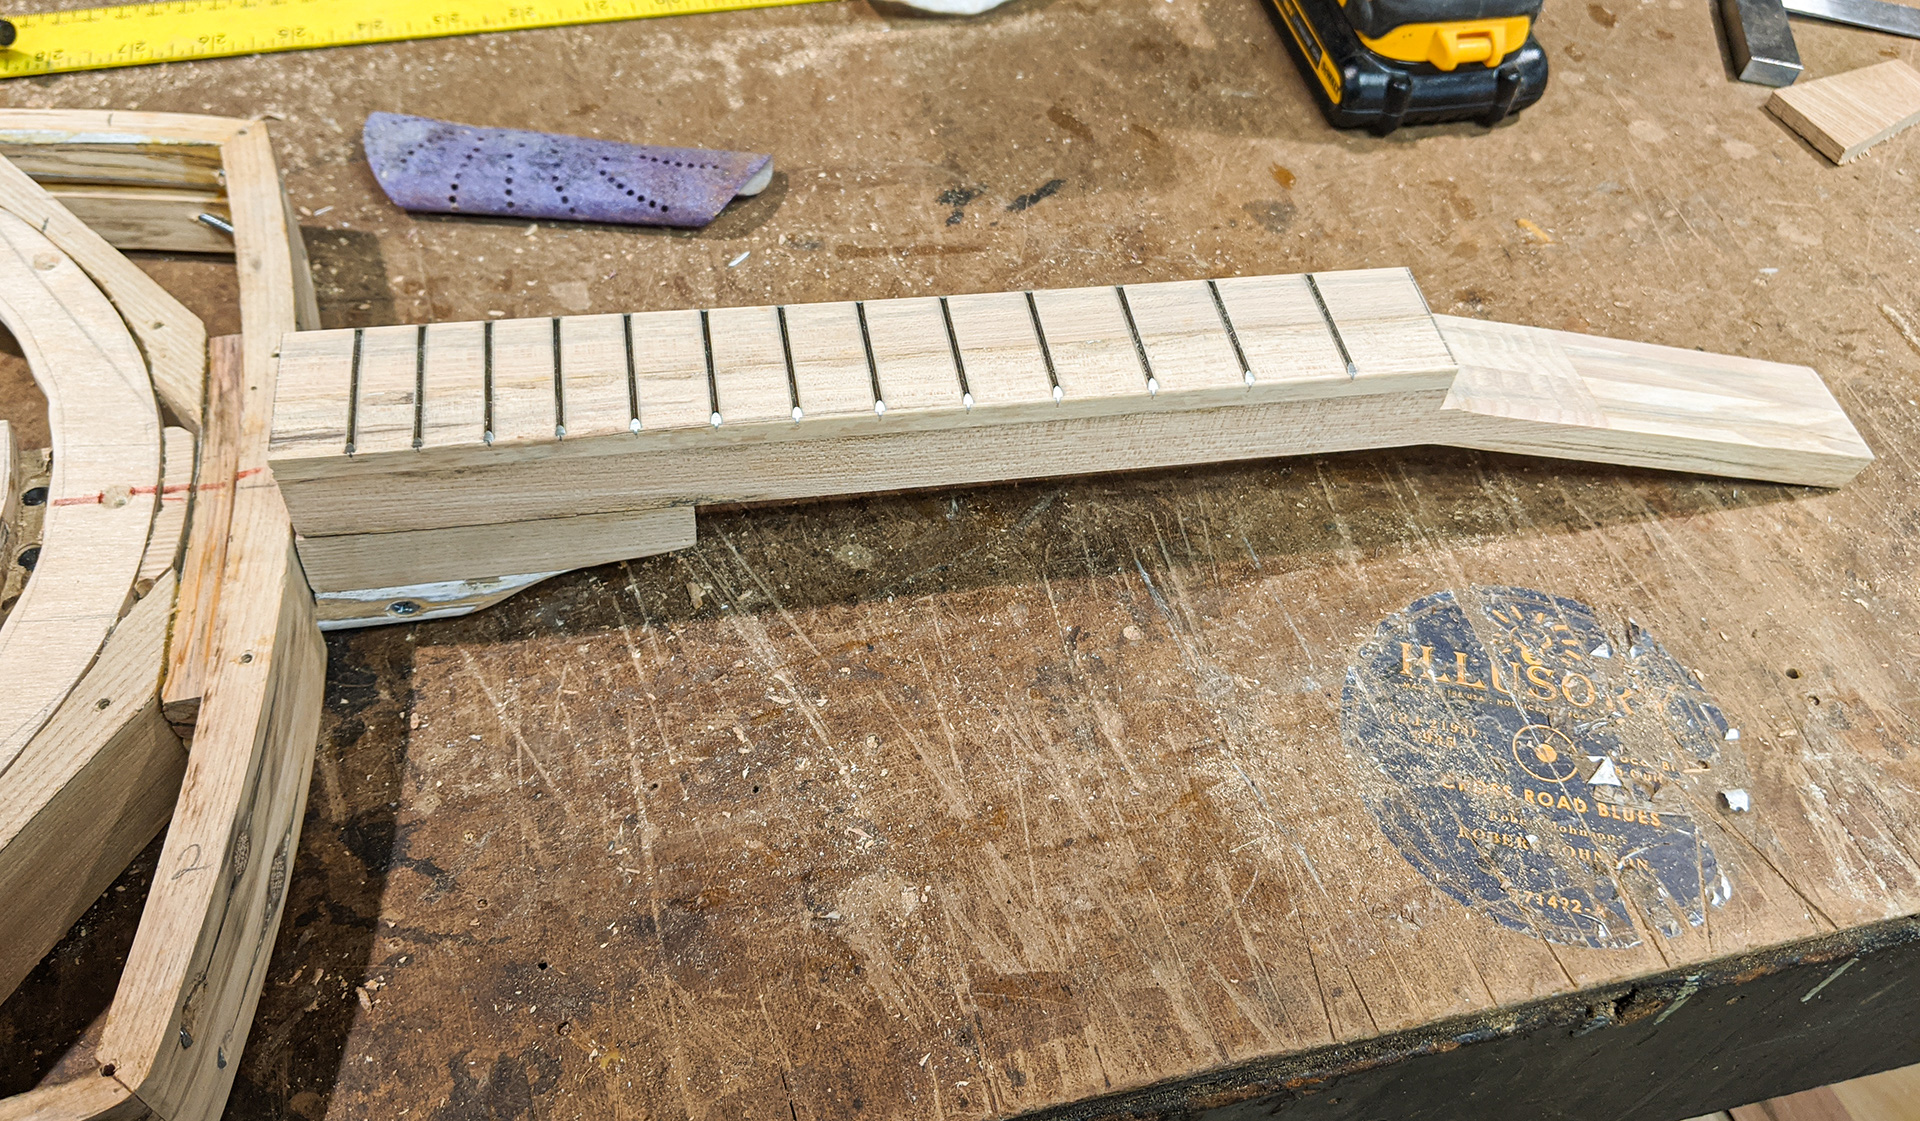
After beveling and dressing the fret ends, my fretboard is ready to be mounted to the neck. Note that I do all of this before the neck has been mounted to the instrument itself... I knew this would make even clamping easier. |
|
|
|
|
|
Lots-o-clamps to get that fretboard on there nice and flat with no gaps. |
|
|
|
|
|
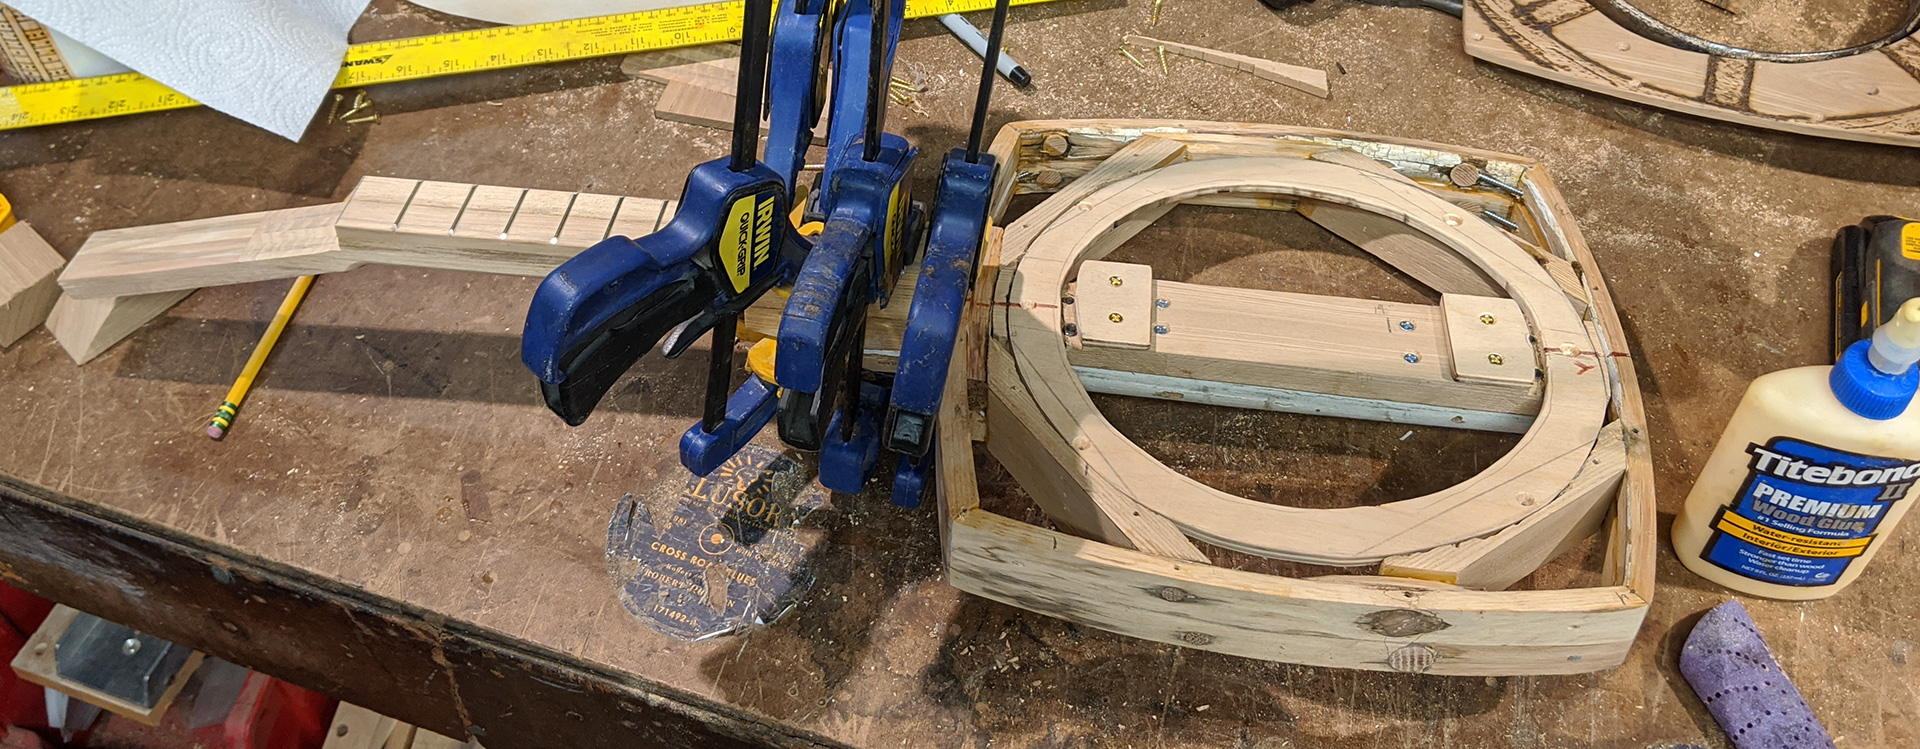
OK, so some stuff happened between the last photo and this one. Originally I had intended for my top panel to be the thing that would hold the banjo head down over the tone ring, and bear all of the tension. After consulting with my drum-making friend Dale Vigent, however, he told me that making an inner ring to handle the tension would work a lot better. He recommended using plywood for strength instead of a solid hardwood panel. In this photo, I have a piece of 6mm baltic birch plywood and am getting it marked for cutting. |
|
|
|
|
|
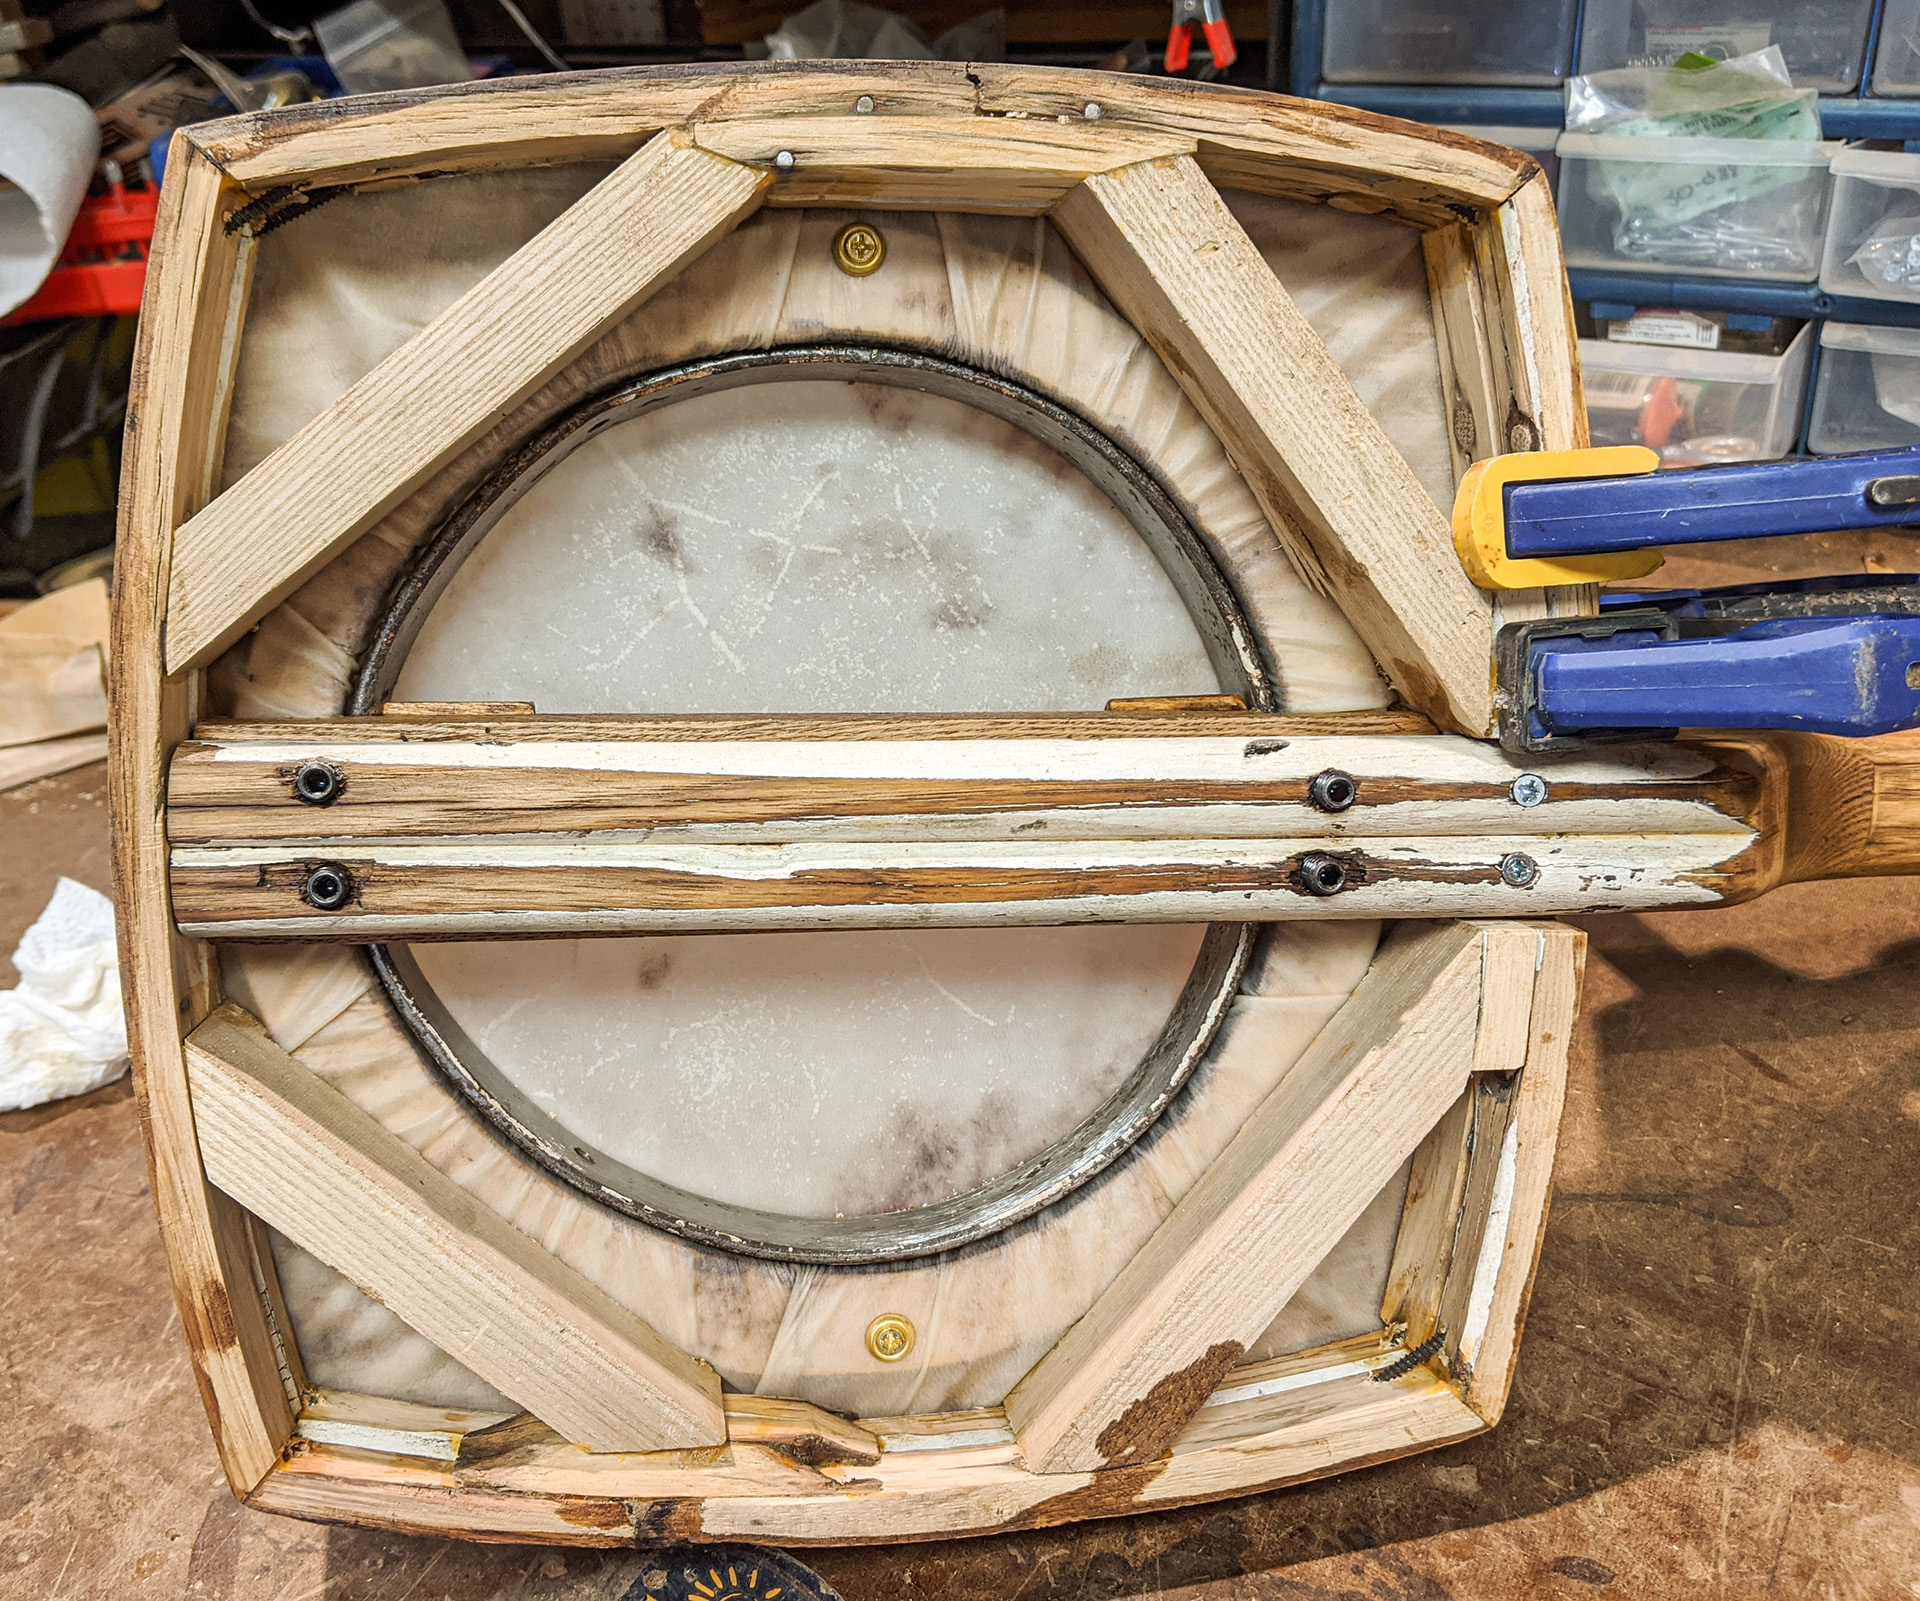
Here my plywood ring is mounted down into my frame, nice and snug against the tone ring. I had to route pockets down into my angled corner braces so that the plywood ring could sit flush and not interfere with the mounting of the top panel. It took some doing, but in the end I knew it had been the right choice. There was no way that thin American chestnut top panel could have handled all of the tension of the tight hide banjo head without bowing and probably cracking. |
|
|
|
|
|
At this point I chose to try to get fancy and put set screws up through the neck braces, so that they would touch the bottom of the tone ring and could be used to adjust its height, and thereby the tension of the head. So far, the head has stayed nice and tight and I haven't had to use these, but they are there and should work if needed. |
|
|
|
|
|
Here I have drilled holes and put screws down through my mounting ring into the braces. Remember that this plywood ring is going to be the thing holding my banjo head down at tension, so it has to be mounted pretty securely. I did do one extra thing to strengthen the ring... I soaked it well with thin super glue and let it harden. I don't really know what actual effect this had on its strength... but I know it didn't decrease it! |
|
|
|
|
|
Here my neck (with fretboard) is ready to glue onto the heel extension of the neck brace. I did have to do some careful sanding of the top of that heel... my neck brace was at a bit of an angle, and I had to compensate for that to make sure my neck ended up being flat in relation to the surface of the instrument. |
|
|
|
|
|
Some glue and clamps and the neck becomes a part of the larger instrument. |
|
|
|
|
|
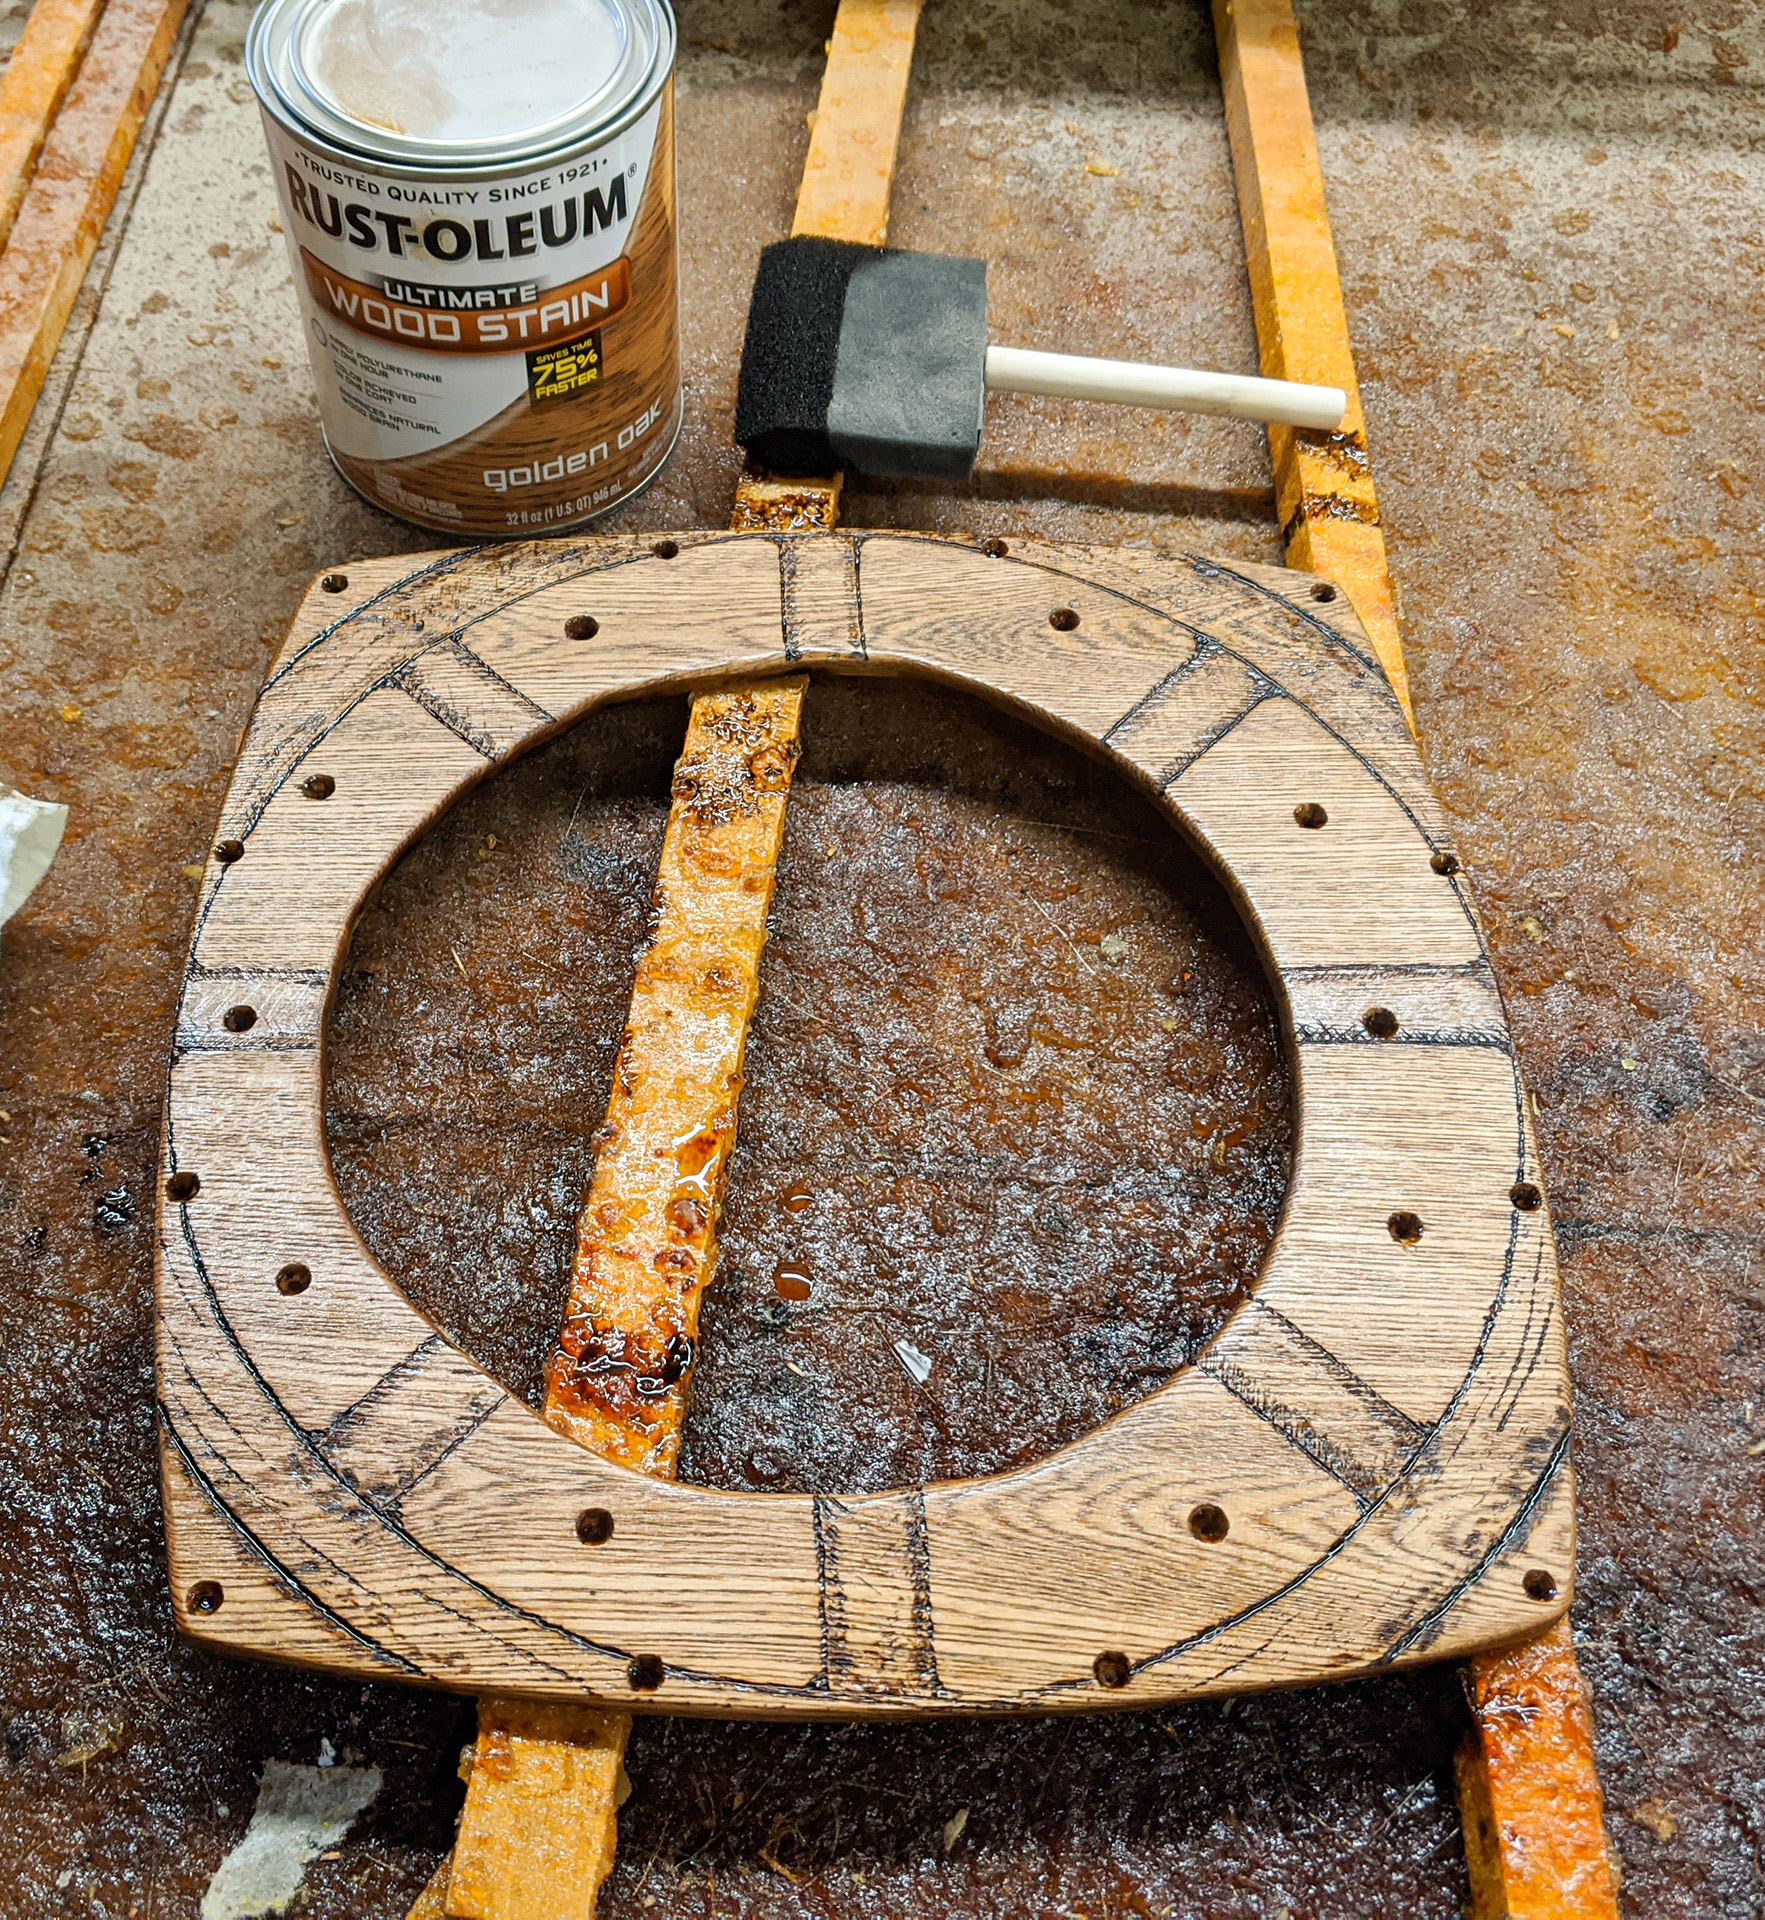
While the neck glue sets up, I head over to the finishing bench and get some Golden Oak stain onto the top panel. That stain really brings out the grain of the chestnut nicely. |
|
|
|
|
|
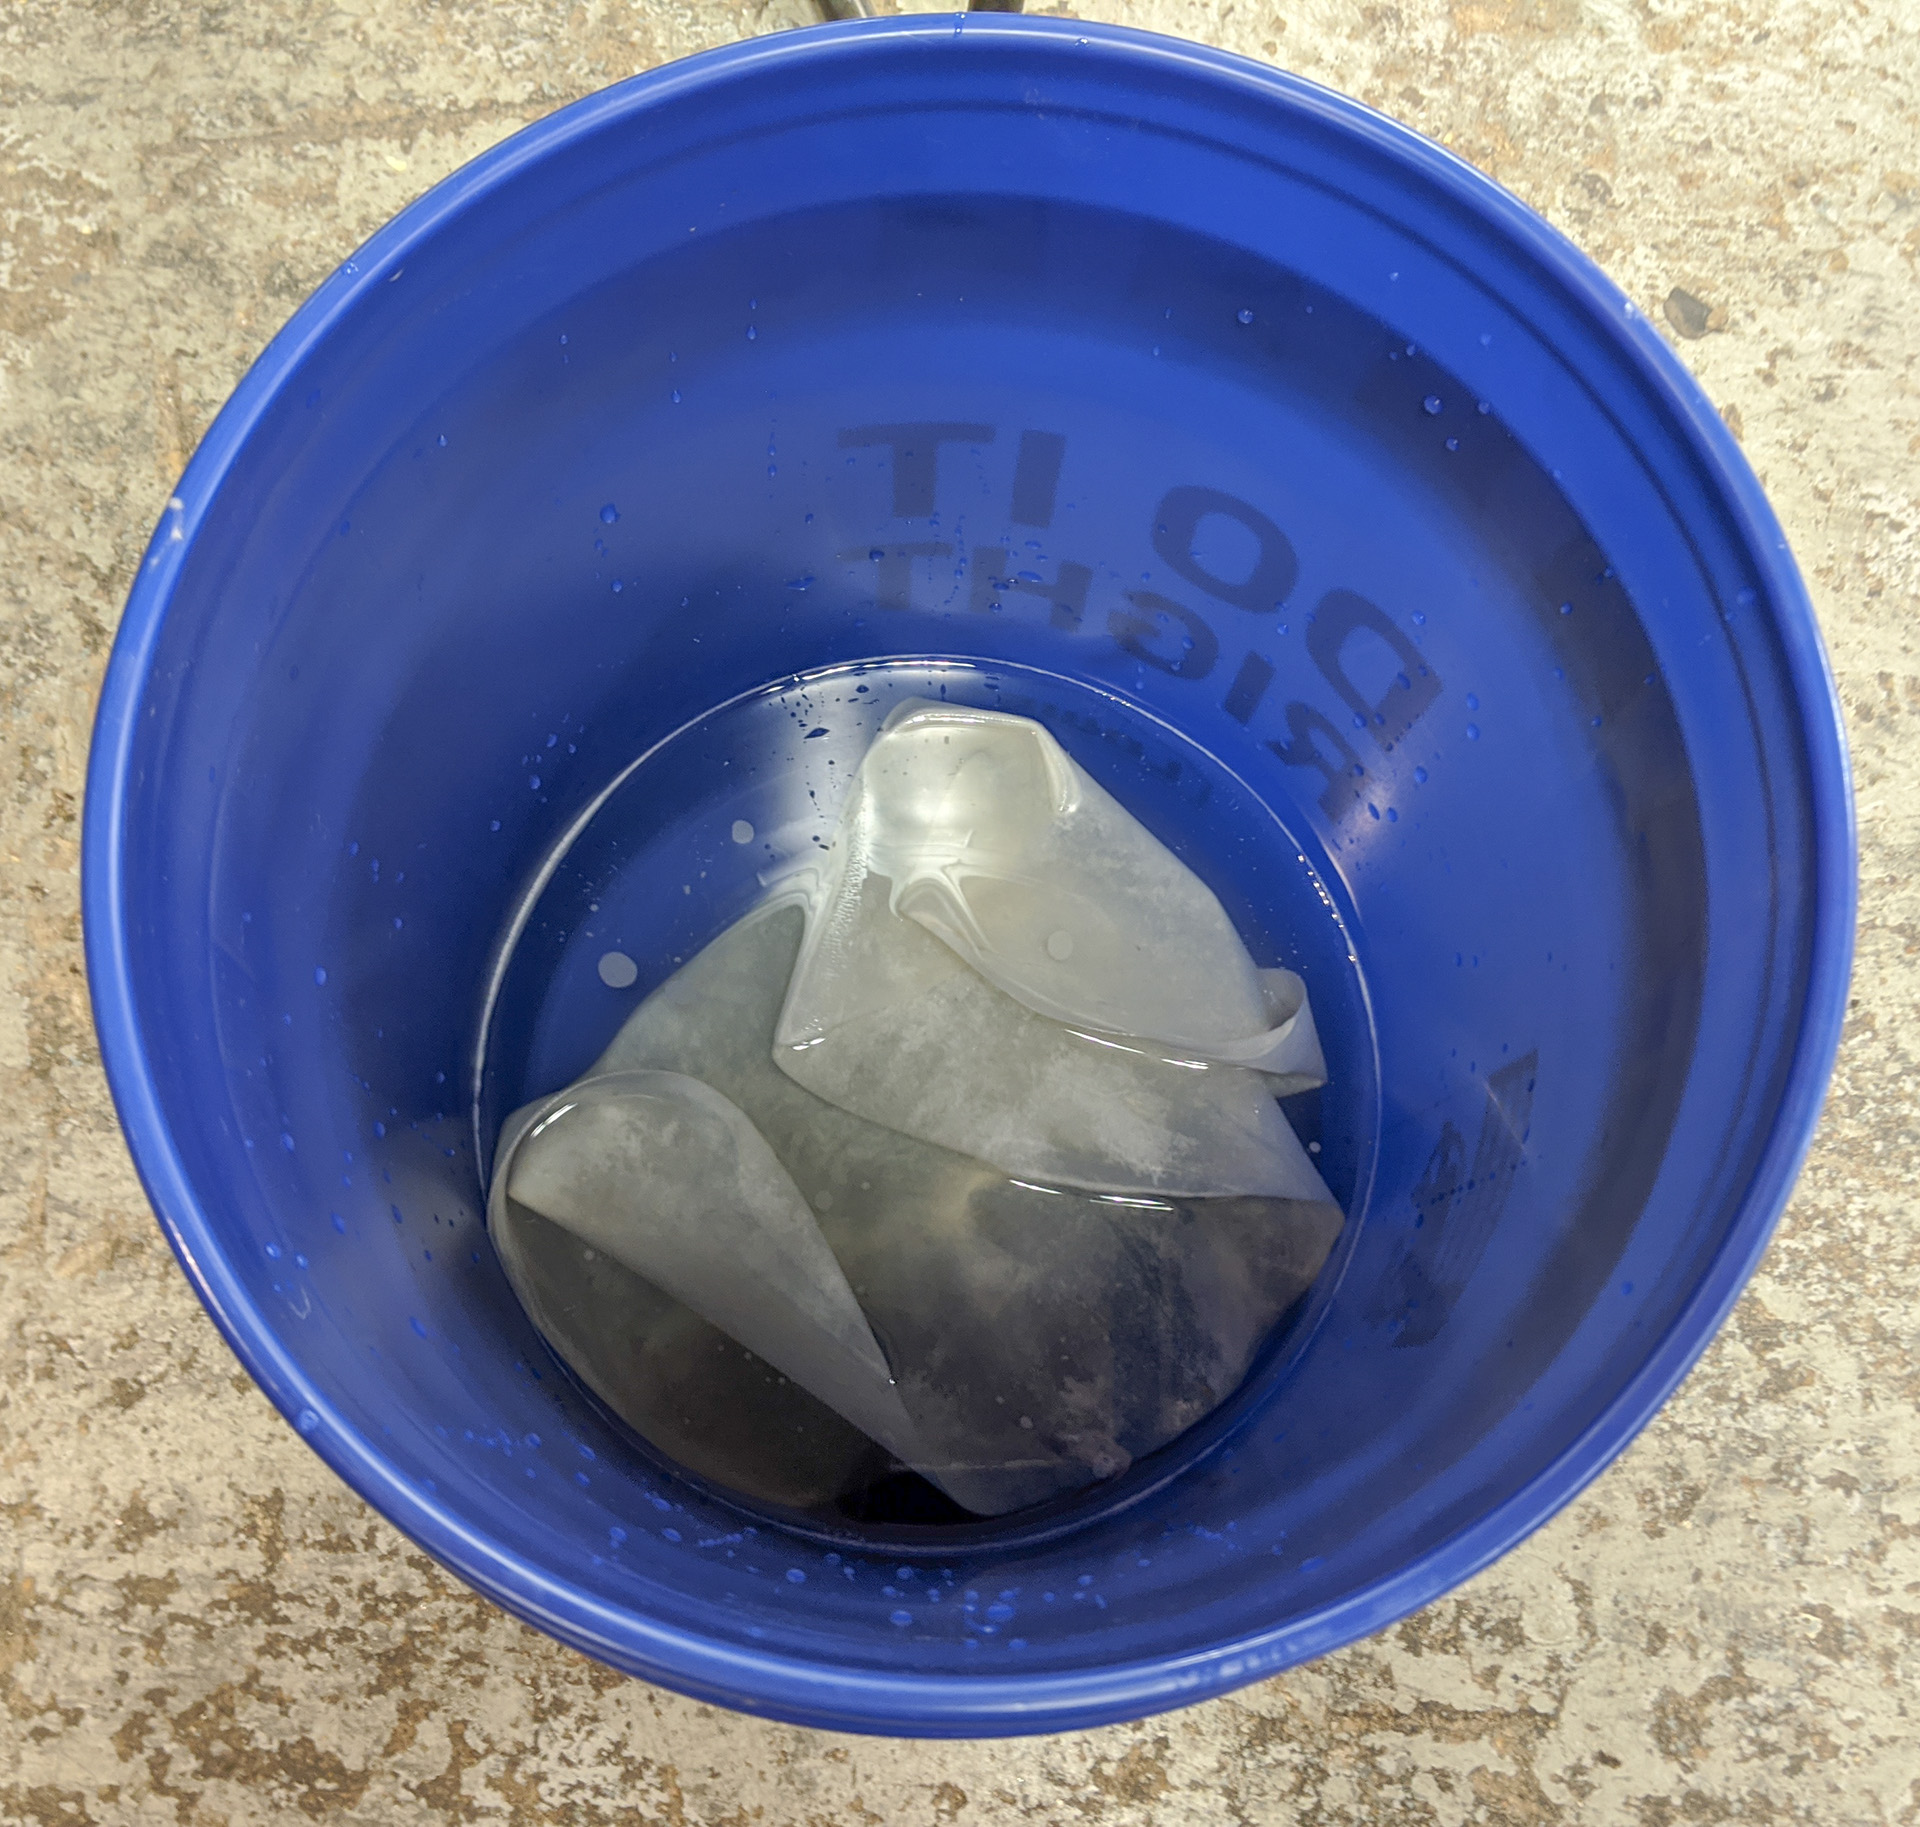
The moment of truth approaches... the one part of this that I am the least sure about - the mounting of the banjo head. Here, I am soaking the head in water for a couple of hours to soften it and make it more pliable. This is a necessary step when installing a banjo (or drum) head made from natural hide. |
|
|
|
|
|
So with my soaked hide ready, the tone ring in place, and my top panel and a bin of screws close to hand, I'm ready to proceed. The steps that followed happened quickly and I didn't have time to stop and take pictures of each stage. Here, the still-wet hide head has been placed over the ring, and while a helper holds it taut, I push the plywood ring down over it, doing my best to keep it from folding over or wrinkling. I insert each screw down through the ring into the braces, pulling the skin as tight as I can before inserting each screw. Then the top panel goes down over it, and each screw is put in, starting with the inner ring, and again I pull the skin as tight as I can before putting in each screw. |
|
|
|
|
|
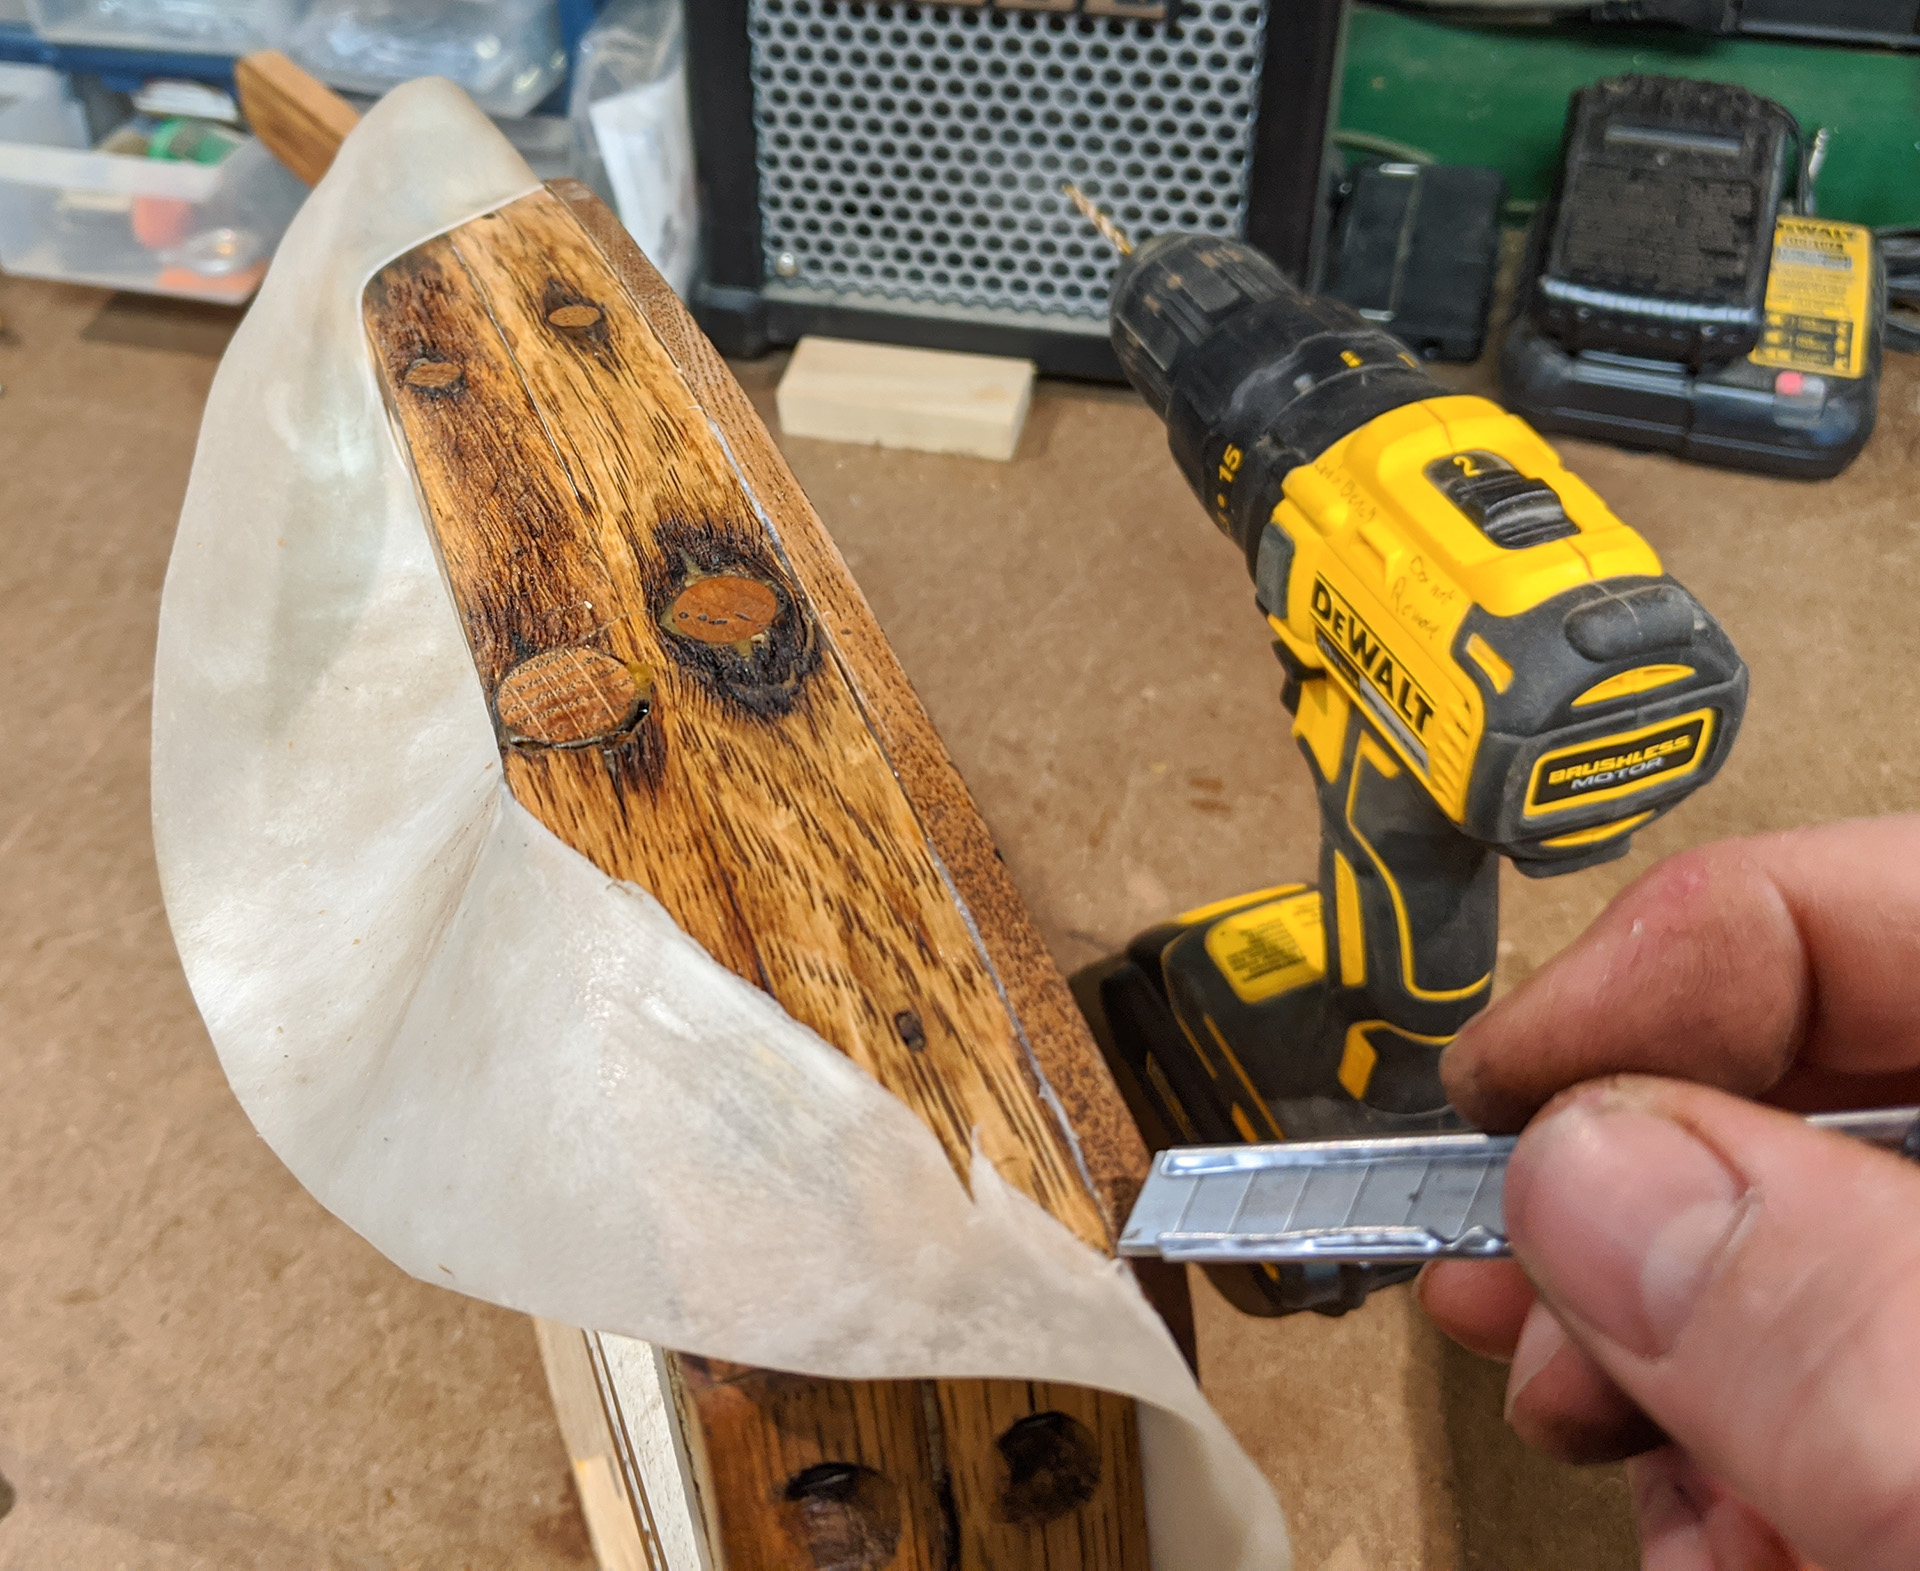
Once all the screws are in, I use a sharp razor knife to trim away the excess at the edge of the instrument. |
|
|
|
|
|
I then go back around the perimeter screws, backing each one out one at a time, applying clamps on either side, and then screwing it back down tight. This eliminated any gaps and greatly increased the clamping pressure being applied to the head by the top panel. |
|
|
|
|
|
Here's a look at the underside/inside of the instrument with the head in place. Note that it did wrinkle up a bit, but none of these wrinkles extended out onto the drumhead. Also note the two screws with decorative washers I added up through the head into the plywood ring... probably unnecessary, but I wanted to be sure there were no sections of the head that could stretch and sag too much. |
|
|
|
|
|
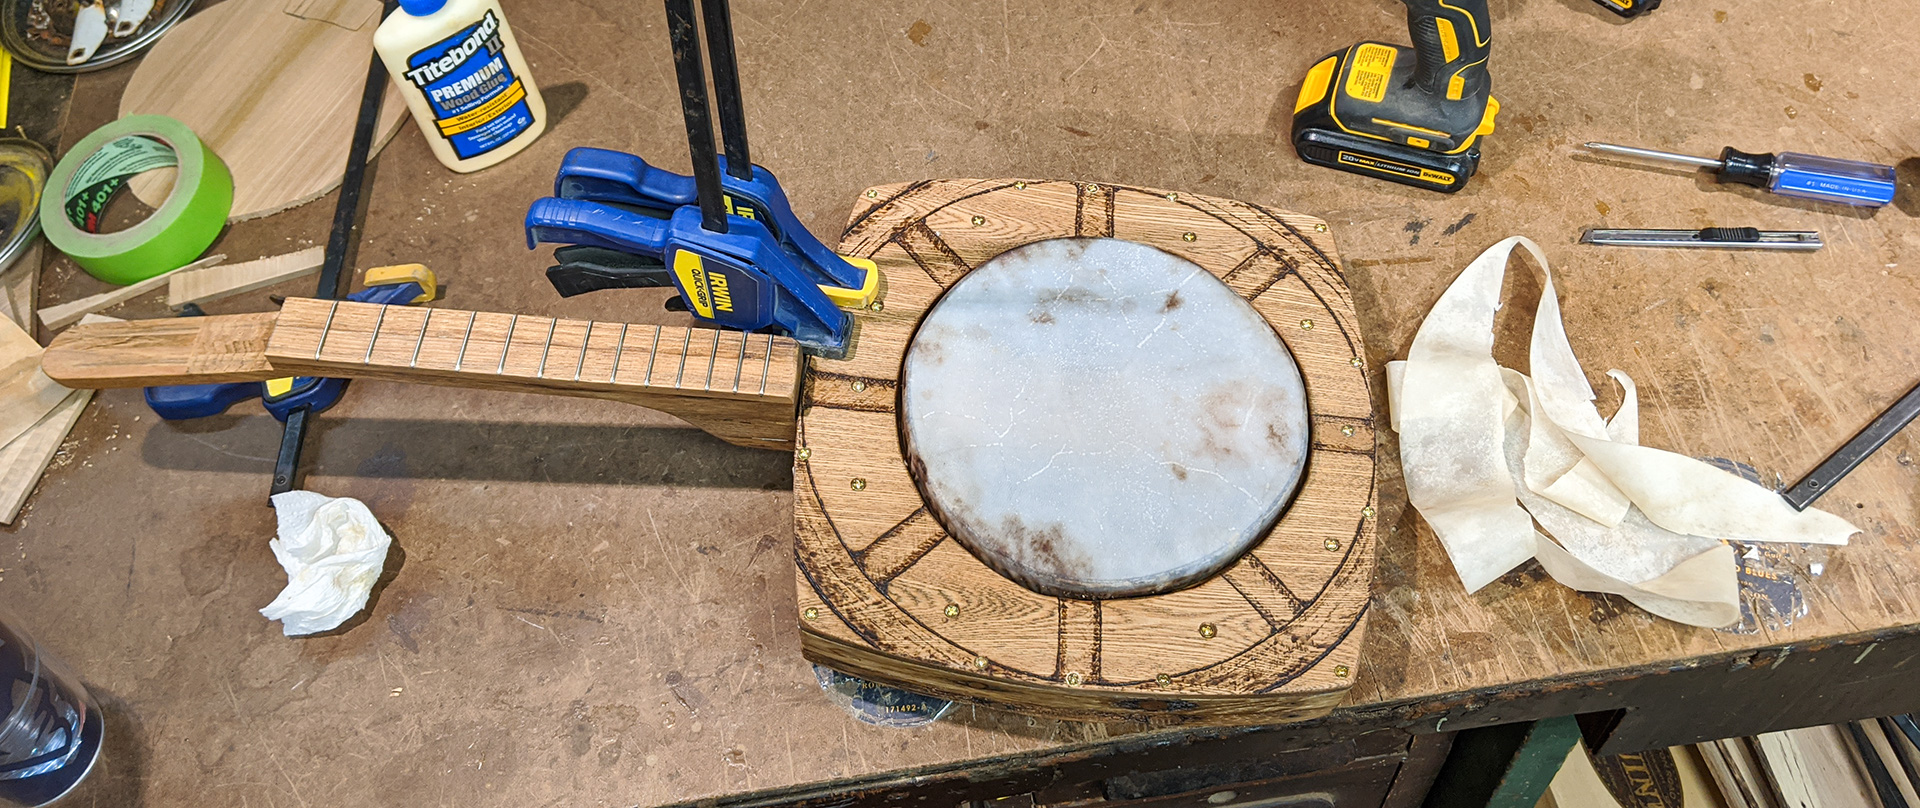
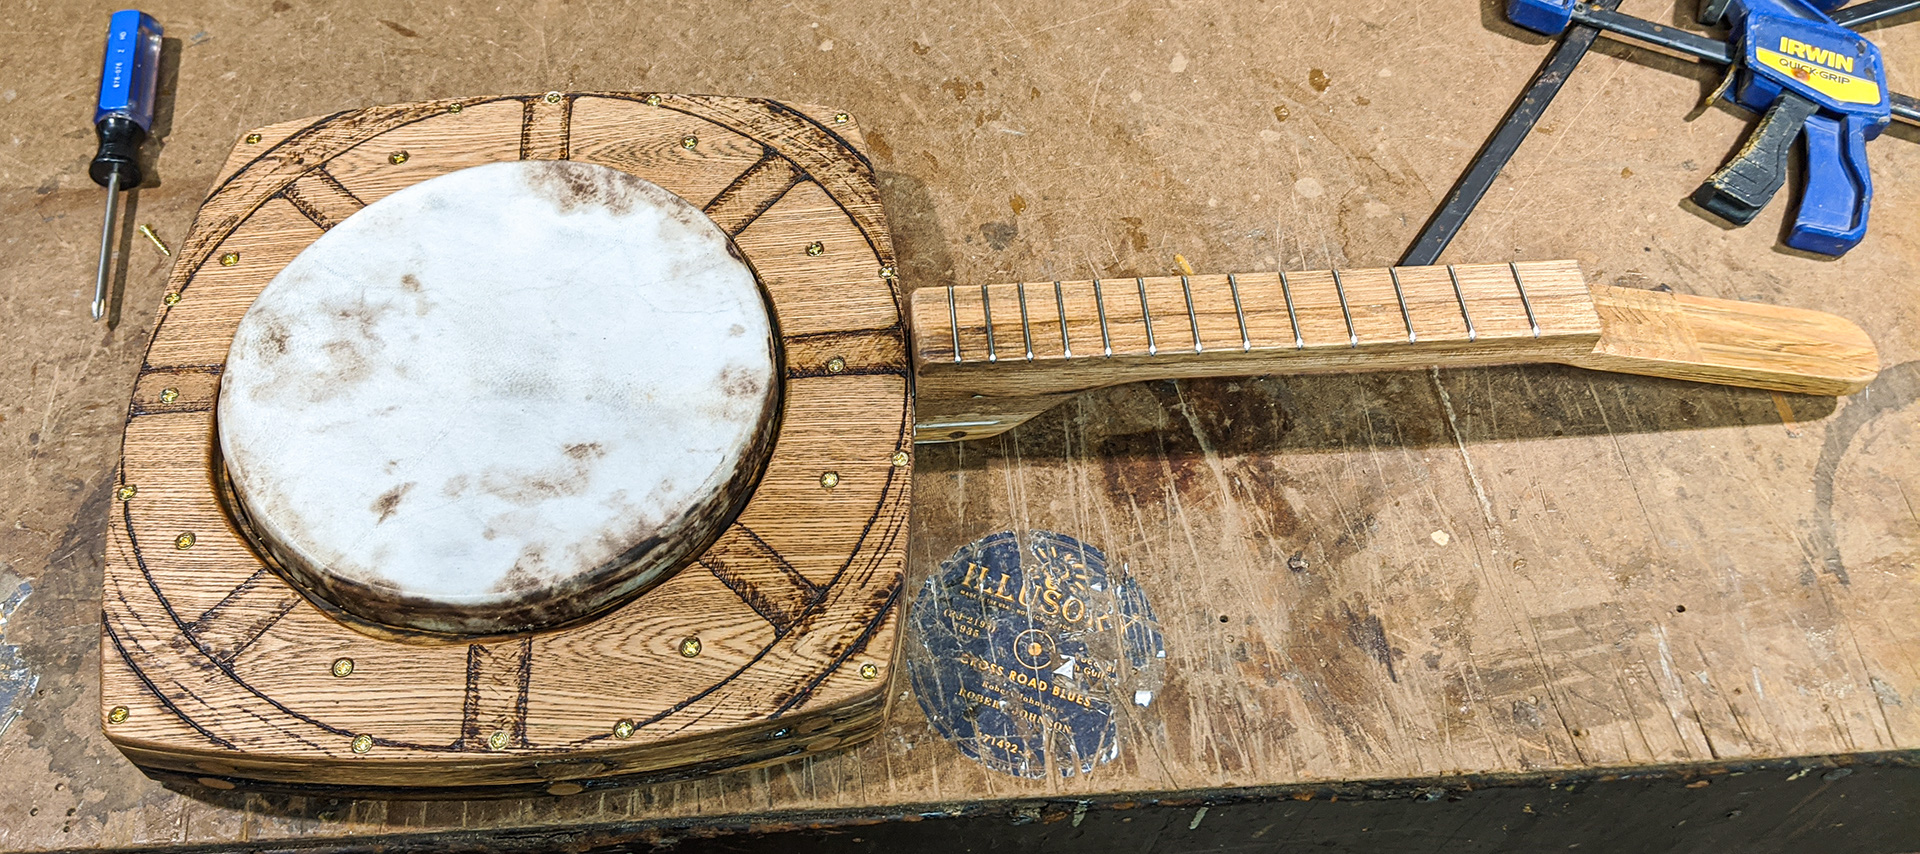
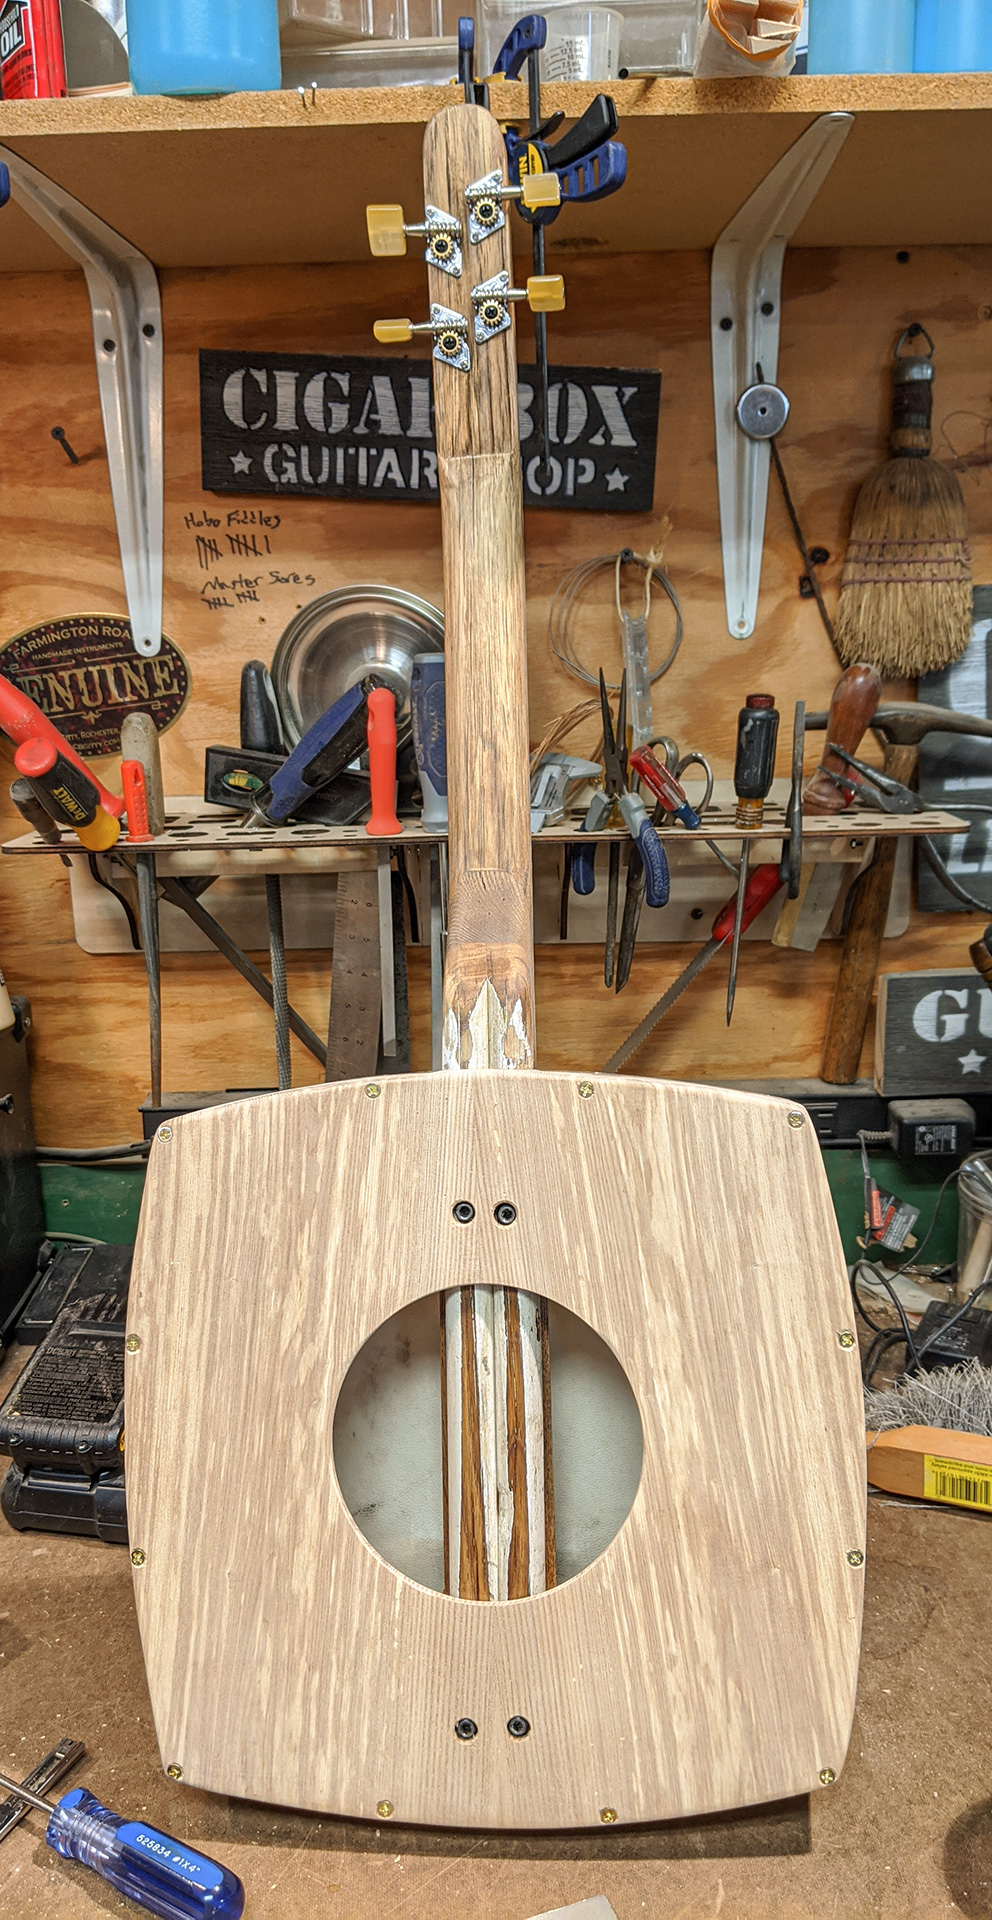
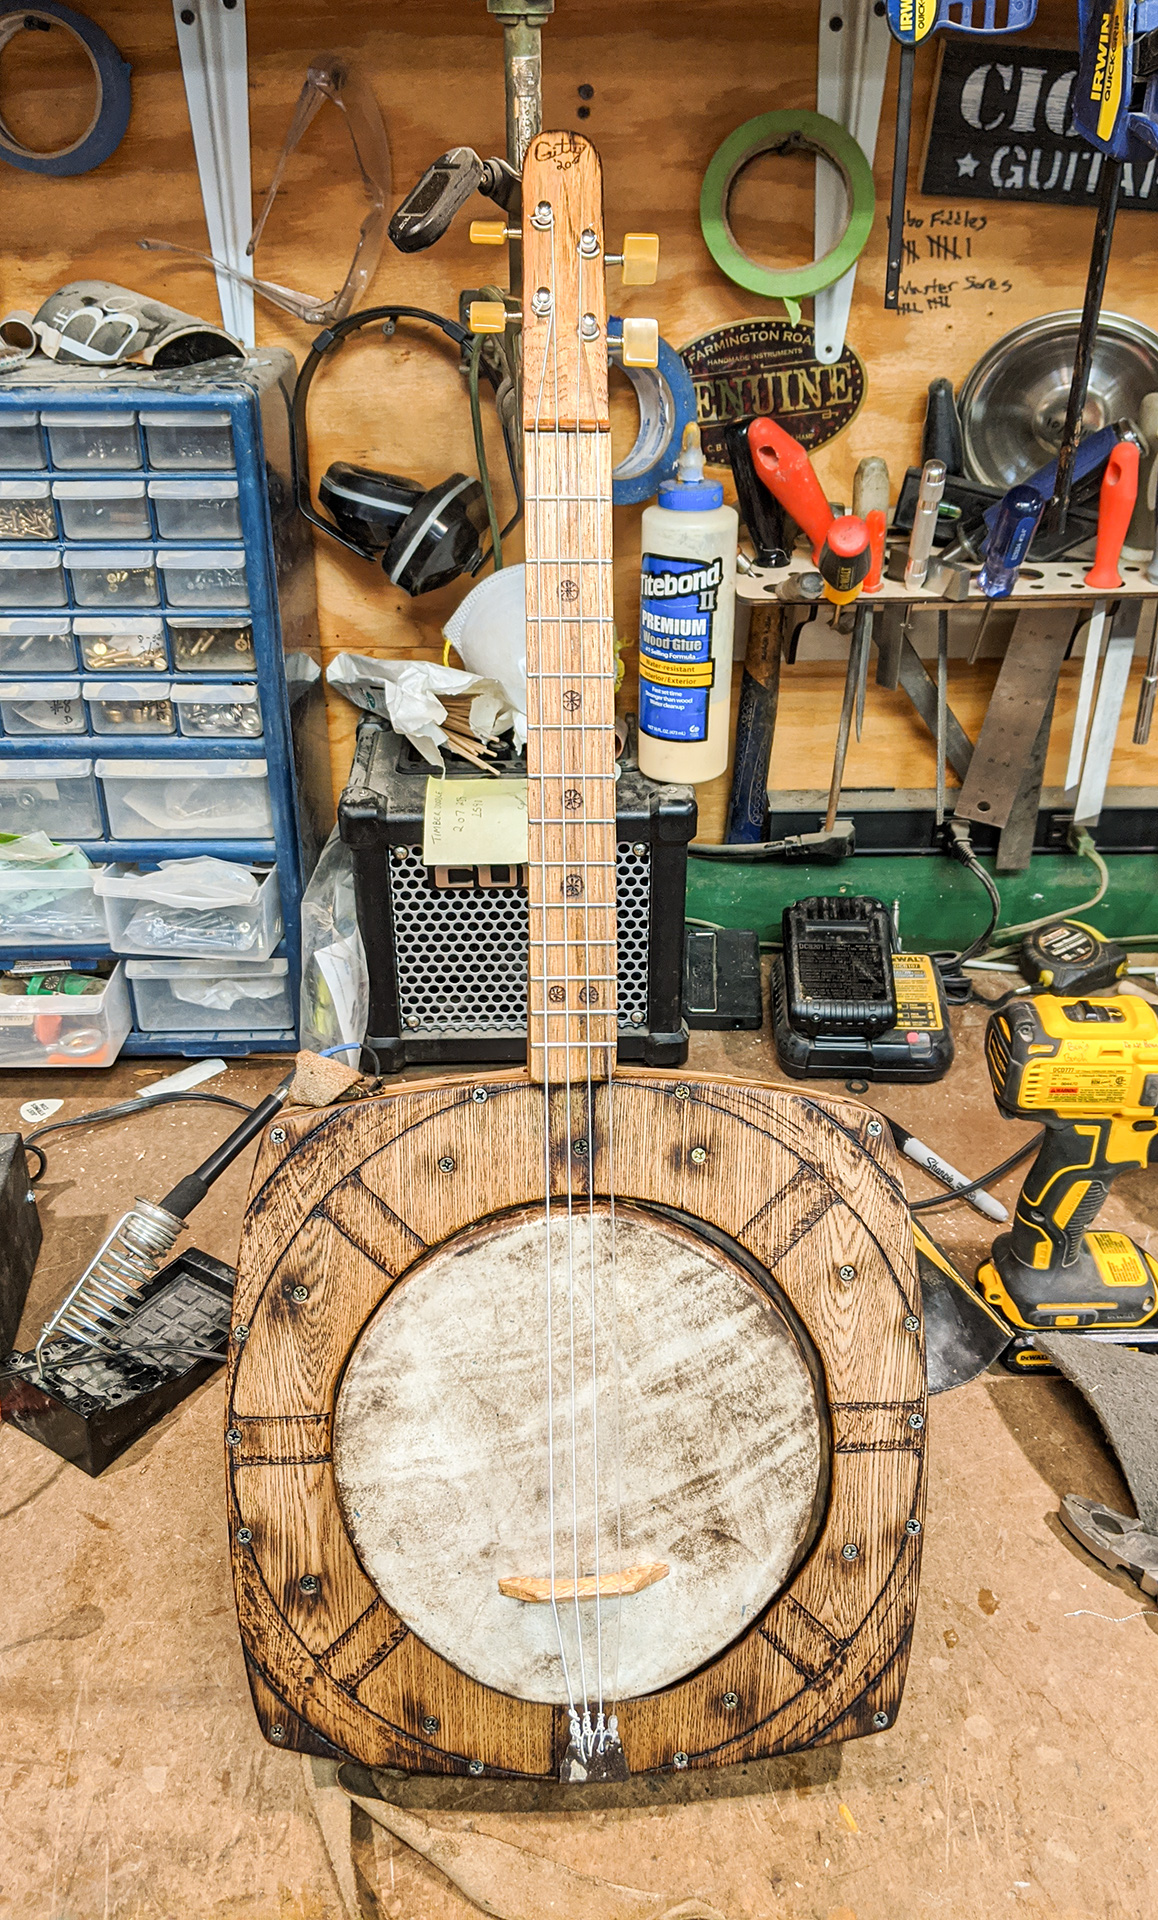
Well, here she is, with head mounted in place and trimmed. She's starting to look like a banjo, eh? I have also applied the golden oak stain to the neck by this point. |
|
|
|
|
|
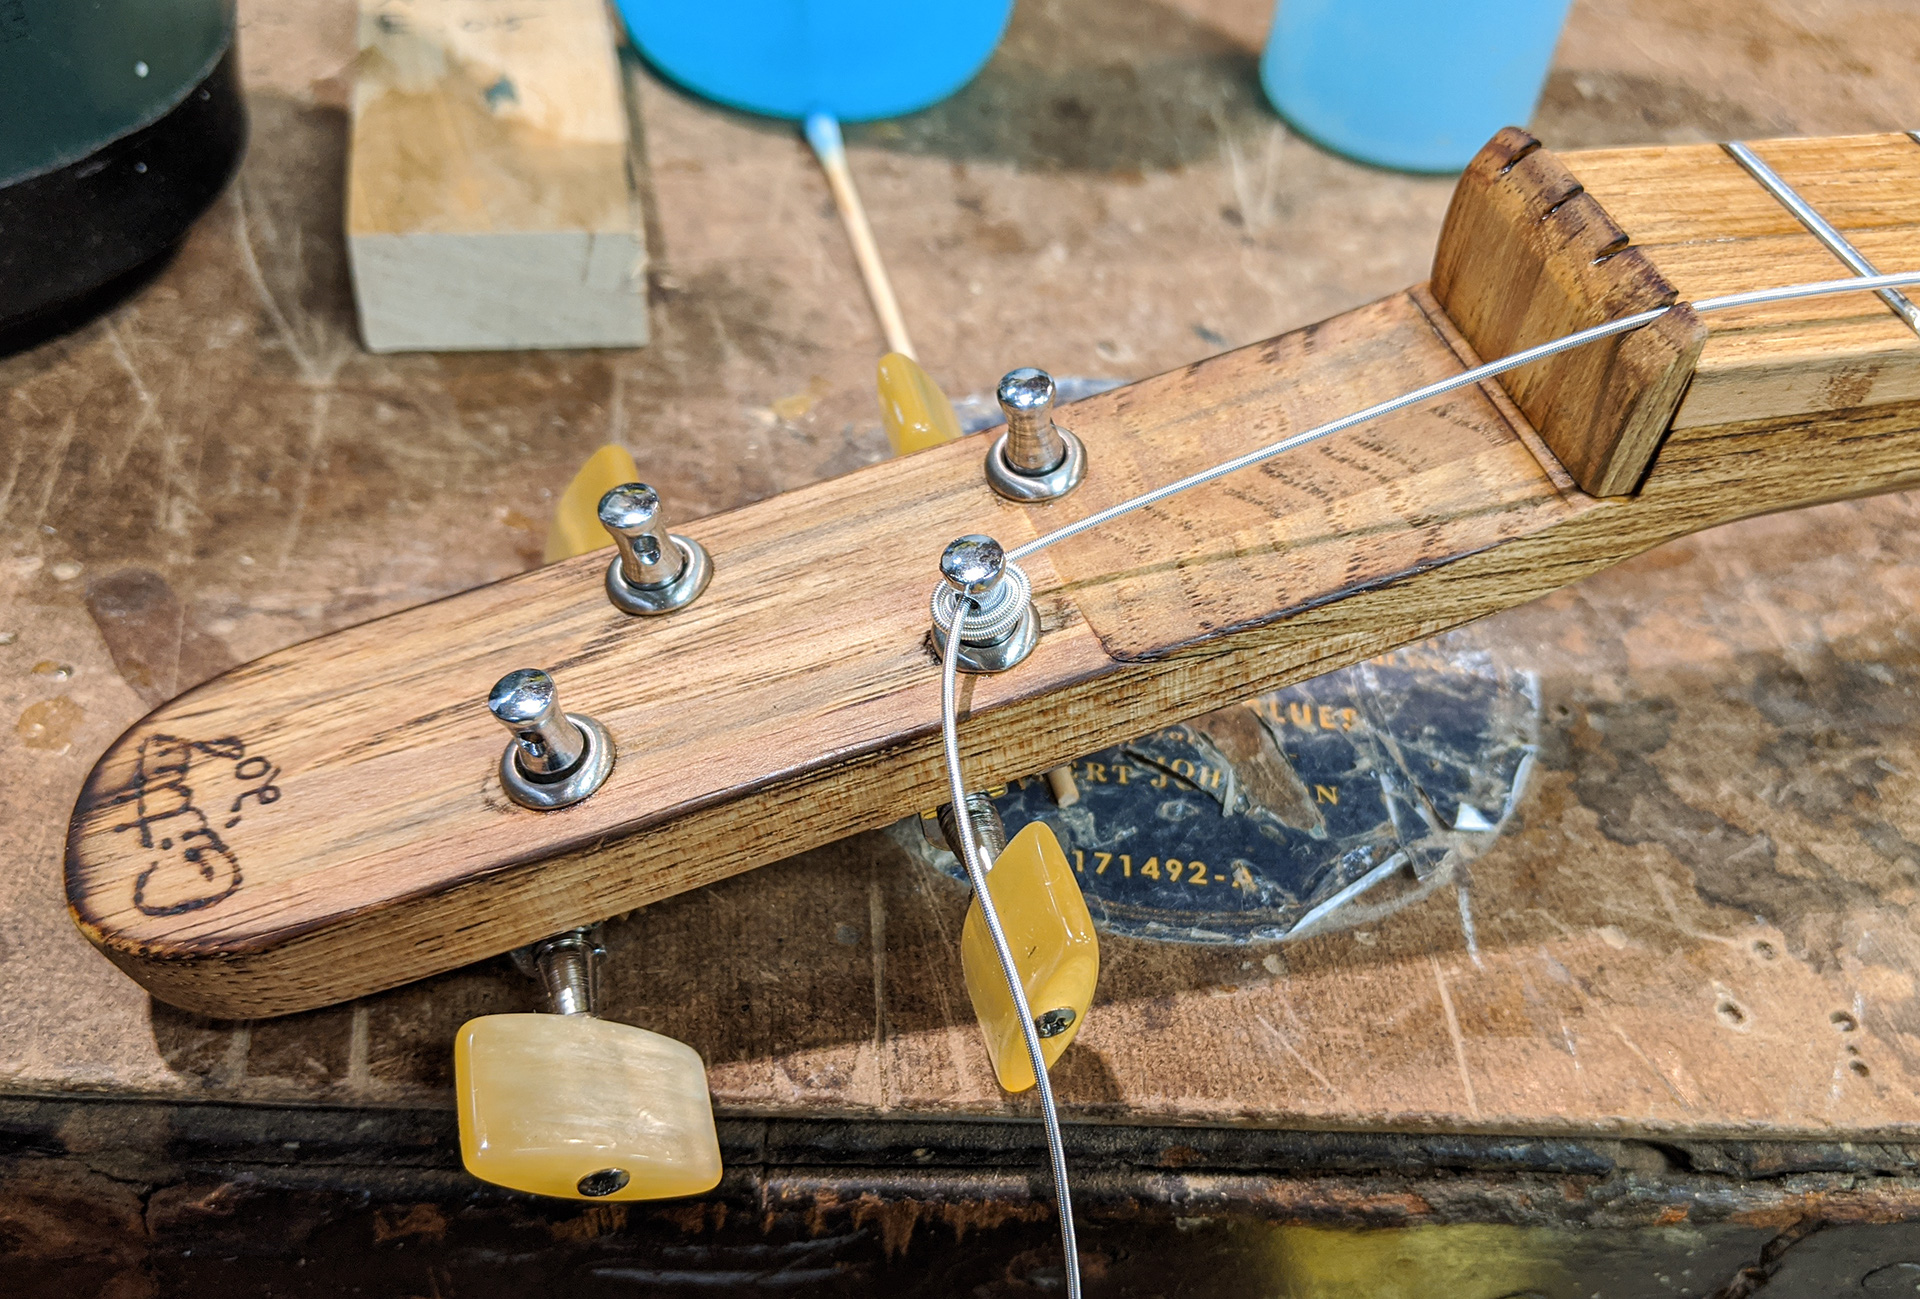
Here, I have installed a nut (made from some of the leftover laminated-together neck stock), and also marked and drilled my tuner holes using a C. B. Gitty 4-string headstock template. |
|
|
|
|
|
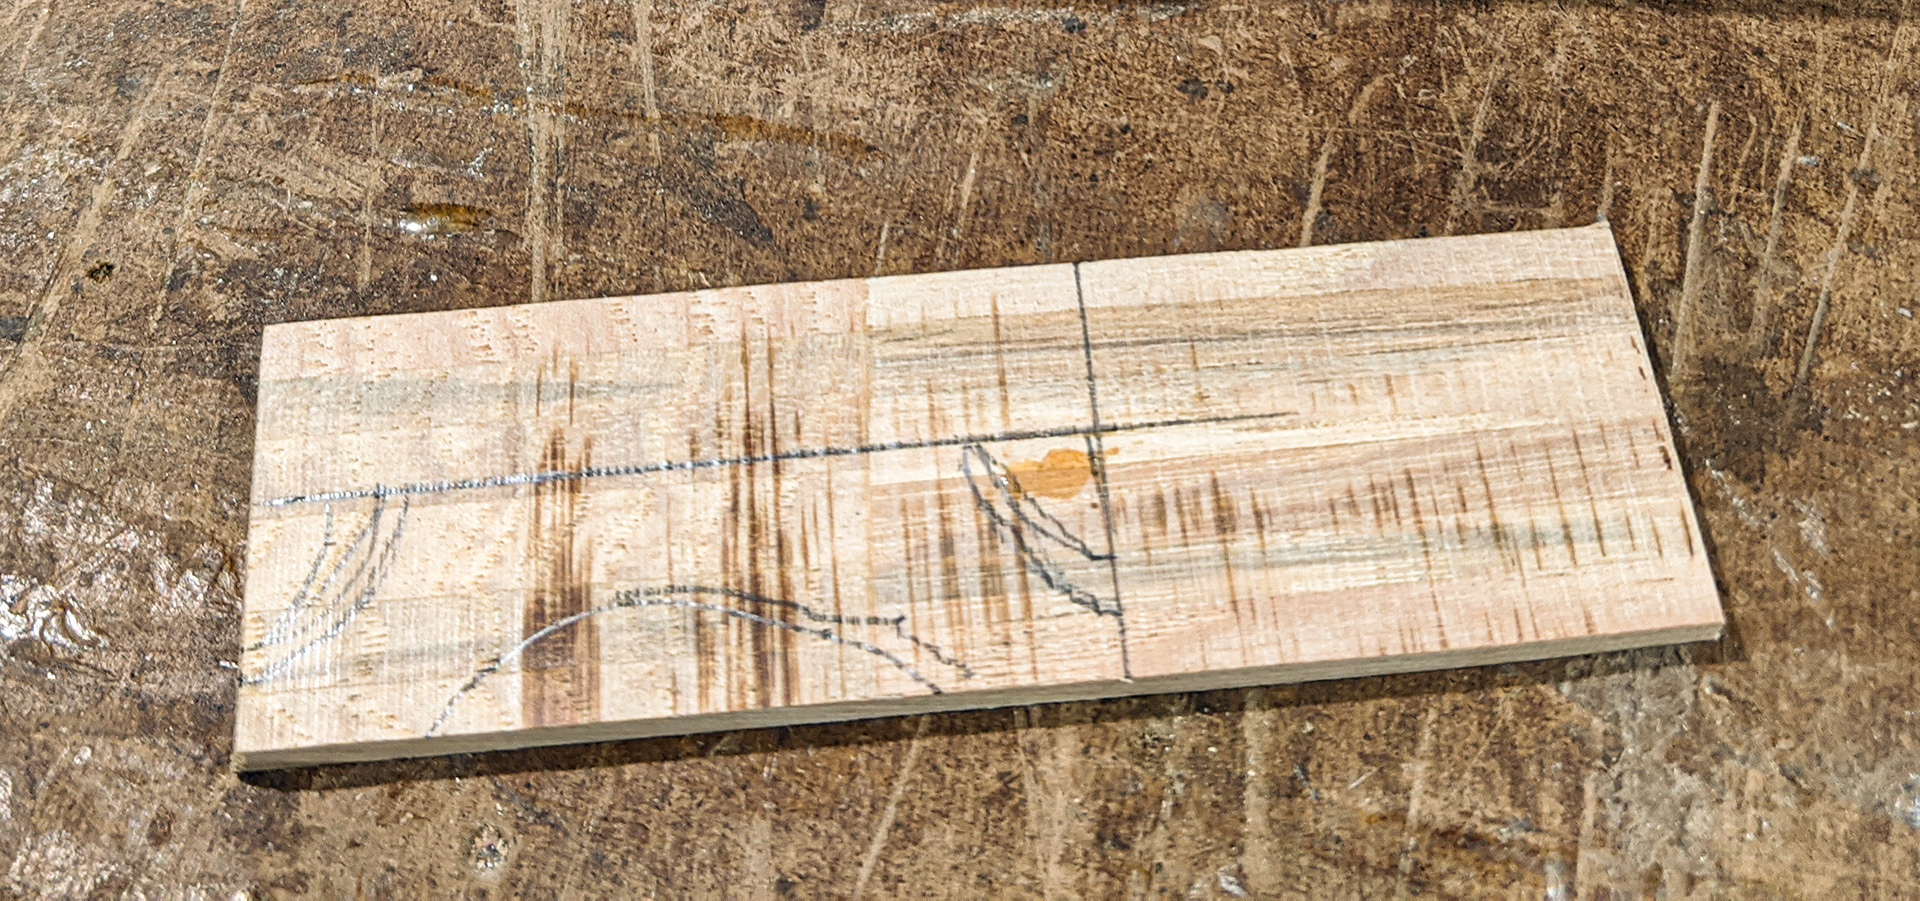
Here, I have marked out the basic design for my bridge on the cutout piece left over from my headstock-thinning endeavors. A bit of sawing and sanding soon has it looking like a standard banjo bridge. |
|
|
|
|
|
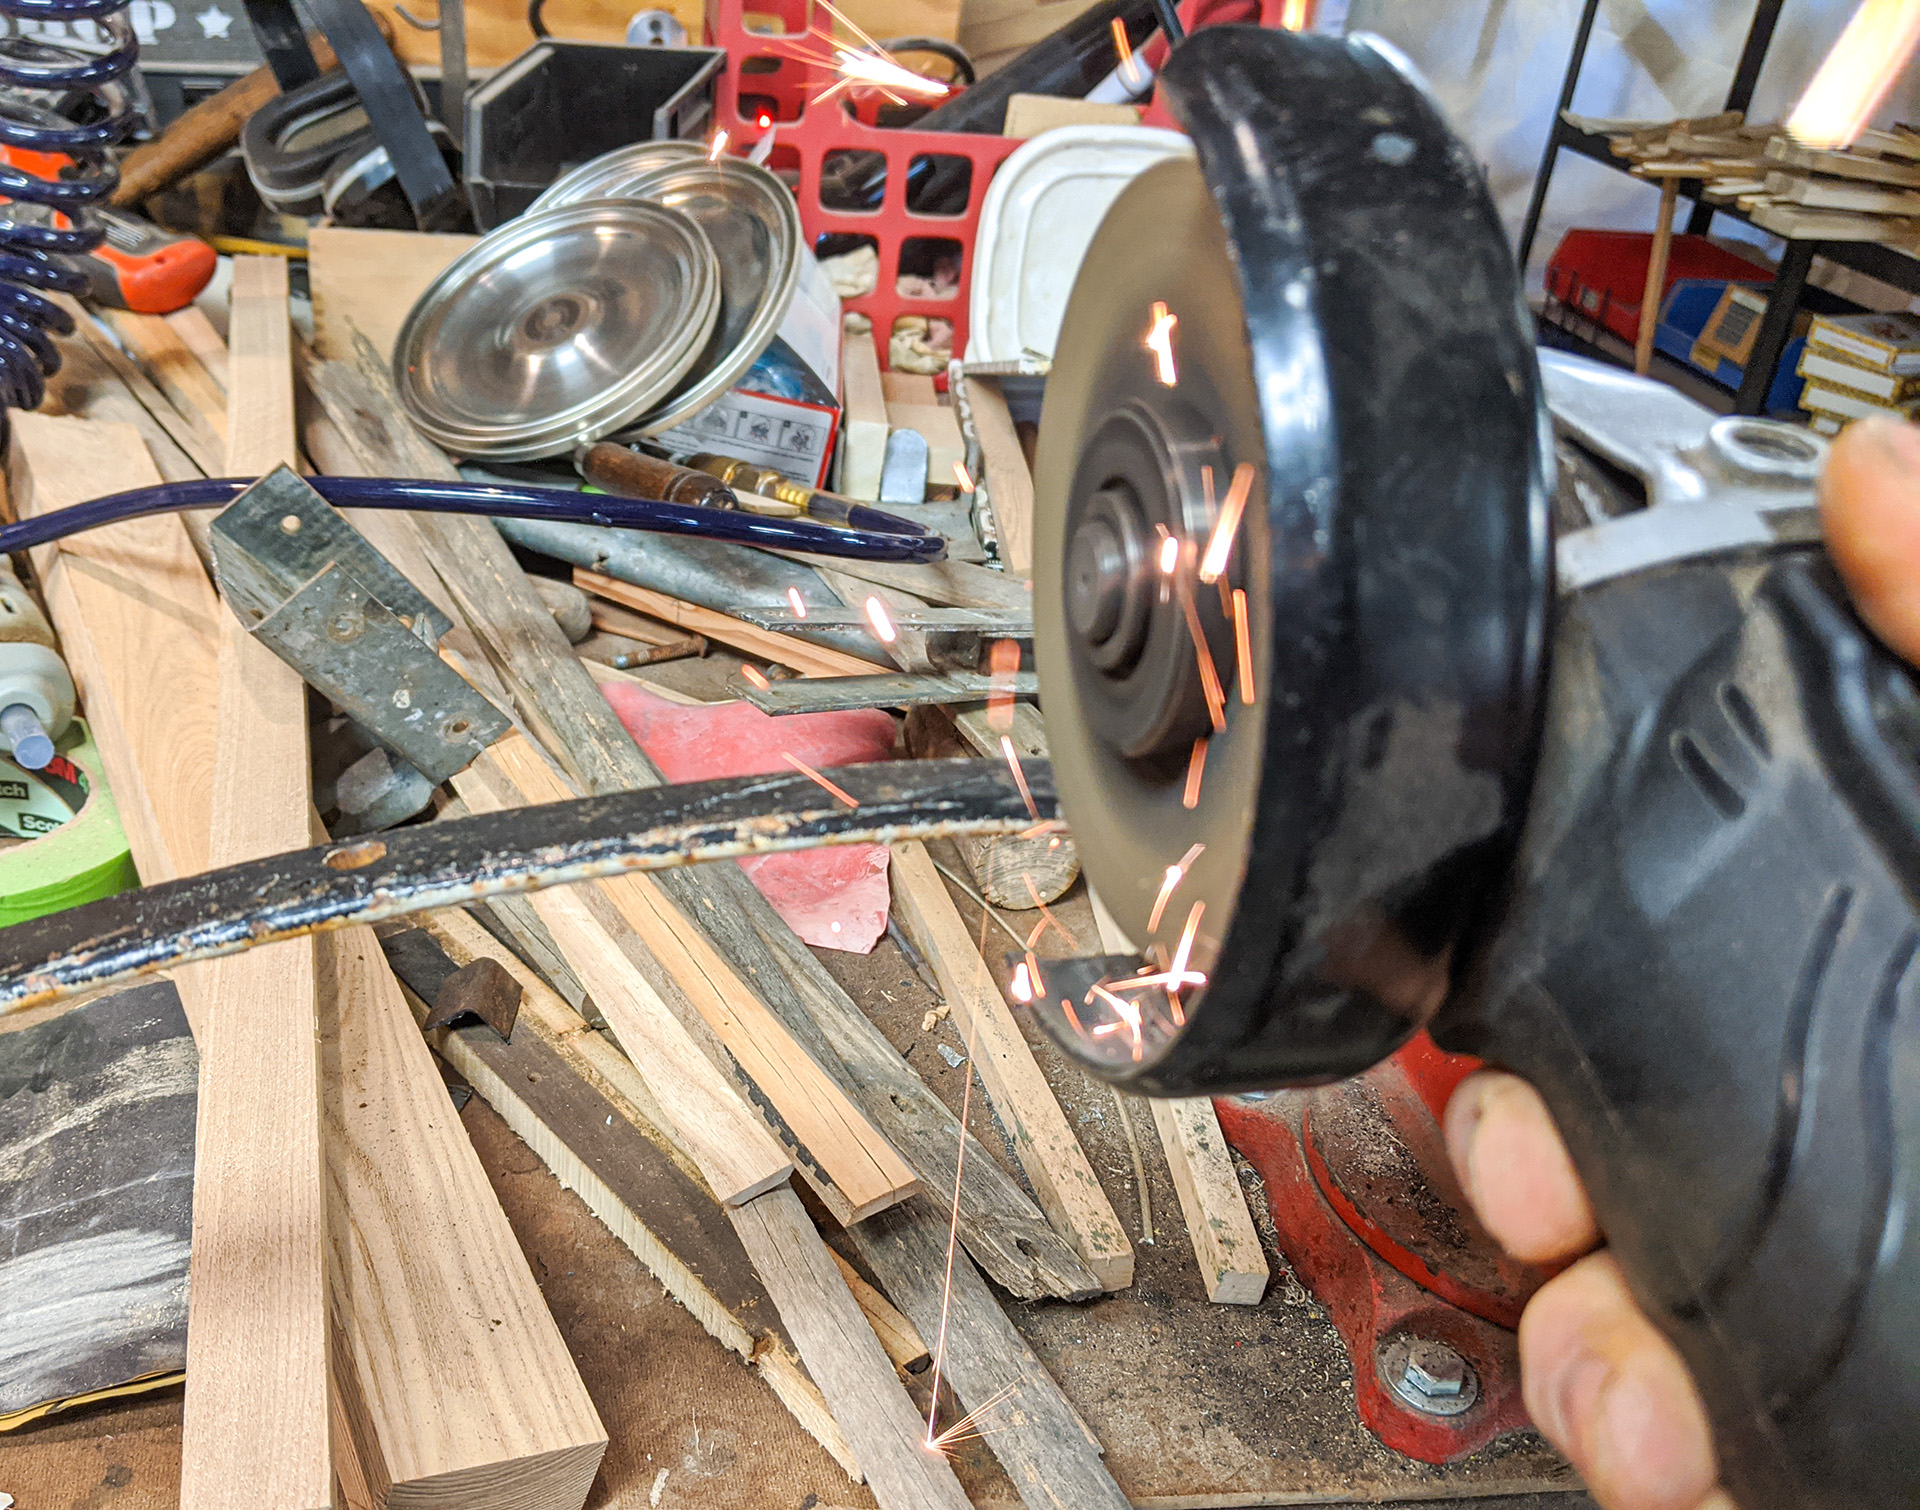
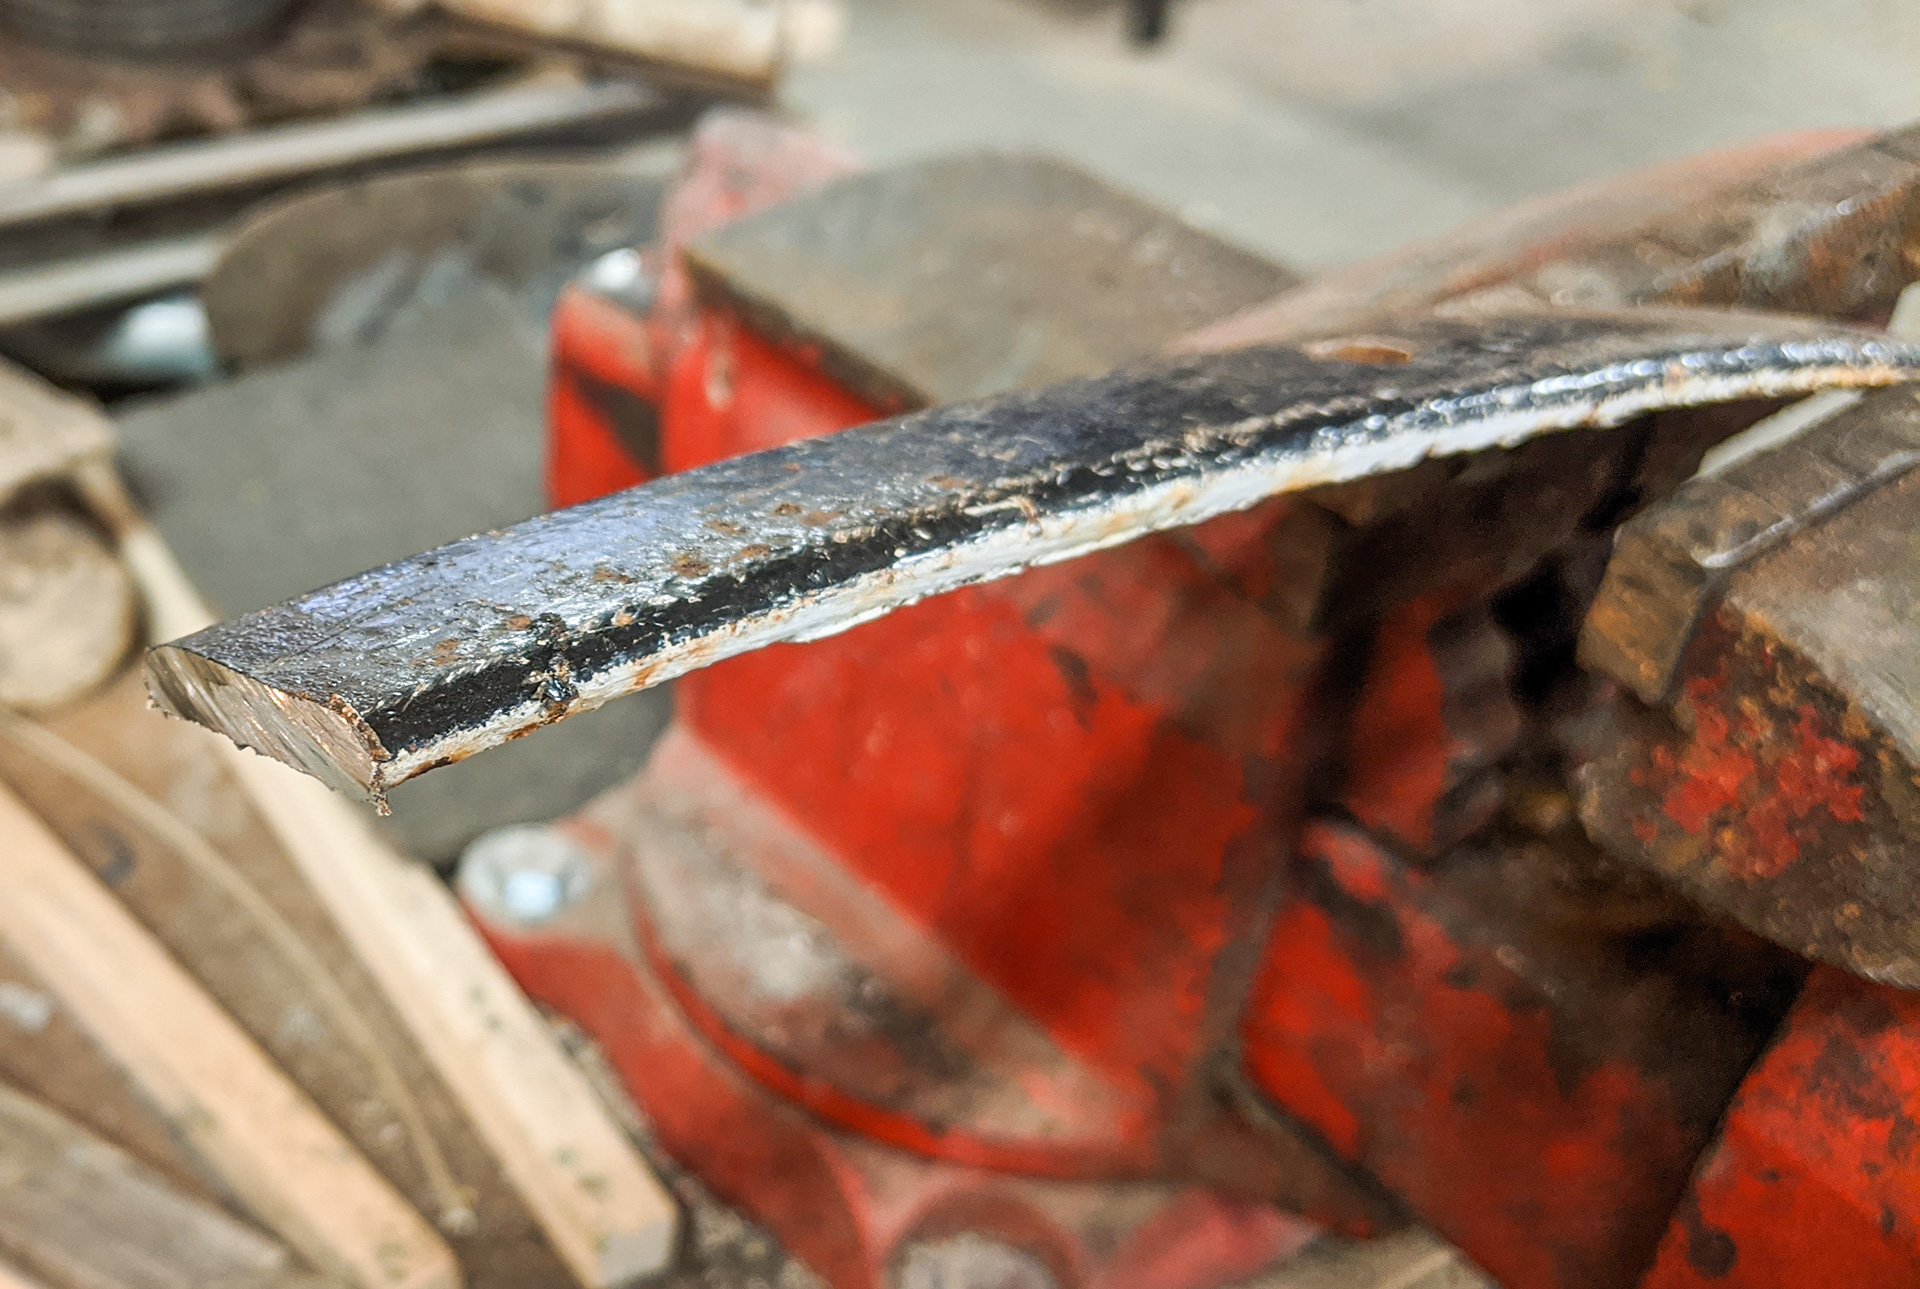
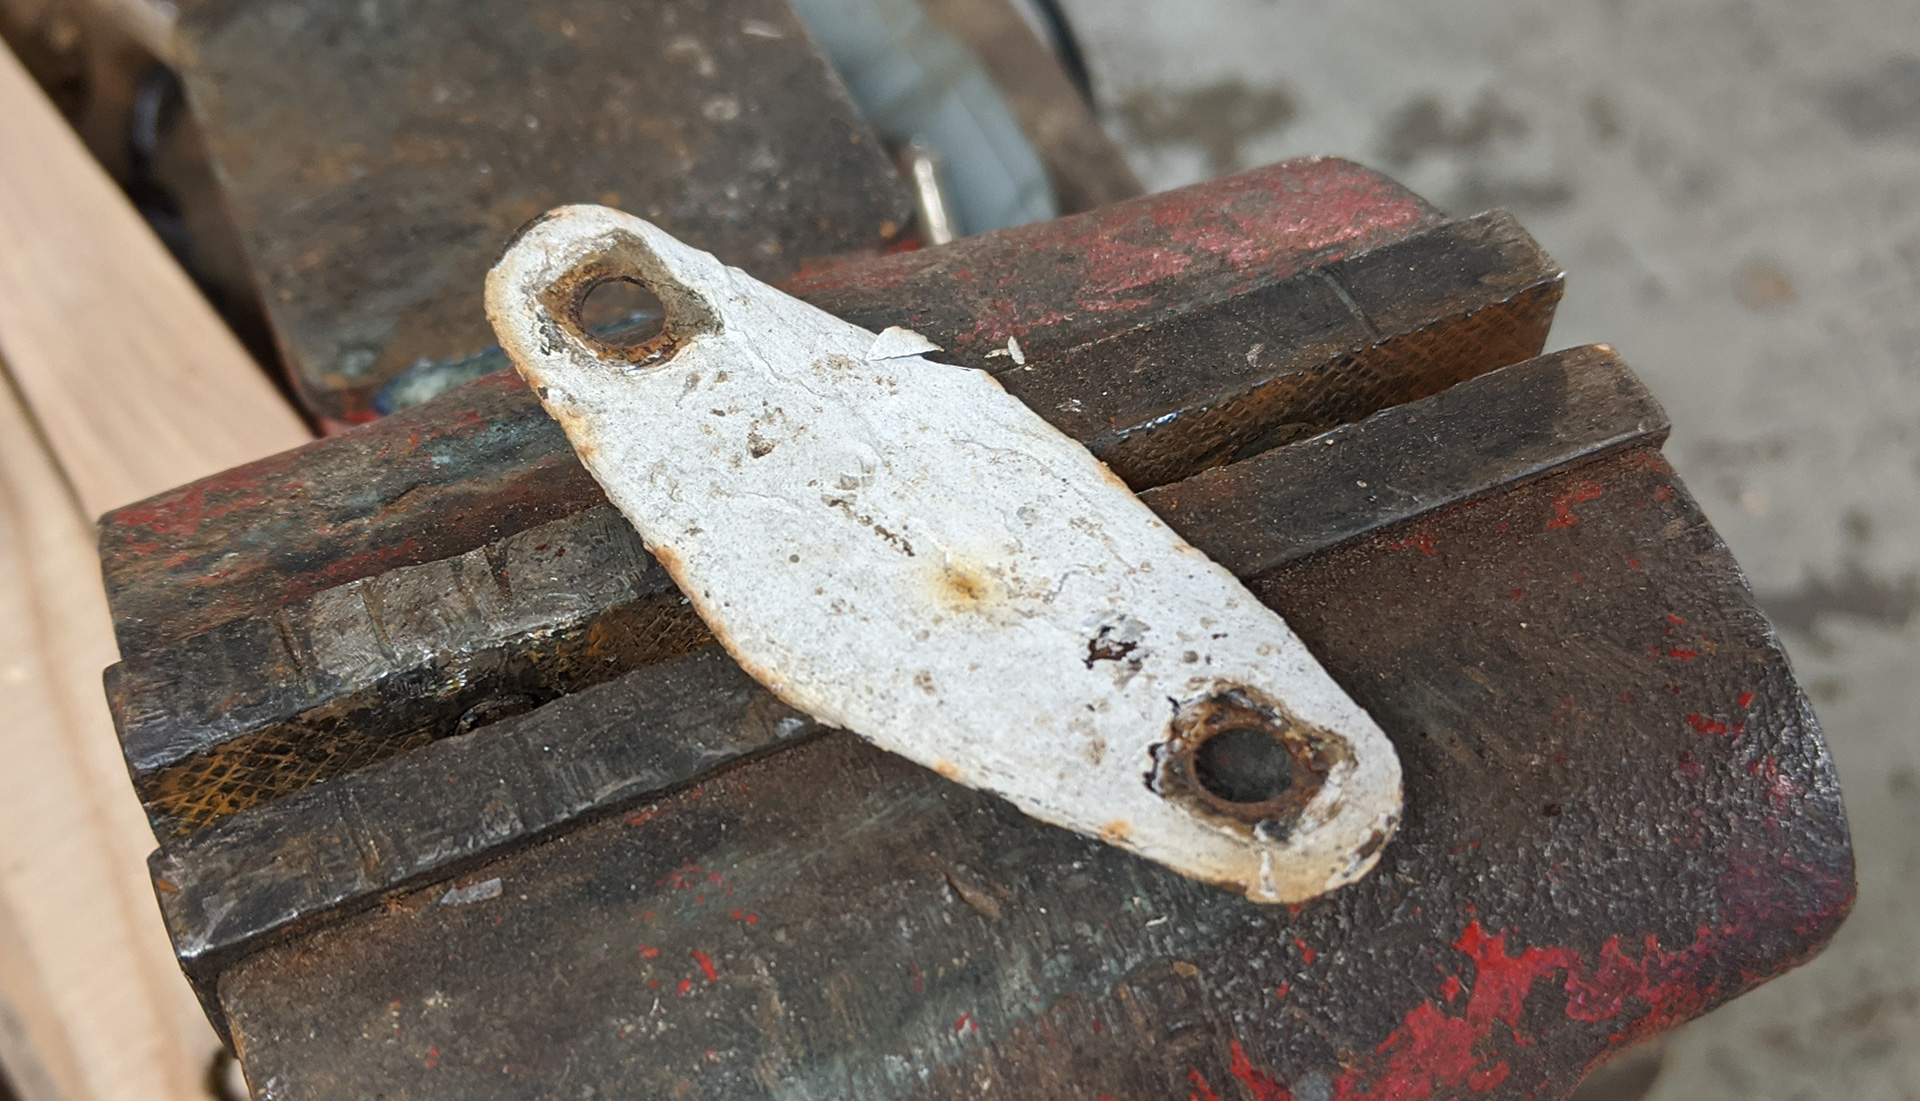
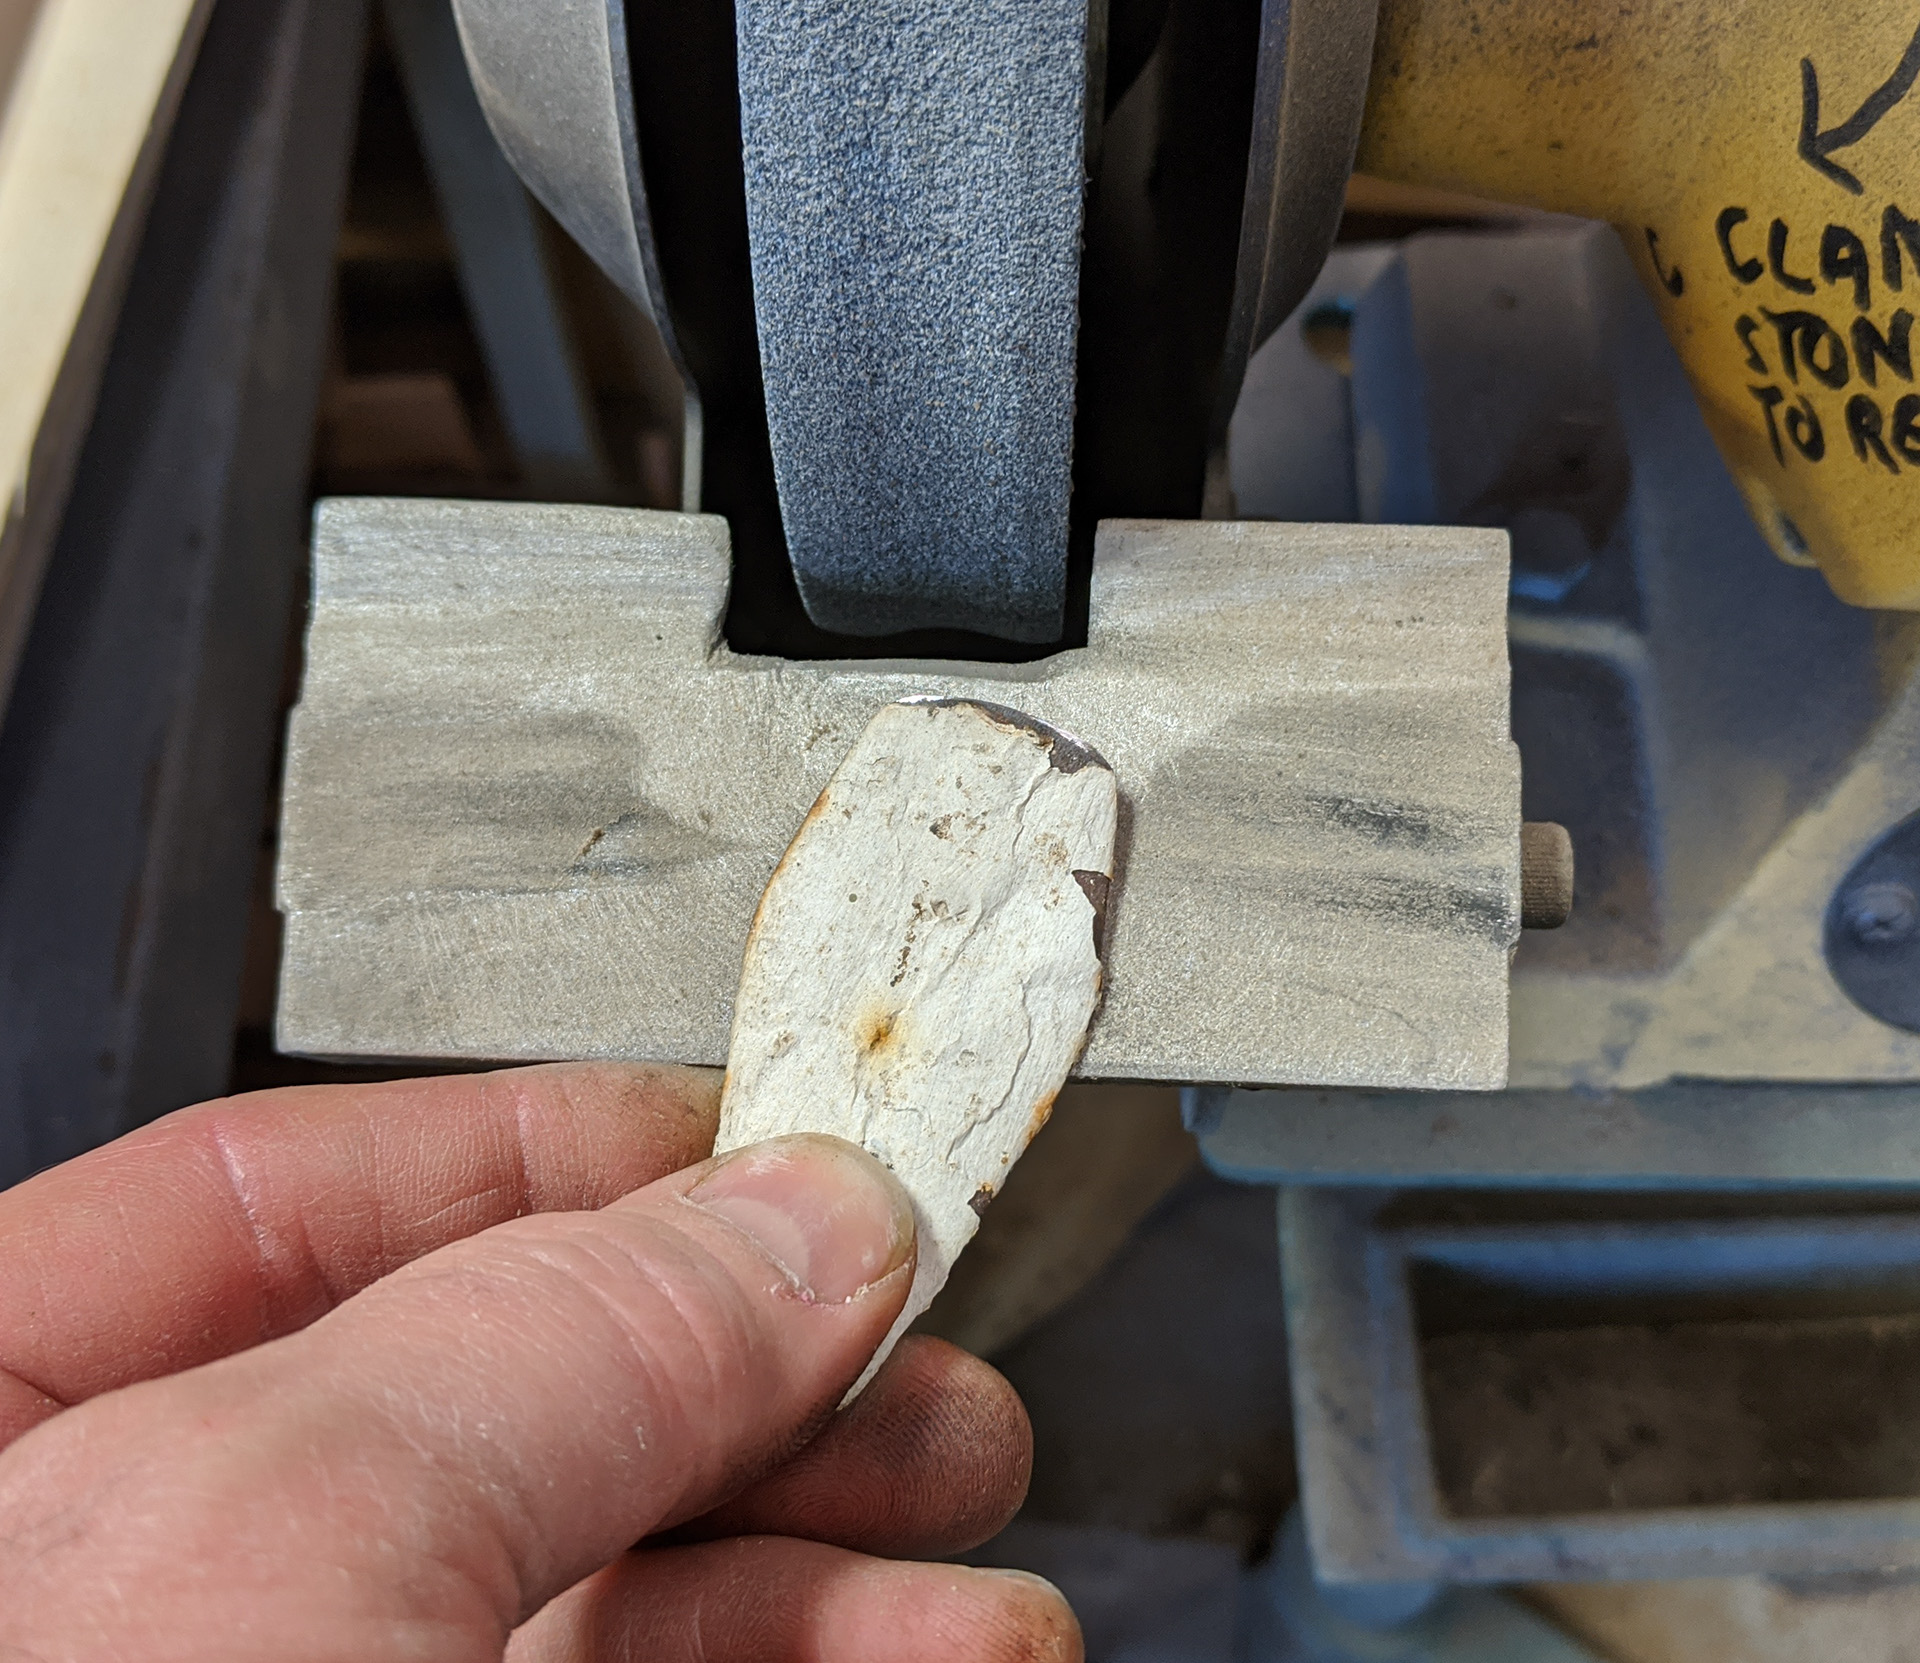
For the tailpiece, I decided to repurpose one of the joining brackets from the original carriage wheel. Because it had a curved profile, to fit over the curved rim, I first point it flat on my vise anvil... |
|
|
|
|
|
And then it's over to the grinding wheel for some shaping. |
|
|
|
|
|
I leave the original mounting hole in place on one side, and grind the other side down to a wider, flatter surface that I can drill string mounting holes in. |
|
|
|
|
|
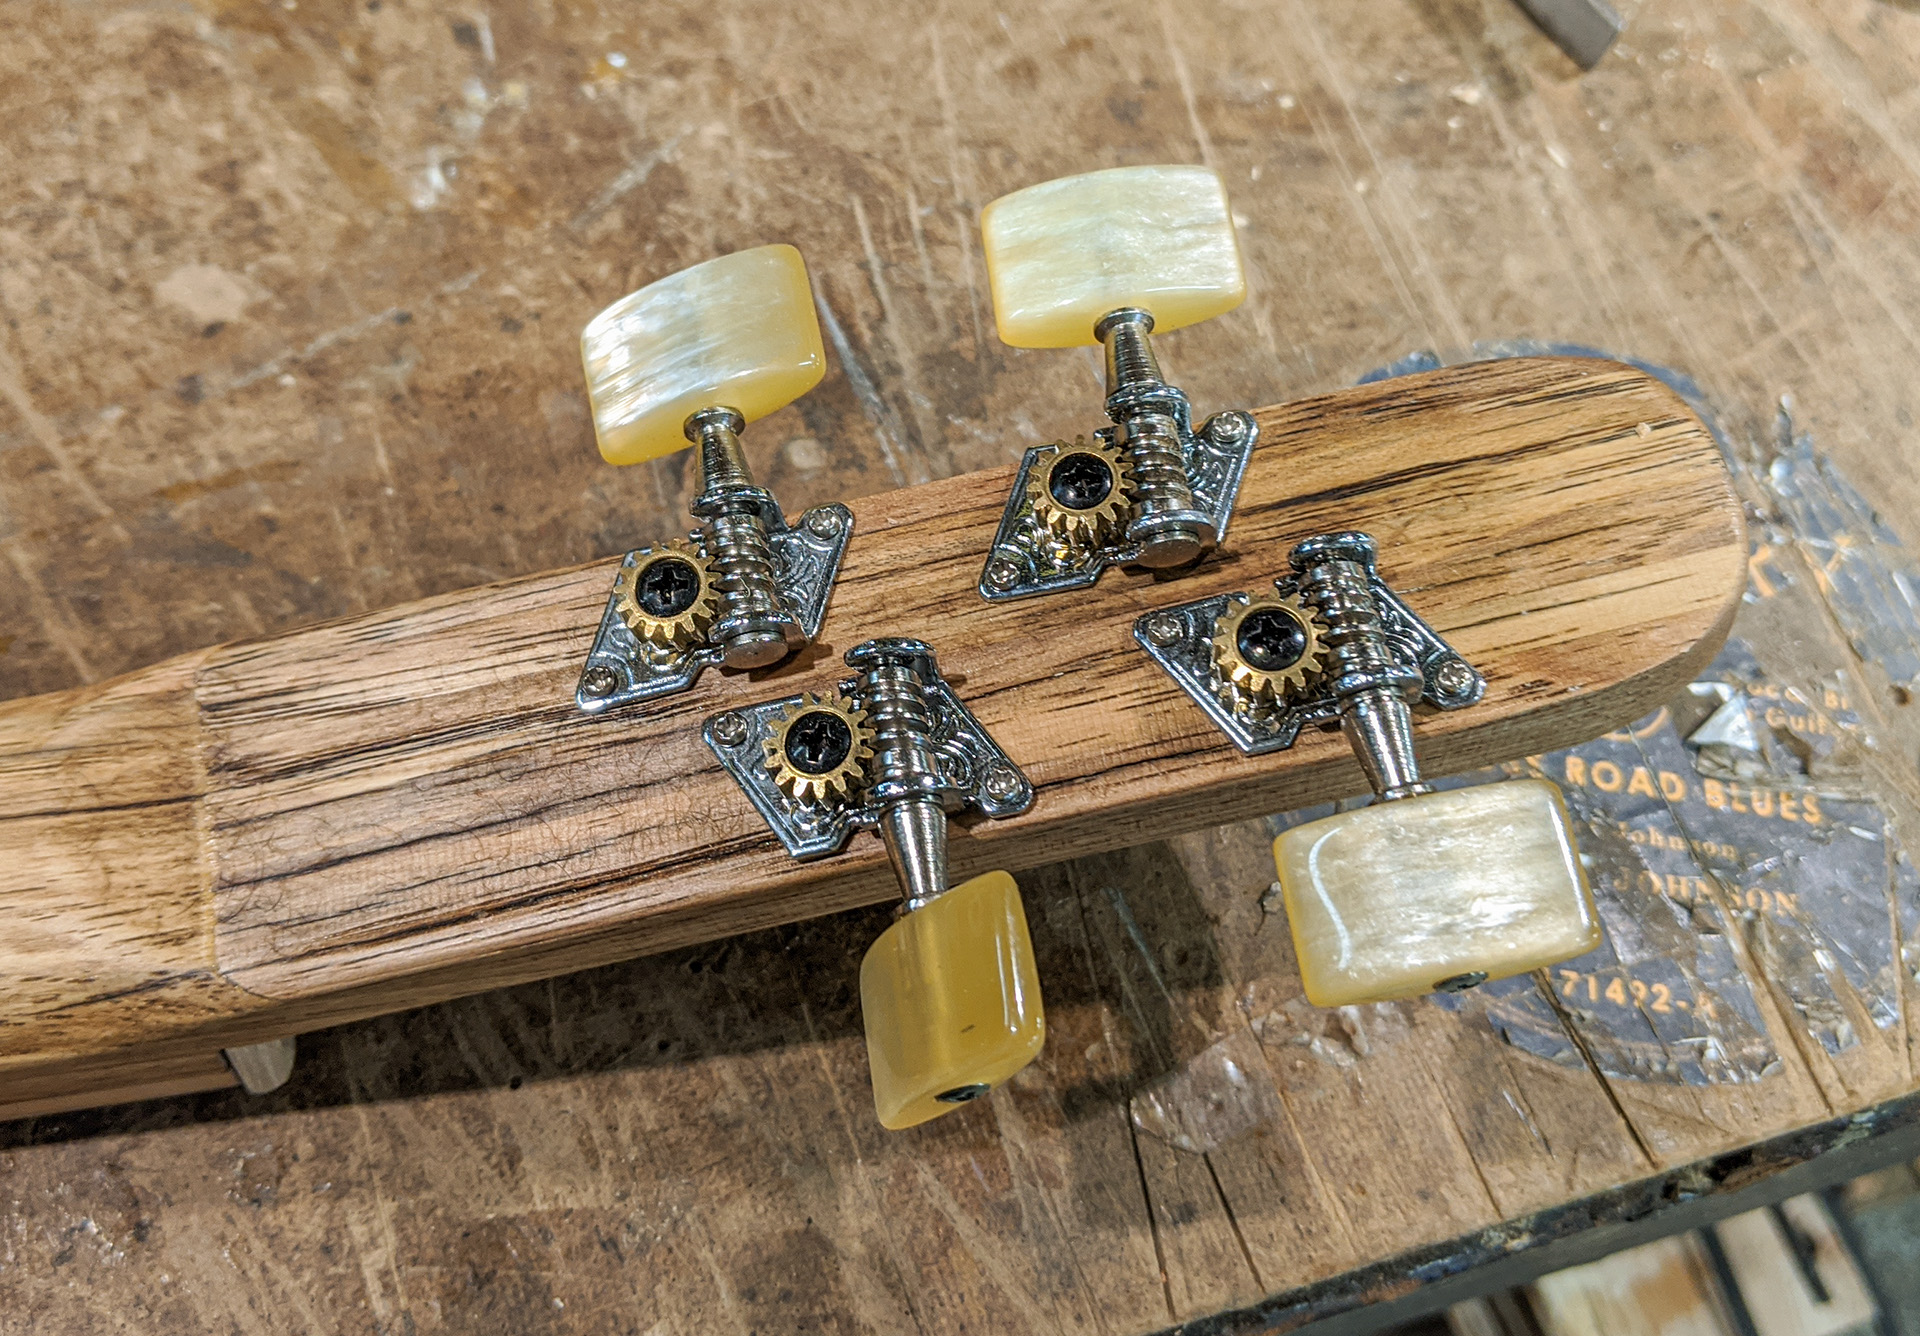
Here, I have mounted my tuners to the headstock. These are shorter-shaft ukulele tuners (the same style we supply with our Gittylele kits), because I cut my headstock a little too thin for guitar tuners. |
|
|
|
|
|
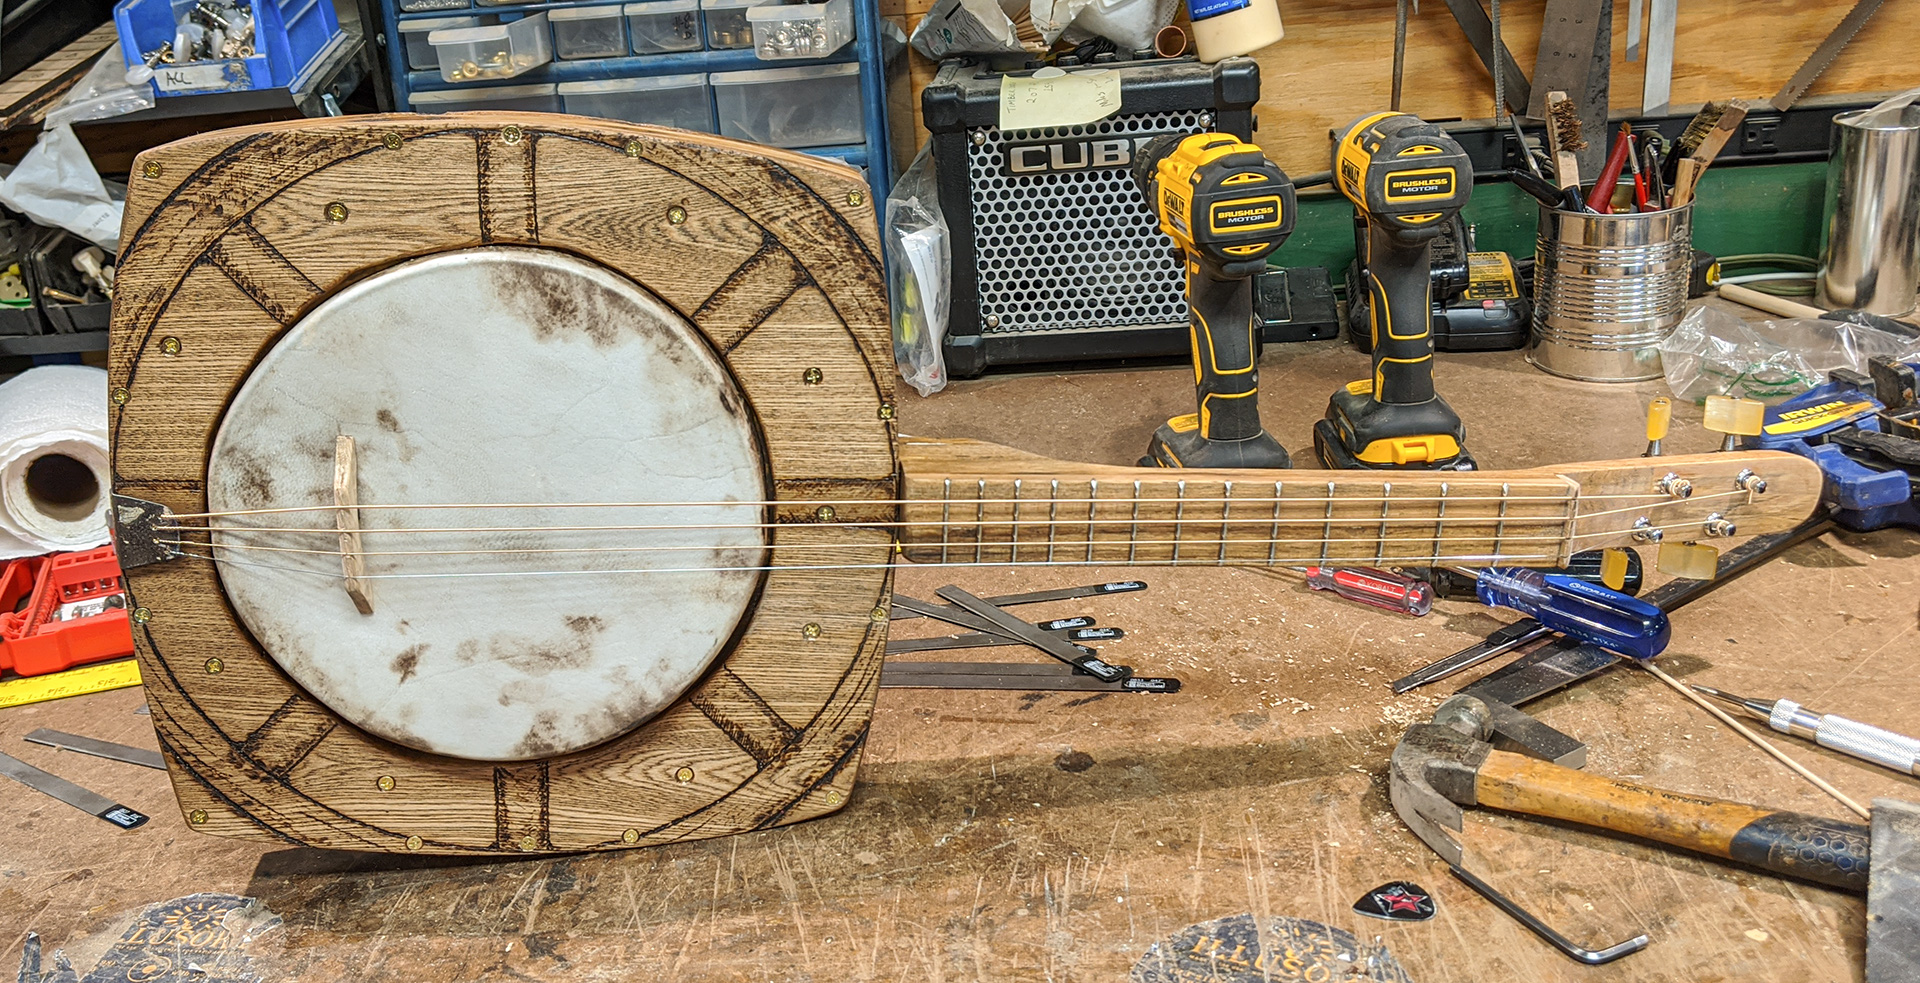
Here is the first test stringing of the instrument. The back is still open, and I put a set of steel strings on it: 3 phosphor bronze wound strings and one plain steel. The instrument seems to handle the tension and it is LOUD... but a little too loud, bright and jarring, in my opinion. I begin to seriously question whether steel strings are the right choice for this instrument. |
|
|
|
|
|
To help improve the tone, I decided to craft a back panel for the banjo. It's back to the big bandsaw with another piece of American Chestnut for some resawing. |
|
|
|
|
|
Then the planing, sanding and gluing, just like I had done with the front panel earlier. |
|
|
|
|
|
While waiting for the back panel to dry, I cut the steel strings off and restring it with nylon. I used Strings #6 through #3 from a six-string classical nylon set (Low E, A, D and G), to get my desired GDAE tuning. The low G and D strings are a bit looser in tension than the A and E strings, but they reached pitch without breaking and sound good. |
|
|
|
|
|
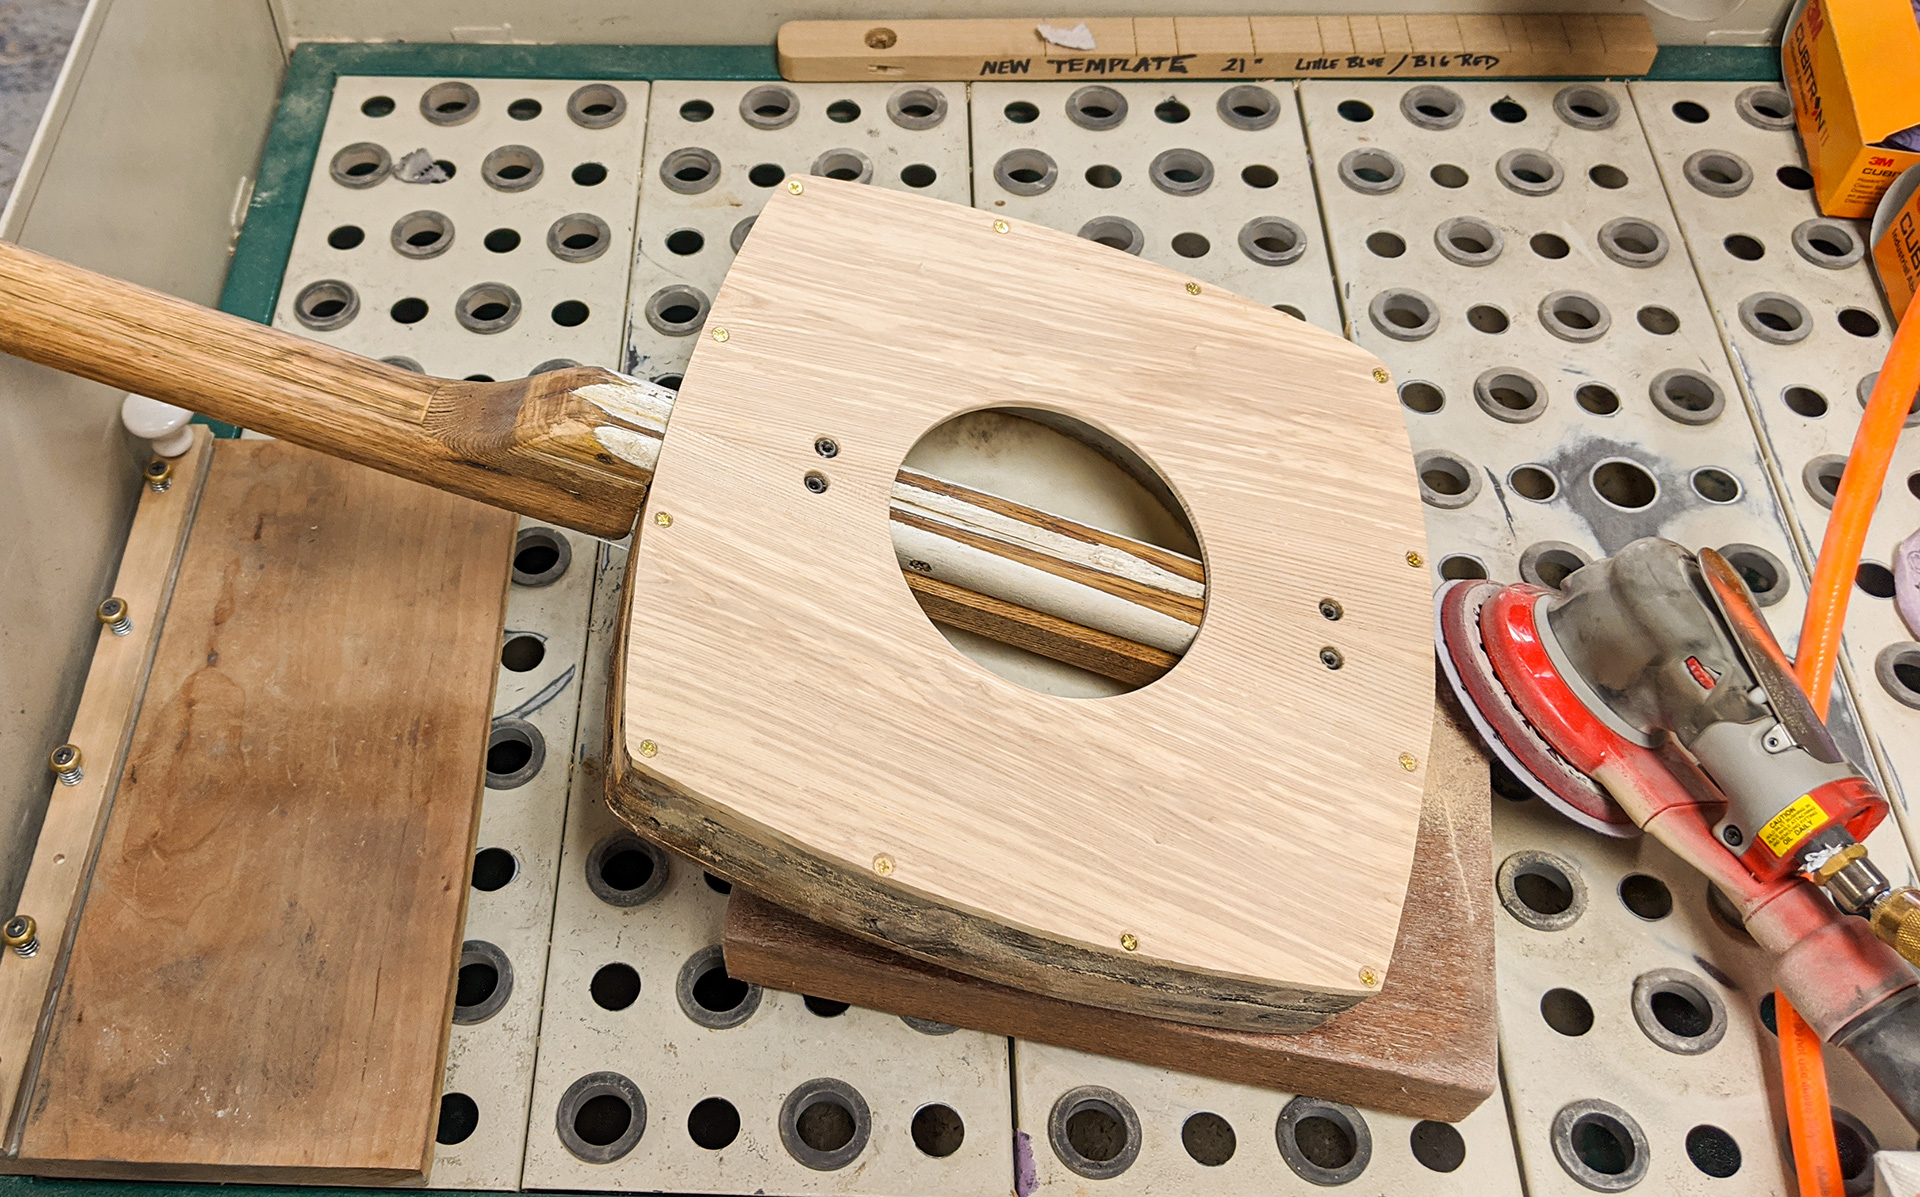
Here I have shaped and mounted my back panel to the body. As you can see, I have also used a hole saw to cut an opening in it. Four-string minstrel-style banjos are often open-backed, so I thought cutting a ~5-inch hole was a good compromise. I have also drilled holes in the appropriate places to allow access to the set screws that control the tone ring height, in case future adjustments are needed. |
|
|
|
|
|
A good bit of hand sanding goes into making sure I have a nice smooth fit of the back panel to the sides. Twelve more flat-top wood screws are used to secure it. I don't glue down the top or the bottom panels on this build, as I want to be able to get into the interior in case the head ever needs to be replaced. |
|
|
|
|
|
Here she is with the back panel mounted in place. Check out that book-matched grain! Just after this, I take the strings and all of the hardware off and head back to the finishing bench to put on another coat of stain, and then when that was dry, a coat of linseed oil. |
|
|
|
|
|
Once the linseed oil had dried a bit, I head back to my bench for some woodburning. Here I'm adding some fret position markers (with a wagon wheel design, of course). I also add some side position markers. |
|
|
|
|
|
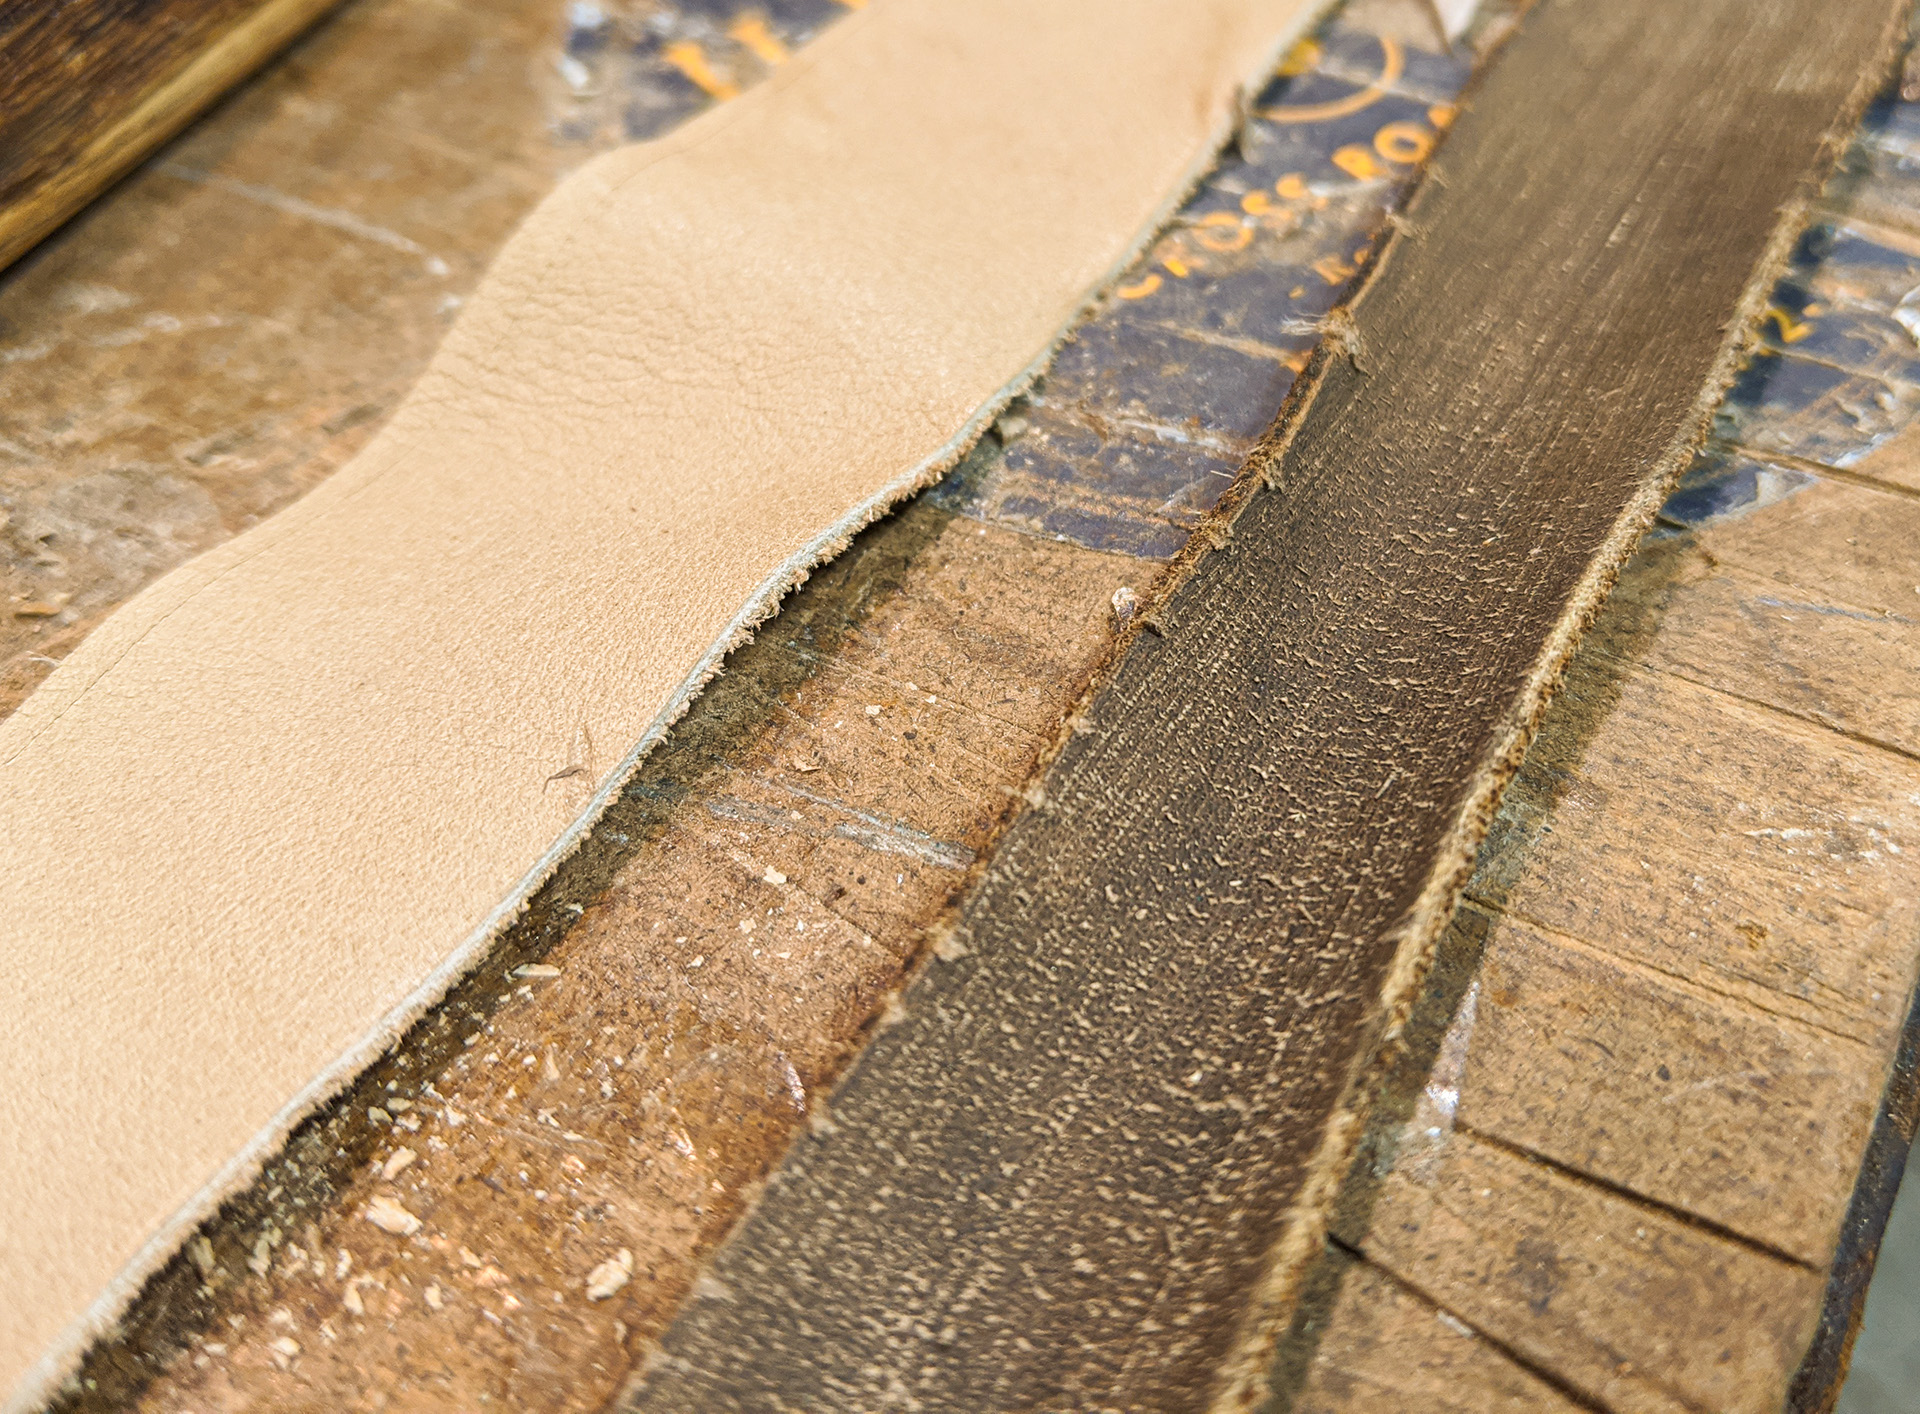
Because the instrument is fairly heavy (remember all of that hardwood bracing that went into it, plus the steel tone ring?), I realize it needs a strap. I had some strips of light-colored leather under the bench, but they just didn't look right. So, I did some "relic-ing" of one. The piece on the left in this photo was what I started with, and the piece on the right is what I ended up with. My goal was to have a strap that looked like an old piece of well-worn harness leather... and I think I got pretty close. |
|
|
|
|
|
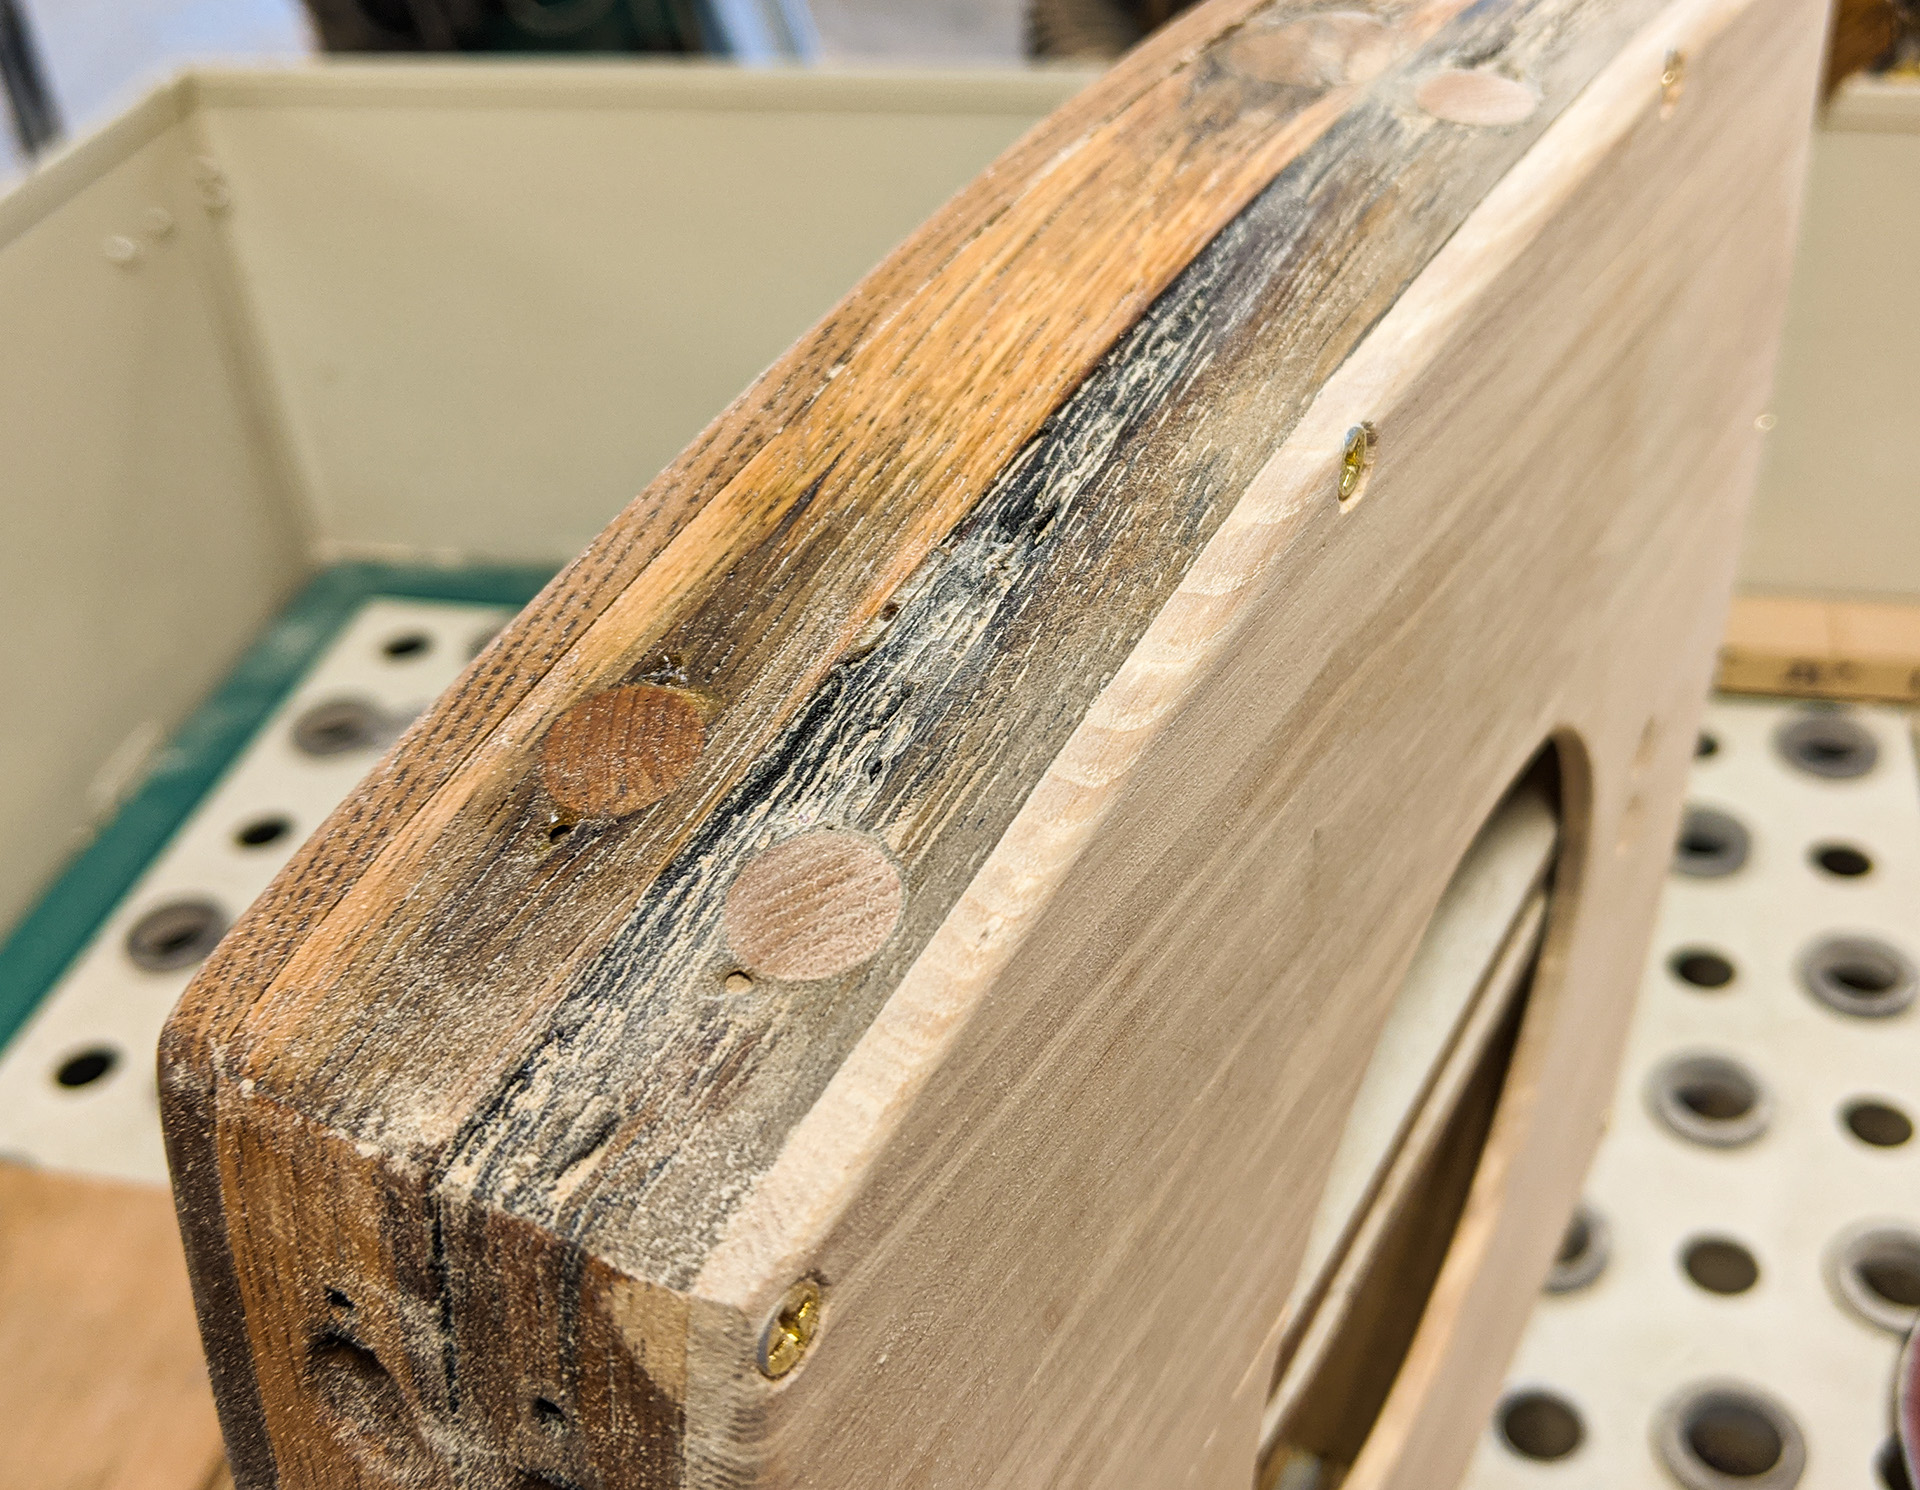
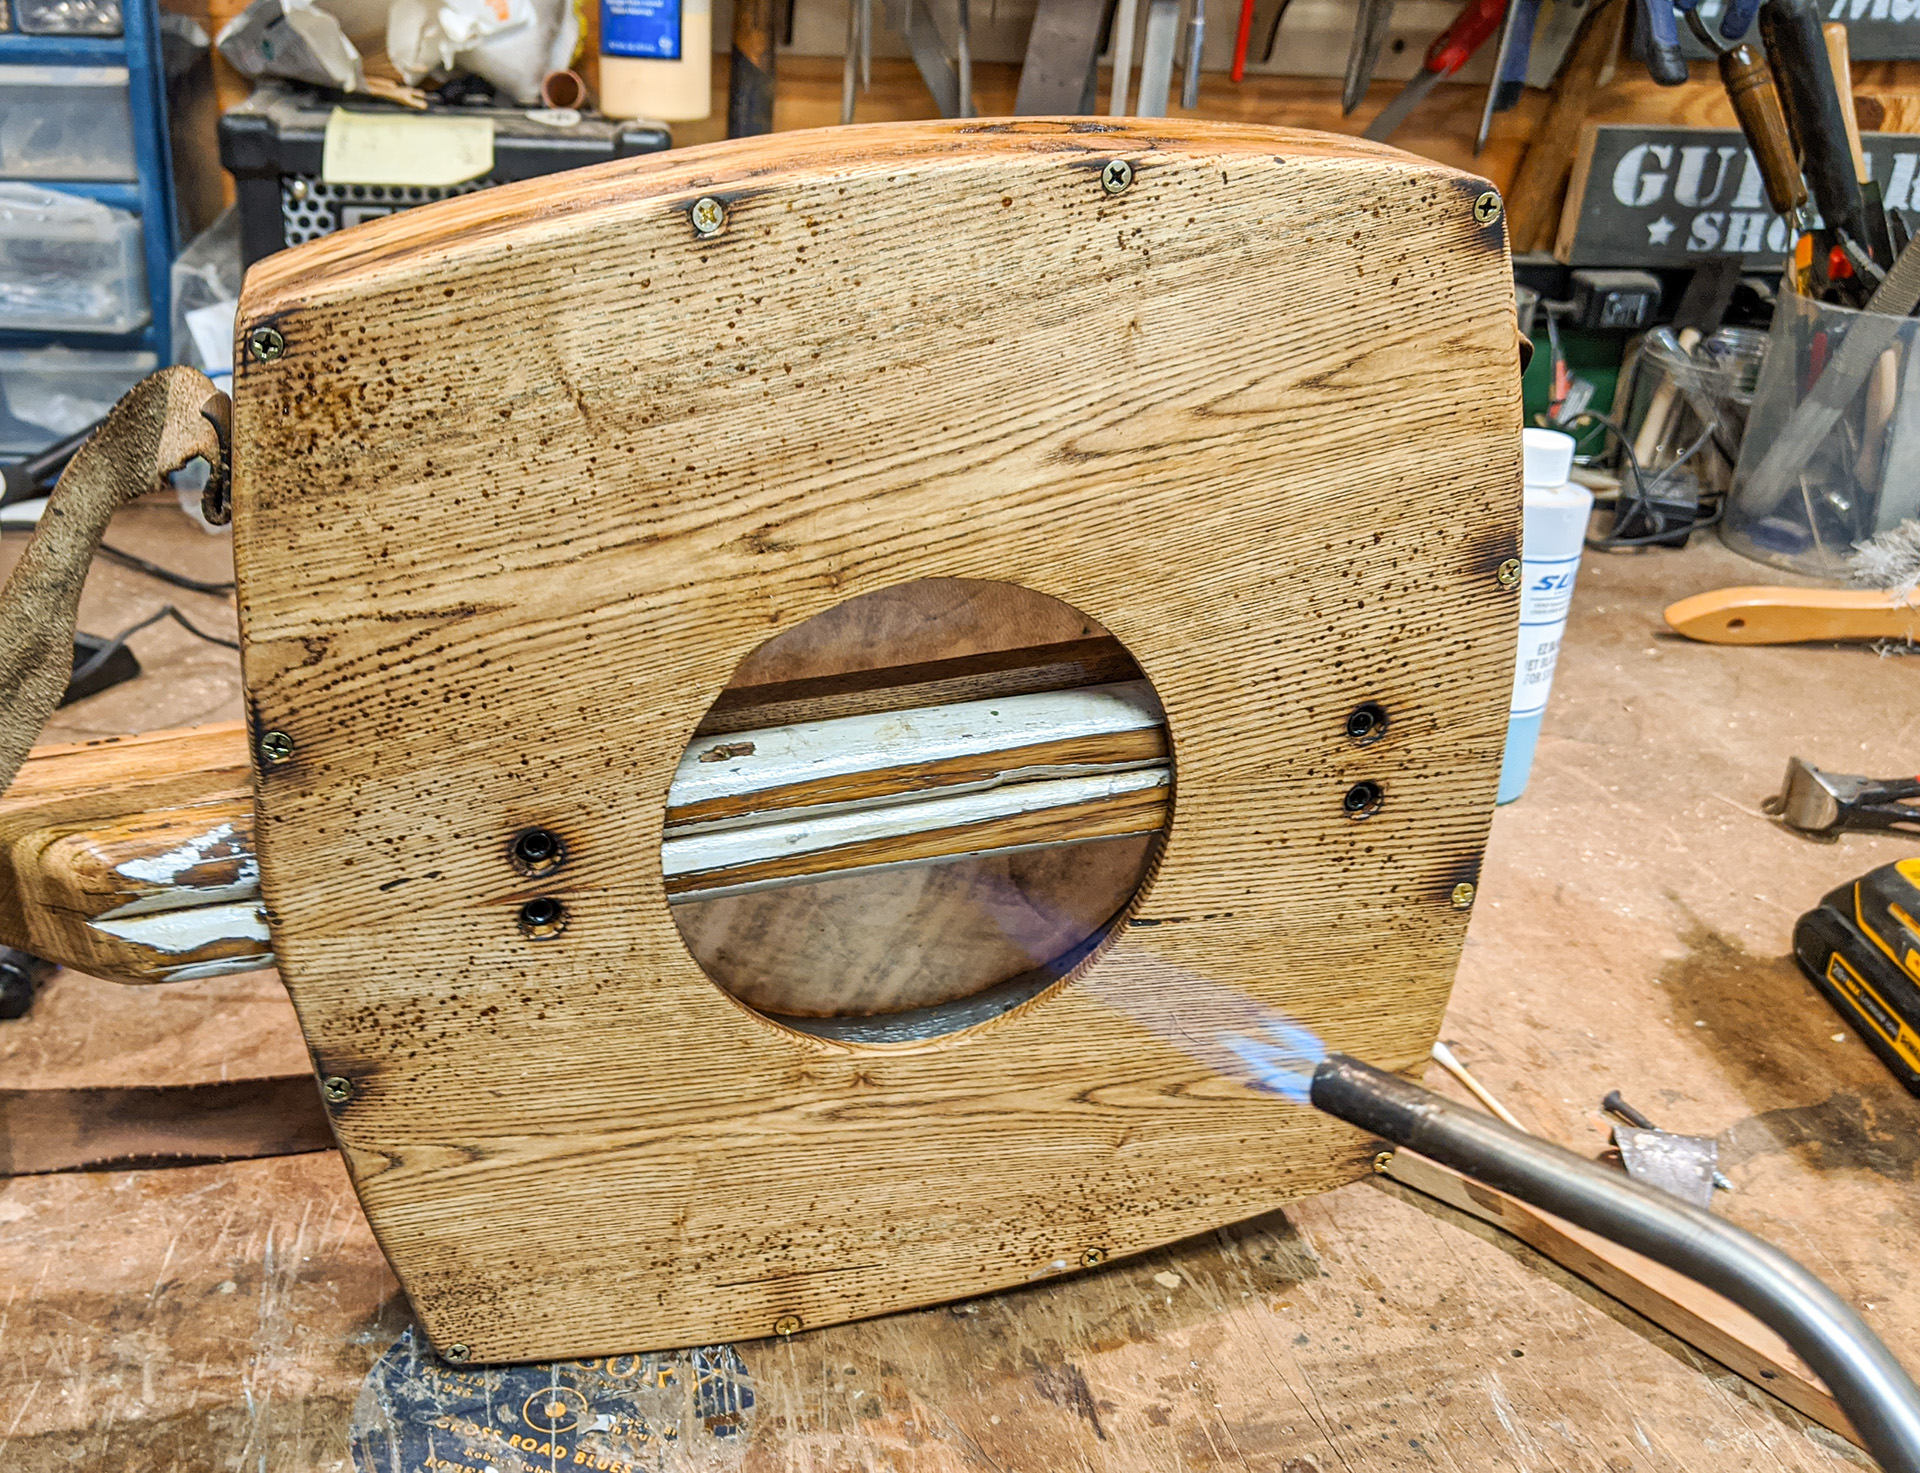
At this point, with the instrument nearly finished, I decided it needed just a little something extra, so I turned to my old reliable friend... the propane torch. I had already had the torch out as part of the strap relic-ing process, so now I turned it on both the front and back panel, to darken things a bit around the screw holes and edges... |
|
|
|
|
|
And I have to say that I am pretty happy with the result. The staining on the banjo head was NOT done with the propane torch, but via a light wash with some special pigment-based stain we happened to have handy. |
|
|
|
|
|
Now I string her back up with fresh nylon strings, the same sizes I had used previously. |
|
|
|
|
|
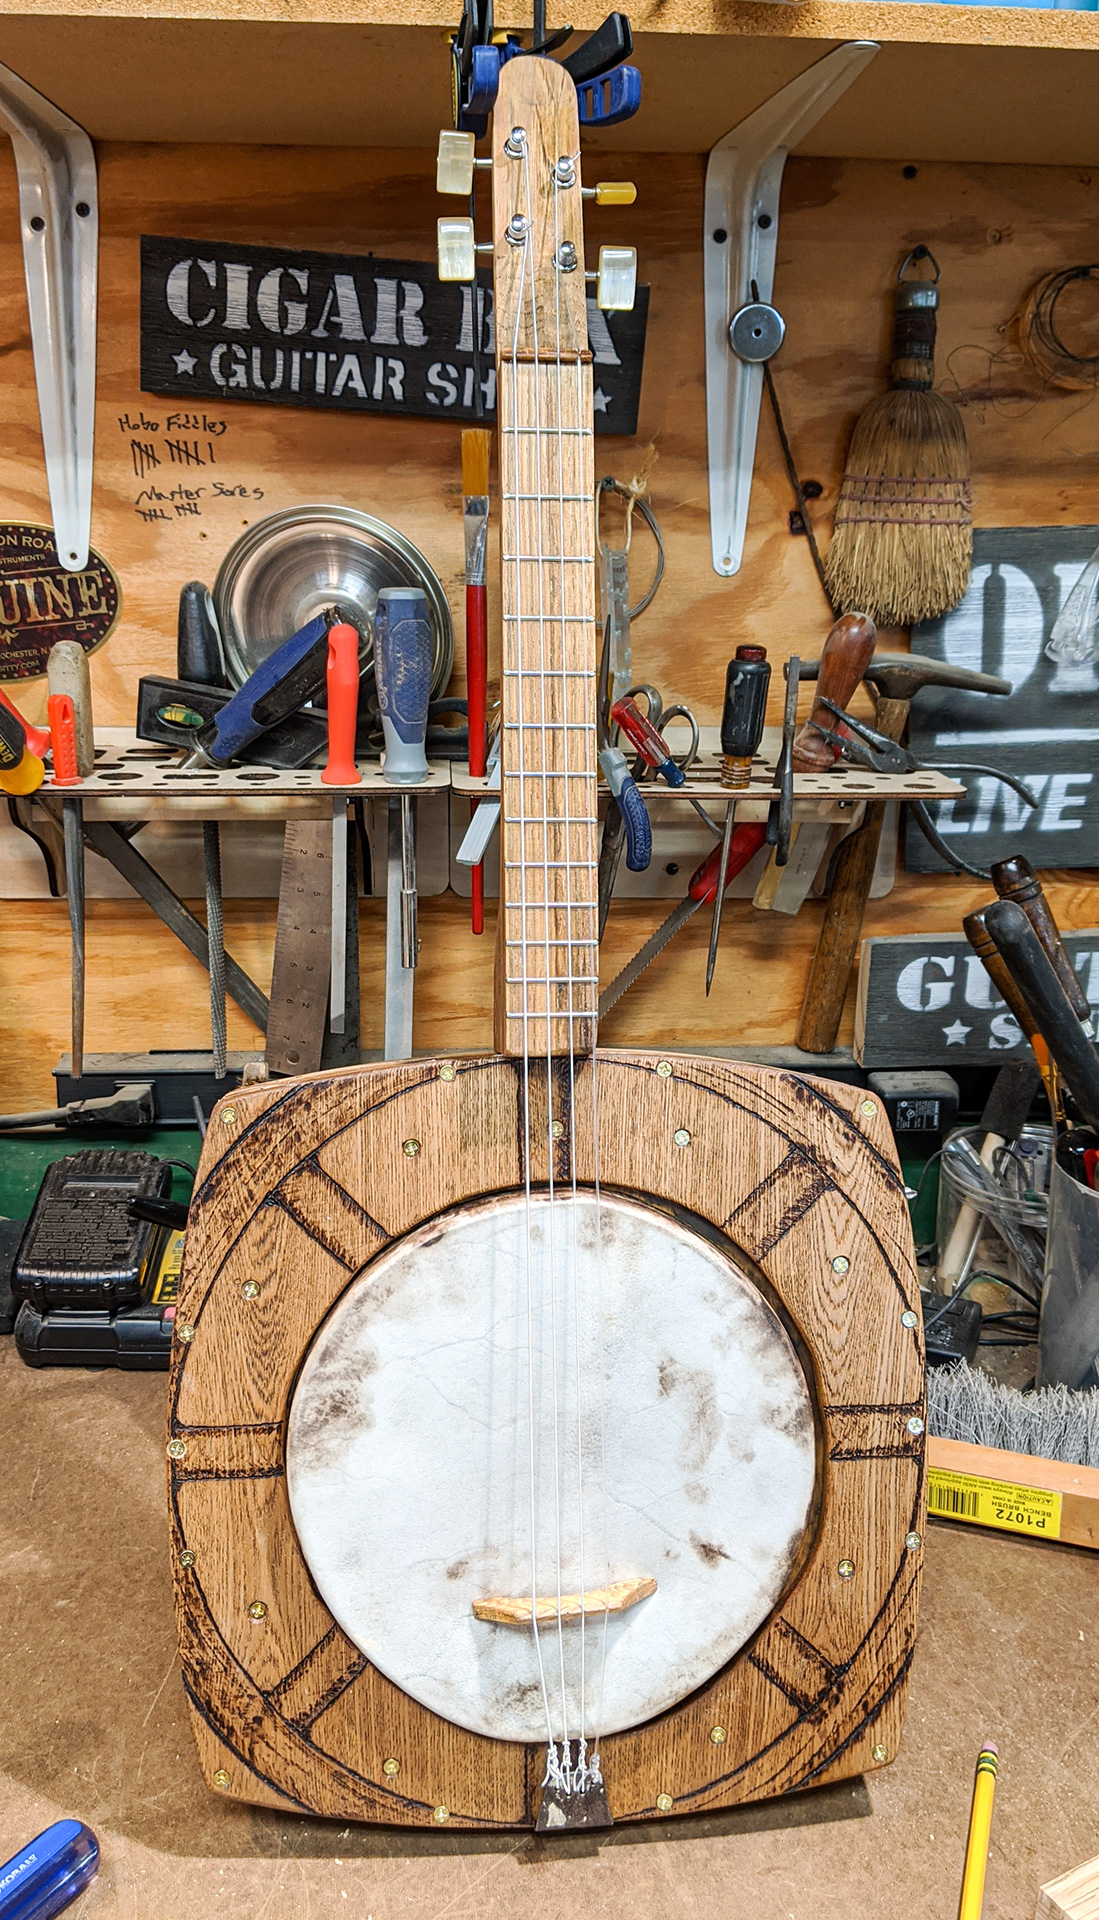
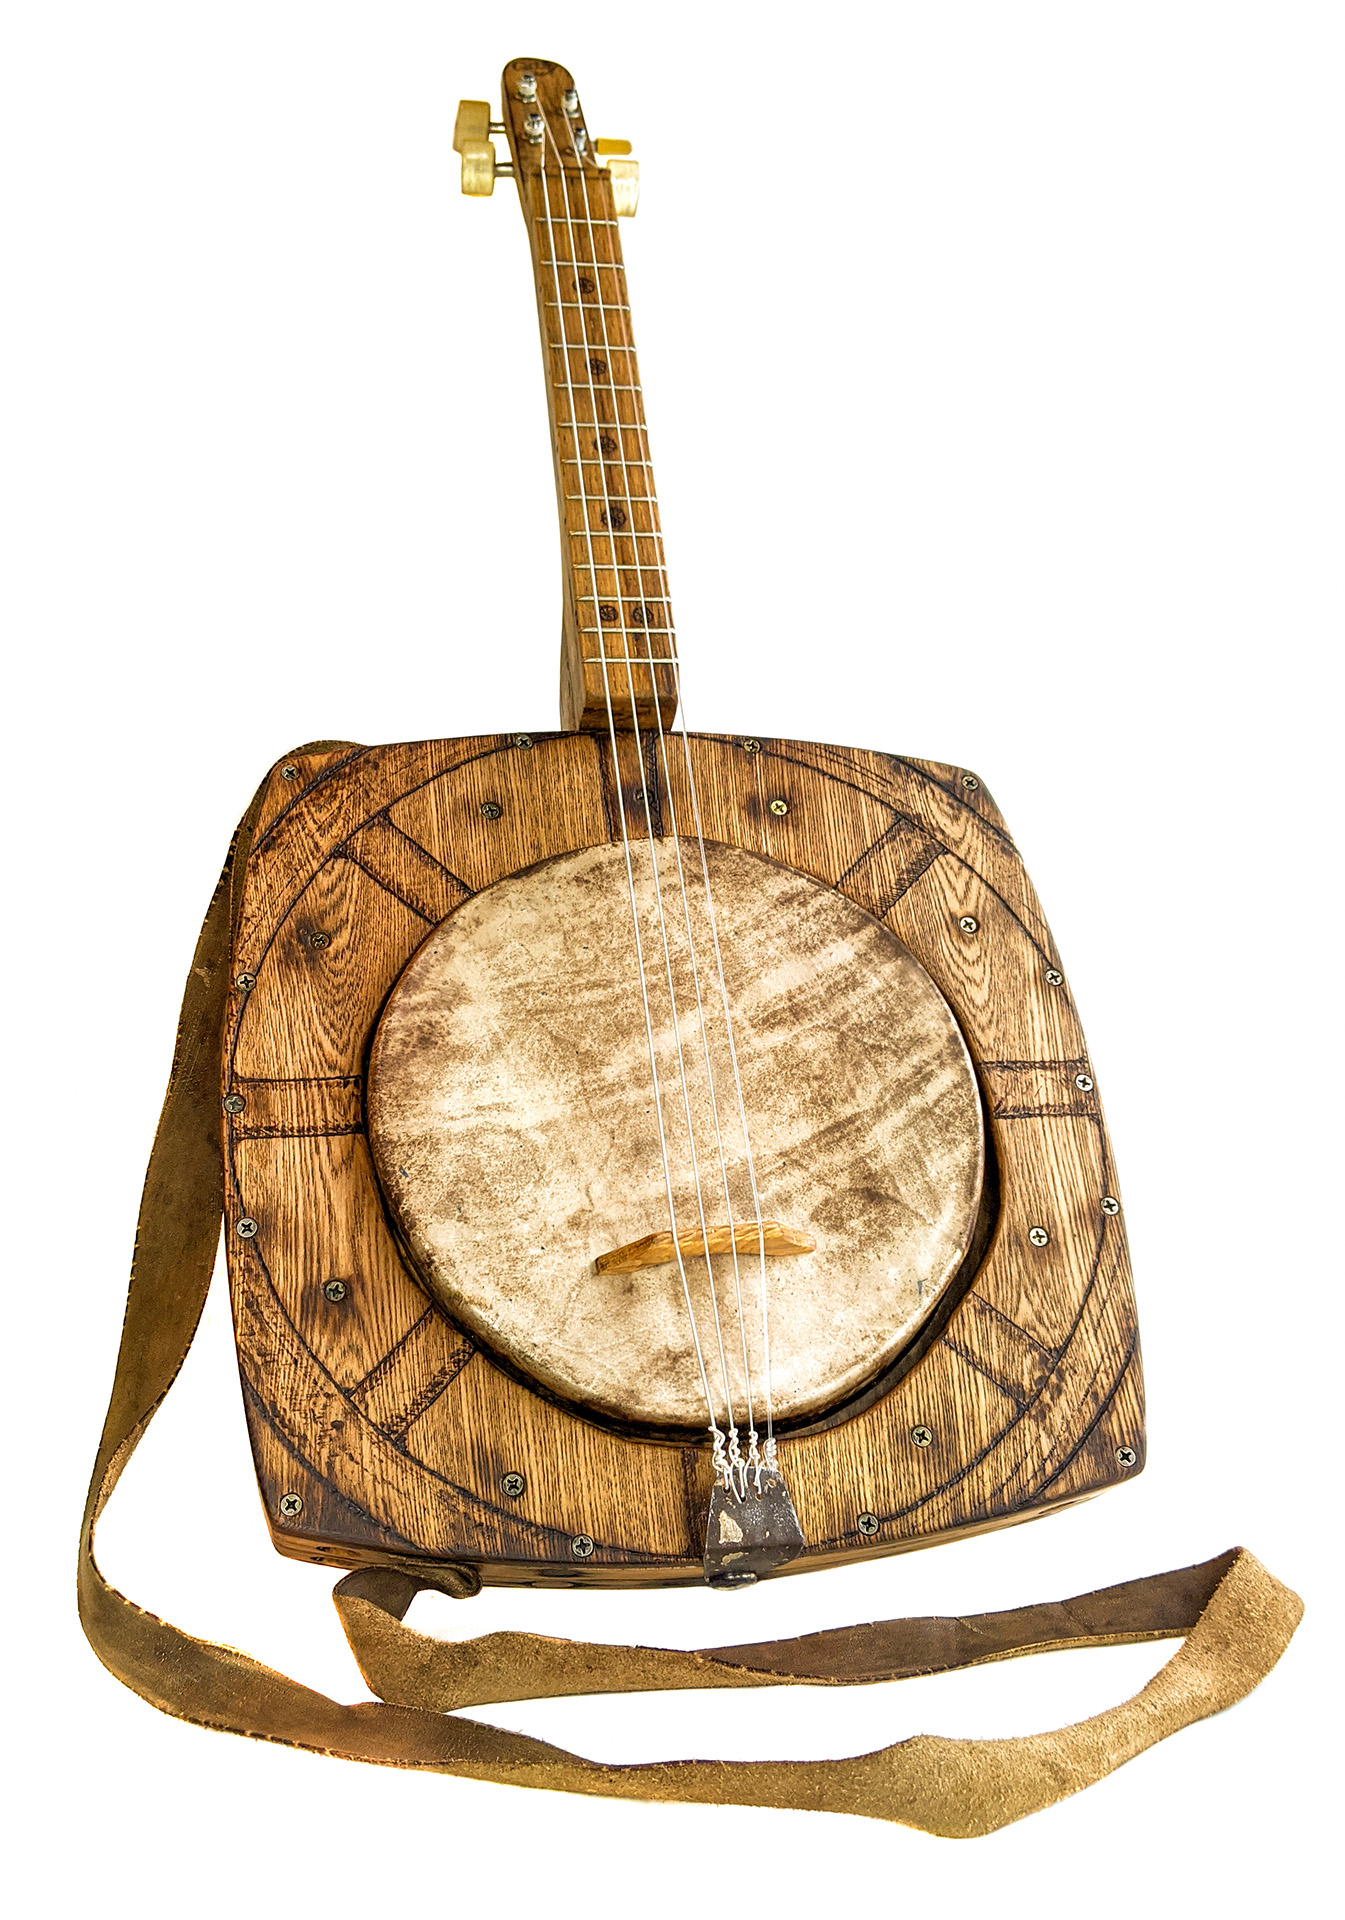
A few tweaks of the nut and bridge to get the action into line... And then, she was done. What a lovely, warm tone this banjo has with those nylon strings. Whether strumming with a pick, playing clawhammer style, or picking out a tune, she plays well and sounds wonderful. |
|
|
|
|
|
Heading into this build, I really didn't know if it could be done. Could you build an instrument out of an old carriage wheel? Had anyone ever done it? Well, it turns out, you can... and now someone has. An old half-rotted antique, rich with history, backstory and patina, has been transformed into a piece of art that can, in turn, be used to create more art in the form of music. The magic of that transformation will never grow old, for me... and as you probably suspected, I am already thinking about what my next crazy heirloom build will be. |
|
|
|


As always, I hope you've gotten a bit of inspiration from this chronicle of my build, both the triumphs and the mistakes. and that it will help encourage you to create something amazing of your own. Happy building!
Recent Posts
-
Steve Holladay's "Pocket Box Guitar"
If you're a member of the Friends of C. B. Gitty group on on Facebook, you've probably seen some of …14th Jan 2026 -

2024 World's Wildest Electric Cigar Box Guitar Build-Off Winners!!!
C. B. Gitty Crafter Supply is proud to announce the winners of the 2024 "World's Wildest Electric Ci …31st Oct 2024 -
")
Improved C. B. Gitty: Easier Than Ever! (Work in Progress)
Ben “Gitty” has been cleaning house, making our website even easier find your favorite parts, kits a …7th Oct 2024