How To Install Cigar Box Guitar Tuners
Want to know how to install tuners on your cigar box guitar? In this post, you'll learn how to install cigar box guitar tuners, whether your guitar will have 3 or 4 strings.
The instructions in this post are adapted from our free plans on how to build a complete cigar box guitar (CBG).
They include simple directions and helpful pictures that will guide you through the short and satisfying installation process.
What You'll Need
To complete this part of your project, all you'll need are tuners and a CBG headstock that's ready for them to be installed.
Plus, you'll need a handful of common tools, such as those listed here:
- drill
- drill bits
- 1/16-inch, 1/4-inch, & 5/16-inch (~1.5mm, 6mm, & 8mm)
- clamps or a vice grip
- ruler
- pencil
- eye and ear protection
Installing the tuners isn’t difficult, but it does need to be done right, so follow the instructions in the photos below carefully, and you shouldn’t have any trouble.
Instructions
The instructions here are for classic tuner shafts that require a 1/4-inch hole.
The bushings for those tuners require 5/16-inch countersunk holes, something that's addressed later in these directions.
Some tuners, such as sealed-gear tuners, require a 25/64-inch hole and no countersunk bushing-hole.
Directions for using that style of tuners are the same as those listed here, only with different-sized holes for the tuner shafts.
Determine Tuner Orientation
Pro-tip: When mounted, the brass gears and backs of the tuners should always be oriented towards the body of the instrument, not towards the top of the headstock.
For 3-string CBGs, be sure to figure out whether you have two left or two right tuners before drilling the holes.
The photos show a 3-string CBG headstock with two left and one right tuner.
The right and left designations are determined by looking at the back of the headstock.
So, when looking at the back of the headstock with correctly installed tuners (the gears oriented towards the body), tuners with the tuning button on the right are right-side tuners.
Conversely, tuners with the button on the left are left-side tuners.
To keep this project frustration-free, it's important to remember that the right and left designations are determined when looking at the back of the headstock.
Moving forward and while walking through the following steps, always re-check your measurements before drilling.
Measure & Mark Tuner Locations
Measure in and mark 3/8-inch from both sides of the headstock.
At that 3/8-inch measurement, draw a line on both sides, parallel to the edges.
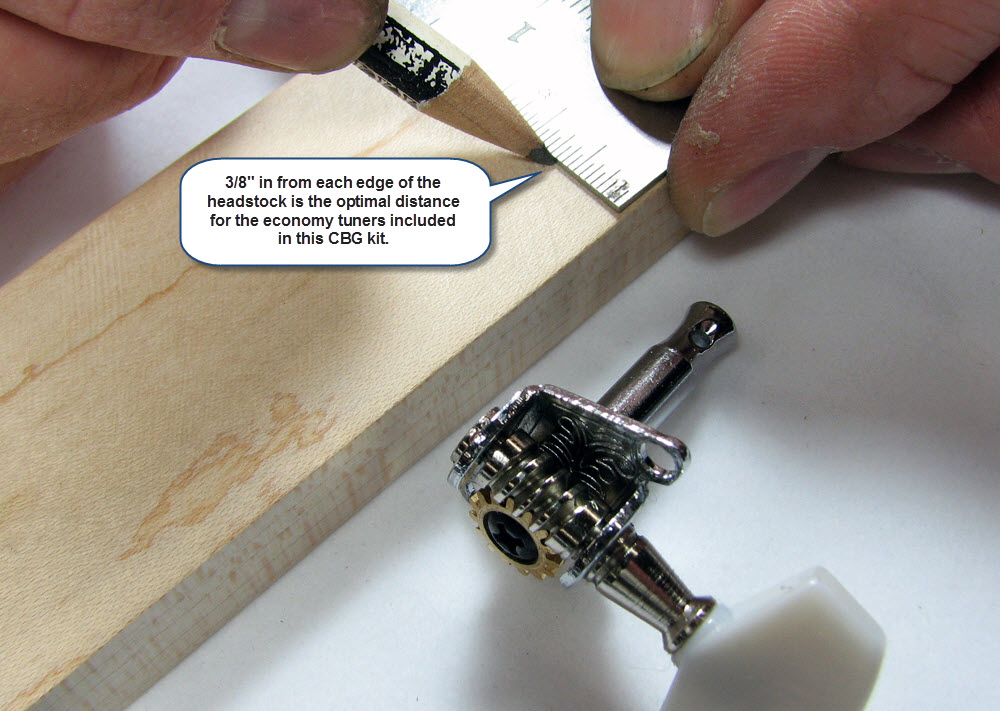
It's on these lines that you will mark the tuner locations.
Note that you don’t have to place your tuners precisely like this, but however you place them, make sure that they are very close to 3/8-inch away from the edge of the headstock.
The photo below shows measurements for three tuners on a headstock that is 4 1/2-inches long.
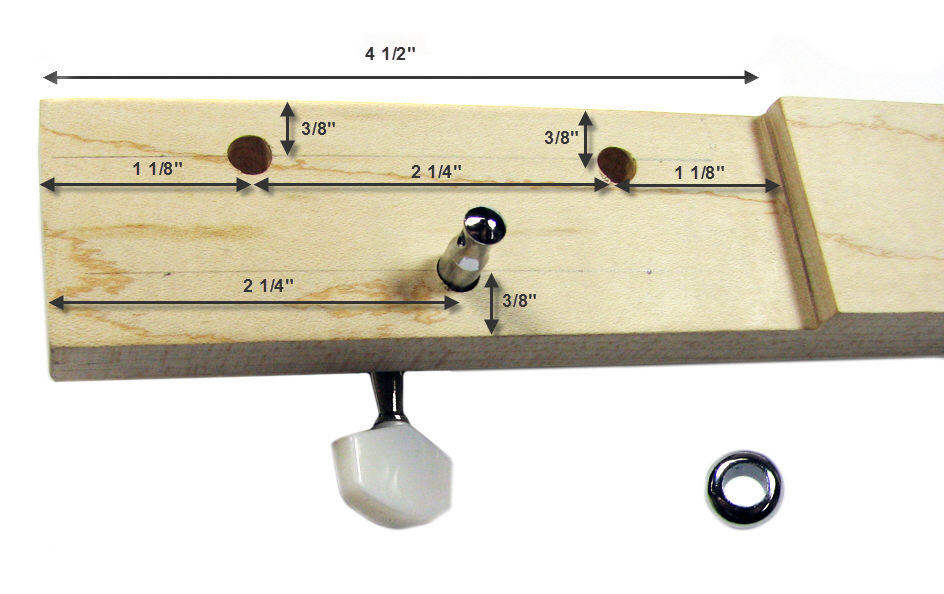
Your headstock may be a different measurement, or you may be installing four tuners as opposed to three, and that's fine.
Just make sure that your tuner locations are spaced in such a way that the mounting plates fit on the back of the headstock.
Also, make sure that you don’t place them so close together that you can’t easily turn the buttons.
With your tuner locations marked, it's time to secure the neck to your work surface.
Secure the Neck
To safely drill proper holes, you'll want to have the neck held firmly in place.
Secure the neck in a vice, or with clamps to your work surface, with the front facing up.
Any "blowout" (small bits of wood) from the drill bit exiting the back of the headstock will be hidden by the tuner mounting plates.
Additionally, before drilling the holes, you may want to have a piece of scrap wood under the headstock.
This helps to prevent you from drilling any unwanted holes into your workbench (or kitchen table) and minimizes the amount of drill-bit "blowout."
With everything secured, it's time to drill the tuner holes.
Drill the Holes
Pro-tip: Always re-check your measurements before drilling.
To prevent the drill bit from "walking" (moving on the surface of the wood before entering it), you may want to poke a hole at the tuner locations.
To do this, you can use anything with a firm point, i.e., screwdriver, awl, etc.
Then, use a 1/4-inch bit to drill the tuner holes.
Make sure the drill bit is perpendicular to the headstock so that the holes are at a 90-degree angle.
Next, you'll countersink holes for the tuner bushings.
Countersink Holes
Once you have the 1/4-inch holes drilled for the tuner shafts, you will need to drill the top half of the holes slightly wider for the tuner bushings.
A 5/16-inch bit is necessary to countersink or drill the bushing holes.
Pro-tip: We highly recommended that you use a piece of tape on the drill bit as a depth gauge -- you don’t want these wider holes to go all the way through the headstock.
Drill the countersinking holes just deep enough to accept the tuner bushings, as shown in the photo below.
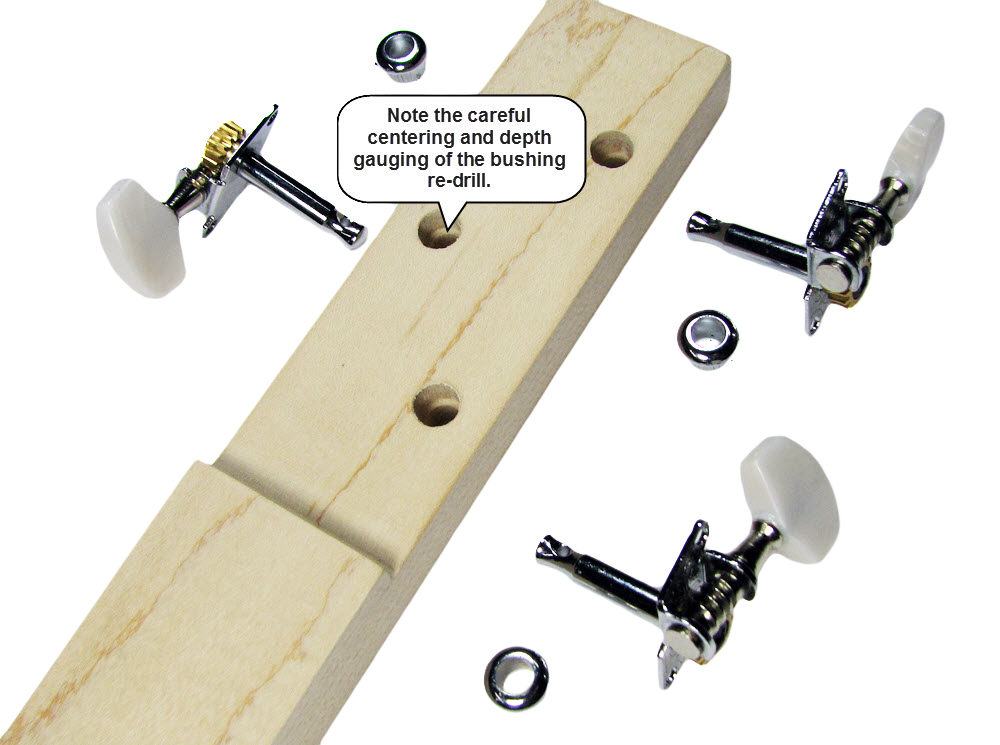
Note: Here's a helpful trick on how to drill properly-sized holes for bushings.
With the tuner holes drilled and countersunk, it's time to flip the neck over and drill the tuner mounting screw holes.
Drill Mounting Screw Holes
For this step, you'll insert the tuners (gear towards the body) and mark the locations for the mounting screw holes.
You absolutely must pre-drill the screw holes using a 1/16-inch bit.
If you try to force the mounting screws into the hardwood without pre-drilling, they are almost guaranteed to sheer off.
Make sure that the mounting-plate edges are parallel to the headstock edges, and then mark the center of each hole location.
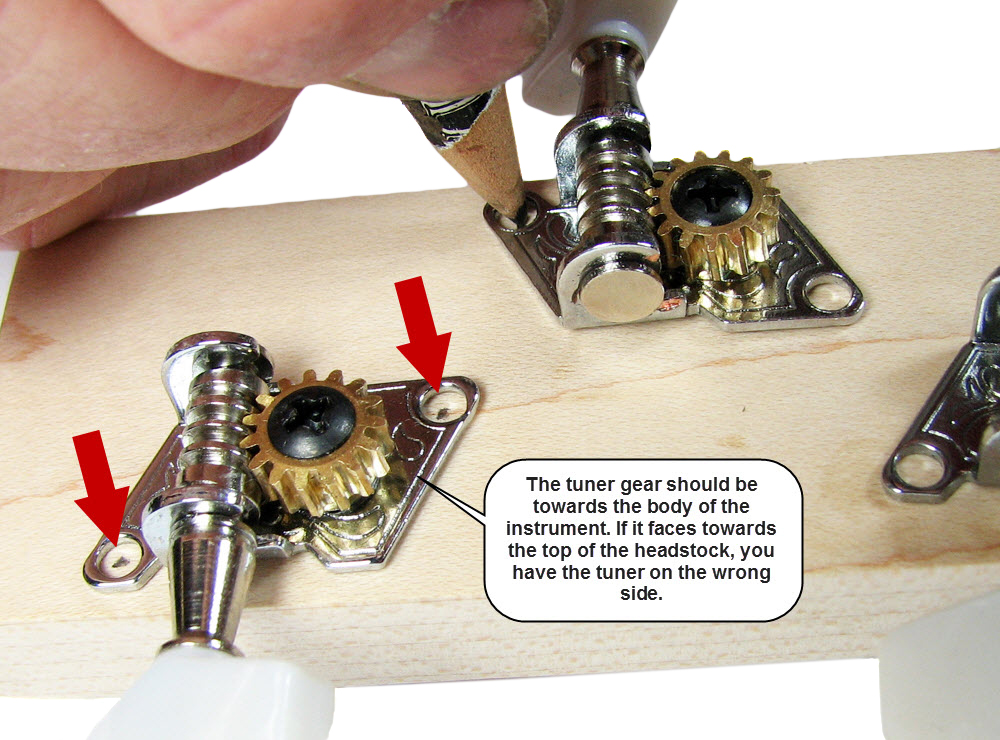
Once you’ve marked the screw locations, remove the tuners and pre-drill the holes with a 1/16-inch bit, then mount the tuners using the included screws.
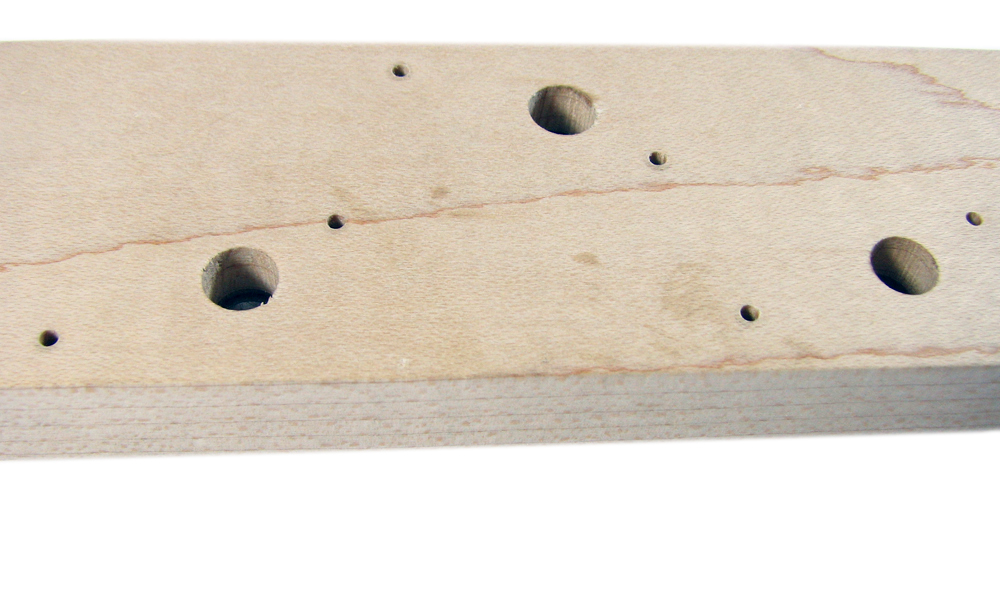
The finished tuners should look like the ones in the photo below.
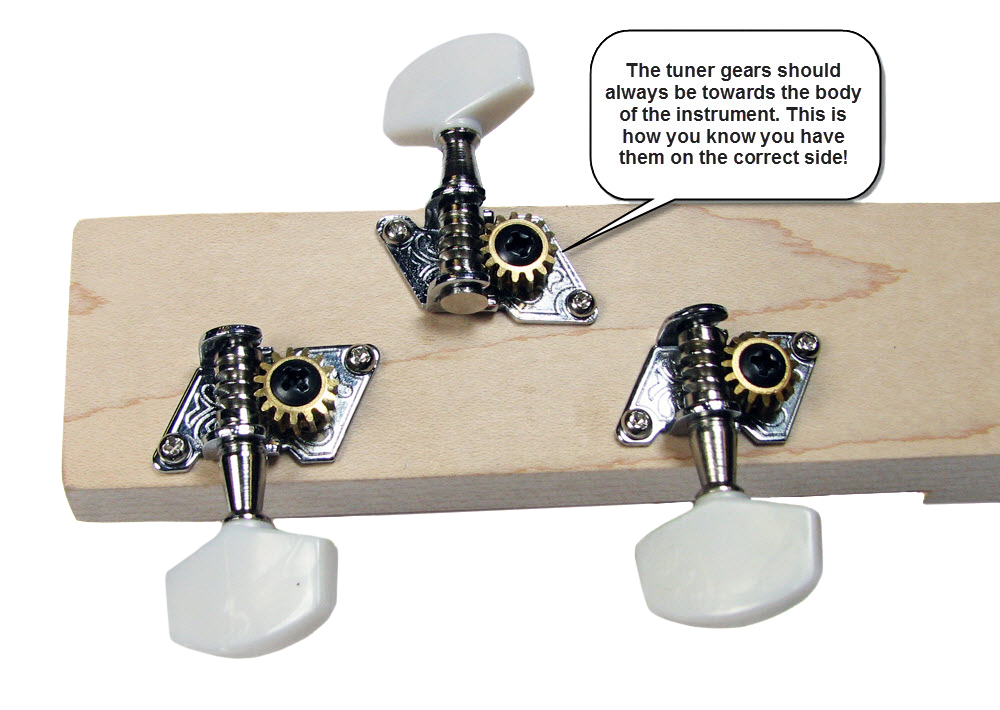
And there you have it! Tuners quickly and properly installed into your CBG headstock.
Conclusion
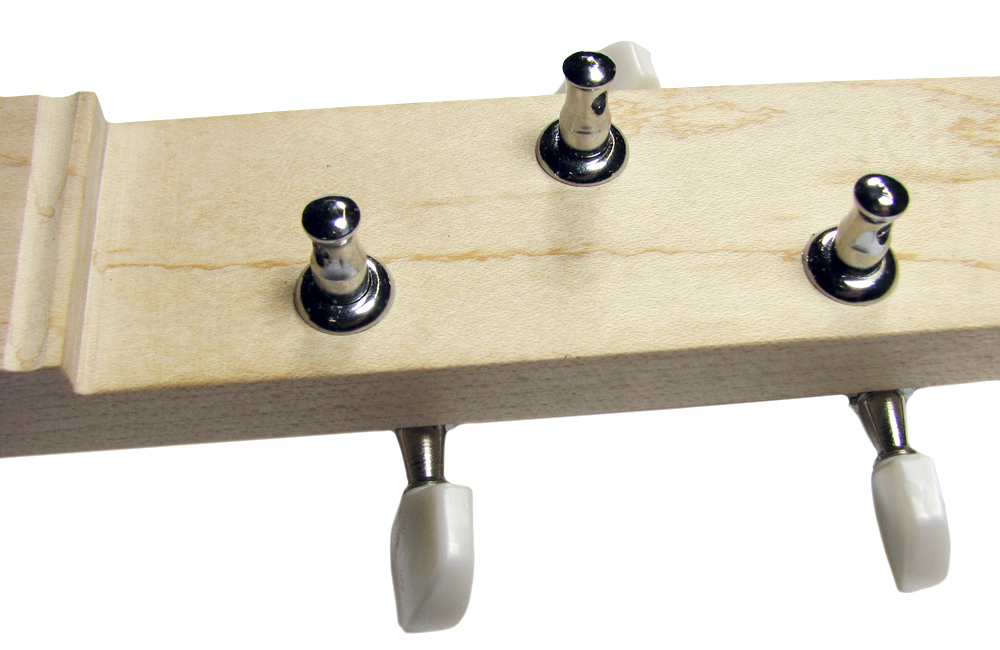
After following the above steps, you'll have completed your cigar box guitar tuner installation.
Below is a photo example.
For more easy-to-understand directions that will guide you through an entire basic cigar box guitar-build, click here for the free plans.
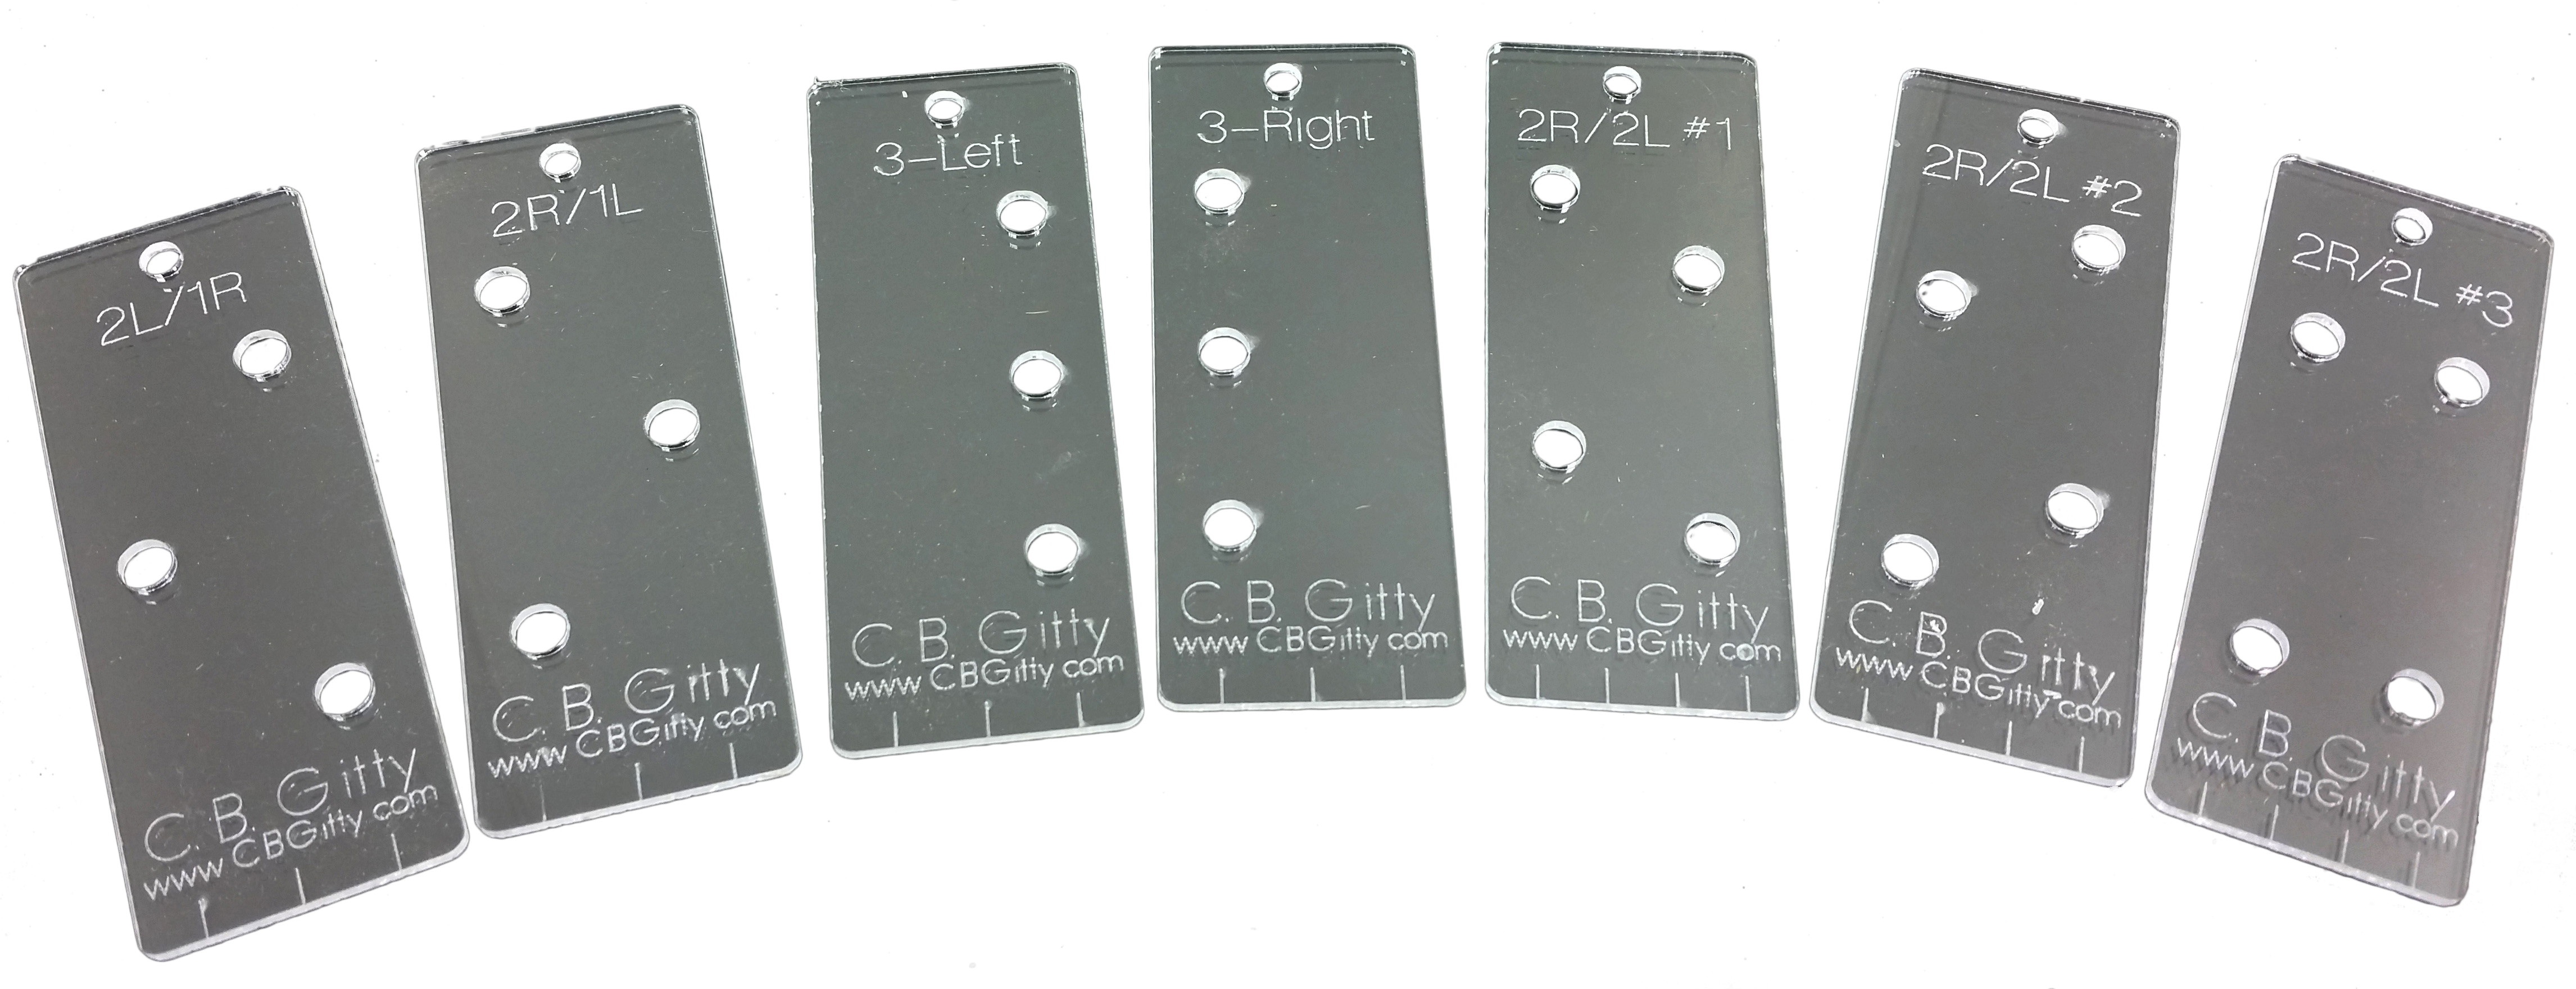
If you'd like to totally streamline your tuner installation process, check out these headstock templates.
These templates perfectly lay out tuner locations for both 3- and 4-string cigar box guitars in a number of really cool configurations.
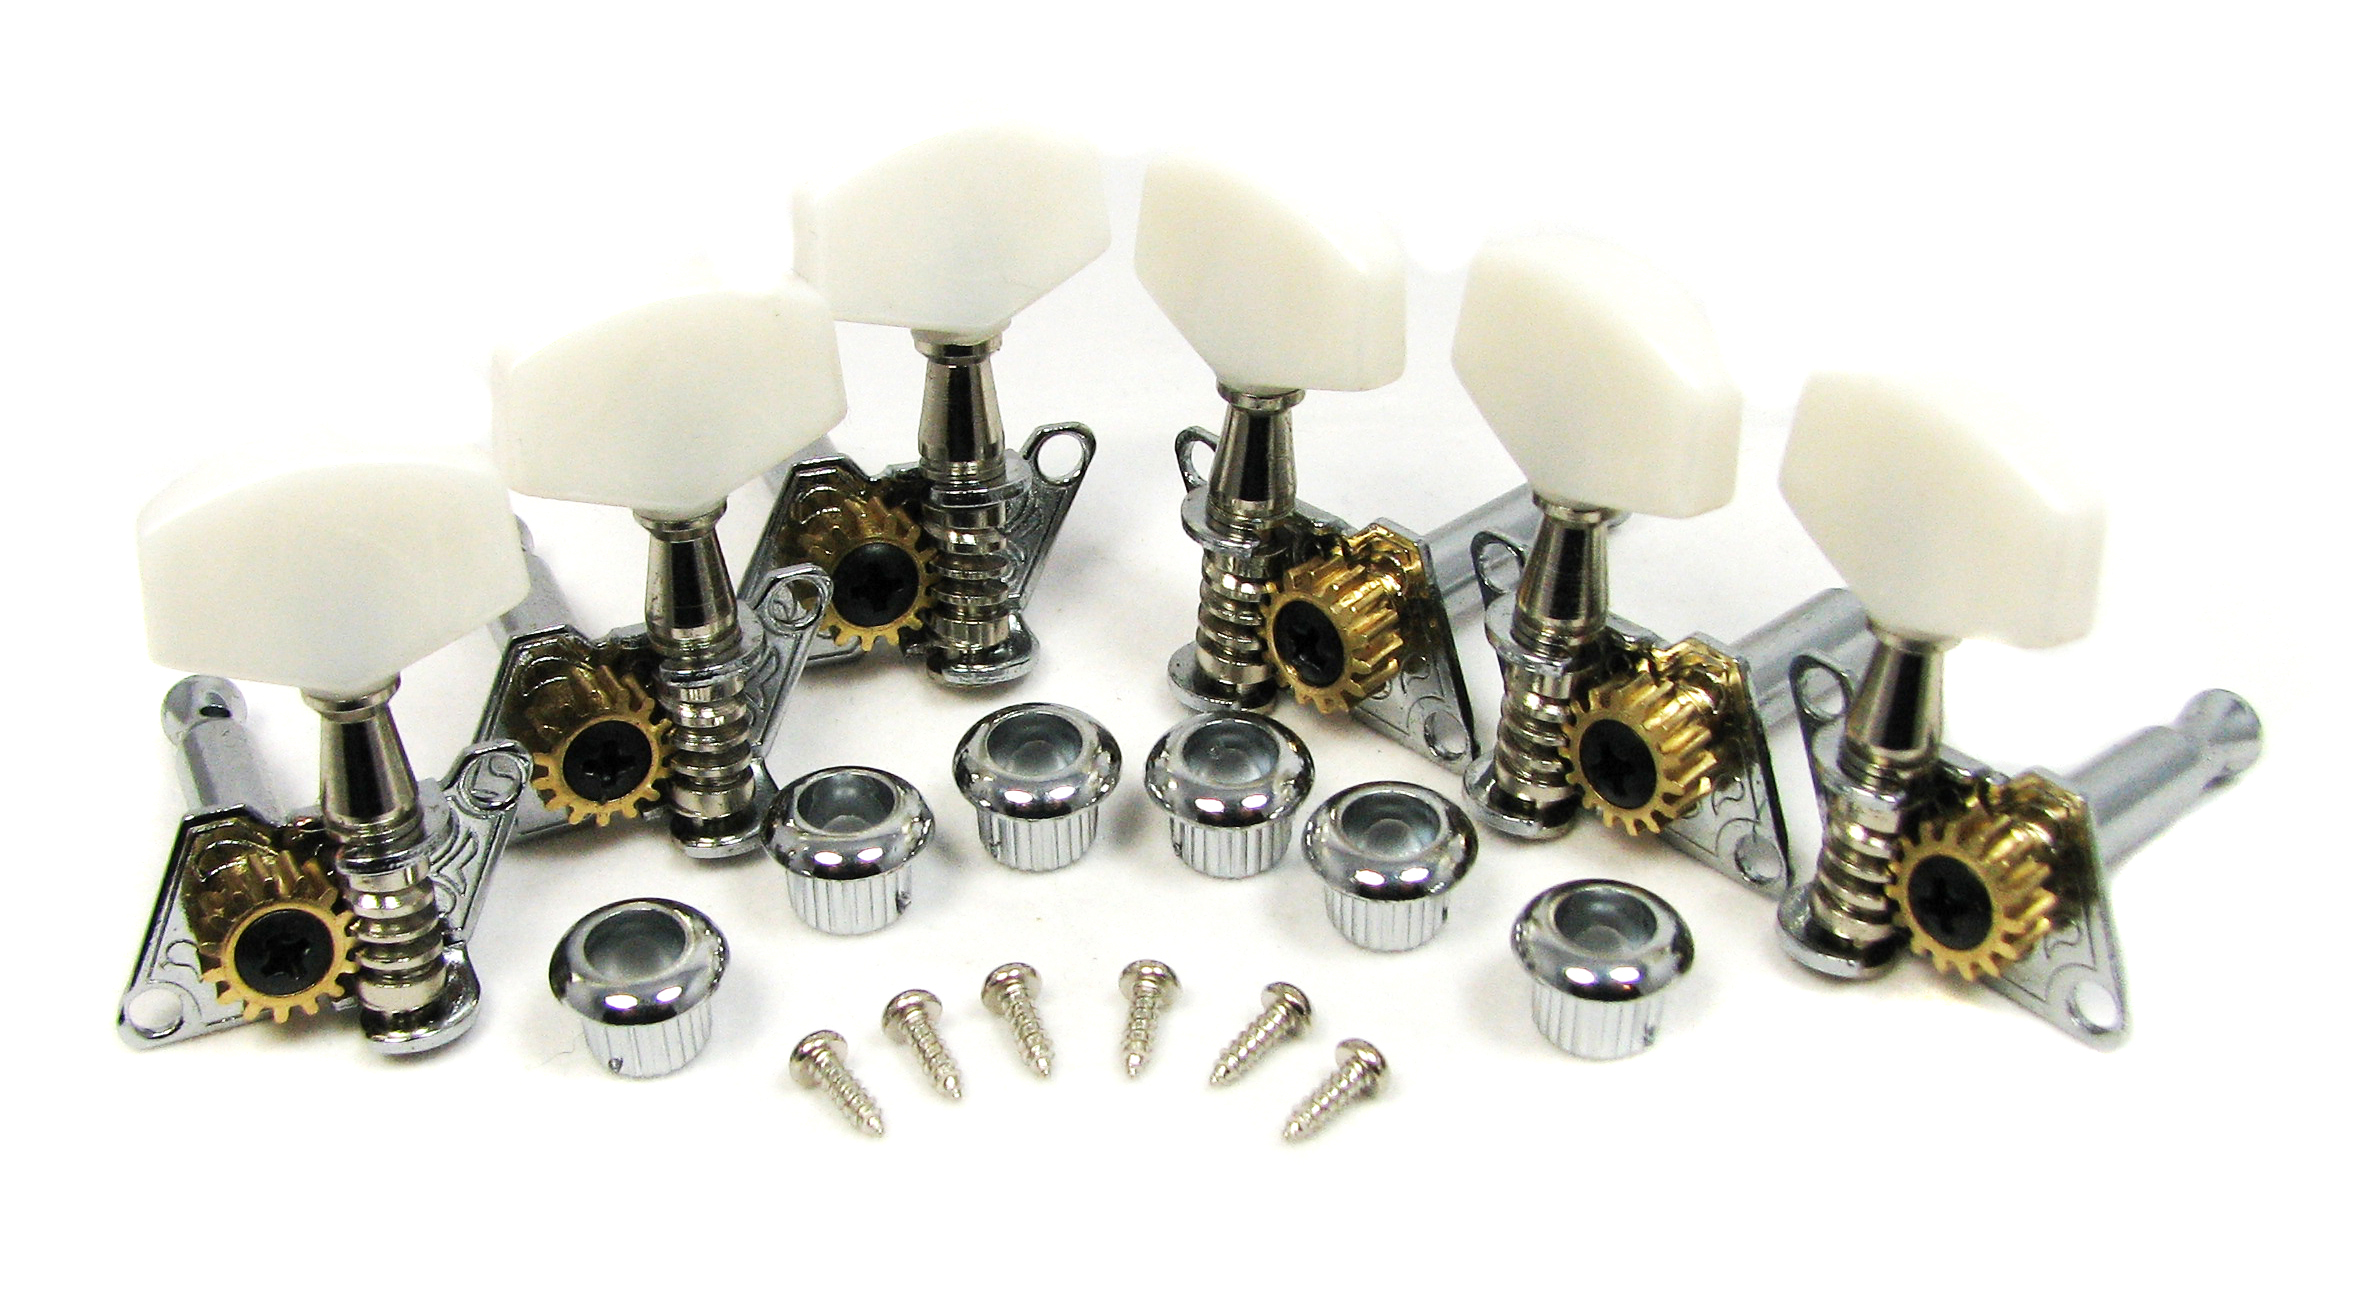
And if you haven't got your tuners yet, make certain to choose your favorite ones from C. B. Gitty's huge assortment here.
More Tutorials
Learn more about building cigar box guitars with the articles posted below.
Click on the images to access the articles.
How To Make A Cigar Box Guitar Headstock
How To Notch A Box For A Cigar Box Guitar Neck
Recent Posts
-
2024 World's Wildest Electric Cigar Box Guitar Build-Off Winners!!!
C. B. Gitty Crafter Supply is proud to announce the winners of the 2024 "World's Wildest Electric Ci …31st Oct 2024 -
Improved C. B. Gitty: Easier Than Ever! (Work in Progress)
Ben “Gitty” has been cleaning house, making our website even easier find your favorite parts, kits a …7th Oct 2024 -
Build-Off Contest 2024: The World's Wildest ELECTRIC Cigar Box Guitar
CBGitty.com is looking for the WILDEST, LOUDEST & MOST DIABOLICAL electric cigar box guitar ever …6th Sep 2024

